- Overview
- Configuration
Salesforce
Automate user management with Salesforce and ADManager Plus integration
Integrating Salesforce with ADManager Plus, enables organizations to automate and simplify their identity management processes by extending them across Active Directory (AD), Exchange, Office 365, etc. By integrating with ADManager Plus, user lifecycle management actions can be automatically synchronized so that changes made in Salesforce user account management tasks such as provisioning, updates, and deprovisioning are automatically synchronized between Salesforce and ADManager Plus, reducing manual effort, minimizing errors, and enhancing overall IT security.
Centralized employee data management
Automatically provision and deprovision employees and centrally manage them in ADManager Plus, thus eliminating manual data entry errors.
Workflow-controlled employee provisioning and deprovisioning
Integrating Salesforce CRM and ADManager Plus enables IT administrators to securely provision and deprovision employees using multi-level workflows.
Key notes
- Authentication type: OAUTH (client credentials)
- Access Token URL: https://<your domain>/services/oauth2/token
- Scope: Full (depends on the use case)
Steps to generate the Client ID and the Client Secret in Salesforce:
- In ADManager Plus, navigate to Automation > HCM Integrations.
- Click Custom HCM to create a new HCM.
Steps to set up OAuth in ADManager Plus:
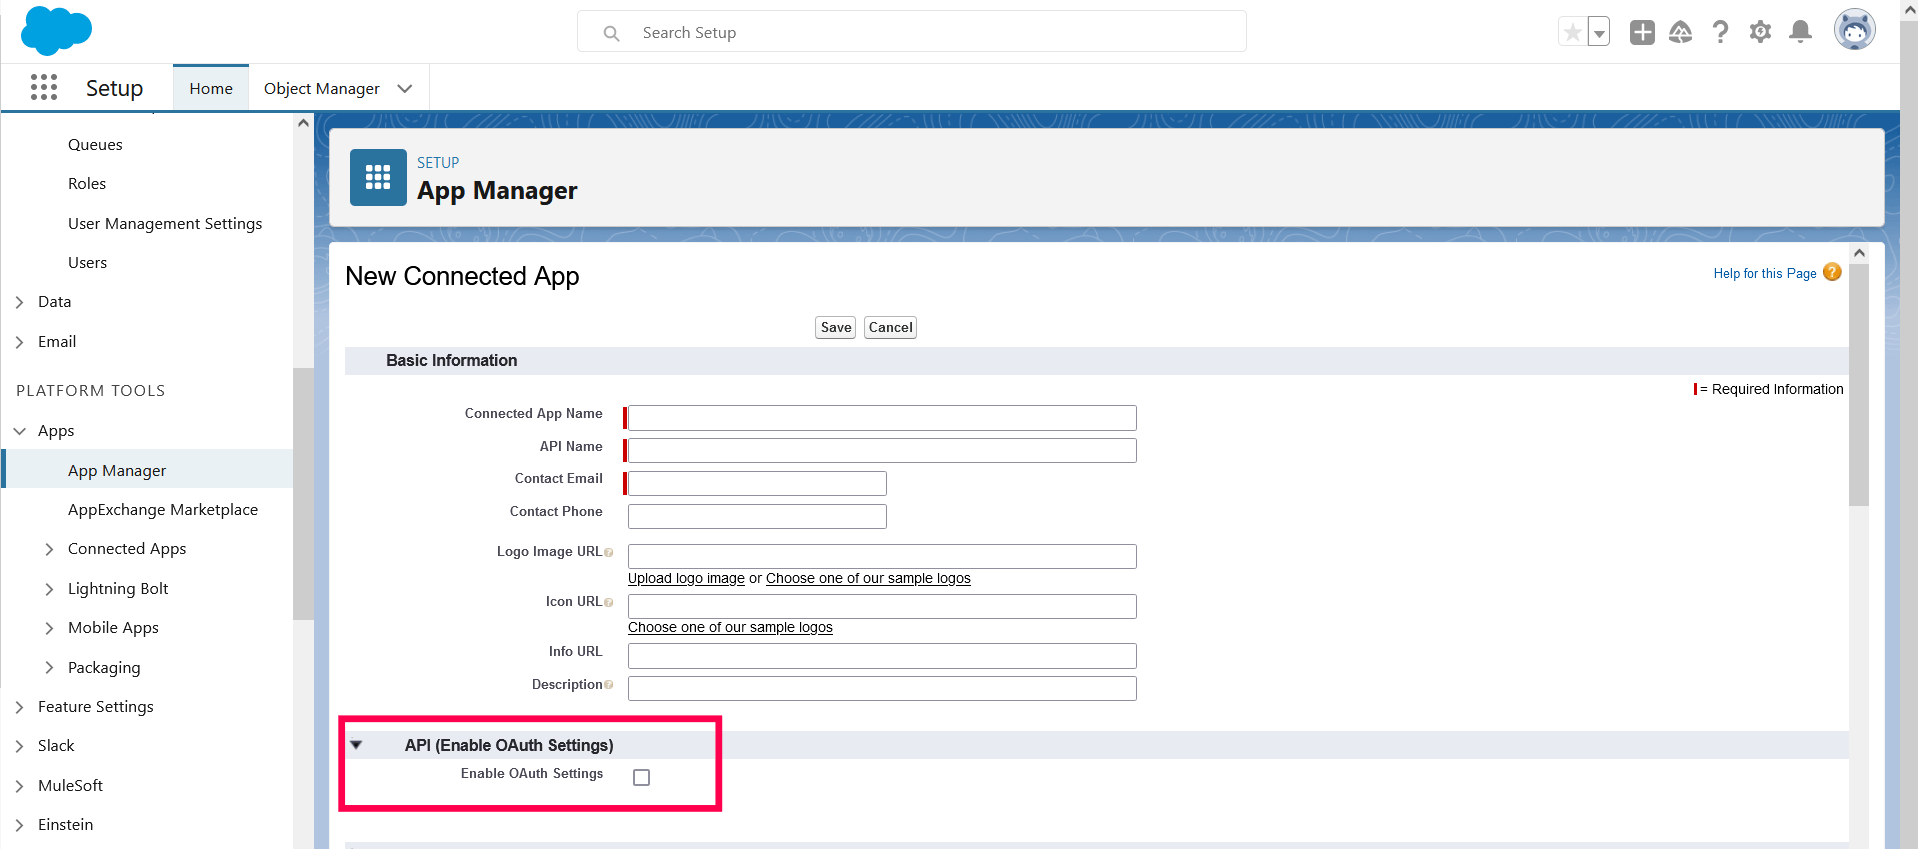
- Navigate to: Home > Apps > App Manager > New Connected App.
- Check the Enable OAuth Settings box for that connected app.
- Select the following scopes:
- Manage user data via APIs (api)
- Full access (full)
- Access unique user identifiers (openid)
- Access Lightning applications (lightning)
- Perform requests at any time (refresh_token, offline_access)
- Check the boxes next to Require Secret for Web Server Flow, Require Secret for Refresh Token Flow, and Enable Client Credentials Flow.

- Save your changes.
- Select an execution for the flow.
- From the connected app detail page, click Manage.
- Click Edit Policies.
- Under Client Credentials Flow, for Run As, find the user to which you want to assign the client credentials flow.
- The execution user must have the API Only permission.
- Save your changes.
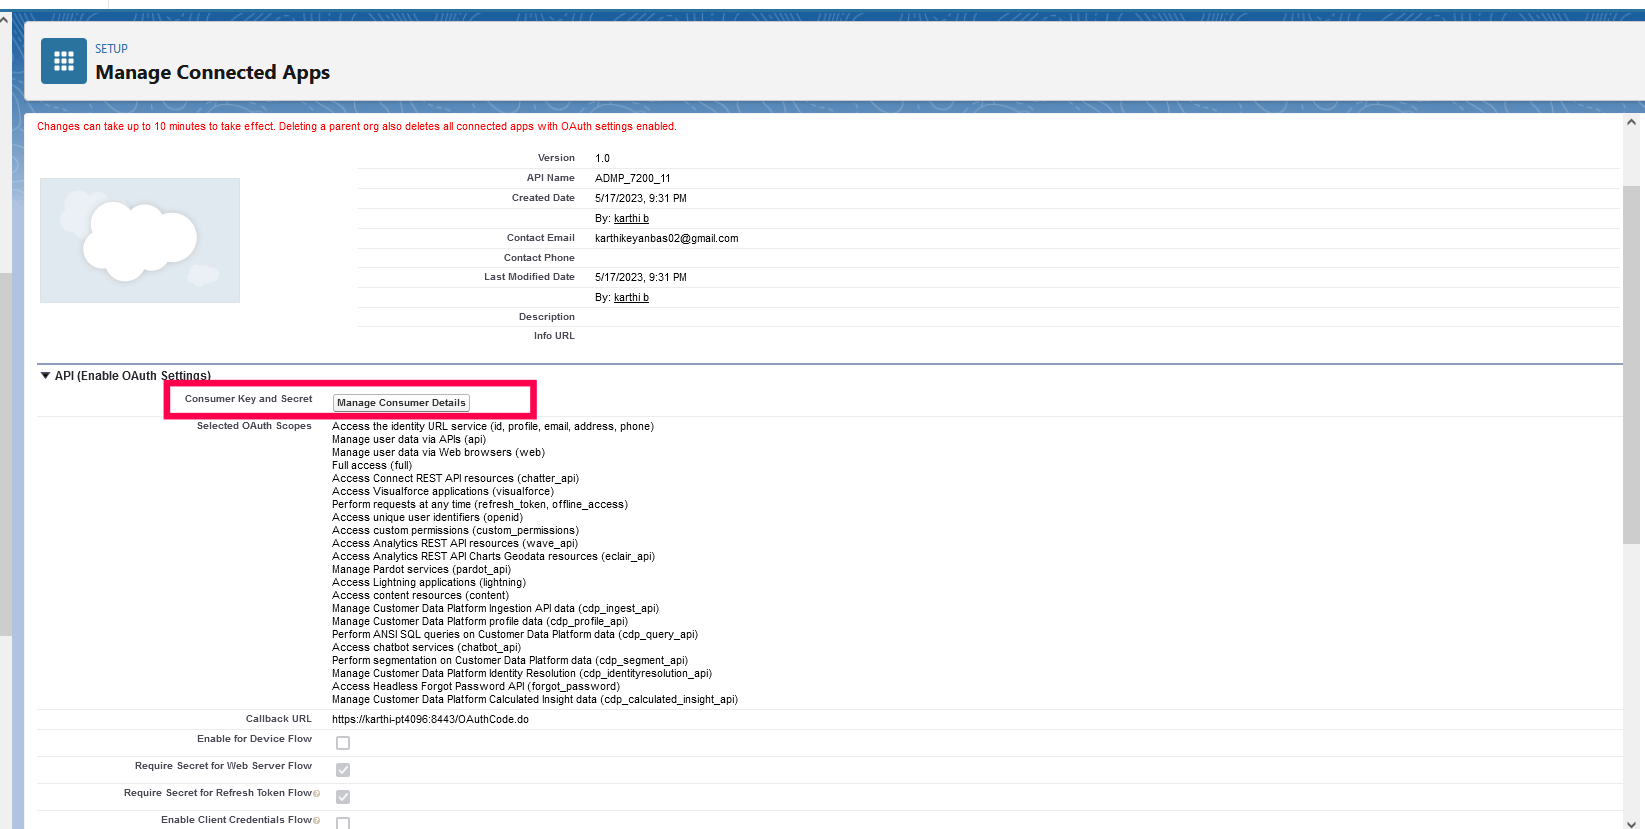
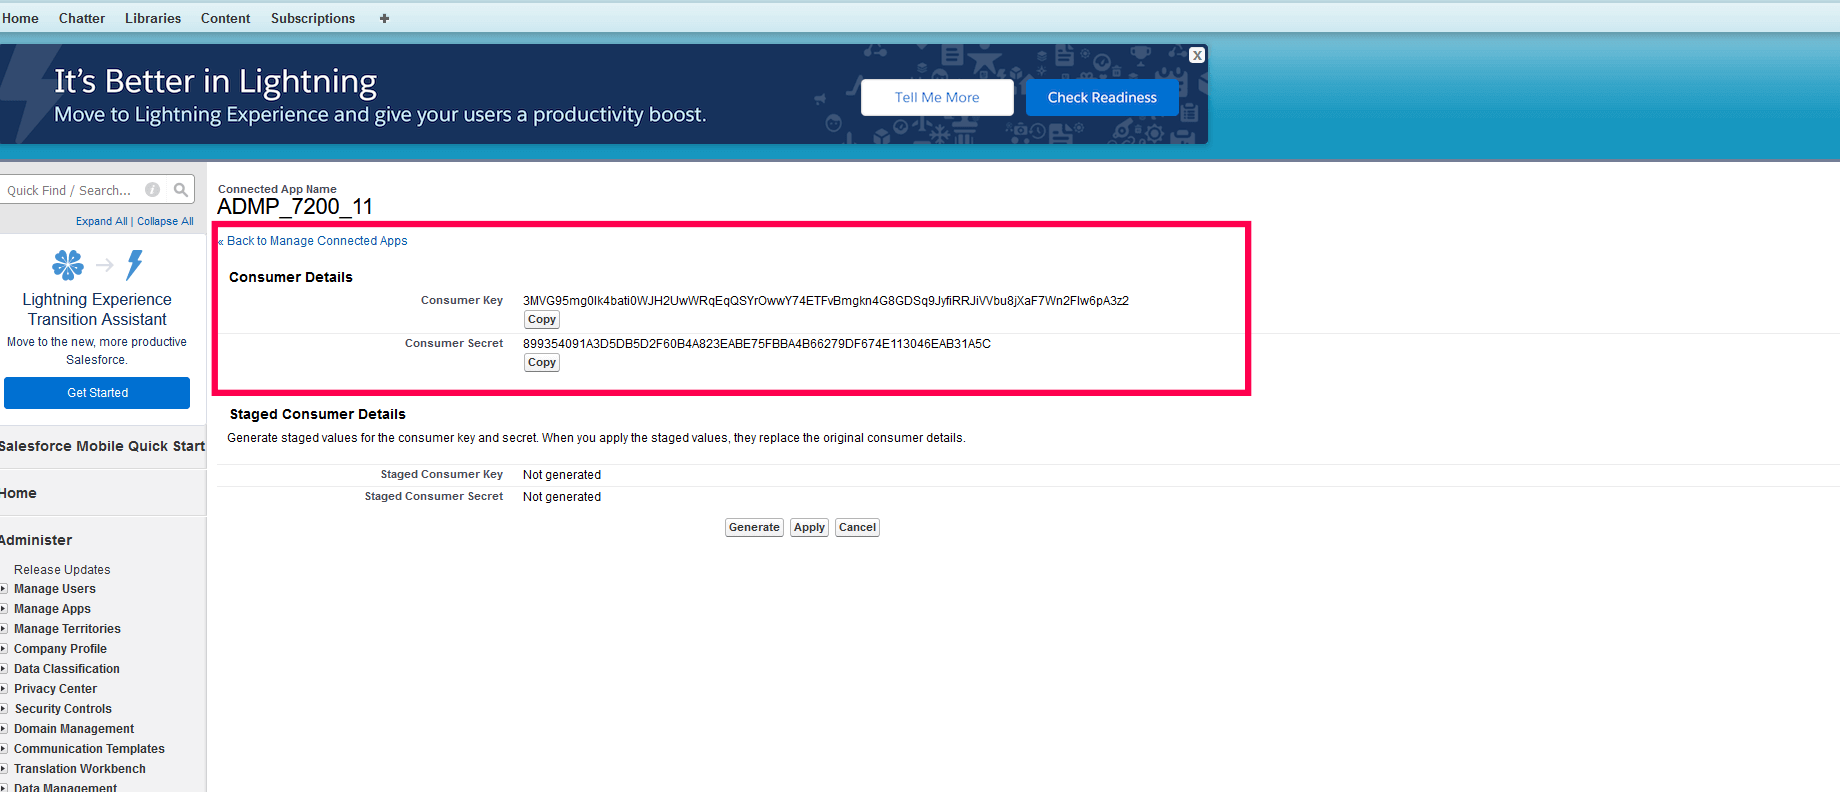
- After saving the connected app, click Manage Consumer Details to find the Consumer Key and Consumer Secret.
Configure authorization in ADManager Plus
- Create a custom app by navigating to Automation > HCM Integrations > Create custom app.
- In the Authorization tab, select the authorization type as OAuth, fill in the credentials, and click Configure.
- Authentication type: OAUTH (client credentials)
- Access Token URL: https://<your domain>/services/oauth2/token
- Scope: Full (depends on the use case)
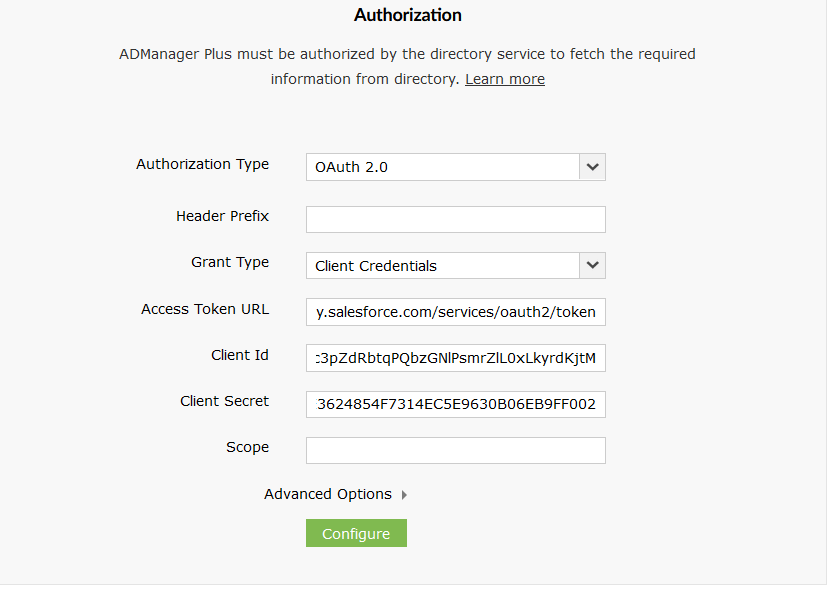
- Click Add API Endpoint.
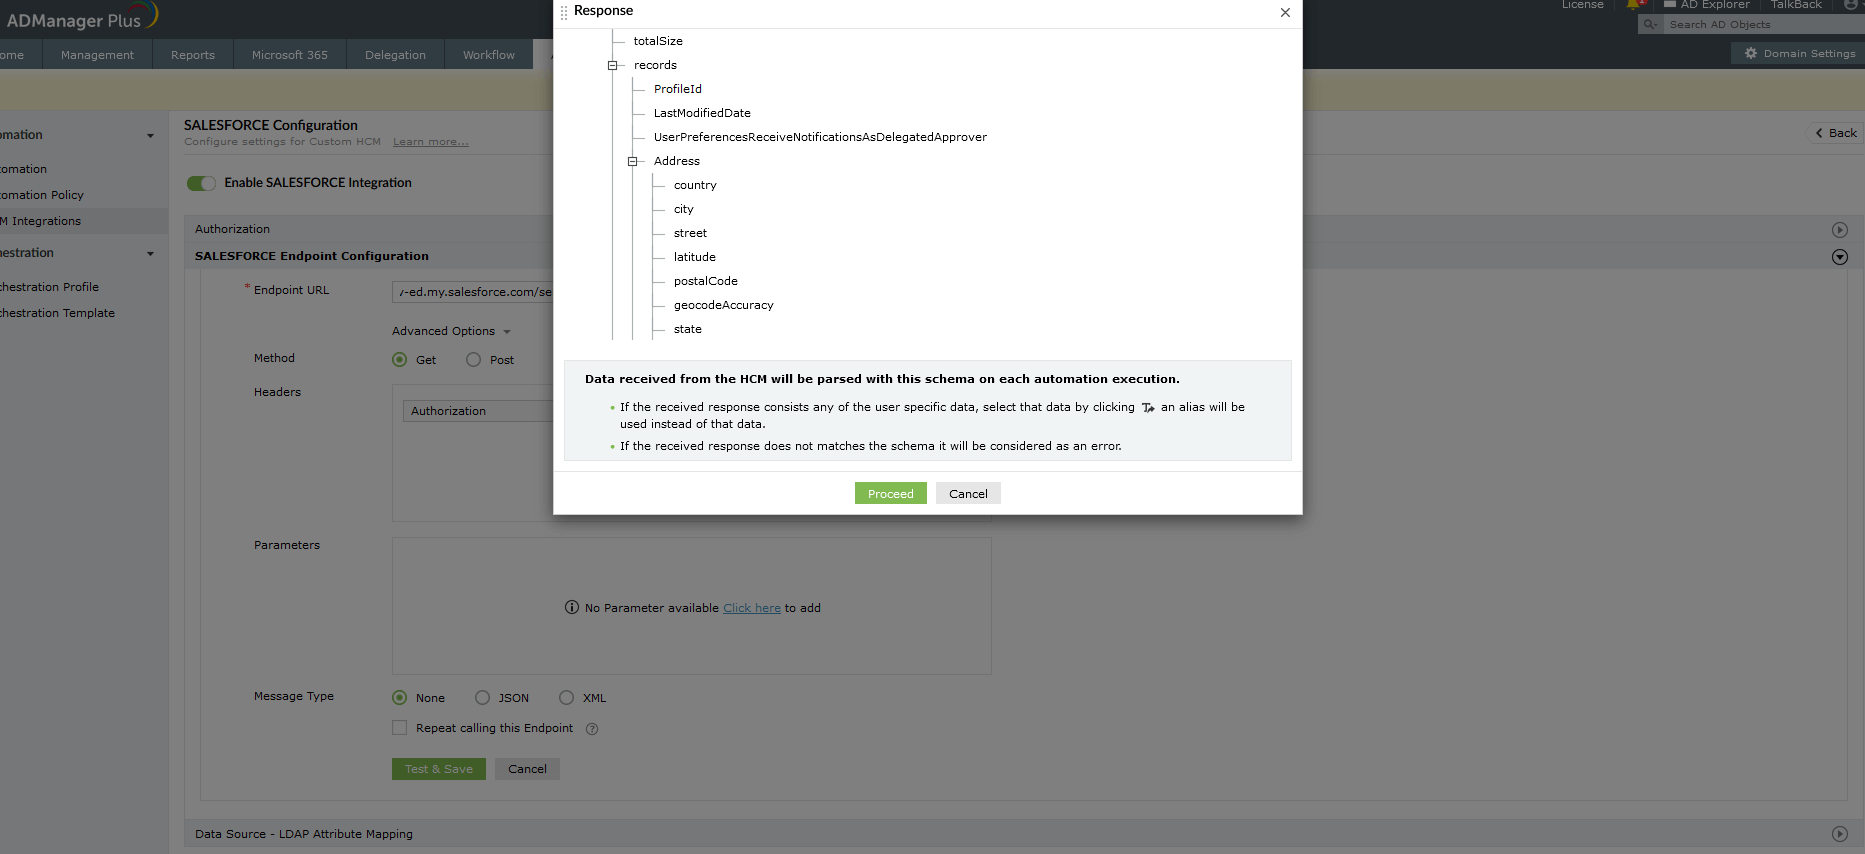
- In the Endpoint Configuration tab, select the preferred endpoints, and select Test & Save.
- API reference: https://developer.salesforce.com/docs/atlas.en-us.api_rest.meta/api_rest/resources_query.htm
- Sample endpoint: https://zhield-dev-ed.my.salesforce.com/services/data/v54.0/query?q=SELECT+FIELDS(ALL)+FROM+User+LIMIT+200
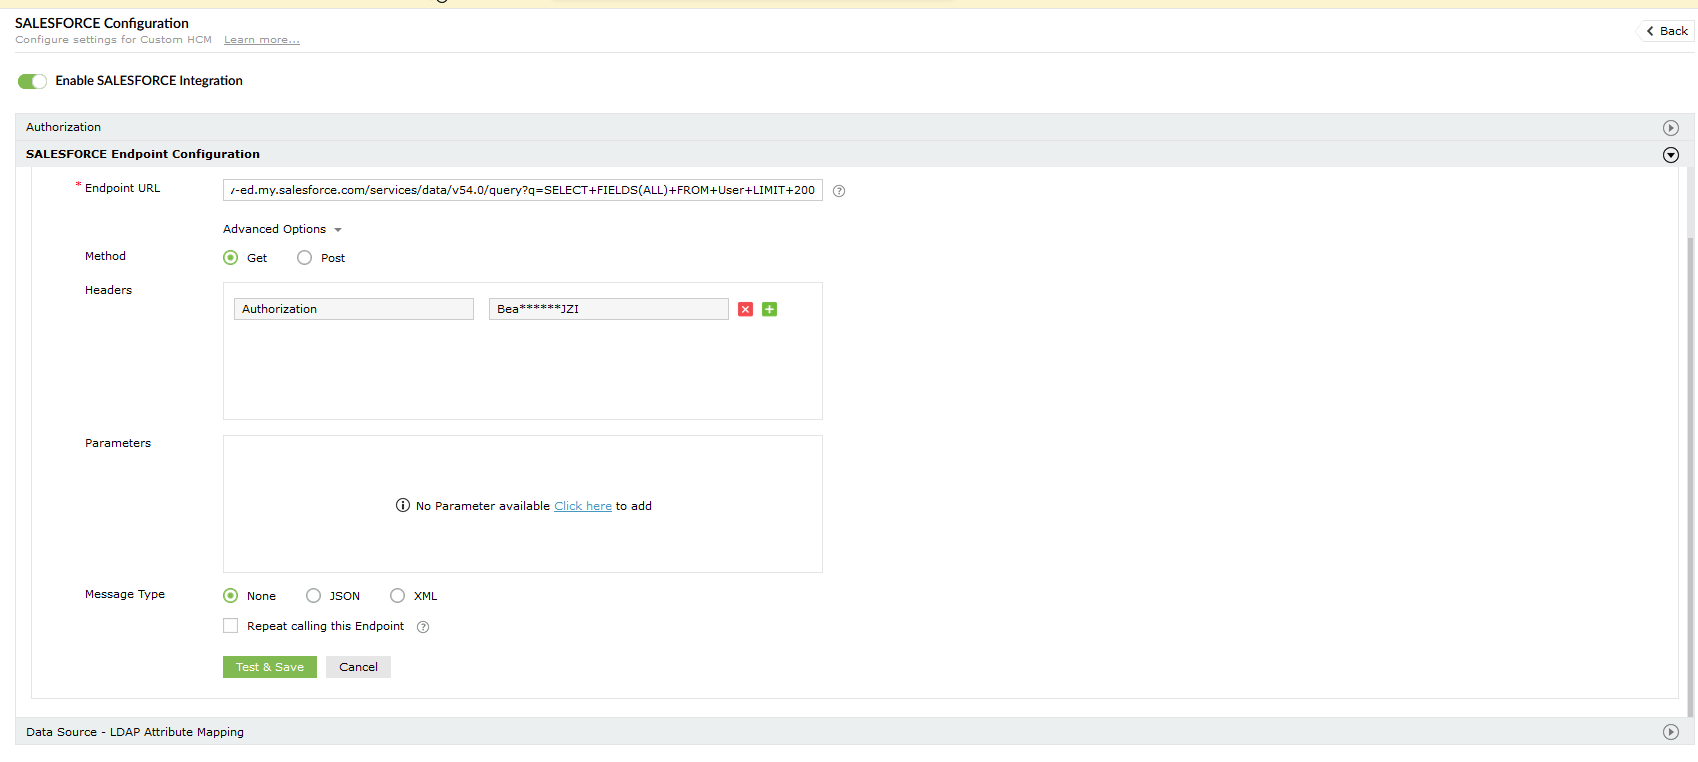
Sample response
