Associate Execute Function action to text in a panel
Execute function action invokes a custom function specified in any of your ManageEngine AppCreator applications.
- Configure actions to associate to a panel's image
- Configure action confirmation for function execution
- ZML implementation for action confirmation
To associate an execute function action:
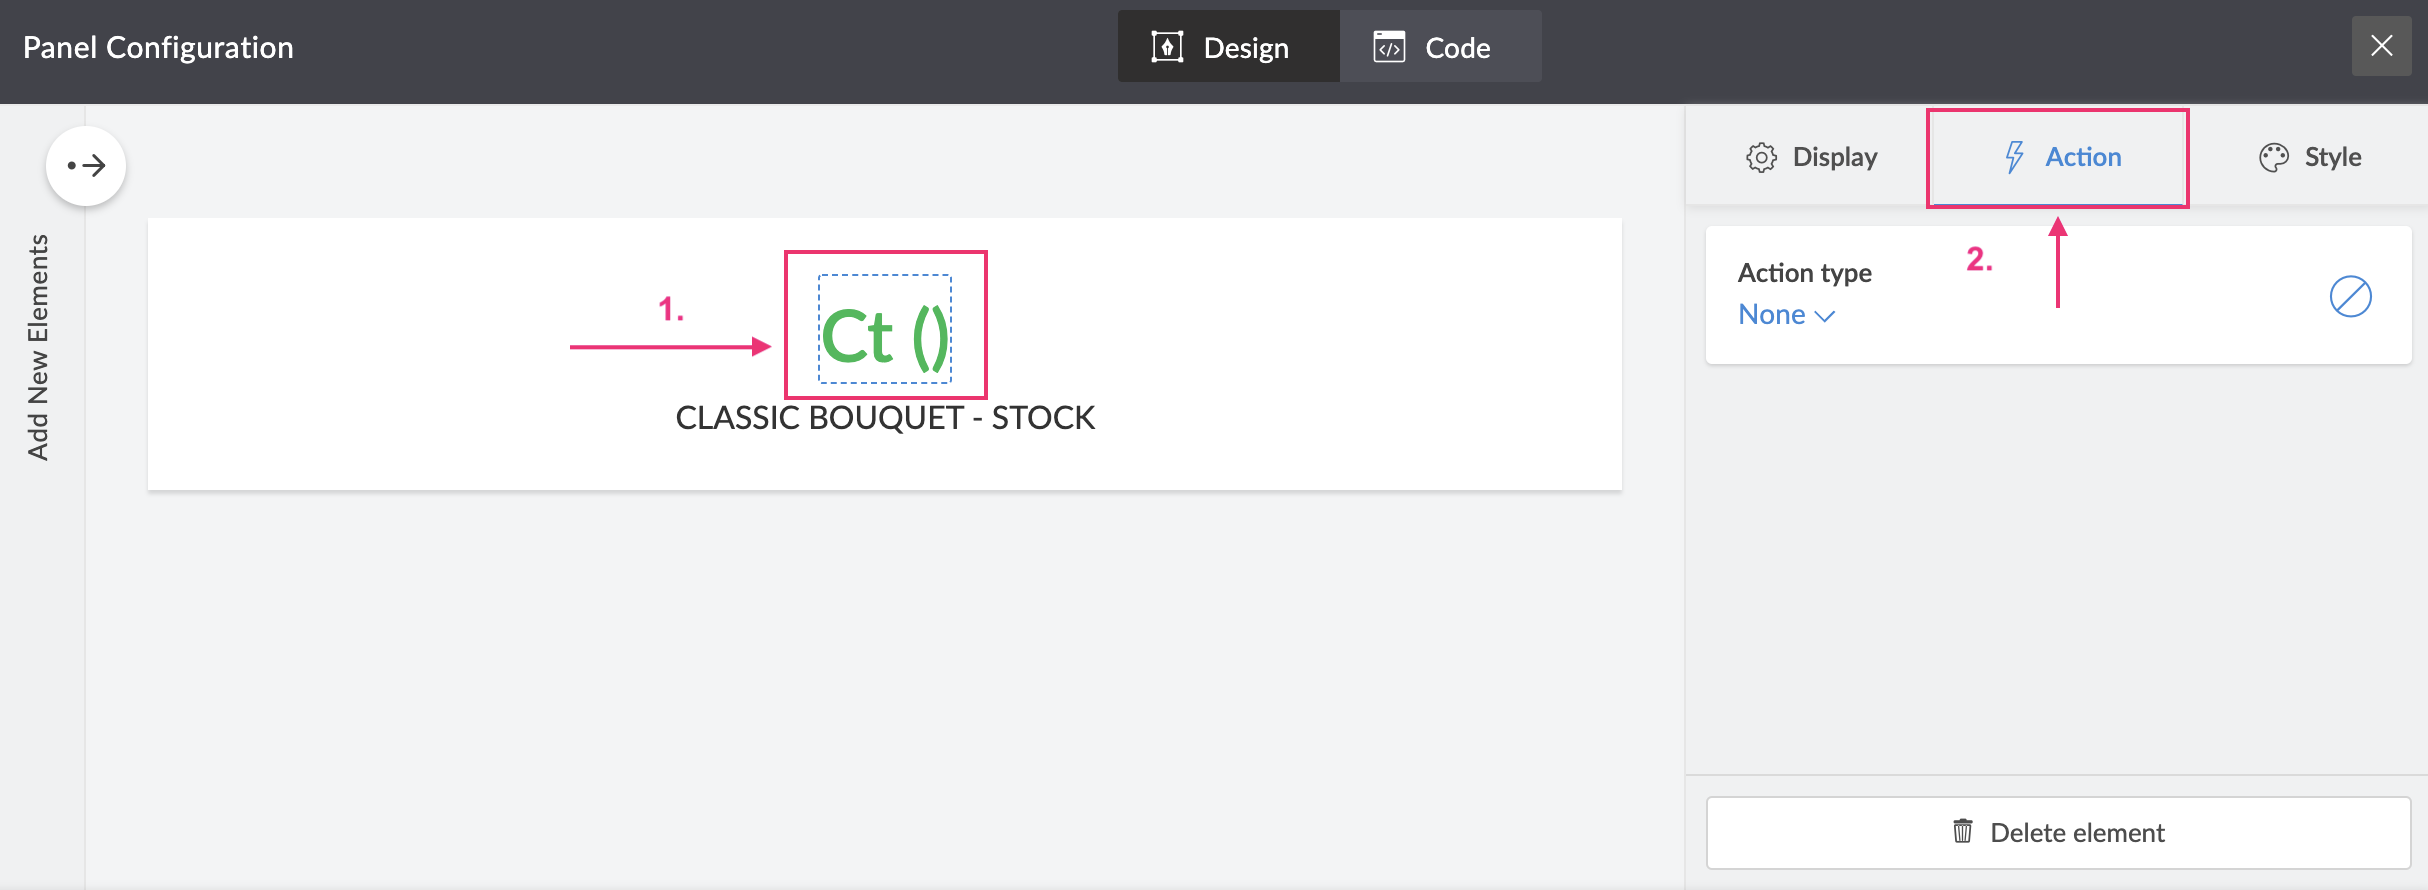
- Double click the panel to associate an action to the text in it or single click to select the panel and then click the Configure option in the toolbar at the top center of the page builder.

- Click to select the configured text in the panel to associate an action.
- Select Action from the options on the right side of the configuration menu.

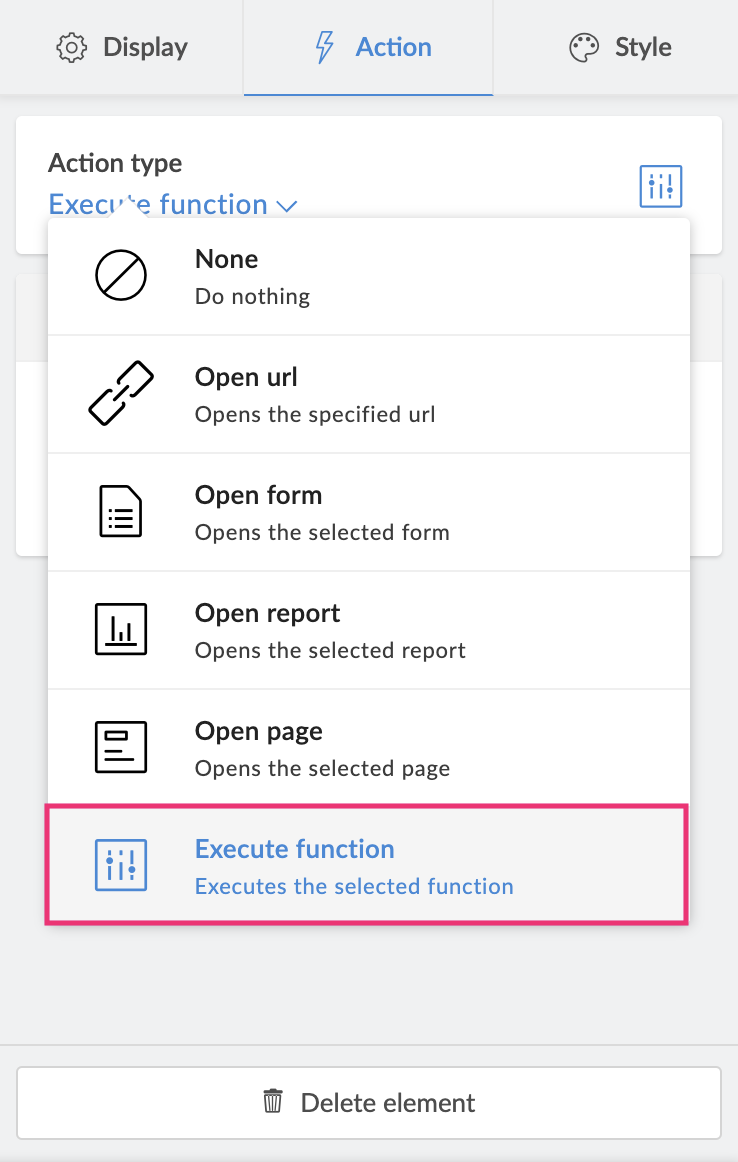
- From the Action dropdown, select Execute function.

- Select a Function from the dropdown.
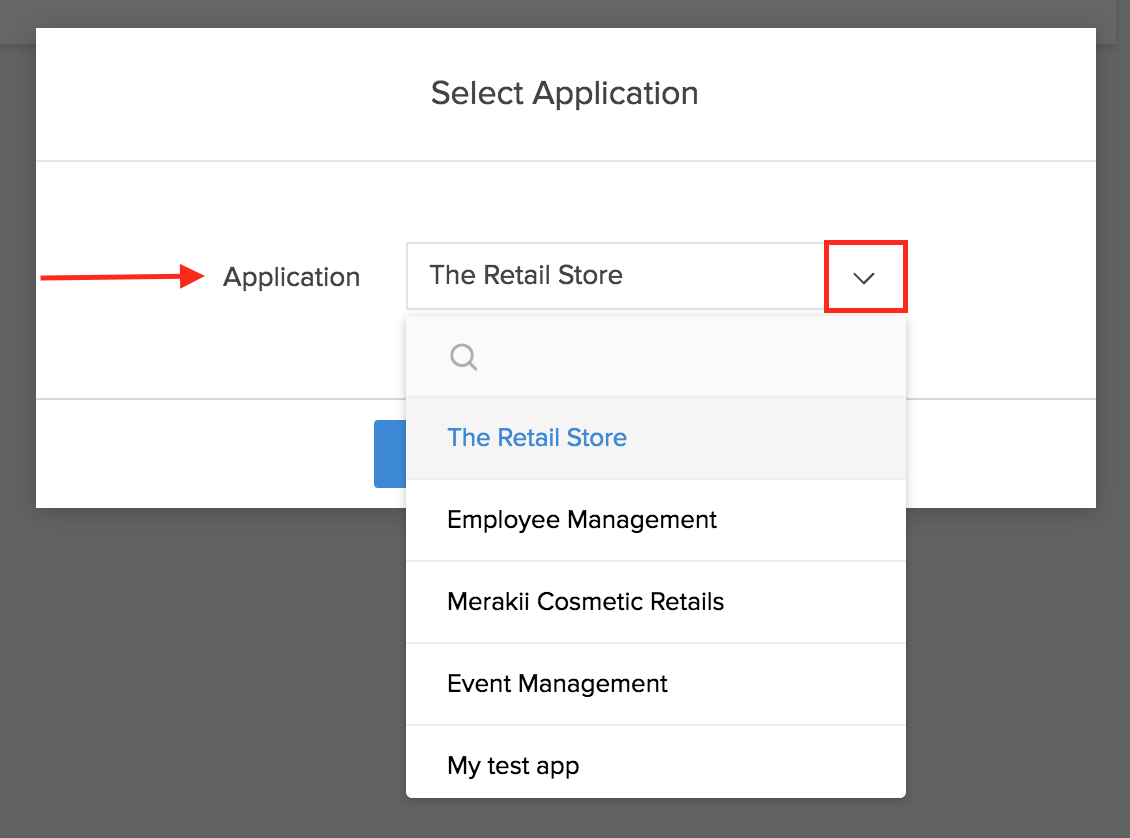
Note: The Function dropdown lists all the custom functions in the application you are currently working on. To select a custom function from another application, click the Change App give in Blue, on the footer of the Function dropdown. Select another application and click Done to view all the custom functions in it.
- Enter a Query parameter in the space provided. You can choose an argument of the selected function, to pass it as a page parameter.
- Select when to execute the function workflow: At Once or After Confirmation.
- If you choose At Once, go to the next step (8).
- If you choose After Confirmation, you must specify the confirmation message and button text for the confirm execution and cancel execution buttons. Learn more
- Specify a Success message to be displayed, on successful execution of the associated function.
- You can make the changes and close the panel configuration sheet. The changes will be auto-saved.
Confirmation for function execution in panel text
Before executing actions such as deleting certain records, a confirmation for proceeding with it helps ensure you don't delete important records by accident. Sometimes, inexperienced users may never even realize that a record was deleted or that more than one record was accidentally deleted. In such instances, it is always safe to confirm the action request before execution.
Here are some of the scenarios where actions can have confirmations before they're executed:
- Deleting
- Approving or Rejecting
- Changing Status
- Send emails
Configure confirmation for function execution
- Edit your application
- Open your page builder and select the panel that contains the text for which you want to configure an action.
- Click the Configure option in the toolbar in the header area of the page builder. A configuration pane will slide in.
- On the left side of the configuration pane, a preview of the panel will appear.
- Click to select the text inside the panel.
- Click the Action tab and choose Execute function from the Action Type dropdown on the right.
- Select a custom function and specify the argument value.
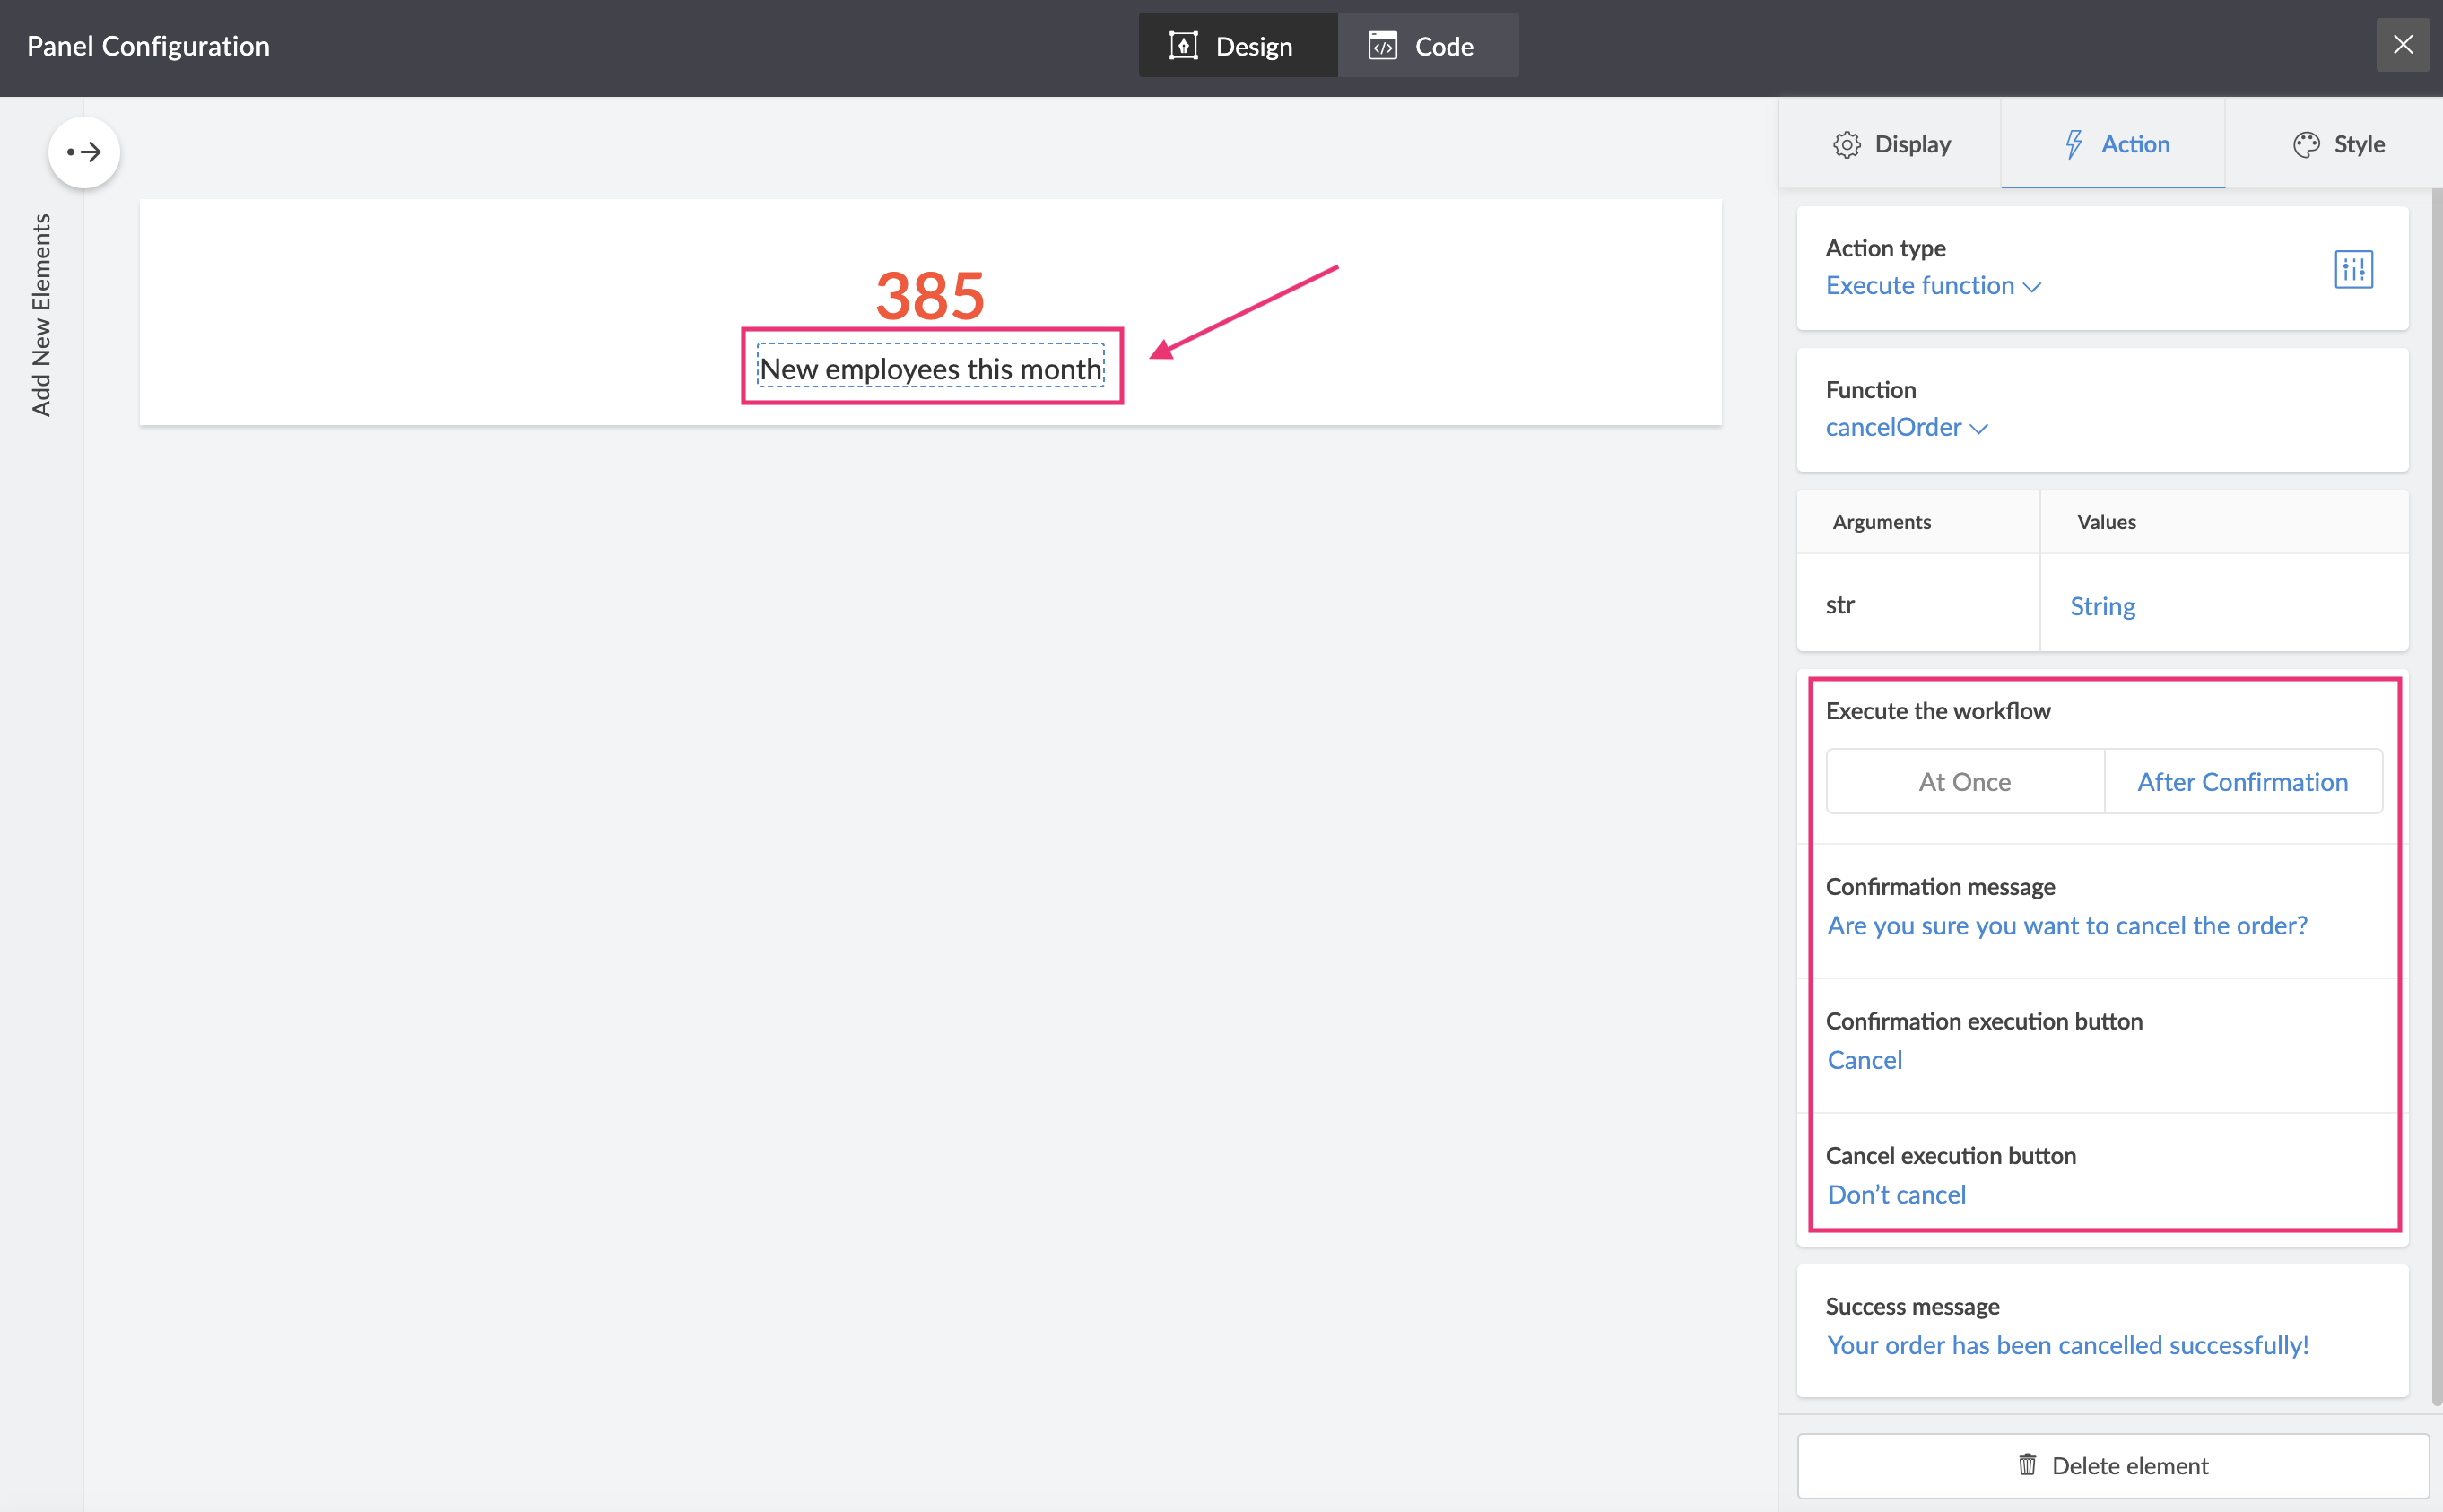
- Click After confirmation under the Execute the workflow section.
- Specify the following:
- Confirmation message: The message that will be displayed in the confirmation popup informing users of the action that will take place when they confirm to execute it.
- Confirmation execution button: The button text that will be displayed to confirm the function execution.
- Cancel execution button: The button text that will be displayed to cancel the function execution.
<div class="noteNew>Note: The default values for the Confirmation execution button and Cancel execution button will be Yes and No respectively.
- The changes will be saved automatically. When you access your page in live mode, the confirmation popup will prompt users before the function is executed.
ZML script for confirmation of function execution
The below script shows how to configure the confirmation popup details such as confirmation message, confirmation execution button and cancel execution button for the execute function action in the panel component:
<pr height='fill' width='fill'>
<pc>
<text action='ExecuteFunction' executeWorkflow='afterConfirmation' confirmationMsg='Are you sure you want to cancel the order?' confirmButtonText='Cancel' cancelButtonText='Don’t cancel' parameters='String' functionName='cancelOrder' color='#333333' size='16px' uppercase='false' underline='false' bold='false' italic='false' type='Text' successMsg='Your order has been cancelled successfully!' value='New employees this month'> </text>
</pc>
</pr>
</panel>