Understand common actions in kanban report
There are some common actions that are available in the report without having to predefine them. These actions are available in default positions. They are often required because of which they mandatorily appear in the report. The following are the common actions:
Add a record
The add record icon appears at the top-right corner of the report along with the search icon. This enables you to add a new record to the report. Clicking the add icon opens the Form window. You can fill in the field values and click submit. You will find that the record that you submitted is displayed in your report.

Search records
Search enables you to look for specific data within a report. On clicking the search icon, the search window lists the fields of the report. You need to select the field, operator and the condition by which you want to run the search. The records that match the condition are displayed. You can select multiple fields, thereby specifying multiple conditions based on which the records need to be looked for.
The search option helps you sift through voluminous records and narrow down to information that you require. Let's assume you have a Food Delivery app. You have a report that displays order details and the status of Delivery. If you are looking for records of a particular date in a particular status, you can use search. Click on the search field. All the fields in the report are listed. Select the fields that would help you single out the required records. In this case, select Date field, select the operator "is" and select the date; select the Status field and enter the Status. The relevant records are displayed.
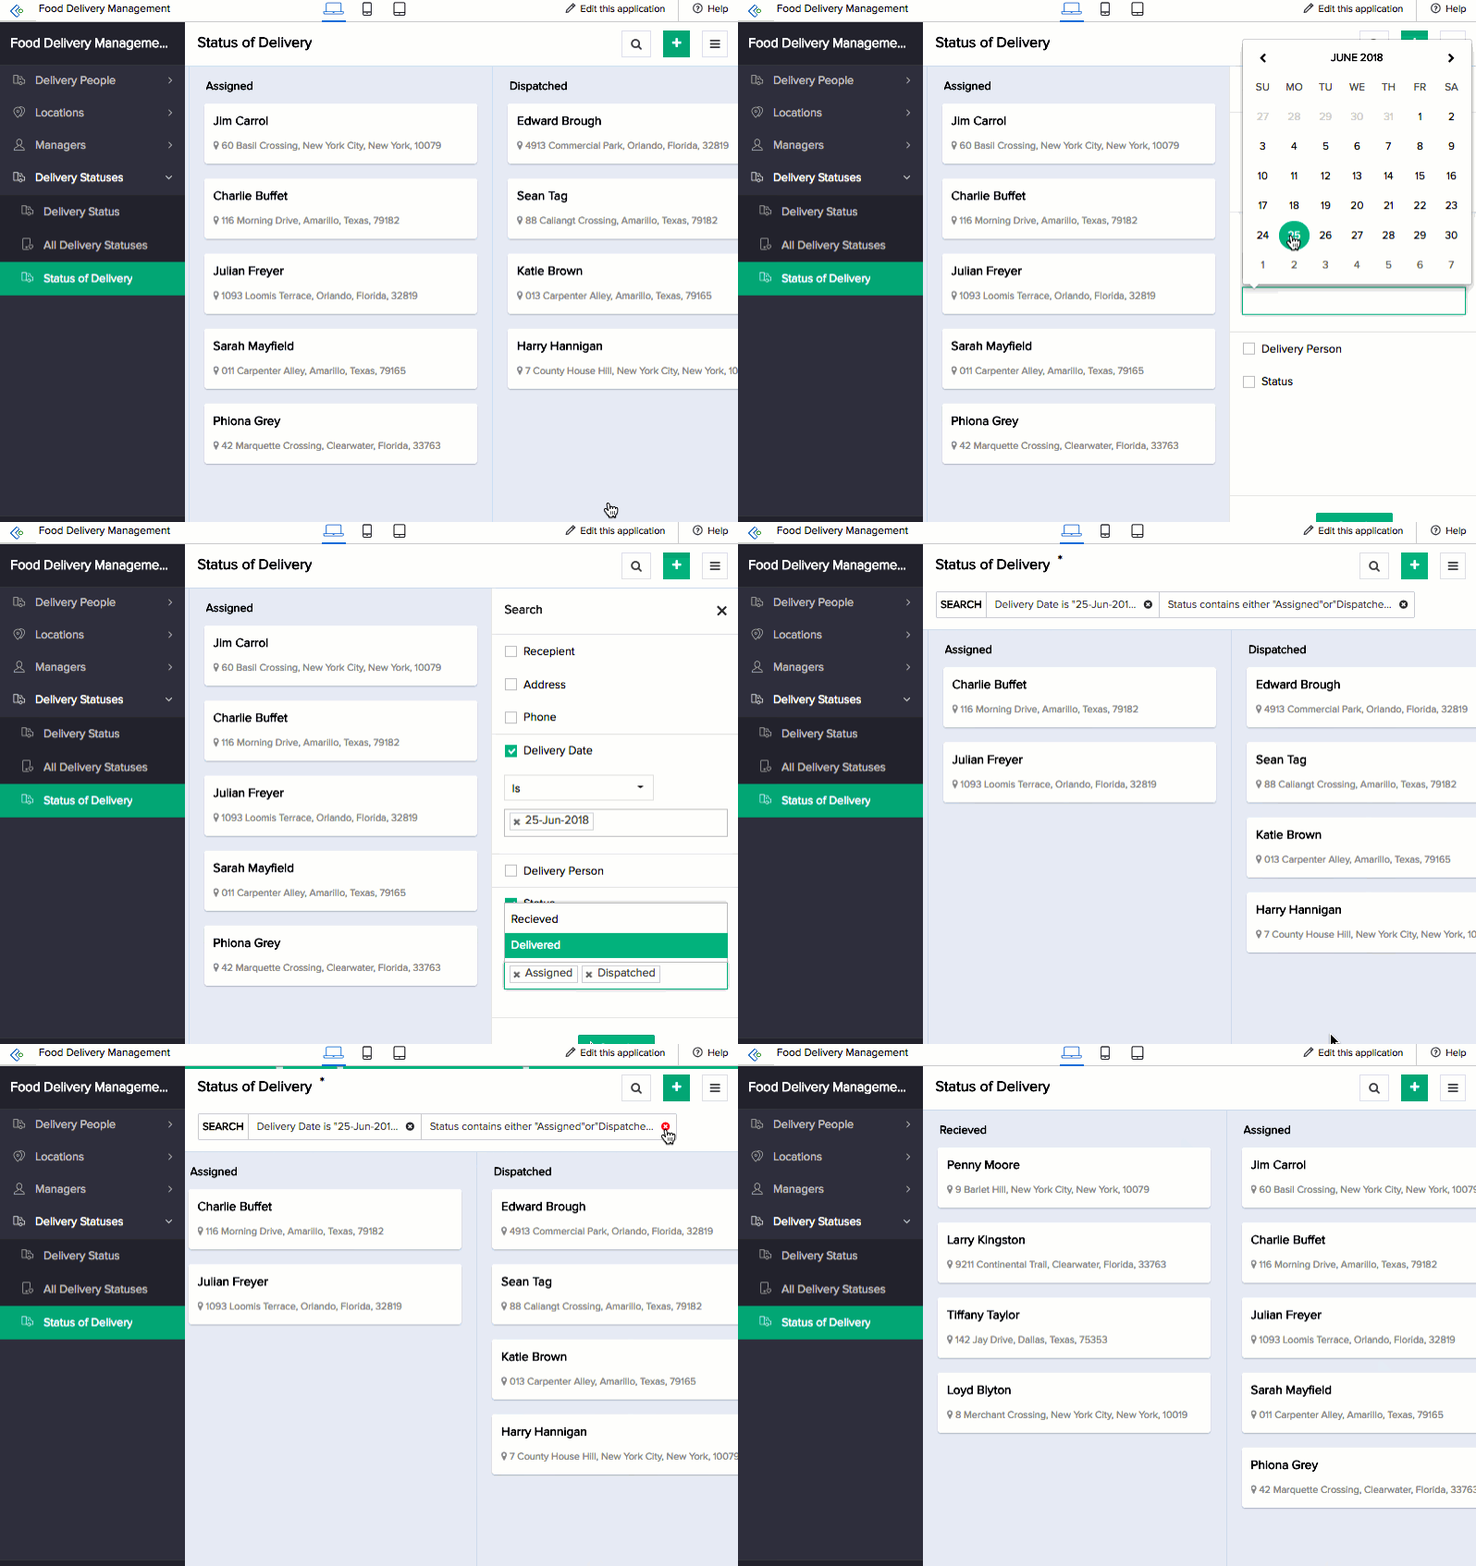
For Radio button, Dropdown, Checkbox and Multiselect field types, the criteria values will be pre-populated based on the configured options. So, the user can use the field values to search for matching records.
The search field in browser presents a slide in pane that has all the fields from which you could specify your search criteria.
Print records
To access print option, click the hamburger icon. Printing provides you with options to print as a list or as a summary. List is a table grid layout and Summary layout includes is a record level details as label and value pairs.
Import records
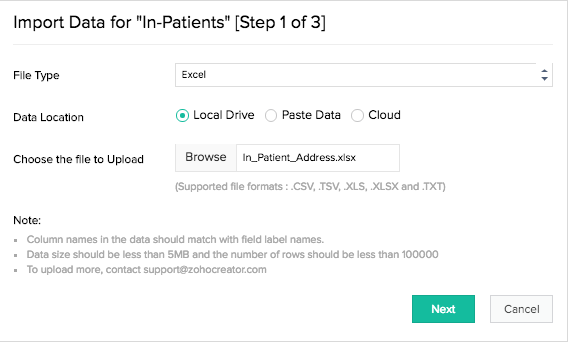
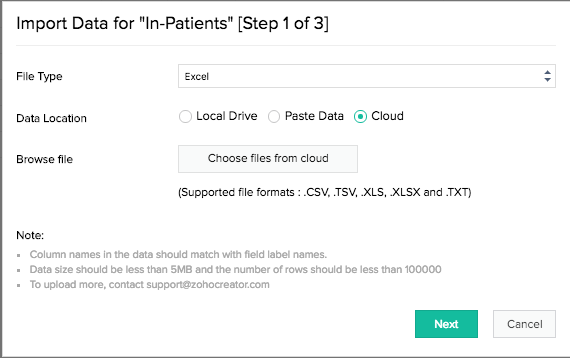
Importing records help you create a report in AppCreator by importing records that are already available in a different application. This eliminates the effort you will have to put in to recreate the report. To access the option, click on the hamburger icon. Selecting Import displays the congruent window. You can select the field type, the location of the file, and upload it. On uploading, you will be prompted to realign your report to AppCreator's design and make it comprehesible by assigning the field names to appropriate positions.
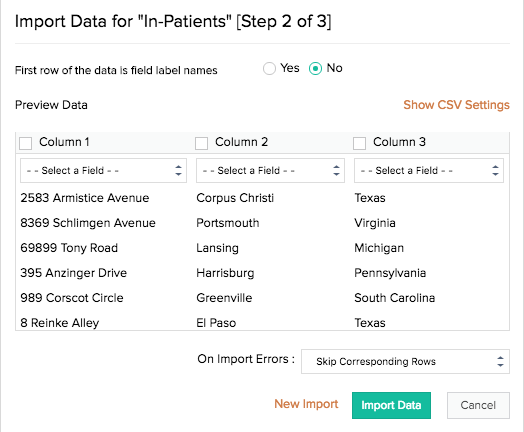
There are three data locations from where you can select and import your records:
- Local Drive: Enables you to browse for the file on your local drive and upload the file from there.
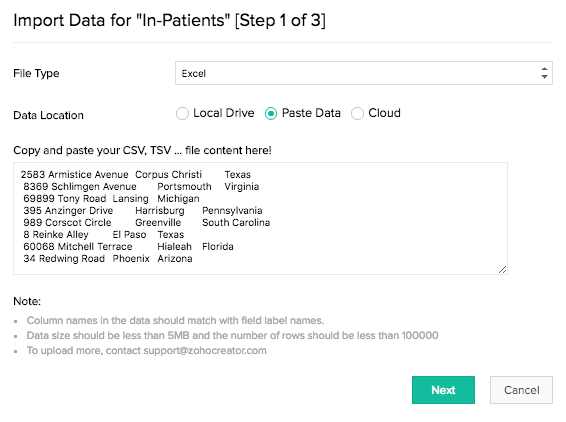
- Paste Data: Enables you to copy records from a source file and paste them on the clipboard.
- Cloud: Enables you to pick and upload a file from your cloud storage.
Validations while importing records
Importing requires validating certain field values to ensure compatibility with the properties enabled in the form fields. Name Field, Phone Number Field, Address Field values are validated based on a few prerequisites.
Name field
The name field has four subfields: namely, Prefix, First Name, Last Name, and Suffix. The name field value is separated by space. While importing values for this field, a few validations are required to ensure that the values are compatible with the enabled form properties. The following are the validations for name field values:
- The first name is a default value.
- If the name field is a mandatory field, it is necessary that the imported field value contains all the subfields (separated by space) that are enabled as display fields.
Example: If you have selected Prefix, First Name (default), and Last Name in your form, and your imported value has only Prefix and First Name,an error message will be displayed citing the missing subfield value as reason.
Incorrect Value: Mr. Davy
Correct Value: Mr. Davy Higgins
- If you have specified prefix options in your form field properties, the imported field value needs to have a prefix that is compatible with the defined options. Prefix is identified by the period used at the end.
Example: Let's assume in your form field, you have specified Mr. and Miss. as options for prefixes.
Incorrect Value: Mrs. Jessica Hubert
Correct Value: Miss. Jessica Hubert
- There are four subfields in the name field. If your imported field value (separated by space) exceeds four, the rest of the values will be displayed as suffix.
Example: Let's say you have imported a name field value with five separate entities.
Mrs. Jessica Mary Hubert, M.D. (prefix, first name, middle name, last name, and suffix). The application will, by default, allow the middle name, Mary, to take the last name position, and the last name and suffix, Hubert and M.D., will be assigned the suffix position.
Phone number field
The phone number field has a few validations based on which the imported value is assessed.
- All phone numbers need to start with the '+' symbol. If the imported value does not adhere to this, an error message will be displayed.
Incorrect Value: 12012327123
Correct Value: +12012327123
- If the imported field value has characters other than numerics, spacing, -, or (), an error message will be displayed stating that the field does not support other characters.
Incorrect Value: 1201232712A
Correct Value: +12012327123
- If the imported value is a non-existent phone number, an error message will be displayed.
- If you have specified one or more country codes for the phone number field in your form, it is required for the imported values to have those country codes. If the value contains a non-existent country code or one that you have not specified in the form field properties, an error message will be displayed.
Address field
The address field has six subfields: namely, Address Line 1, Address Line 2, City/District, State/Province, Postal Code, and Country. A few validations are made while importing the field values to ensure that the values are compatible with the enabled form properties. The address field value is separated by comma and space. The following are the validations for address field values:
- Address Line 1 is a default subfield.
- If the field is a mandatory field, and Address Line 2 is selected as a display field, there is no validation while importing. If the imported field value does not include a value for this subfield, it gets ignored.
Example: If your address is 4913 Commercial Park, Orlando, Florida, 32819.
4913 Commercial Park is Address Line 1 and Orlando is City/District. There is no value for Address Line 2 and it does not affect the correctness of the address field value.
- If the imported field value (separated by comma) does not have all the subfield values that are selected to be displayed, the validation throws an error.
Example: Let's assume you have enabled all the six subfields but your imported field value does not include postal code and country.
Incorrect Value: 42 Marquette Crossing, Clearwater, Florida. An error message will be displayed citing missing subfield values as reason.
Correct Value: 42 Marquette Crossing, Clearwater, Florida, 33763, United States
- If you have enabled only four of the subfields and your imported field value has information exceeding this limit, the excess information will be displayed as the last selected subfield.
Example 1: Let's say you have enabled Address Line 1, City/District, and State/Province. The imported value is 42 Marquette Crossing, Clearwater, Florida, 33763, United States. The application will assign subfields to values (separated by comma and space) in the reverse order.
Incorrect Value: 42 Marquette Crossing, Clearwater, Florida, 33763, United States. In this case, United States will be assigned State/Province, Florida will be assigned City/District, and the rest of the address will be assigned Address Line 1.
Correct Value: 42 Marquette Crossing, Clearwater, Florida,33763,United States. Removing the space between the values will allow the assumption that it is a single value, assigning it the State/Province subfield and making the rest of the address fall into the correct subfields.
Example 2: Let's say you have enabled Address Line 1, City/District, and State/Province. The imported value is 42B, Golf Course Hill, Marquette Crossing, Clearwater, Florida.
Incorrect Value: 42B, Golf Course Hill, Marquette Crossing, Clearwater, Florida. In this case, 42B will be assigned Address Line 1, Golf Course Hill will be assigned City/District, while Marquette Crossing, Clearwater, Florida will be assigned State/Province.
Correct Value: 42B,Golf Course Hill,Marquette Crossing, Clearwater, Florida. Removing the space will assign 42B,Golf Course Hill,Marquette Crossing the Address Line 1 subfield, making the rest of the address fall into the correct subfields.
Export records
Exporting records help you obtain or download the records that are in AppCreator report into a specific format for a purpose outside of ManageEngine AppCreator environment. AppCreator enables you to export your reports in a few simple steps so that you can access them offline and email them to your colleagues who are non-ManageEngine users. You can perform export operations across all the three platforms supported by AppCreator — web, mobile, and tablet.