Single Sign-On
Analytics Plus supports single sign-on functionality to allow users to access Analytics Plus seamlessly, without having to provide login credentials. Single sign-on can be enabled with any third party application that supports SAML authentication, such as G Suite. This way, users who are logged in to any of Google's services do not have to enter their credentials to log in to Analytics Plus. In this example, G Suite will play the role of an identity provider.
Note: Only Analytics Plus administrators can set up the SAML configuration.
This section explains how to set up the SAML configuration and enable single sign-on.
Configure SAML settings for single sign-on
To enable single sign-on, SAML settings need to be configured for your application and users have to be associated with it. Multiple SAML configurations can also be set up in Analytics Plus, in scenarios where you wish to authenticate users via different applications. For instance, users who sign on through G Suite can instead log in seamlessly through Dropbox, by switching their association from the SAML configuration or user management settings.
Set up a SAML configuration
To set up SAML configurations in Analytics Plus, follow the steps below:
Navigate to the User Management section in the Settings page, and click the SAML Configuration tab.
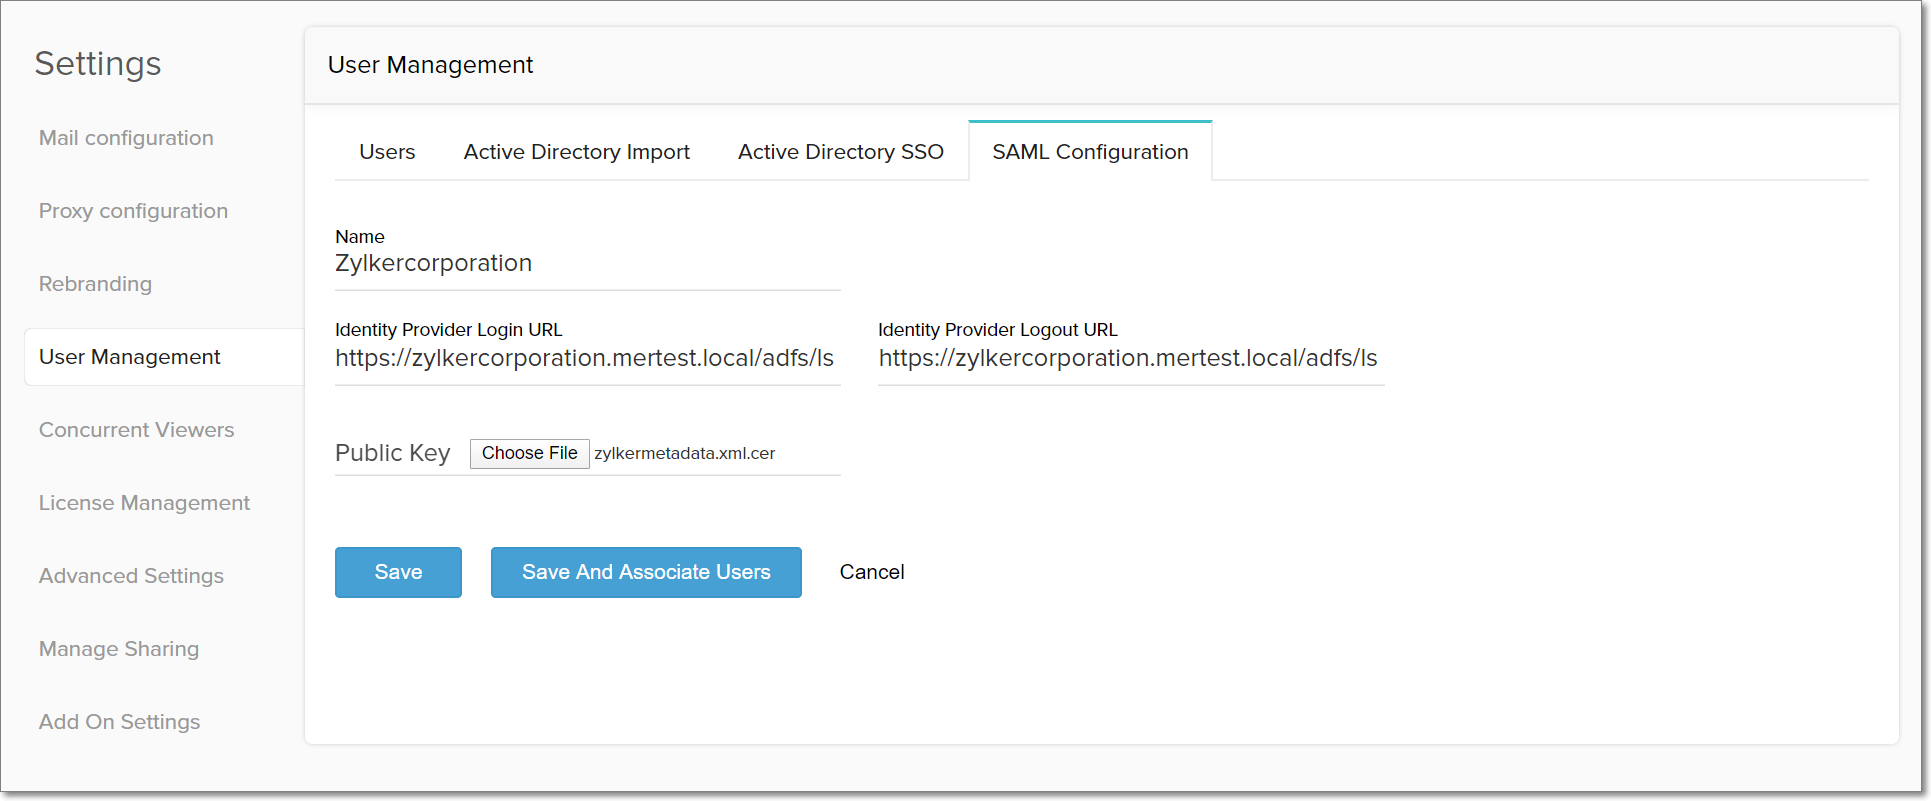
Click Add New. Enter your application's name, login and logout URLs, upload the identity provider certificate from your application, and click Save. Administrators can now associate users to this SAML configuration to enable single sign-on.

Enabling single sign-on
Once a SAML configuration is set up, you can enable single sign-on for users in Analytics Plus by associating them to their respective applications. This can be accomplished in two ways:
From the SAML Configuration tab:
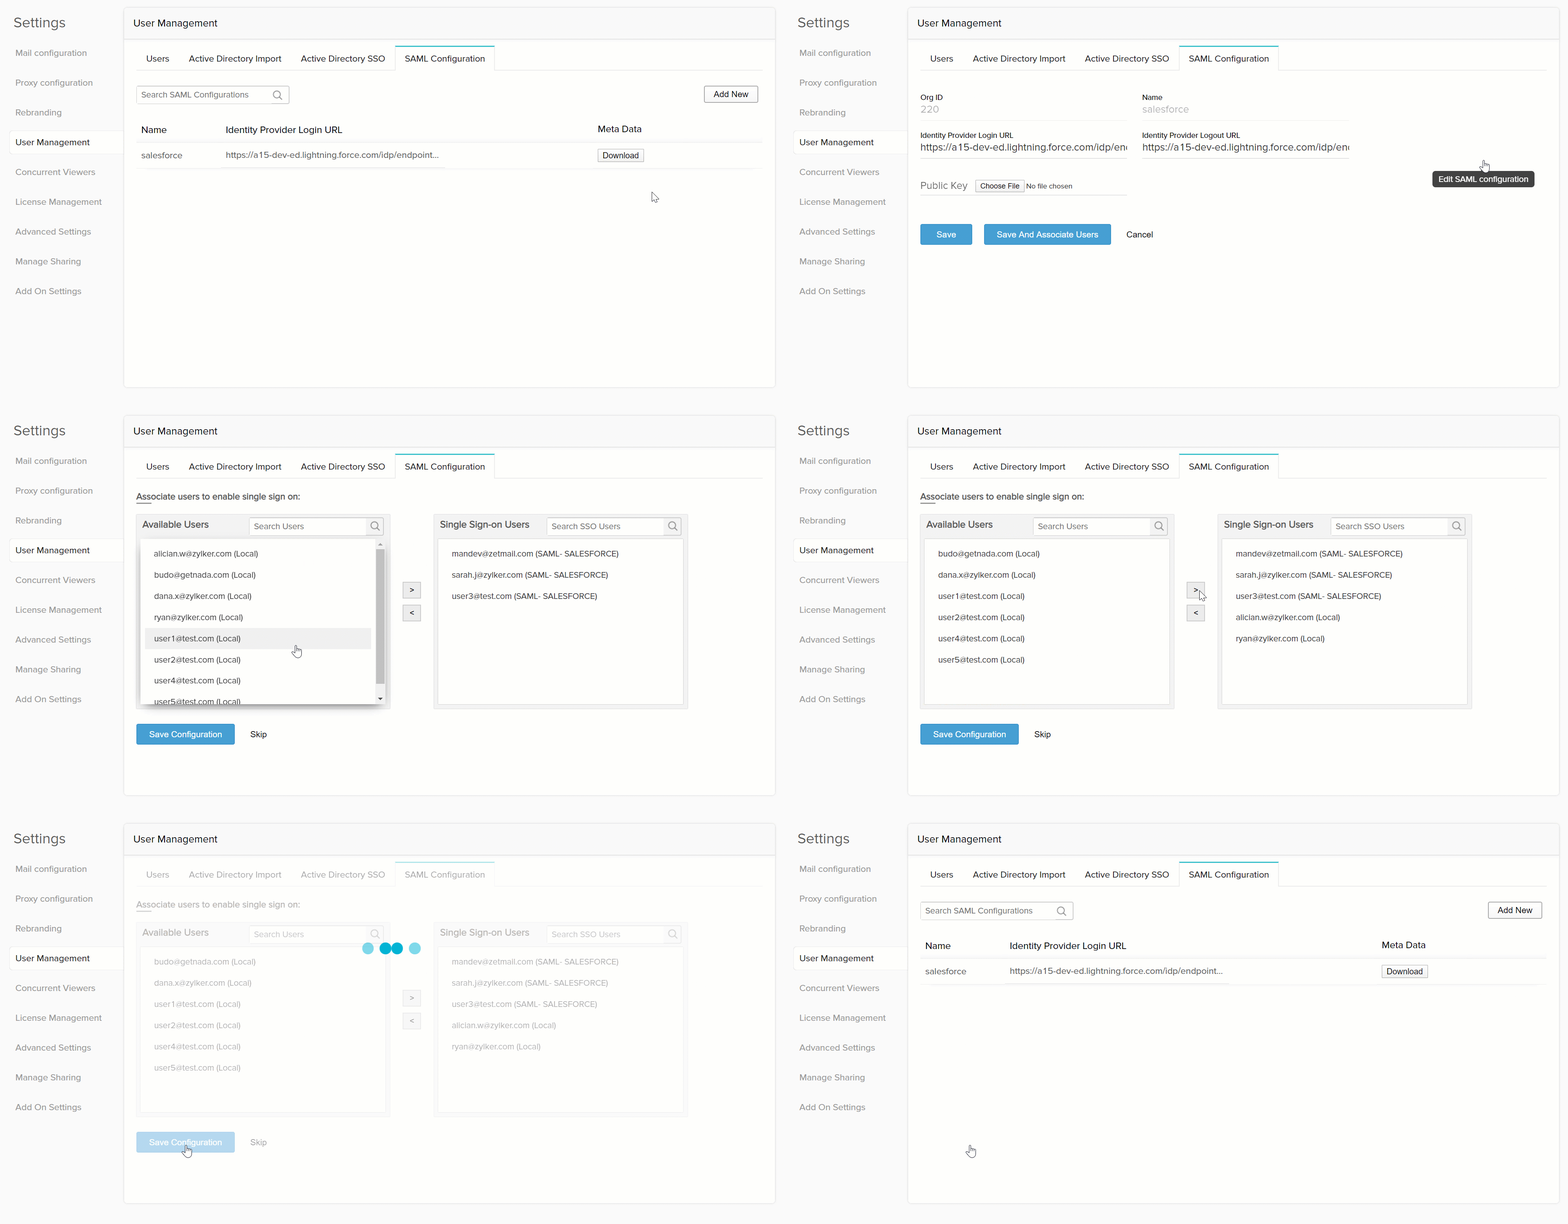
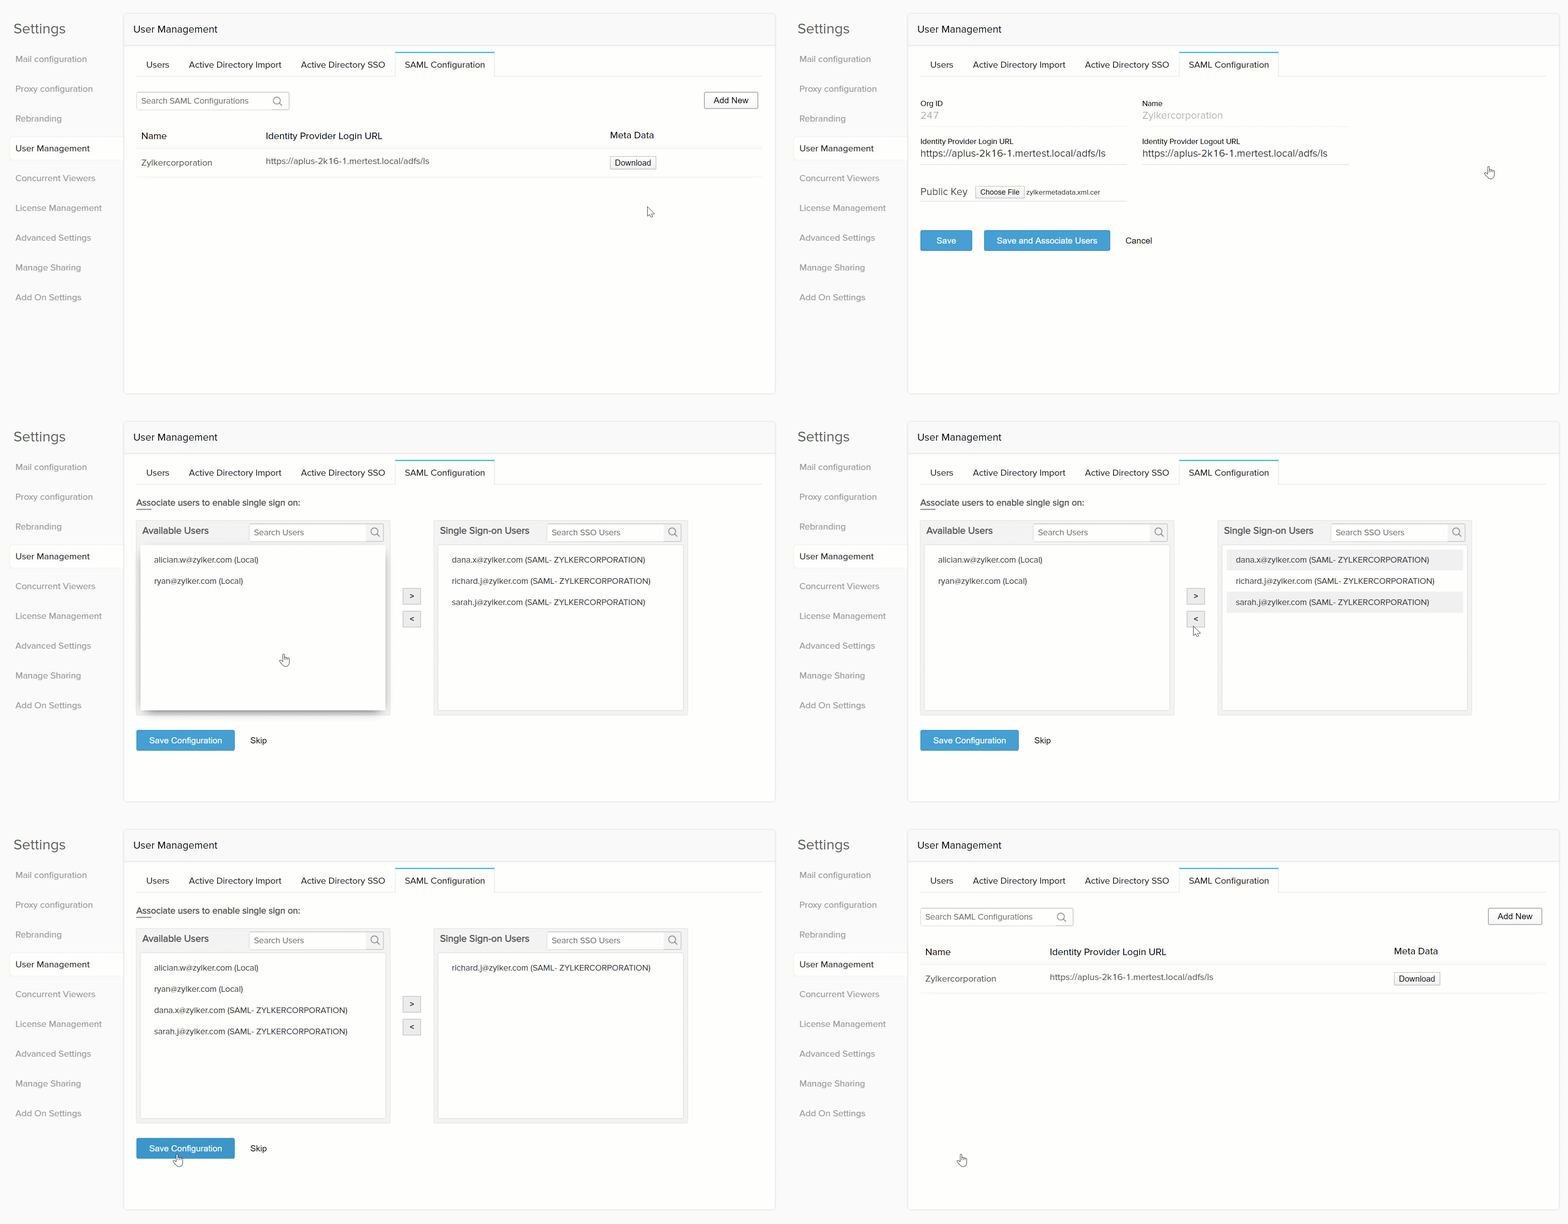
You can associate users by clicking the Save and Associate Users button when creating a new SAML configuration. Select the users from the Available Users list and move them to the Single Sign-on Users list, and click Save Configuration to save the changes.

From the Add User / Edit User screens
Single sign-on can also be enabled while adding new users or editing an existing user, by selecting the Enable Single sign-on button.

Once single sign-on has been enabled, users can log in to Analytics Plus by accessing the login link that has been emailed to their registered email addresses.
Disabling single sign-on
Follow the steps below to disable single sign-on for individual users
Navigate to the required user in the Users tab, and click the Edit User icon that appears on mouse over.
De-select the Enable Single Sign-On option, and click Save.

Follow the steps below to disable single sign-on for multiple users.
Navigate to the SAML Configuration tab and click the Edit SAML configuration icon that appears on mouse over the required SAML configuration.
Click the Save and Associate Users button. In the page that appears, select the required users from the Single Sign-on Users list and move them to the Available Users list.
Click Save Configuration to save the changes.

Deleting SAML configurations
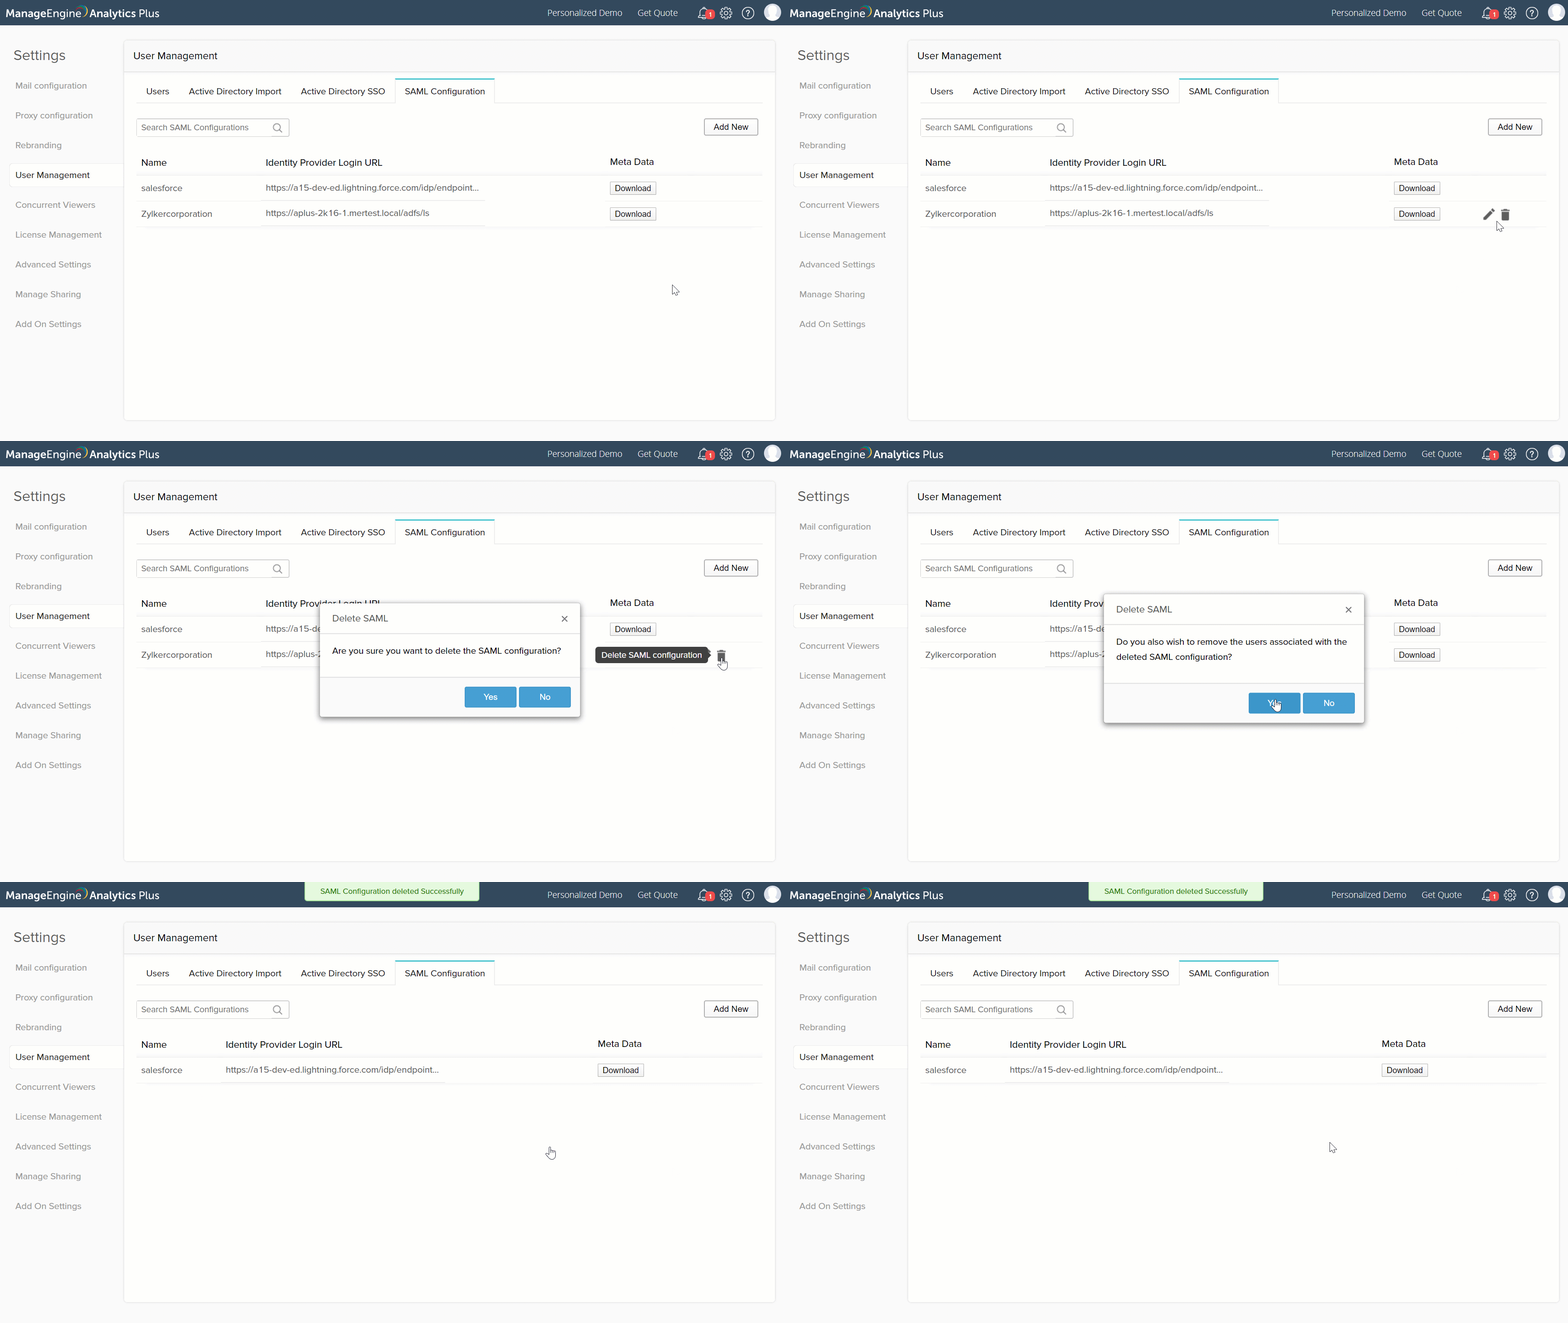
An application's SAML configuration, and thereby its single sign-on capabilities, can be deleted from Analytics Plus. This disables the single sign-on functionality for all users associated with that application. To delete a SAML configuration, navigate to the SAML Configuration tab. Click the Delete button that appears on mouse over the required configuration, and confirm your action to delete the SAML configuration. You can also choose to delete all the associated users in the subsequent pop-up.
