How to configure Conditional Access in Microsoft Entra ID
Implementing a secure authentication system is a must-have for any organization. However, too many locks will make a door not only impenetrable, but also irritating to use. To balance the need for security and efficiency, Microsoft Entra ID uses Conditional Access policies to enforce different sets of authentication requirements that adapt to varying conditions. Continue reading to learn the basics of Conditional Access: What it is, how it works, and how to set up a policy for your organization in Microsoft Entra ID.
What is Conditional Access in Microsoft Entra ID?
Conditional Access is a policy-based approach to secure access to and within Microsoft Entra ID, allowing organizations to set rules and requirements for accessing applications and resources. It works by evaluating conditions at the time of access (known as sign-in conditions), such as the location, time, or device from which the access request is raised, and enforcing policies to ensure that access is granted only under predefined conditions.
What do you need to set up Conditional Access in Microsoft Entra ID?
Before you can begin configuring Conditional Access policies, there are several prerequisites to keep in mind:
- Microsoft Entra ID P1 or P2 license: You need either Microsoft Entra ID P1 or P2 licensing for your tenant.
- Administrative permissions: You need to be a Global Administrator, Security Administrator, or Conditional Access Administrator to create and manage Conditional Access policies.
- Multi-factor authentication (MFA): While Conditional Access policies can work without MFA, it’s a common component for enhancing security. Ensure that MFA is configured for users who need it.
- Endpoint management (optional): If you want to control access based on the device state (i.e., whether the device is compliant with your organization’s security policies), you'll need to integrate Microsoft Intune or another endpoint management solution.
How does Conditional Access work in Microsoft Entra ID?
When Conditional Access is set up, it acts as a security gatekeeper that ensures user authentication and access to resources meet the specified sign-in conditions and authentication requirements. A typical conditional access flow is as follows:
- The authentication process begins when the user enters their primary credentials, typically a username and password. If these credentials are correct, the process moves to the next stage.
- The conditional access policy evaluates whether the conditions specified in the policy are met. If they are, the policy’s actions are applied.
- If the policy requires additional verification, the user will be prompted to provide a second form of authentication from the available methods. After successfully providing this second factor, the conditional access policy is reassessed to determine if further MFA is required.
- If the conditional access policy is fully satisfied, access to the resource is granted. However, if any part of the process fails, access is denied.
How do you configure Conditional Access in Microsoft Entra ID?
To configure a Conditional Access policy in Microsoft Entra ID, follow these steps:
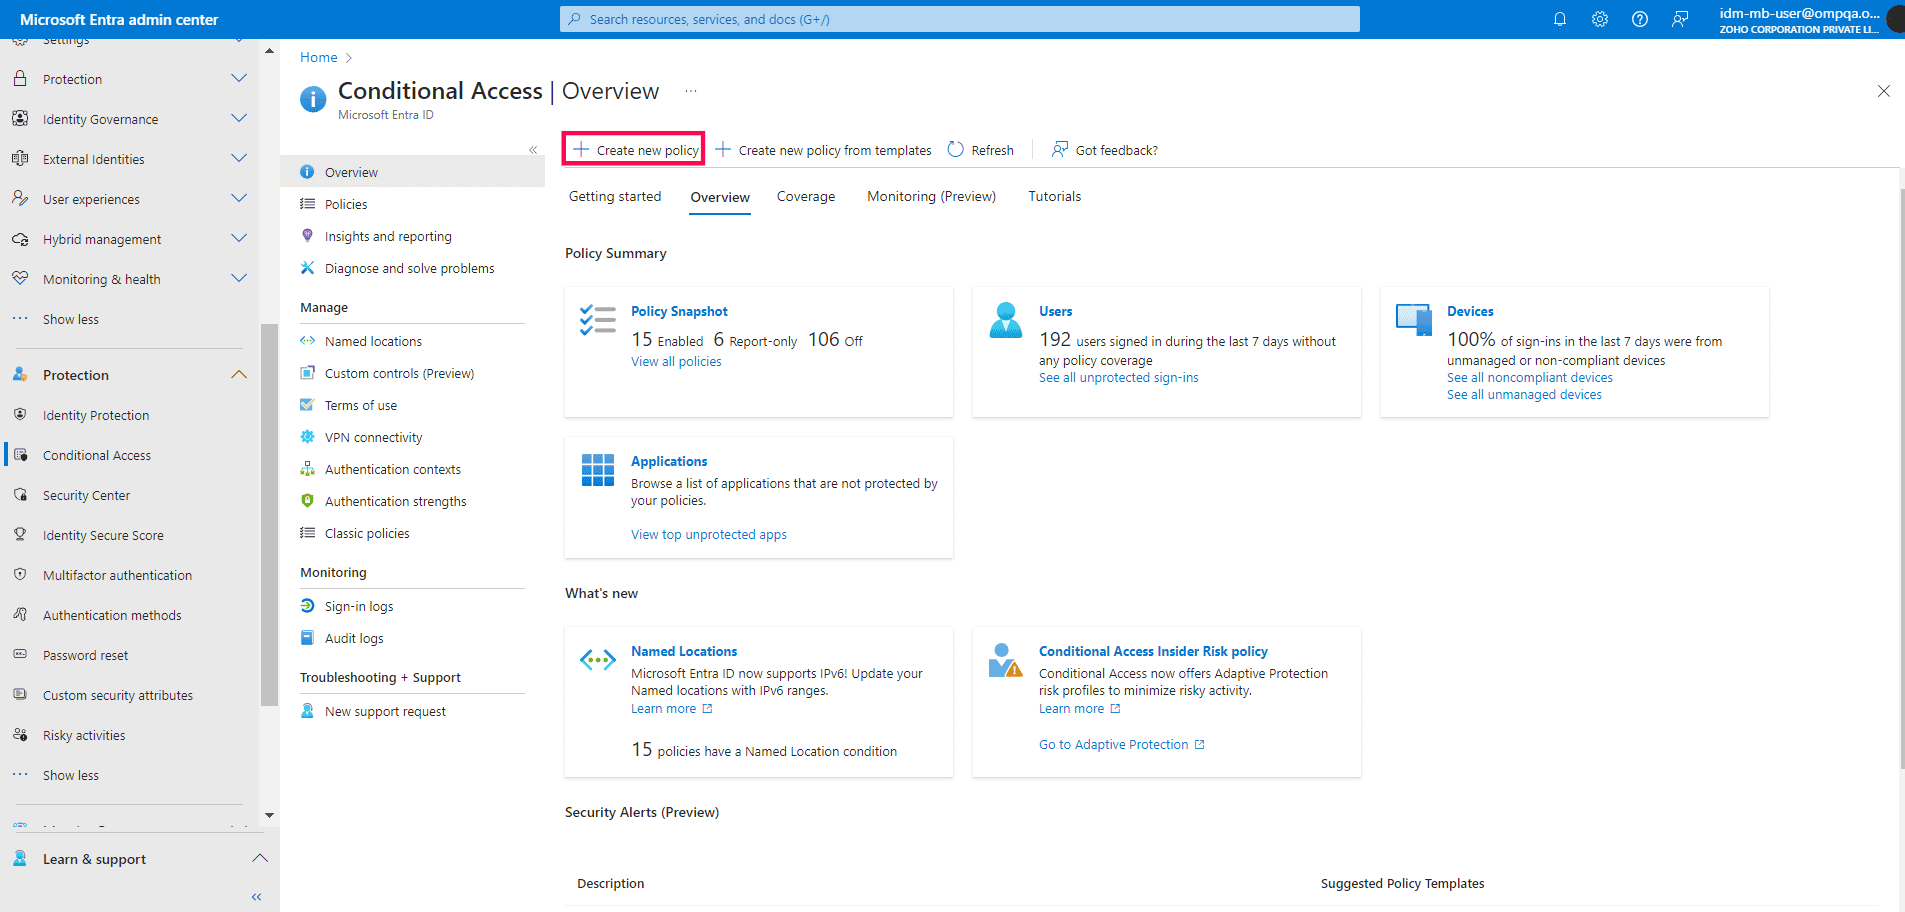
- Log in to the Microsoft Entra admin center and navigate to Protection > Conditional Access.
- Click + Create New Policy.
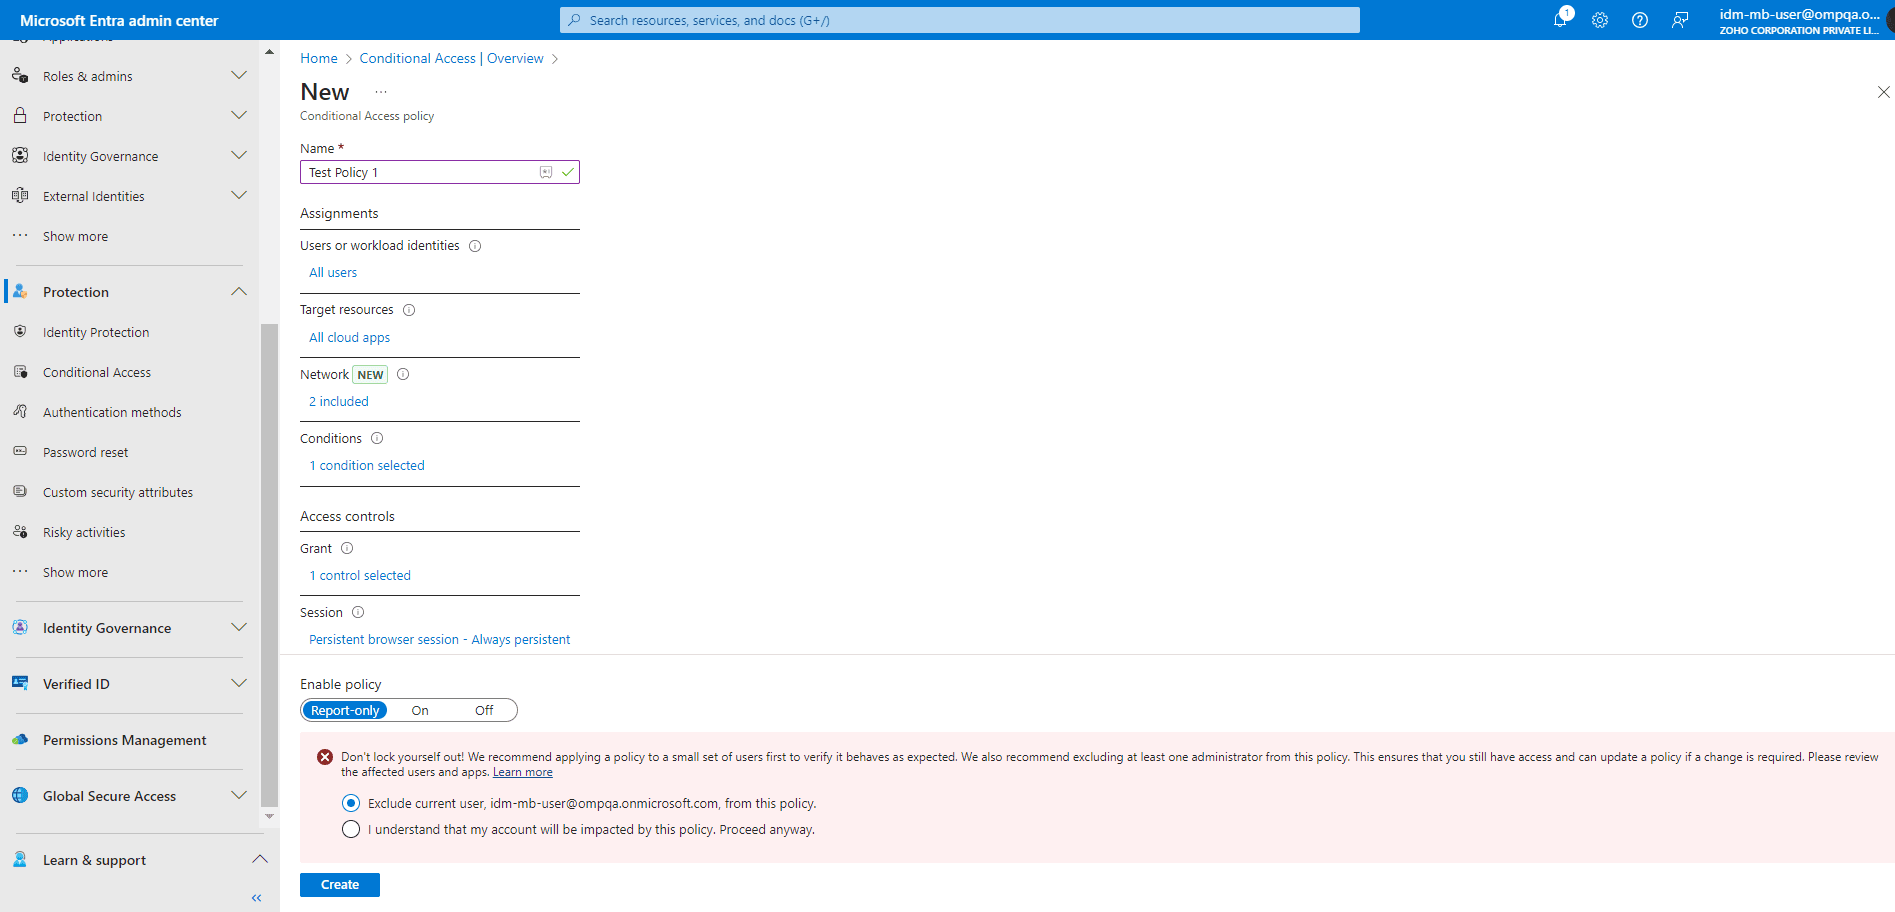
- After entering a name for the policy, configure the following:
- Assignments:
- Users or workload identities: Choose the objects for which this policy applies. You can include or exclude specific objects or roles using the Edit filter option.
- Target resources: Specify the cloud applications, user actions, or authentication context configured to which the policy applies.
- Network: Set the locations and IP addresses that you want this policy to apply to.
- Conditions: Define the risk level of the sign-ins for which this policy should apply.
Note: Workload identities cannot be granted access through conditional access policies.
- Access Controls:
- Under Grant, decide whether to block or grant access. If granting access, you can require conditions such as MFA or a compliant device.
- Under Session, you can enforce additional controls, like limited access or requiring user consent for certain actions.
- Assignments:
- Once everything is configured, enable the policy. It’s recommended to first enable it in Report-only mode to see how it will affect users before enforcing the policy organization-wide.
- When done configuring your policy, click Create.
- Test the policy with a few users to ensure it’s working as expected before rolling out the changes across the organization.
- After the policy is live, use the Sign-in Logs and Conditional Access insights workbook within the portal to monitor its effectiveness and adjust as needed.
Administer your Microsoft 365 environment effortlessly and effectively with M365 Manager Plus
ManageEngine M365 Manager Plus is a comprehensive administration and security solution for Microsoft 365 used for reporting, managing, monitoring, auditing, and creating alerts for critical activities in your Microsoft 365 environment. You can delegate granular permissions to technicians without elevating their Microsoft 365 privileges and create custom roles with any combination of reporting, management, and auditing tasks.
There are other benefits to using M365 Manager Plus to manage and monitor your Microsoft 365 environment:
- Gain a thorough understanding of your environment, not just in Microsoft Entra ID, but also in Exchange Online, SharePoint Online, OneDrive for Business, and other Microsoft 365 services, with detailed reports and intuitive visualizations, all from a single console.
- Filter your reports just once and save them as custom reports that you can access in just a few clicks.
- Export reports generated in M365 Manager Plus in not just CSV, but also in other presentable formats such as HTML, PDF, and XLSX.
- Easily manage users, groups, contacts, mailboxes, teams, and sites in bulk, without PowerShell scripting.
- Keep tabs on even the most granular user activities in your Microsoft 365 environment.
- Configure alert profiles in M365 Manager Plus to notify you of specific activities that take place outside of business hours or occur at unusual frequencies.
- Monitor the health and performance of Microsoft 365 features and endpoints around the clock.
Control and customize the administration of your Microsoft 365 environment.
Try now for freeStreamline your Microsoft 365 governance and administration with M365 Manager Plus
Get Your Free Trial