How to create custom Microsoft Entra ID workbooks
Admins using Microsoft Entra ID for their identity management requirements are required to power through a vast amount of entries in Audit logs to find the activities that they want to track. This comes with some problems, such as filtering every time a specific set of data is needed, not being able to save them as separate reports, and viewing a vast set of logs that cannot be interpreted easily.
Microsoft Entra workbook is a tool that can help you visualize the logs generated in your environment as custom reports in various methods like graphs, pie charts, and more. This can help you get a clear overview of the activities in your tenant without having to worry about cluttering it up with granular details.
You can create your own Microsoft Entra workbooks or use one of the templates available to get started.
What do you need to create custom Microsoft Entra workbooks
To create your own Microsoft Entra Workbooks for your tenant, you will need to have the following requirements set before you start.
- A Microsoft Entra ID tenant with at least a P1 license
- A Log Analytics workspace
- An account with the Log Analytics Reader or Log Analytics Contributor role to access or update the Log Analytics workspaces used
- Knowledge on KQL scripting
How to create custom Microsoft Entra workbooks
You can create your own Microsoft Entra workbooks without resorting to the available templates by following the steps mentioned below.
- Log in to Microsoft Entra ID with an account that has the permissions to access Workbooks.
- Navigate to Identity > Monitoring & Health > Workbooks and click New.
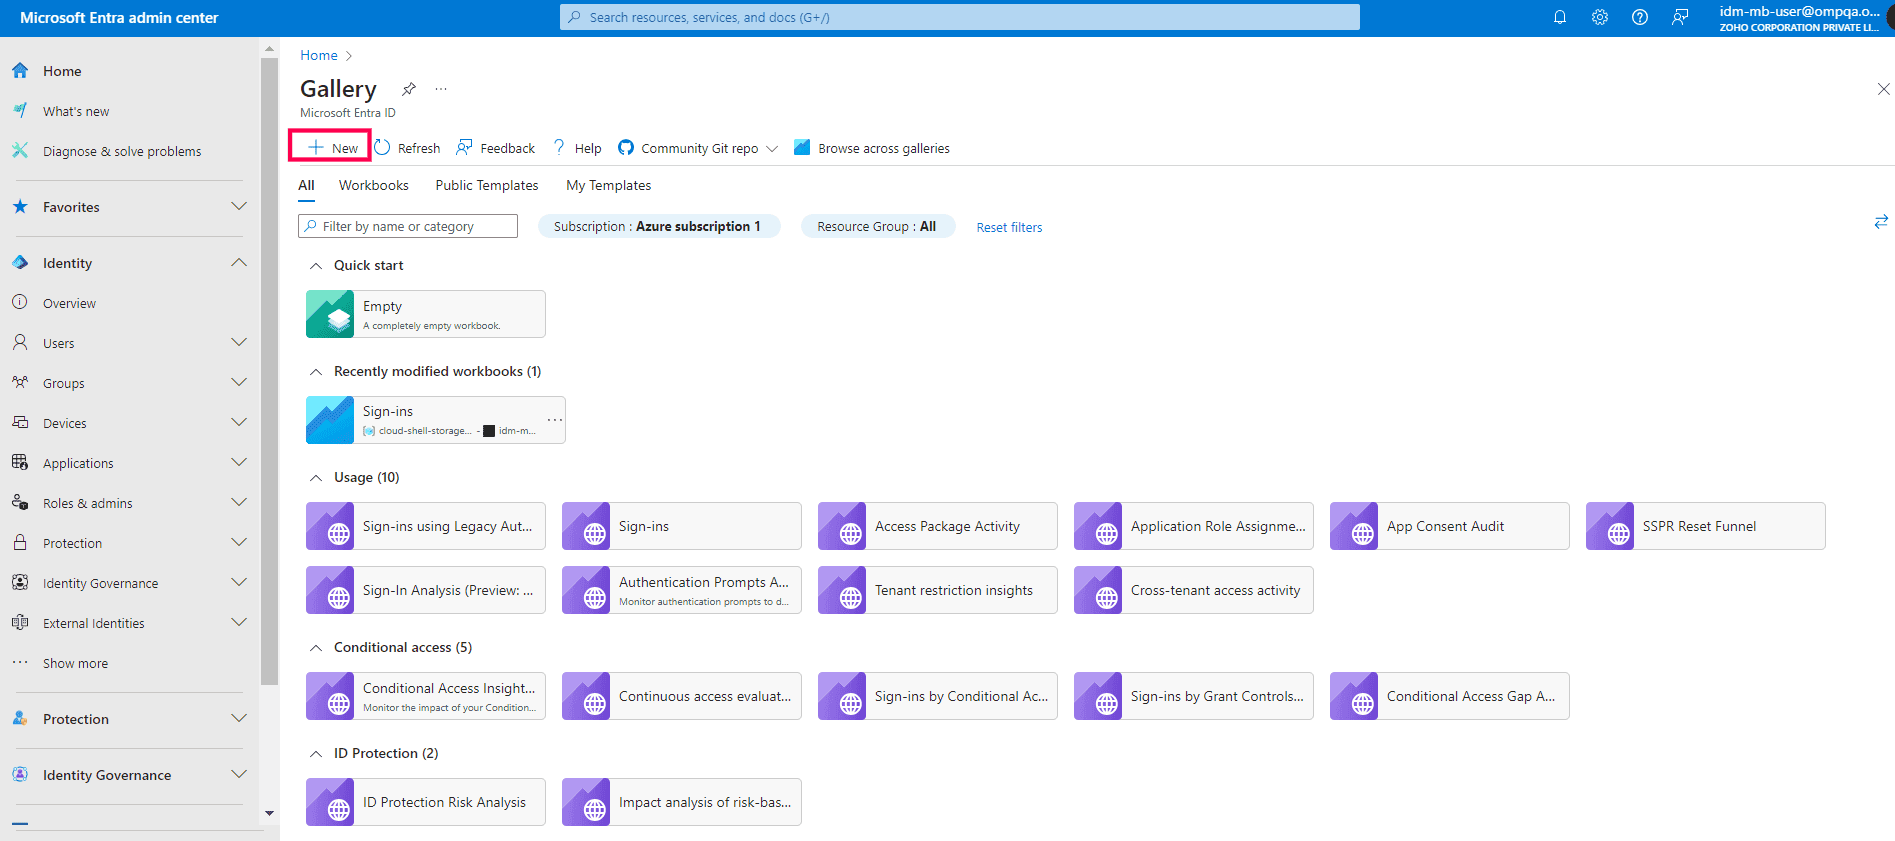
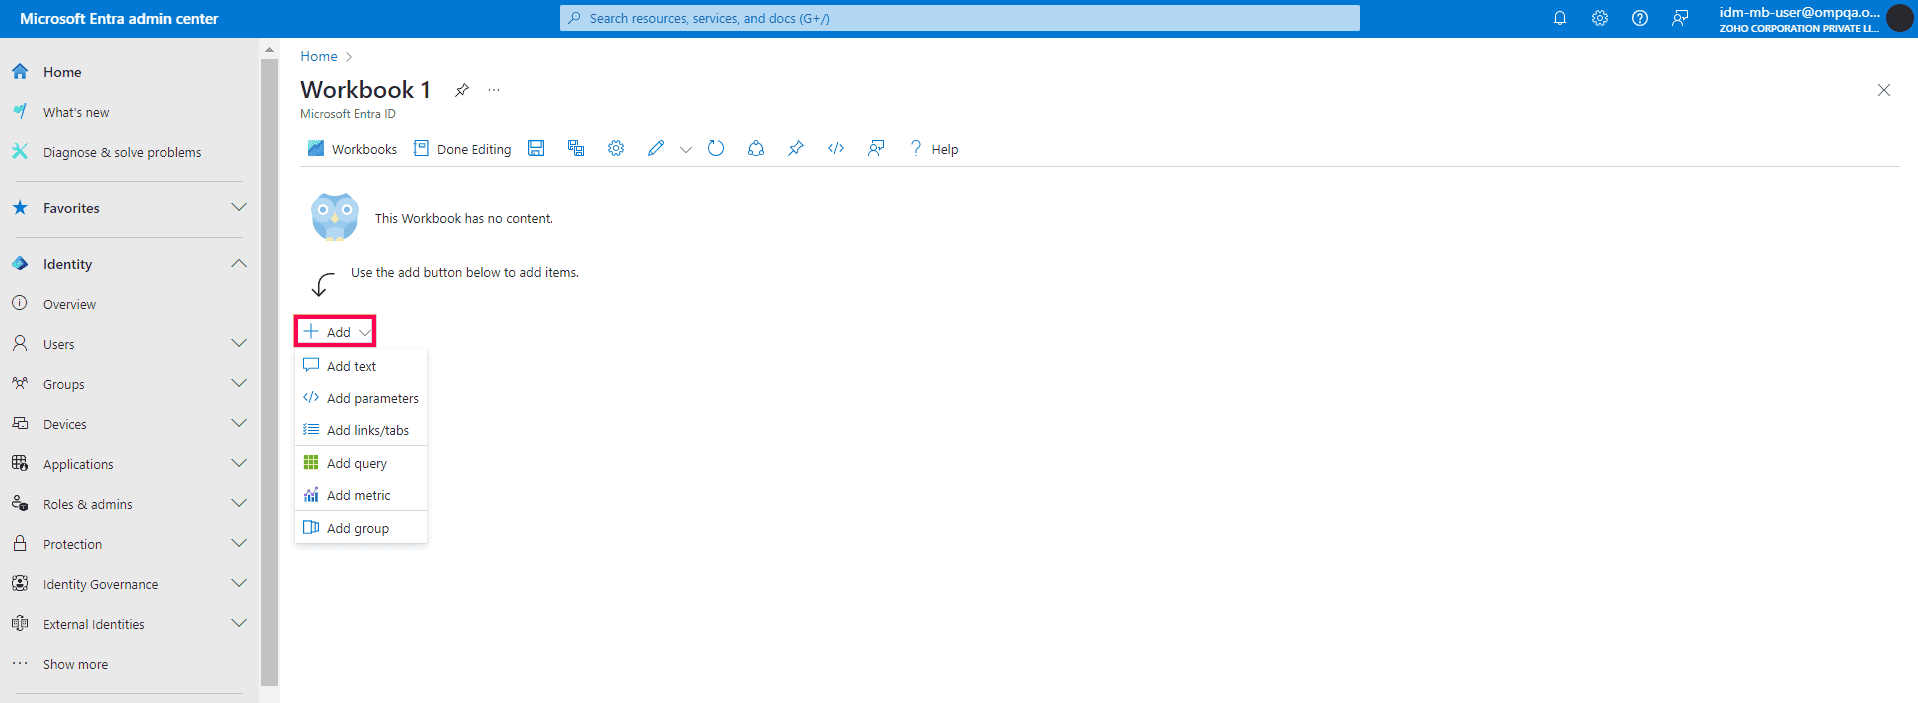
- Click Add to get started with one of the six options displayed.
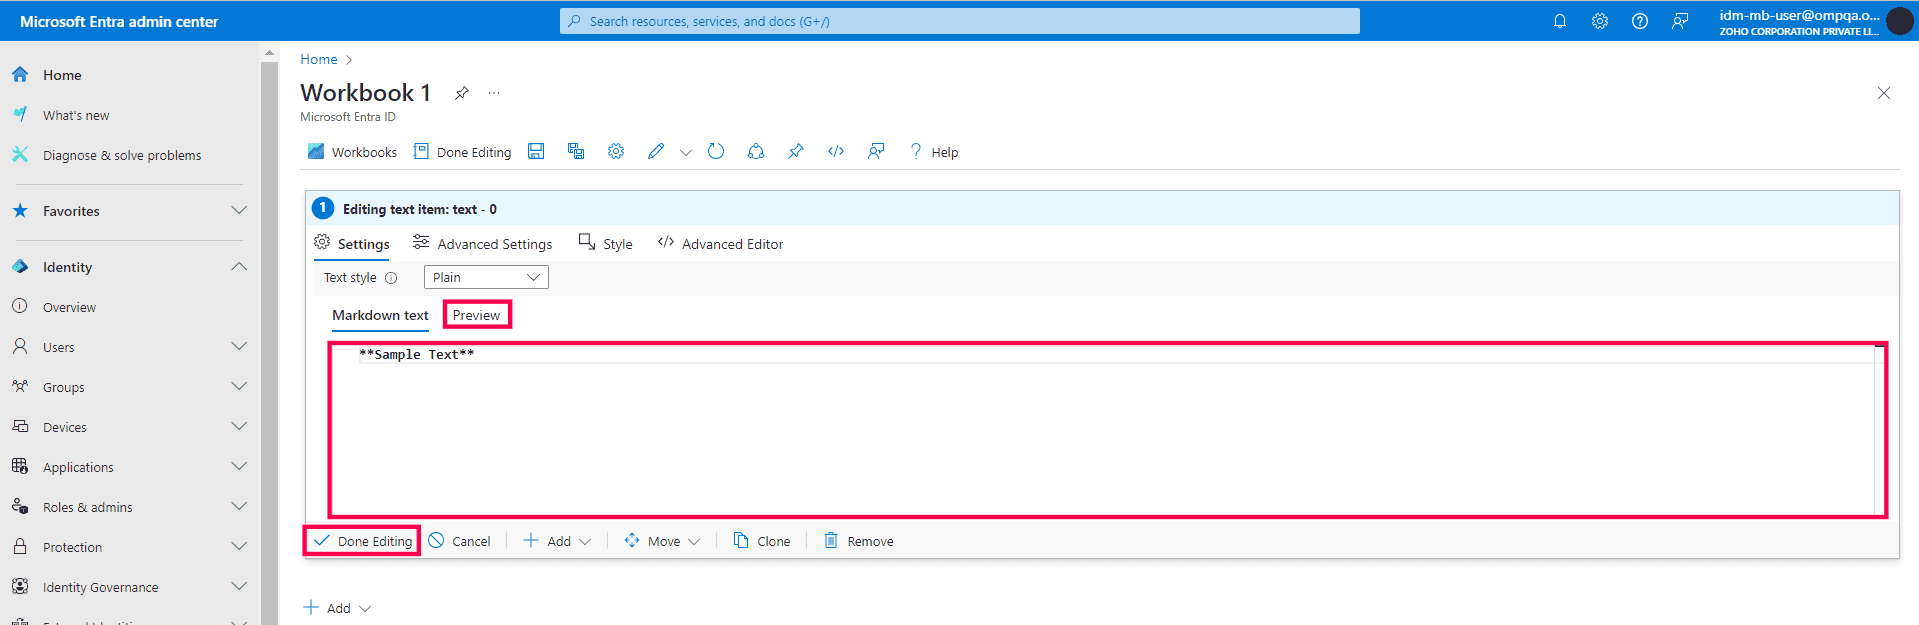
a. Plot the text for your workbooks
Texts help you give the context of the elements you refer to in the workbook. You can enter your text in markdown using elements like bold, italics, or even hyperlink your text and view the output using the Preview tab. You can also bring in parameters and links configured in texts.
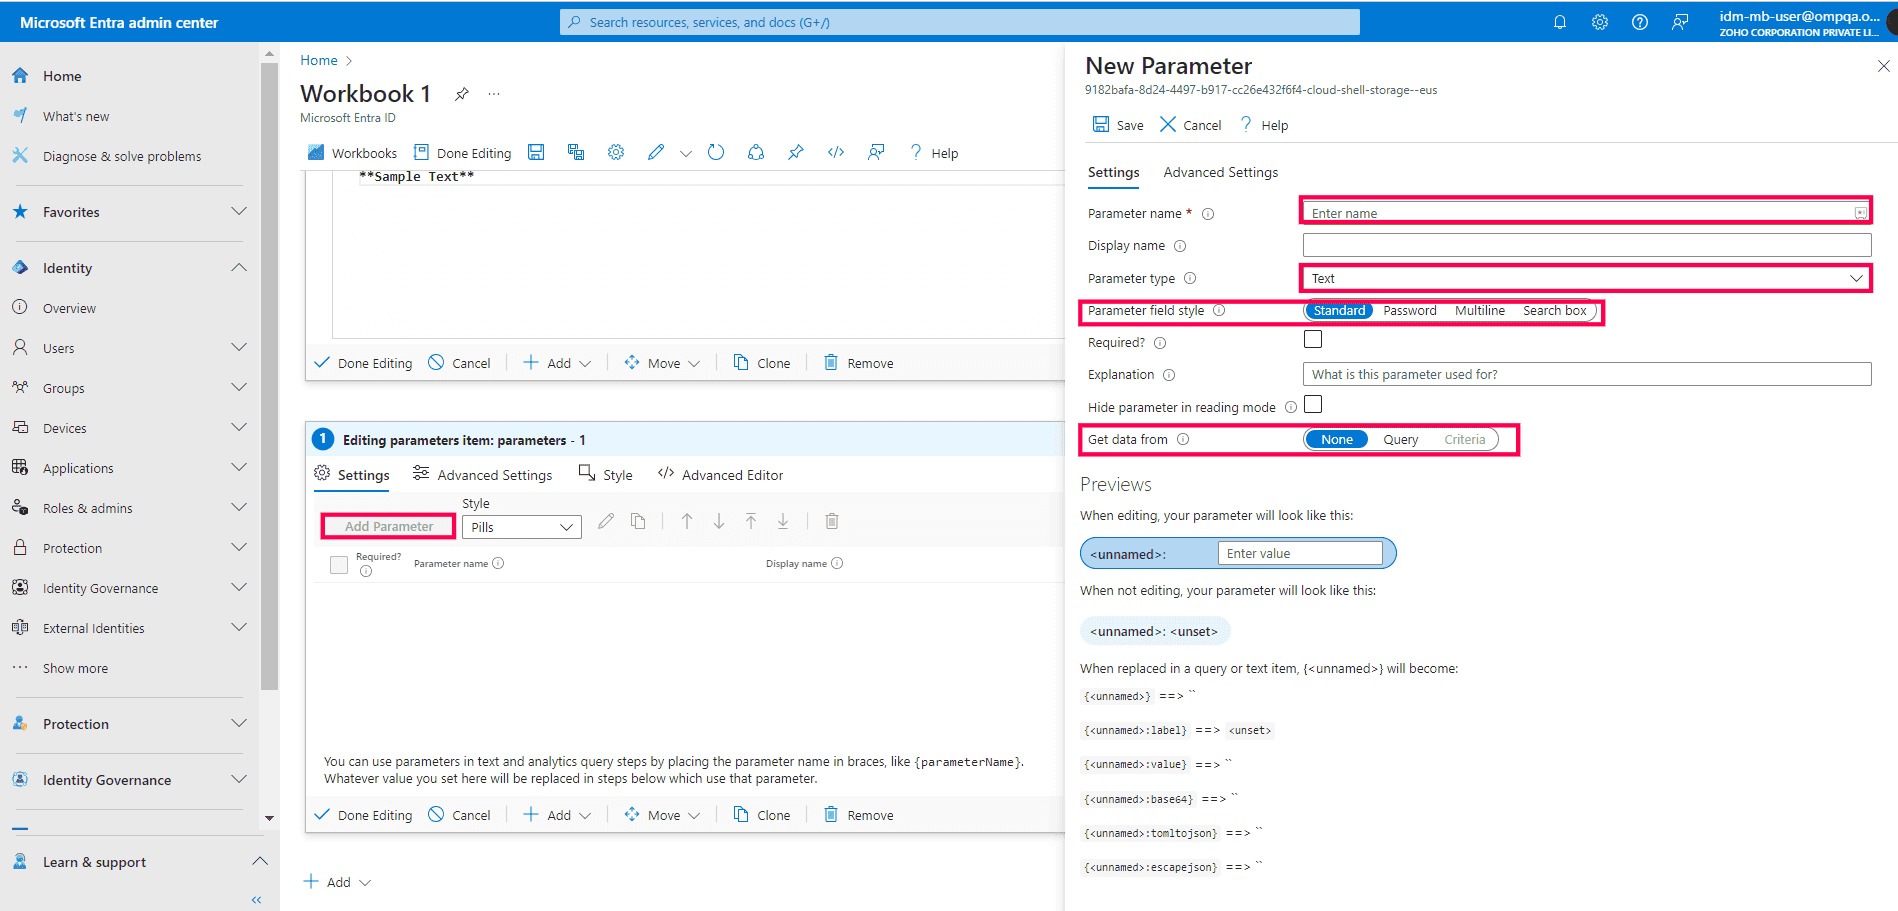
b. Get user inputs with parameters
You can create fields for users to enter their preference for the data generated, like the time range or the specific unit for which the workbook should display data, by using Parameters. You can create one by clicking Add Parameters in the Add option, then Add Parameter, and filling out the options displayed.
- Parameter name : Provides a suitable name for the parameter.
- Display name: Provides a suitable display name for the parameter.
- Parameter type: Selects how the data is collected, such as text, drop-down, time range picker, etc.
- Parameter field type: Configures how the parameter field is displayed.
- Required: Decides if the parameter is to be mandatory filled.
- Allow multiple selections: Grants the option for users to select more than one item in types like drop-down.
- Explanation: Provides a suitable description of the parameter.
- Hide parameter in reading mode: Configures if the parameter can be made visible in read-only mode.
- Get data from: Configure the data source for the parameter using Queries or Criteria.
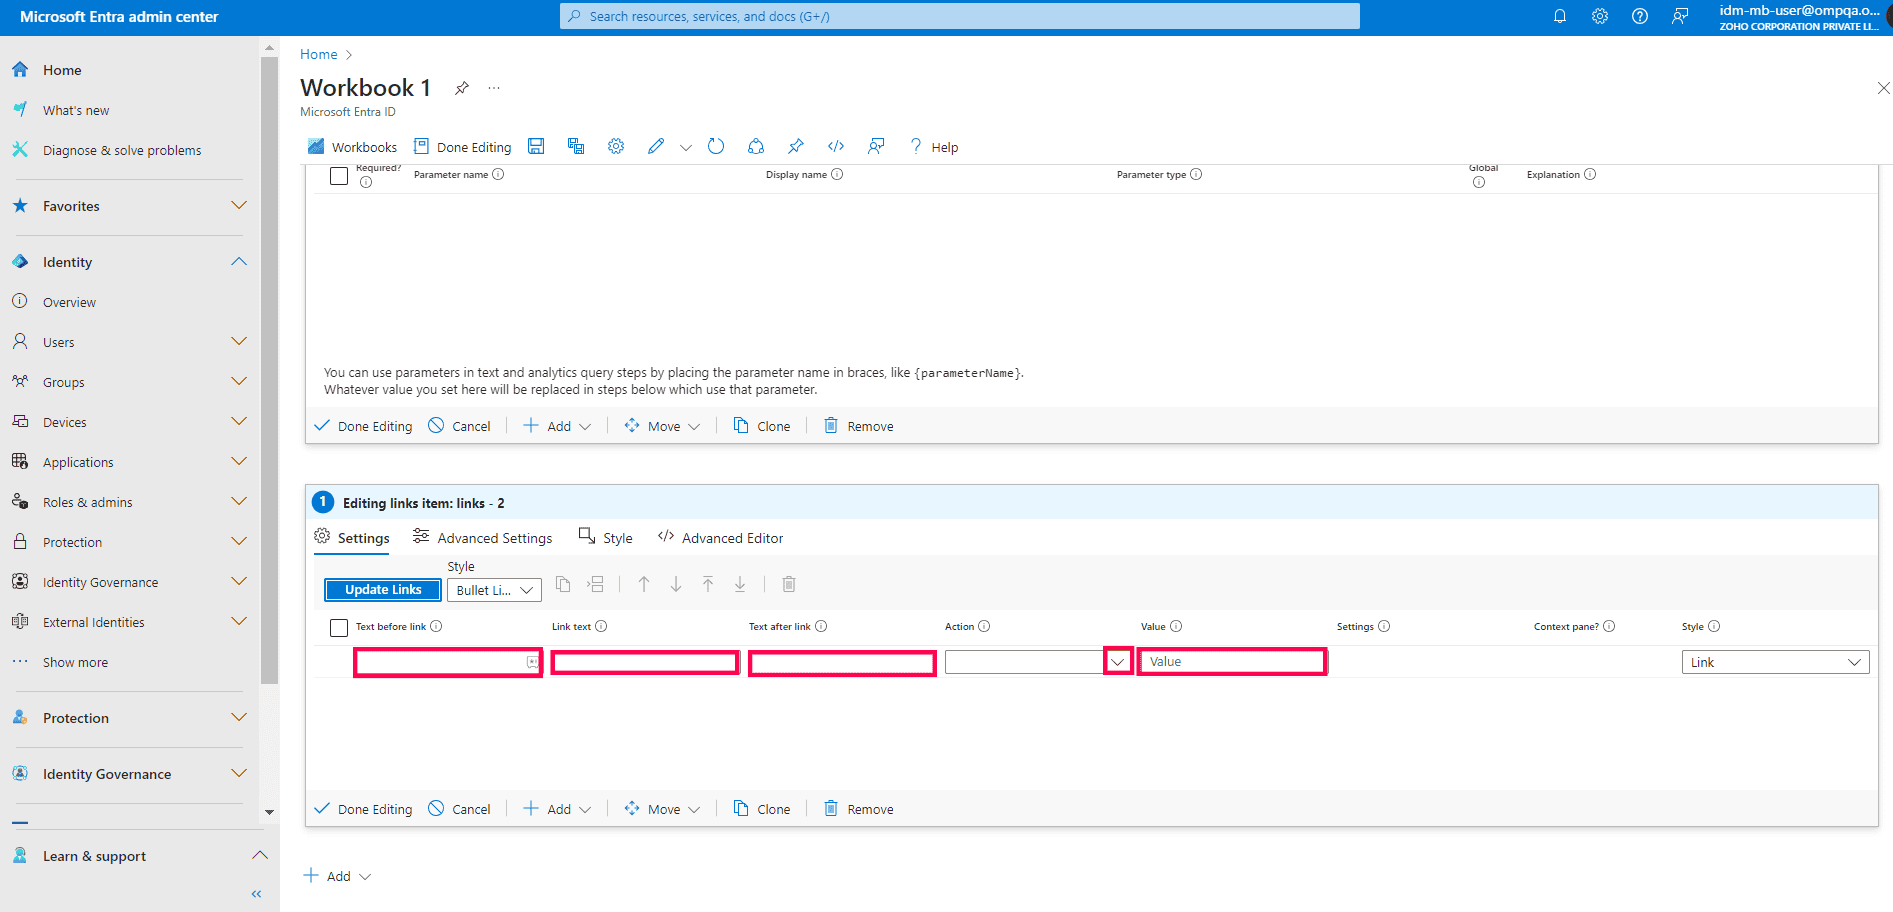
c. Add links to internal sections
Links can help your users navigate to related or frequently used sections of your workbook or pages of the Entra Admin Center and carry out some actions in a single click. You can create one by following the steps mentioned below.
- Navigate to Add links/tabs after clicking Add.
- Fill the Text before link, Link text, and Text after link fields with your preferred text.
- Select the action that you would like to be executed upon clicking the link from the Action dropdown and the values that need to be used by the action in the Value field. For example, you can select Scroll to a step in the Actions tab and select the field to be viewed in the Value field.
- Click Update links button to finish creating your links.
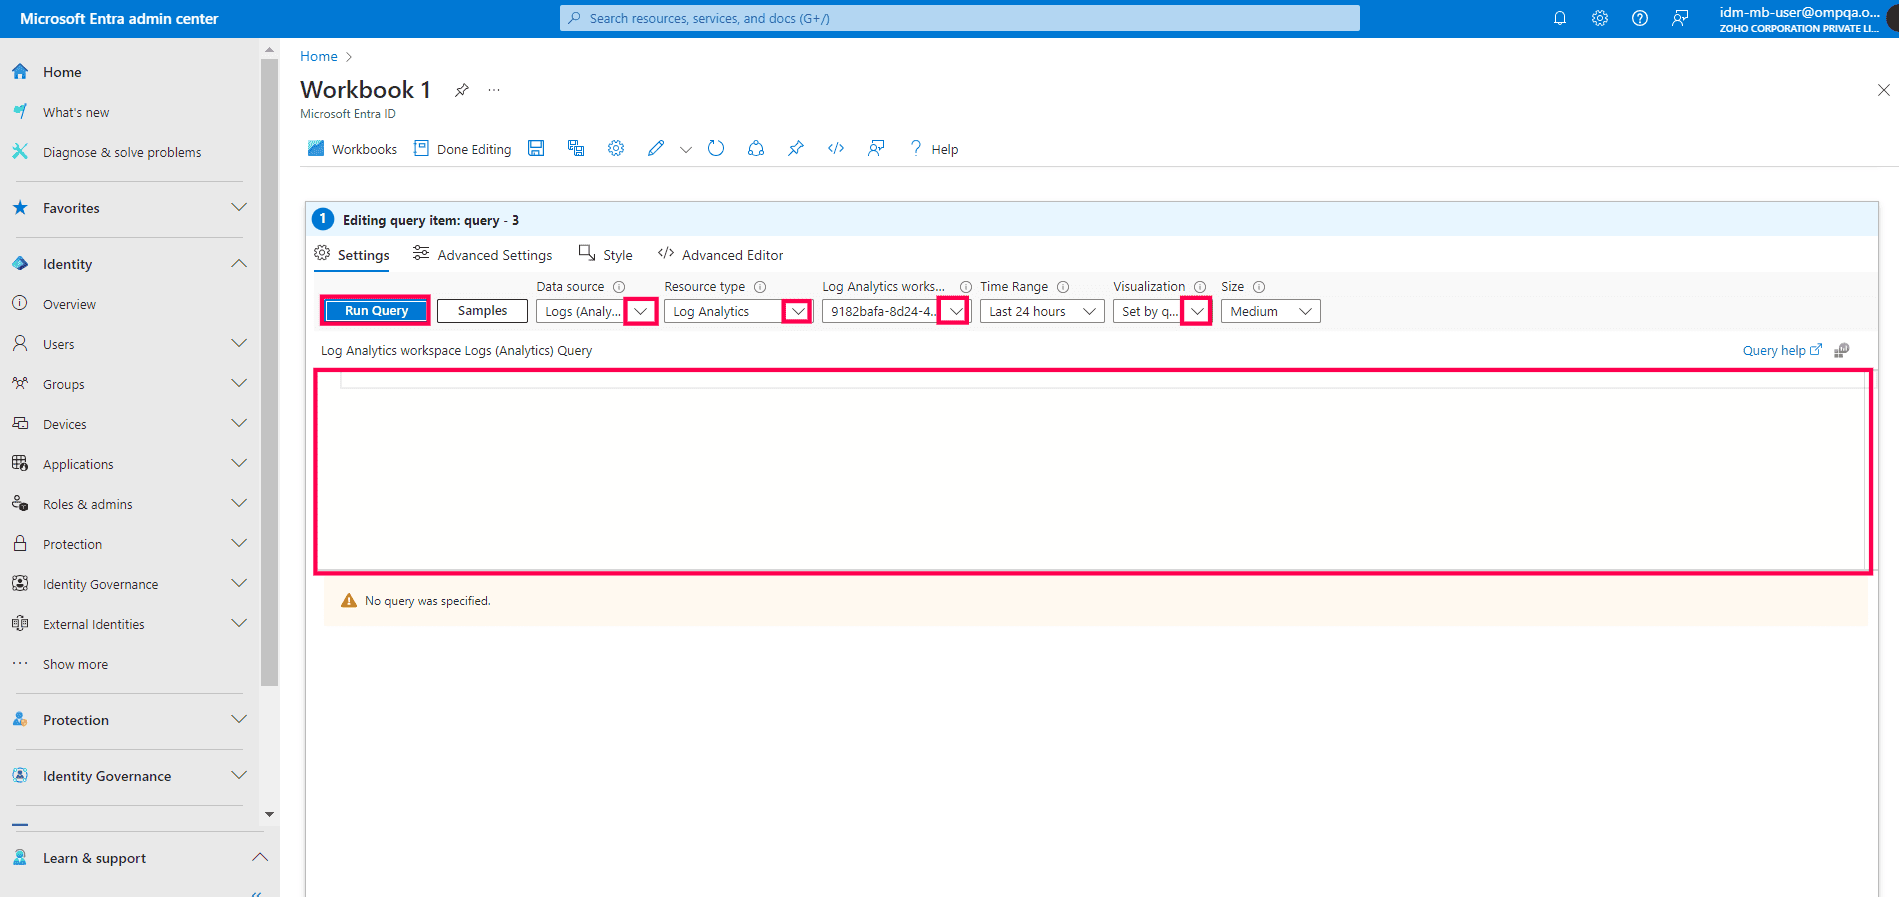
d. Write queries to process audit data
Queries are the most important components of a workbook. They help pull in the data that will be represented graphically in workbooks. Multiple sources like Azure Resource Graph, JSON, Merge, or Azure Health can be used to get the data for queries, but the suitable source to extract and use data from Audit logs is the Log Analytics workspaces. You will need to use Kusto Query Language (KQL) to write queries for workbooks. You can create and link a query using the steps below.
- Navigate to Add Query after clicking Add.
- Select the Data source, Resource type, and the Log Analytics workspace that you want to use the data from. You can also select how you want the data to be represented graphically from the Visualization tab.
- Type in your query in KQL in the field below and click Run Query.
- Click Done Editing to save your query configuration.
e. Track trends in your tenant with metric charts
Metrics can be used to view the change in values of a single variable for a period of time. This can be used to track data like the performance of your resources and the health of your services. You can add a Metric Chart by following the steps mentioned below.
- Navigate to Add Metric after clicking Add.
- Click Add Metric and fill the fields shown below.
- Select your Log Analytics workspace in the Namespace field.
- Choose the metric that you want to track by selecting it from the Metric dropdown.
- Decide which value you want to track using the Aggregation dropdown.
- Sum: The total of all values captured over the interval.
- Count: The number of records captured over the interval.
- Average: The average of the values captured over the interval.
- Min: The smallest value captured over the interval.
- Max: The largest value captured over the interval.
- Assign a Display name if you wish to.
- Click Save to finish configuring your metrics.
- Click Run Metrics to test your configuration.
- Click Done Editing to save your metric chart configuration.

f. Create sub sections using Groups
You can group the multiple elements that you have created into a single group that you can hide and show to declutter your workbook. You can also group components that are related to one another in the same section. You can create a new group by using the steps mentioned below:
- Navigate to Add Groups after clicking Add.
- Select your preferred Load Type:
- Lazy: A drop-down arrow that expands and collapses the group.
- Explicit: A customizable button that expands and collapses the group.
- Always: The details of the group are always displayed.
- Click Add in the field to fill the group with components like text, parameters, links, queries, and metric charts.
- Navigate to the Advanced Settings tab to type in your Group Title.
- Click Done Editing to finalize your configuration.

Once you are done adding your desired components, you can click Done Editing on the top ribbon and finish creating your Microsoft Entra workbook.
Get a clear overview of your Microsoft 365 environment with M365 Manager Plus
ManageEngine M365 Manager Plus is a comprehensive administration and security solution for Microsoft 365 used for reporting, managing, monitoring, auditing, and creating alerts for critical activities in your Microsoft 365 environments. You can gain a thorough understanding of your environment not just in Microsoft Entra ID, but also Exchange Online, SharePoint Online, OneDrive for Business, and other Microsoft 365 services, with detailed reports and intuitive visualizations, all from a single console.
There are also other benefits to using M365 Manager Plus to manage and monitor your Microsoft 365 environment.
- Filter your reports just once and save them as custom reports that you can access in just a few clicks.
- Export reports generated in M365 Manager Plus in not just CSV, but also in other presentable formats such as HTML, PDF, and XLSX.
- Delegate granular permissions to technicians without elevating their Microsoft 365 privileges and create custom roles with any combination of reporting, management, and auditing tasks.
- Easily manage users, groups, contacts, mailboxes, teams, and sites in bulk without PowerShell scripting.
- Keep tabs on even the most granular user activities in your Microsoft 365 environment.
- Configure alert profiles in M365 Manager Plus to notify you of specific activities that take place outside of business hours or occur at unusual frequencies.
- Monitor the health and performance of Microsoft 365 features and endpoints around the clock.
Effortlessly generate reports and customize dashboards for your Microsoft 365 environment.
Try now for freeStreamline your Microsoft 365 governance and administration with M365 Manager Plus
Get Your Free Trial