The last thing users want to see when they start work for the day is the "account locked out" message due to password expiration. Changing the password may slip out the users' mind among the other more important work to focus on. They should be notified constantly and well before the date of password expiration to make sure they change their passwords on time.
M365 Manager Plus brings you password expiration notification feature, which provides the following functionalities.
- Schedule group- based or domain- based password expiration notifications.
- Configure, how many days prior to password expiration, the notifications must be sent.
- Set the frequency of notifications (weekly, daily, or on specific days).
- Customize the message to be sent along with the email notification.
- Notify managers about the password expiration of users.
Steps to schedule a password expiration notification
- Login to admin portal of M365 Manager Plus.
- Go to Admin tab.
- Go to Administration → Password Expiry Notification in the left pane.
- Click Add New Notification.
- Select a suitable tenant from the Microsoft 365 Tenant drop-down.
- Give a name to the scheduler in Scheduler Name and an optional description in Description field.
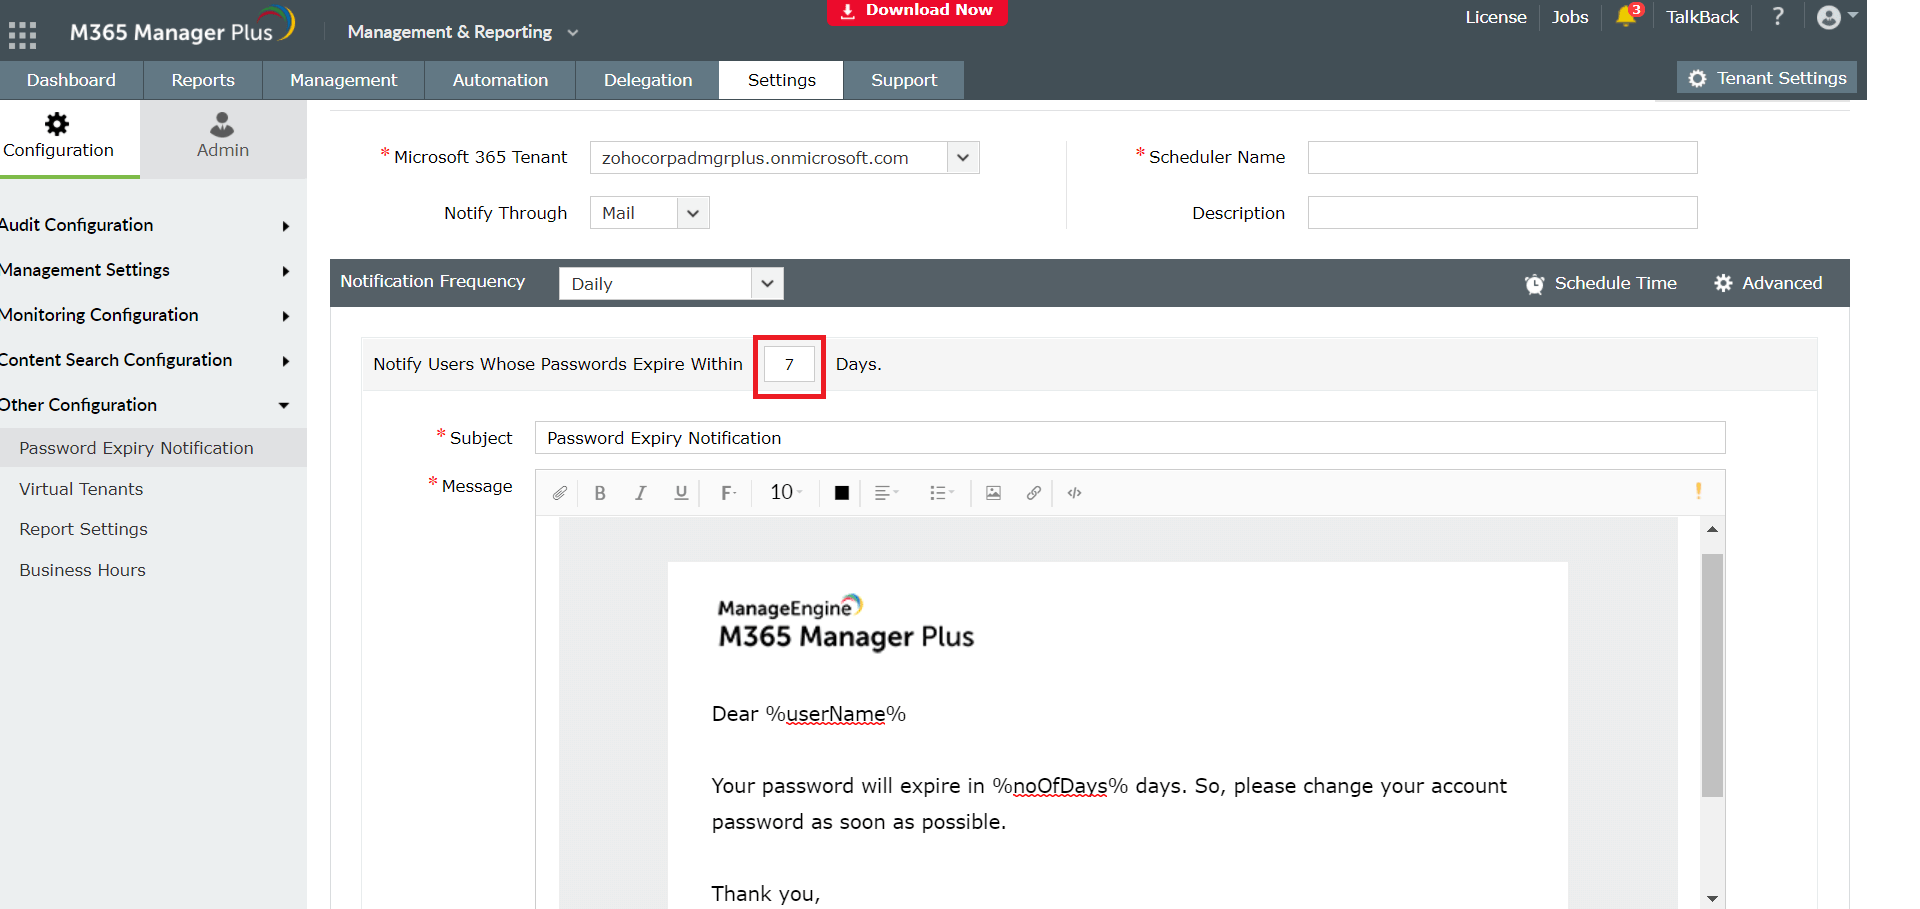
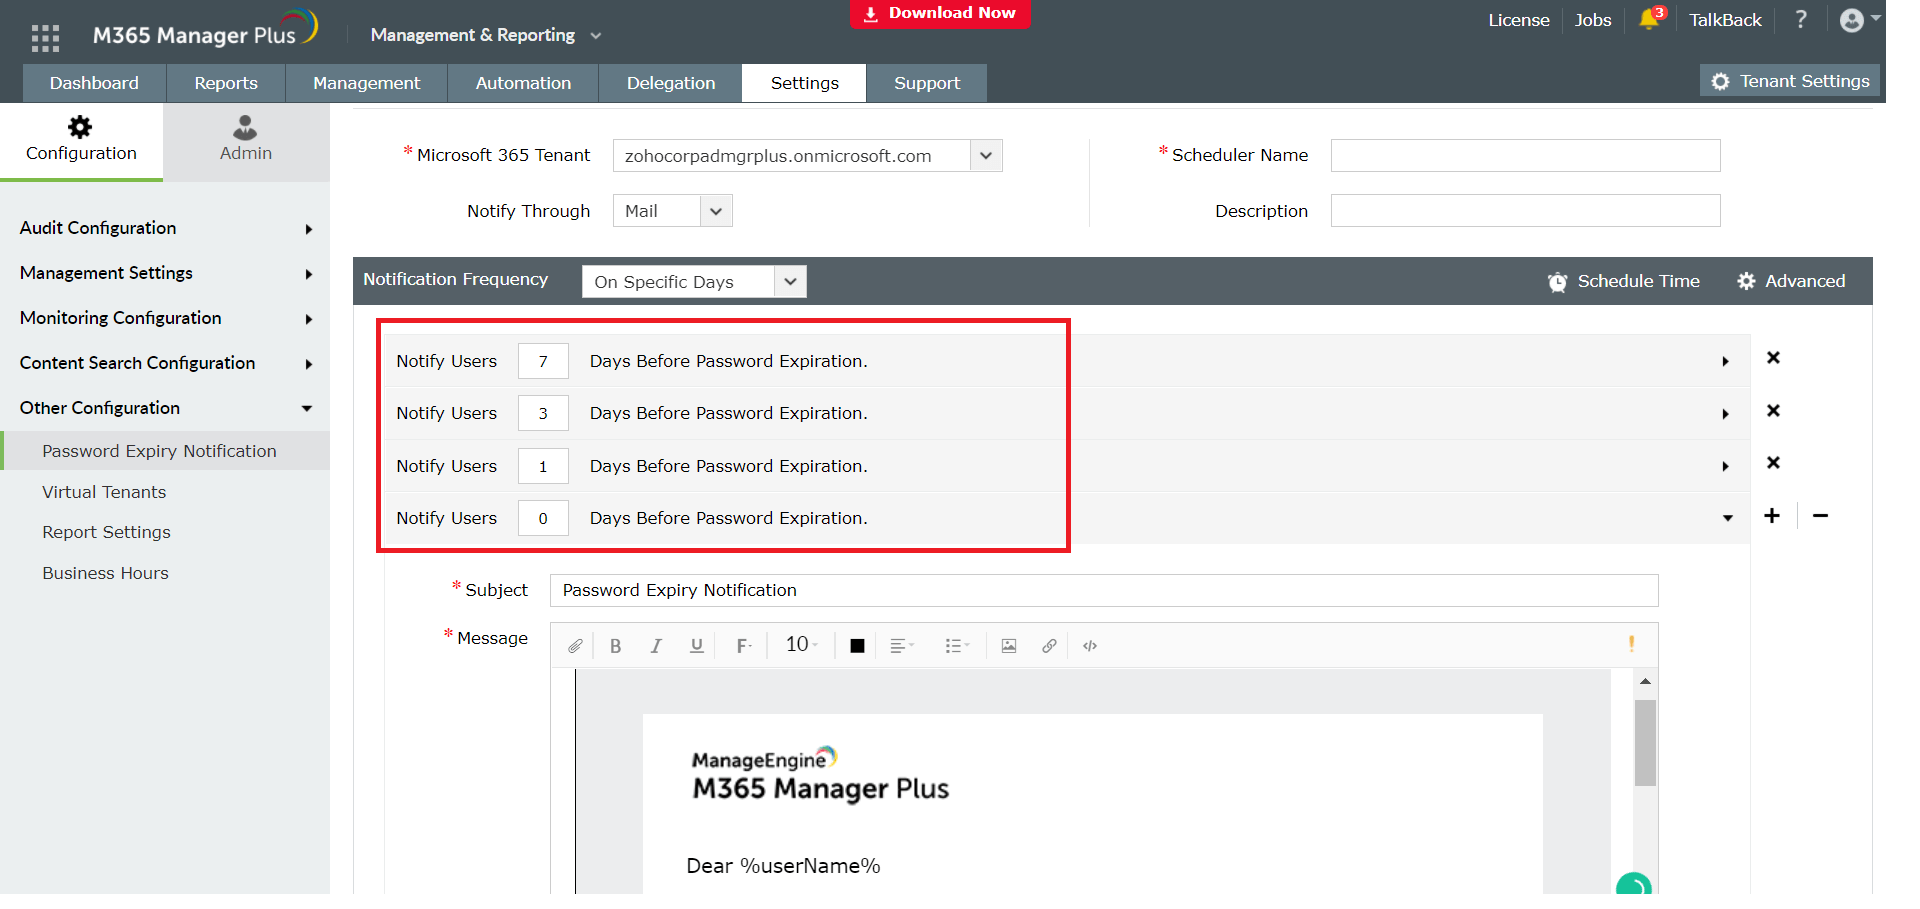
- Select the Notification Frequency and select how frequently the notification must be sent. (Weekly, daily or on specific days)
- If you select Weekly or Daily, mention who must be notified. [Refer the highlighted field in the image]. For example, if you give '7' in the highlighted field, users whose passwords expire within 7 days from the date of scheduling will be notified on a daily/weekly basis, based on your selection.
- If you select On Specific Days, mention when they should be notified. [Refer the highlighted field in the image]. As per the values given in the image, users will be notified 7 days, 3 days, and 1 day prior to the date of password expiration. 0 day indicates the date of password expiration.
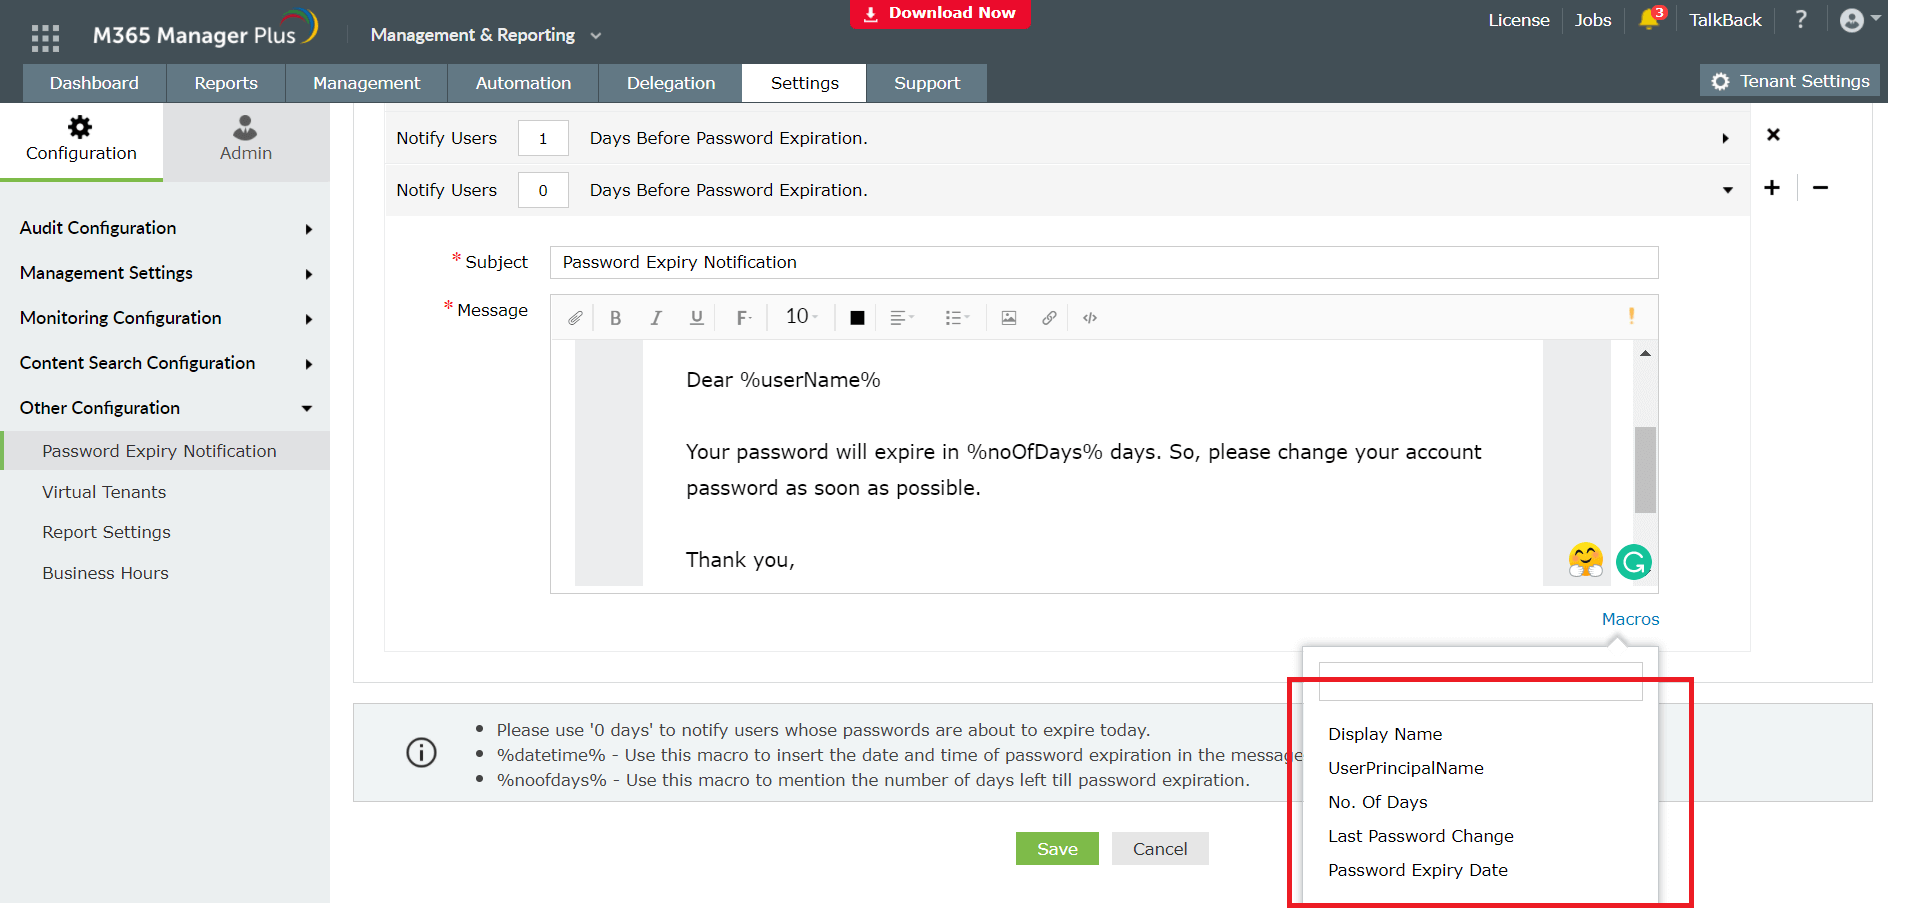
- Customize the subject and message of the email. You can use the Macros option found near the message box to include other attributes.
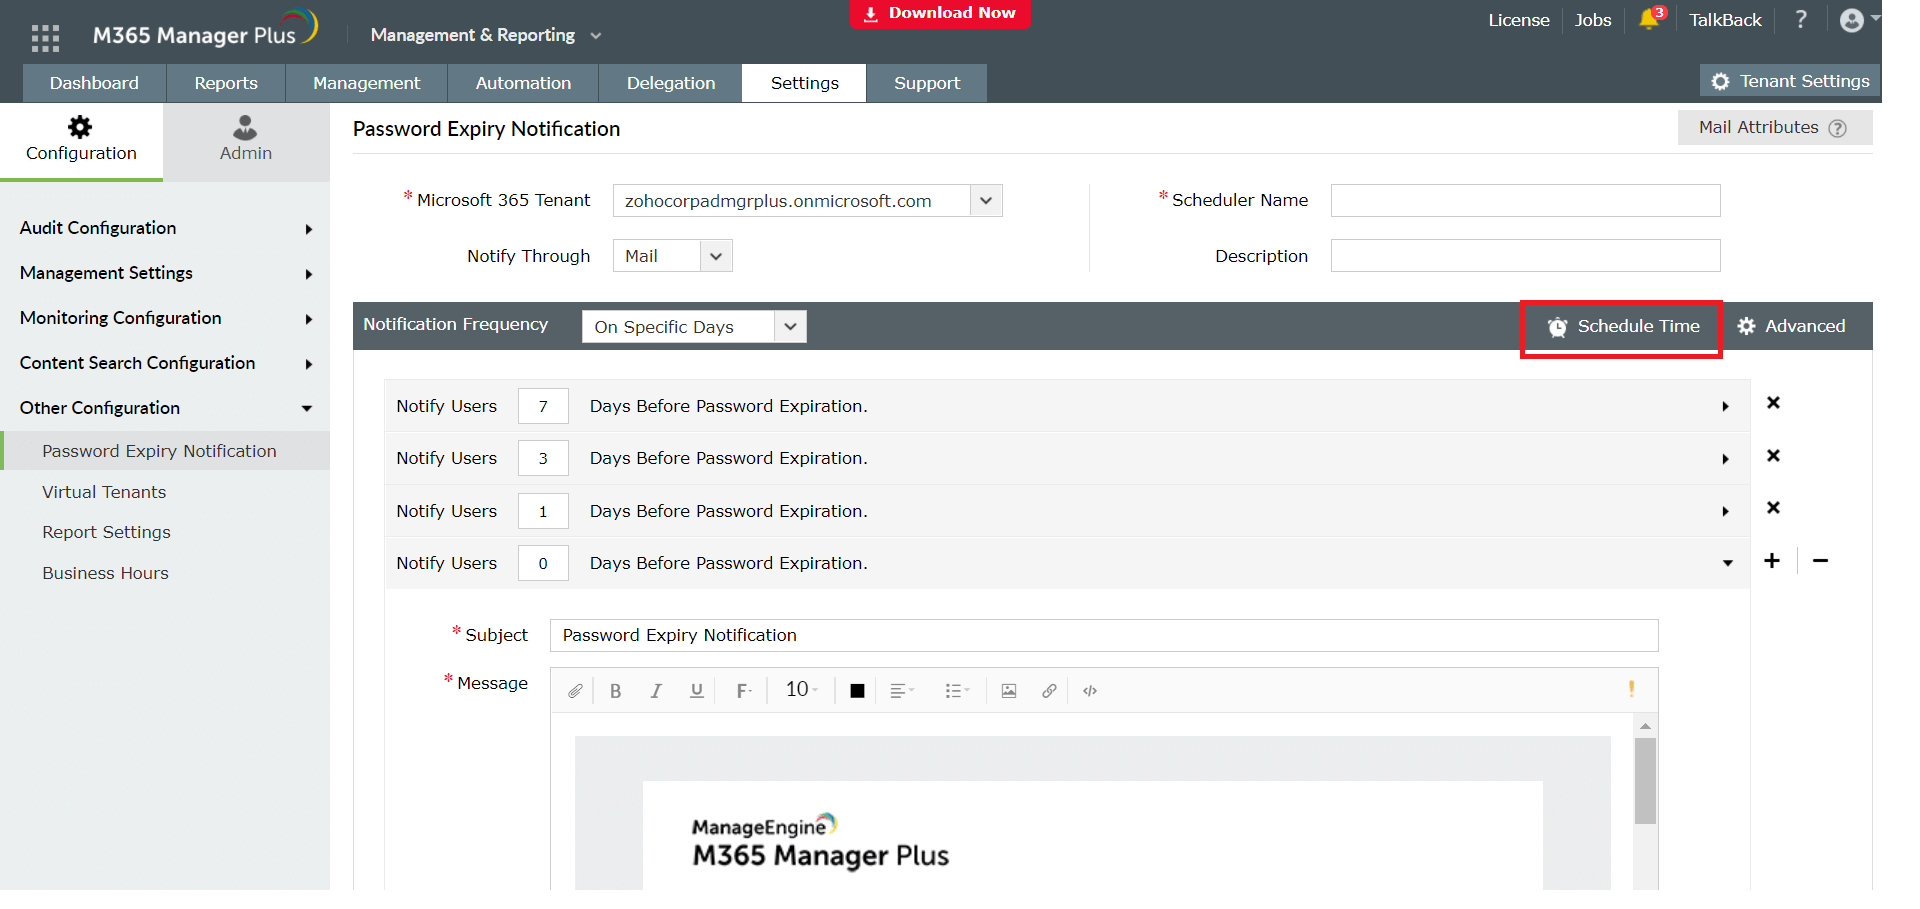
- Configure the time at which the notification must be sent, using the Schedule Time option.
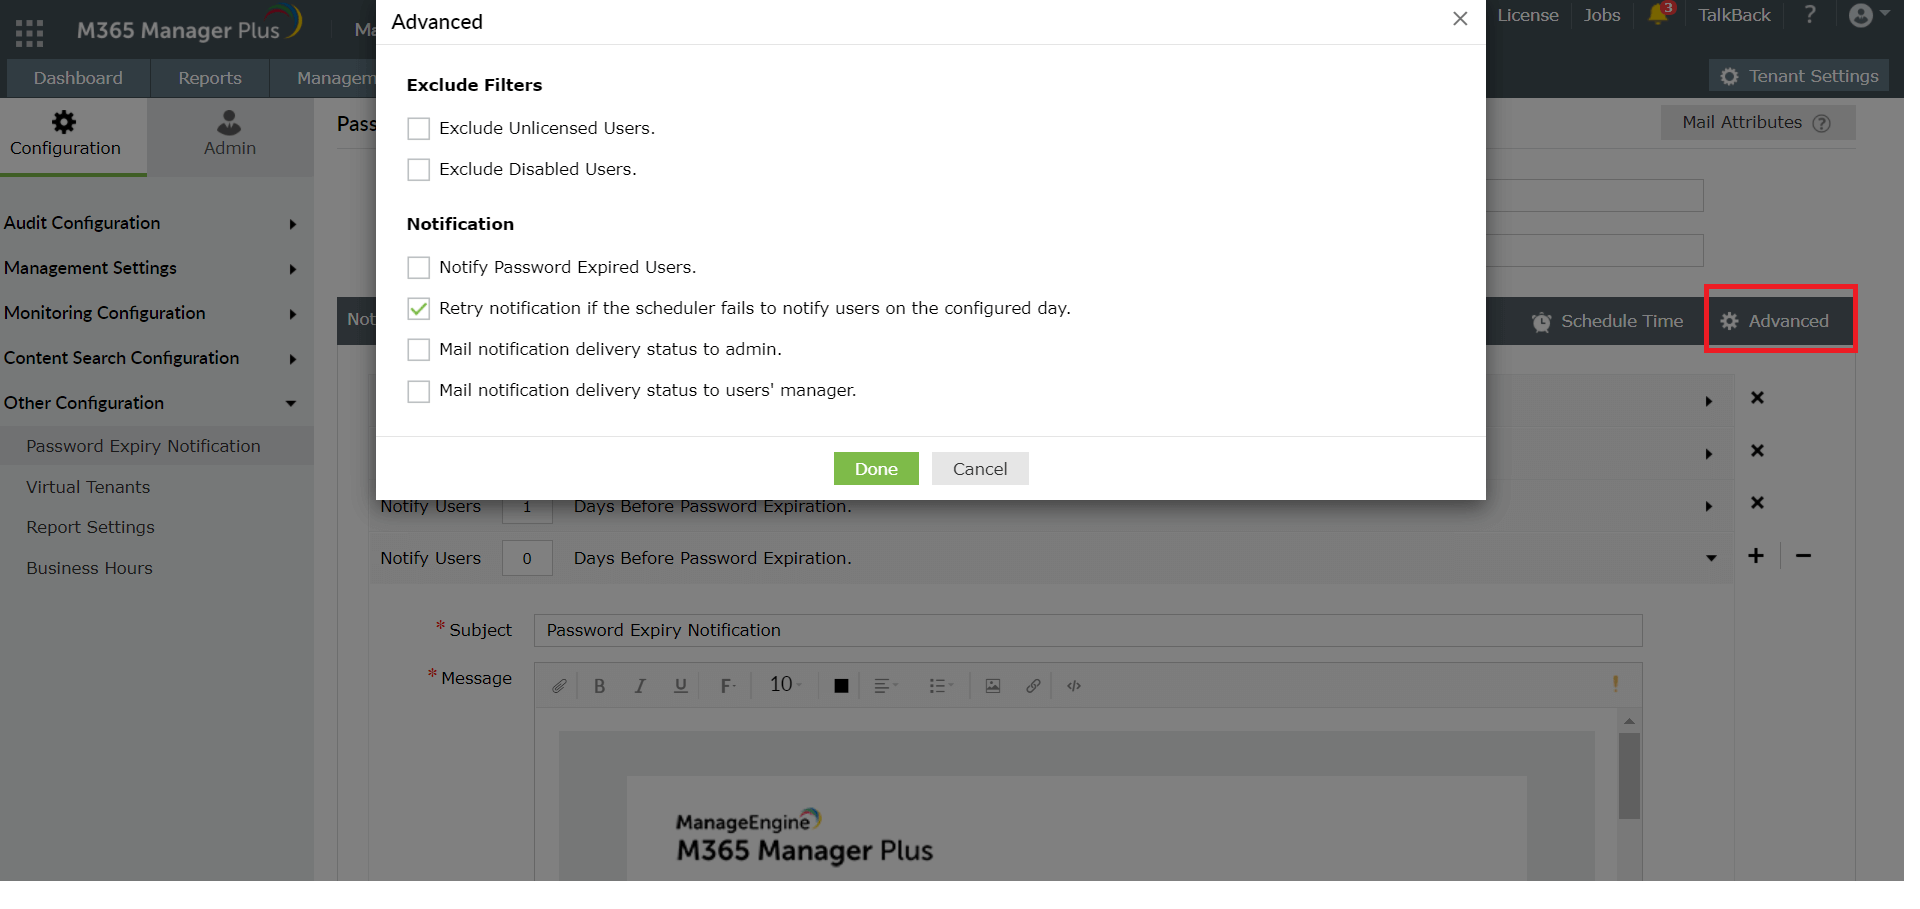
- Click Advanced, to find more customization options which are self explanatory.
- Finally click Save.
Read more about M365 Manager Plus, here.

