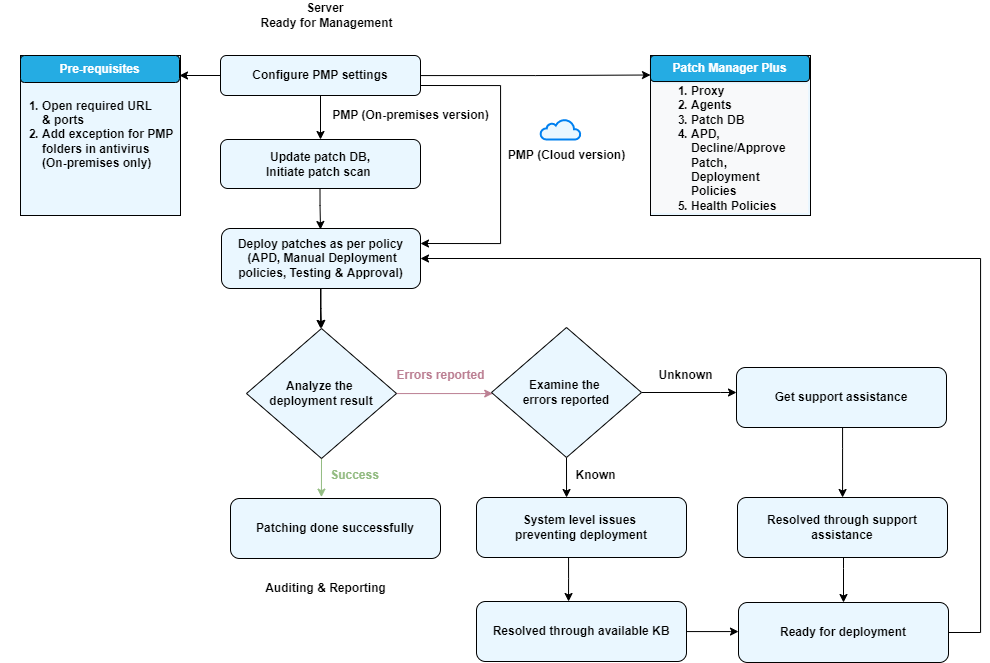
This section provides the workflow of patch management using Patch Manager Plus and will guide you through the steps to set up the product.
The workflow diagram below summarizes the entire patch management process using Patch Manager Plus. For further information, you can browse through the Related Links section.

Once installed or subscribed, you need to configure the product for first-time use. Below mentioned are the basic steps that need to be followed (based on the product version, i.e. on-premises or cloud).
The Patch Manager Plus server handles installing agents on client computers, scanning for missing patches, downloading and deploying the patches and so on. In certain scenarios, the antiviruses installed in the network might hinder the proper functioning of the Patch Manager Plus server and agent components. Hence, it is recommended to exclude all the folders related to Patch Manager Plus in the server, Distribution Server and agent computers.
How to exclude Patch Manager Plus folders from antivirus scan?
The Patch Manager Plus server requires internet connectivity to access the vendor sites and download the missing/required patches. Here's how to configure the Proxy Server settings.
To manage computers across the network, the Patch Manager Plus agent - a lightweight application, needs to be installed on the targeted devices. Read more about agent installation and managing computers.
The Patch Database Settings lets you perform a range of tasks related to effective patch management and DB synchronization within the product.
You can select the types of patches for the respective operating systems from the Patch Database Settings tab. You can access it through: Admin > Patch Database Settings (under Patch Settings)
You can select the types of patches for the respective operating systems from the Patch Database Settings tab. In addition, you can also schedule the Vulnerability Database Update. Head on to Admin > Patch Database Settings (under Patch Settings)