PGP Keys and Management
PAM360 allows you to create and manage Pretty Good Privacy (PGP) keys from the PAM360 web interface. The PGP keys are used to encrypt texts, emails, signing files, etc. PGP keys work as a key pair as they have a Master Key with a Sub Key bound to it. While creating a PGP key in PAM360, you can assign operations for the Master Key and the Sub Key individually, eg., signing and certifying to the Master Key and authentication and encryption to the Sub Key.
The PGP keys created are saved in the product key repository to secure and centralize their management. You may add a detailed description to the keys referring to their usage instances which helps you search and locate the keys faster. Also, there are provisions to edit the key description, view the passphrase, store them in an organized manner, or export the keys to your system or email address. Apart from the above, PAM360 provides detailed reports on the creation of PGP keys and operations performed on them such as export, edit, delete, etc. Each of the above operations will be logged into the Audit section of PAM360. You may also set up email notifications to get notified about the expiration of the PGP keys.
Click the links below to learn more about each operation you can perform on the keys from the PGP Keys tab.
1. Create PGP Key
Follow these steps to create a key to store in the PAM360 repository:
- Navigate to the Admin >> PKI Management >> PGP Keys.
- Click the Create button.
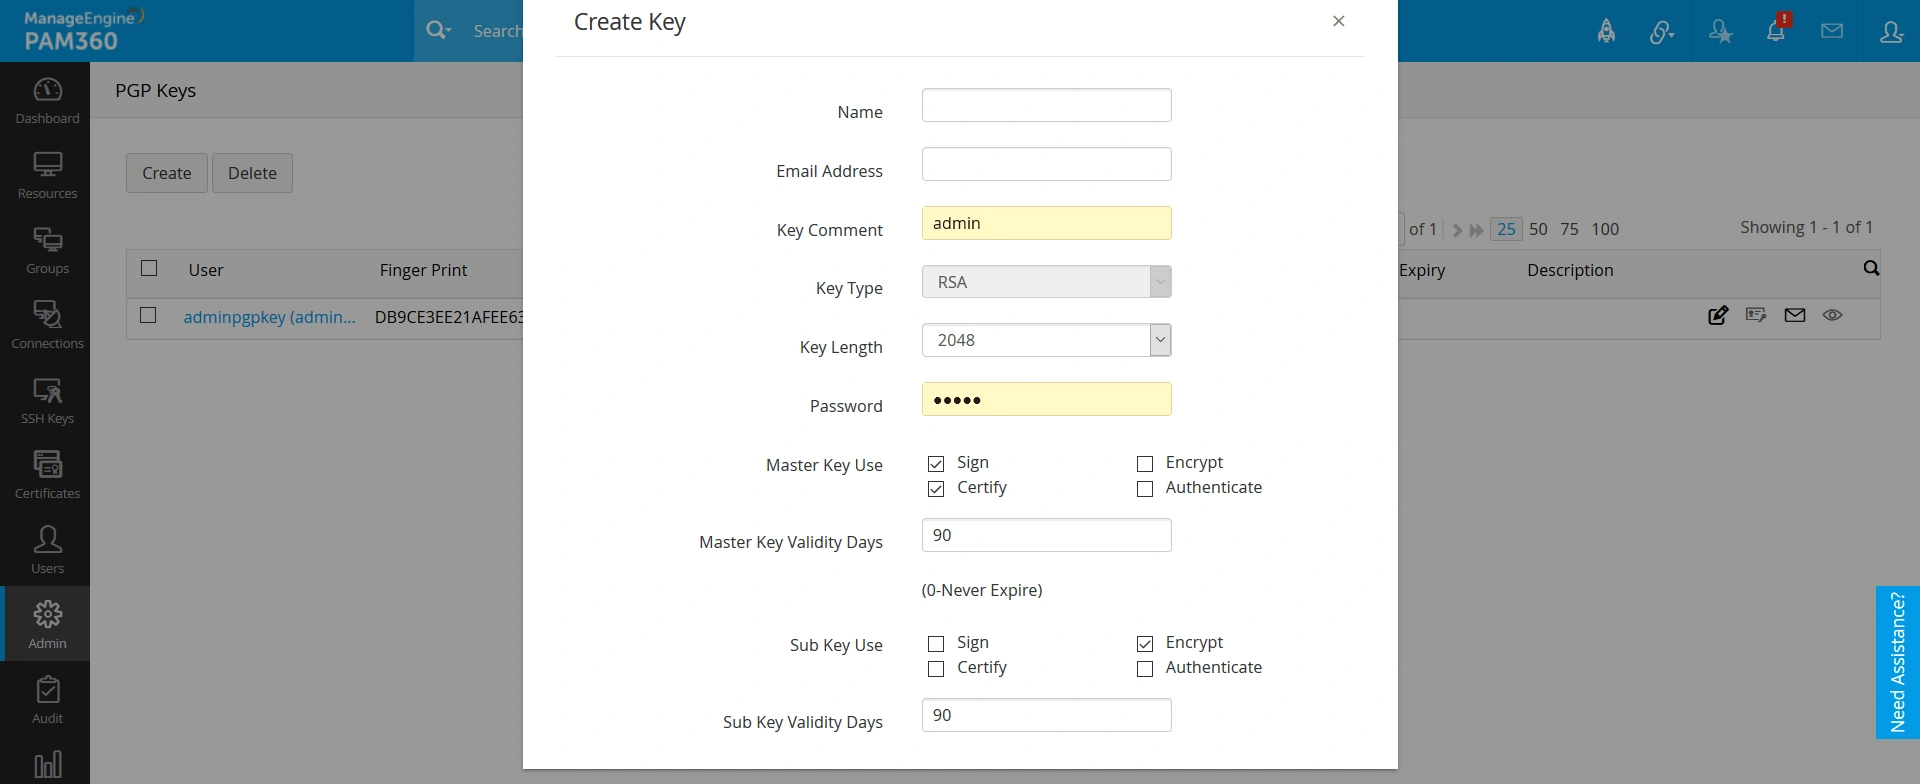
- Enter the following attributes:
- Name - Enter the key name
- Email Address - Enter the email address of the creator.
- Key Comment - Enter a comment regarding the key explaining what it is going to be used for. Eg: Email encryption.
- Key Type - The key type is RSA by default.
- Key Length - Choose the key length from the drop-down (2048 or 4096)
- SSH Key Passphrase - Enter a valid key passphrase.
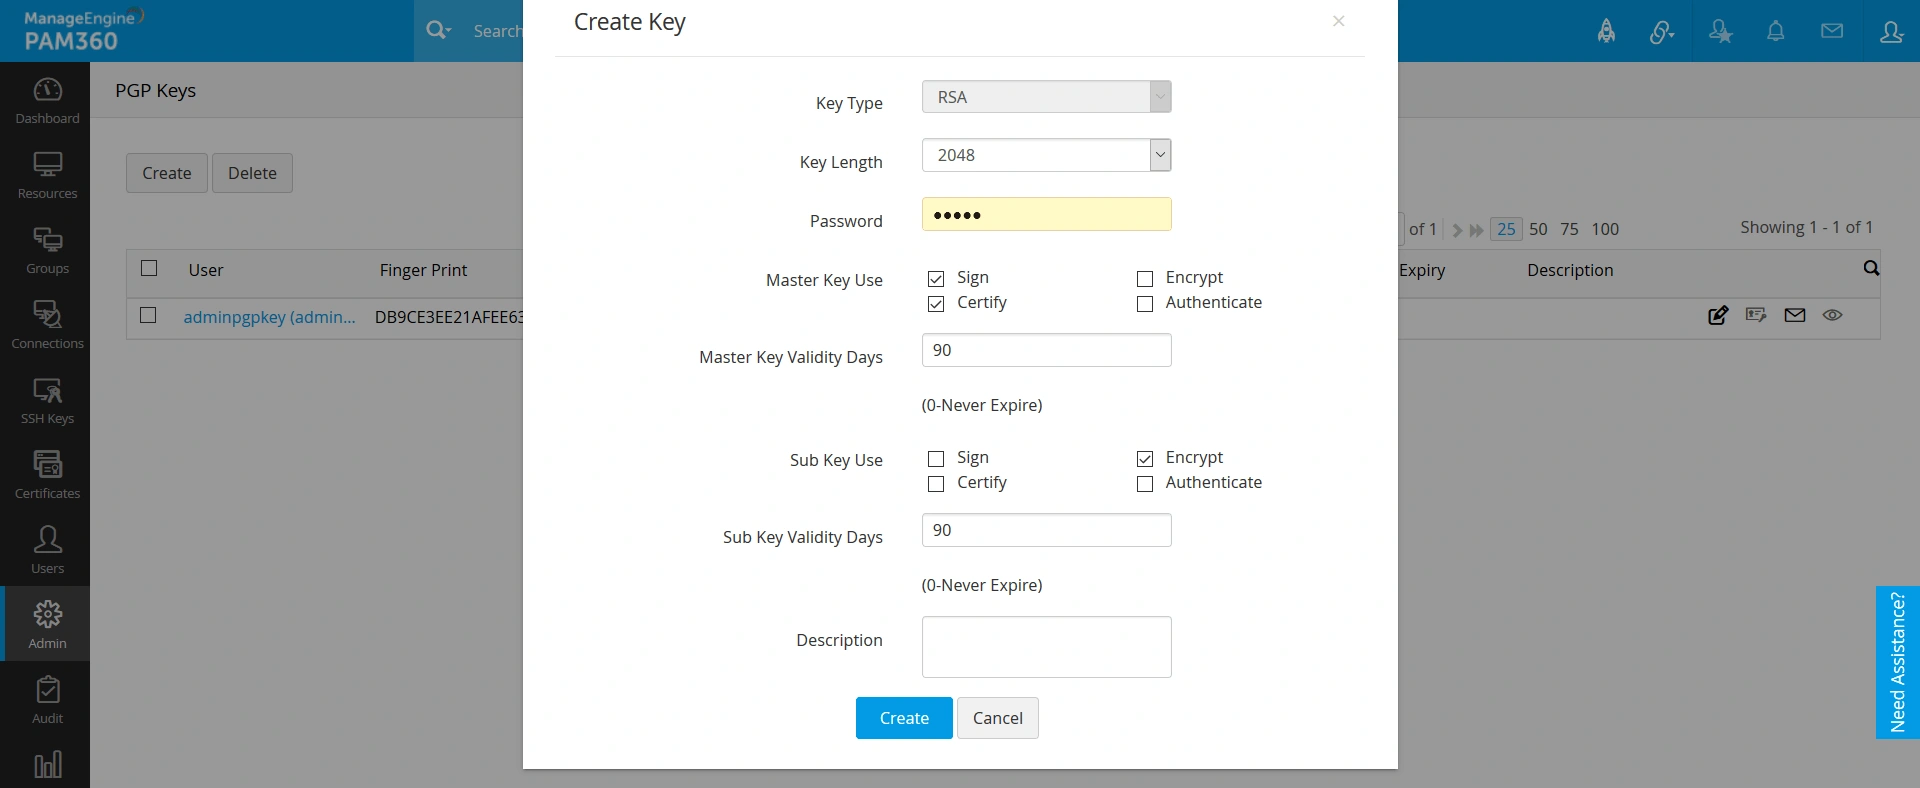
- Master Key Use - Select the required check boxes to choose what the Master Key will be used for. The available options are Sign, Certify, Encrypt, Authenticate.
- Master Key Validity Days - Specify the expiry period for the Master Key —the default value is 90 days. Enter '0' for the key to be valid forever.
- Sub Key Use - Select the required check boxes to choose what the Sub Key will be used for. The available options are Sign, Certify, Encrypt, Authenticate.
- Sub Key Validity Days - Specify the expiry period for the Sub Key —the default value is 90 days. Enter '0' for the key to be valid forever. Please note, the validity period of the Sub Key cannot exceed that of the Master Key.
- Description - Enter a description for the key.
- Click the Create button.


Now, the key is enumerated in the PGP Keys tab. To view the key details of both Master Key and Sub Key, click the name of the key. The contents of the Master Key and the Sub Key will be listed separately.
Additional Detail
The Master Key and the Sub Key both combine to create a single key and will be treated as such under PAM360 license too.
2. Import PGP Key
Follow these steps to import PGP key to the PAM360 repository:
- Navigate to Admin >> PKI Management >> PGP Keys.
- Click the Import button.
- In the pop-up that appears:
- Browse and select the File Location.
- Mention the Passphrase and Description, and click Import.
- Now, you have successfully imported the PGP key(s) to the PAM360 repository.

3. PGP Keys Management
Apart from creating and importing keys, PAM360 provides additional key-level actions that help you manage or remove PGP keys efficiently. The following operations are available directly from the PGP Key list:
- Edit PGP Key : Click the edit icon next to the key, modify the description in the edit window, and click Update.
- Export PGP Key : Click the export icon, choose Export Public Key or Export Private Key to download the key as an .asc file. Exported keys remain passphrase-protected and require the correct passphrase when used externally.
- Email PGP Key : Click the mail icon, select whether to send the public or private key, enter one or more email addresses (comma-separated), and click Send.
- Show PGP Key Passphrase : Click the show passphrase icon beside the key to view its passphrase.
- Delete PGP Key : Select the keys to remove, click Delete, and confirm. This action is logged with date, time, and user details in Audit.
