PAM360 User Account Settings
Additional Detail
The procedure outlined in this document applies only till PAM360 builds 8201. For user account settings in builds 8300 and above, please refer to this help document.
- Clear Clipboard
- Accessibility Controls
- Change Password
- User Settings
- Remote Session Settings
- Personalize
- Export Settings
- Miscellaneous
A PAM360 user can customize their PAM360 web interface by accessing the My Profile section. To access this section, click the My Profile icon located at the top-right corner of the PAM360 webpage. This document details the customization options available for the end-users under the My Profile settings, allowing users to manage their account preferences effectively.
1. Clear Clipboard
By selecting Clear Clipboard from the drop-down list under the My Profile icon, users can remove all passwords, account or resource details, sample codes, and any other copied information from the clipboard. This action ensures that sensitive information is not left accessible on the clipboard.
2. Accessibility Controls
PAM360 provides a comprehensive set of accessibility controls to ensure a smooth and inclusive user experience for individuals with diverse needs. These controls can be customized based on motor, vision, interaction, and mobility requirements. To access the accessibility controls, click on the My Profile icon and select Accessibility Controls. In the slider that expands, enable or configure the required options under the following categories: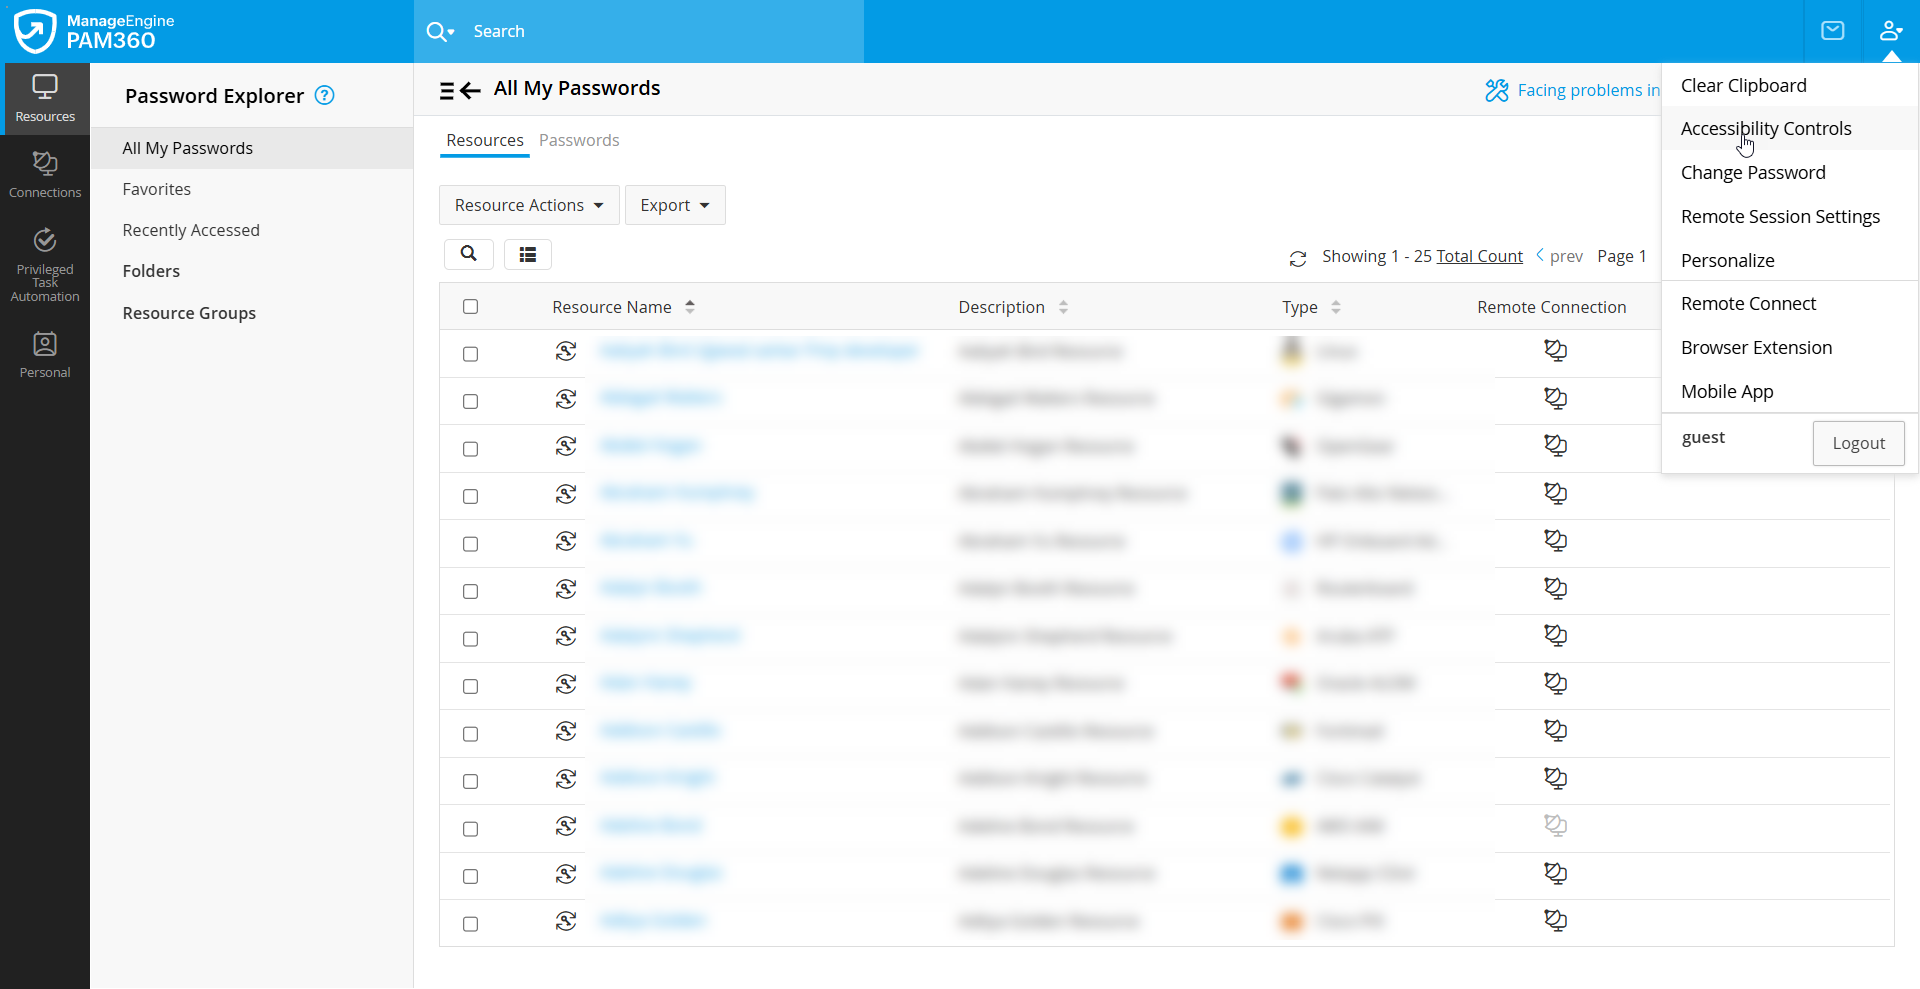
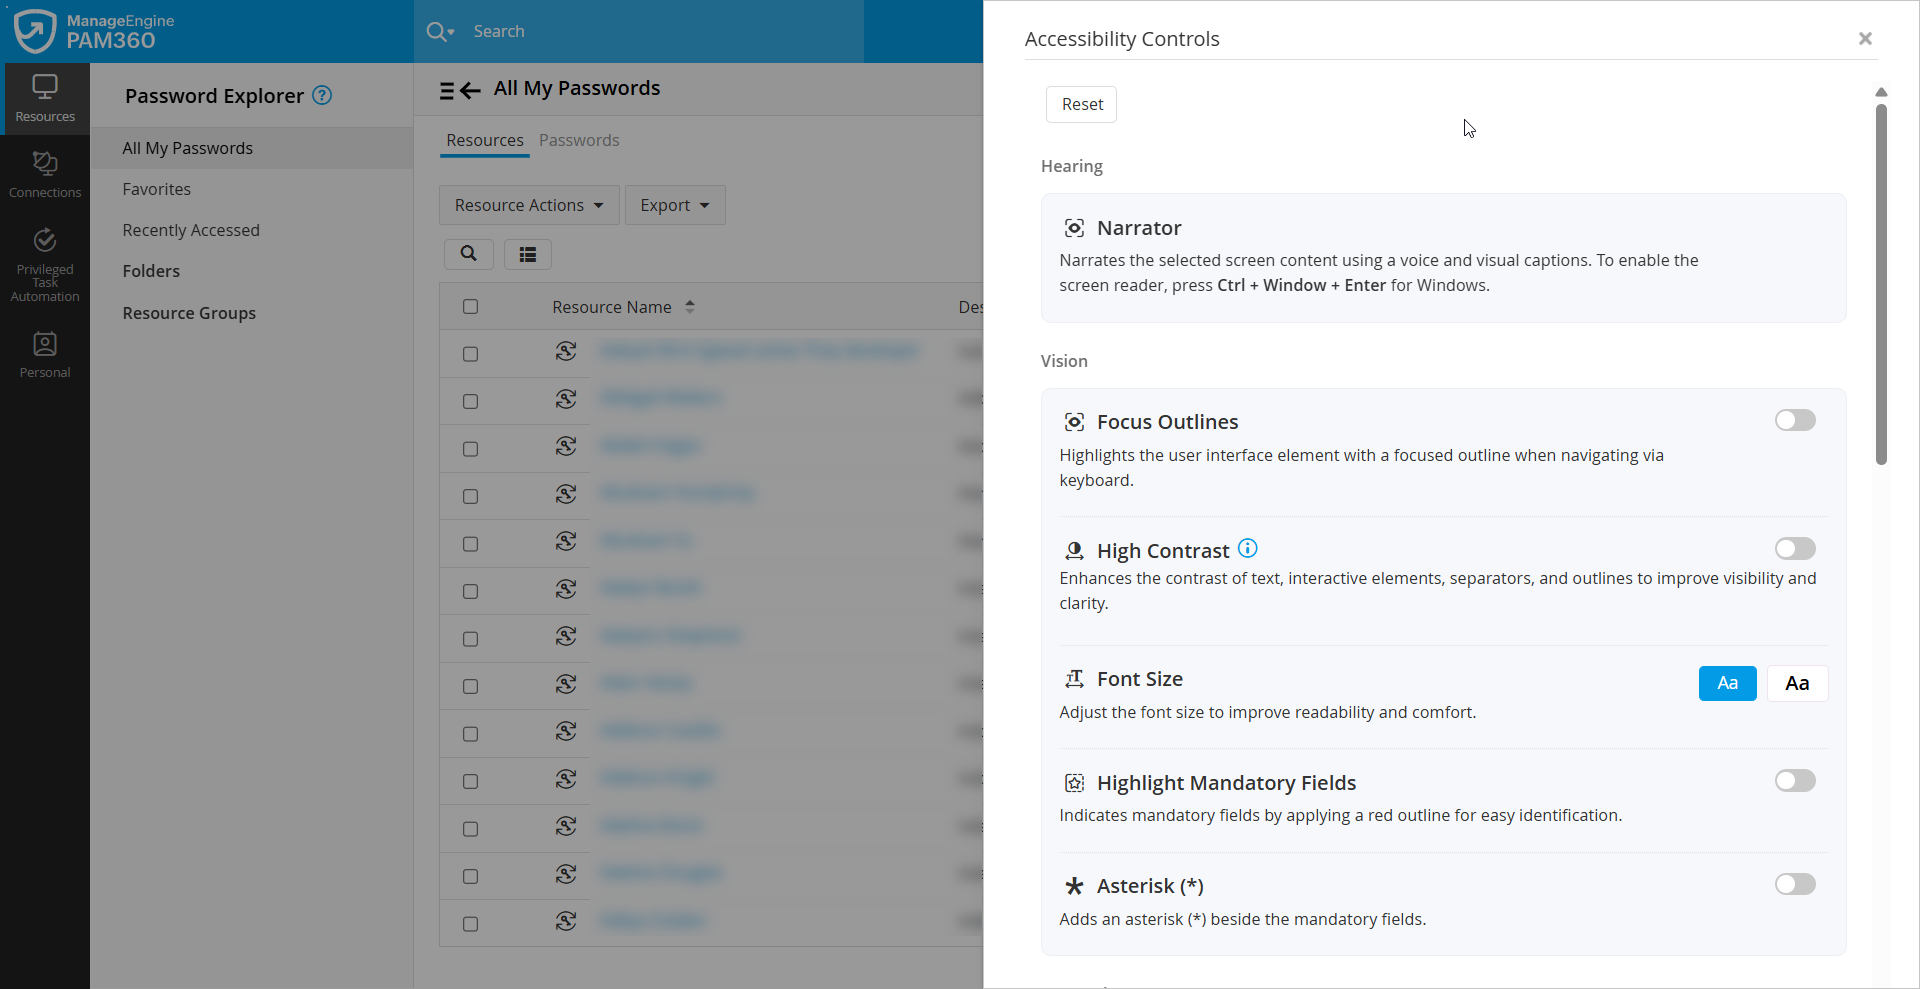
- Hearing
- Narrator: Narrates the selected screen content with voice output and visual captions. To enable the screen reader, press Ctrl + Window + Enter for Windows, Command + F5 for Mac, and Super + Alt + S for Linux.
- Vision
- Focus Outlines: Highlights the user interface interactive element with a focused outline while navigating with the keyboard.
- High Contrast: Improves visibility by enhancing the contrast of text, interactive elements, separators, and outlines.
- Font Size: Adjust the font size for improved readability and comfort.
- Highlight Mandatory Fields: Indicates mandatory fields by applying a red outline for easy identification.
- * Asterisk: Adds an asterisk (*) next to mandatory fields for easy recognition
- Interaction
- Font Spacing: Adjust the font spacing for better readability and comfort.
- Focus Mask: Hides the surrounding areas to reduce distractions and emphasize the hover or focus area.
- Underline Links: Adds underlines to hyperlinks to improve visibility.
- Strike-through Disabled Buttons: Marks disabled buttons with a strike-through to show they are inactive.
- Mobility
- Cursor Style: Customize the cursor’s style and size for easier tracking.
- Enlarge Clickables: Enlarges the size of checkboxes, buttons, and other interactive elements to make clicking actions easier.
Once accessibility controls are enabled, the following shortcut keys help you navigate PAM360 efficiently:
- Skip to Main Content (Ctrl + M): Directly jumps to the main content, bypassing navigation elements.
- Primary Click (Ctrl + K): Activates the selected button, checkbox, or toggle.
- Close / Cancel (Ctrl + Q): Closes form, dialogs, or pop-ups.
- Search (Ctrl + /): Opens the search box to perform a global search.
- Skip Menu (Escape key): Skips the main menu to quickly navigate across sections.
3. Change Password
To modify your local authentication password, select the Change Password option from the drop-down menu. In the ensuing pop-up window, enter the required information and click Save.
Please note that if your IT administrator has implemented a password policy for your organization, the new password must comply with these guidelines. You can access information about the password policy set by your IT administrator by clicking on the information icon. The Generate Password option can be used to create a password that aligns with your organization's policies. Always remember your new password, as it will not be sent via email. If you forget your password, use the Forgot Password link on the PAM360 login page to initiate the reset process. If this link is unavailable, please contact your administrator.
4. User Settings
Additional Detail
The user settings option is only visible to users with REST and Application Access in PAM360.
Click on the User Settings option to open a dialog box that displays the REST and Application access associated with your user account within PAM360. Here, you can disable the REST API/SDK access and re-enable it when required, as well as regenerate your authentication token if you suspect the existing token may be compromised.
Additional Detail
After logging in to their user account for the first time, the user should initially regenerate the authentication token from the User Settings window for subsequent use of the PAM360 APIs.
5. Remote Session Settings
Modify the keyboard language preference for remote sessions from here. In the dialog box that opens, select the Keyboard Language. This keyboard language will apply to all the RDP remote sessions initiated via the PAM360 interface.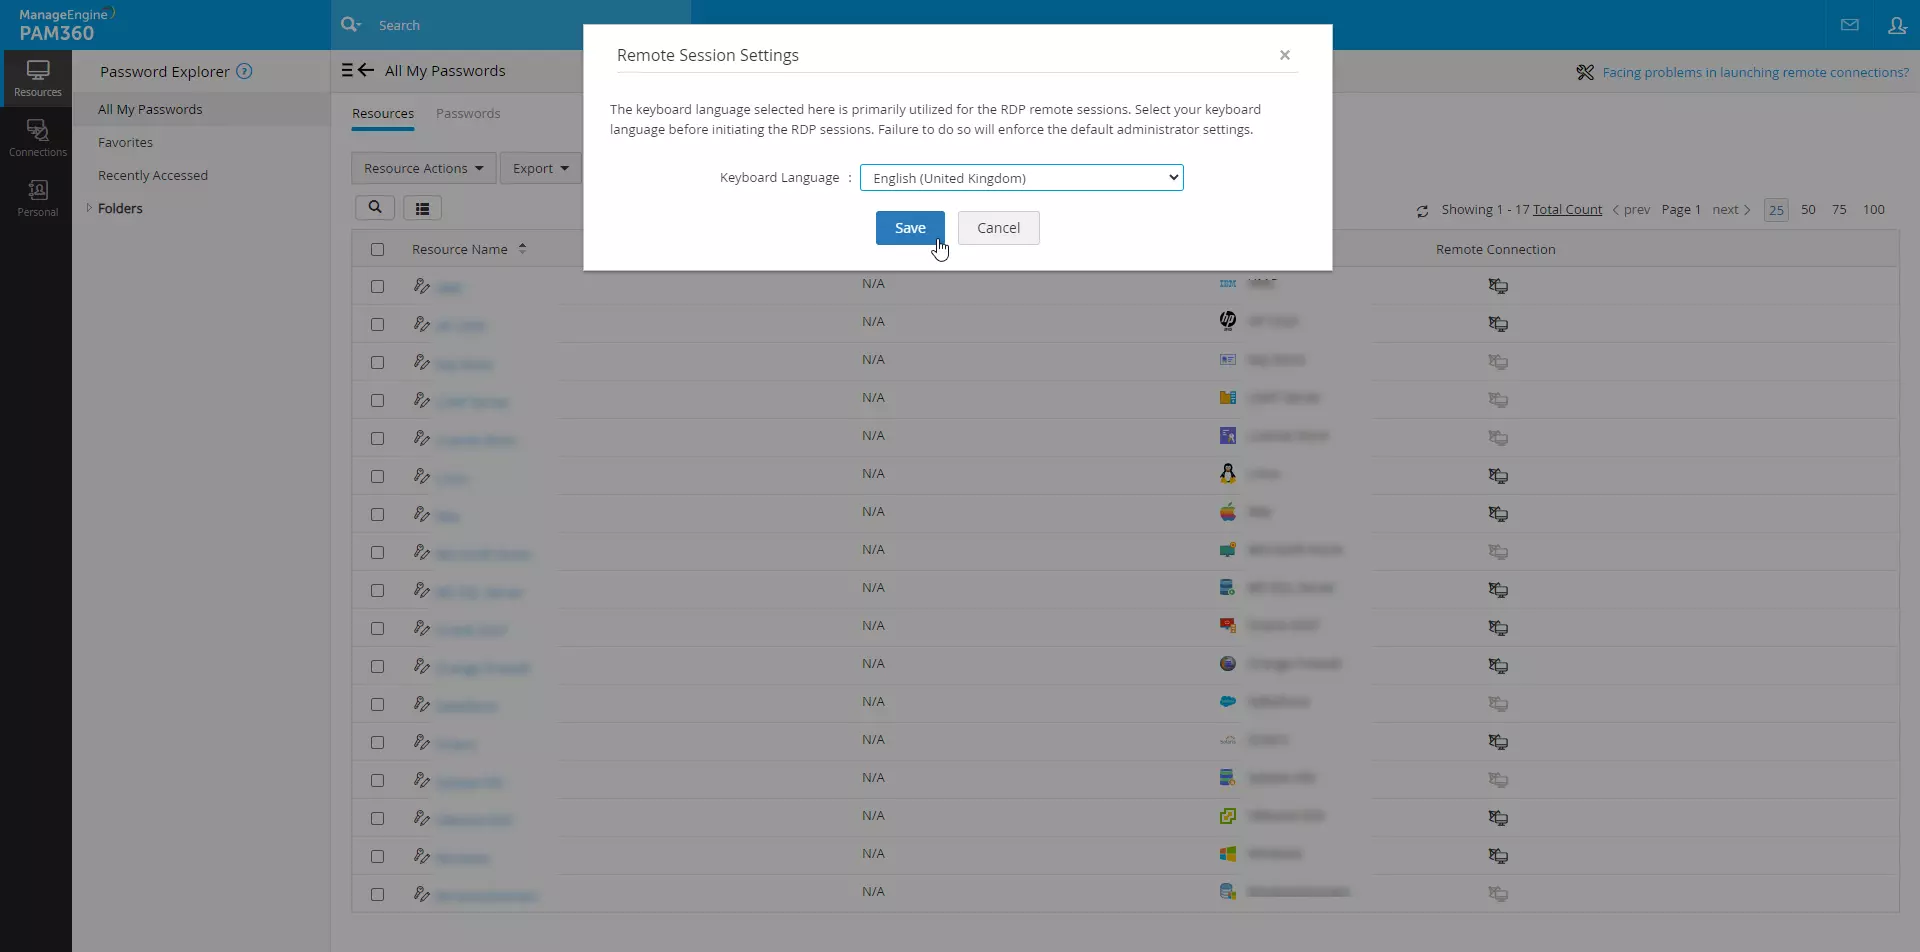
Additional Detail
The keyboard language configured will only apply to the remote sessions initiated after configuration.
6. Personalize
PAM360 allows users to personalize the display settings of their accounts. Users can select a convenient language, enable night mode, and choose a theme and background color of choice for their interface. To personalize your PAM360 account:
- Select the Personalize option from the My Profile drop-down menu.
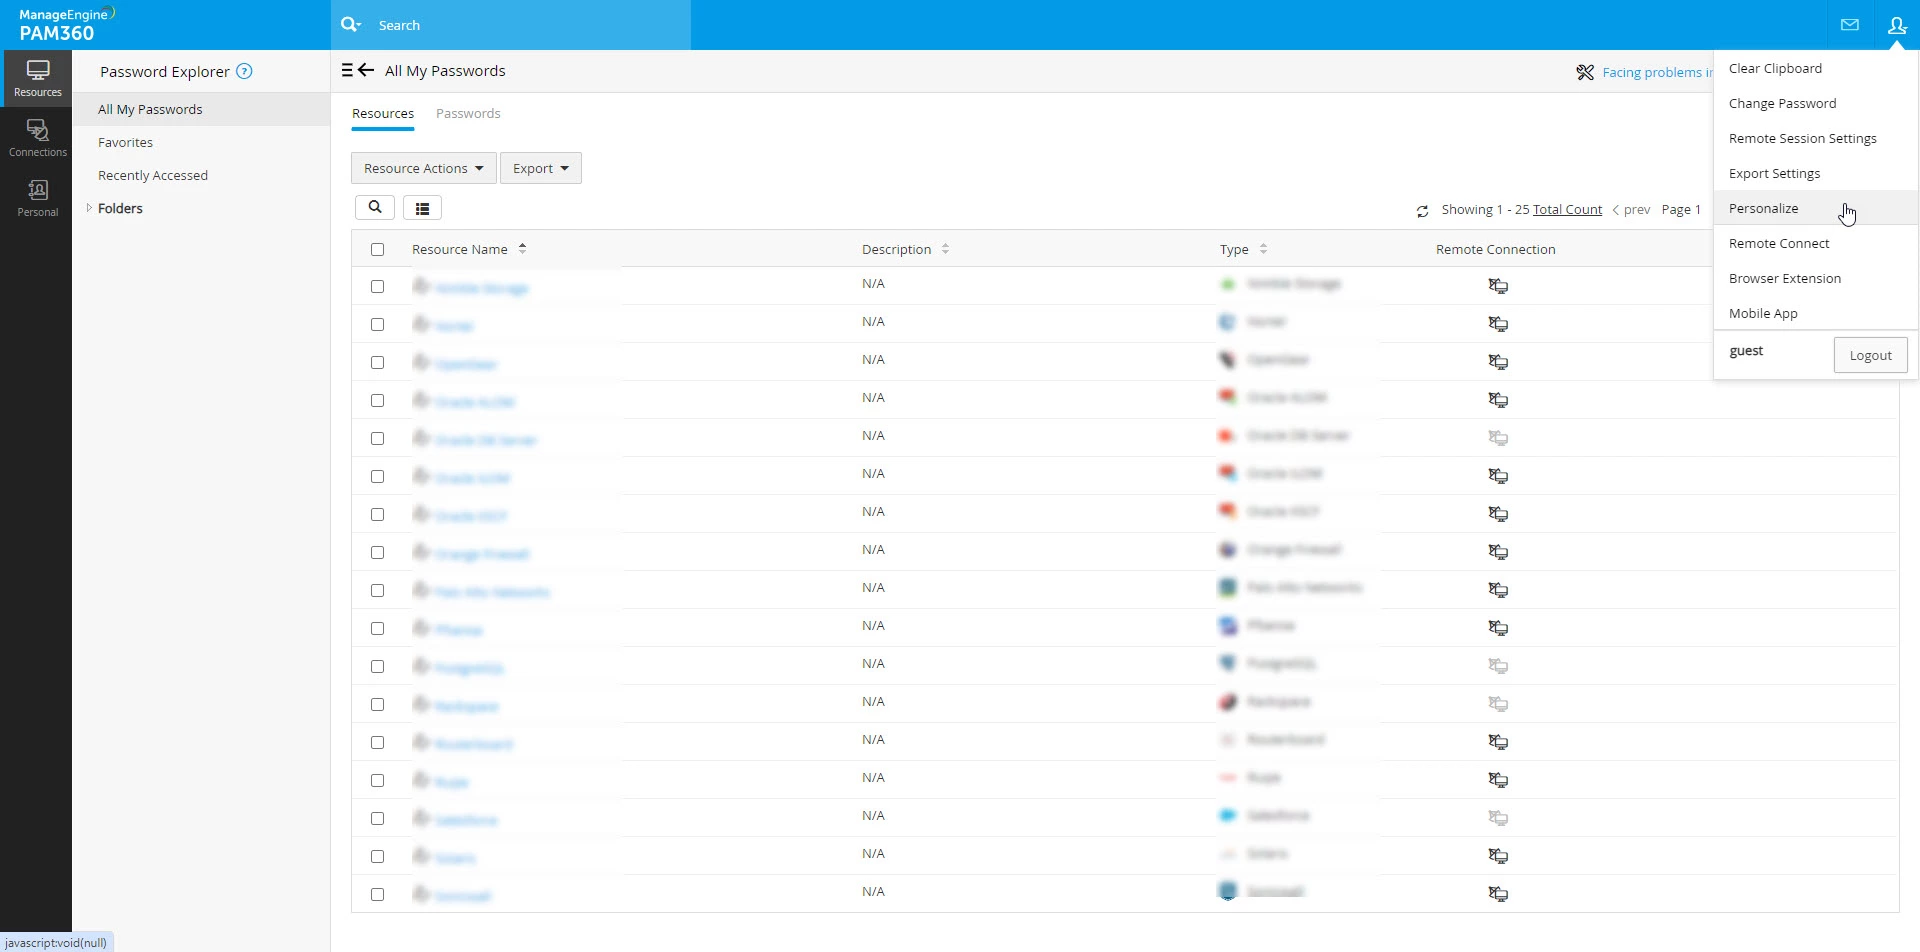
- In the Personalize window:
- Language - Select your preferred language from the Language drop-down menu.
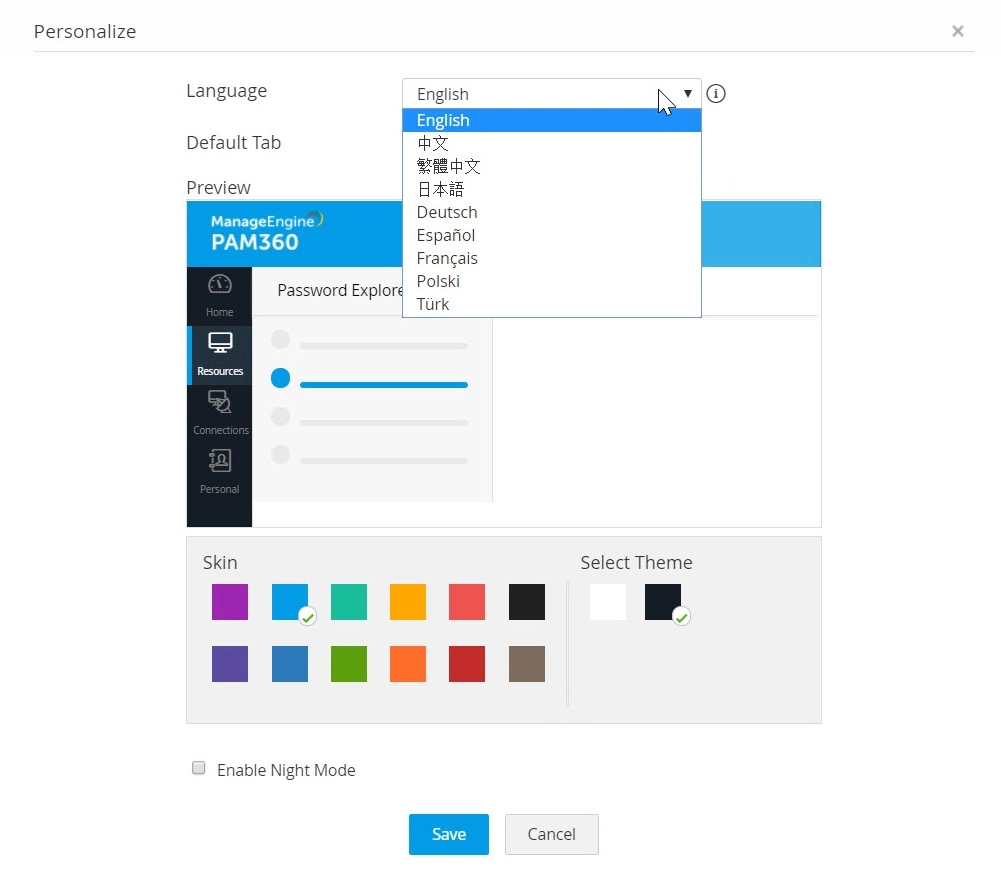
- Default Tab - Choose the default tab to be displayed on the home screen every time the PAM360 web interface is launched.

- Skin - Choose a background color of your choice from the available list of skins.
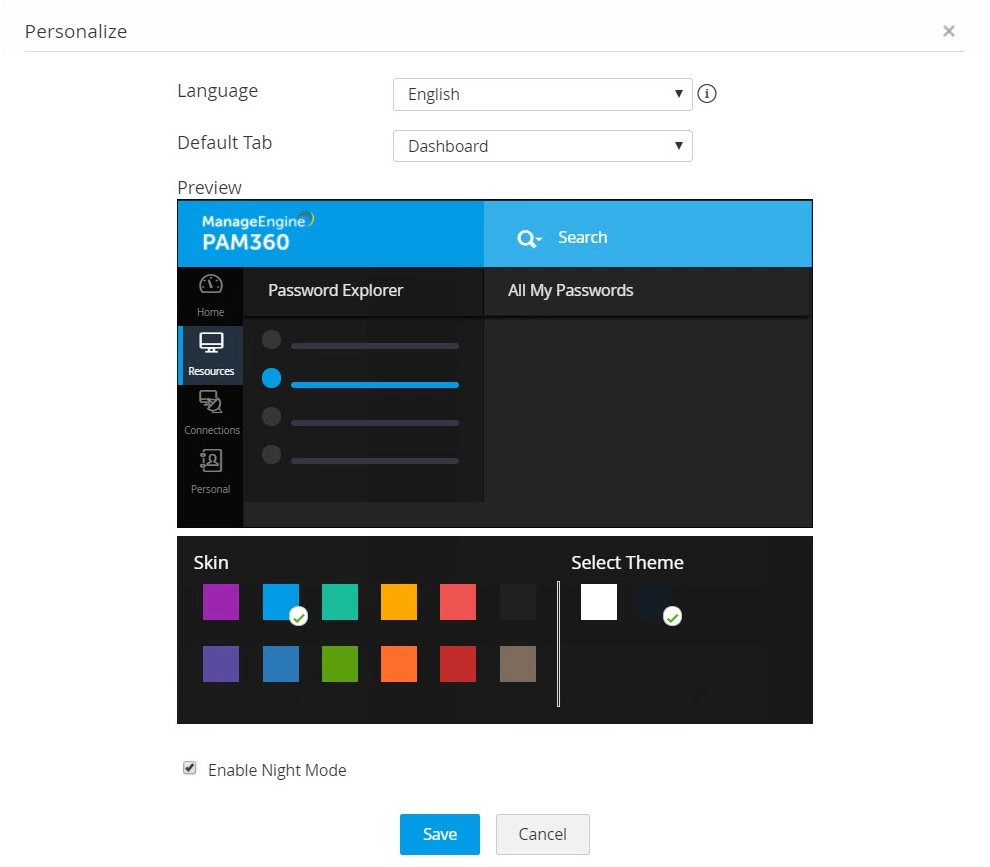
- Select Theme - Choose between Light and Dark themes to be applied throughout the interface.
- Tick the Enable Night Mode checkbox to implement night mode.
- Review the changes made to your PAM360 account under the Preview section.
- Click Save to apply the changes.
Once saved, PAM360 will apply the selected changes to throughout your PAM360 interface.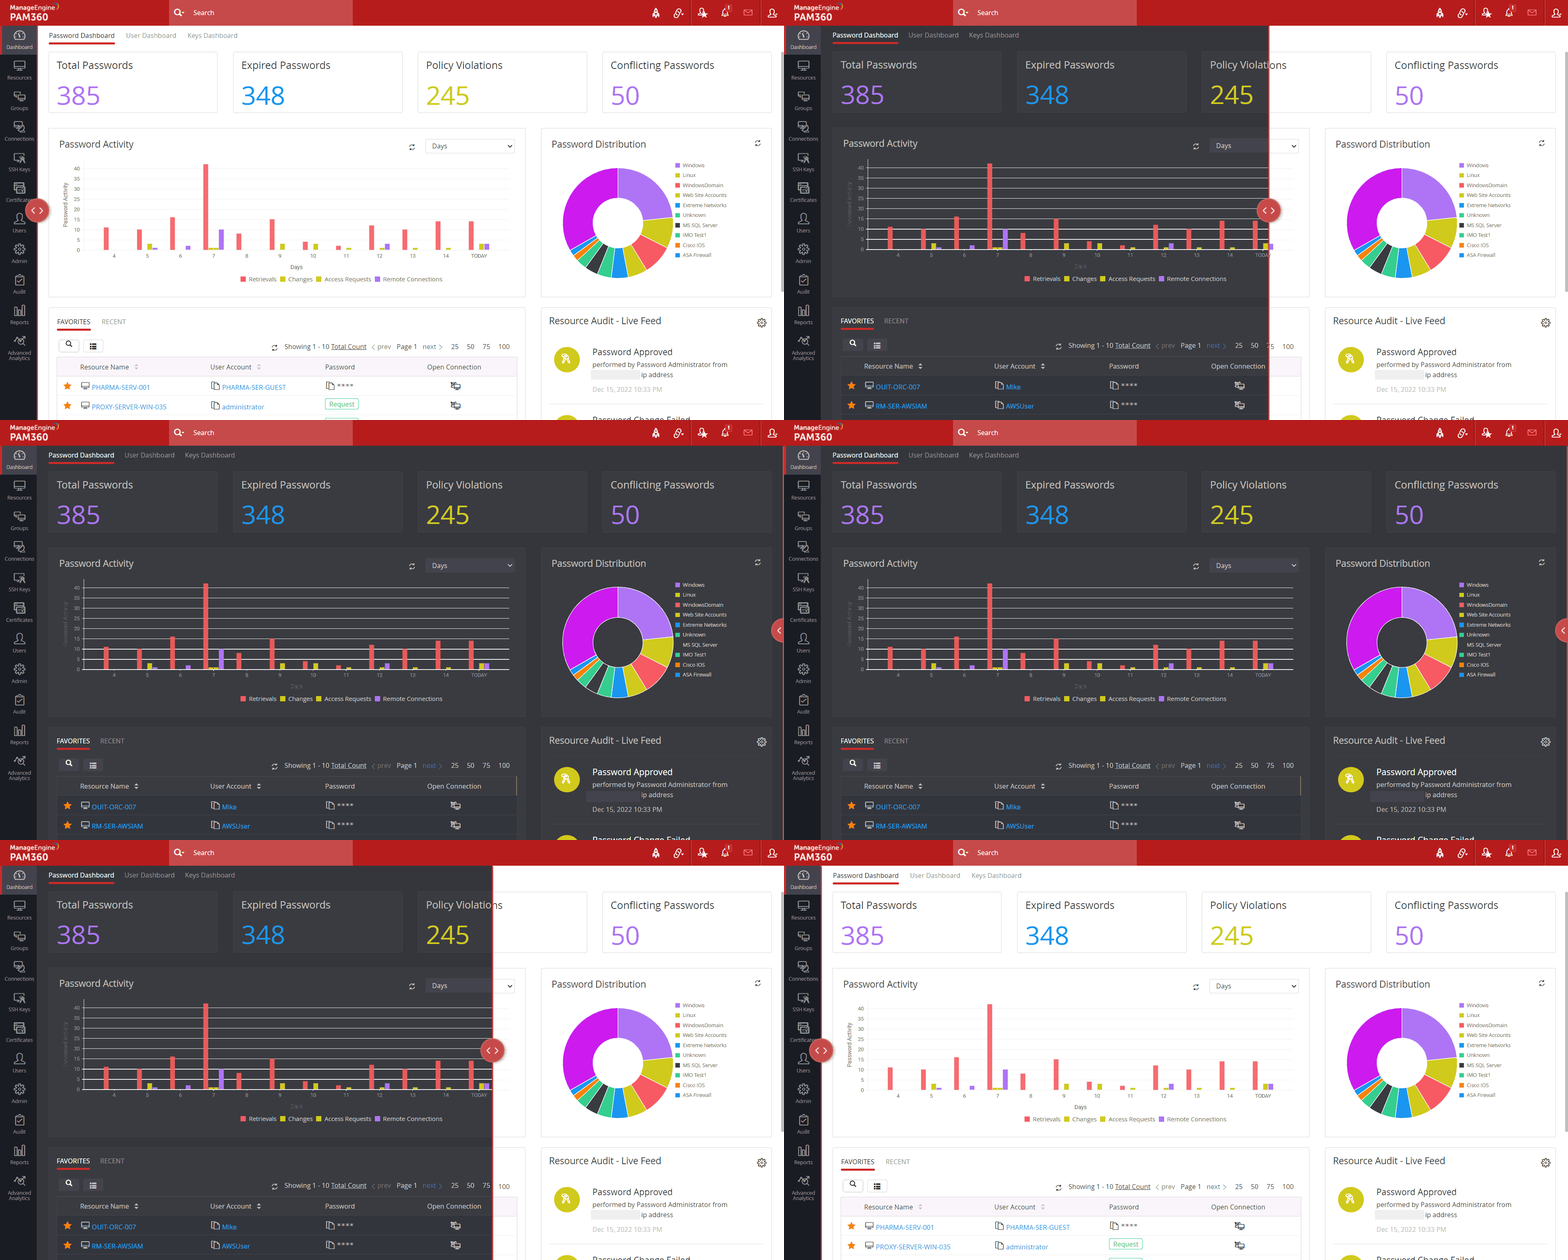
7. Export Settings
To protect all the exported files across PAM360, administrators can either set a single password, which will be uniformly used for all export operations, or allow the users to set their passwords for the files they export. Click Export Settings to know the global encryption password set by the administrators or to set your password for further exports.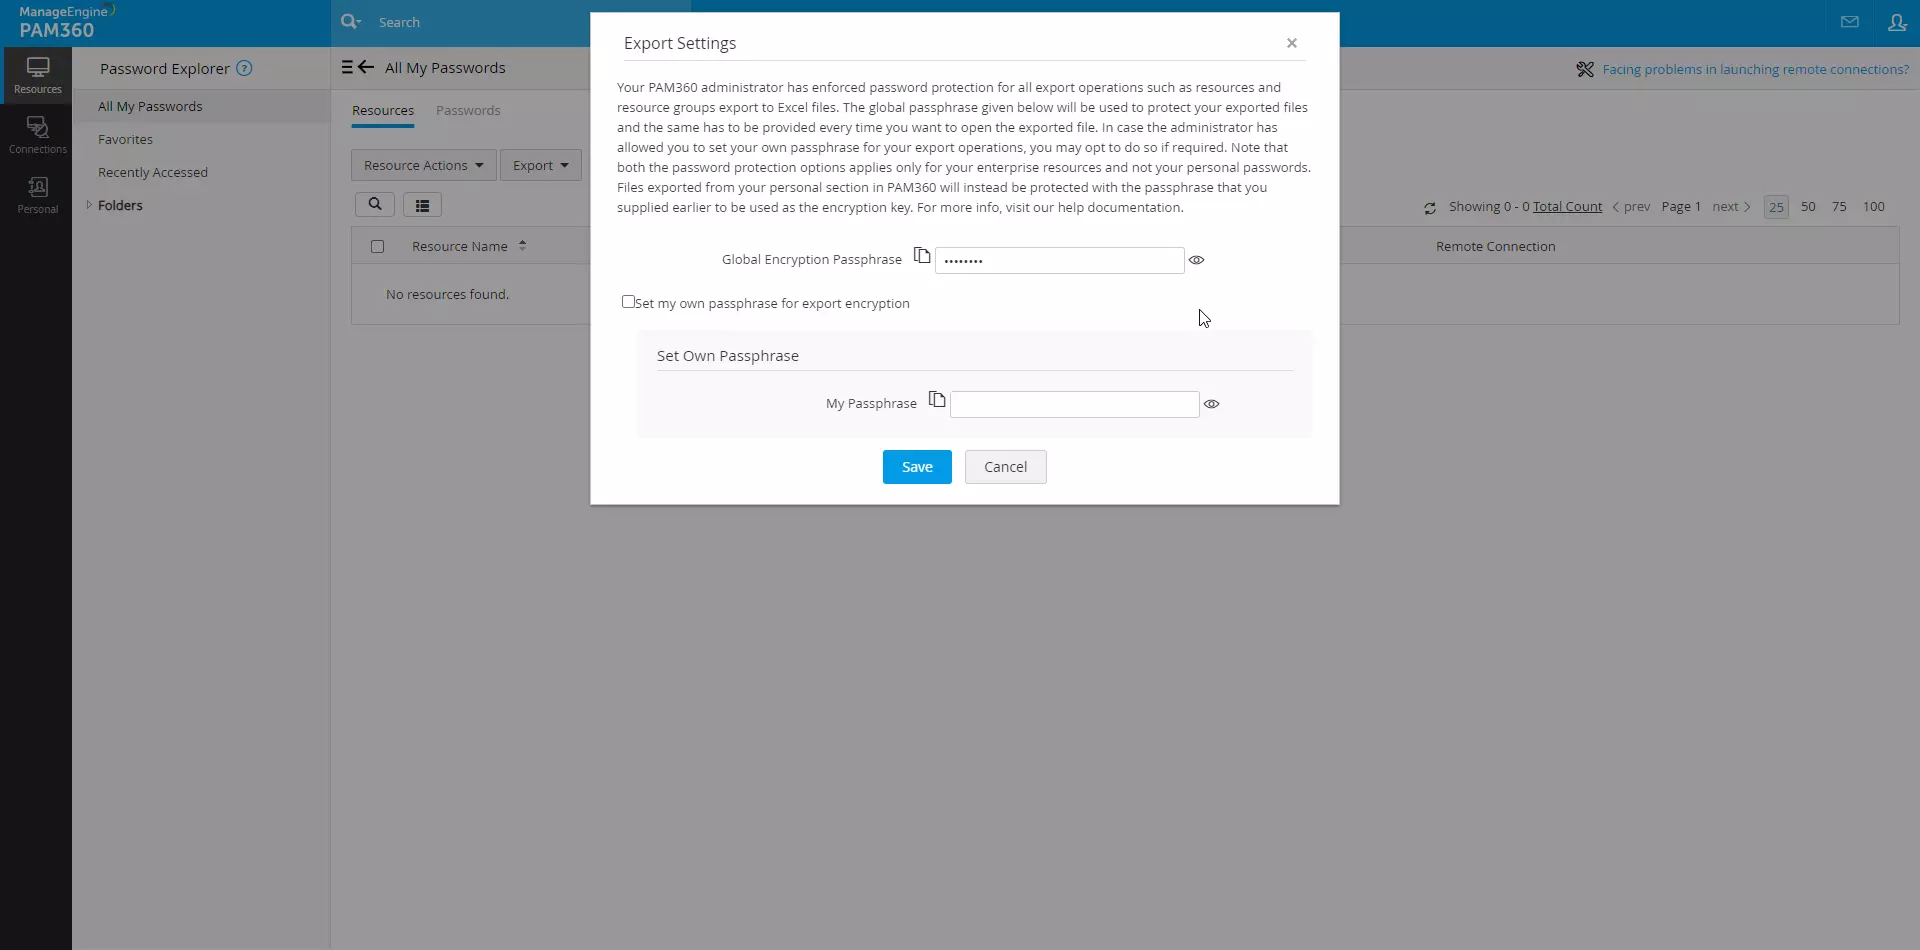
8. Miscellaneous
- Click on the Browser Extension, Remote Connect, and Mobile Application options from the My Profile drop-down menu to access their dedicated web pages for enhanced functionality and user experience.
- Click on the Logout option to exit the PAM360 interface securely. It is important to log out after your session to protect your account and sensitive information, especially when accessing PAM360 from shared or public devices.