Configuring Single Sign-On (SSO) using SAML 2.0 for Okta
ManageEngine PAM360 supports SAML 2.0, enabling integration with Federated Identity Management Solutions for Single Sign-On (SSO). PAM360 acts as the Service Provider (SP) and integrates with Identity Providers (IdP) using SAML 2.0. The integration process involves exchanging SP details with IdP and vice versa to establish trust between the SP and IdP and facilitate seamless authentication. Once integrated, users can log in to the IdP and automatically gain access to PAM360 from the IdP's GUI without needing to re-enter their credentials, streamlining the authentication process. PAM360 offers out-of-the-box integration with Okta.
Additional Details
PAM360 also supports configuring SAML SSO for the secondary server, allowing users to log in to PAM360 via the secondary server when the primary server is down, ensuring continuous access and minimal disruption.
This document covers the following topics in detail:
- Prerequisites
- Adding PAM360 as an Application on the Okta Dashboard
- Assigning PAM360 Application to Users
- Downloading Okta IdP Metadata File
Follow these steps to seamlessly integrate PAM360 with Okta, enabling a smooth and secure SSO and SLO experience.
1. Prerequisites
To configure PAM360 as an SP on the Okta dashboard, you need the SP details displayed on the Configuration For Single Sign-On Using SAML page under the Service Provider Details section. These details are necessary for setting up PAM360 as an SP on the Okta dashboard, ensuring a seamless integration between PAM360 and Okta. Explore this link for the detailed steps to obtain the required SP details for configuring PAM360 as an SP on the Okta dashboard.
2. Adding PAM360 as an Application on the Okta Dashboard
Follow these steps to add PAM360 as an application on the Okta dashboard and configure the SAML settings.
- Log in to the Okta Admin Console with administrator credentials.
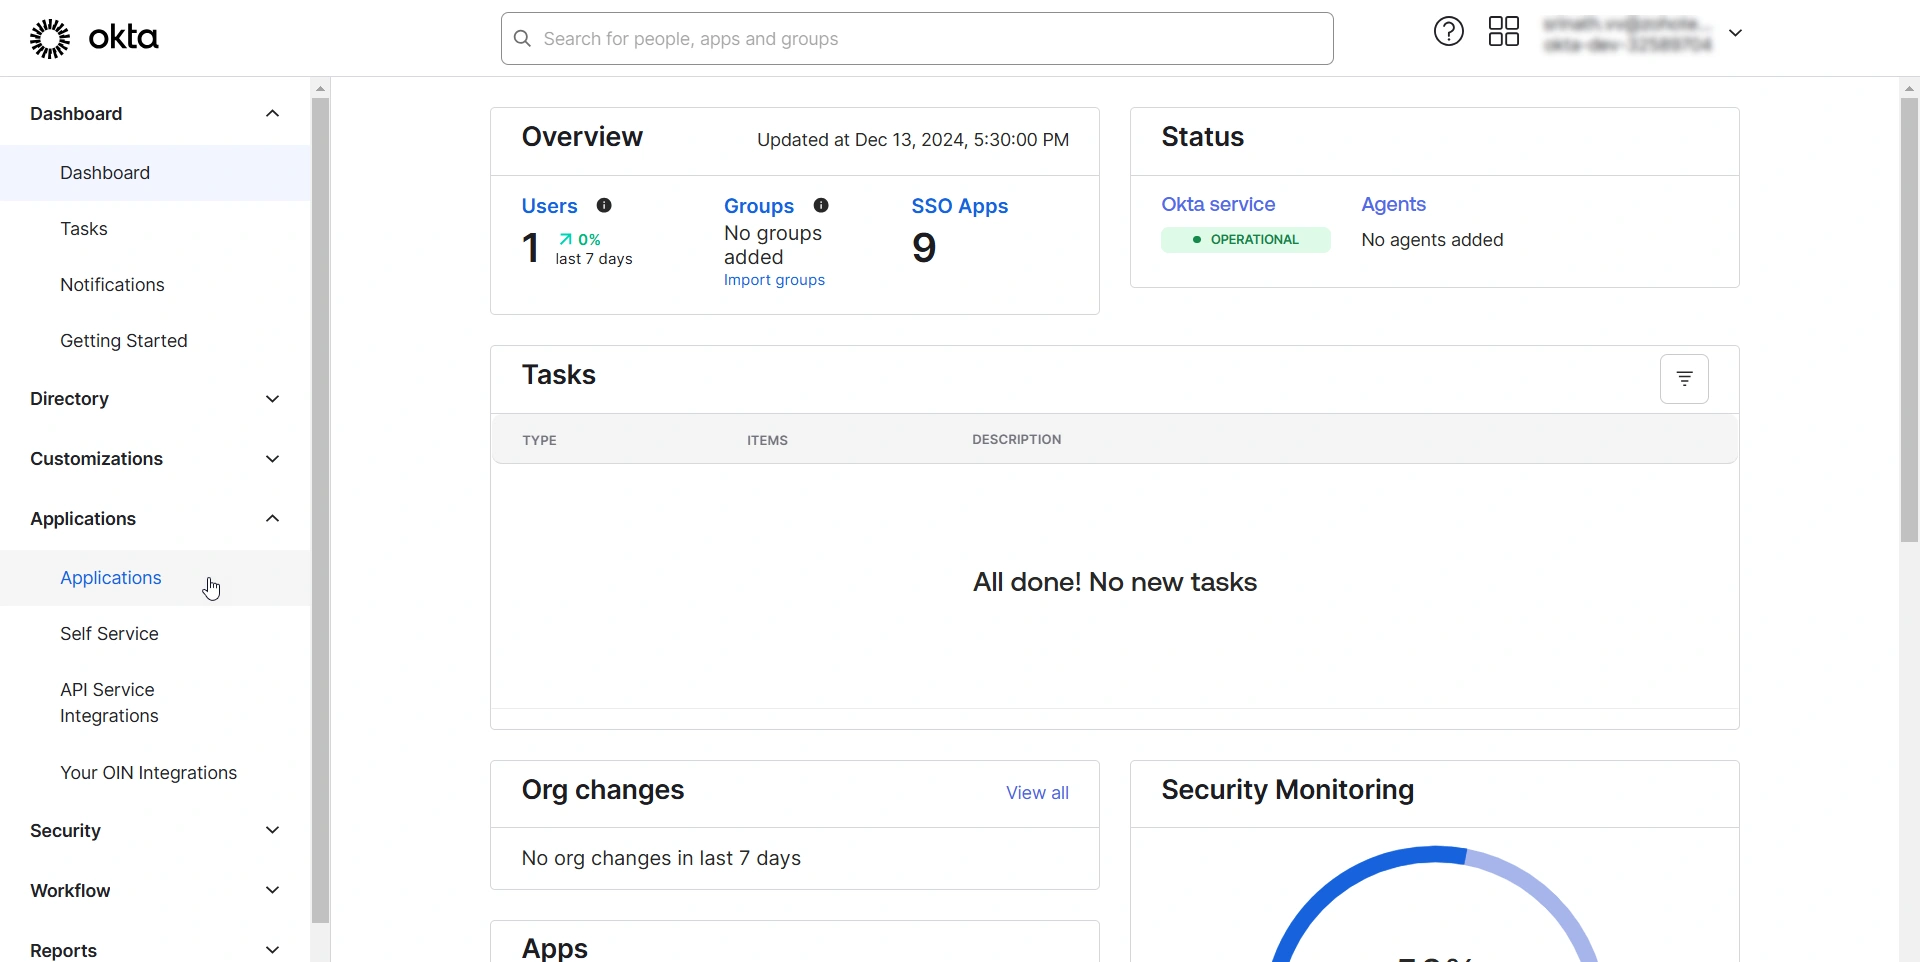
- Select Applications from the left pane and click the Create App Integration button on the Applications page.
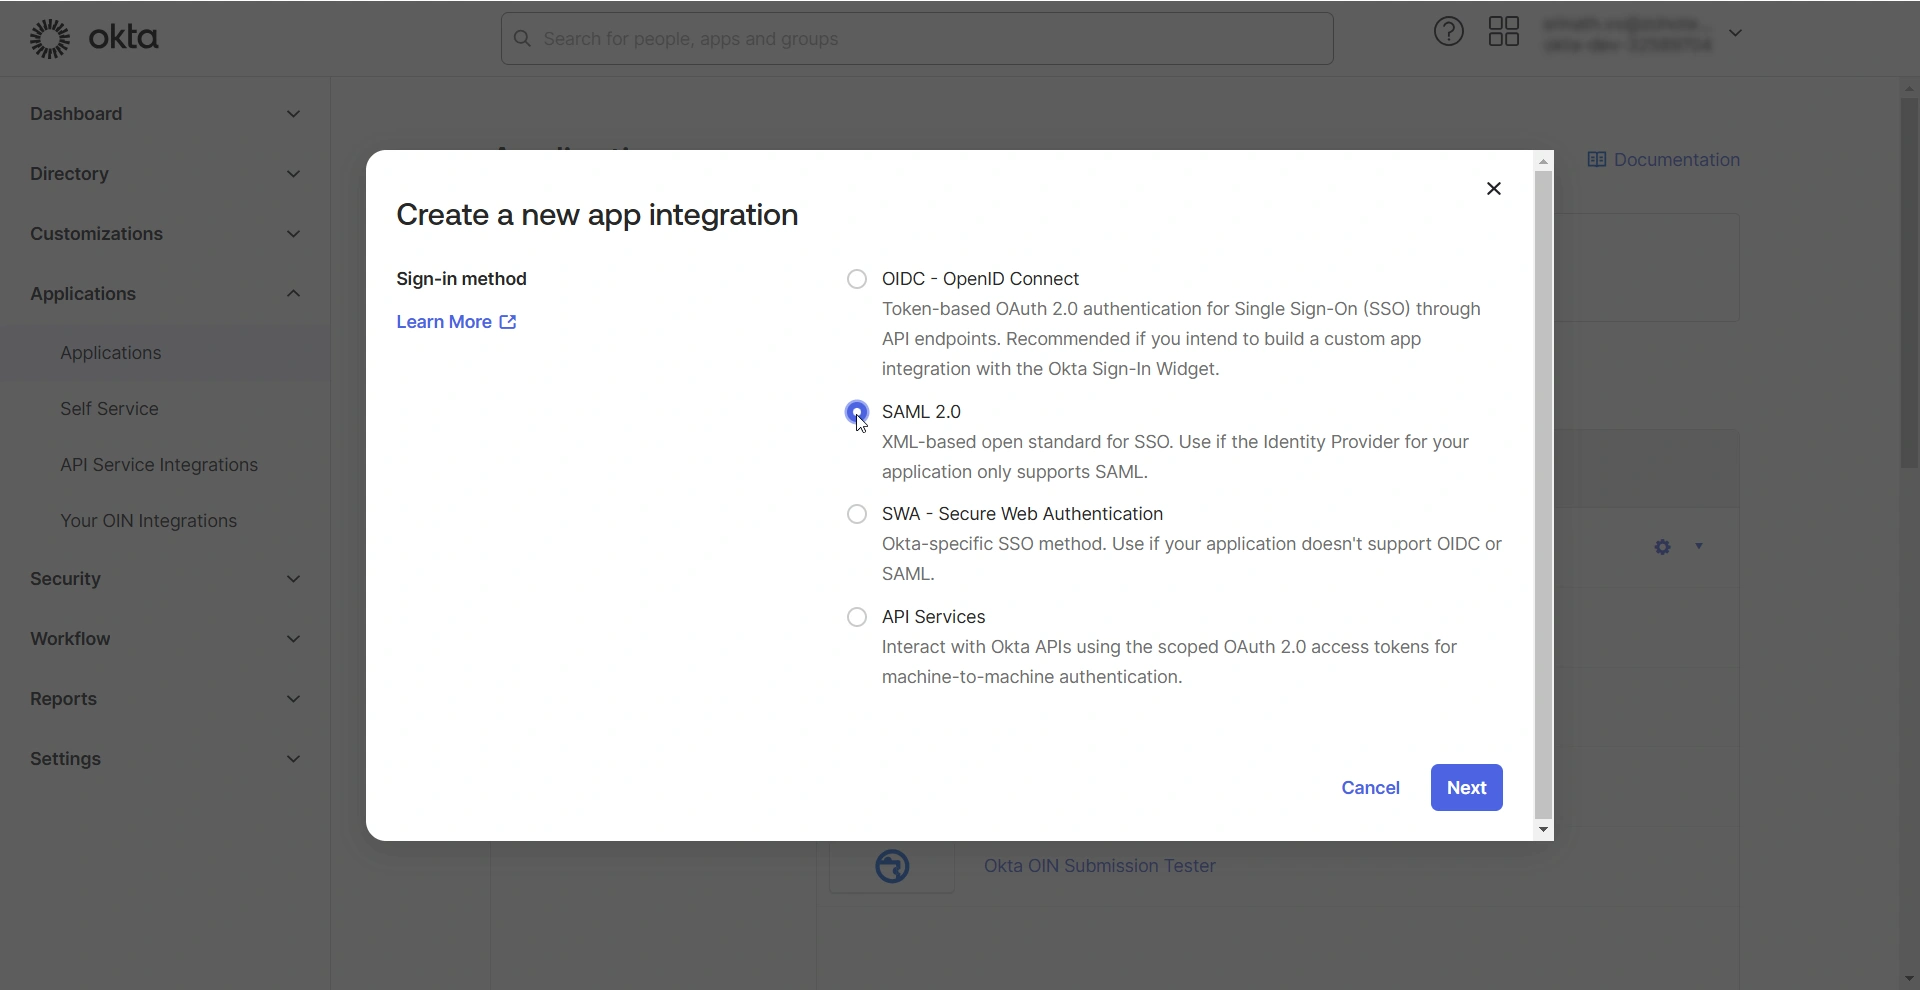
- In the Create a new app integration window that opens, select SAML 2.0 and click Next. You will see the Create SAML Integration page.
On the Create SAML Integration page, you should complete the following configurations: General Settings and Configure SAML.
2.1 General Settings
On the Create SAML Integration page, under General Settings, you should provide essential information about the application you are adding. Follow these steps to complete this section:
- Enter a name of your choice in the App name field. This name will serve as a unique identifier for PAM360 on the Okta dashboard.
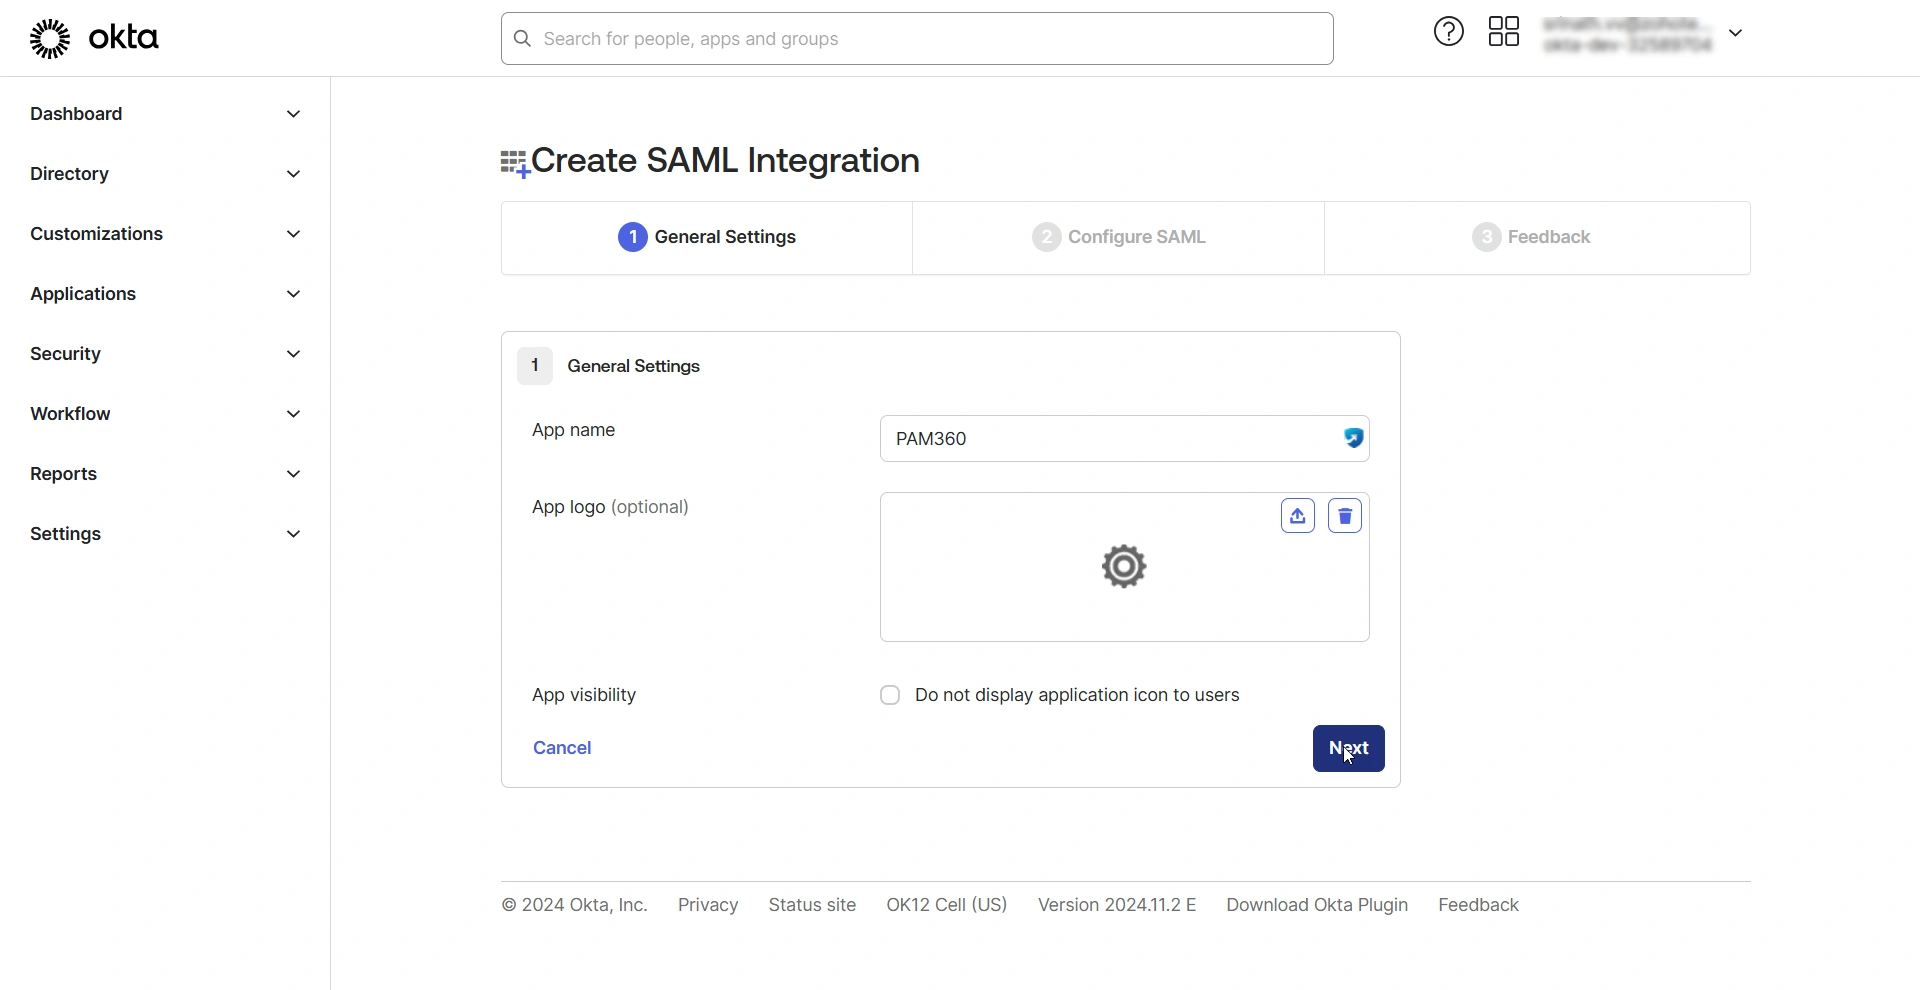
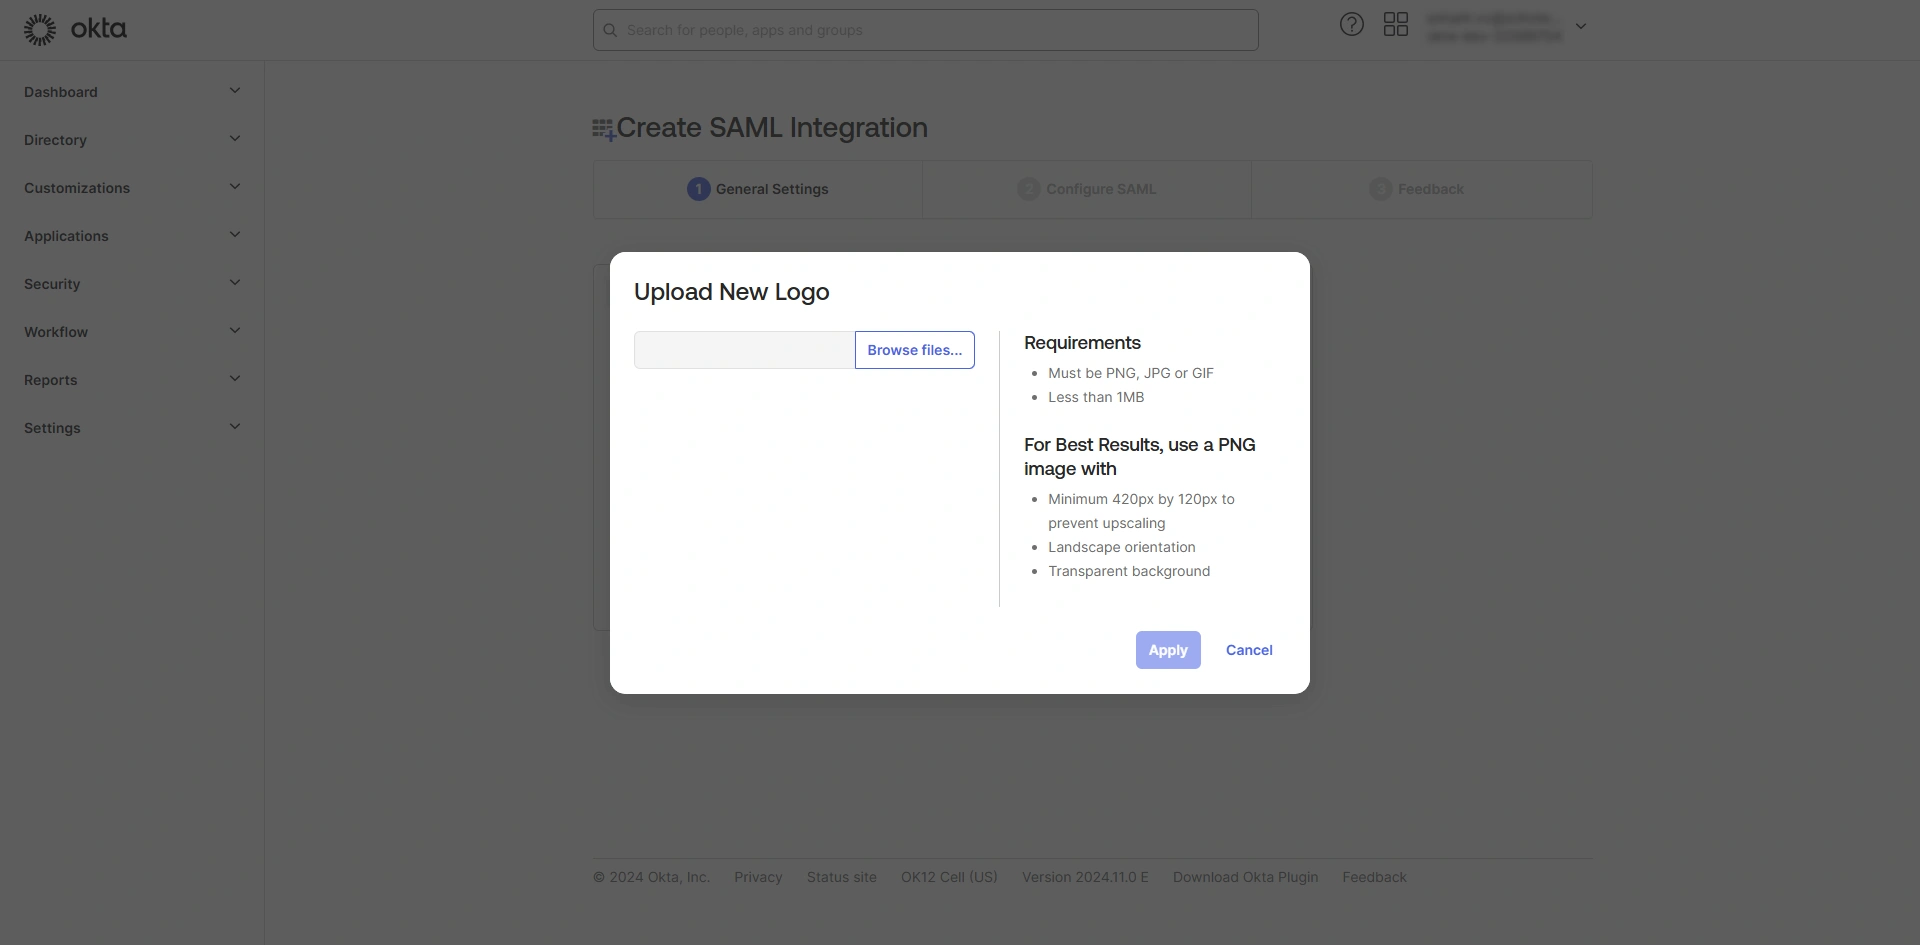
- If you wish to upload a logo for the application, click the Upload new icon beside the App logo field, click Browse files, choose an image from your machine, and click Apply.
- Enable the App visibility checkbox if you do not wish to display the application icon to users.
- Click Next to continue to the next step.
2.2 Configure SAML
On the Configure SAML window, under SAML Settings, enter the following details.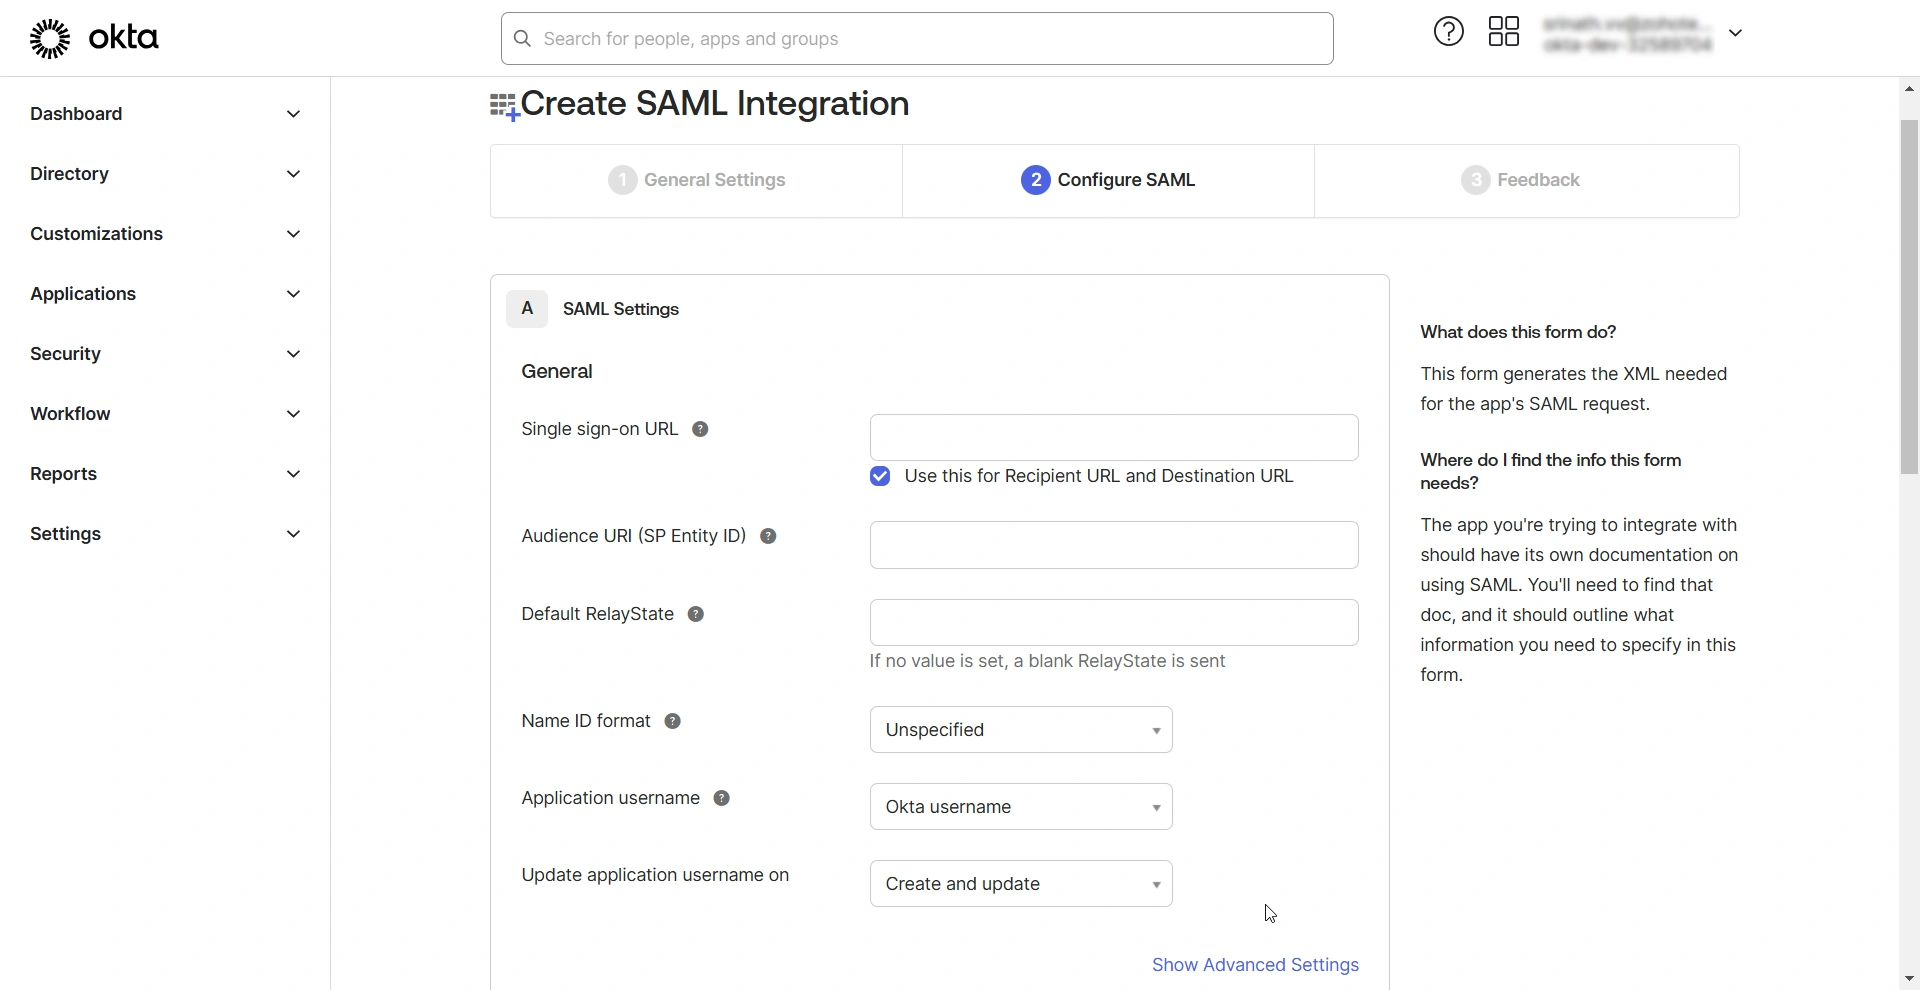
- Single sign-on URL - Enter PAM360's Assertion Consumer Service (ACS) URL in this field. ACS URL is the PAM360's endpoint URL, where Okta will send the SAML responses.
- For MSP, enter the ACS URL in the https://<pam-access-url>/saml2 format. and tick the Use this for Recipient URL and Destination URL checkbox.
- For client organizations, enter the ACS URL in the https://<pam-access-url>/saml2?ORGN_NAME=<org_name> format and enter the recipient and destination URLs as follows:
- Recipient URL - https://<pam-access-url>/saml2
- Destination URL - https://<pam-access-url>/saml2
- Audience URI (SP Entity ID) - Enter the PAM360's entity ID in this field.
- Default RelayState - Leave this field blank.
- Name ID format - Select Unspecified from the drop-down field.
- Application username - Select None from the given options.
- Click the Show Advanced Settings button to reveal advanced SAML properties.
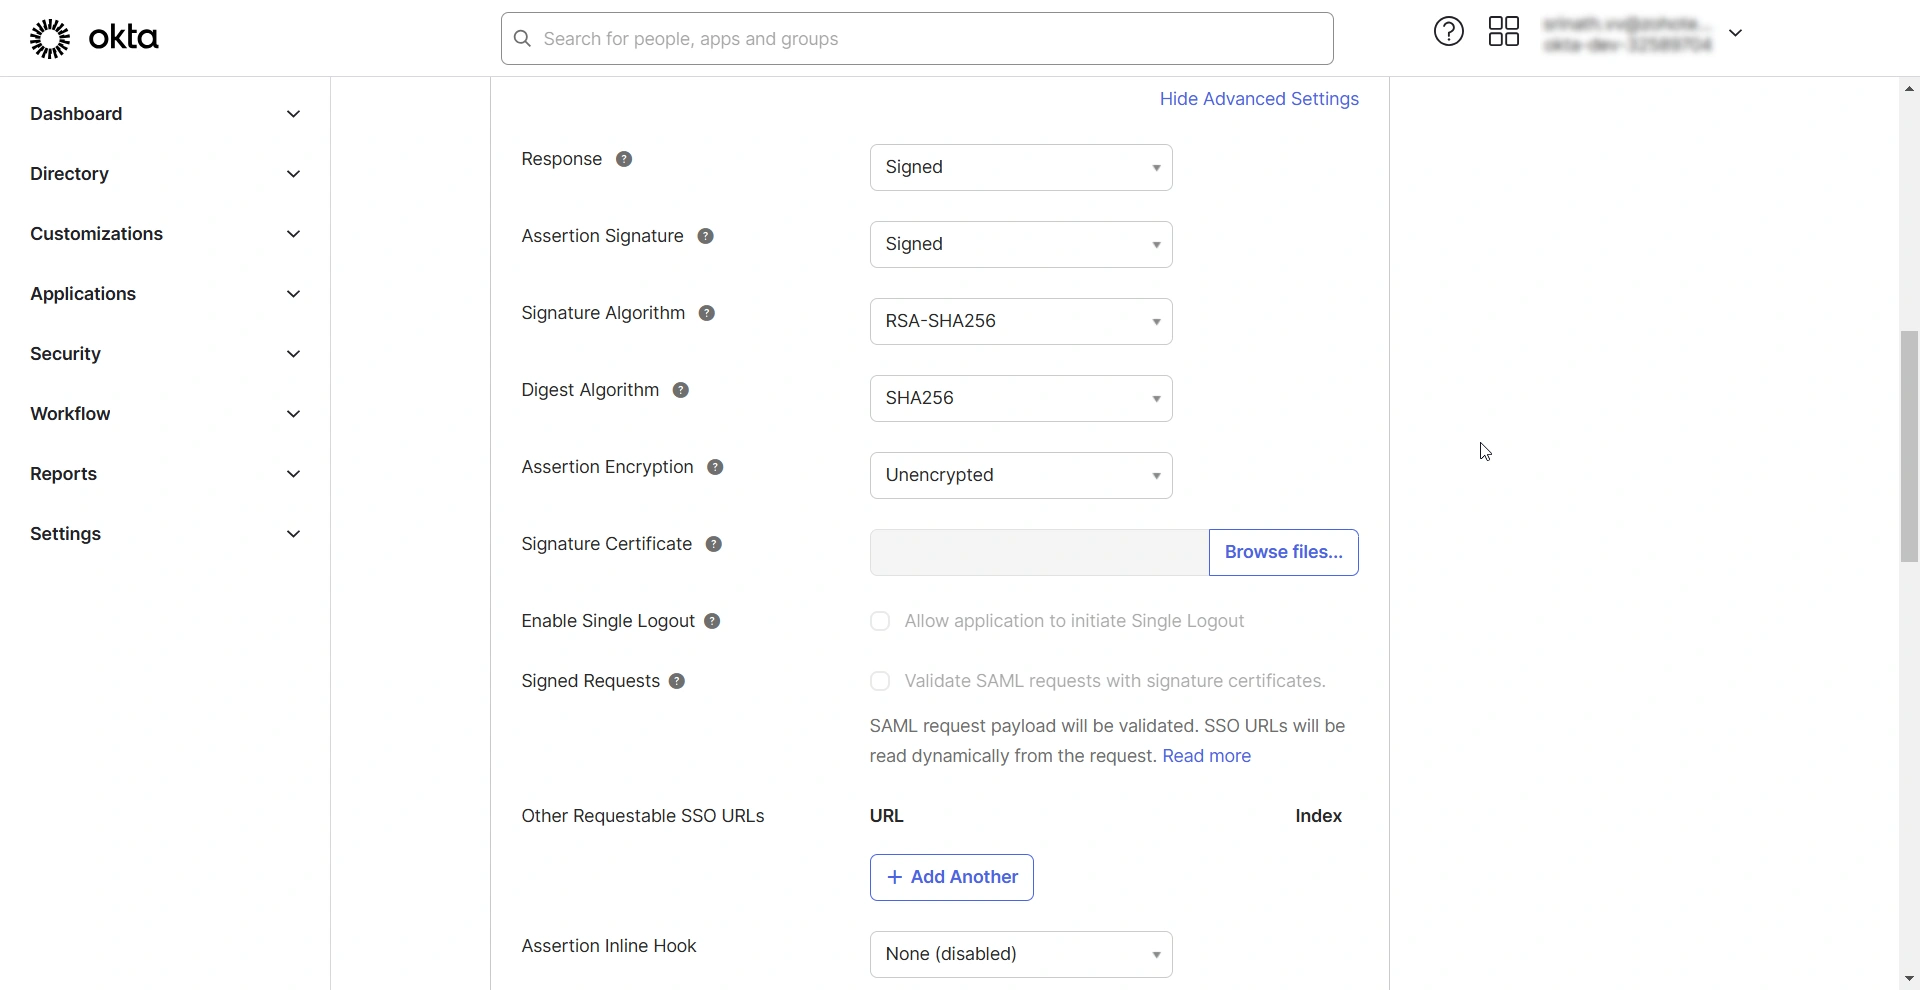
- Signature Certificate - Upload the PAM360 certificate in this field.
- Enable Single Logout - Tick this checkbox to allow PAM360 to send single logout requests. When Single Logout is enabled, users can log out of PAM360, terminating all active sessions established with SSO.
- Single Logout URL - Enter the PAM360's single logout service URL in this field.
- SP Issuer - Enter the PAM360's entity ID in this field.
- Signed Requests - Enable this checkbox to validate the SAML requests received from PAM360.
- Authentication context class - Select the desired authentication class from the drop-down field.
- Honor Force Authentication - Select Yes if you wish to re-authenticate users when they access PAM360, even if they have an active session with Okta (IdP).

After configuring the SAML properties, specify the Attribute Statements. The attribute statement is a crucial part of the SAML assertions that provides information about the authenticated user. PAM360 identifies the user by cross-referencing the attribute within the attribute statement with its username before granting access to the user. As the usernames in Okta and PAM360 could be different, you must specify the format. There are two possible scenarios:
- If you have users imported from AD in your PAM360 environment, their username will be in the format Domain\Username (Email ID prefix). In Okta GUI, under Attribute Statements, specify the following details:
- Name: Enter a name for the attribute statement, e.g., AD users.
- Name Format: Choose Unspecified from the available options.
- Value: toUpperCase(substringBefore(substringAfter(user.email, "@"), ".")) + "\" + substringBefore( user.email, "@")
- If you do not have an AD integration, enter the value in the attribute statement as substringBefore(user.email, "@") because, in Okta, user profiling is done in the format username@domain.com. But, in PAM360, user names are depicted only as usernames (Email ID prefix).
Caution
This step is crucial because specifying the correct NameID format in Okta ensures that users assigned to the PAM360 application can authenticate successfully using SAML Single Sign-On.
After configuring the required parameters, click the Preview the SAML Assertion option to review a sample of the SAML assertion that will be sent by the IdP to PAM360. Then, click Next to proceed to the next step. Complete the feedback questionnaire and click Finish to finalize the SP configuration and SAML parameters on the Okta Dashboard.
3. Assigning PAM360 Application to Users
After setting up the newly added application integration (PAM360), you must assign it to the users in your Okta directory.
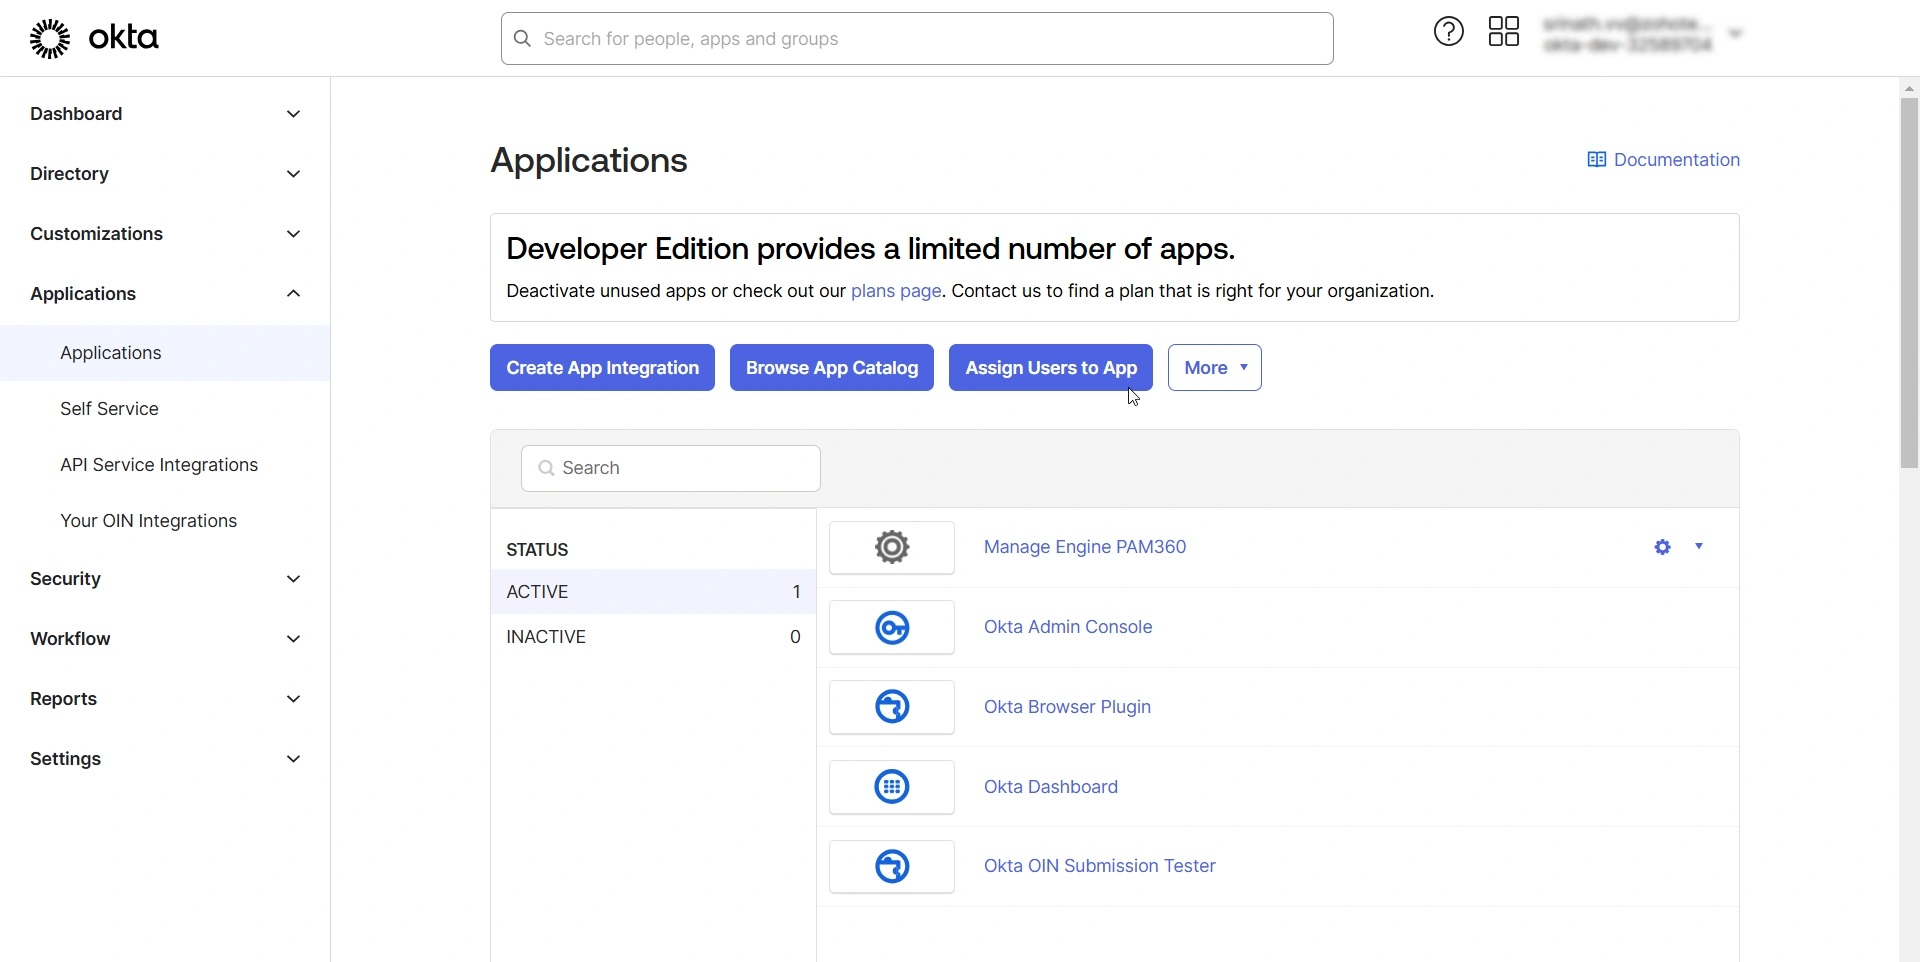
- Access the Applications page from the left pane and click the Assign Users to App button.
- In the Assign Applications page, under the Assign Apps to People tab, select the PAM360 application under the Applications section and select the desired users for whom you wish to provide access to the PAM360 integration under the People section.
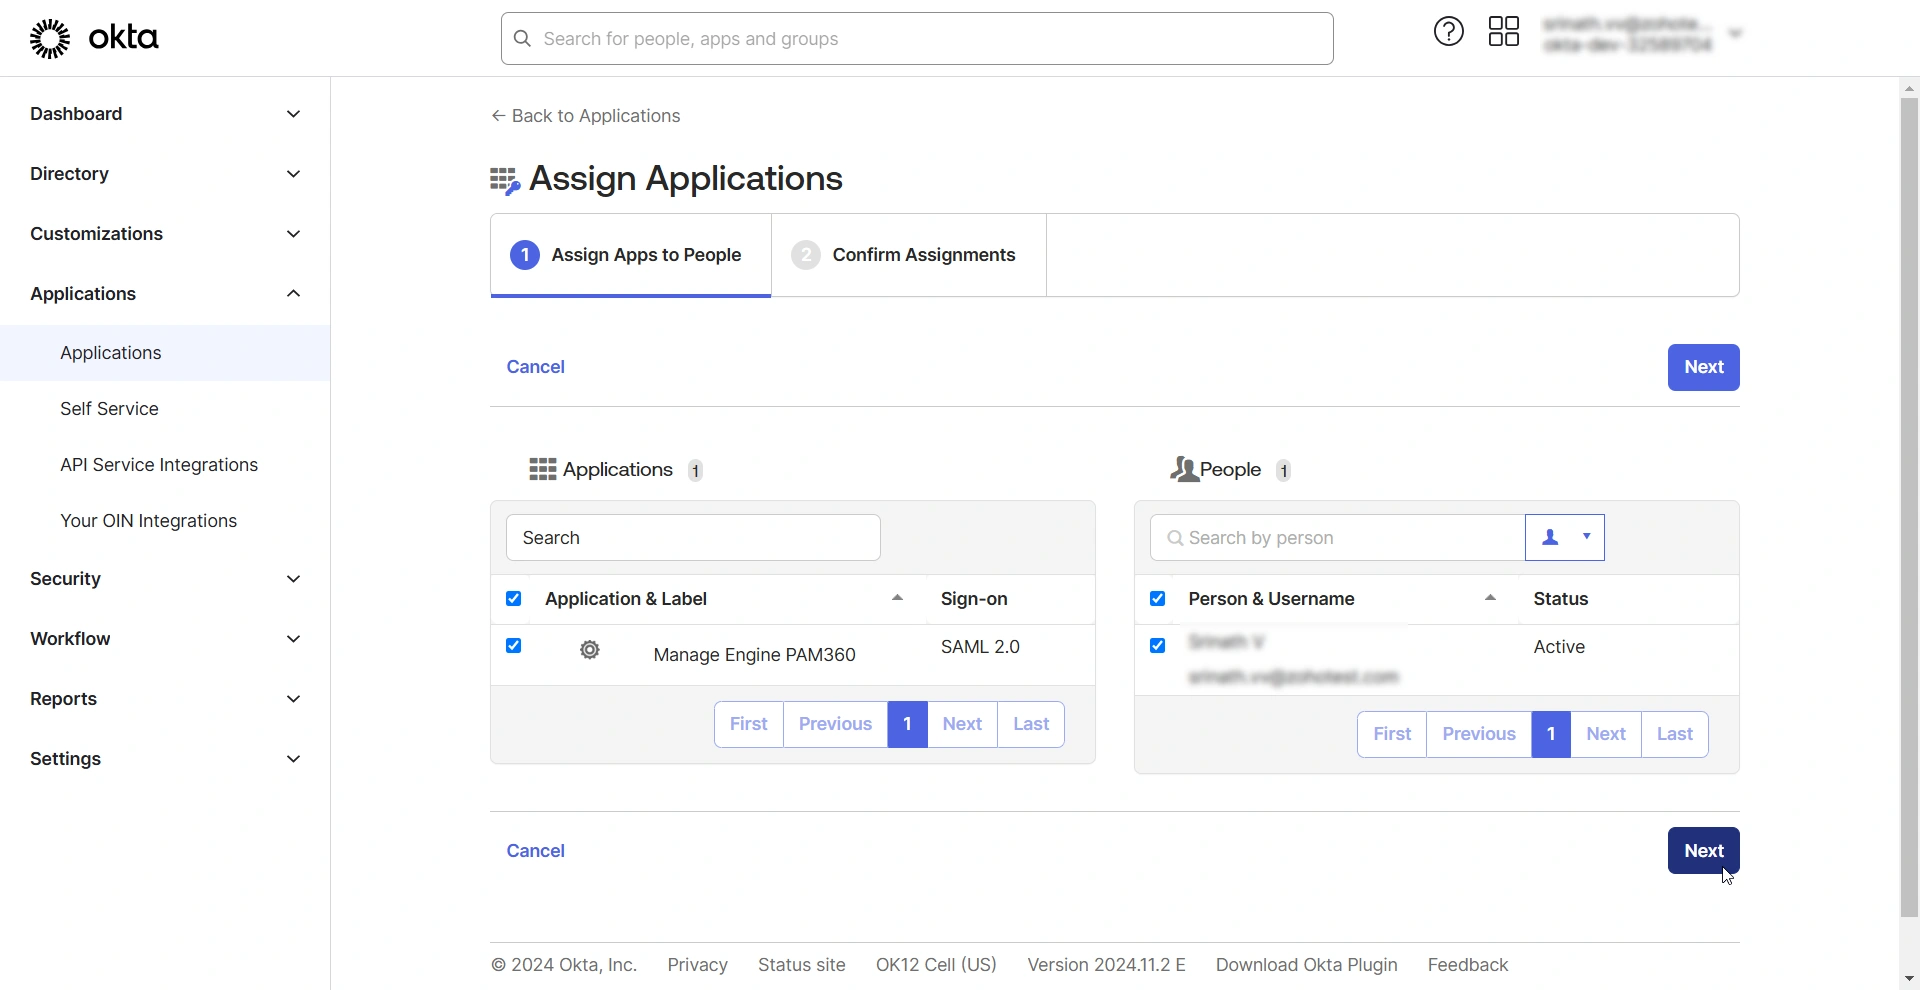
- After selecting the users, click Next to continue.
- In the Confirm Assignments tab, review the application and the assigned users.
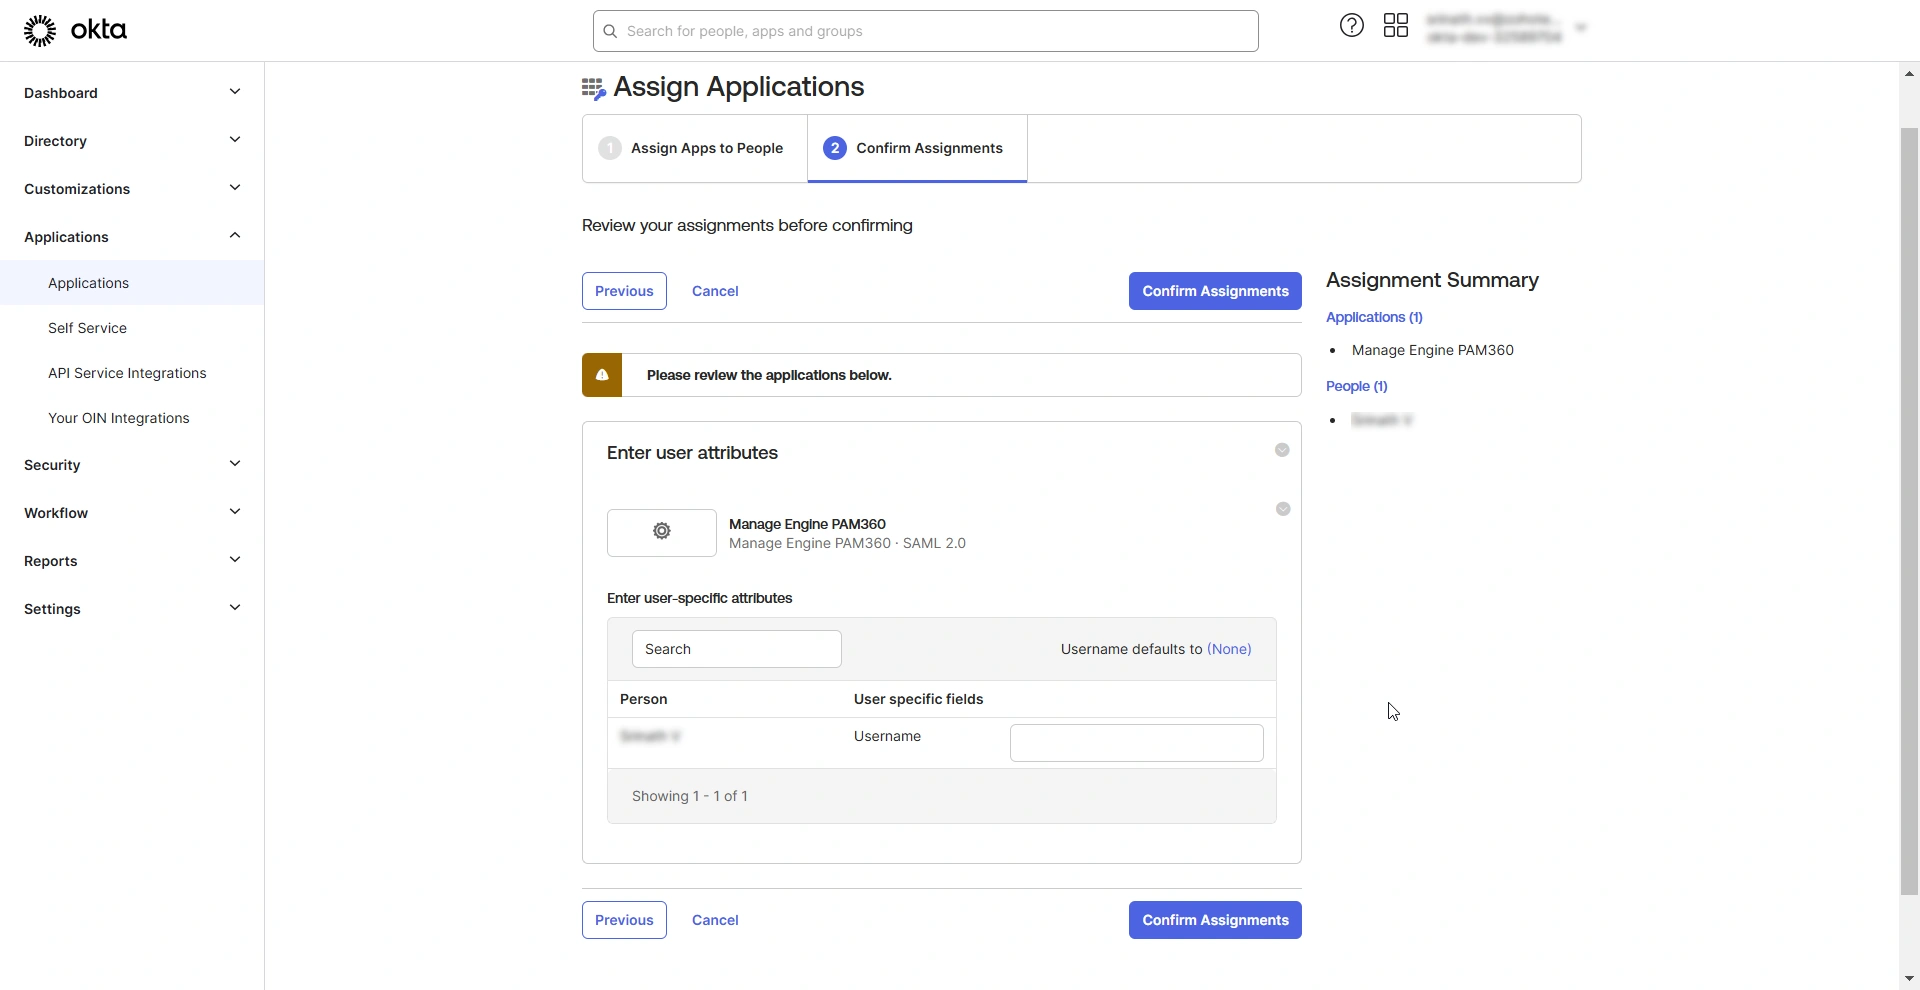
- Click the Confirm Assignments button to assign the selected users to the PAM360 application integration.
4. Downloading Okta IdP Metadata File
Follow these steps to download the IdP details as a metadata.xml file after configuring PAM360 as an SP.
- Access PAM360 integration from the Applications page.
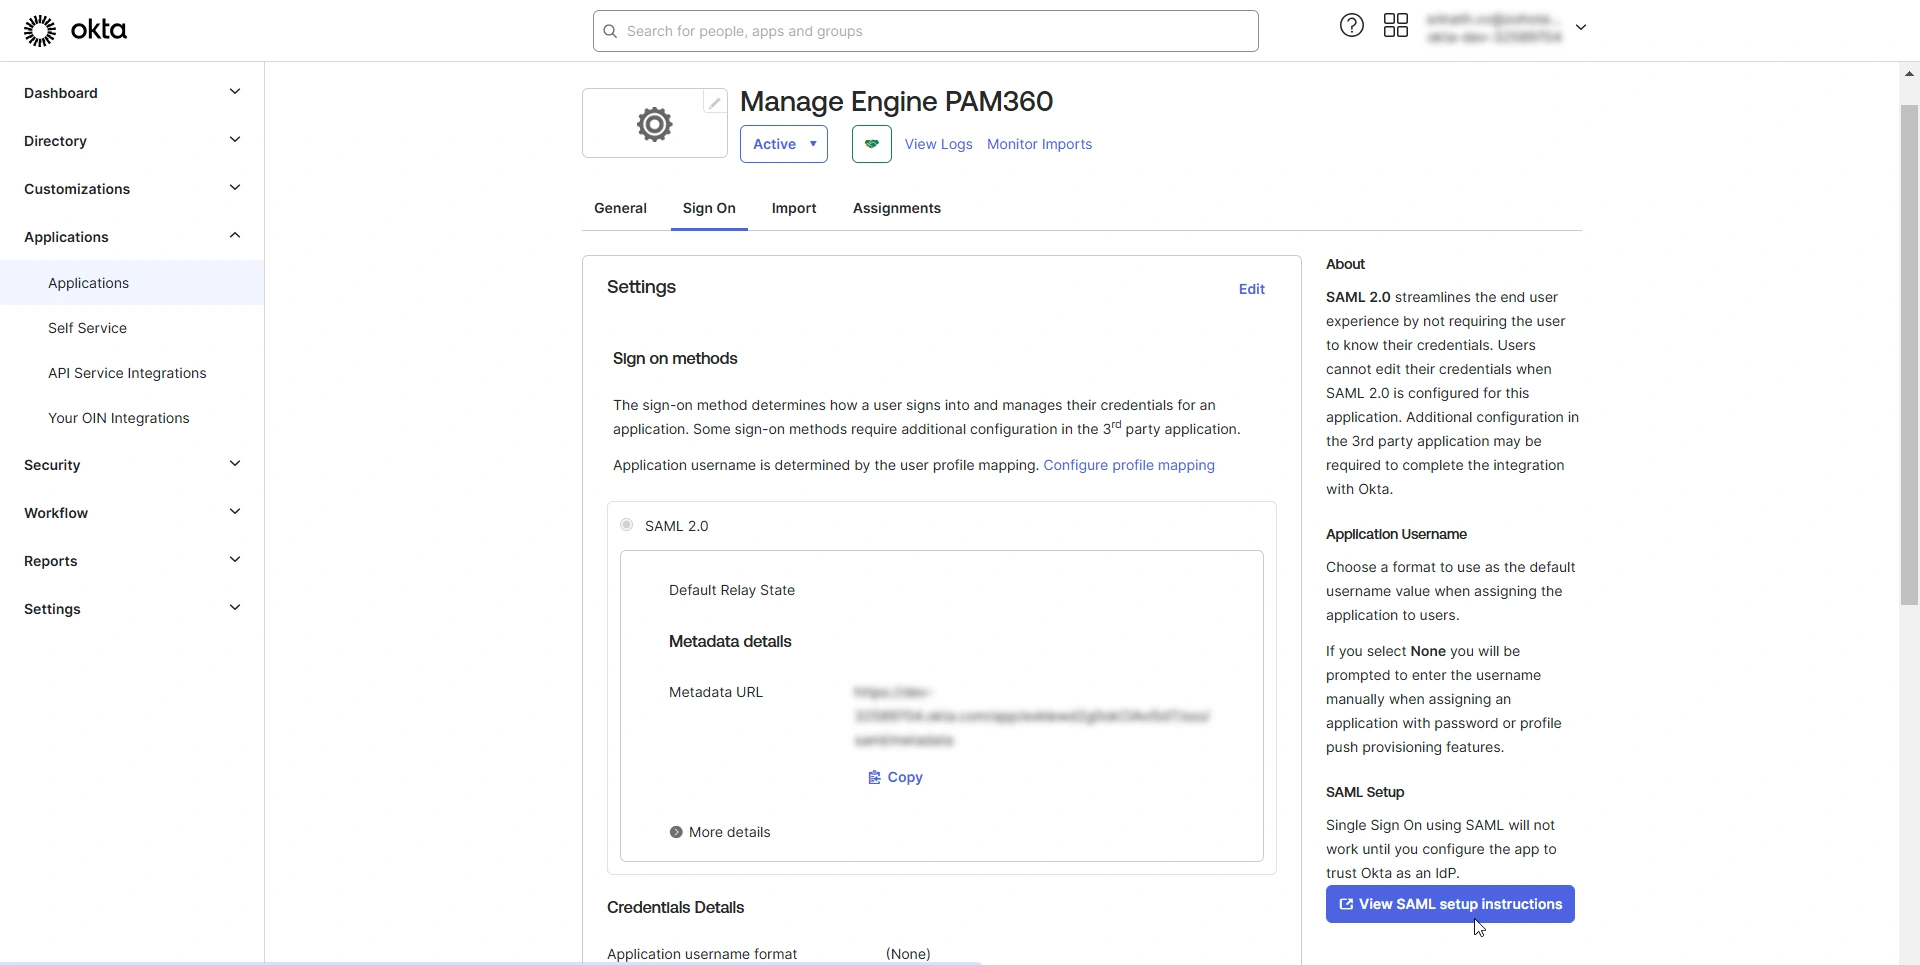
- On the PAM360 integration page, switch to the Sign On tab and click the View SAML setup instructions option. In the SAML setup instructions page, you will find all the necessary details to configure Okta as an IdP on the PAM360 interface.
- Scroll down to the end of the page and find the Optional field. Copy the metadata provided in this field and save it as an XML file.
- Now, you can upload this XML file while configuring the IdP details on the PAM360 interface, eliminating the need to enter all the IdP information manually.
After configuring PAM360 as an SP in Okta, you must configure Okta as an IdP in PAM360 to establish it as a trusted entity. Access the PAM360 browser window and proceed with the IdP configuration starting from Step 2 - Configure Identity Provider Details. Explore this link for the detailed IdP configuration steps. Based on the provided steps, configure Okta as an IdP and enable SAML Single Sign On on the PAM360 interface.