Setting up Two-Factor Authentication - Zoho OneAuth Authenticator
Zoho OneAuth Authenticator, a comprehensive multi-factor authentication application, helps you secure your online accounts, thus improving your business security. It is available for download on multiple devices - iOS, Android, iPad, macOS, watchOS, and Windows platforms and can be installed at your convenience. Once configured, the OTP Authenticator of Zoho OneAuth generates a 6-digit number every 30 seconds that must be entered as the second factor of authentication, following the usual first-factor authentication.
Caution
Enable Zoho OneAuth Authenticator as the Two-Factor Authentication (TFA) and enforce it to the PAM360 users prior configuring it from the Zoho OneAuth Authenticator interface. Refer here for detailed instructions.
Connecting to the PAM360 Web Interface with Zoho OneAuth Authenticator as TFA
As explained here, for the TFA-enabled users, the first level of authentication will be through the usual authentication, i.e., the users have to authenticate through PAM360's local authentication or Active Directory/Microsoft Entra ID/LDAP authentication.
Perform the below steps to connect to the PAM360 web interface with Zoho OneAuth Authenticator as the TFA:
- On the PAM360 login page, proceed with the first level of authentication and click Login.

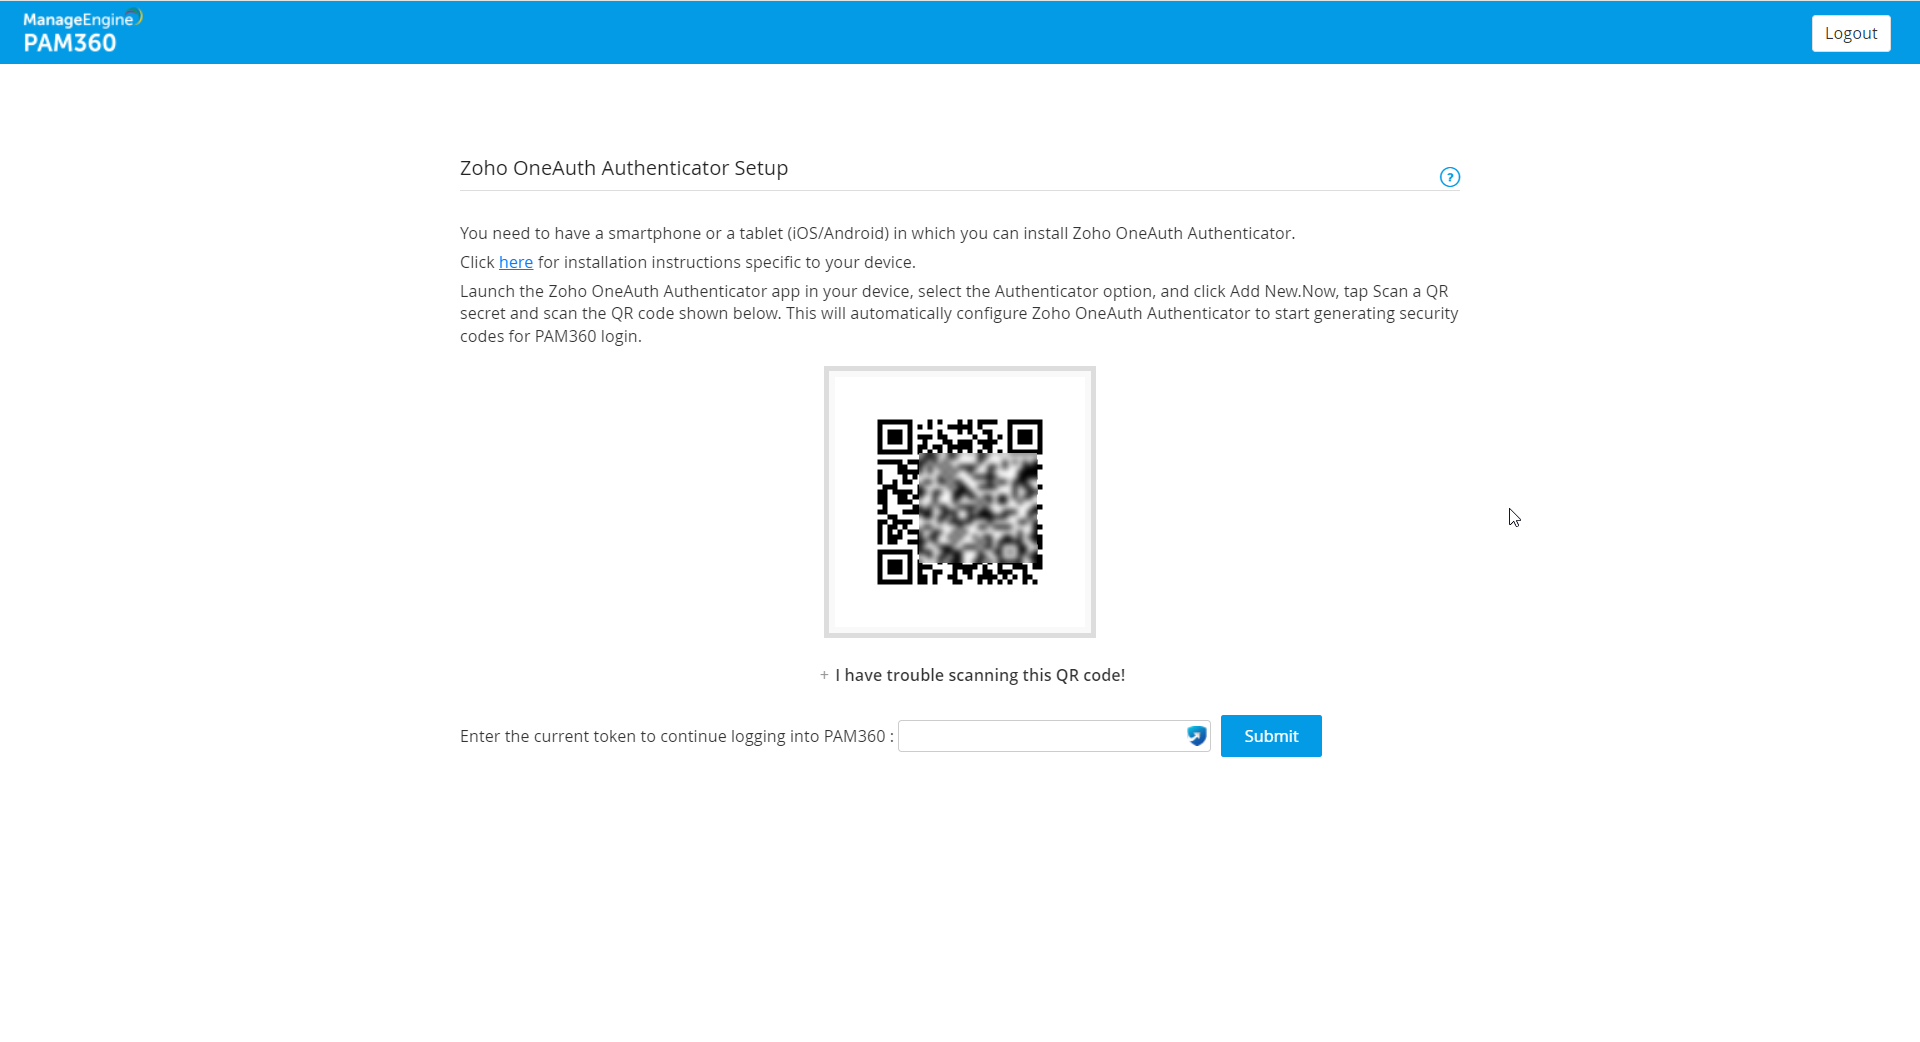
- If you are logging in to PAM360 for the first time after enabling TFA through Zoho OneAuth Authenticator, you will be prompted to associate it with your PAM360 account. Follow the below steps to associate Zoho OneAuth Authenticator with your PAM360 account:
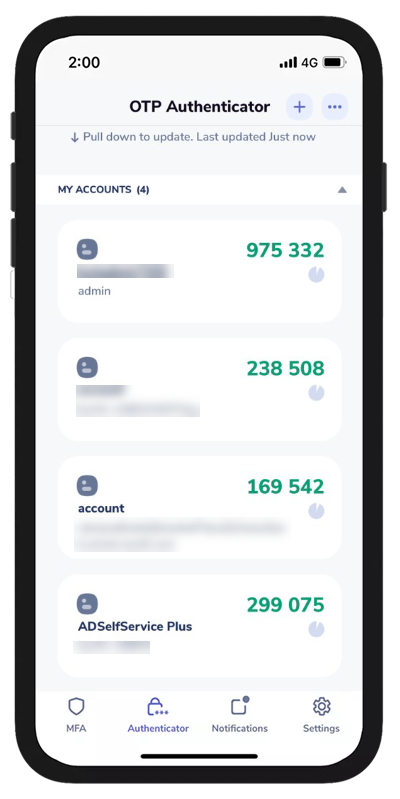
- Launch the Zoho OneAuth application on your mobile device/tablet and tap Authenticator from the bottom pane.
- Tap the + button or select Add new.

- Click Scan a QR secret and point your device to the QR code shown in the PAM360 GUI. This will automatically configure your PAM360 account in the Zoho OneAuth Authenticator application and will start generating the authentication codes for PAM360.
- Enter the code generated in the Zoho OneAuth Authenticator for authentication in the PAM360 GUI text box.


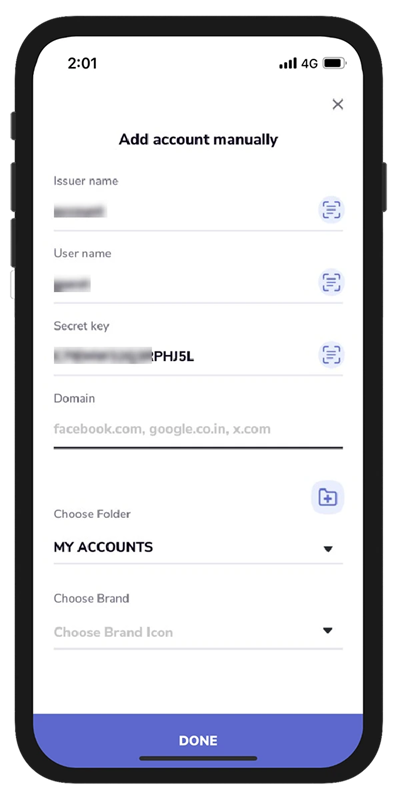
- If you have trouble scanning the QR code, the automatic setup will not work. Alternatively, you can carry out the following manual steps in the Zoho OneAuth Authenticator application to complete the configuration process:
- Click the text I have trouble scanning this QR code! present below the QR code in the PAM360 GUI.
- From the Zoho OneAuth application, tap the + button or click Add new.
- Select Manual Entry and enter the Issuer name, User name, and the Secret key. The Secret key is the alphanumeric key shown in the PAM360 GUI.
- Select the folder and the account brand icon and click DONE.
- Zoho OneAuth Authenticator is now configured and will start generating the authentication codes periodically. Enter the current generated code to continue logging in to PAM360.
Additional Details
If you lost your TFA registered device or deleted the Zoho OneAuth Authenticator application, reset the TFA using the applicable method mentioned here.