RSA SecurID
When RSA SecurID is enabled, users can use the RSA security console's security codes for identity verification while logging in to ADAudit Plus.
Note: When enabling RSA SecurID two-factor authentication in ADAudit Plus, contact RSA support or use your RSA login to get the RSA dependent libraries named authapi.jar and its compatible log4j jars, and paste them into the ADAudit Plus lib folder (<product_installation_path>/lib/).
Steps to add the ADAudit Plus server in the RSA admin console
- Log in to your RSA admin console (e.g., https://RSA machinename.domain DNS name/sc).
- Go to the Access tab, select Authentication agent from the drop-down, and click Add new.
- Create a Client, and set its type as Standard Agent.
- Go to the Home tab, select Manage Users, and click Add new.
- Create a user with a last name and a user ID similar to the SAM Account name in the domain.
- After adding the user, click the username, and in the menu, select Secure ID Token.
- Click Assign Token, select any one token, click Assign, and click Save.
- Go to the Authentication tab, click On Demand Authentication, and select Enable Users.
- Select the User from the list, and click Enable for ODA.
- Select the associated pin and expiration date, and click Save.
- Go to the Access tab, and select Authentication agent from the drop-down.
- Click Generate Configuration File, select Generate Config File, and click Download now.
- Extract the AM_Config.zip file to get the sdconf.rec file.
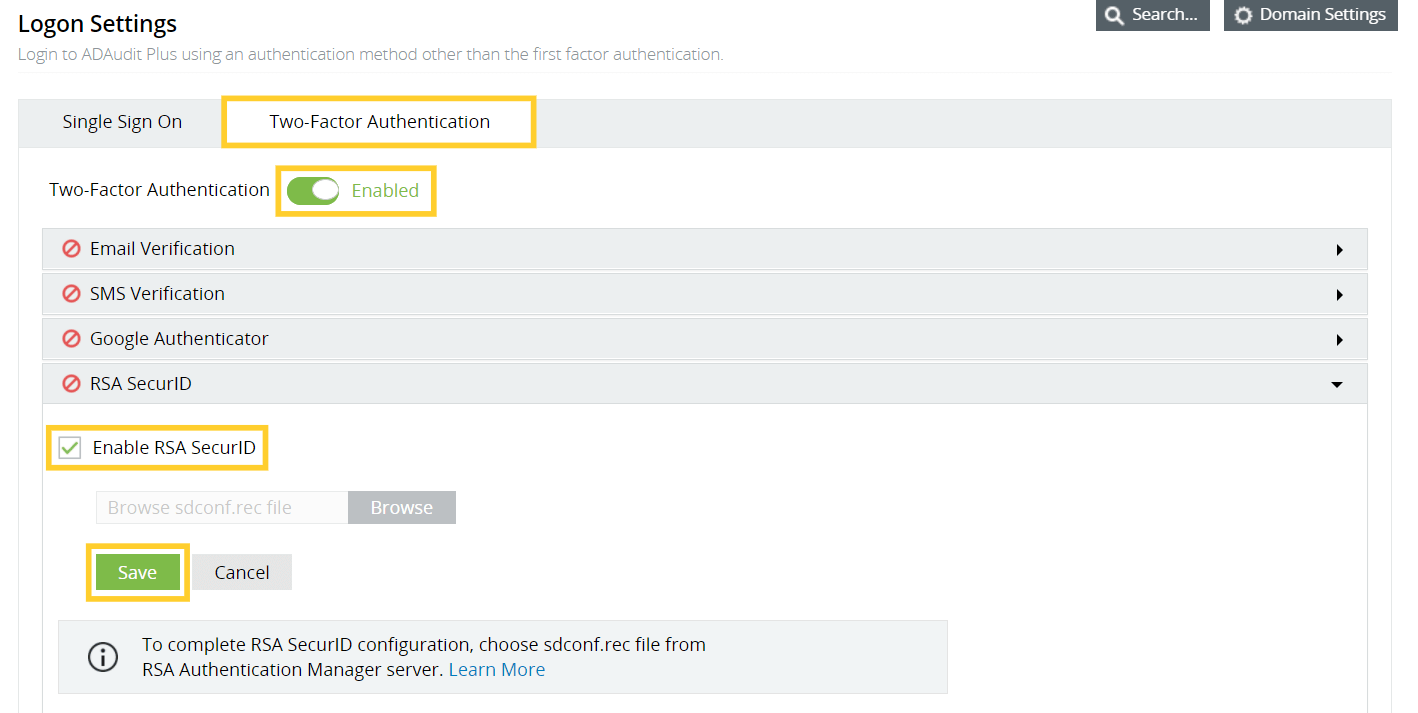
Steps to enable RSA SecurID in ADAudit Plus
- Open the ADAudit Plus web console.
- Navigate to Admin → Administration → Logon Settings, and select Two-Factor Authentication.
- Under RSA SecurID, check Enable RSA SecurID.
- Browse and select the sdconf.rec file downloaded from the RSA Authentication Manager Server.
- Click Save.

Don't see what you're looking for?
-
Visit our community
Post your questions in the forum.
-
Request additional resources
Send us your requirements.
-
Need implementation assistance?
Try OnboardPro

 Click here to expand
