Table of contents
- Description
- Prerequisites
- Adding the Package
- Deploy to the target computers
- Uninstall Microsoft 2016
Description
This document provides steps required to deploy Microsoft Office 2016 to multiple computers using Endpoint Central.
Prerequisites
System Requirements
Before you deploy the software application, ensure that the computers to which you deploy Microsoft Office 2016, meets the system requirements prescribed by Microsoft. Refer to the article for more
Download the Installation Files
Download the Office 2016 Installation files from the Microsoft website and store in the network share. Office image files has to be purchased from the vendor for installing the application. Network share is recommended only while you wanted to deploy the software to computers within the network. If you wanted to deploy Microsoft Office to computers located in a remote location, you can use HTTP upload.
Note: The network share should have read permissions to Everyone in the group and should be accessible from all the computers to which you are trying to install.
Note: If you are copying the contents from a CD, you can skip the steps below and copy the contents of the CD directly to the network share
- Extract the contents from OfficeProfessionalPlus_x86_en-us.img using 7zip.exe
- Copy all the extracted contents, with the same directory structure, to the network share that you created.
Note: Office image file has to be purchased from the Vendor for installing the application.
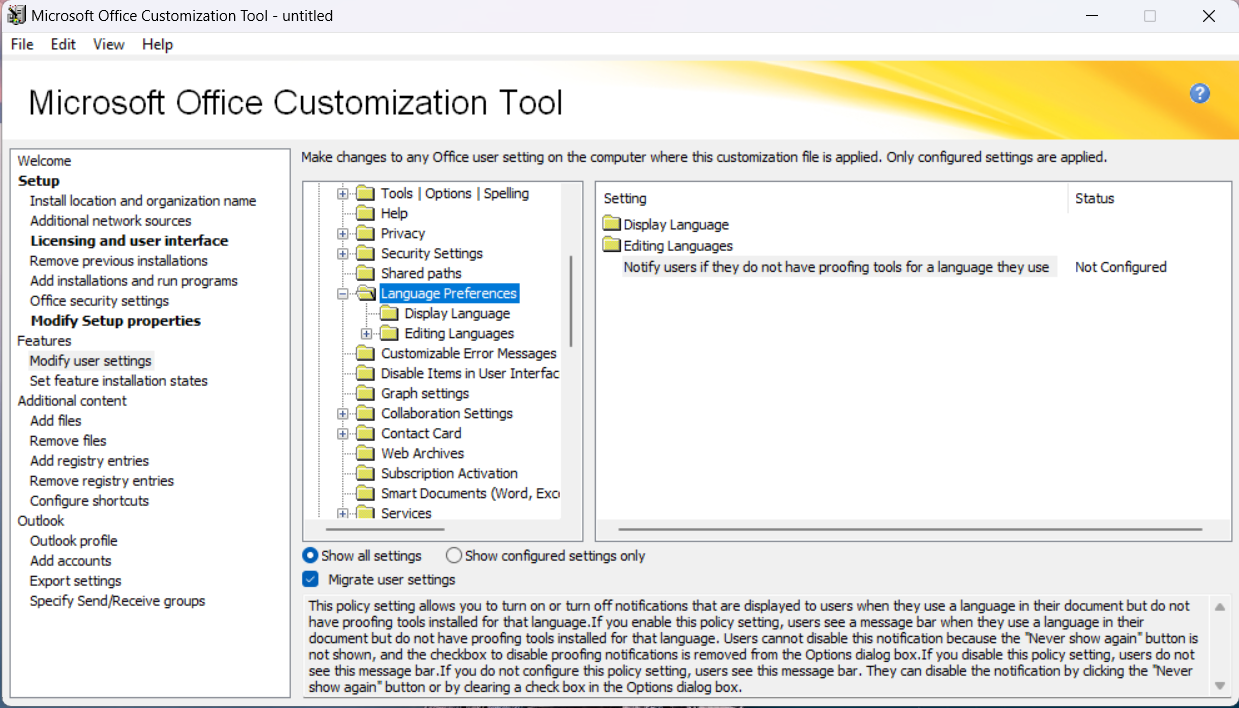
Customize the installation
- Open a command prompt window
- Change the directory to the network share where you have stored the installable file
- Enter
setup.exe /admin
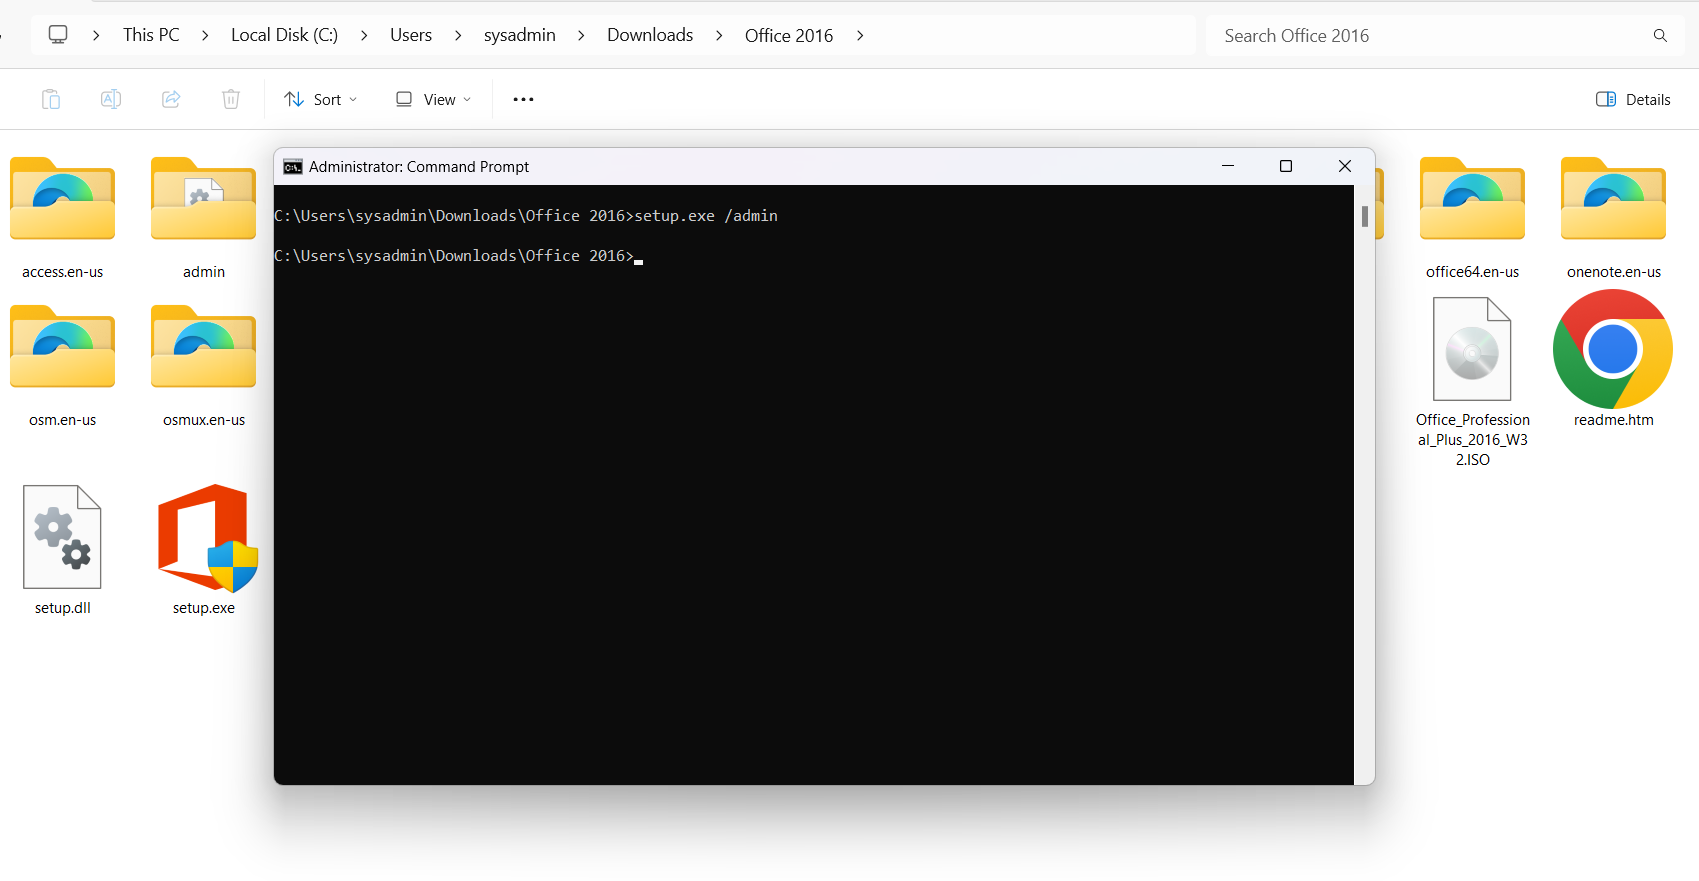
Note: This opens the OCT from where you can specify the information about the license, information about the company, and change outlook profiles.
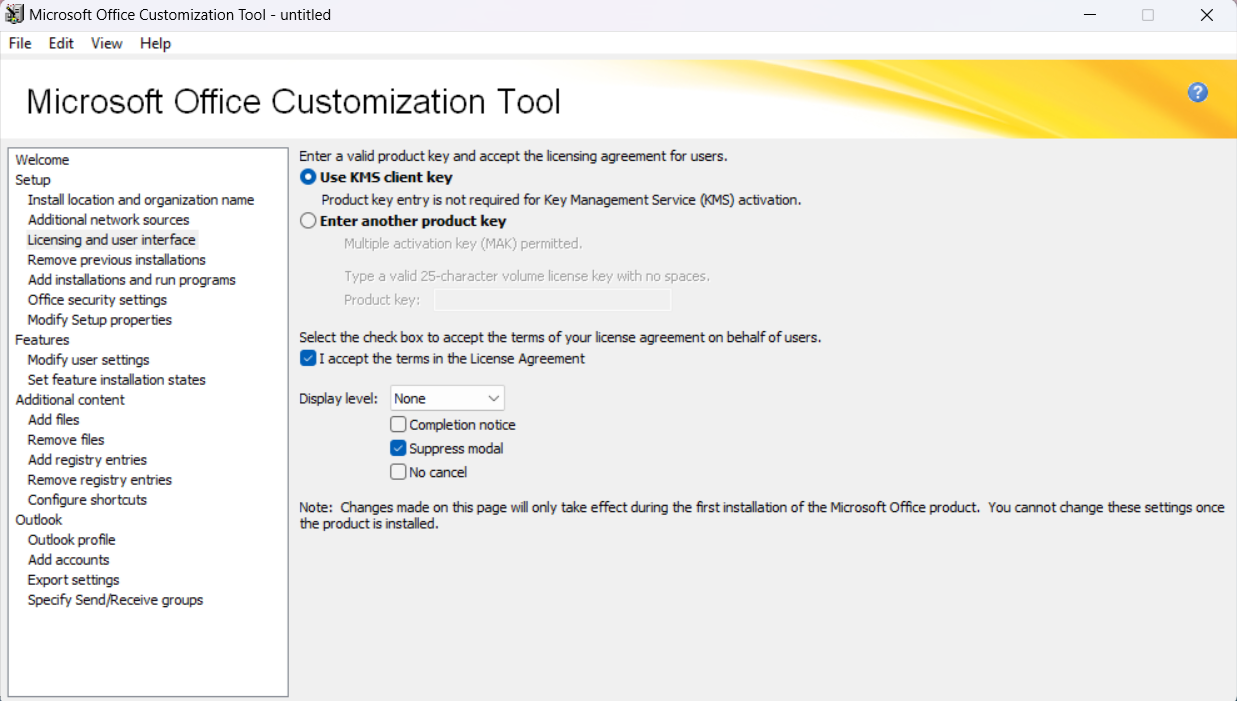
- Enter the required product key under Licensing and user interface.
Note: If you select the MAK(Multiple Activation Key) option, you are required to enter a 25-character key. However, if you select the KMS key option, you are not required to enter a key.
- Select the Display Level as None, enable the Suppress Modal check box and ensure that the Completion notice is unchecked as it will be checked by default.
- Specify whether to remove the installations of older versions
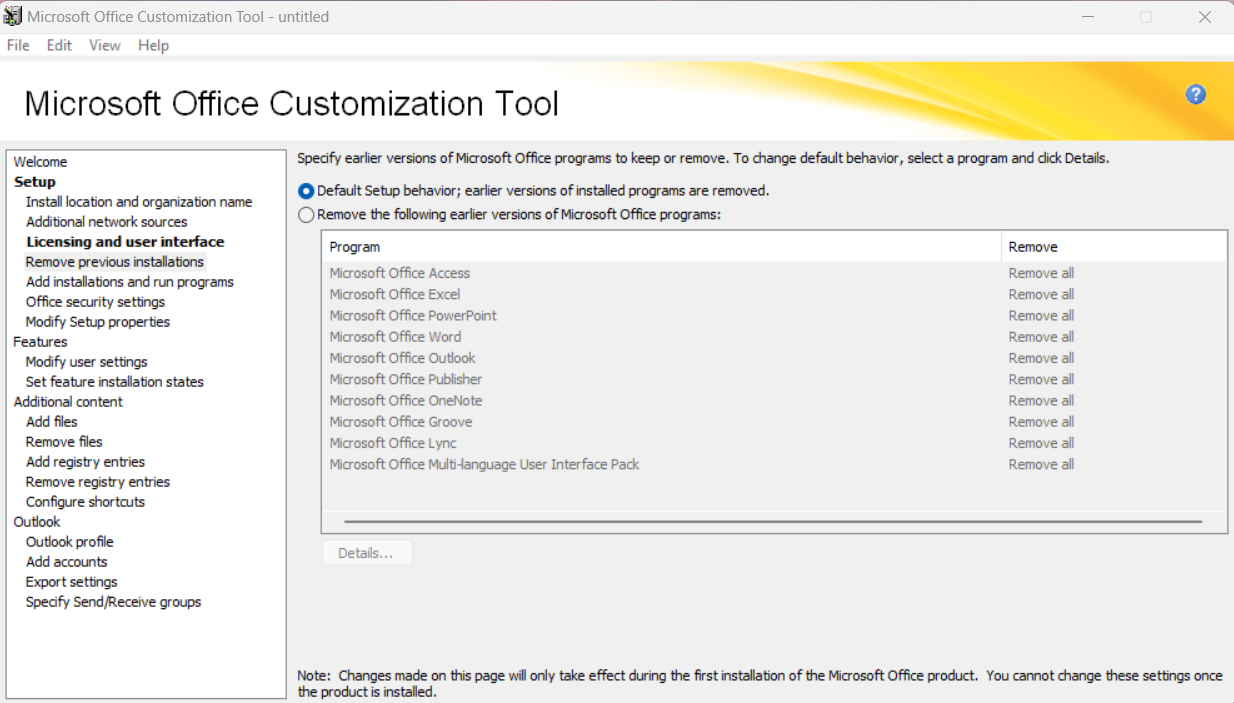
Note: The default setting is to remove all the older version. If you want to retain some of the office components select the Remove the following earlier versions of Microsoft Office programs option and choose the components that you want to retain.
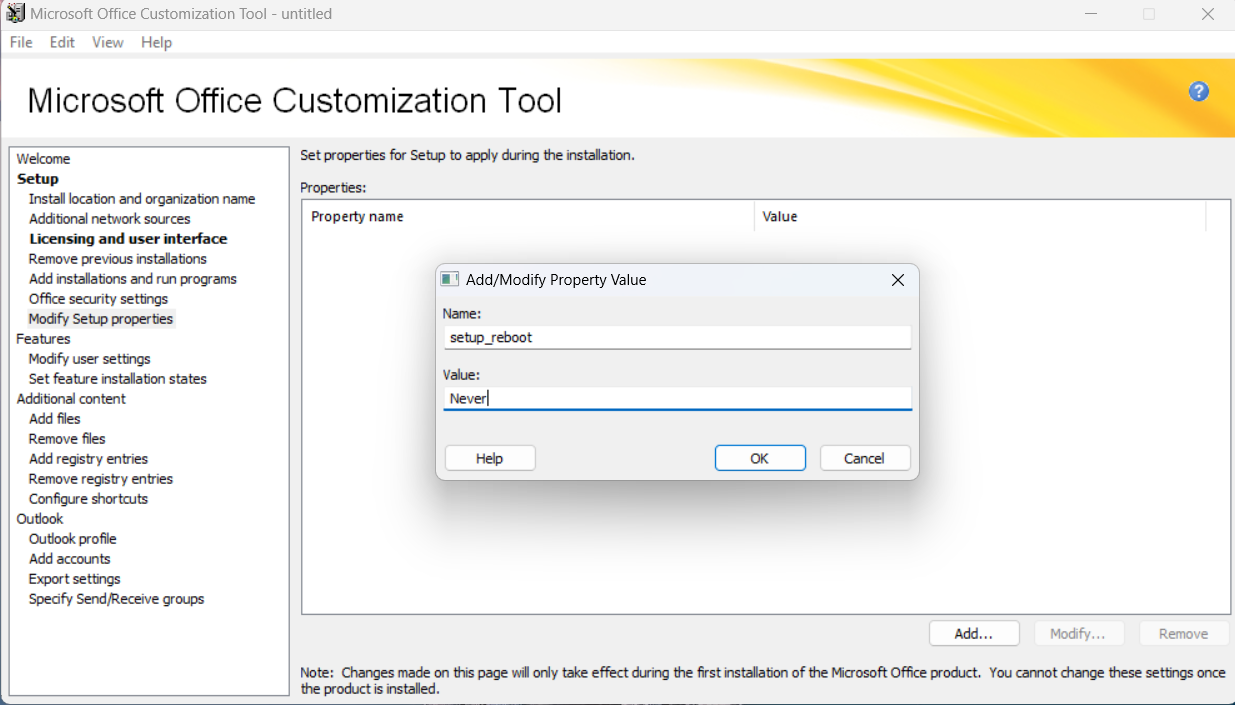
- Make the following settings if you do not want computers to reboot after installation:
Your computers will not be rebooted after installation.
- In the OCT, under Setup, click Modify Setup Properties
- Click Add
- In the Name field, enter
setup_reboot
- In the Value section, type Never
- Change the default language settings, if required, after installation. This is an optional step. To change the default language settings using OCTs, follow the steps given below:
- On the Modify User Settings page, expand the tree to Microsoft Office 2016\Language Preferences
- Open the folder that you want in the navigation pane
- Double-click the required setting in the right pane
- Select Enable and specify a value
- Save the customized file with a suitable name, after making the required customization changes. (for example, the name could be custom.msp)
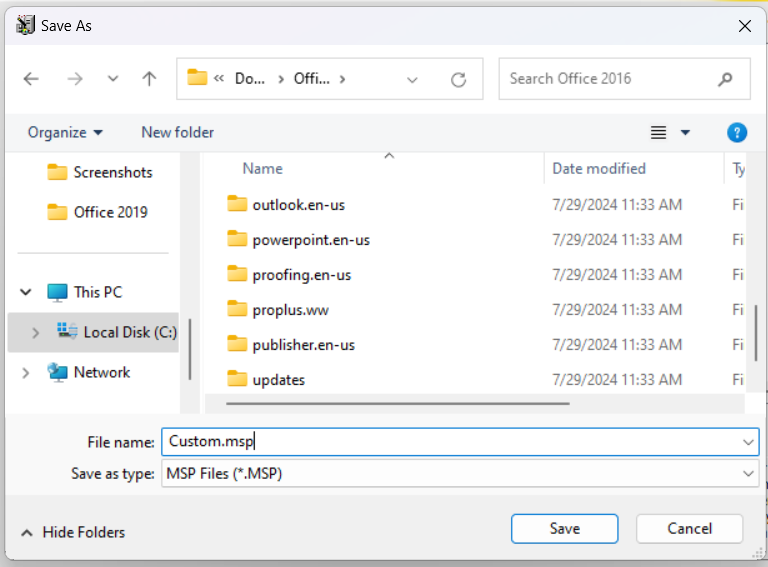
Note: This MSP file should also be saved in the same network share.
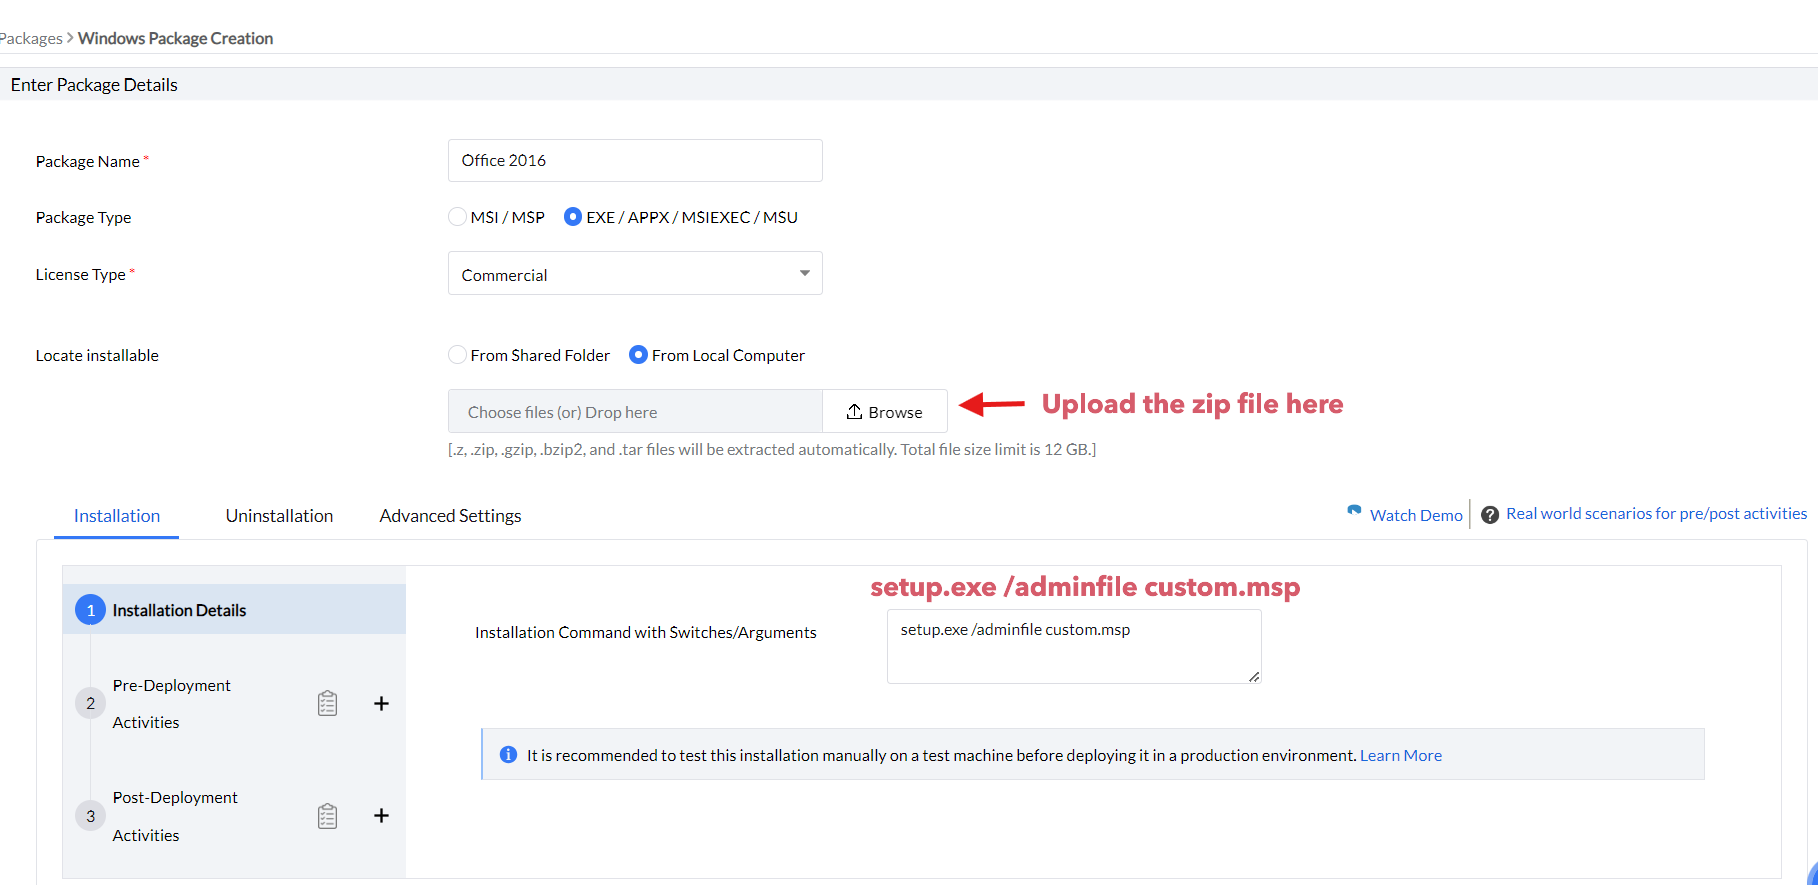
Add the software package
- Click the Software Deployment tab
- Click Add Package
- Select the EXE/APPX/MSIEXEC/MSU package type
- Specify a name for the application
| Content |
Share Path |
Http |
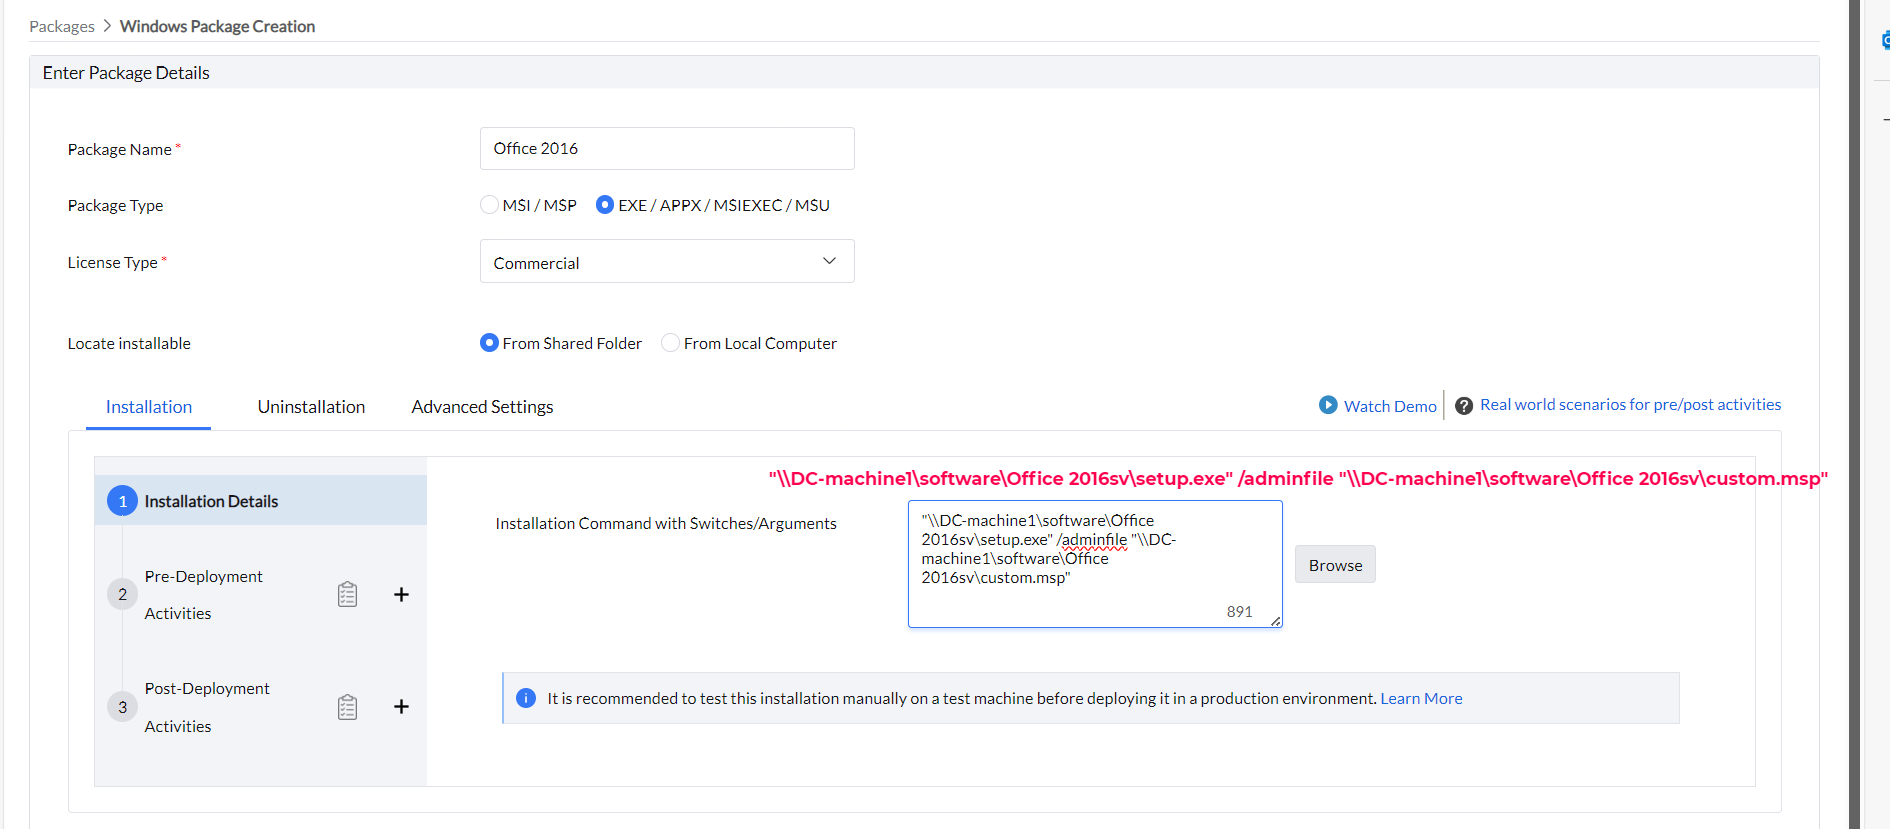
| Installation Command |
"<share_name>\setup.exe" /adminfile "<share_name>\<msp file name>"
|
setup.exe /adminfile custom.msp
|
| Example |
"\\DC-machine1\software\Office 2016sv\setup.exe" /adminfile "\\DC-machine1\software\Office 2016sv\custom.msp"
|
setup.exe /adminfile custom.msp
|
- Specify the Installation Command with Switches/Arguments as given in the table
- Click Add Package
Deploy to target computers
- Select the package that you added
- Click Install/Uninstall Software
- Enter a name and description for the configuration
- Define the package settings
- Configure the deployment settings
- Choose the target computers
- Specify the schedule options, if required
- Click Deploy
You have deployed Microsoft Office Professional Plus 2016.
Uninstallation Procedure
- During customising the xml, Open the SilentUninstallConfig.xml file from the location where the downloaded office setup has been saved or create an XML file with the name SilentUninstallConfig.xml and save it in the downloaded office setup folder.
- Edit the file as below :
<Configuration Product="ProPlus">
<Display Level="none" CompletionNotice="no" SuppressModal="yes" AcceptEula="yes" />
</Configuration>
- Select all the files and folders and zip/7z it all.
- Create the package as mentioned above and upload the created zip file in the package.
- Specify the Uninstallation Command with the Switches/Arguments as given below,
setup.exe /uninstall ProPlus /config SilentUninstallConfig.xml
- Click Add Package.
- Deploy to target computers
Note: If the office edition is standard, ProPlus will be replaced as Standard in both XML and in the uninstallation command.
