

To create an Automate Patch Deployment (APD) Task, go to Threats & Patches → Deployment → Automate Patch Deployment.
Under this section, click on Automate Task and select the Operating System where you want create an APD task. You can create separate tasks for Windows, Mac and Linux based computer groups according to your choice.
Automated Third-party Patch Deployment applies to:
Automated Deployment for Antivirus Updates and Feature Pack Deployment applies to:
Once you have chosen the Operating System, select the applications to patch using this APD task in the Select Applications section.
The window shown in the image will open in the Select Applications section if you choose to patch Windows OS computers.
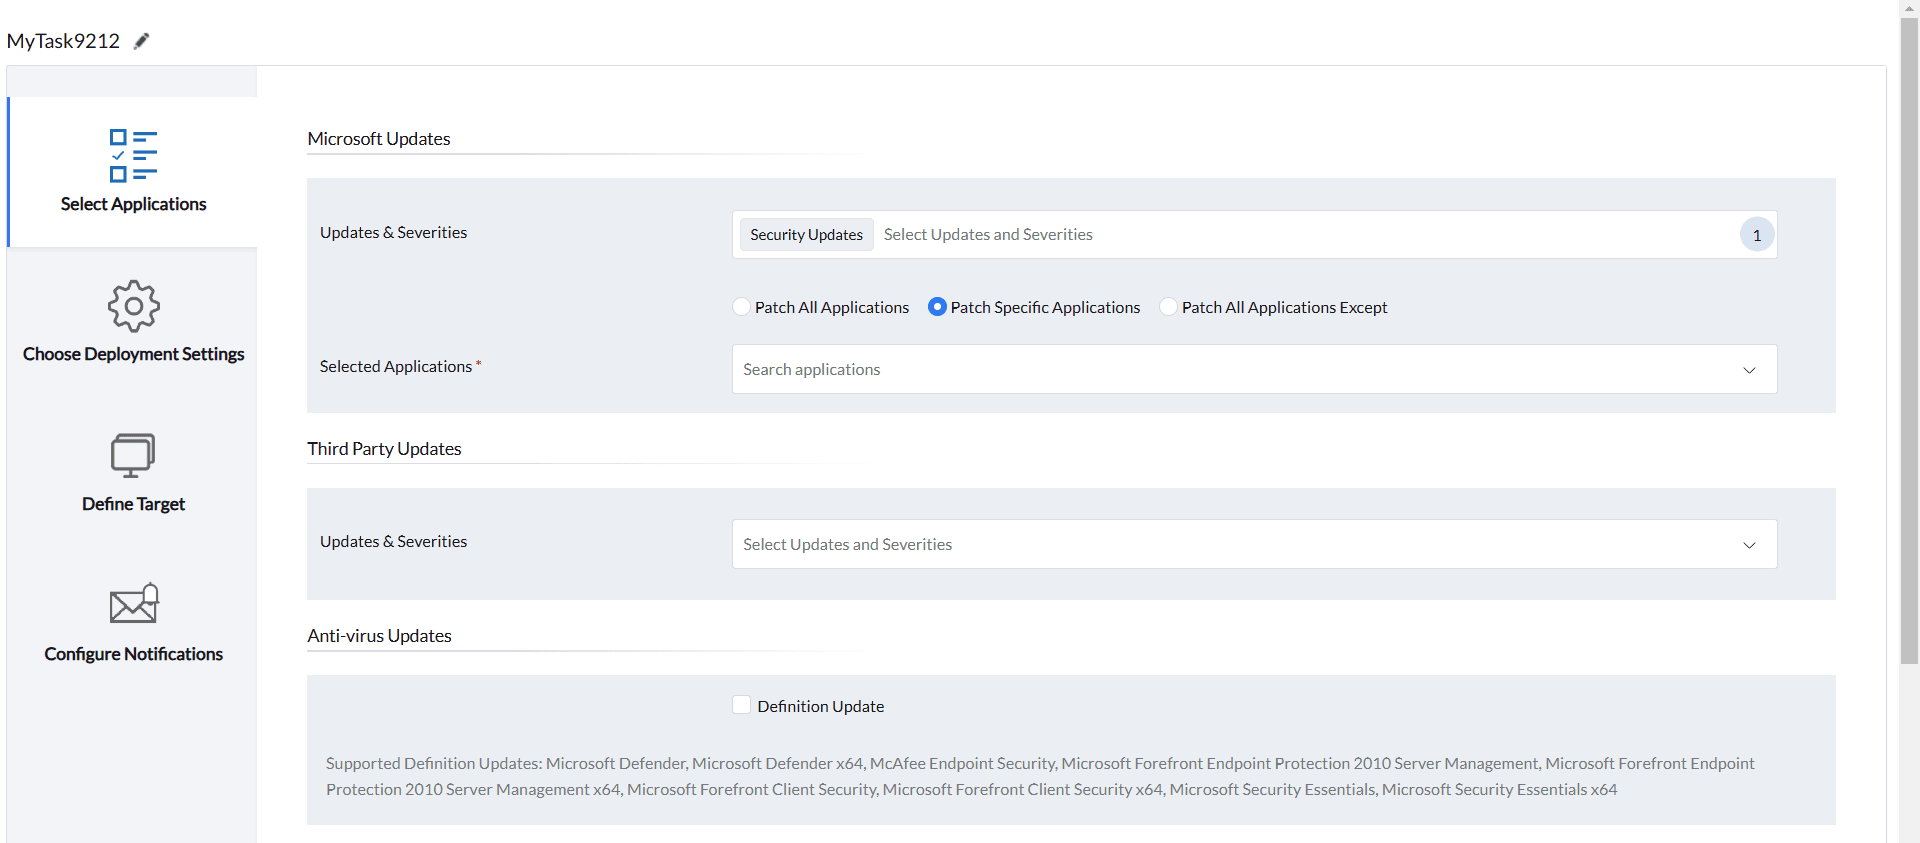
You can choose to automate Microsoft Updates based on Updates and Severities as shown in the image.

After selecting them, choose
Patch All Applications to automate the patching of all applications whenever patches with that severity and update type are released.
Patch Specific Applications to automate the patching of specific applications whenever patches with that severity and update type are released. Select those particular applications under Selected Applications section.
Patch All Applications Except to exclude specified applications and automate the patching of all other applications whenever patches with that severity and update type are released. Select the applications to exclude under the Selected Applications section.

Third Party Updates: You can choose to automate Third Party Updates based on Updates and Severities as shown in the image.

Similar to Microsoft Updates, you can also choose to Patch All Applications,Patch Specific Applications and Patch All Applications Except in this section.
Anti-Virus Updates: By enabling the checkbox present besides Definition Updates, you can choose to automate the anti-virus definition updates.
Supported Definition Updates include: Microsoft Defender, Microsoft Defender x64, McAfee Endpoint Security, Microsoft Forefront Endpoint Protection 2010 Server Management, Microsoft Forefront Endpoint Protection 2010 Server Management x64, Microsoft Forefront Client Security, Microsoft Forefront Client Security x64, Microsoft Security Essentials, Microsoft Security Essentials x64.
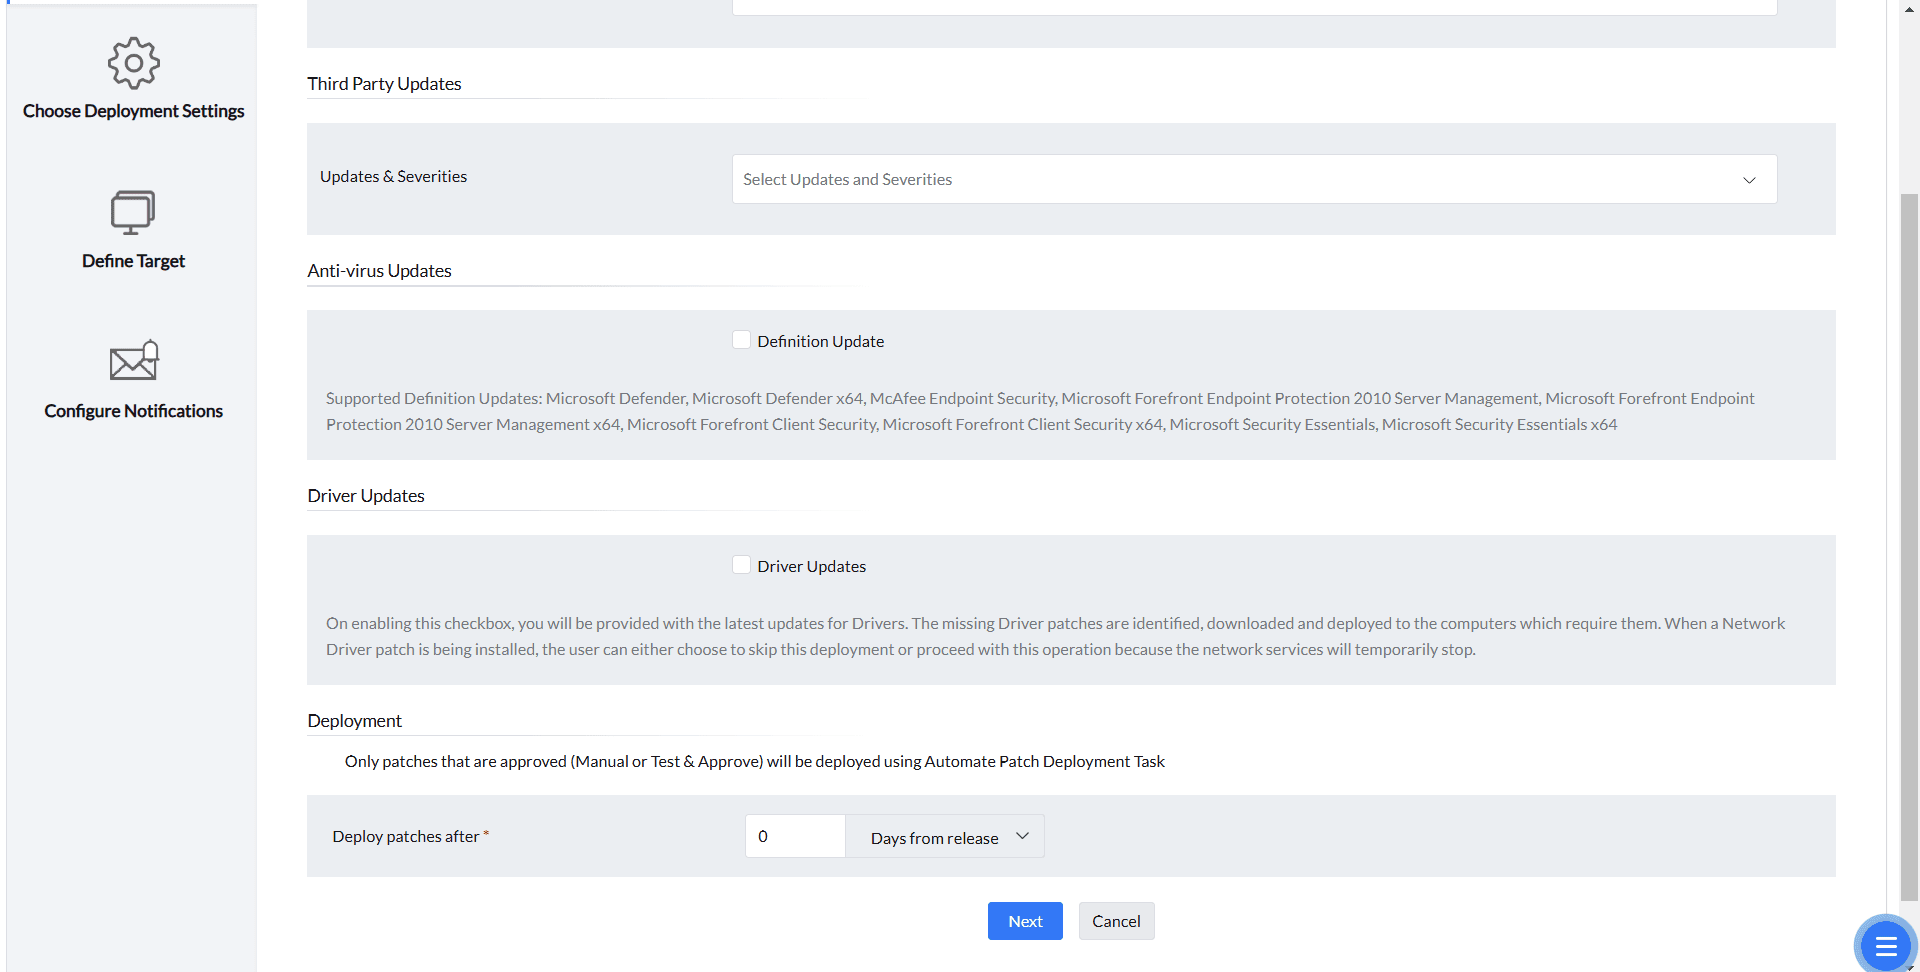
Driver Updates:To automate updating the device drivers, enable Driver Updates checkbox. To know the supported drivers for patching, refer to this page.
Deployment: Under this section, choose the specified number of days post their approval (only supported for Windows Operating Systems) or release after which you want to deploy these patches automatically under Deploy patches after section. Only patches that are approved manually or using the Test & Approve feature will be deployed.

After configuring all the settings, click on Next.
Once you have selected the applications, configure the deployment settings under this section.
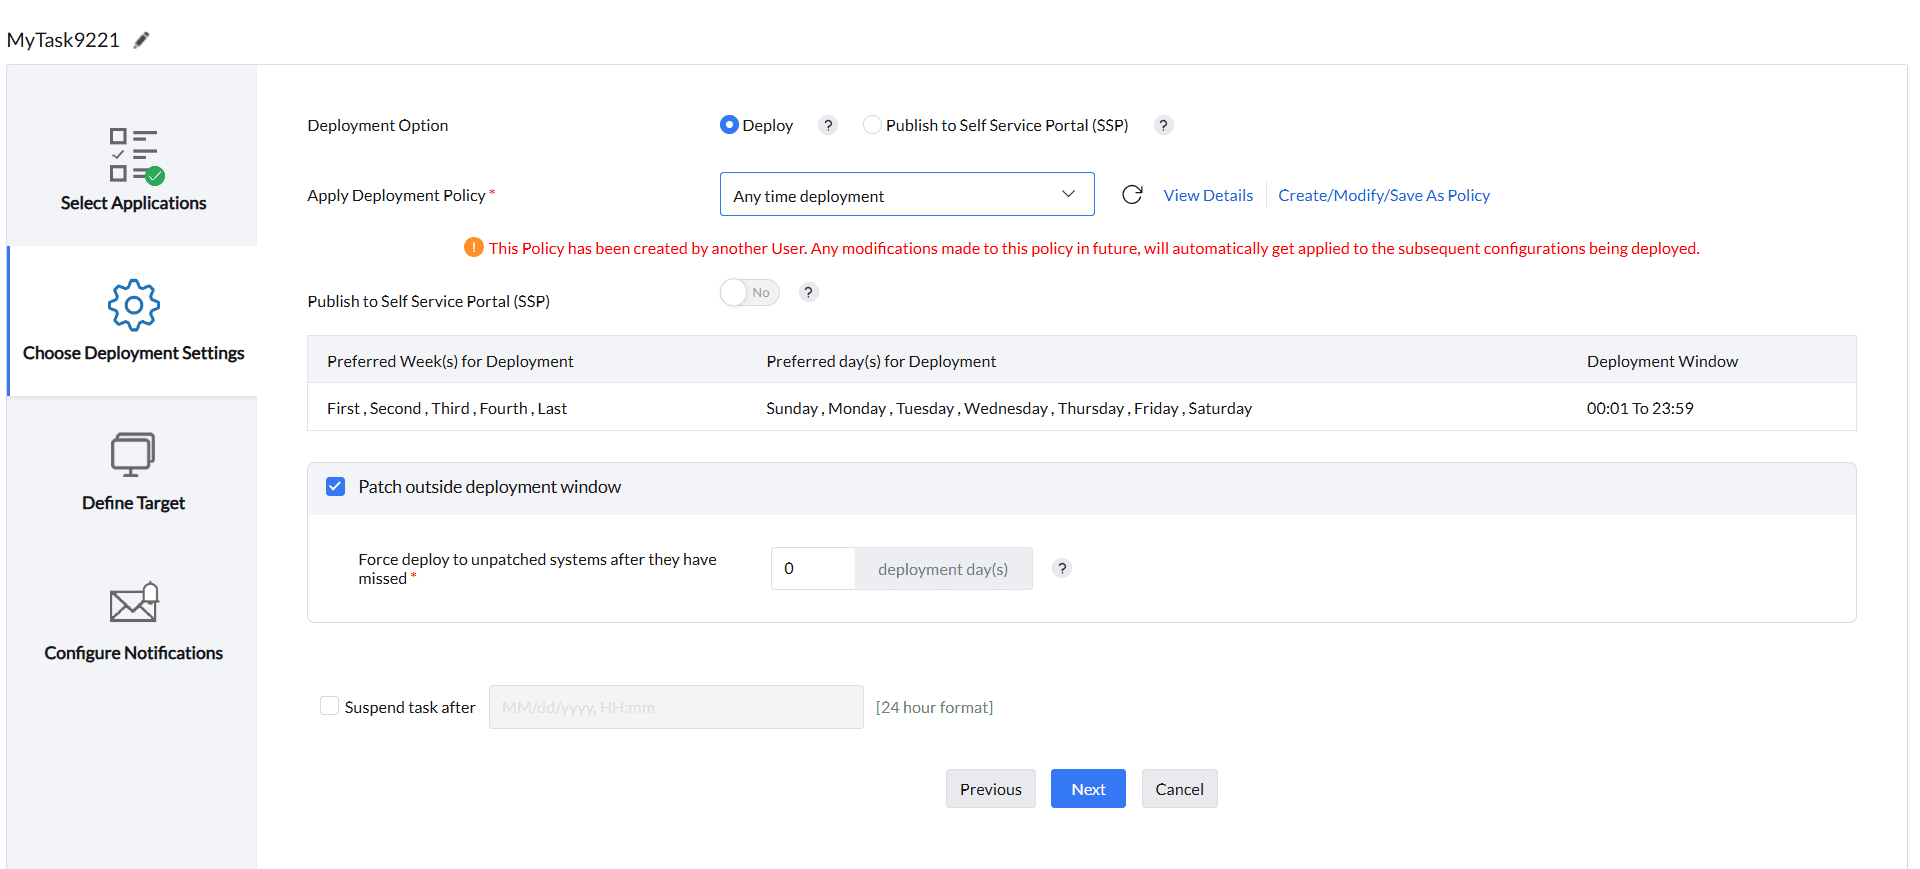
Under Deployment Option, choose Deploy if you want to automate deploying the patches as per a Deployment Policy.
But in large organizations, patching critical servers is crucial, but limited maintenance windows can lead to downtime and productivity loss. You cannot configure a Deployment Policy accordingly. In situations like this, Choose Publish to Self Service Portal (SSP) . The Self Service Portal simplifies patch deployment by letting admins publish updates for users and server owners to install as needed. For servers requiring continuous uptime, you need to schedule patching during planned downtime, for minimizing disruptions. To lean more about Self Service Portal, refer to this page.
If you have selected Deploy,
Choose a customized Deployment Policy as per your enterprise requirements under Apply Deployment Policy option. To learn more about configuring Deployment Policies, refer to this page.
After choosing the deployment policy, select yes or no for Publish to Self Service Portal (SSP). If yes, patches can be scheduled for deployment and pushed to SSP simultaneously, offering flexibility in installation.
After choosing the Deployment Policy, you can also see the Preferred Week(s) for Deployment, Preferred day(s) for Deployment and Deployment Window listed in the table as per the selected policy.
If a user in your Domain continuously skips the patch installation of an application during the deployment window as he/she is working on a critical business task using that application, but you want Domain computers to be up-to-date, enabling the Patch outside deployment window option will be useful. You can set a specified number of days under this option as a grace period, after which force deployment will be initiated for systems that missed patching in the deployment schedule.
If you wish to suspend this APD task after a specific period, enable the checkbox in Suspend After and specify the date and time. This is useful when existing automated patching of server machines needs to be stopped due to changes in scheduled downtime. In such cases, this APD task can be suspended, and you can create a new APD task based on the new server downtime.
After configuring all the settings, click on Next.
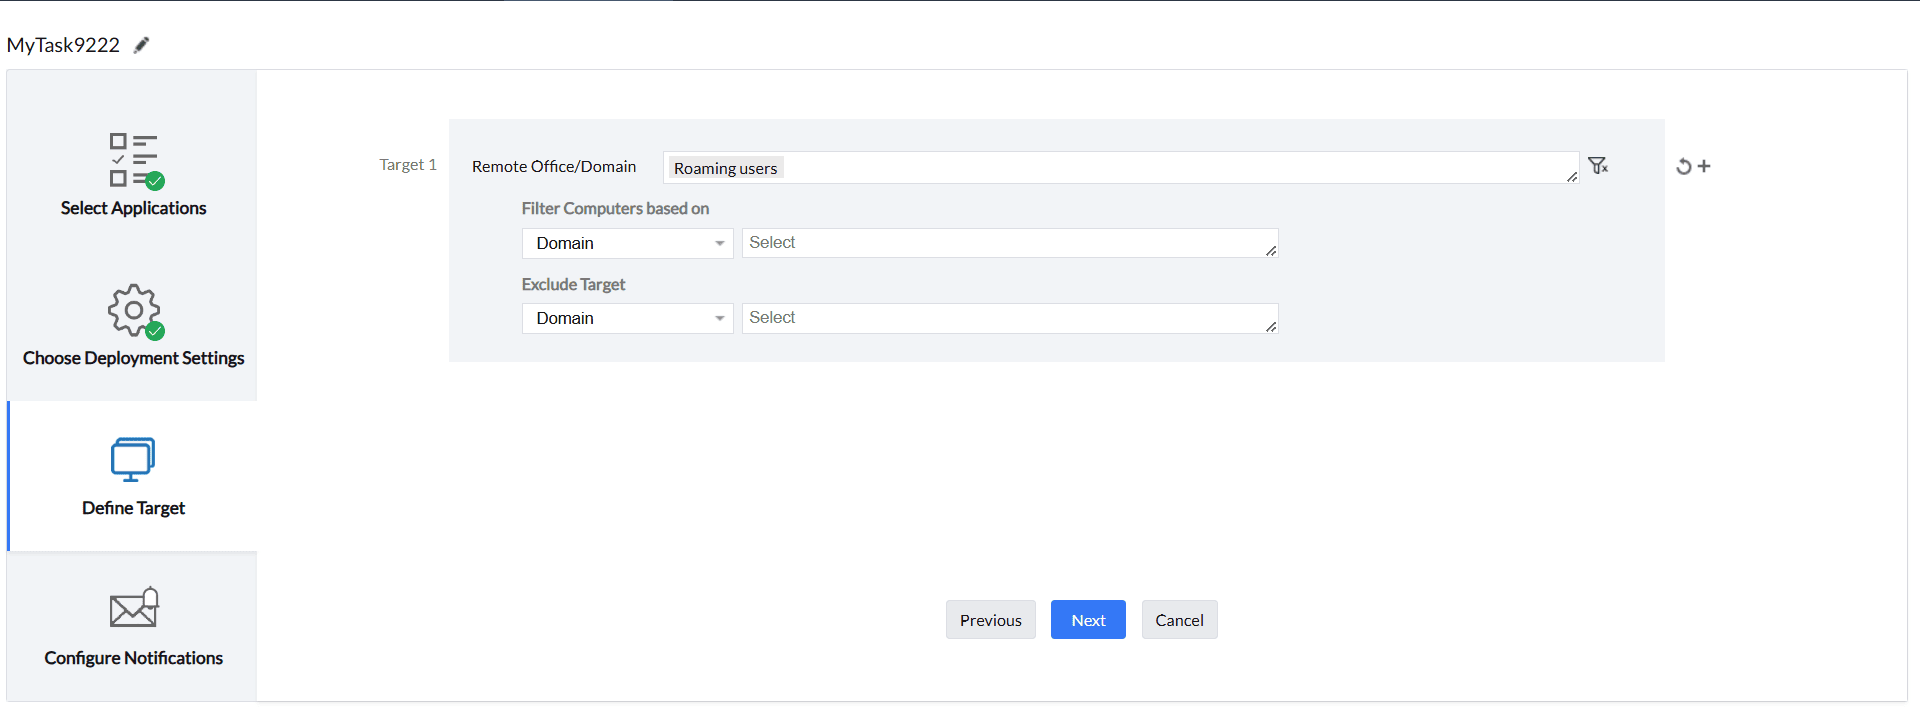
After choosing the deployment settings, you can choose to include or exclude target computers of your choice under the Define Target section, as shown in the above image. To learn more about Defining Targets, refer to this page.
After choosing the targets, click on Next to configure notifications about this APD task.
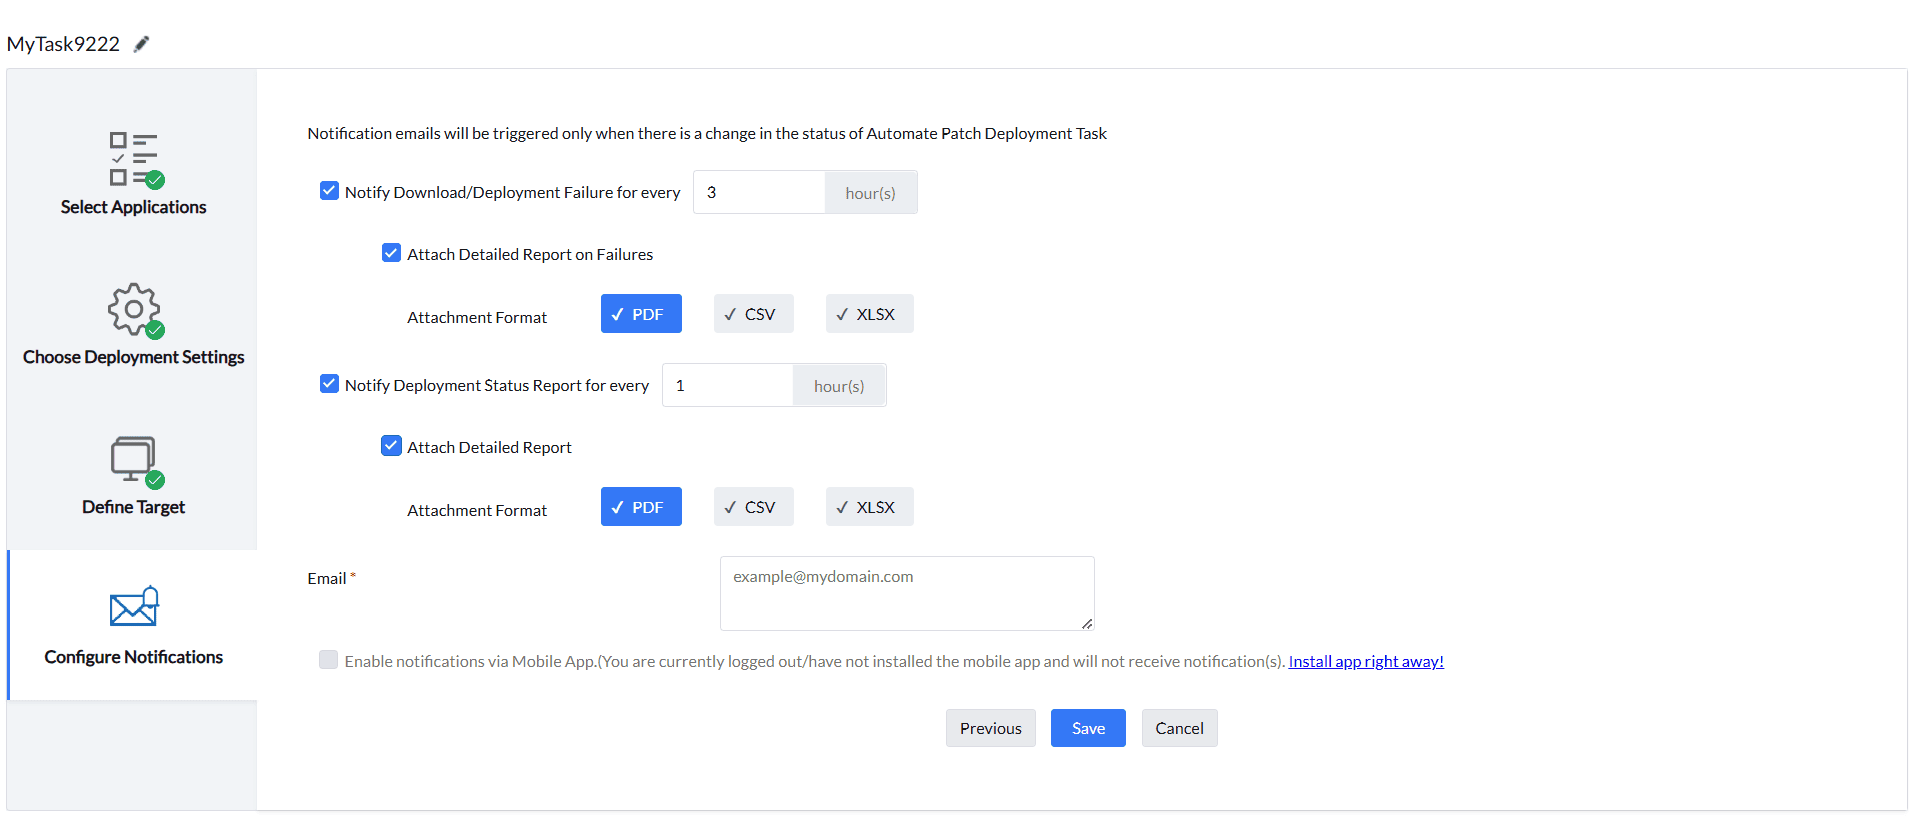
To receive the email notifications for:
If you wish to receive detailed report on the above, enable Attach Report in those respective option and choose the Attachment Format; PDF ,CSV, XLSX according to your choice.
Mention the email to receive notifications under E-mail section.
If you have configured the Mobile App and wish to receive notifications in your mobile, enable the checkbox for the option: Enable notification via Mobile App.
Having configured the notification settings for this APD task, click on Save. An APD task is created and the patches for the chosen applications will be automatically deployed as per your chosen policy in the chosen computer targets, with periodic notifications about the activity being sent to the mentioned E-mail.
If you have any further questions, please refer to our Frequently Asked Questions section for more information.