Free Trial

Migrating to a New Server Machine with Updated Network Configurations

This guide outlines the steps required to migrate your Central Server to a new machine with a different FQDN, IP address, or machine name. By following these instructions, you will ensure that your agents continue to communicate with the new server seamlessly.

Pre-requisites Before Server Migration

  • Ensure that all necessary ports for agent communication with the new server are open. Refer to the port requirements.
  • If your data size is large, follow the cleanup document to remove unnecessary files from the Central Server directory.
  • Verify that there is enough space available in the new directory for the Central Server installation.
  • After migrating to a new FQDN/IP address, verify the NAT settings. If they have changed, re-enrollment of mobile devices may be required.
  • Update the FQDN/IP details on the SAN/CN list of the SSL certificate or use a new SSL certificate with updated details.
  • For OS deployment post-migration, create new bootable media or modify existing media and update the DHCP Server configuration.

Steps to Perform on the Current Central Server Setup

  1. In the web console, navigate to Admin > Server Settings > Central Server Migration.
  2. Central Server Migration option in Admin settings
  3. Select the migration method: Change in FQDN and IP Address. Enter the network details of the new server.
  4. Selecting FQDN/IP method for Central Server migration
  5. Download the Server Migration Guide and follow the 'Steps to Ensure' before initiating migration.
  6. Run the following command in Command Prompt (as administrator) on your old installation:
    server-migration.bat enable
    Example: C:\Program Files\UEMS_Central Server\bin\server-migration.bat enable
  7. Executing Central Server migration script
  8. Zip the entire Central Server installation directory (e.g., UEMS_Central Server) and transfer UEMS_CentralServer.zip to the new computer.
  9. Zipping and transferring the Central Server installation directory

Steps to Perform on the New Central Server Setup

  1. Extract UEMS_CentralServer.zip on the new server to the desired location.
  2. Navigate to 
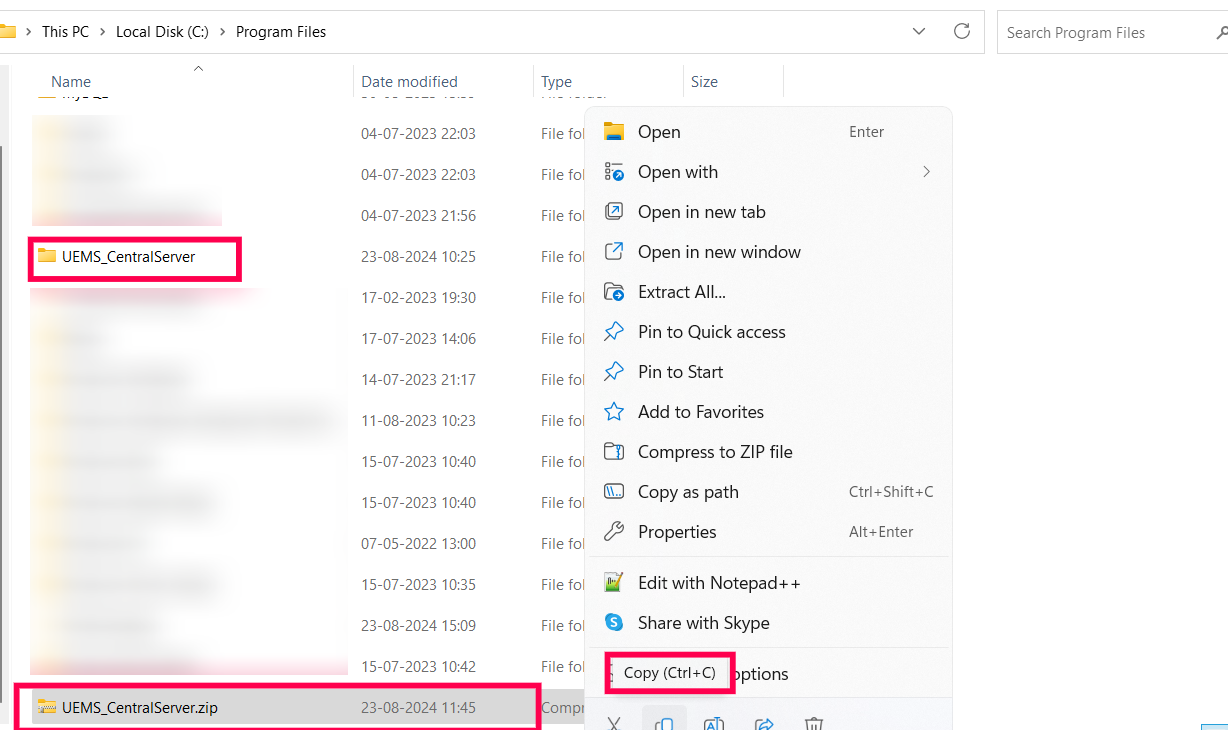
<extracted_location>\conf and delete the ws.modtime file.
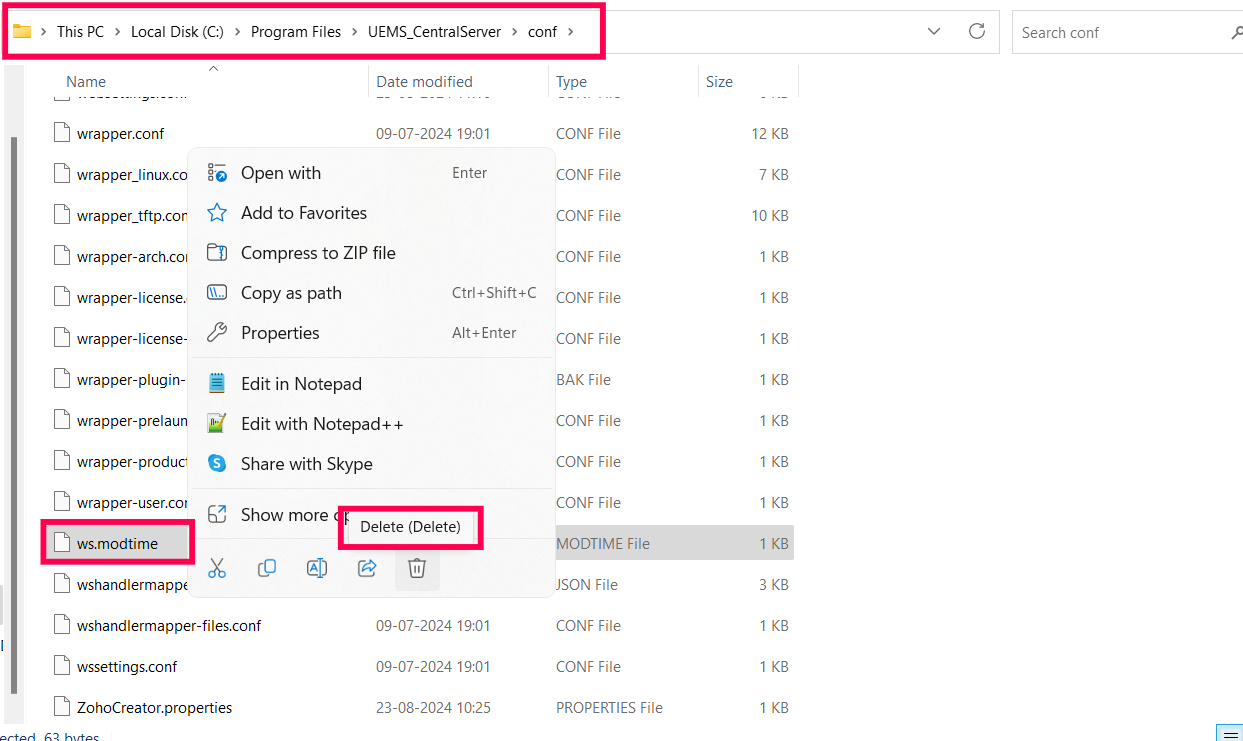
  3. Deleting ws.modtime file after extracting Central Server directory
  4. Run the following command in Command Prompt (as administrator) from the extracted location:
    Migrate-DCServer.bat
    Example: C:\ManageEngine\UEMS_CentralServer\bin\Migrate-DCServer.bat
  5. Executing Migrate-DCServer script for finalizing migration
  6. After migration, start the Central Server service. Agents will contact the new server during their next refresh cycle.

Post-Migration Steps

Verify Successful Migration:

  • Confirm that only the nginX component is running on the old server. If you try accessing the old server console (e.g., https://oldservername:8383), it should redirect to the new server.
  • Ensure the new server has started successfully.

Verify Agent Communication:

  • Navigate to Admin > SOM Settings > Scope of Management > Computers.
  • Filter by "Last Contact Time" to confirm agent communication after the new server startup.
Verifying agent communication after Central Server migration

Steps to Reconfigure the Secure Gateway Server

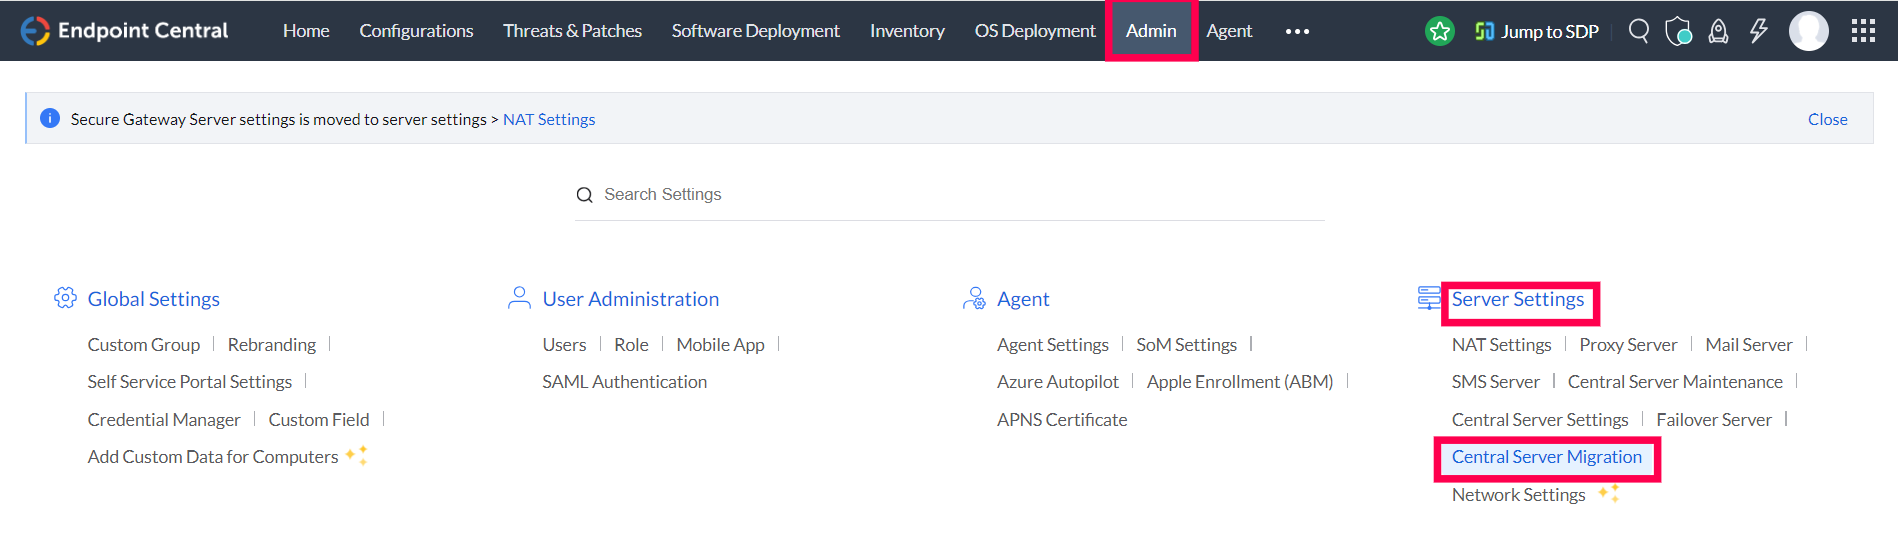
If you have a secure gateway server, update the new server machine name and IP address in the secure gateway server settings. Learn more.

Frequently Asked Questions

  • When should I remove the old setup? Keep the old setup until all agents have migrated to the new server. Once all agents are communicating with the new server, you can uninstall the old server.
  • Do I need to reapply the server license? No, the license remains valid after migration.
Migration Assistance Service

Need Assistance? Try Our Professional Service

We offer a professional service to migrate your Server and Data for $295. Register here if you’re interested.

Was this article helpful?

Thank you for your feedback!

Sorry about that!

By clicking "Submit", you agree to processing of personal data according to thePrivacy Policy.
Back to Top