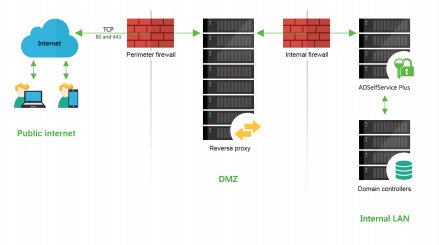
Before jumping into the configuration steps, let's talk about what a reverse proxy is. In computer networks, a reverse proxy is a type of proxy server that retrieves resources on behalf of a client (user) from one or more servers (ADSelfService Plus). These resources are then returned to the client as though they originated from the reverse proxy itself. A reverse proxy is used as a strategic point in the network to enforce web application security.
AD360 is an integrated identity and access management (IAM) solution for managing user identities, governing access to resources, enforcing security, and ensuring compliance. You can integrate ADSelfService Plus with AD360 to unlock many useful features, including a reverse proxy.
Once you set up reverse proxy through AD360, requests from clients (users) are received by the reverse proxy server (AD360) in the DMZ. The reverse proxy server then forwards those requests to the ADSelfService Plus server in the LAN (or, if needed, can be placed in the DMZ). External machines never make a direct connection to the ADSelfService Plus server. Your firewall will only permit the proxy server to access the ADSelfService Plus server and only through the required port.

Enter the reverse proxy server's IP address in the server.xml file under the installation directory using these steps:
<!--Valve className="org.apache.catalina.valves.RemoteIpValve"
remoteIpHeader="x-forwarded-for" proxiesHeader="x-forwarded-by"
requestAttributesEnabled="true"
internalProxies="127\.0\.0\.1|0\:0\:0\:0\:0\:0\:0\:1"/-->
<Valve className="org.apache.catalina.valves.RemoteIpValve"
remoteIpHeader="x-forwarded-for" proxiesHeader="x-forwarded-by"
requestAttributesEnabled="true" internalProxies="<IP_address >"/>
Follow the steps below to set up a reverse proxy server for ADSelfService Plus using ManageEngine AD360.
Once you have integrated ADSelfService Plus with AD360, you an enable a context-based reverse proxy or a port-based reverse proxy or both.
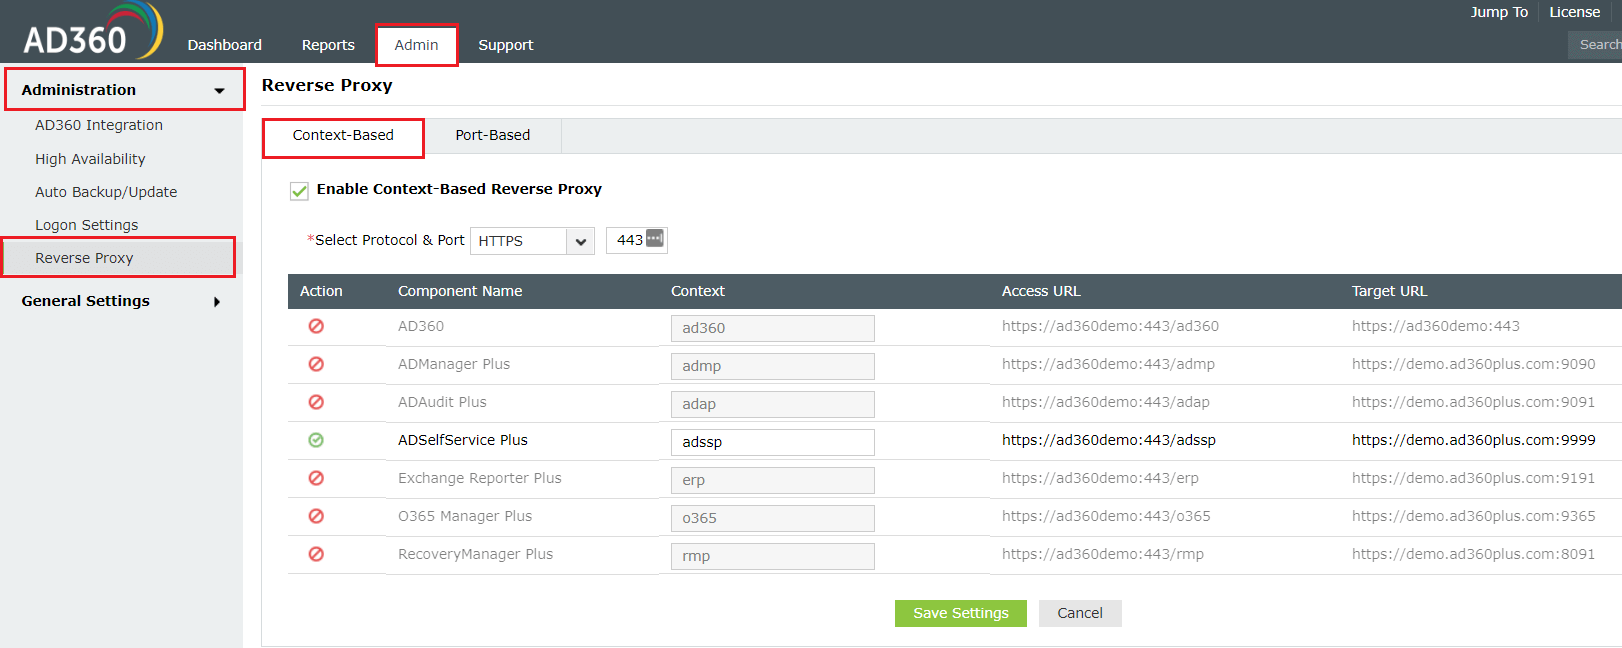
In a context-based reverse proxy, the URL of ADSelfService Plus is given a unique context path. Whenever a user requests access, it's first forwarded to the AD360 server, which then forwards the request to the ADSelfService Plus server based on the context path in the URL. The end user will not know the details of the ADSelfService Plus server.
Follow the steps given below to enable a context-based reverse proxy:

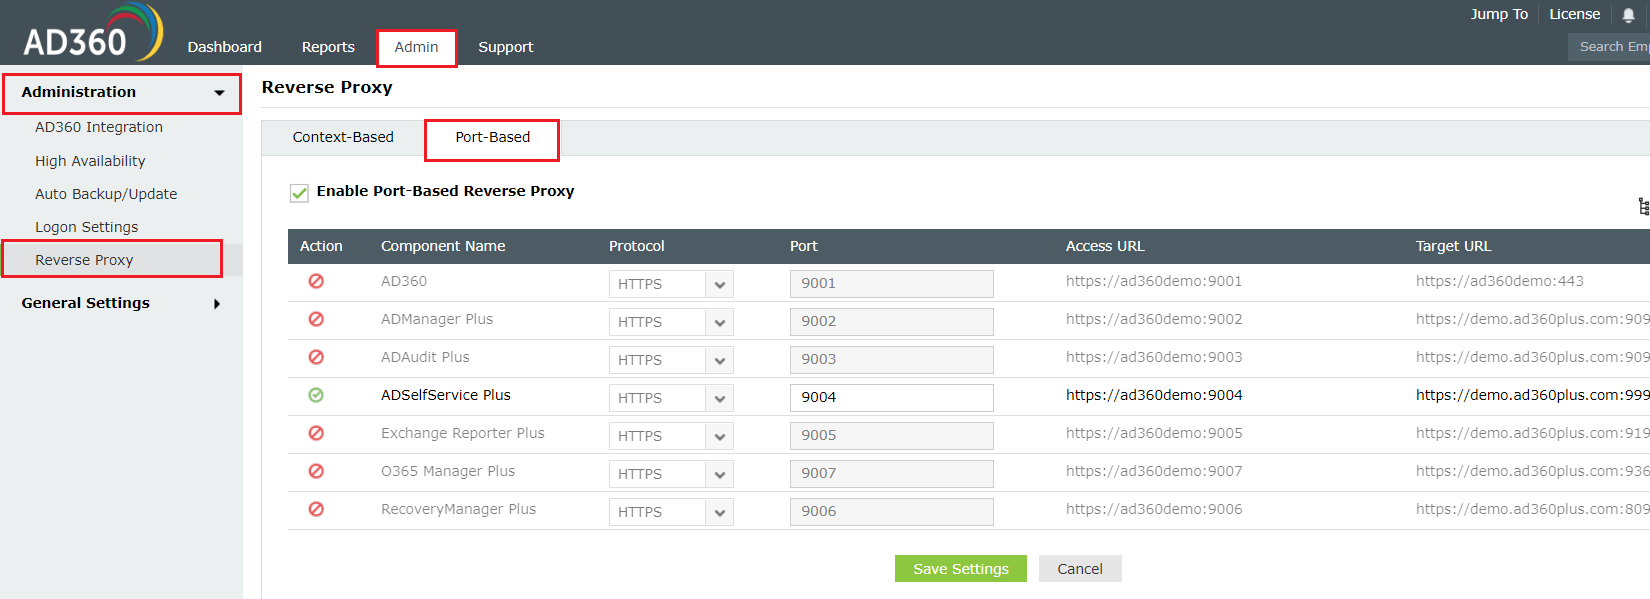
To enable a port-based reverse proxy, you need to choose a unique port number and protocol for ADSelfService Plus. In this case, a unique port number for the ADSelfService Plus server is mandatory whereas specifying the unique protocol is optional. The hostname remains the same. The AD360 server will forward user requests to the ADSelfService Plus server based on the port number in the URL and the protocol.
Follow the steps given below to enable a port-based reverse proxy:

The setup for reverse proxy to ADSelfService Plus server using ManageEngine AD360 is now complete.
Important: Once you enable a reverse proxy, please update the Access URL settings in ADSelfService Plus by navigating to Admin → Product Settings → Connection and clicking Configure Access URL.
Your request has been submitted to the ADSelfService Plus technical support team. Our technical support people will assist you at the earliest.
Copyright © 2025, ZOHO Corp. All Rights Reserved.