ADSelfService Plus in action
How to reset forgotten Windows passwords from the login screen using ADSelfService Plus
Empowering users with a Windows password reset tool
According to recent research, organizations are spending close to one million dollars annually on resolving password-related tickets. This isn’t that surprising, as the Microsoft-approved methods to reset forgotten Windows passwords come with prerequisites like creating a password reset disk or having a Microsoft email account.
ADSelfService Plus allows users to easily reset Windows Active Directory (AD) domain passwords, including on Windows 10, after proving their identity through any of the supported authentication techniques.
Supports: Windows 10, 8, 7, XP, and Vista | Windows Server 2008 and above
Self-service password reset for Windows: How does it work?
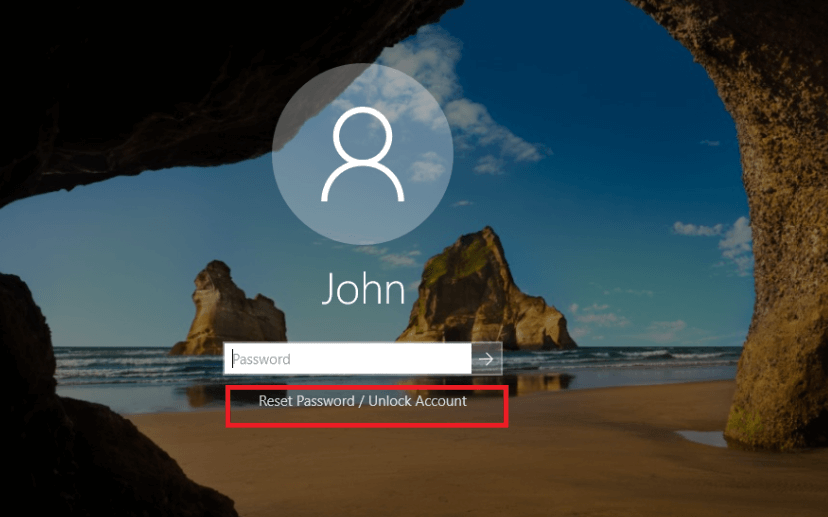
- ADSelfService Plus places a Reset Password/Account Unlock link (logon agent) on the login screen of Windows machines.
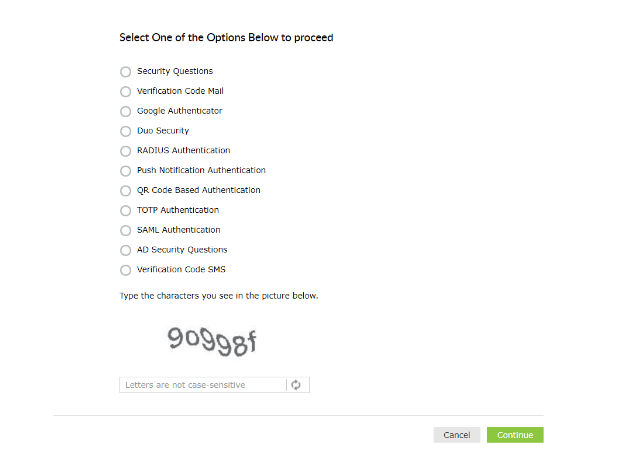
- Clicking this link will open the password reset portal. Users are required to prove their identity through any of the enforced authentication methods, like SMS-based one-time passwords (OTPs), email-based OTPs, Google Authenticator, DUO Security and RSA SecurID.
Note:
- Users must be enrolled in ADSelfService Plus to utilize the self-service password reset and self-service account unlock capabilities.
- Enrollment is a one-time process where users enter their mobile number and email address, set answers to security questions, and provide other details in ADSelfService Plus in order to register for self-service password management. Learn how to enroll users.
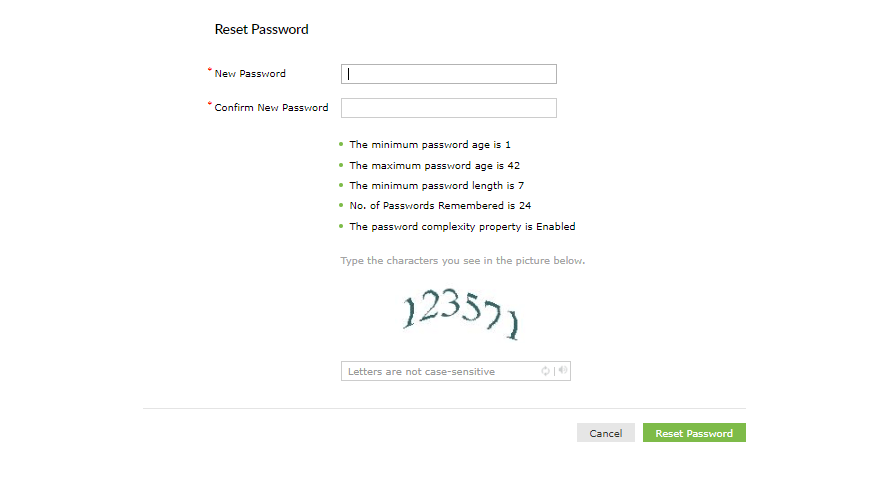
- Once a user’s identity is successfully verified, they will be allowed to reset their Windows AD domain password.
Tip: Ensure password security. Use the Password Policy Enforcer to enforce strong user passwords by including special characters and blacklisting dictionary words and patterns.
Installing the ADSelfService Plus logon agent on users' machines
Before users can reset passwords from their Windows login screen, admins have to deploy the logon agent on users’ machines in the following ways:
- 1. From the ADSelfService Plus admin console
- Download and install ADSelfService Plus.
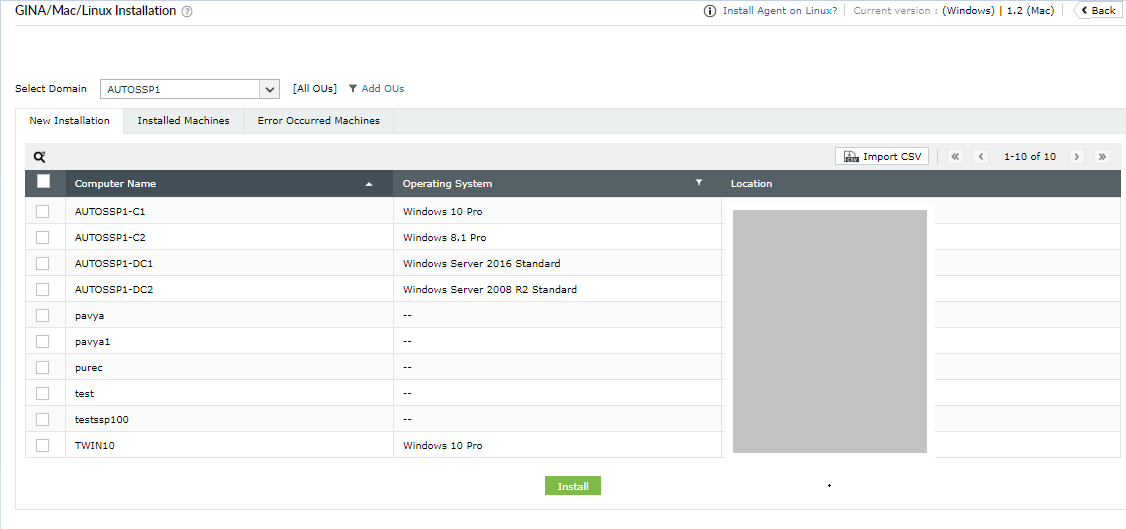
- Navigate to the Configuration tab → Administrative Tools → GINA/Mac/Linux.
- Click GINA/Mac/Linux Installation.
- In the New Installations section, choose the required Domain from the drop-down.
- Click Add OUs to select the OUs for which the logon agent can be installed. Click Get Computers.
- Now, select the computers to which the logon agent needs to be pushed.
- Click Install.
- 2. Installation via GPO
Click here for the installation steps
- 3. Installation via SCCM
Click here for the installation steps.
- 4. Manual installation
- Paste the MSI package (Location: C:\Program Files\ManageEngine\ADSelfService Plus\bin) in the client machine.
- Begin the Client Software Setup Wizard and complete the required steps.
Facilitate SSPR right from the Windows login screen for local/remote users.
Thanks!
Your download is in progress and it will be completed in just a few seconds!
If you face any issues, download manually here


