How to configure custom SMS provider in ADSelfService Plus?
ADSelfService Plus lets you use any one of the following methods to send an SMS:
- GSM modem
- Clickatell (built-in support)
- Custom SMS gateway
Configuring custom SMS gateway:
You can configure a custom SMS gateway to send notifications and verification codes via SMS. ADSelfService Plus also extends support to both HTTP and SMTP-based SMS gateways.
HTTP-based custom SMS gateway:
Follow these steps for ADSelfService Plus to use an HTTP-based custom SMS gateway:
- Log in to ADSelfService Plus with admin credentials.
- Go to Admin → Product Settings → Mail / SMS Settings
- Click SMS Settings tab. From the SMS Provider drop-down, select Custom.
- Select HTTP from the Send SMS via drop down box.
- Select either of the available HTTP methods. That is, Post or Get.
- Enter the HTTTP URL of your SMS gateway provider.
- Specify the HTTP Parameters specific to your SMS provider, the user's mobile number, and the message to be sent.
Note:
- Separate the HTTP parameters with an ampersand (&) sign. Example format: userName=xxx&password=yyy&mobileNumber=%mobNo%&message=%message%.
- xxx = API authentication username.
- yyy = API authentication password.
- %mobNo% = this macro denotes the user's mobile number.
- %message% = this macro denotes the SMS message content.
- More HTTP Parameters - If you SMS provider requires more parameters like unicode and apiID, include them as well using the '&' sign.
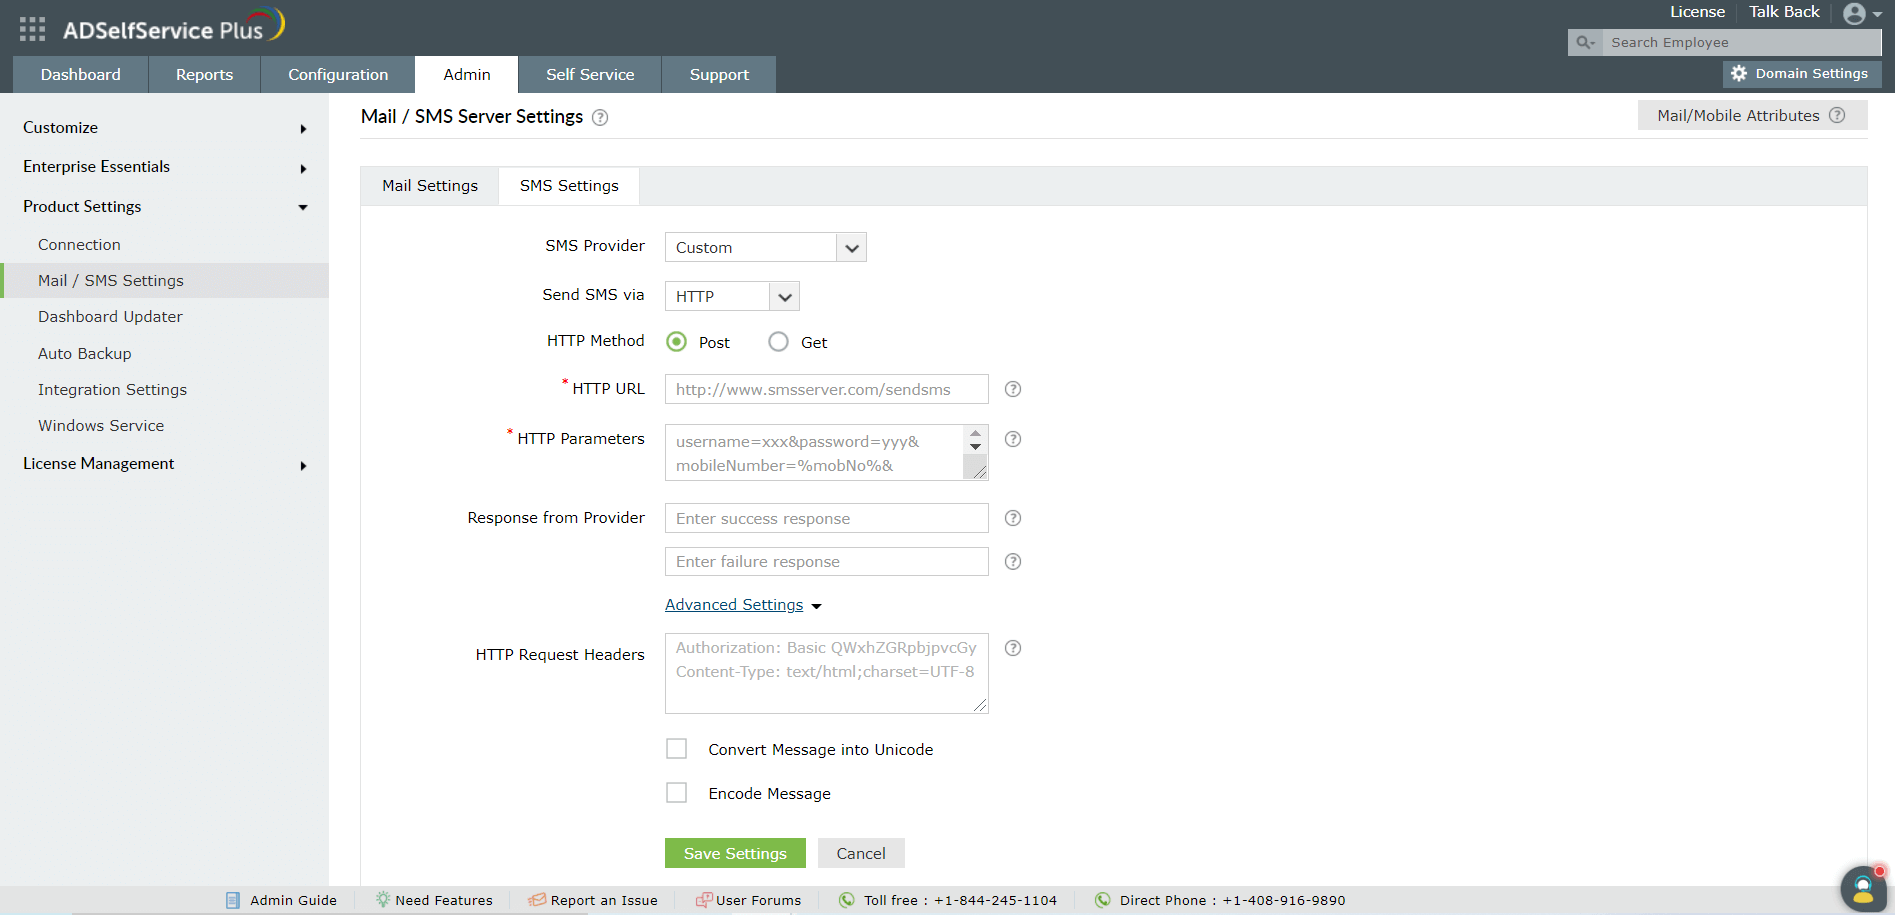
- Specify the Success and Failure response from the provider.
- Enter the HTTP Request Headers specific to your SMS provider.
- If the SMS provider expects unicoded or encoded messages, select Convert Message into Unicode or Encode message respectively.
- Click Save Settings.
SMTP-based SMS gateway:
Follow these steps for ADSelfService Plus to use an SMTP-based custom SMS gateway:
- Log in to ADSelfService Plus with admin credentials.
- Go to Admin → Product Settings → Mail / SMS Settings
- Click SMS Settings tab. From the SMS Provider drop-down, select Custom.
- Select SMTP from the Send SMS via drop down box.
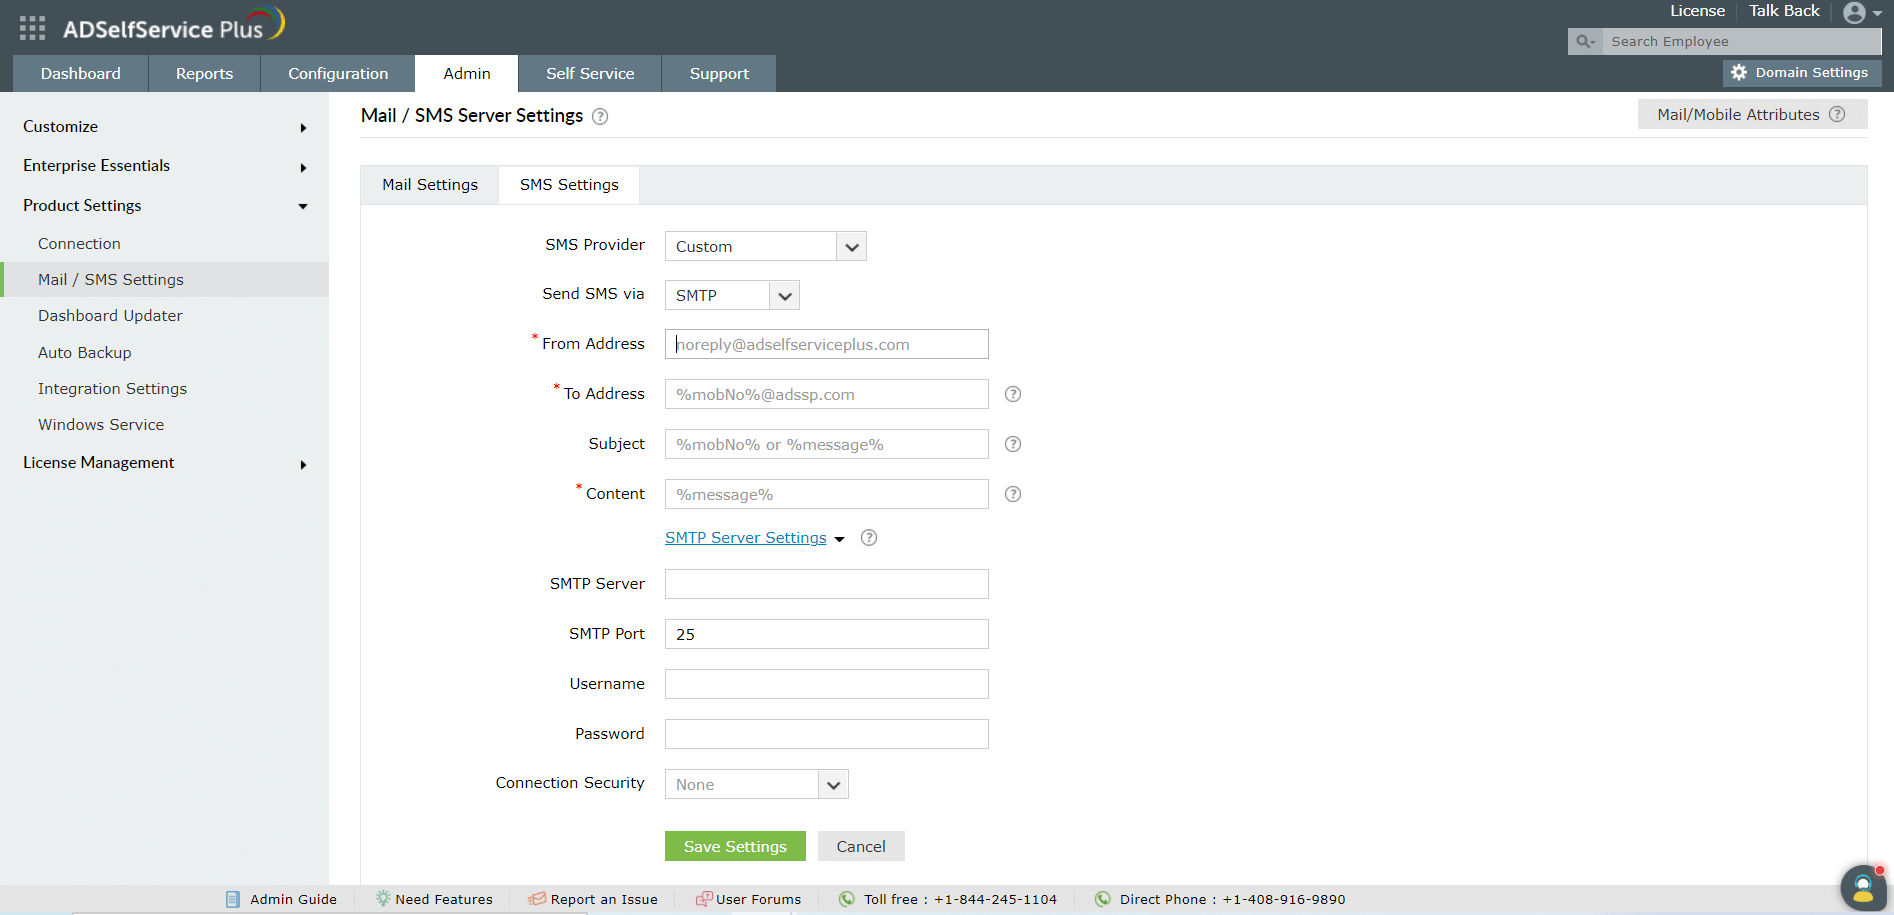
- Enter the email address the SMS will be sent in the From Address field.
- Specify the mobile number macro (%mobNo) followed by the email address of the SMS provider in the To Address field. For example, %mobNo%@clickatell.com. For more details, contact your SMS provider.
- Provide the required Subject. Generally, it is either the mobile number or the message, depending on your SMS provider.
- Specify the Content to be sent
- Click SMTP Server Settings.
- Enter the name or the IP address of the SMTP Server, and the SMTP Server port.
- Provide the Username and Password with required permissions on the SMTP server.
- Select Connection Security from the drop-down, and click Save Settings.
Note: If the SMTP server is not configured, the mail server configured under the Mail Settings tab will be used.
SMPP-based SMS gateway
Follow these steps for ADSelfService Plus to use an SMPP-based custom SMS gateway:
- Log in to ADSelfService Plus with admin credentials.
- Go to Admin → Product Settings → Mail / SMS Settings
- Click SMS Settings tab. From the SMS Provider drop-down, select Custom.
- Select SMPP from the Send SMS via drop down box.
- Enter the SMPP Server Name and SMPP Server Port number.
- Specify the User Name and Password with required permissions on the SMPP server. Click Advanced Settings.
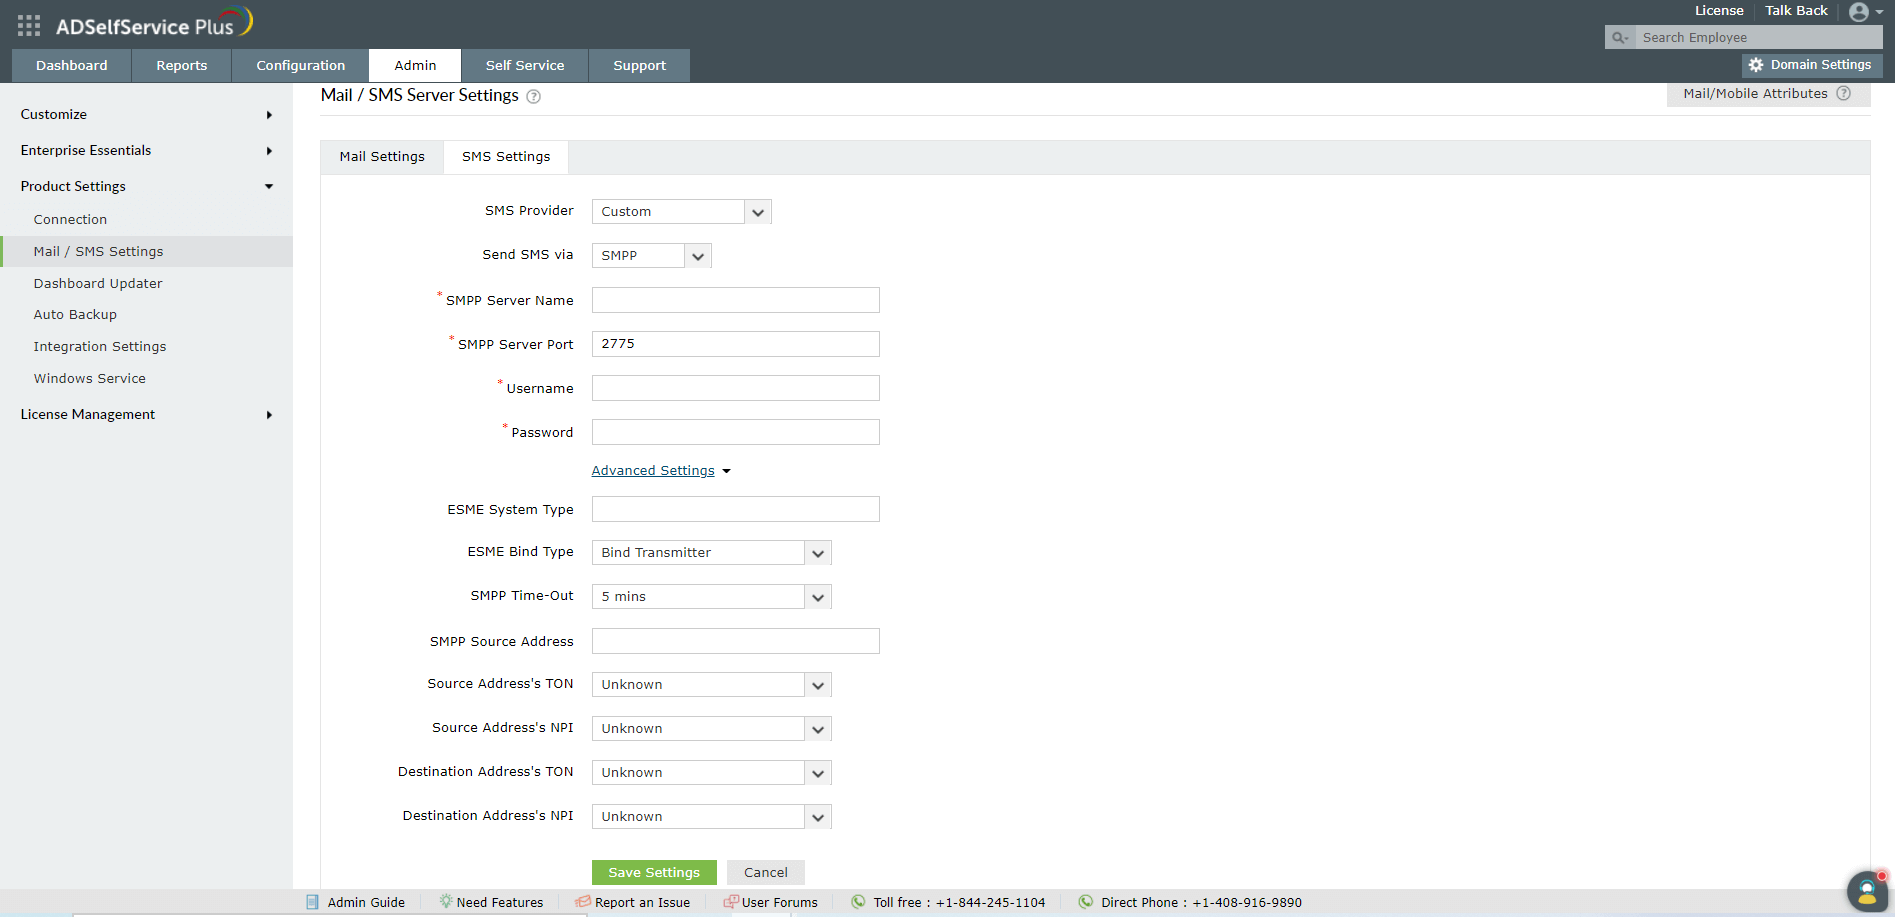
- Enter the ESME System Type. From the ESME Bind Type drop-down, select Blind Transmitter or Transceiver.
- Specify the SMPP Time-Out and SMPP Source Address.
- Select the Source Address’ TON,Source Address’ NPI, Destination Address’ TON, and Destination Address’ NPI from the respective drop-downs.
- Click Save Settings.
Note:
- TON: Type of number
- NPI: Numeric plan indicator
Highlights of ADSelfService Plus
Allow Active Directory users to self-service their password resets and account unlock tasks, freeing them from lengthy help desk calls.
Get seamless one-click access to 100+ cloud applications. With enterprise single sign-on, users can access all their cloud applications using their Active Directory credentials.
Intimate Active Directory users of their impending password and account expiry via email and SMS notifications.
Synchronize Windows Active Directory user passwords and account changes across multiple systems automatically, including Microsoft 365, Google Workspace, IBM iSeries, and more.
Strong passwords resist various hacking threats. Enforce Active Directory users to adhere to compliant passwords by displaying password complexity requirements.
Enable Active Directory users to update their latest information themselves. Quick search features help admins scout for information using search keys like contact numbers.
