January 6, 2026
New Features
CMDB Baselines
- Introducing Baselines, a clean and structured view that shows how CIs have evolved.
- Each baseline you create captures the state of CI configurations (attributes and first-level relationships) at that moment. You can compare different baselines and analyze deviations from the expected behavior.
- To capture CIs, you can:
- Create baseline configurations to define the CIs you want to capture, across CI types and business views.
- Create baselines to capture up to 2,000 CIs in-scope with a baseline configuration.
- Compare baselines within a baseline configuration to identify newly-added, removed, modified, and unmodified CIs.
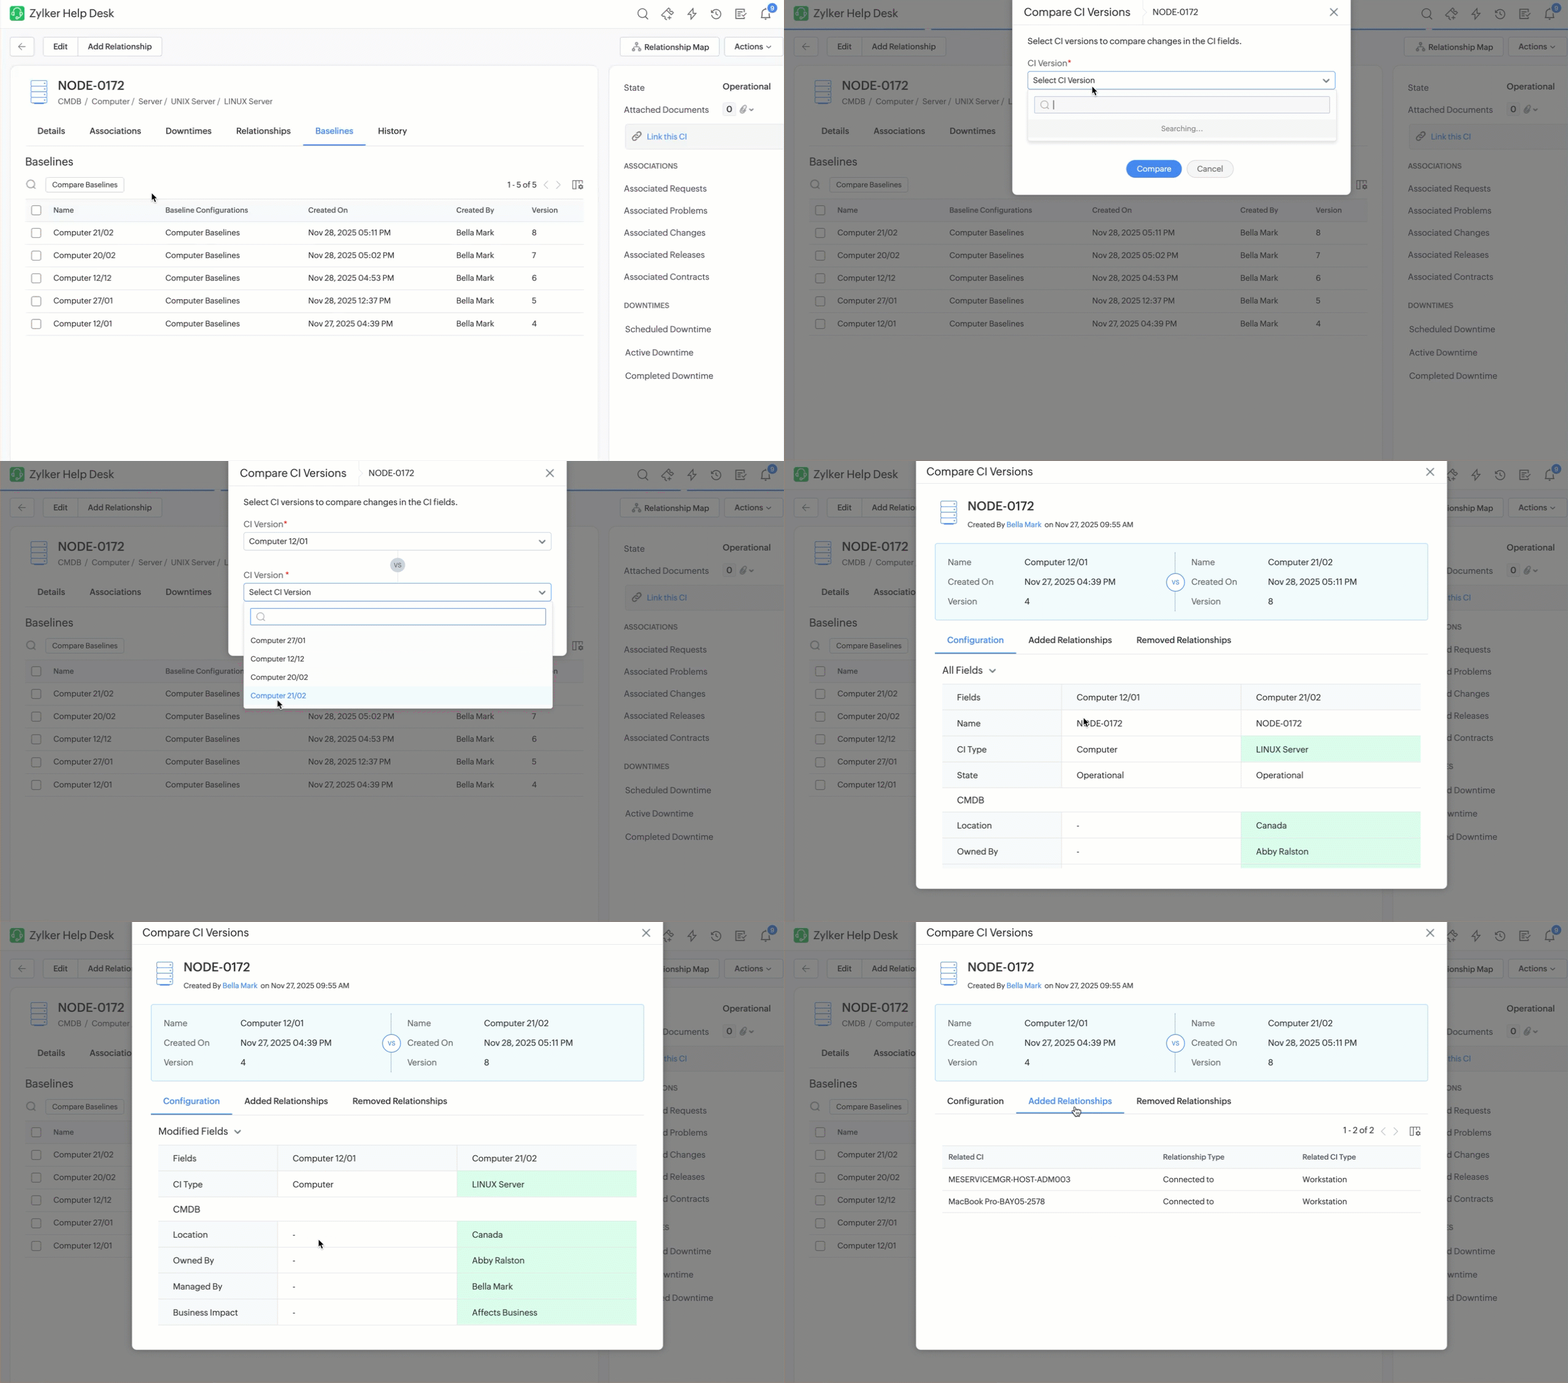
- Compare a CI's configurations across all baselines from the CI details page, business views, and baseline configuration details page.
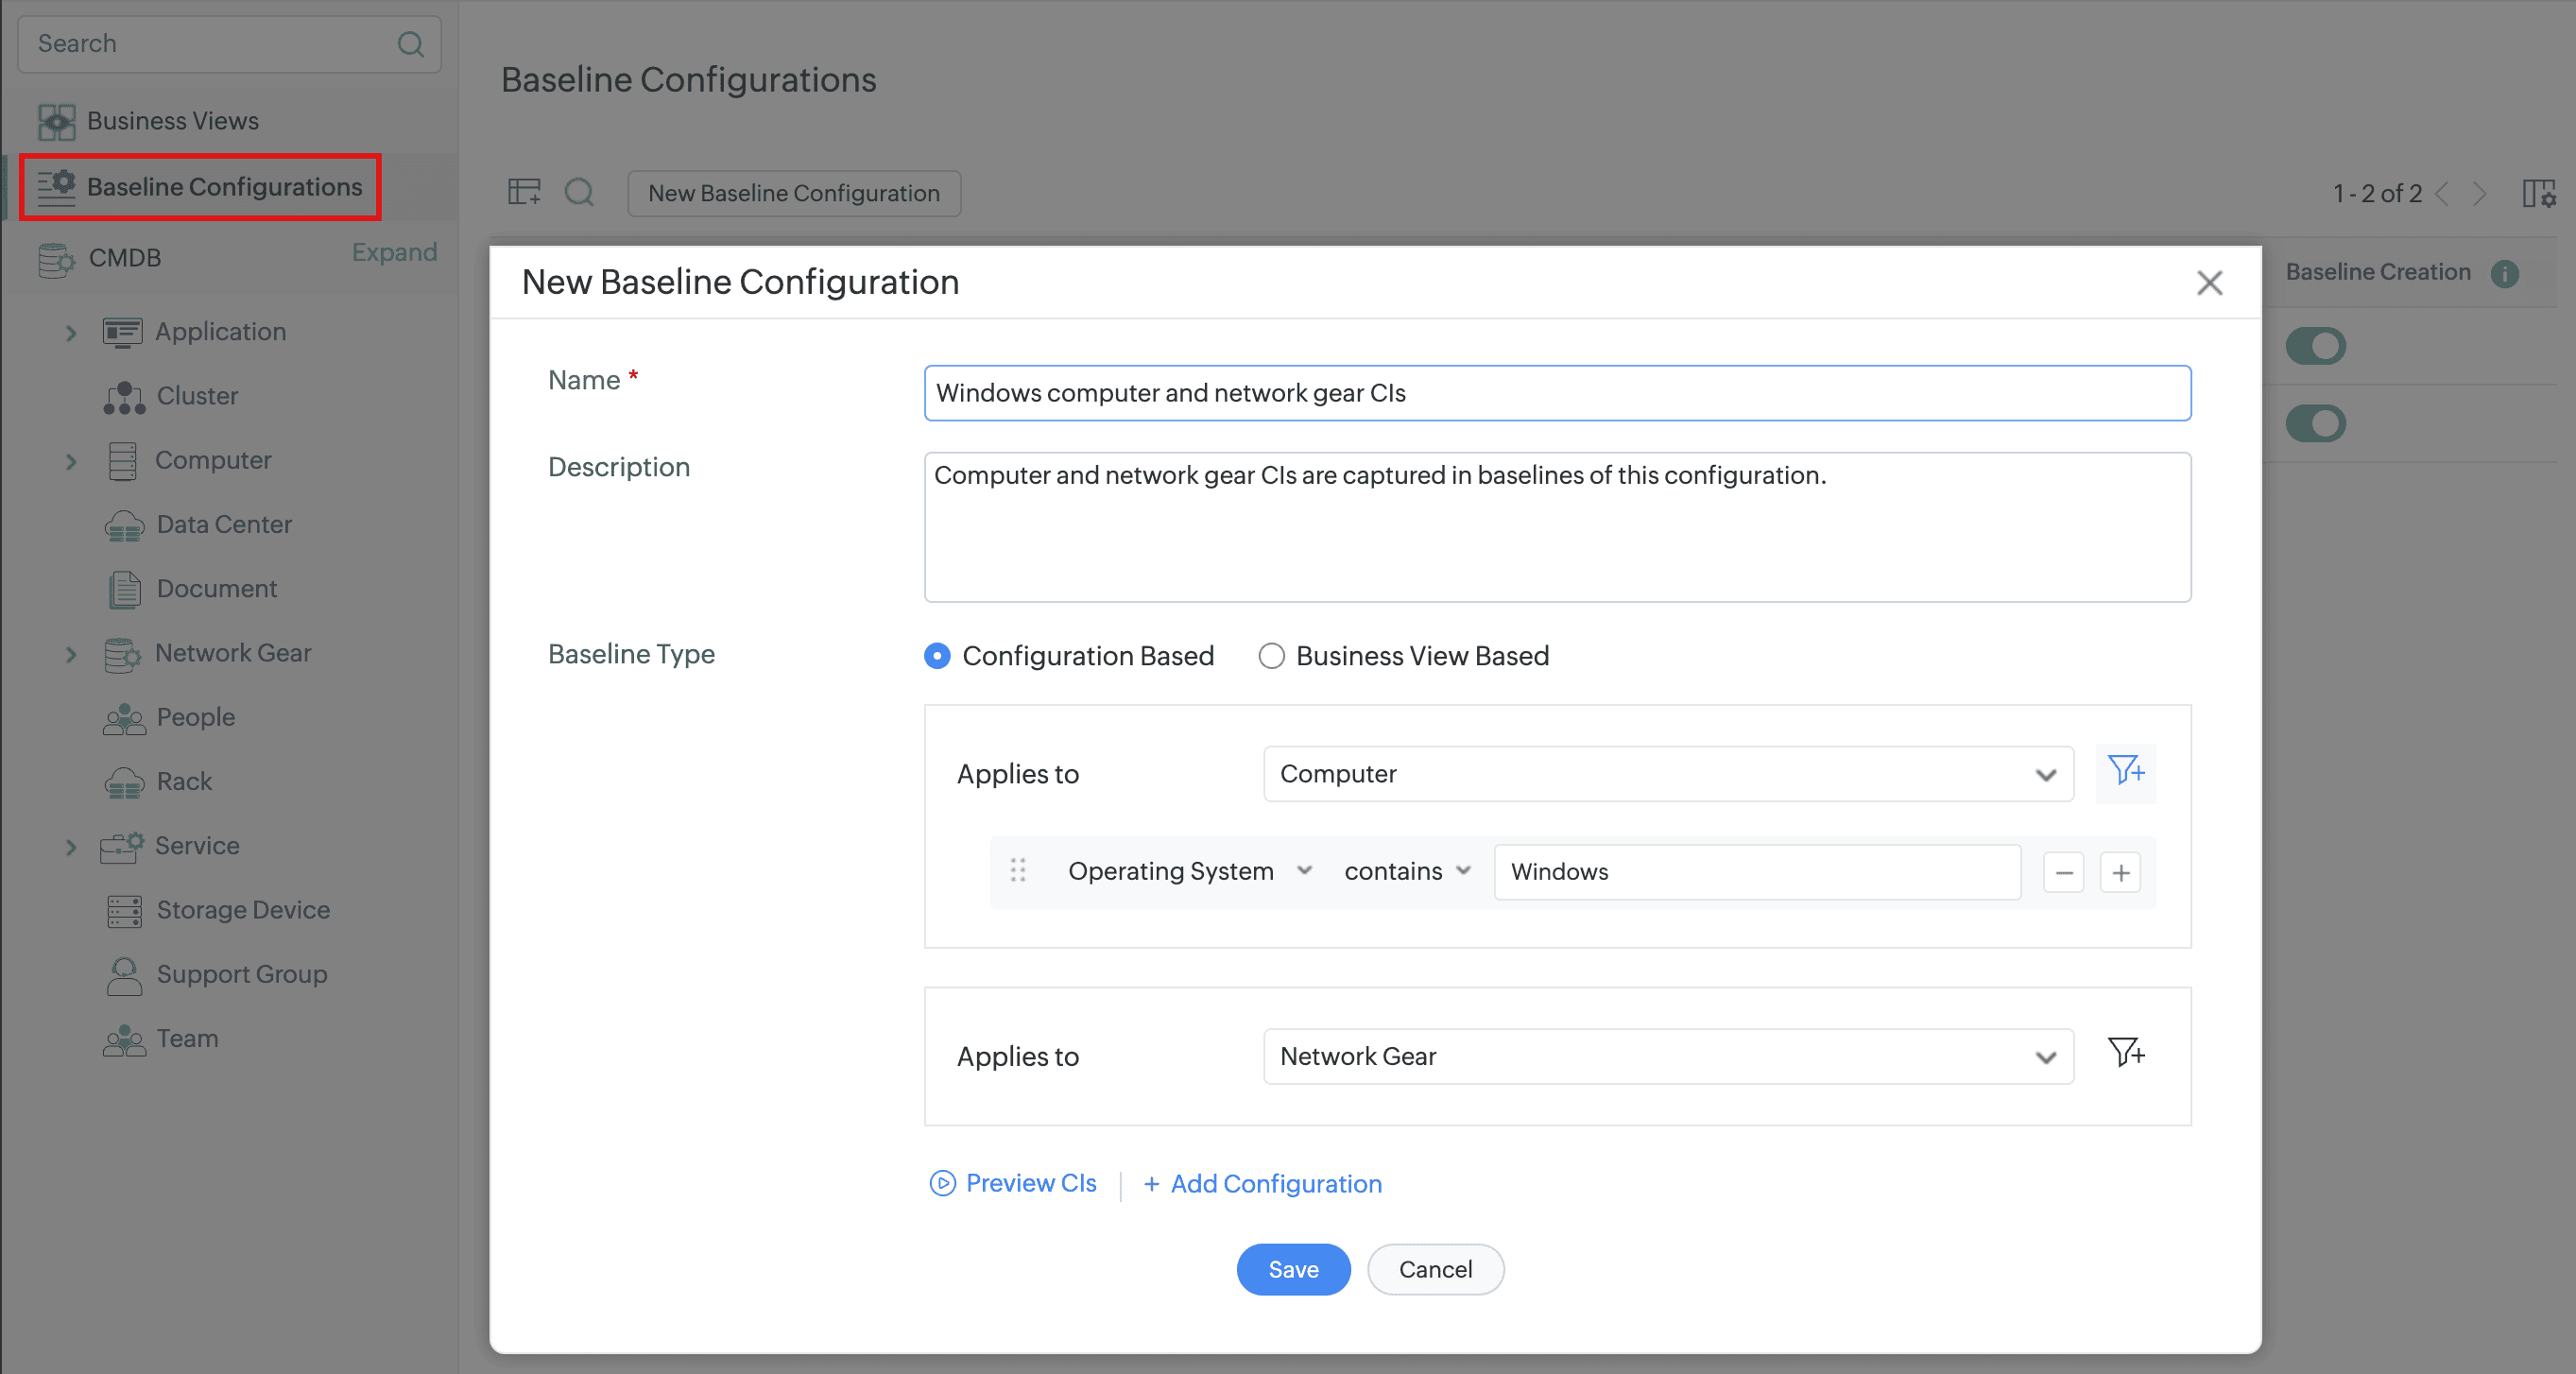
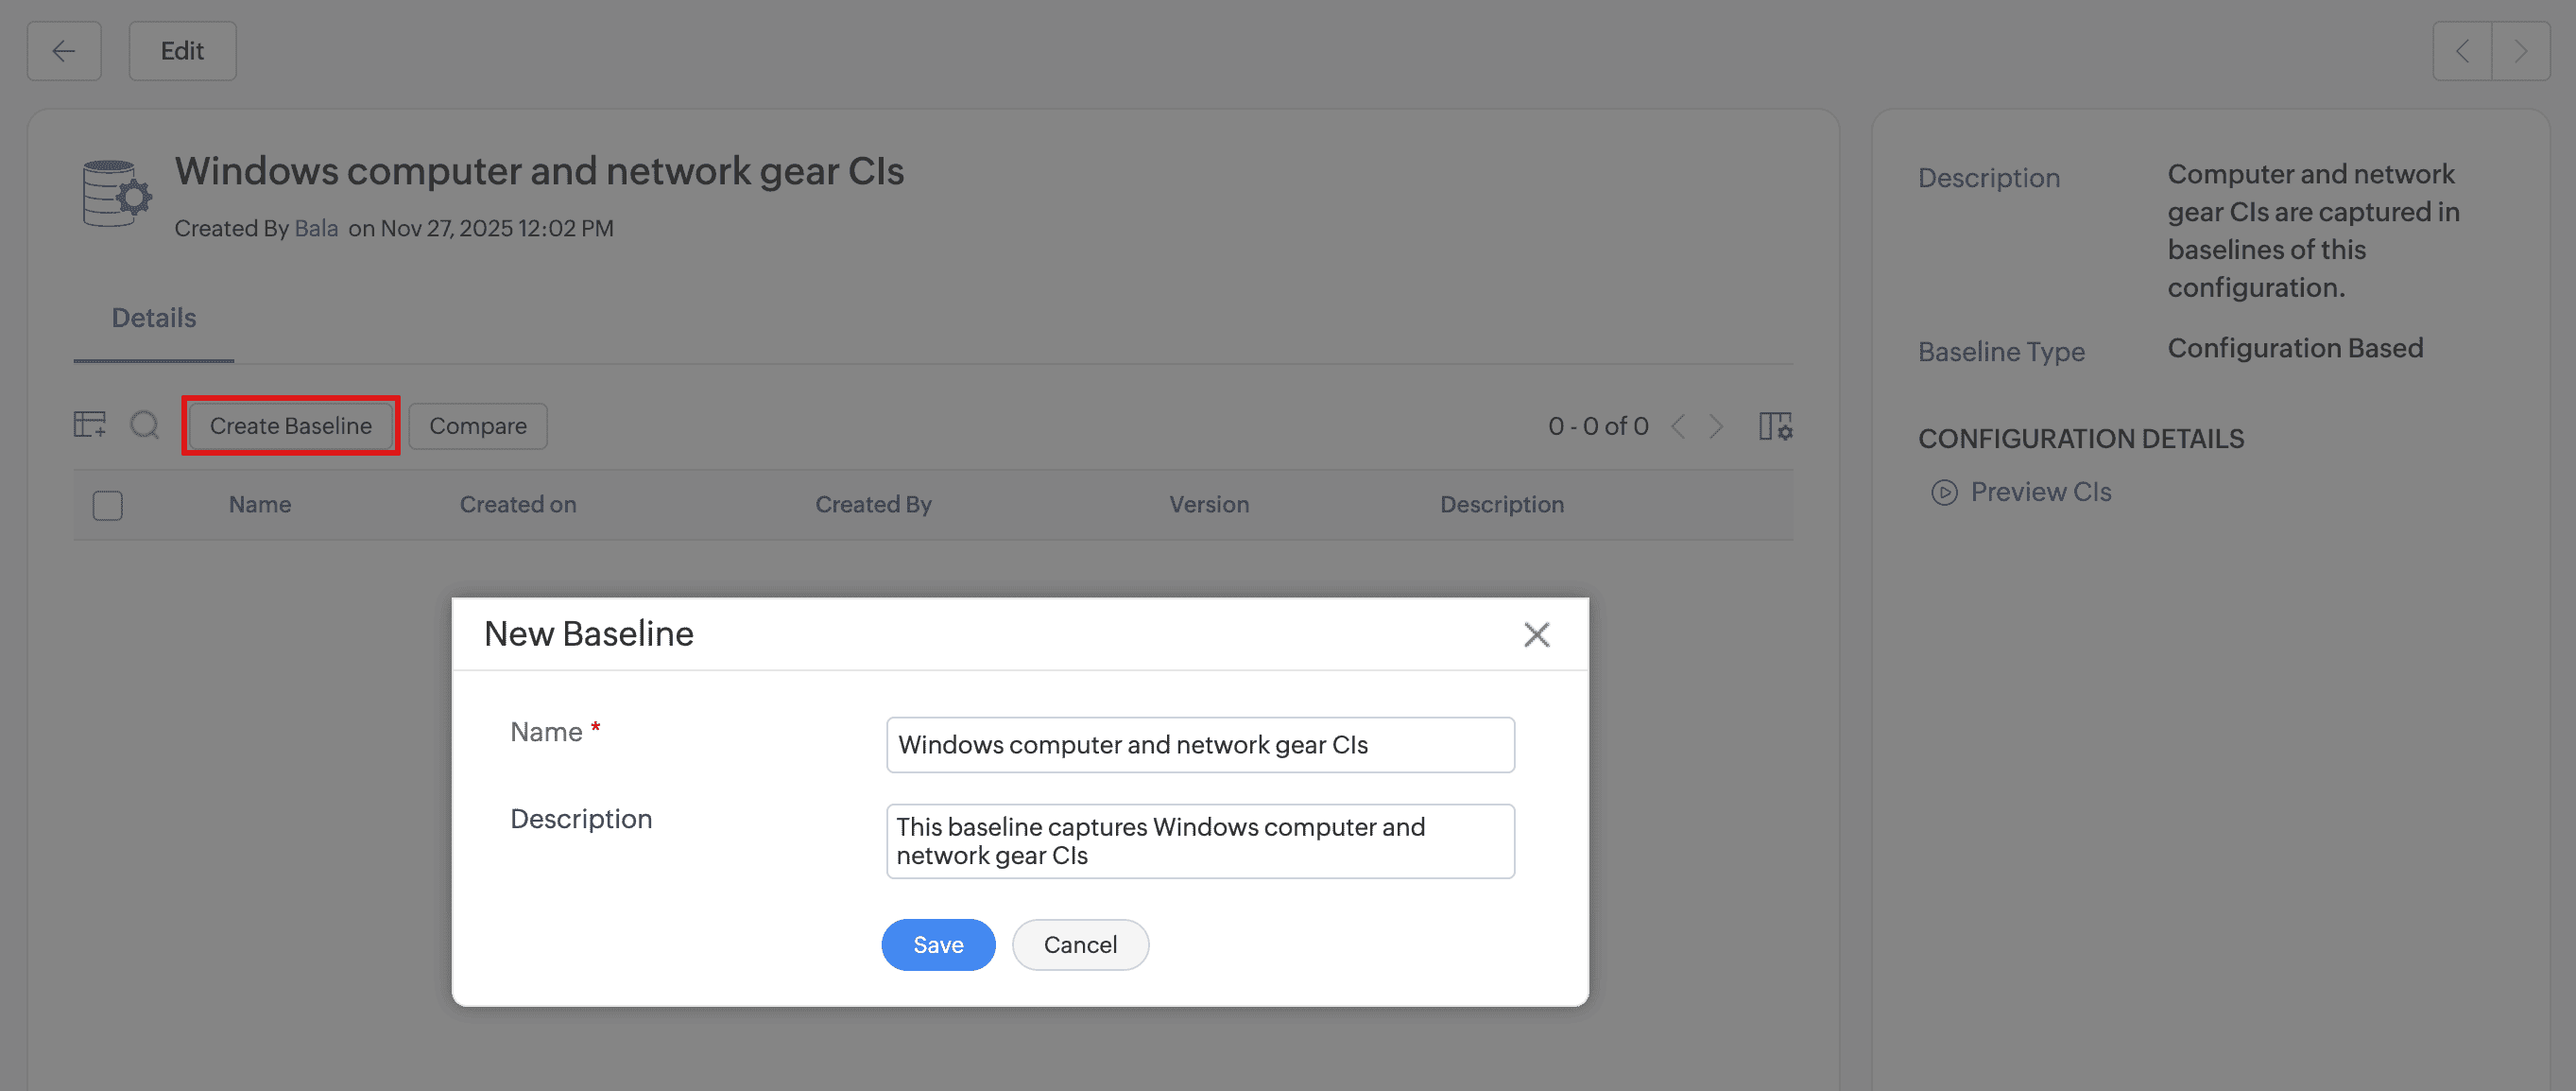
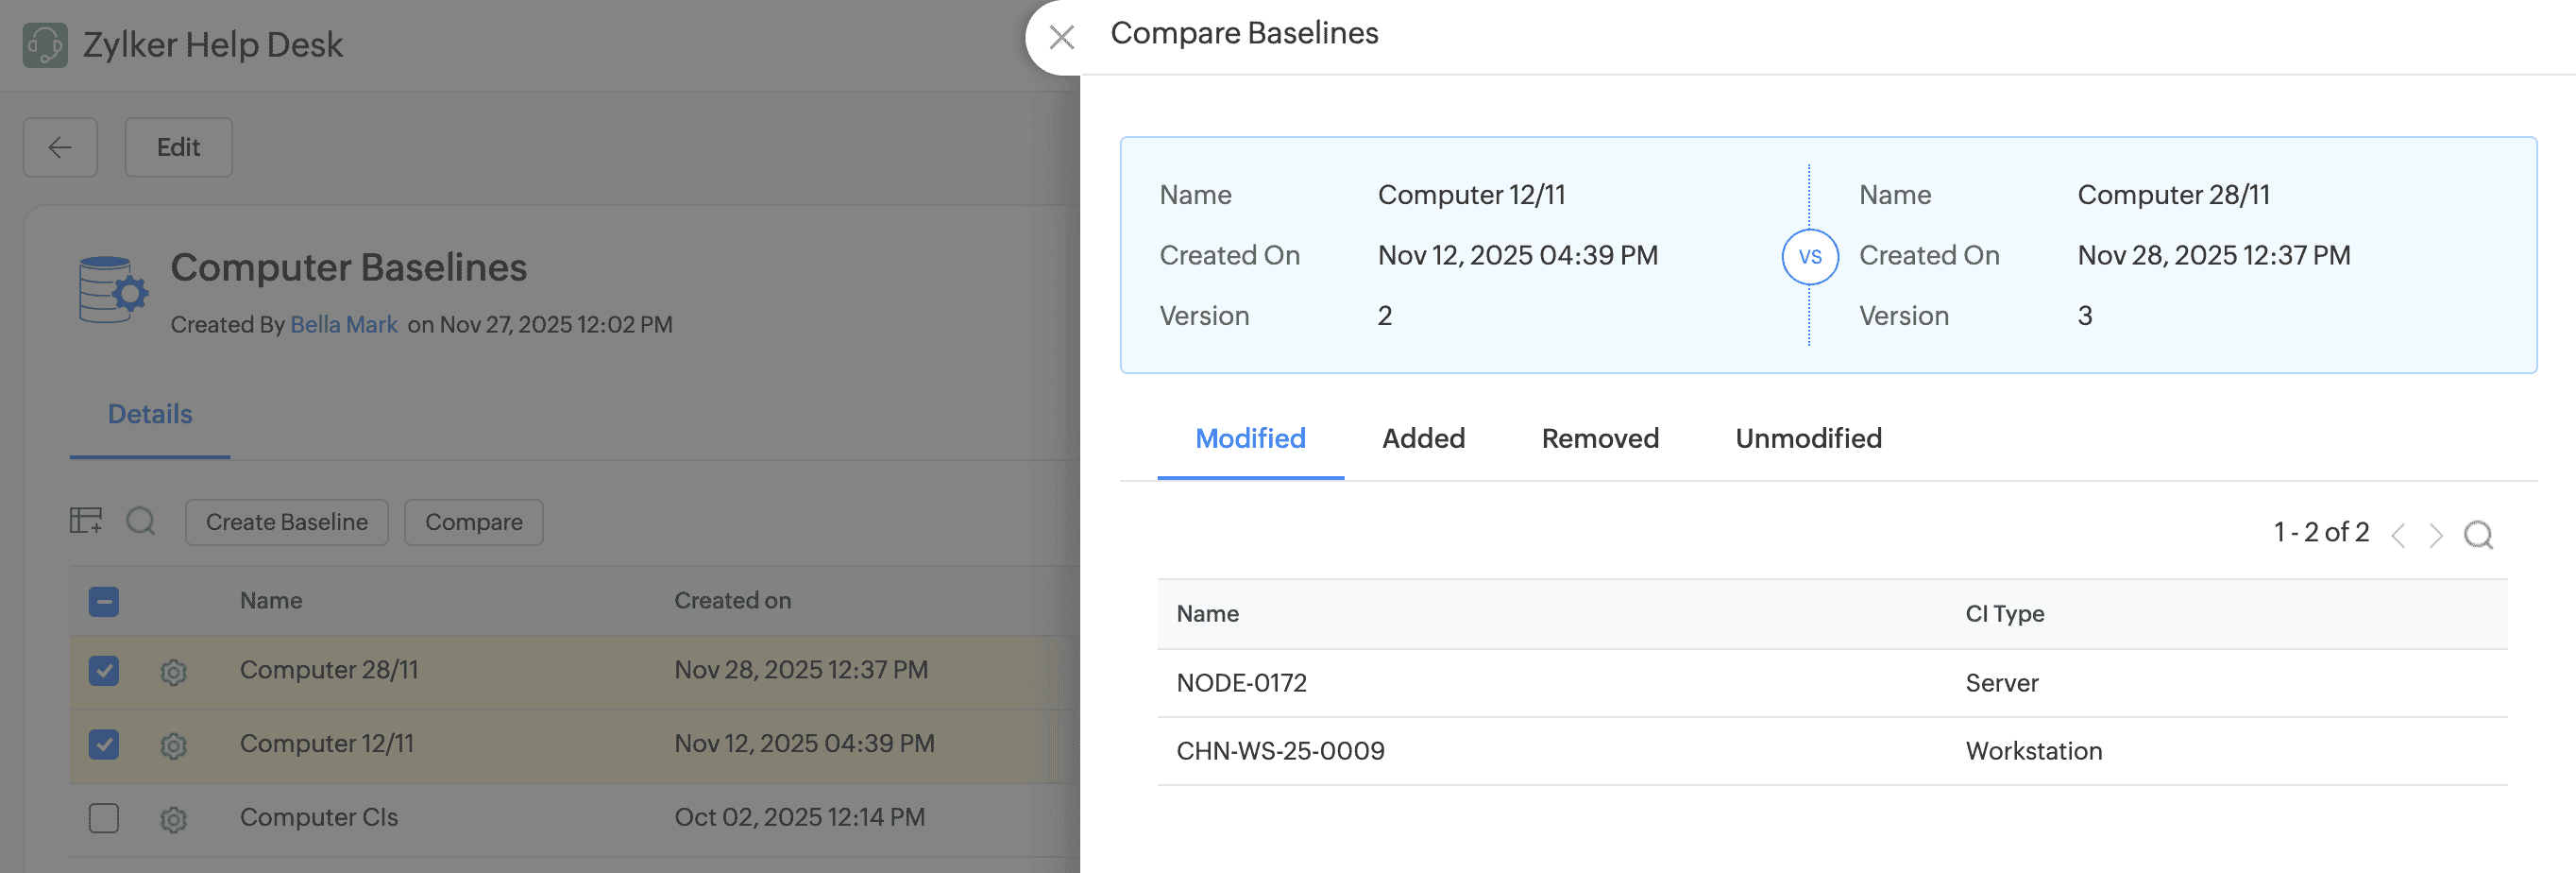
An Illustration of Comparing a CI from its Details Page
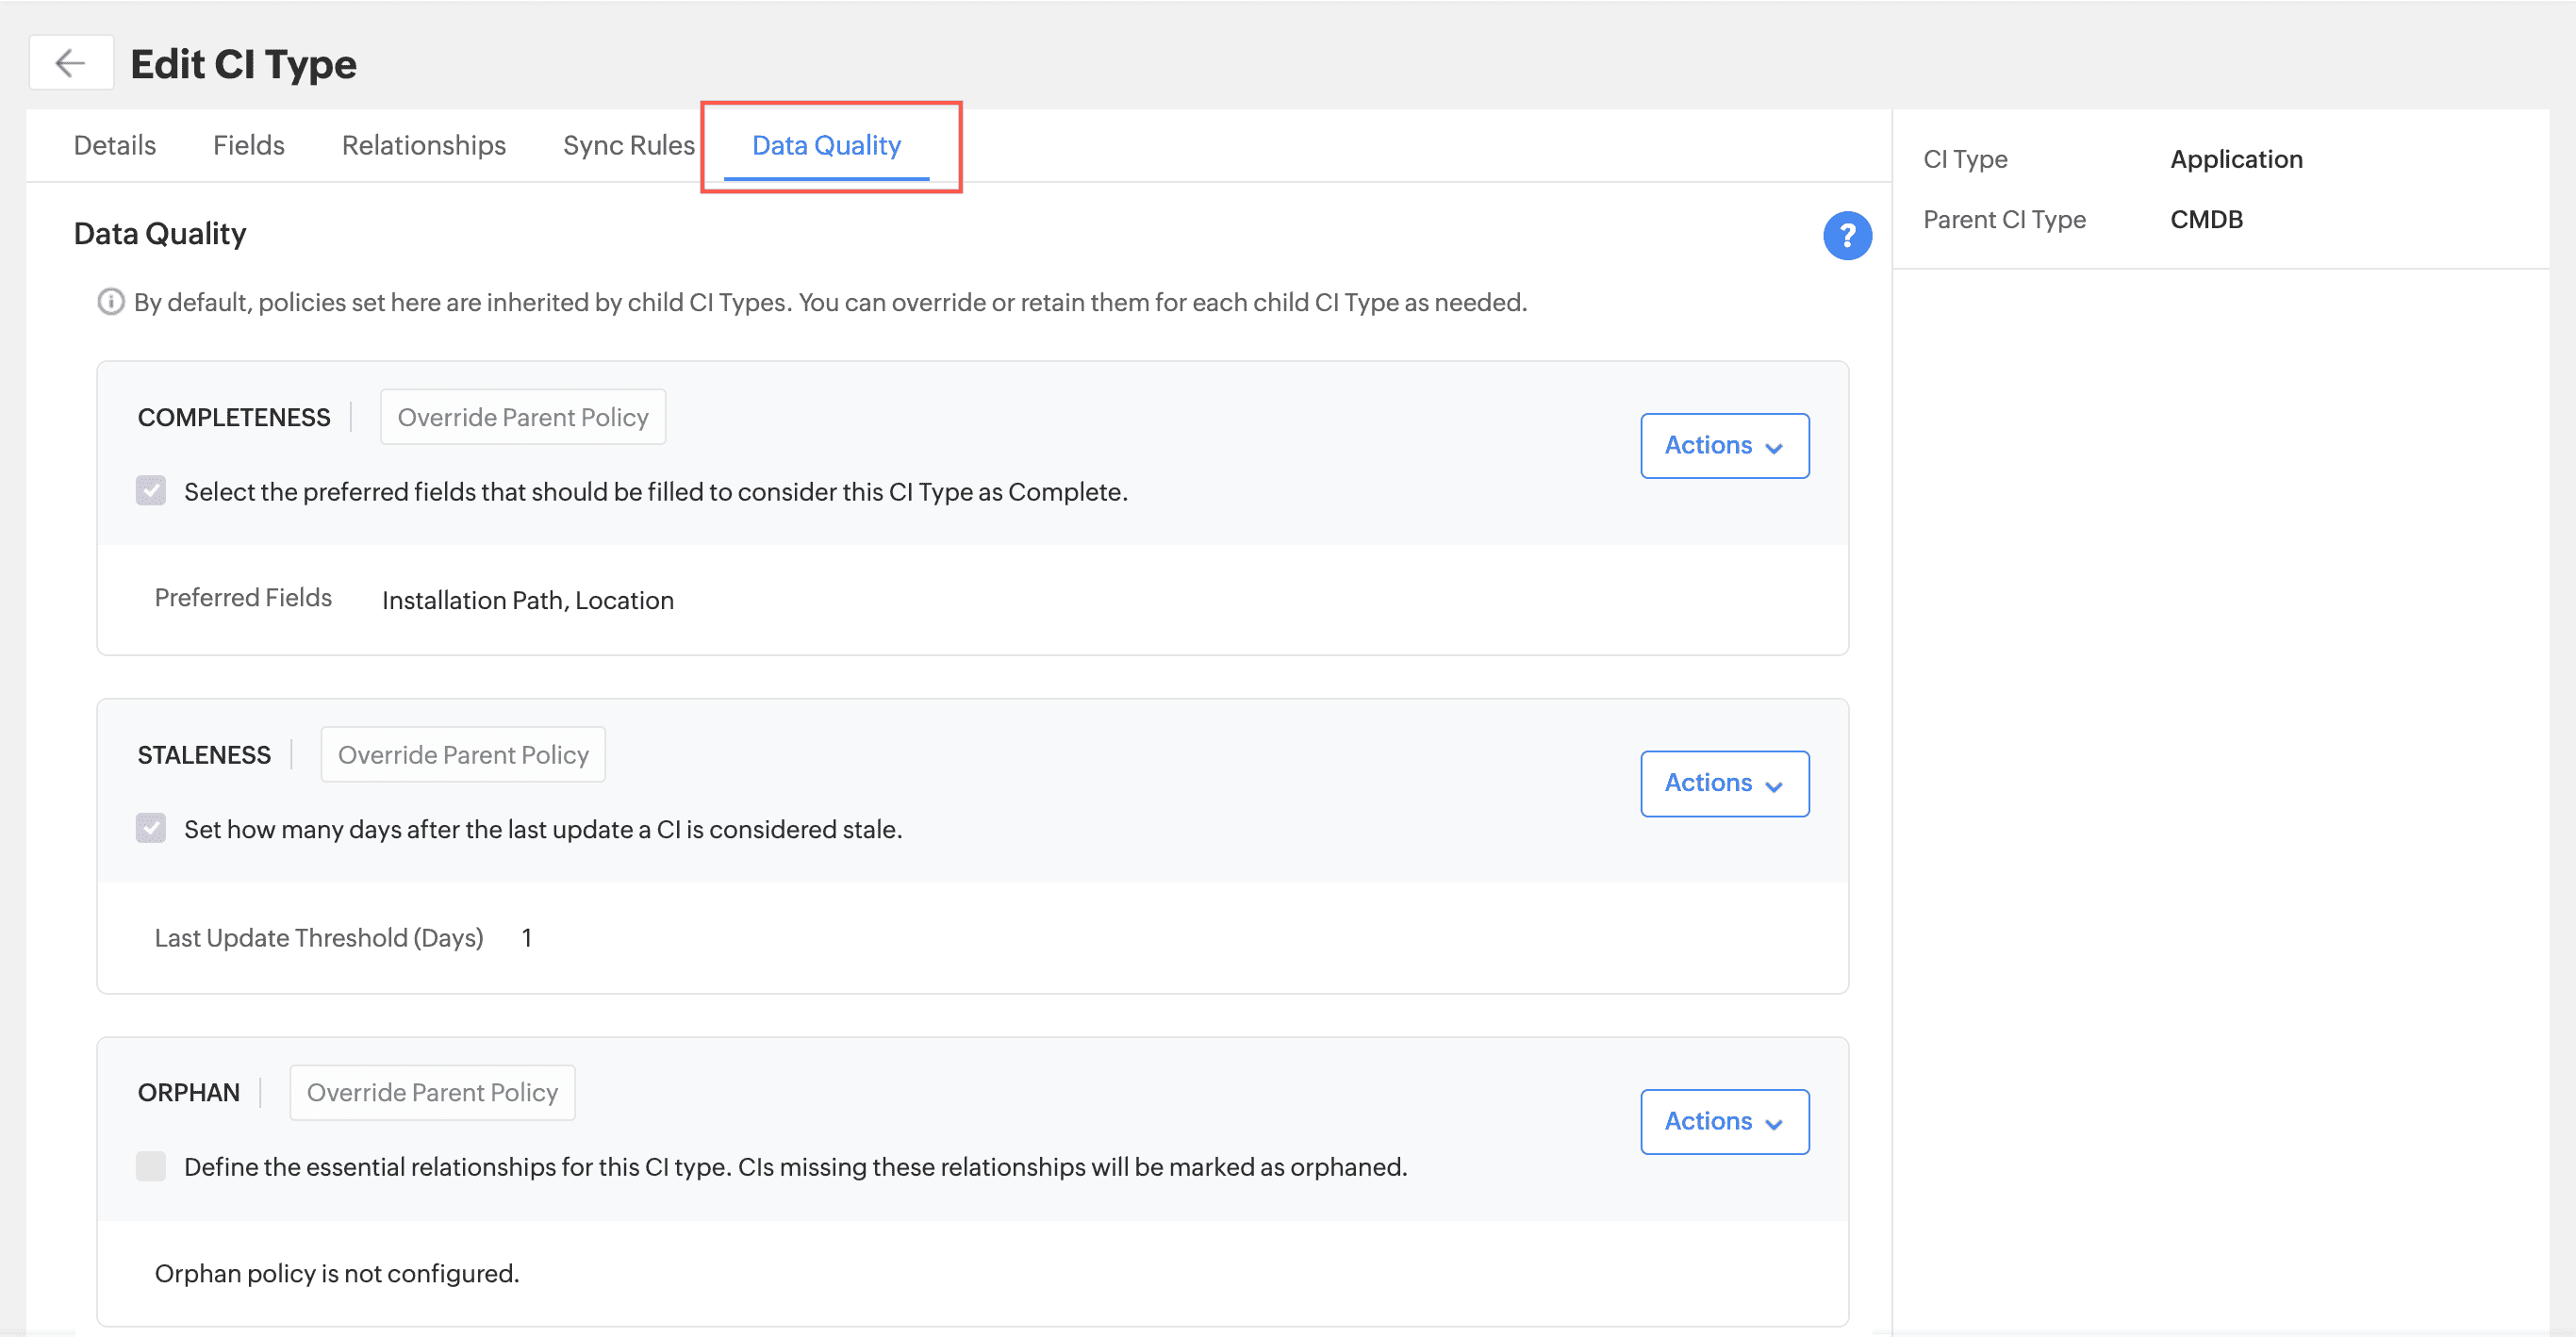
CMDB Data Quality
- You can now configure data quality policies such as Completeness, Staleness, and Orphan for CI types to maintain accurate and reliable CI data.
- To configure these policies go to Setup > Customization > CMDB > CI Types and edit a CI type.
- You can view the results in the CMDB Dashboard, CMDB list view, and CI details view.
Enhancements
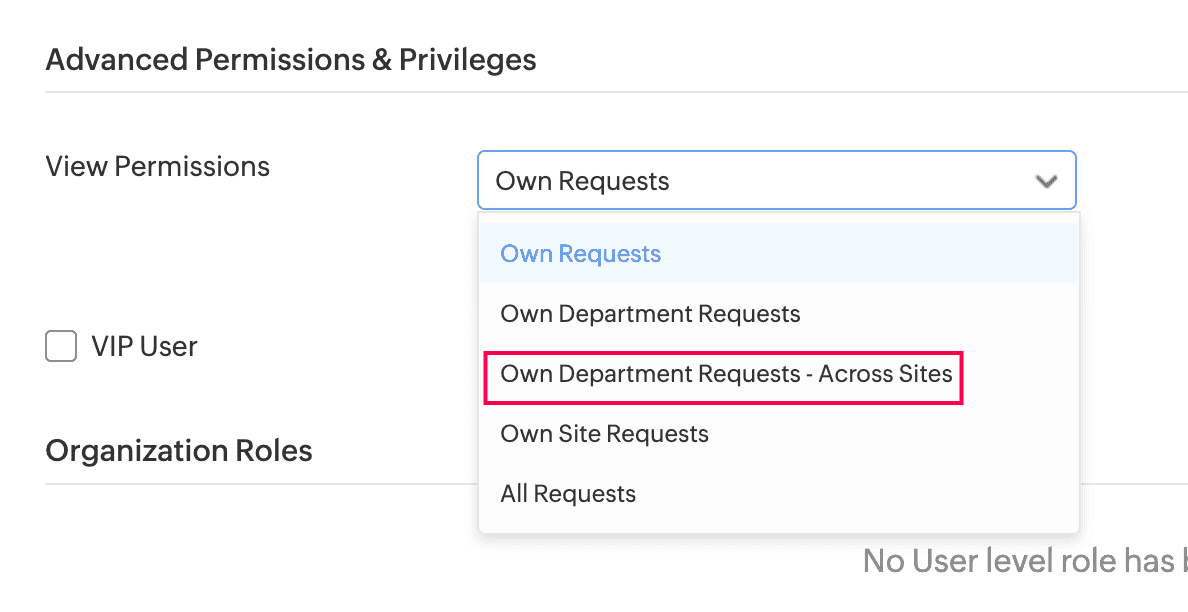
Request View Scope Enhancement
- Allow requesters to view their department requests across sites by choosing the Own Department Requests- Across Sites option under View Permissions while adding/editing requester.
View Direct Reportees' Requests
- You can now allow users to view requests submitted by their direct reportees.
- For technicians this option will be available in the roles page.
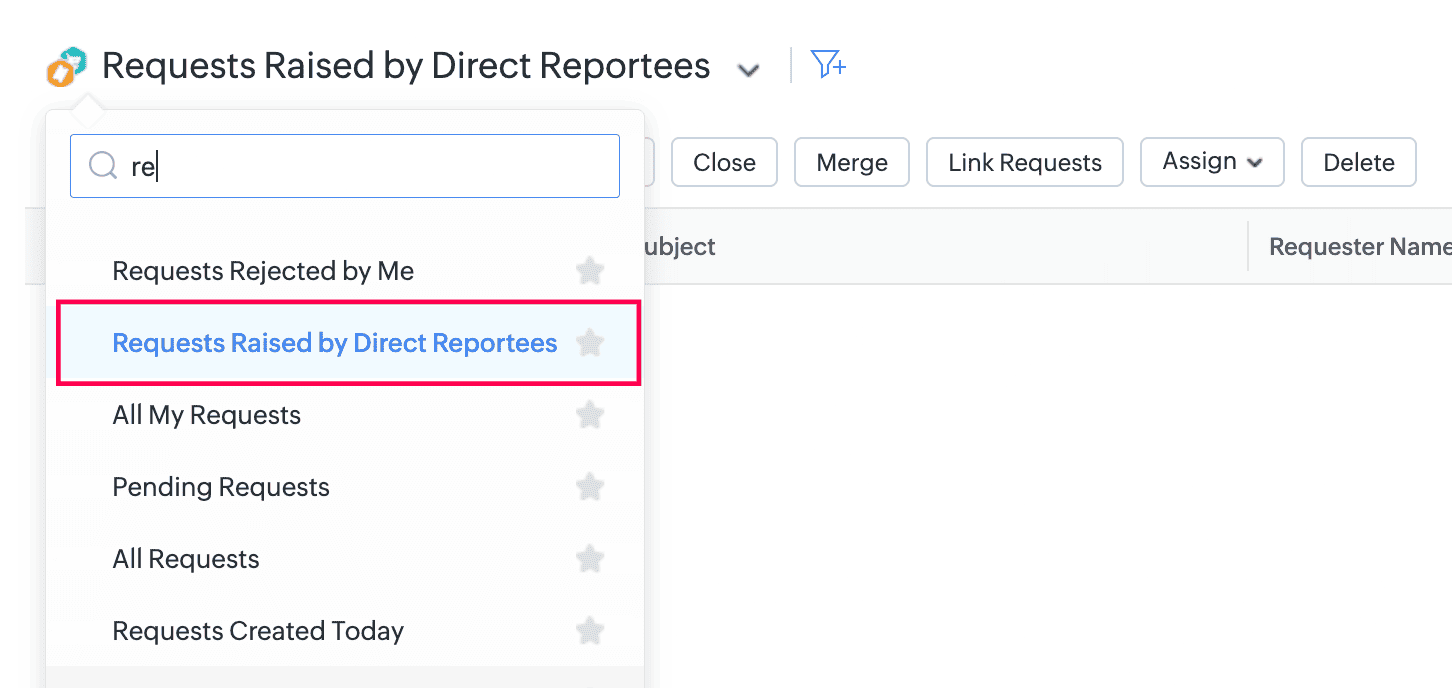
- Users with ViewReporteesRequests role can view their direct reportees' requests with the help of new list view filter Requests Raised By My Direct Reportees. This filter is available in both Request & Archive Request list views.


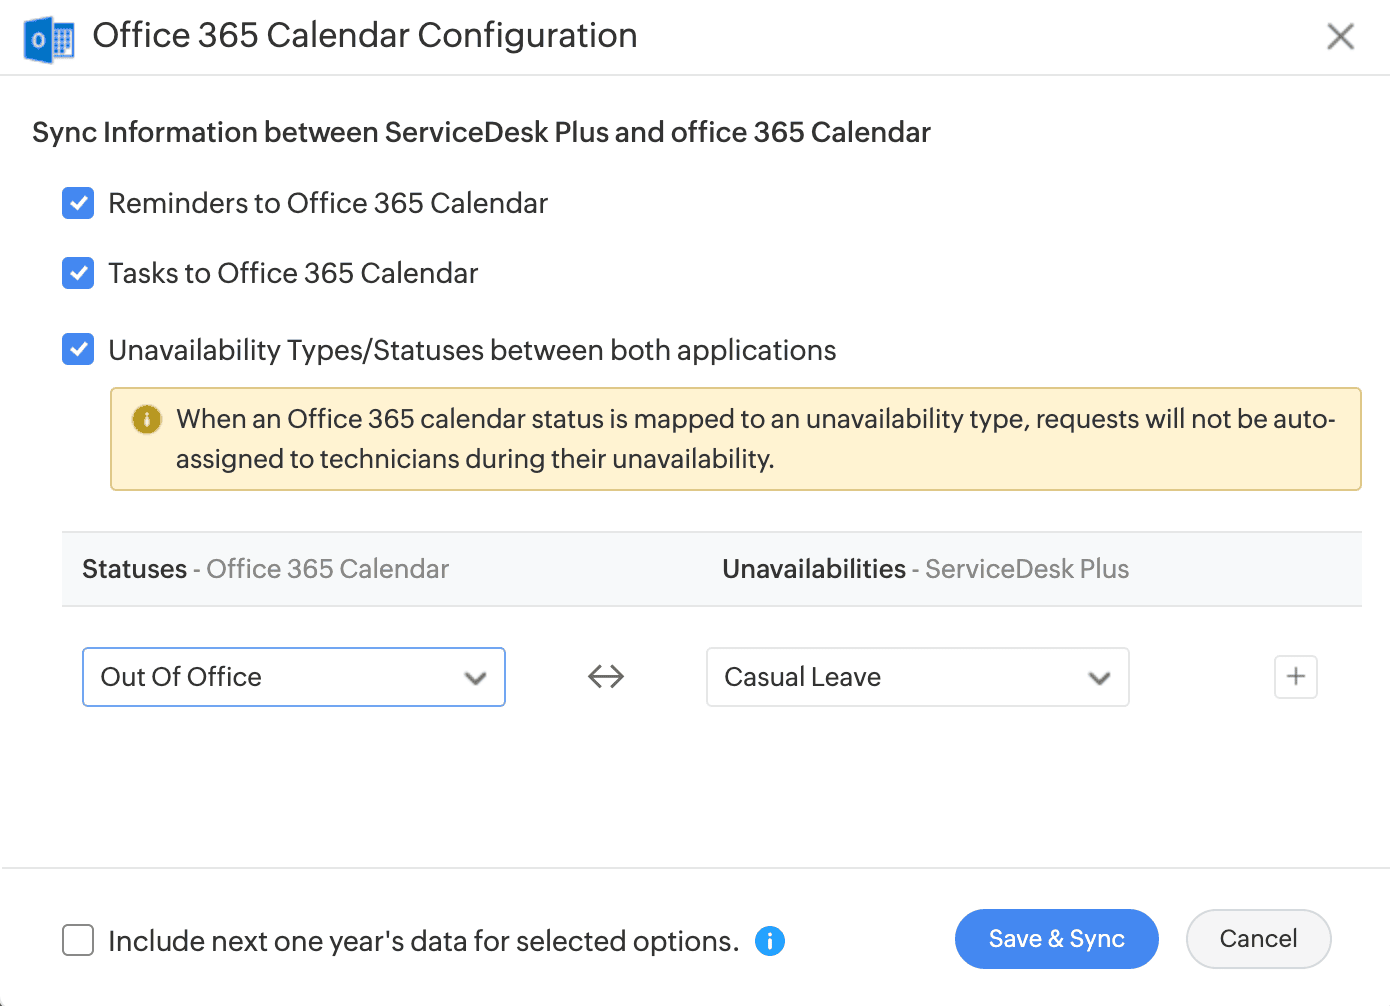
Sync Tasks to Office 365 Calendar
- Tasks in ServiceDesk Plus Cloud can now be synced to Office 365 Calendar.
Request Template Help Card
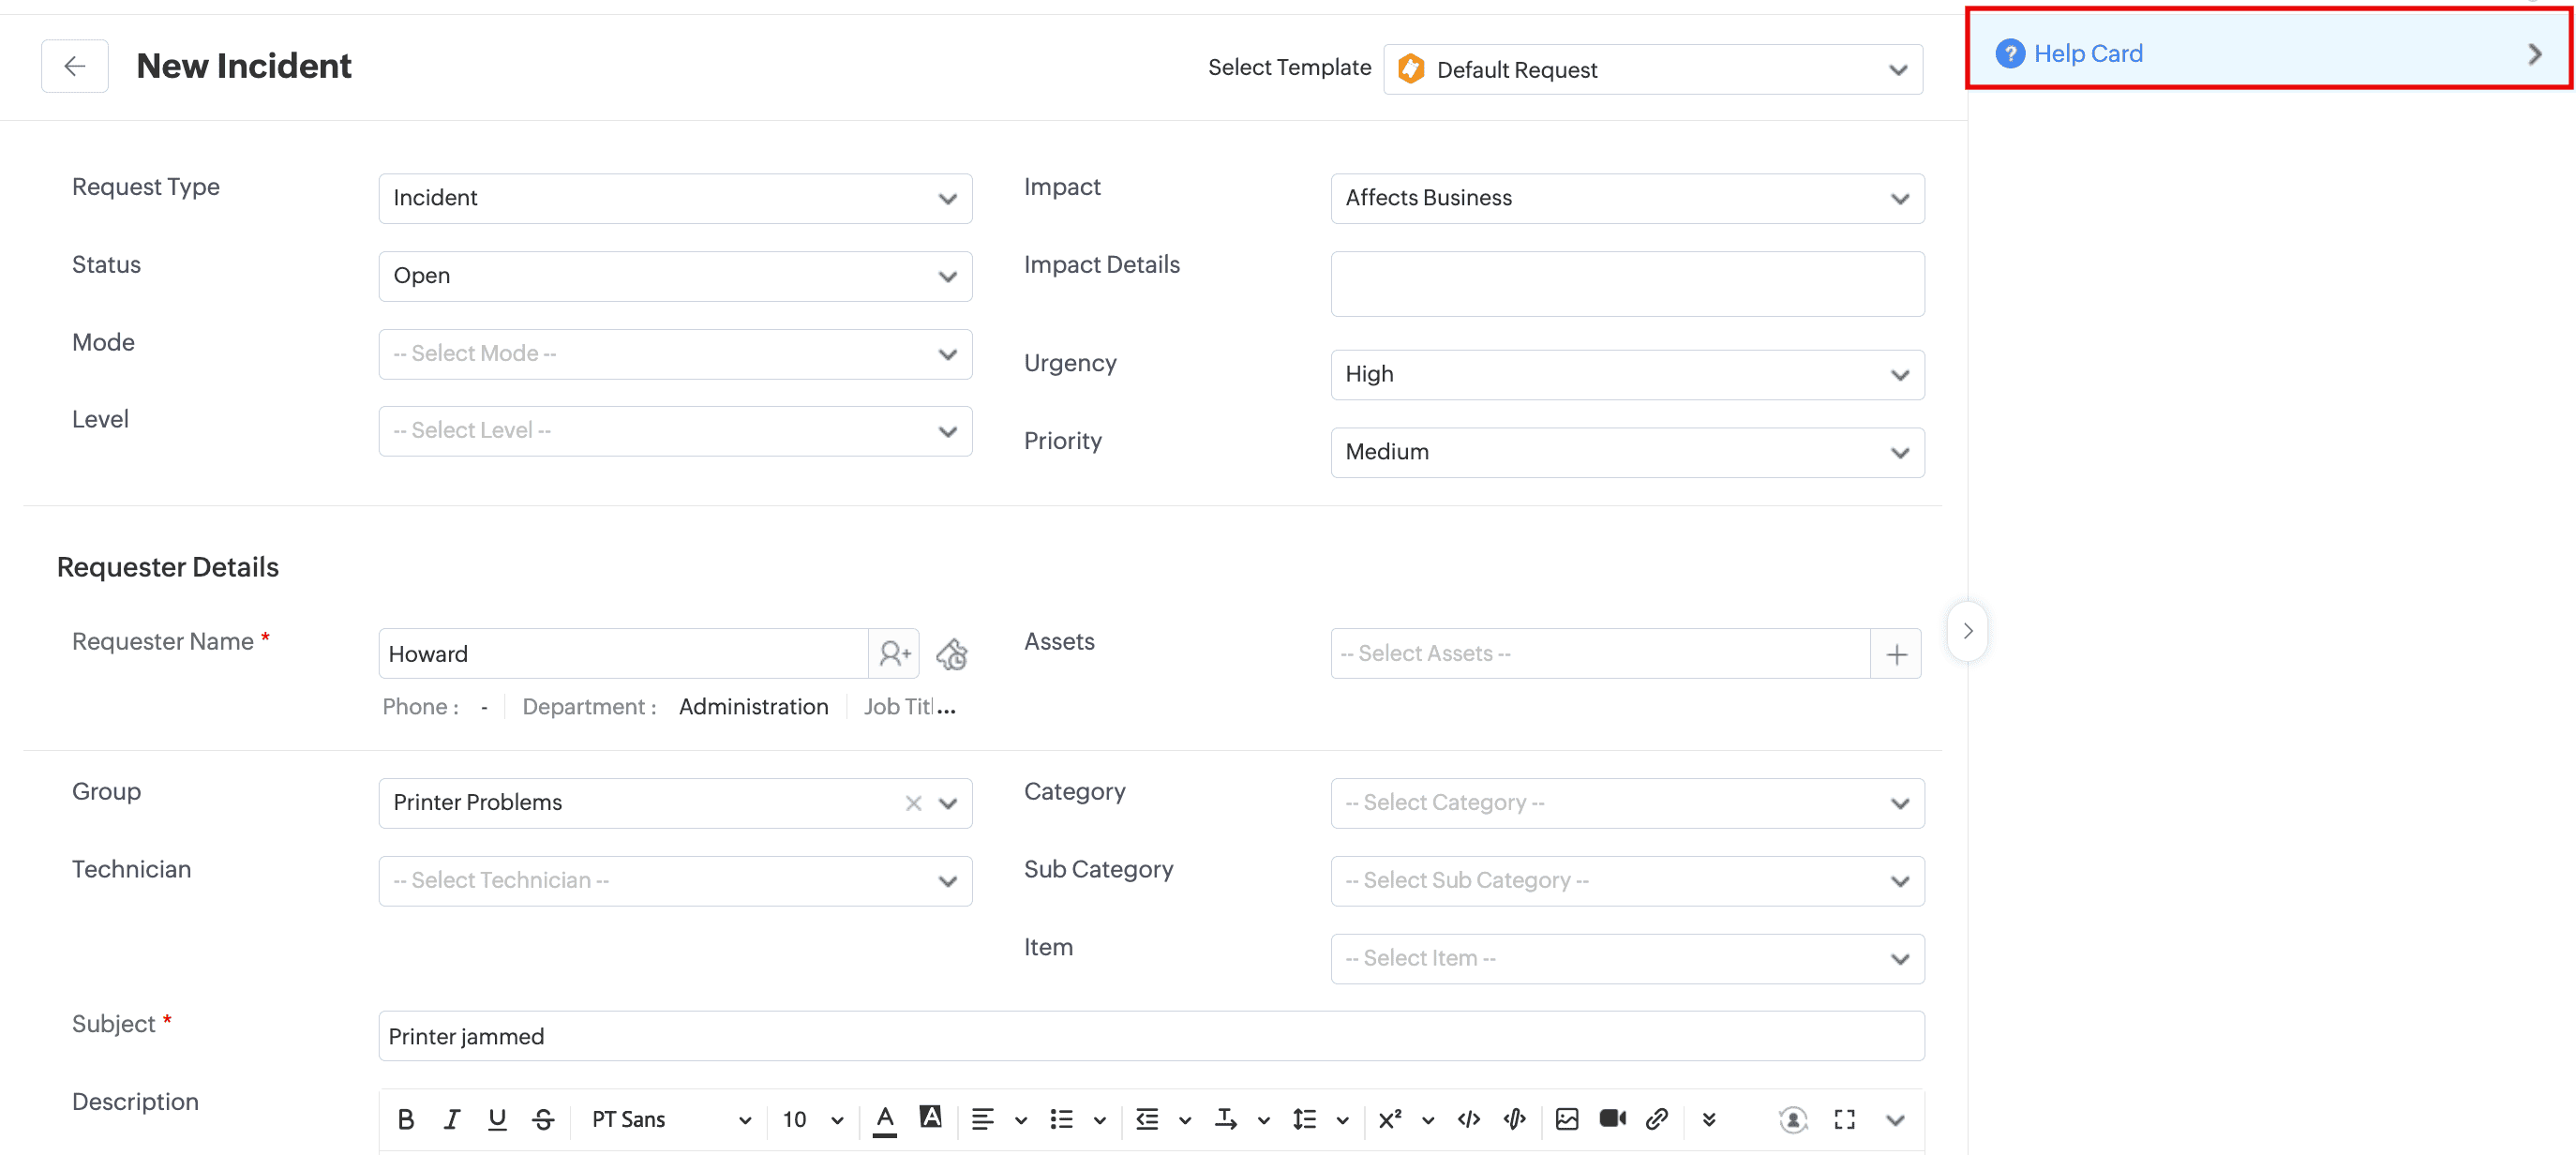
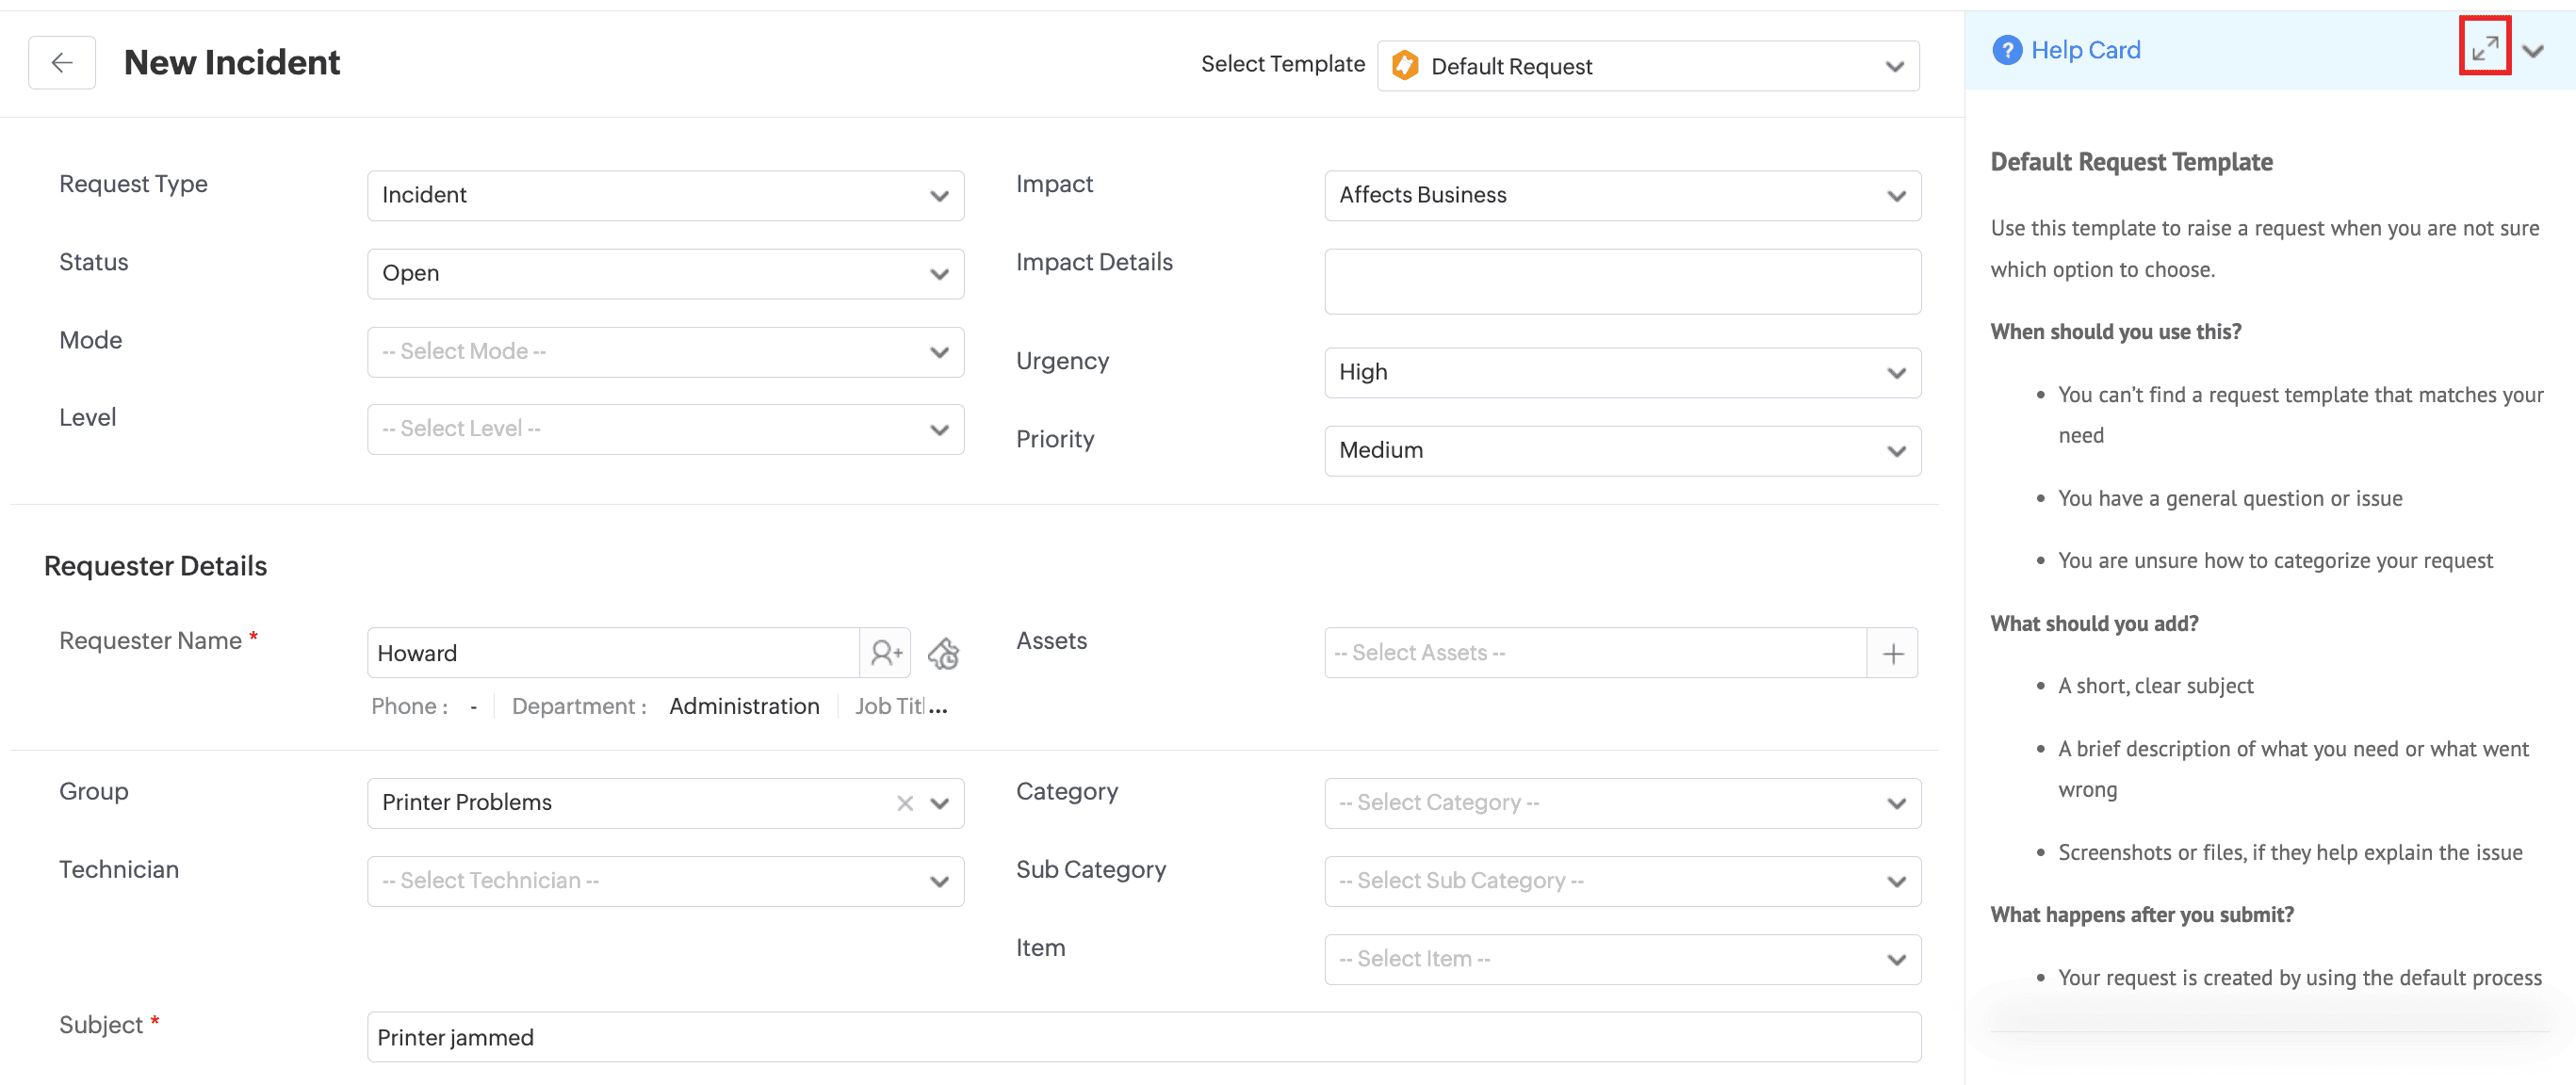
- Help cards in the request form, previously accessed via the Help button, are now available as a collapsible section in the right pane.
Help Card in Request Form
- View help card content in a separate pop-up by clicking the full screen
 icon.
icon. - Administrators can:
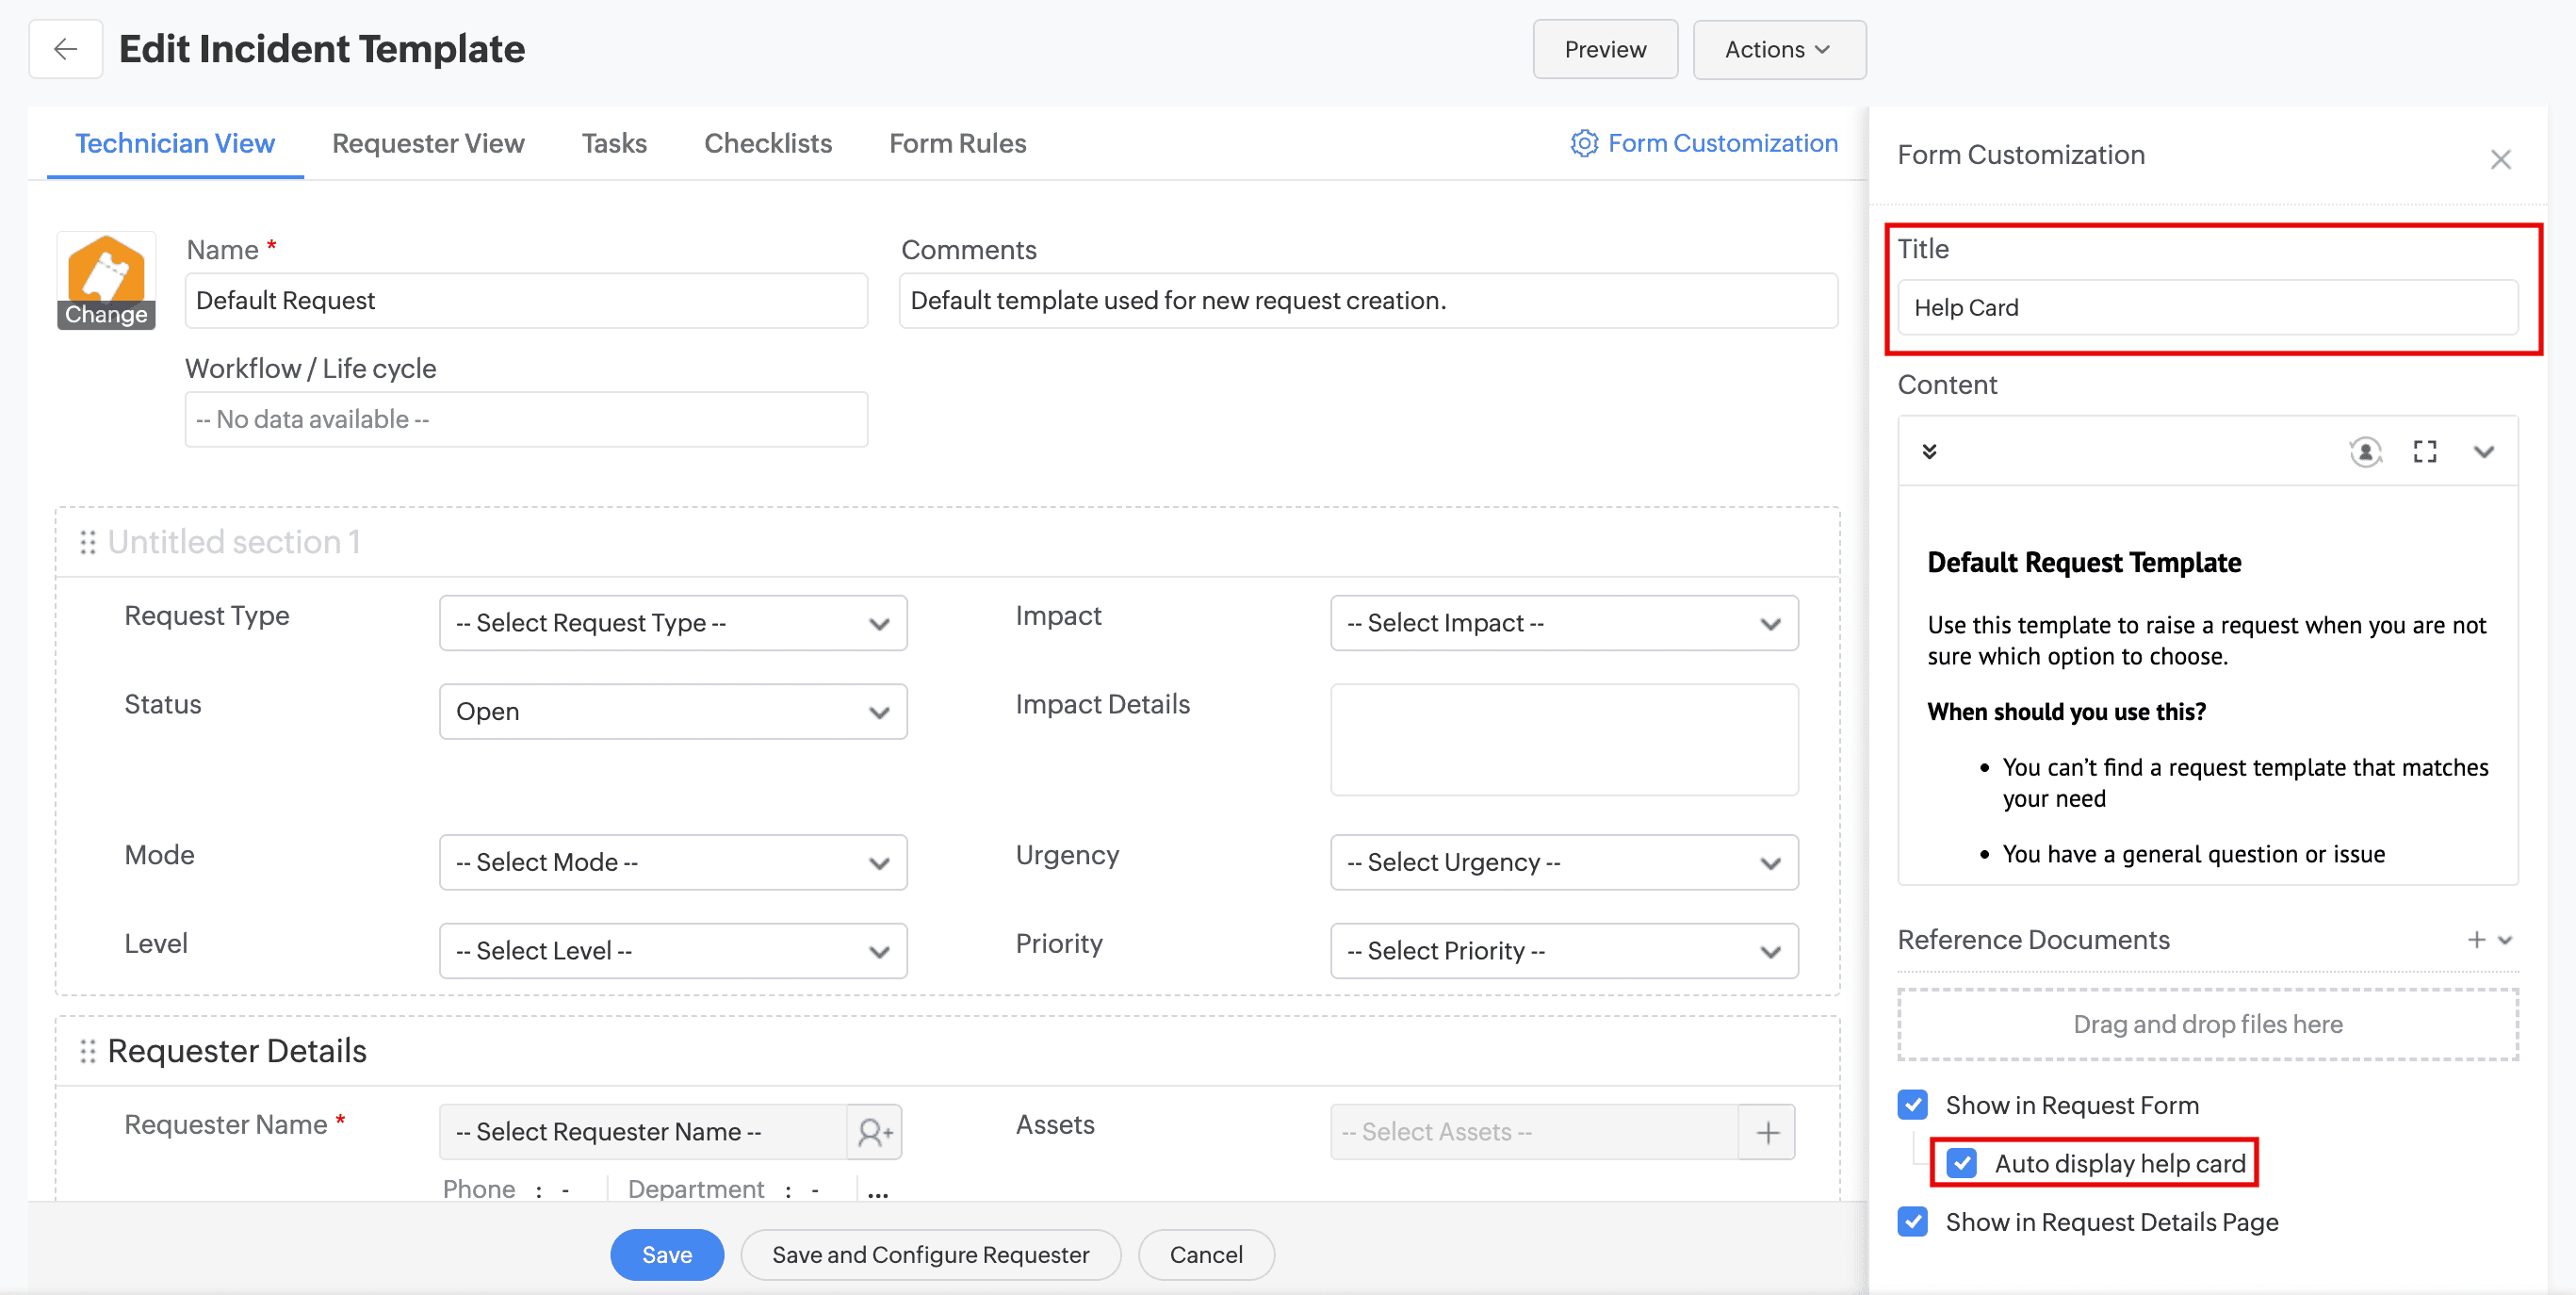
- Set help card titles, unique to each request template.
- Enable Auto display help card to show instructions on the request form by default. If disabled, users must expand the help card to view instructions.
- Auto display help card is enabled automatically for templates where Show in Request Form is already enabled. Administrators can disable this option at any time from the request template.
Linking Changes
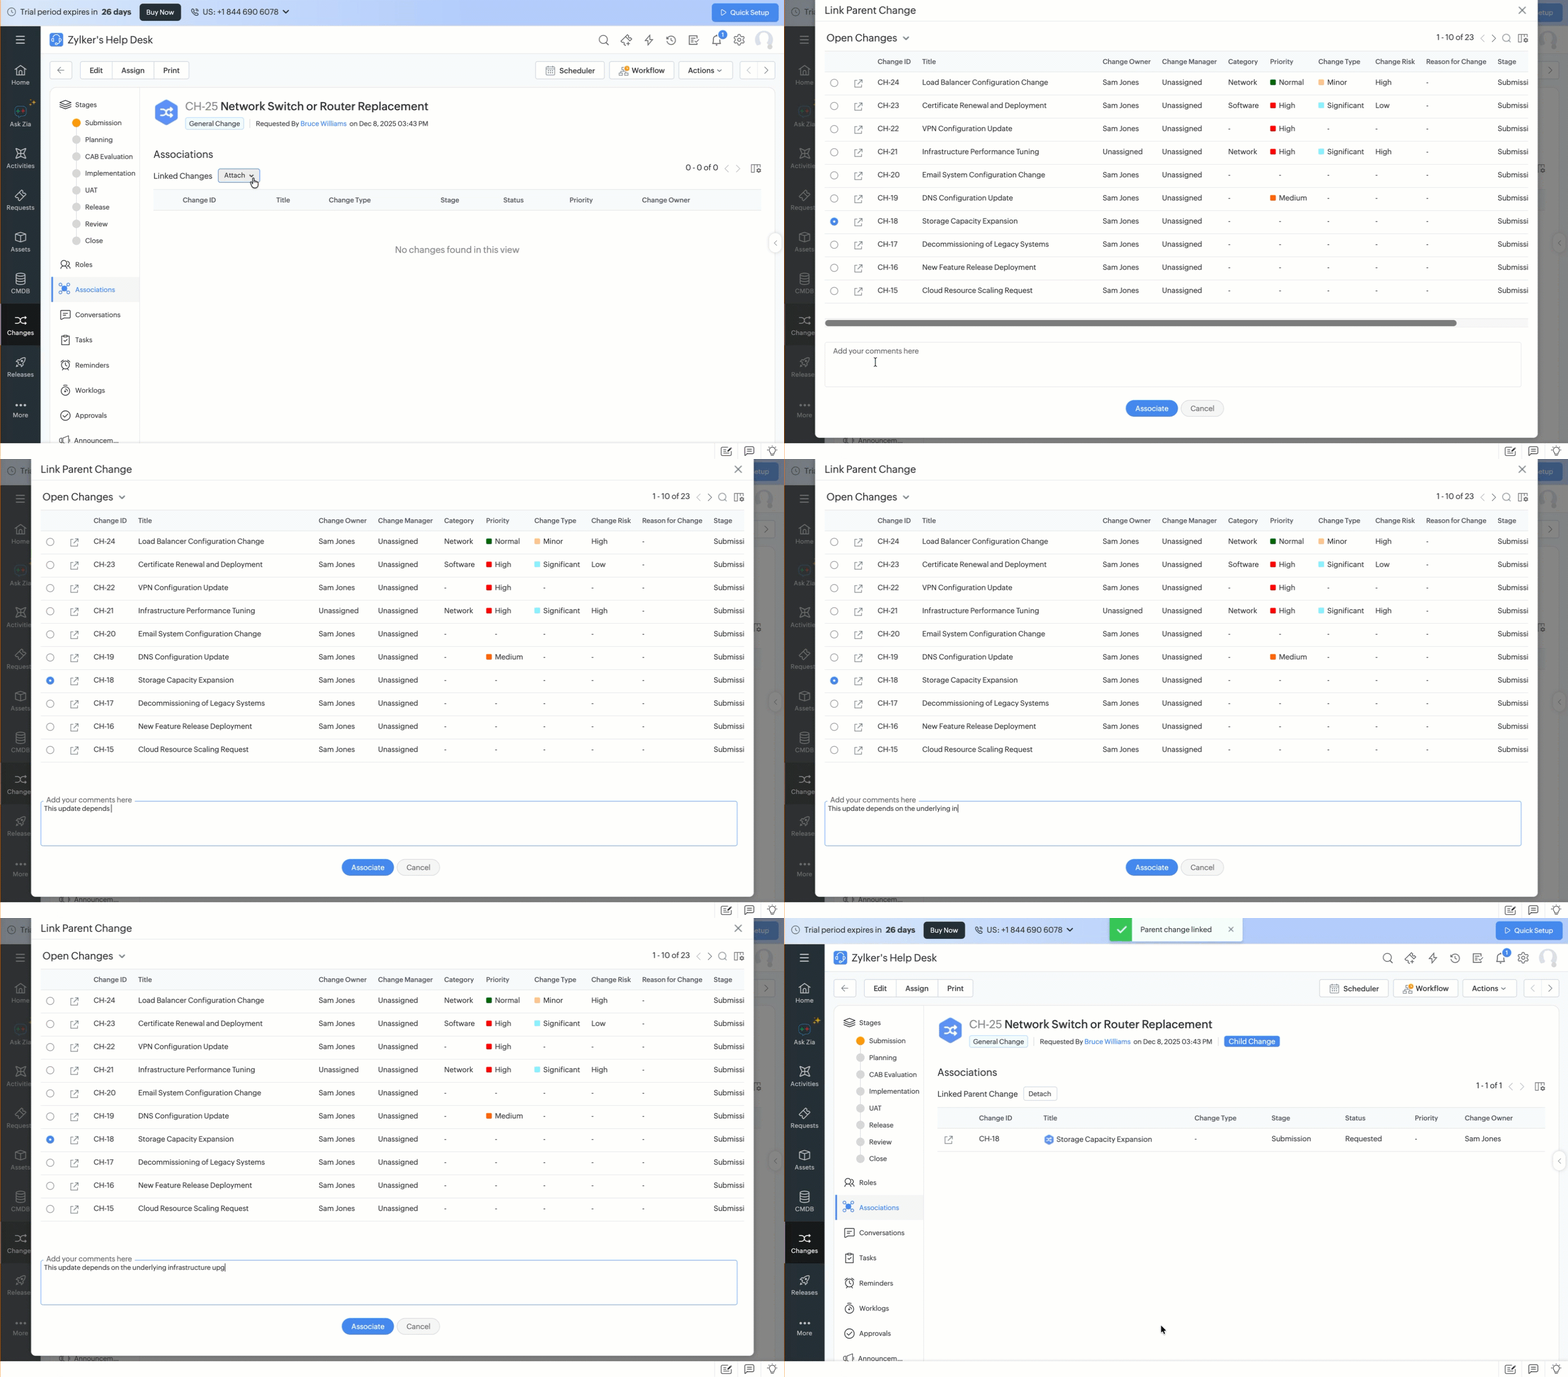
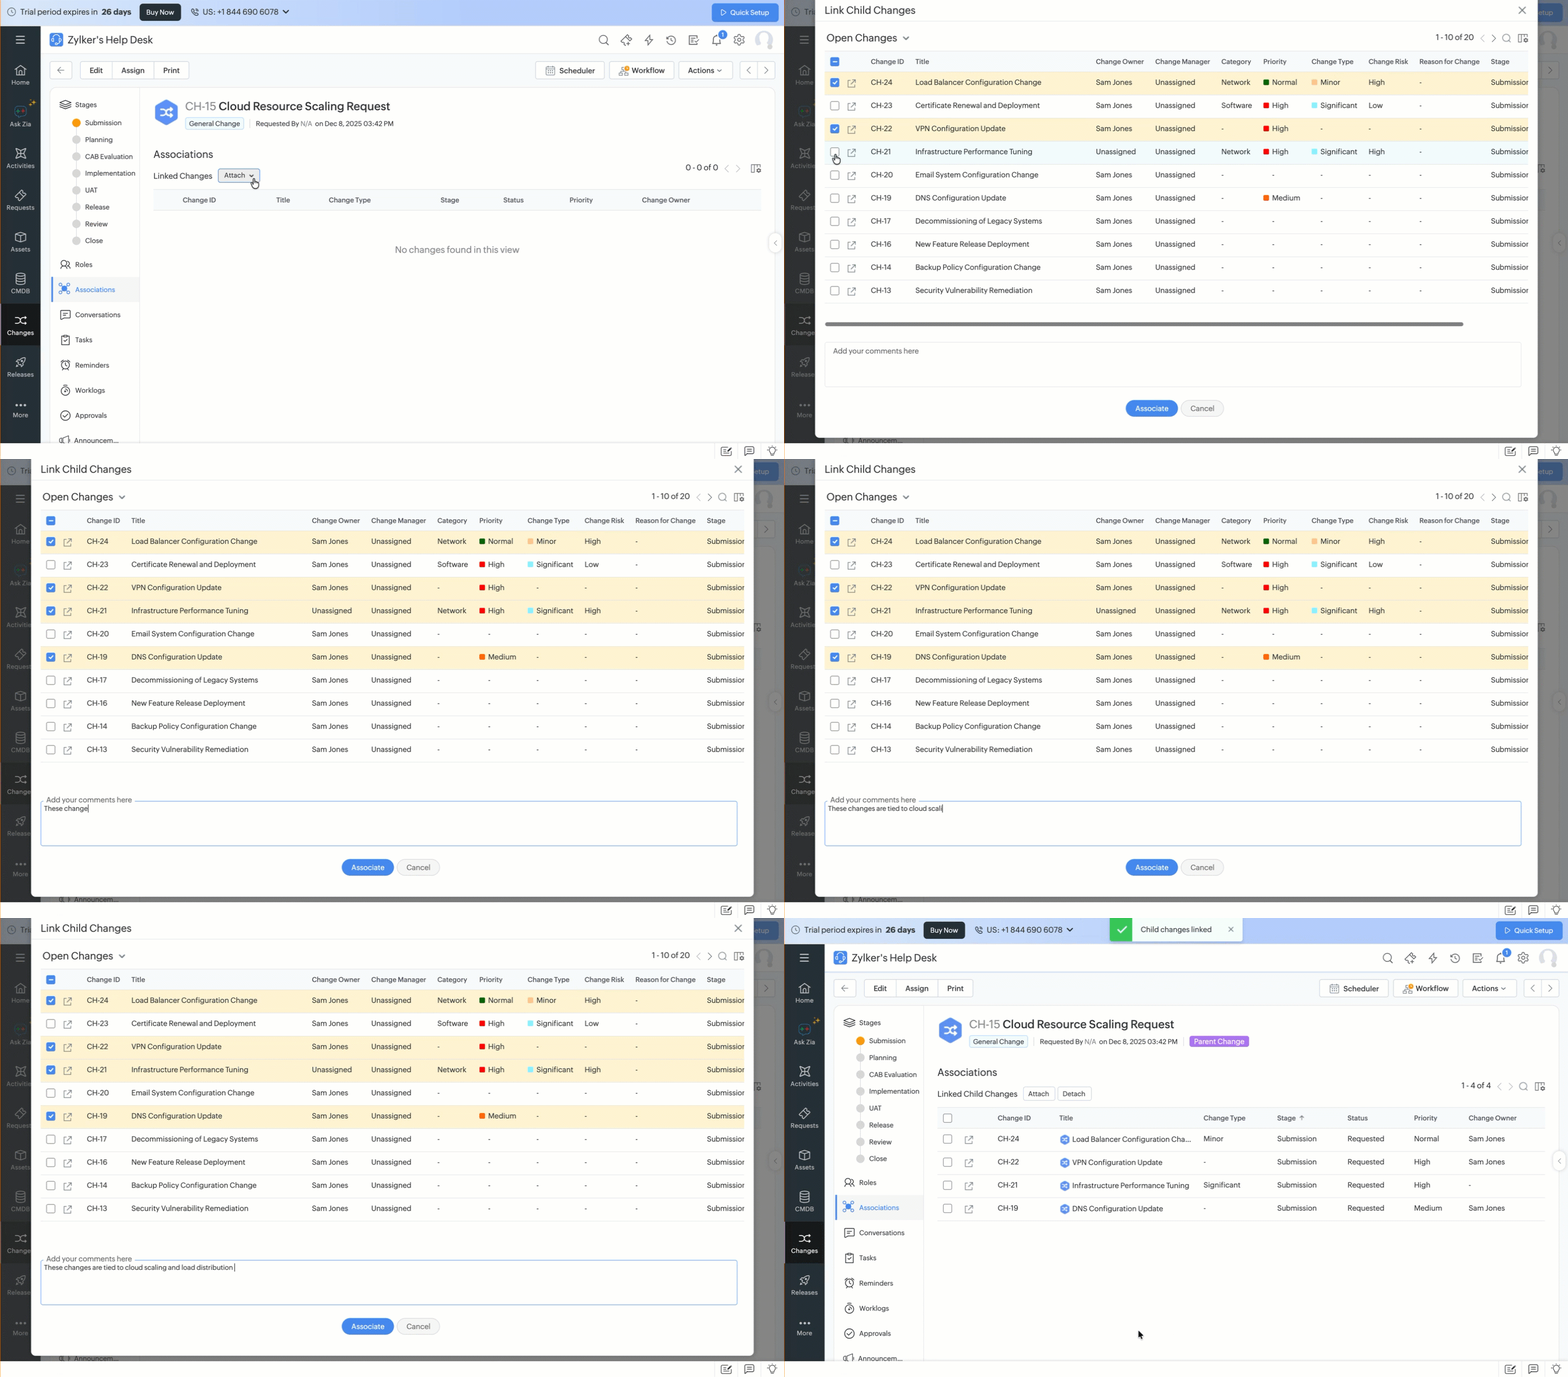
- Link change requests through parent-child relationships to organize, manage, and track complex deployments and related changes, such as staging to production migrations, antivirus patches, or large-scale, multi-phase implementations.
- A change can function as either a parent or a child, but never both.
- Administrators can set closure rules to ensure that a parent change is closed only after all of its child changes are completed. These checks can also be enforced through workflow transitions.
- Users with edit permission to the current stage can link and unlink changes under Associations in the change details page. They cannot perform this action in closed changes, but can link a closed change to open changes.
An Illustration of Linking Parent Change
An Illustration of Linking Child Changes
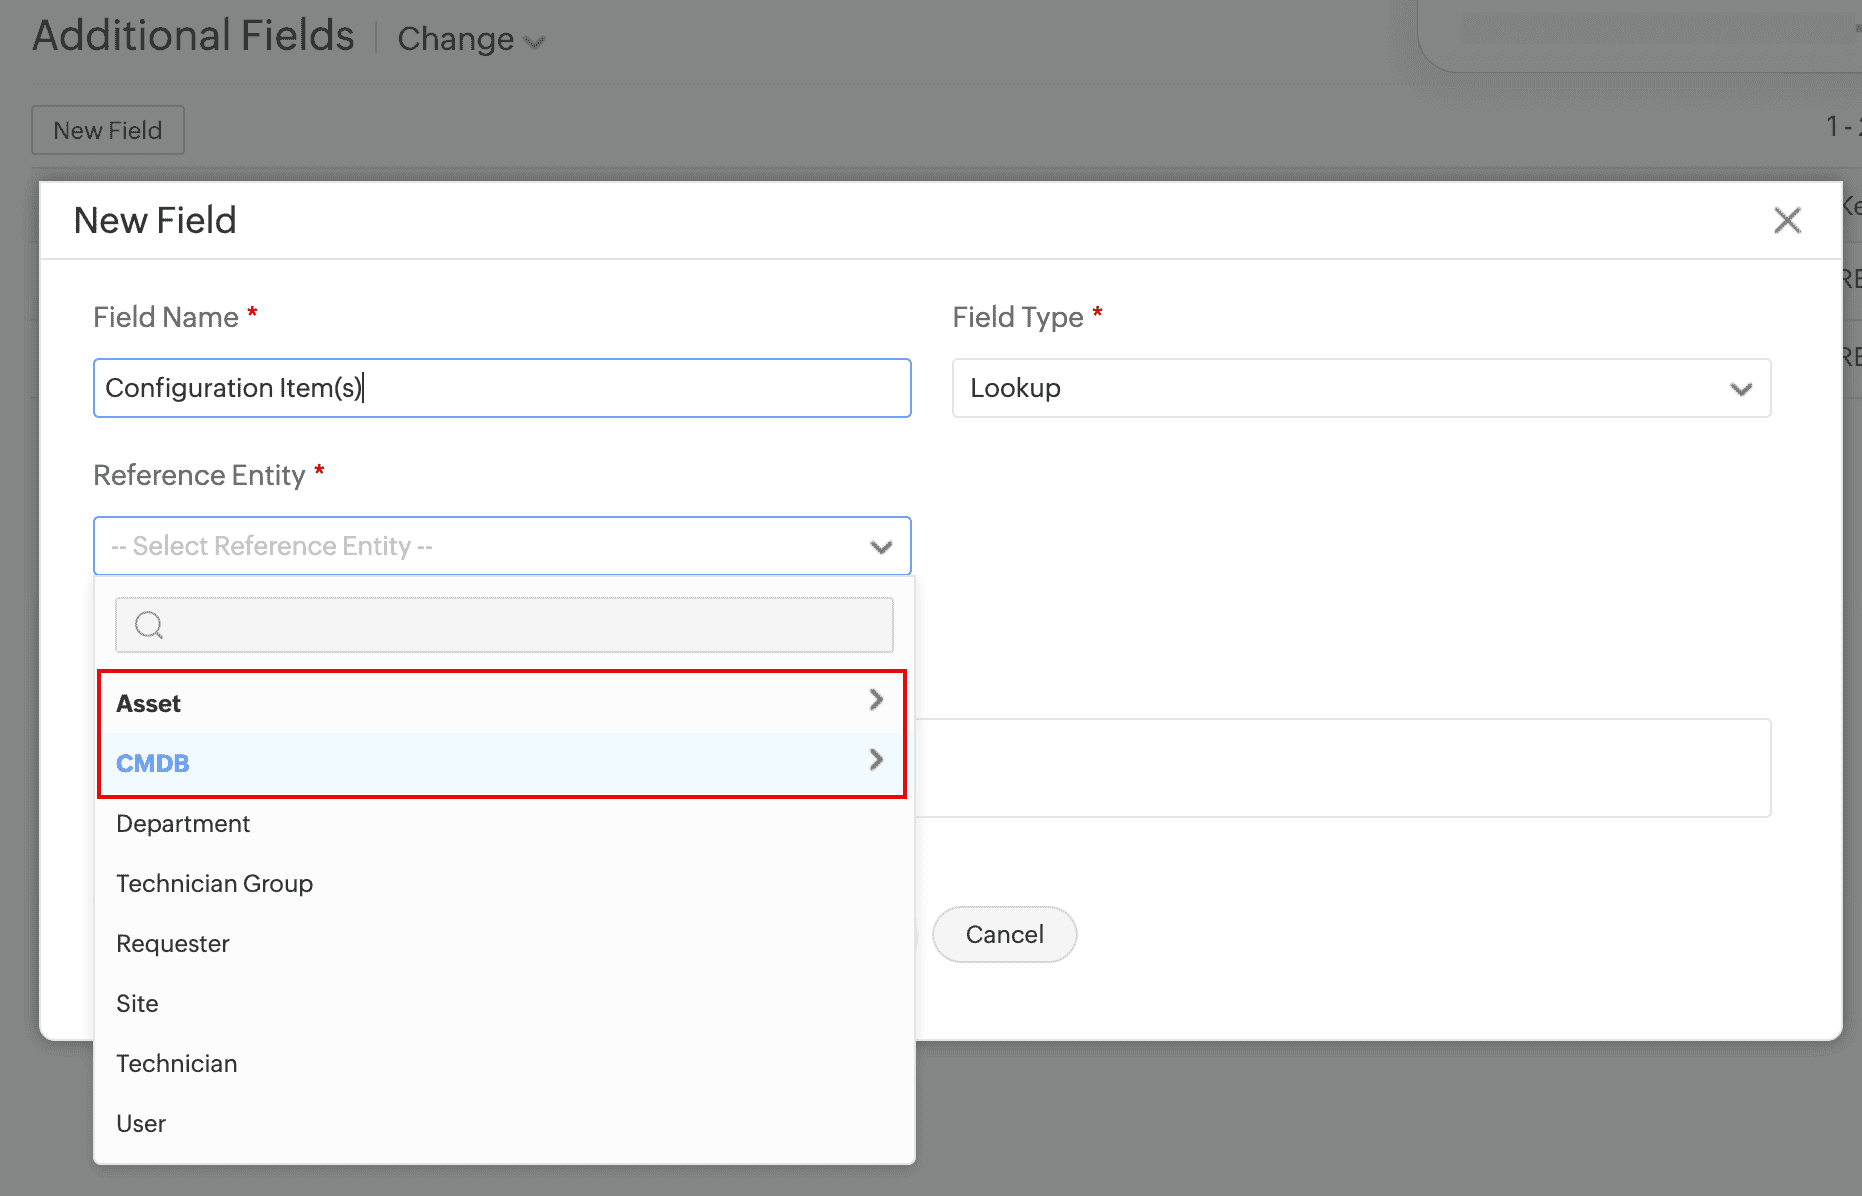
User-Defined Change Lookup Fields
- You can now select Asset and CMDB modules as reference entities for change lookup additional fields.
Release Scheduler
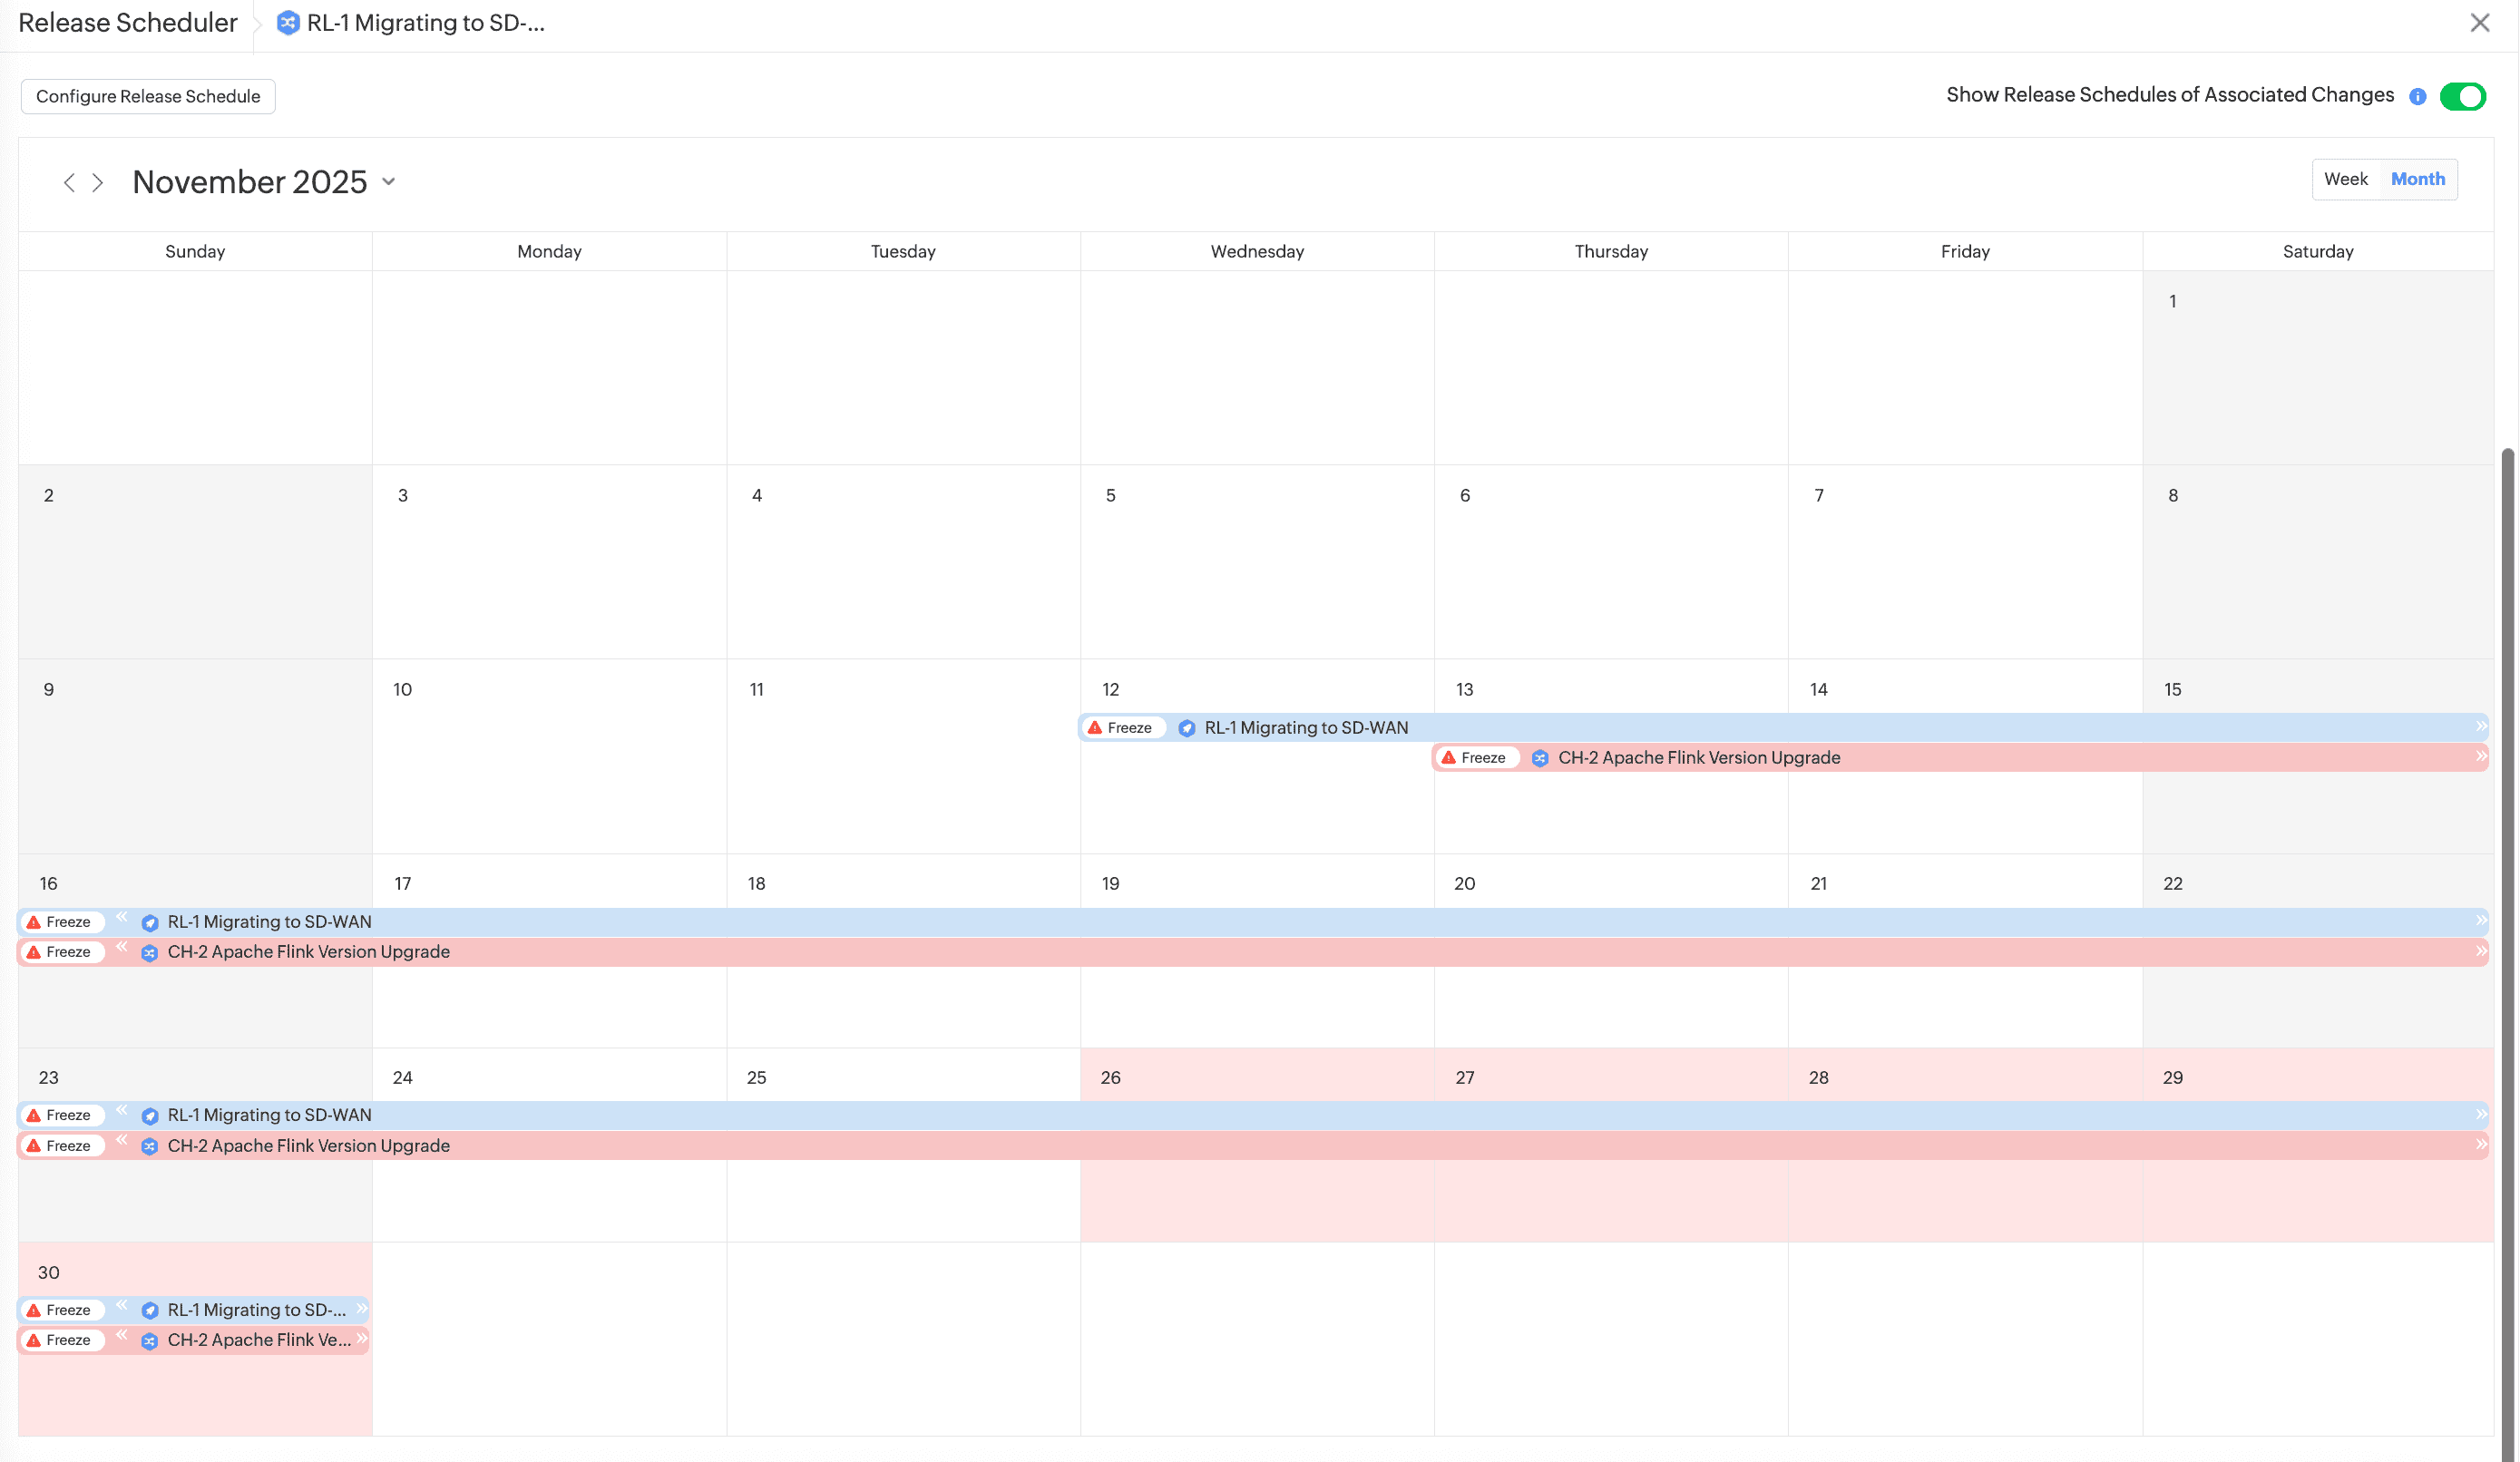
- The release details page now includes Scheduler, a weekly/monthly calendar that displays schedule of the release and its associated changes (each color-coded based on their change type), besides matching or conflicting freeze windows.
- Users with edit permissions can use Configure Release Schedule to modify the release's schedule.
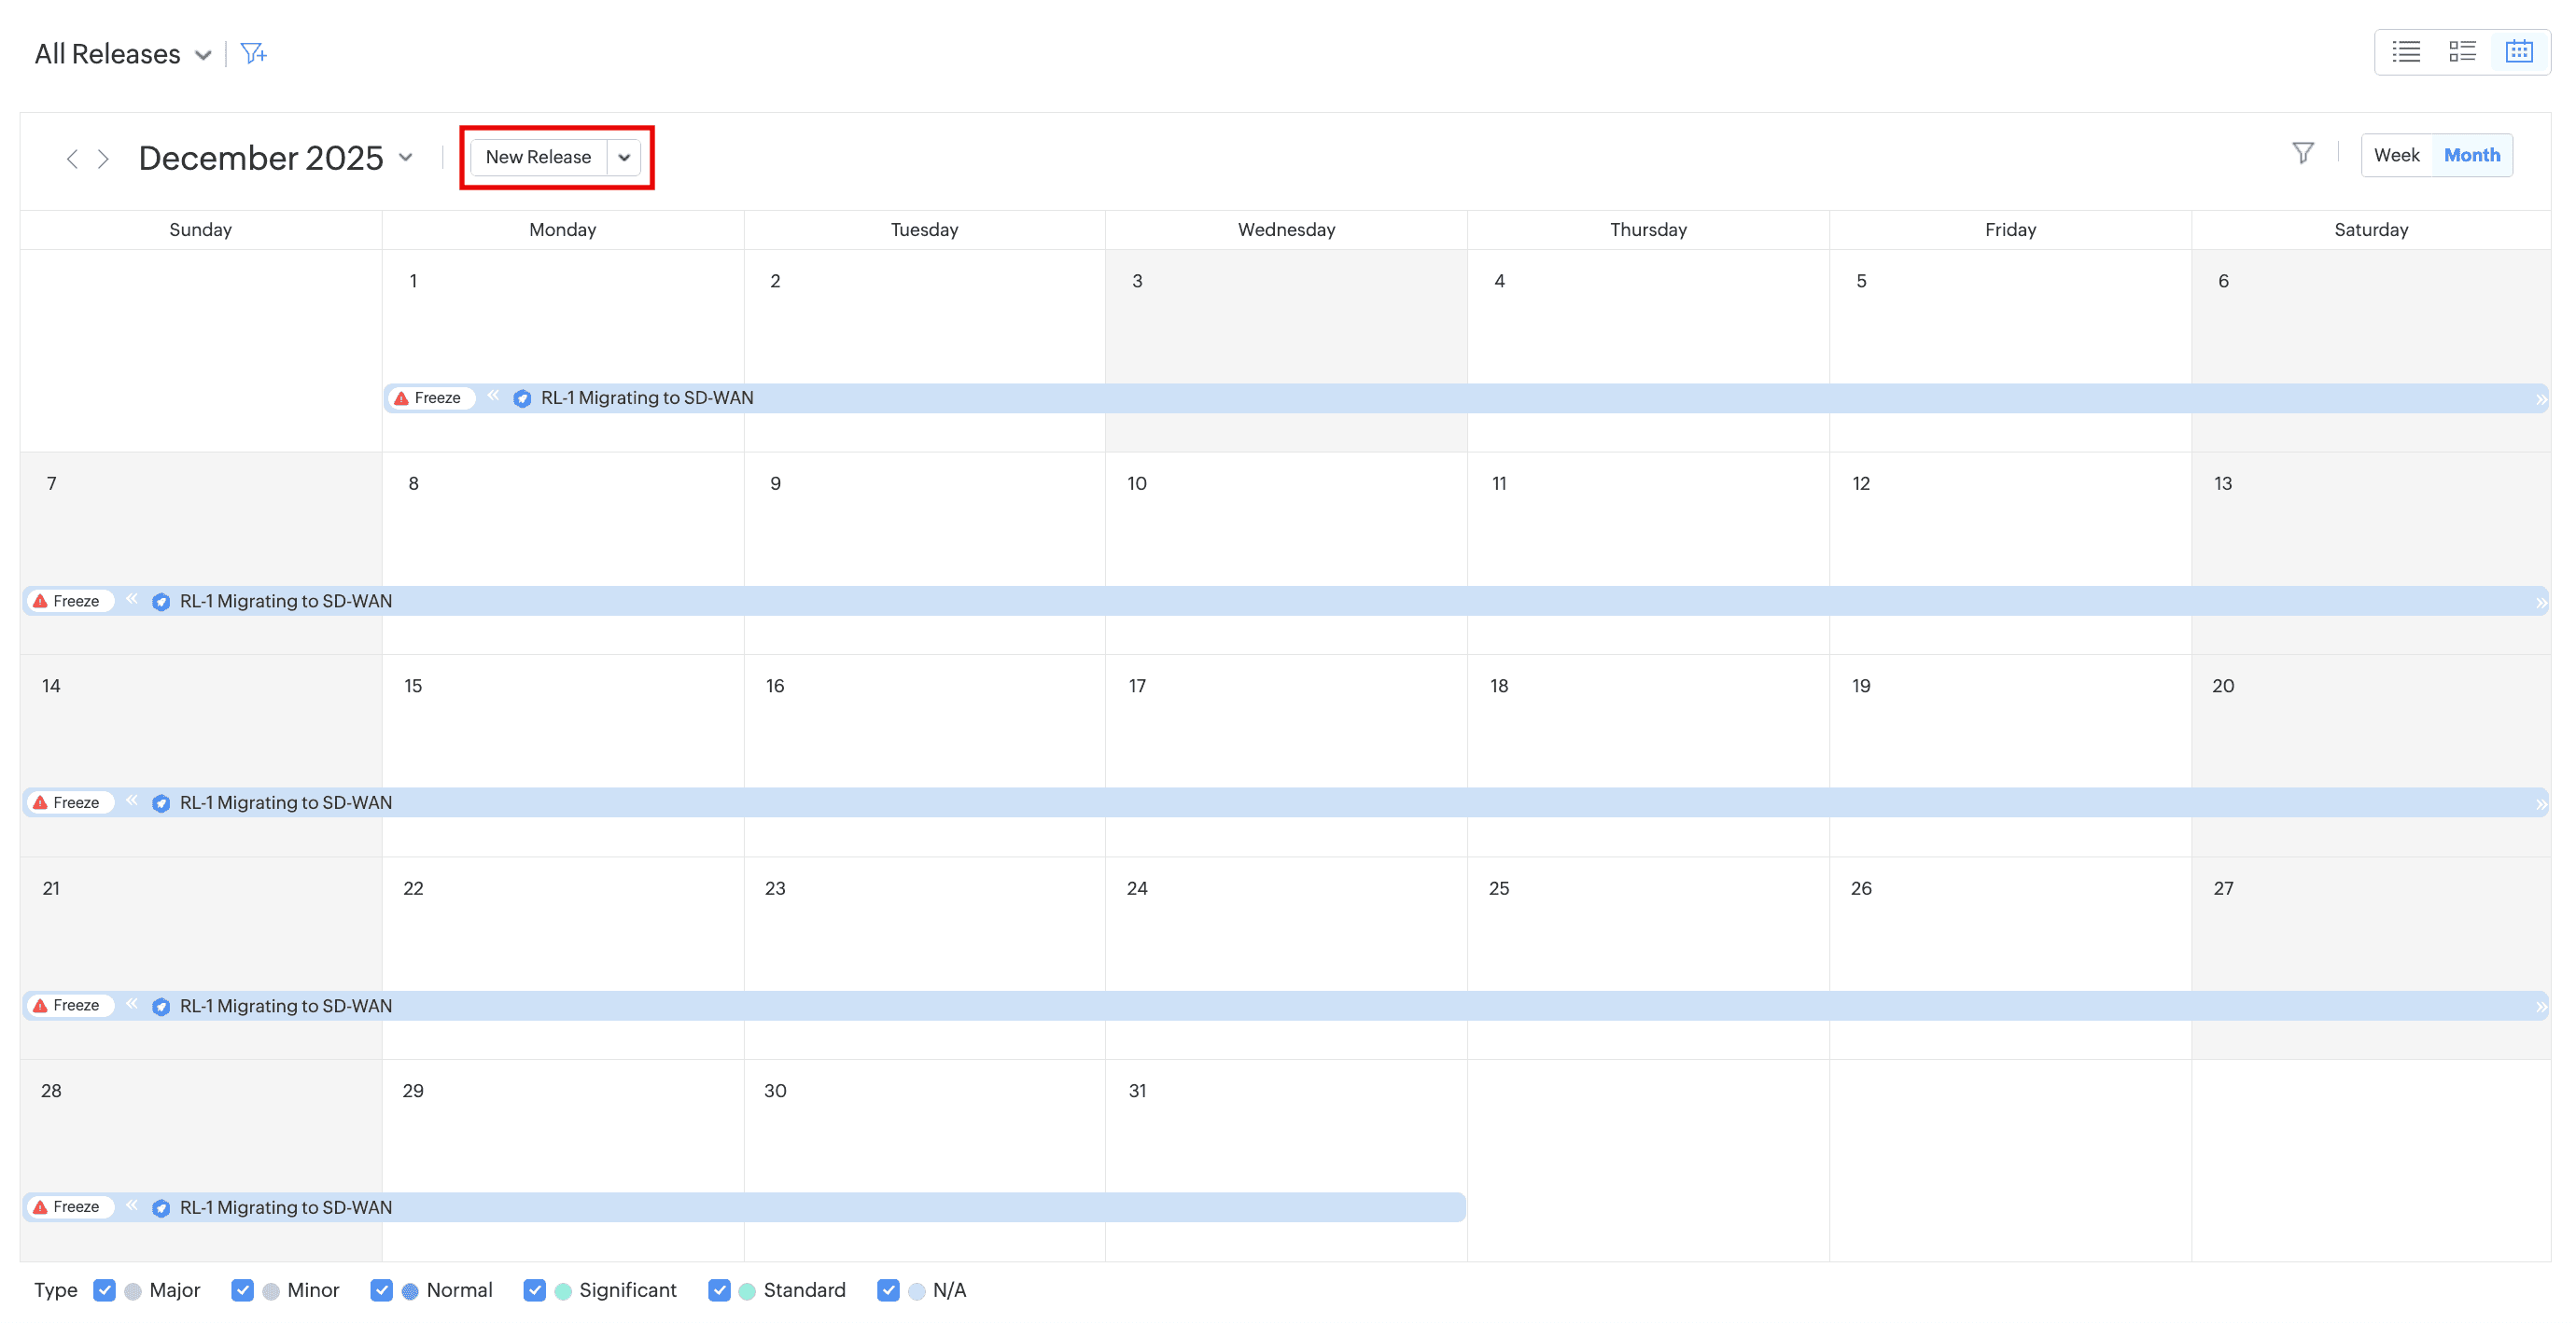
Release Calendar View Enhancement
- You can now create releases from the calendar view.
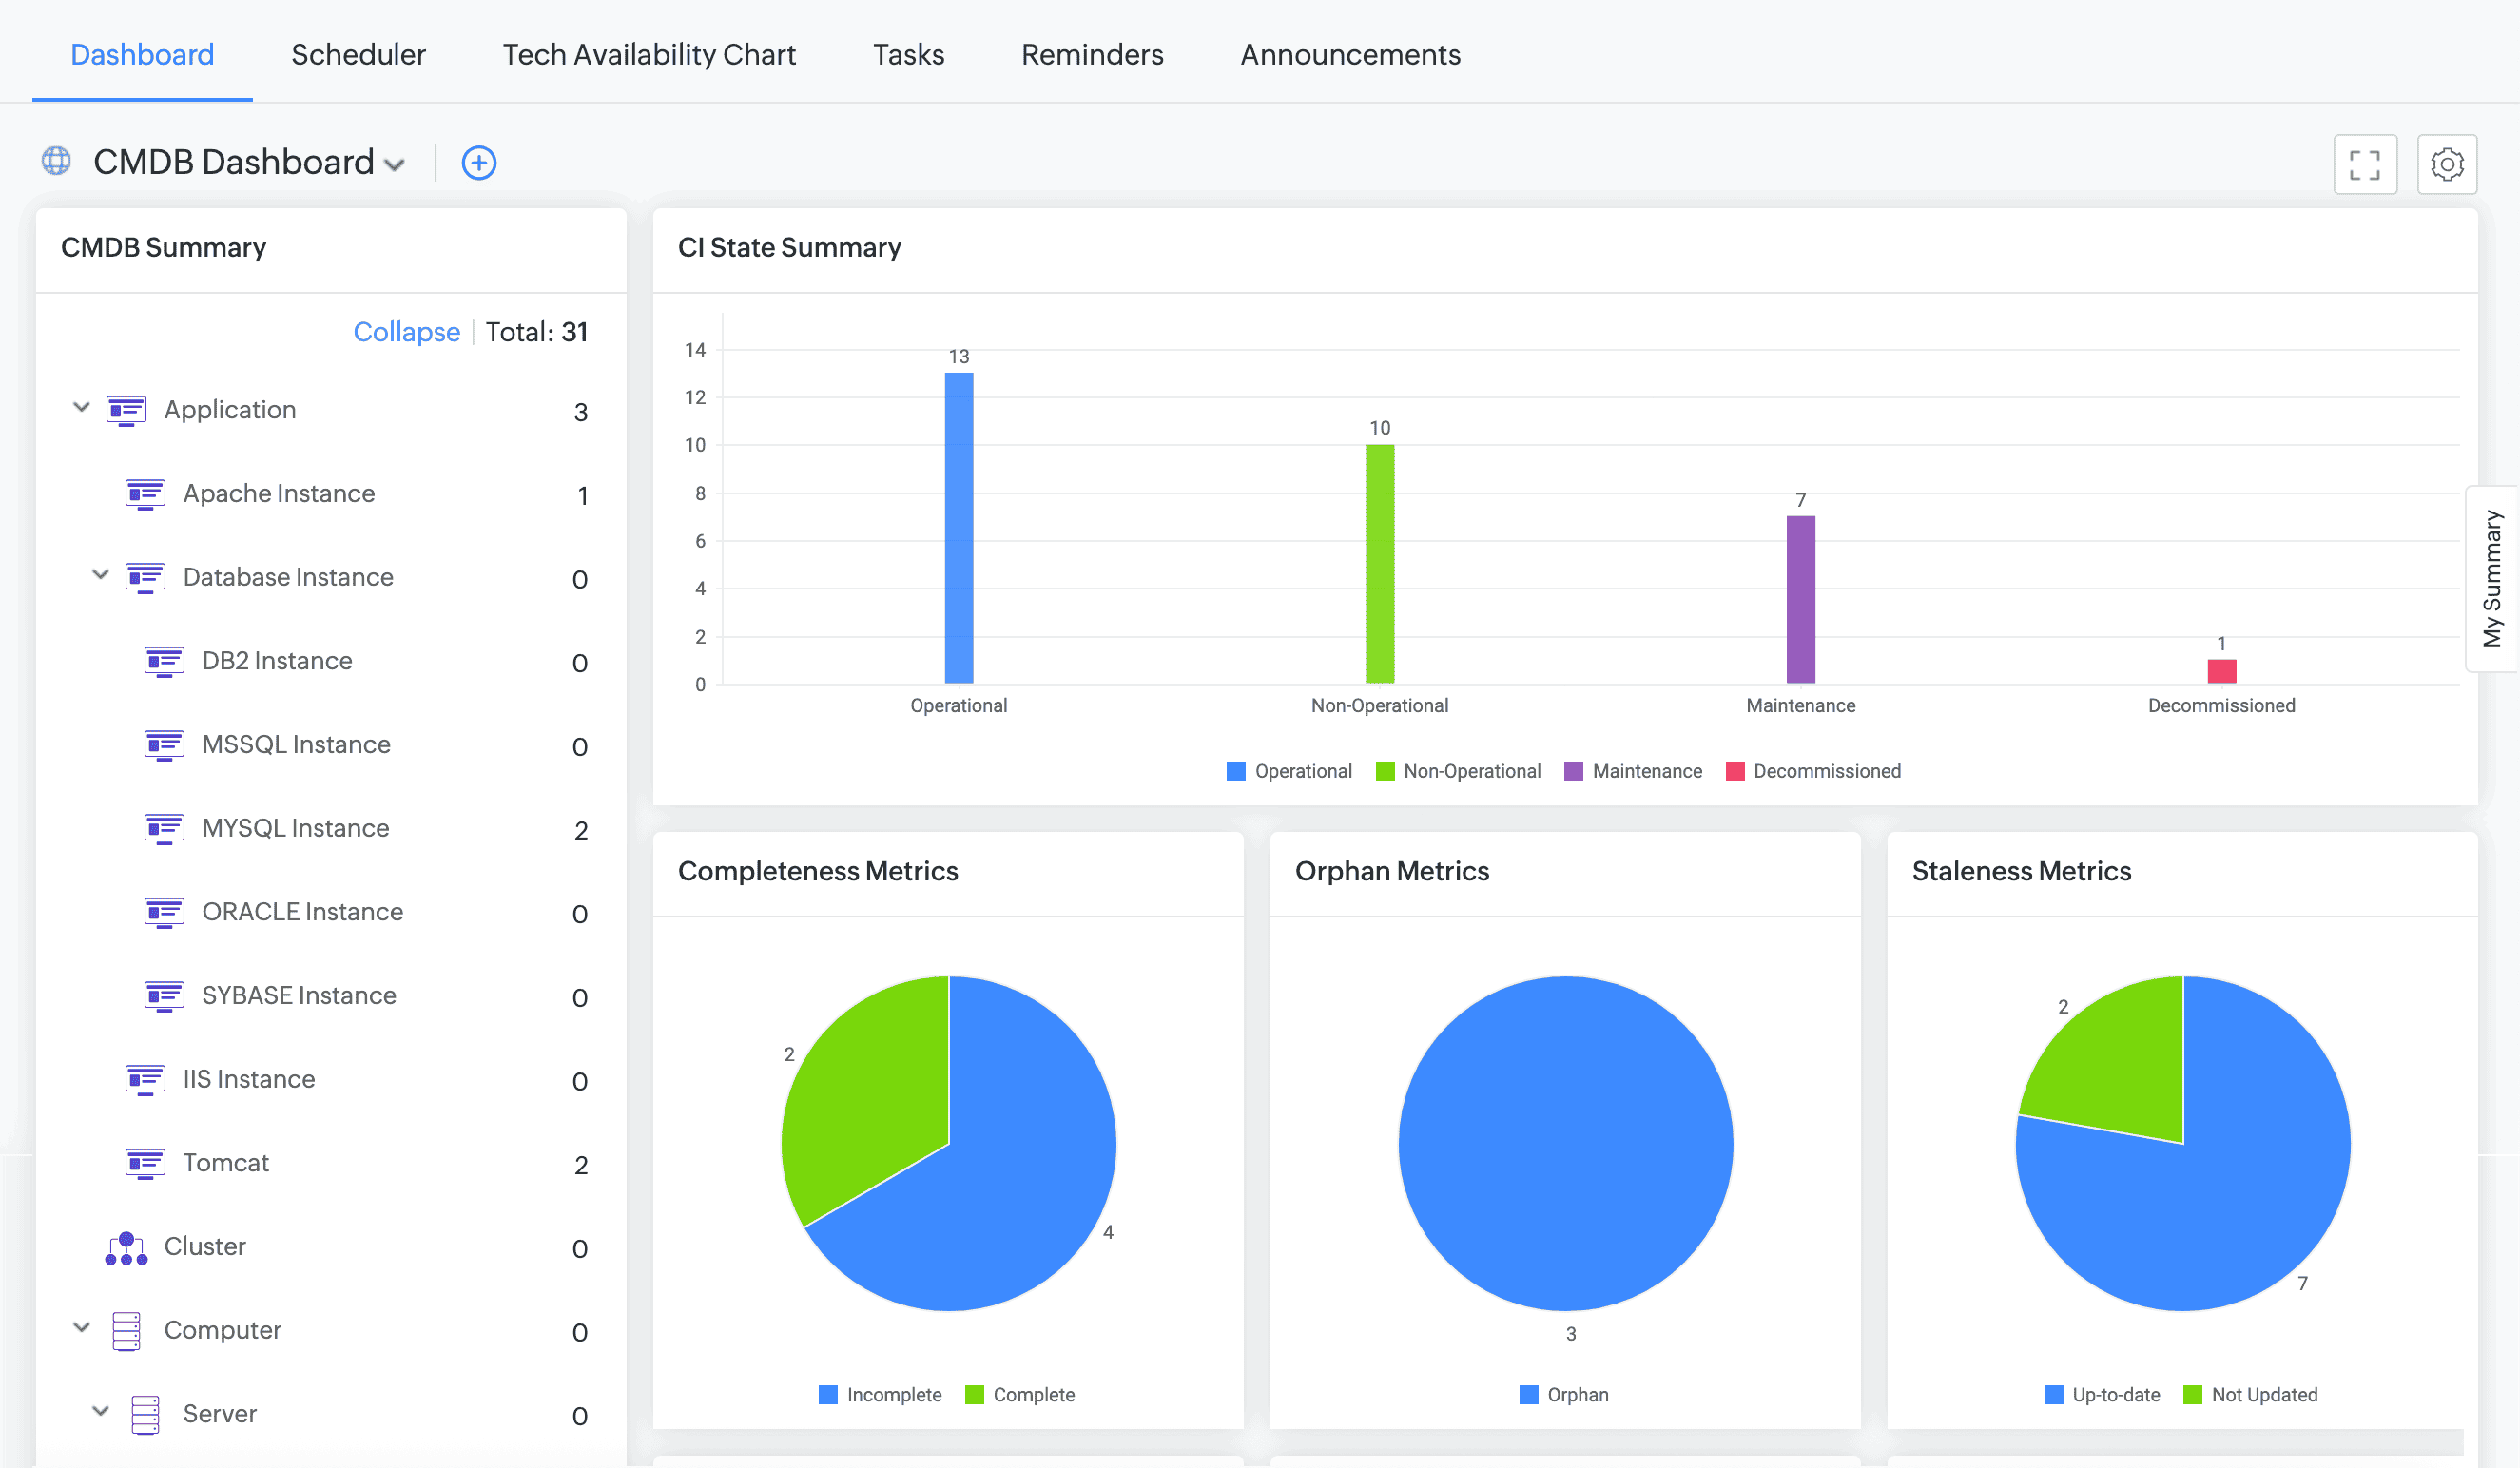
CMDB Dashboard
- Introducing the CMDB dashboard, a centralized interface that provides a comprehensive view of all configuration items (CIs). You can track CI counts by status and monitor key data quality metrics such as completeness, orphan, and staleness and view associations of CI with other modules.
Checklist Enhancements
- Checklists are now available as custom actions under Setup > Automation > Custom Actions > Checklists.

Automations
- Checklist actions can be executed via triggers, workflows, workflow transitions, and timers.
Triggers
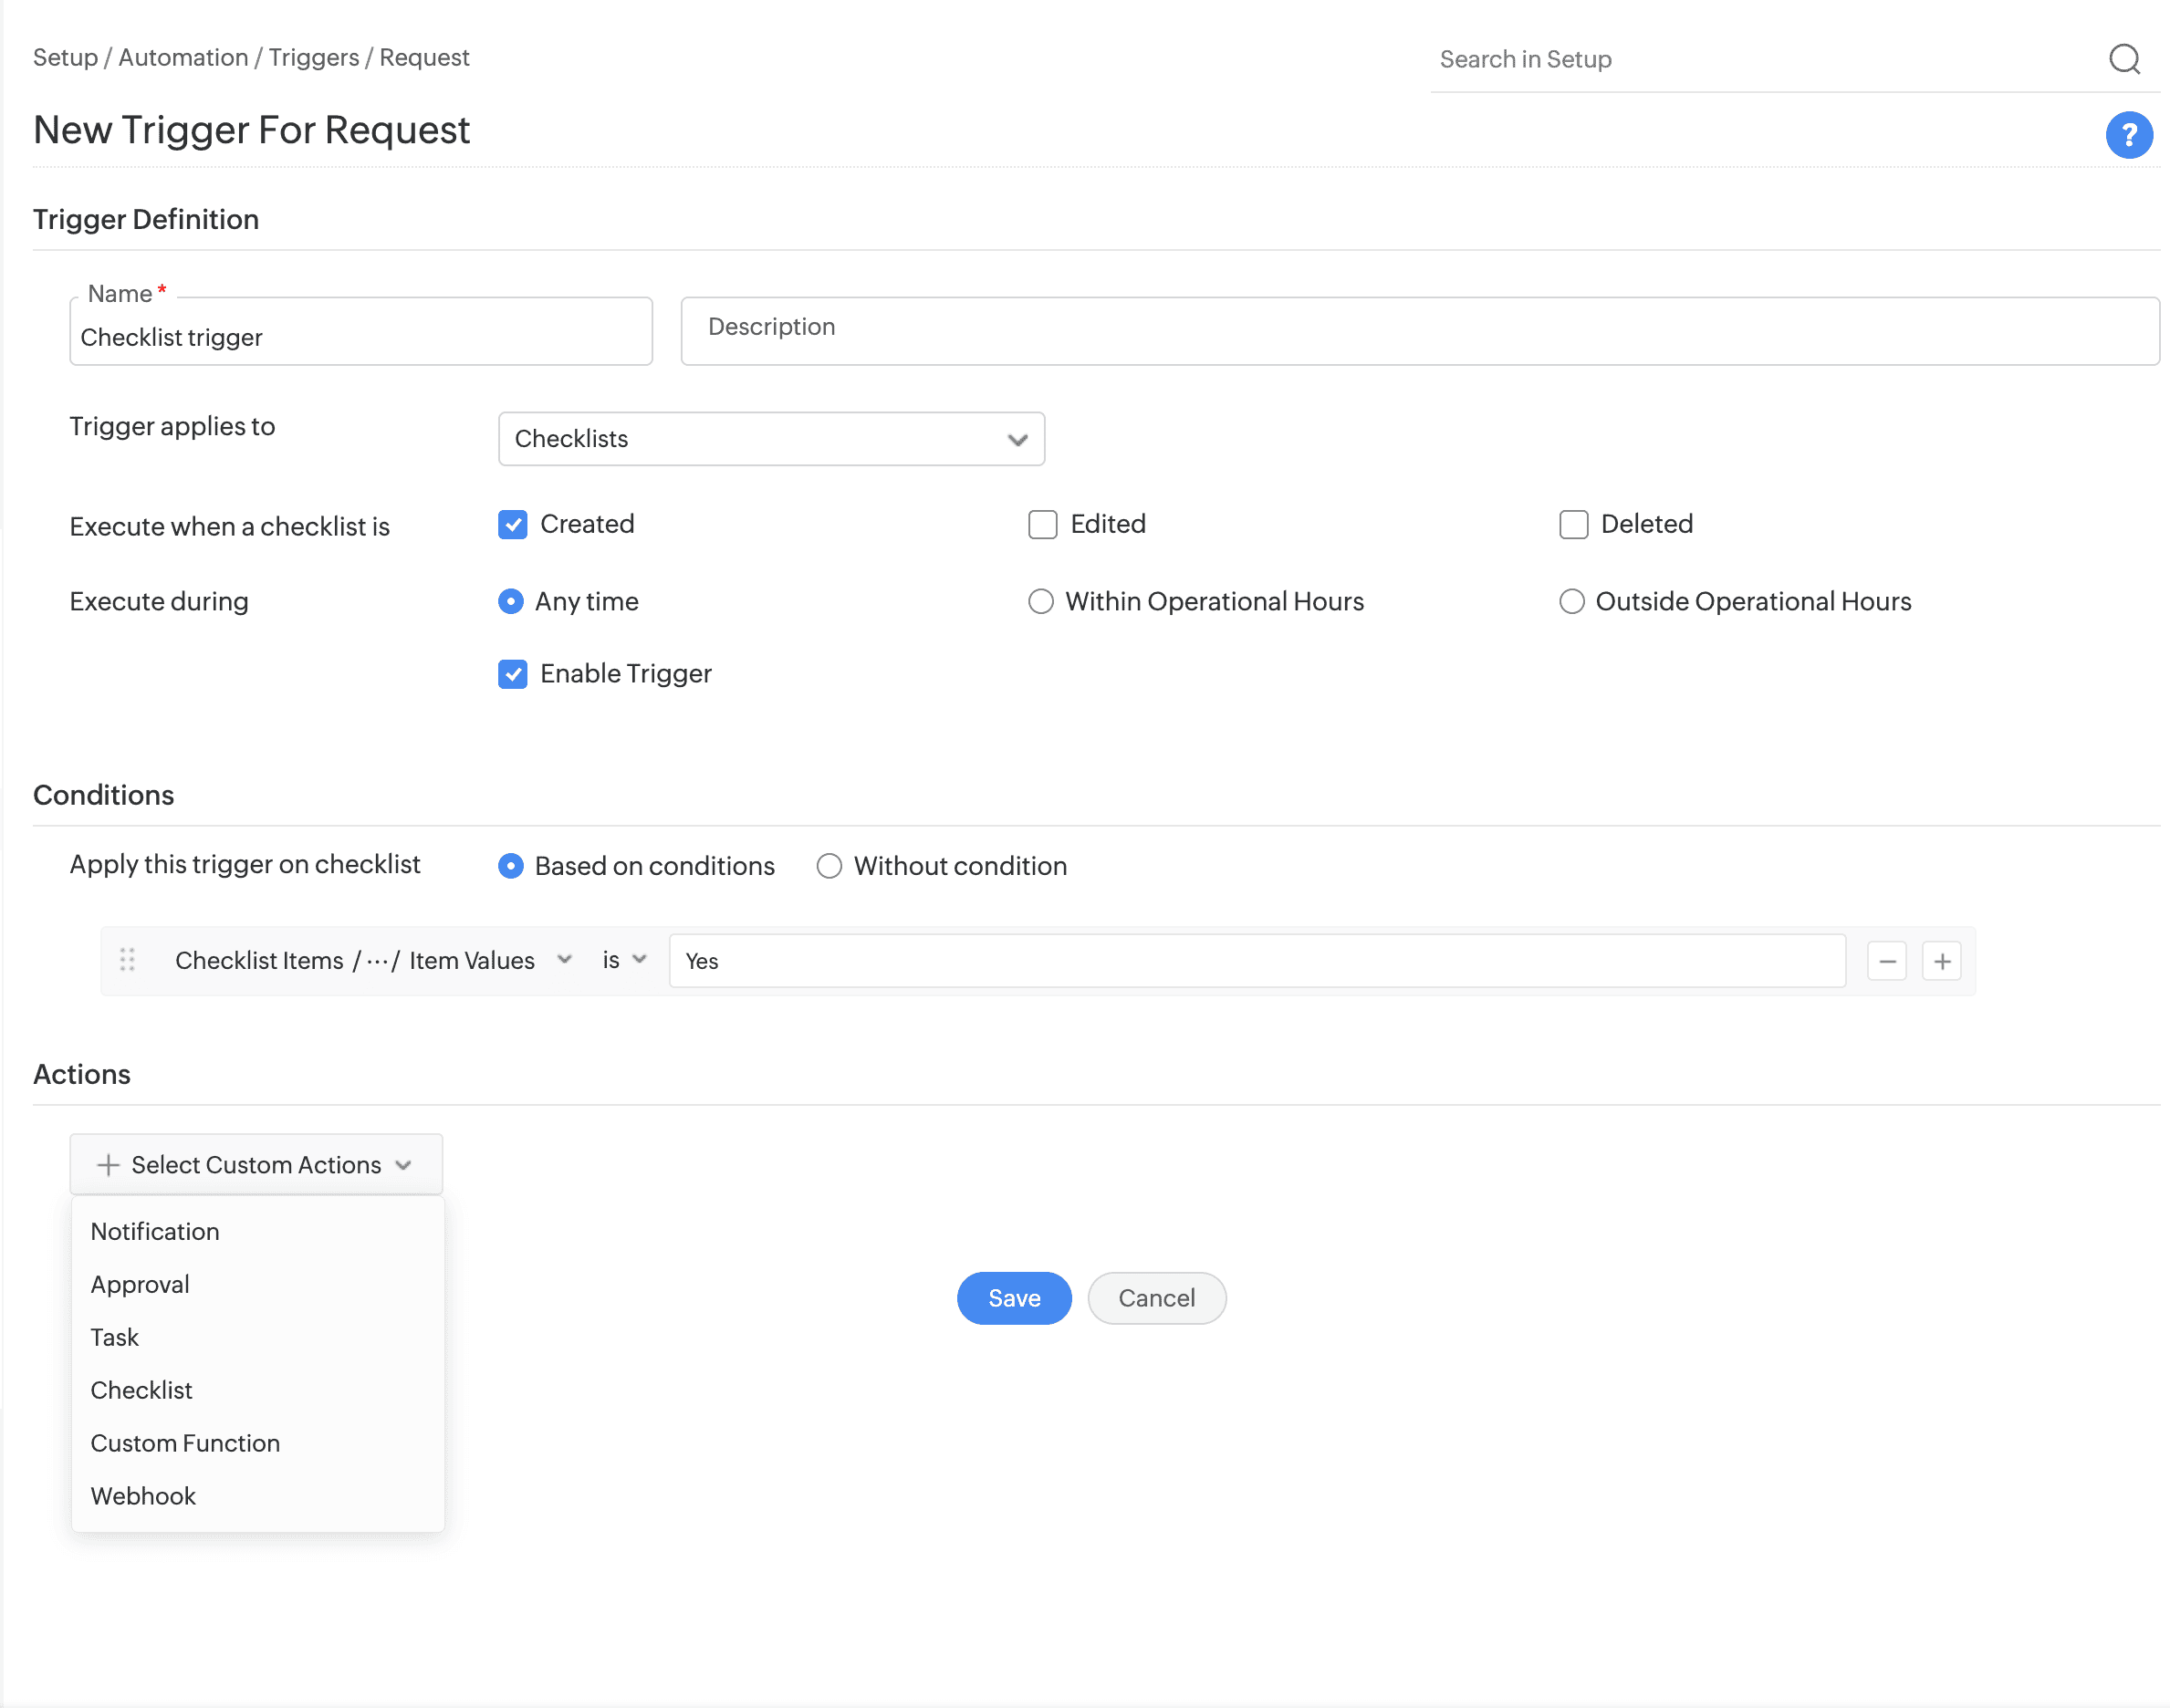
- Triggers can be configured for checklists (request subentity) and can be executed when a checklist is created, edited, or deleted.
- Checklist items can be used as criteria when configuring triggers.
Workflow Transitions
- In Incident and Service Request workflows, Checklist is available as an action node.
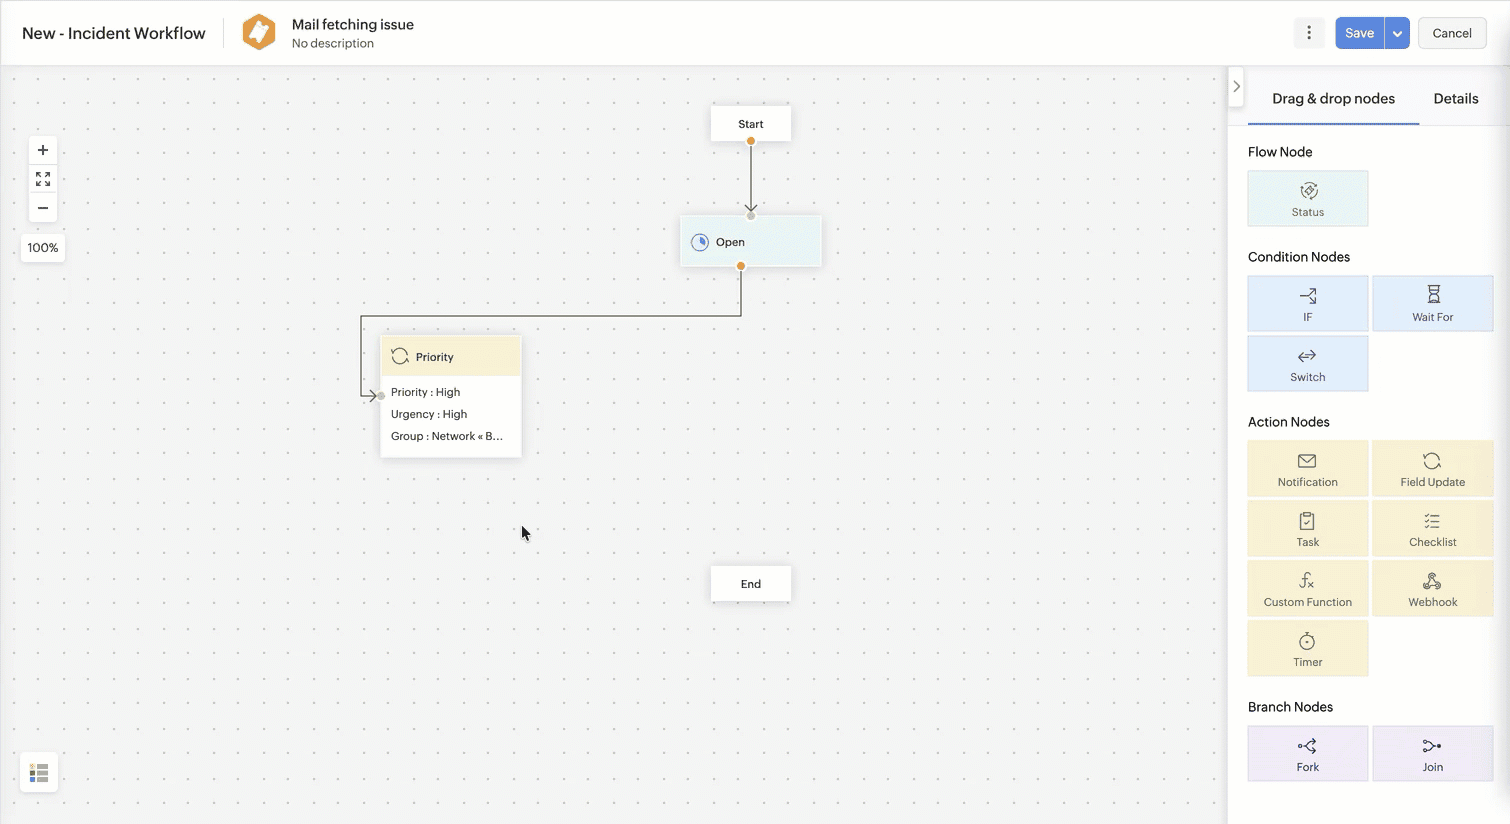
Workflow Transitions
- Checklist actions can be configured under Post-Action Rules in workflow transitions.
Timer
- Checklist actions can be configured within Abort Timer settings.
Incident and Service Request Templates
- Under the Checklists tab, Manage Checklists now supports bulk dissociation of checklists.
- A new requester permission Allow requesters to view checklists in requests created using this template is added under the Checklists tab for templates accessible to requesters.
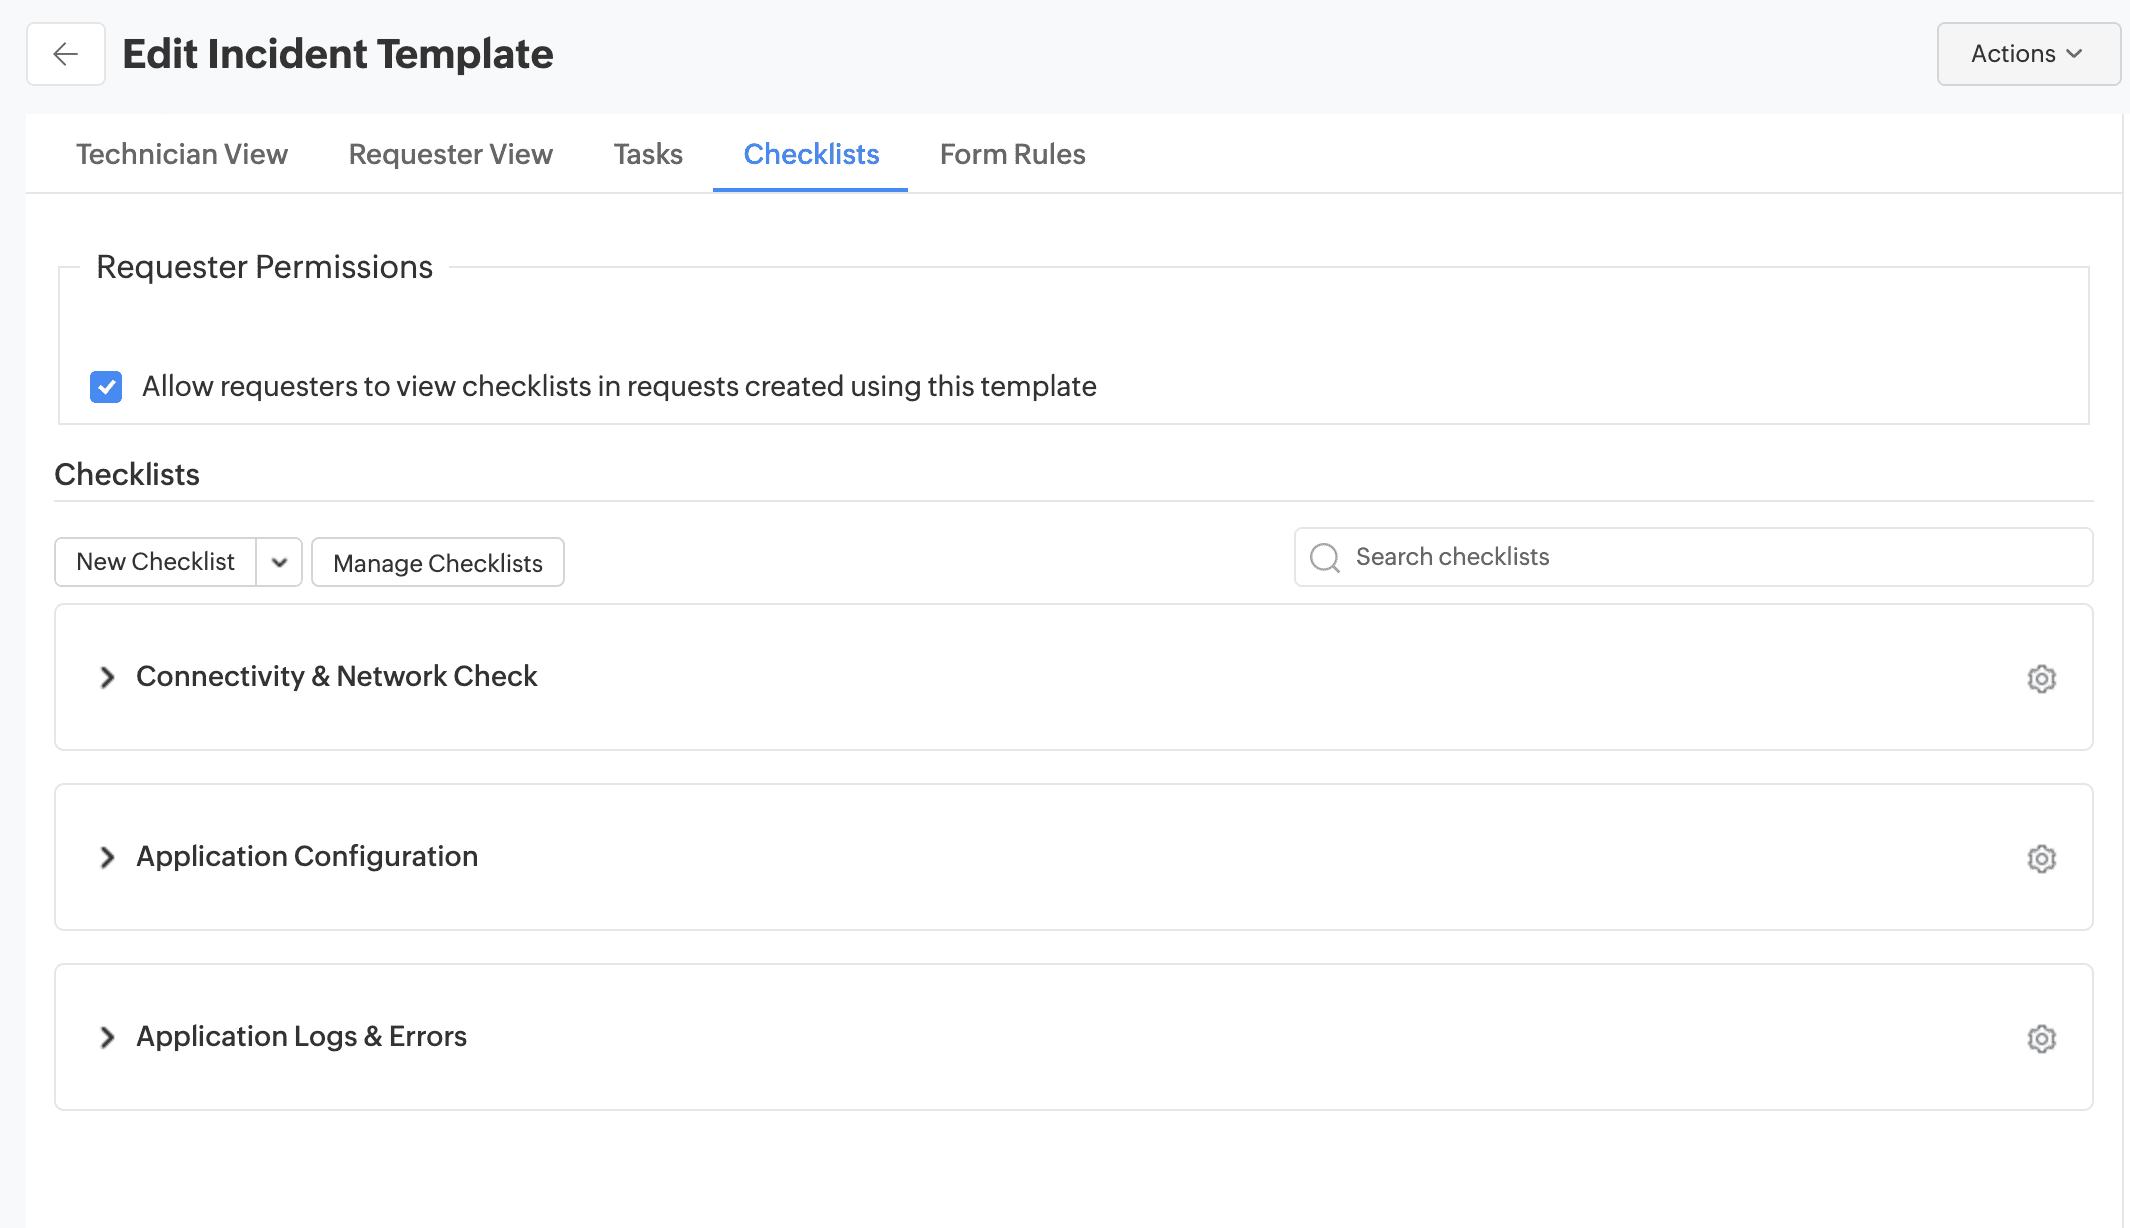
Incident/Service Requests
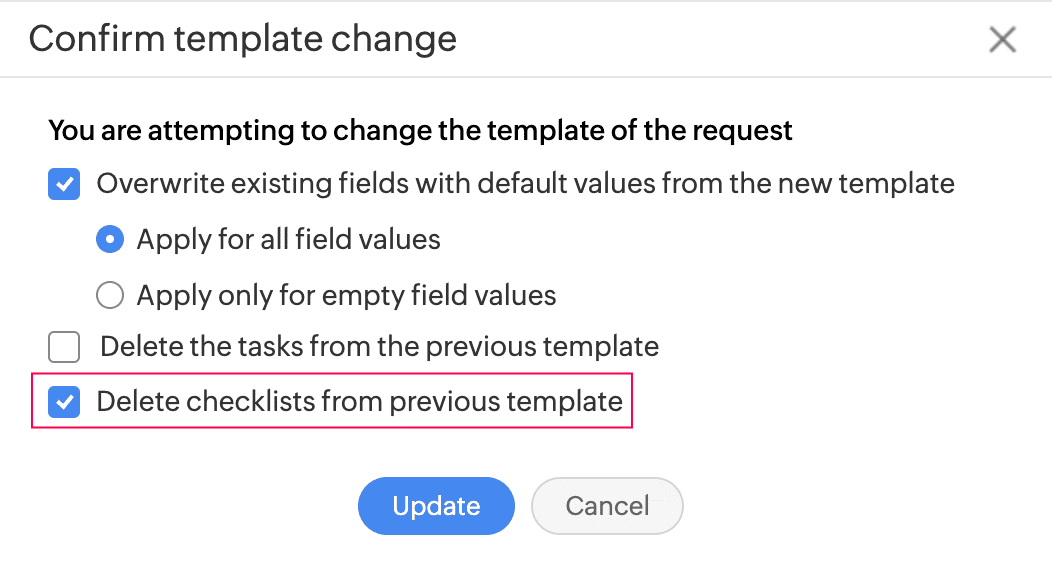
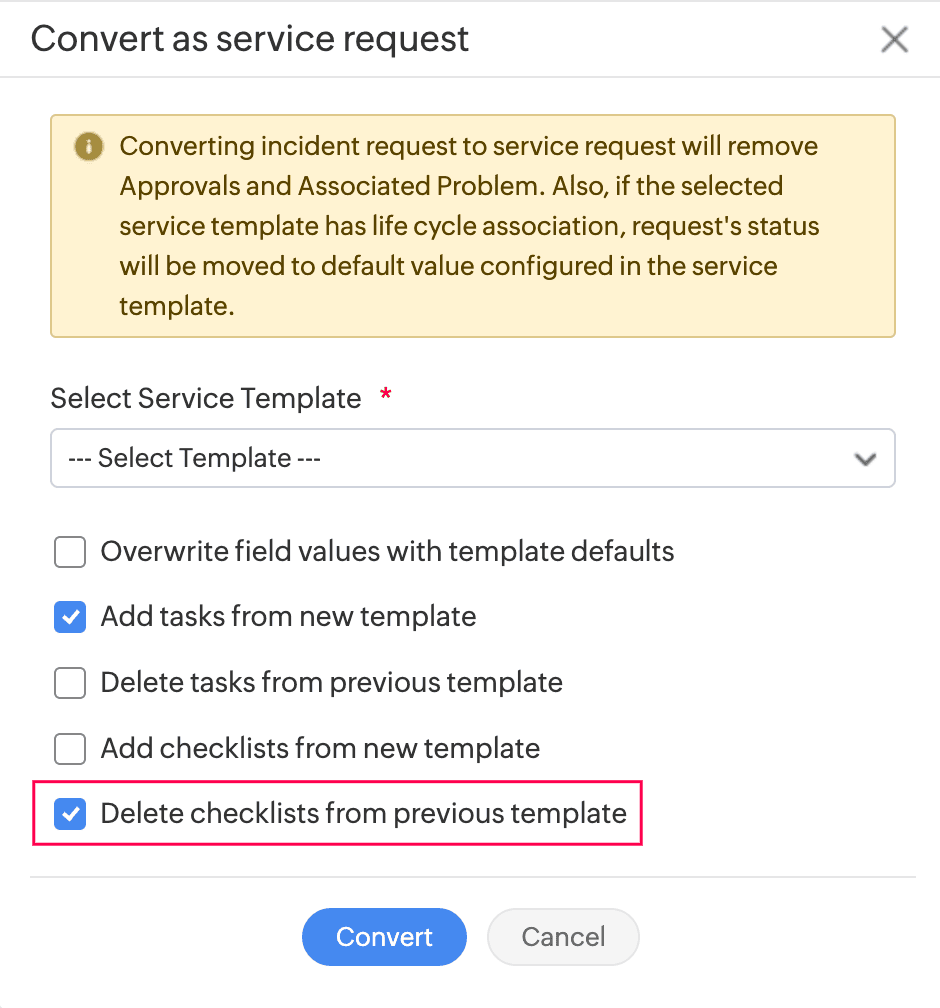
- While converting a request type, you can delete checklists from the previous template. This applies to both incident and service requests.
Timer Action Enhancements
- Define automated actions to run within a specific time window and configure time-delayed actions for sub-entities such as tasks and approval levels across requests, changes, problems, and releases.
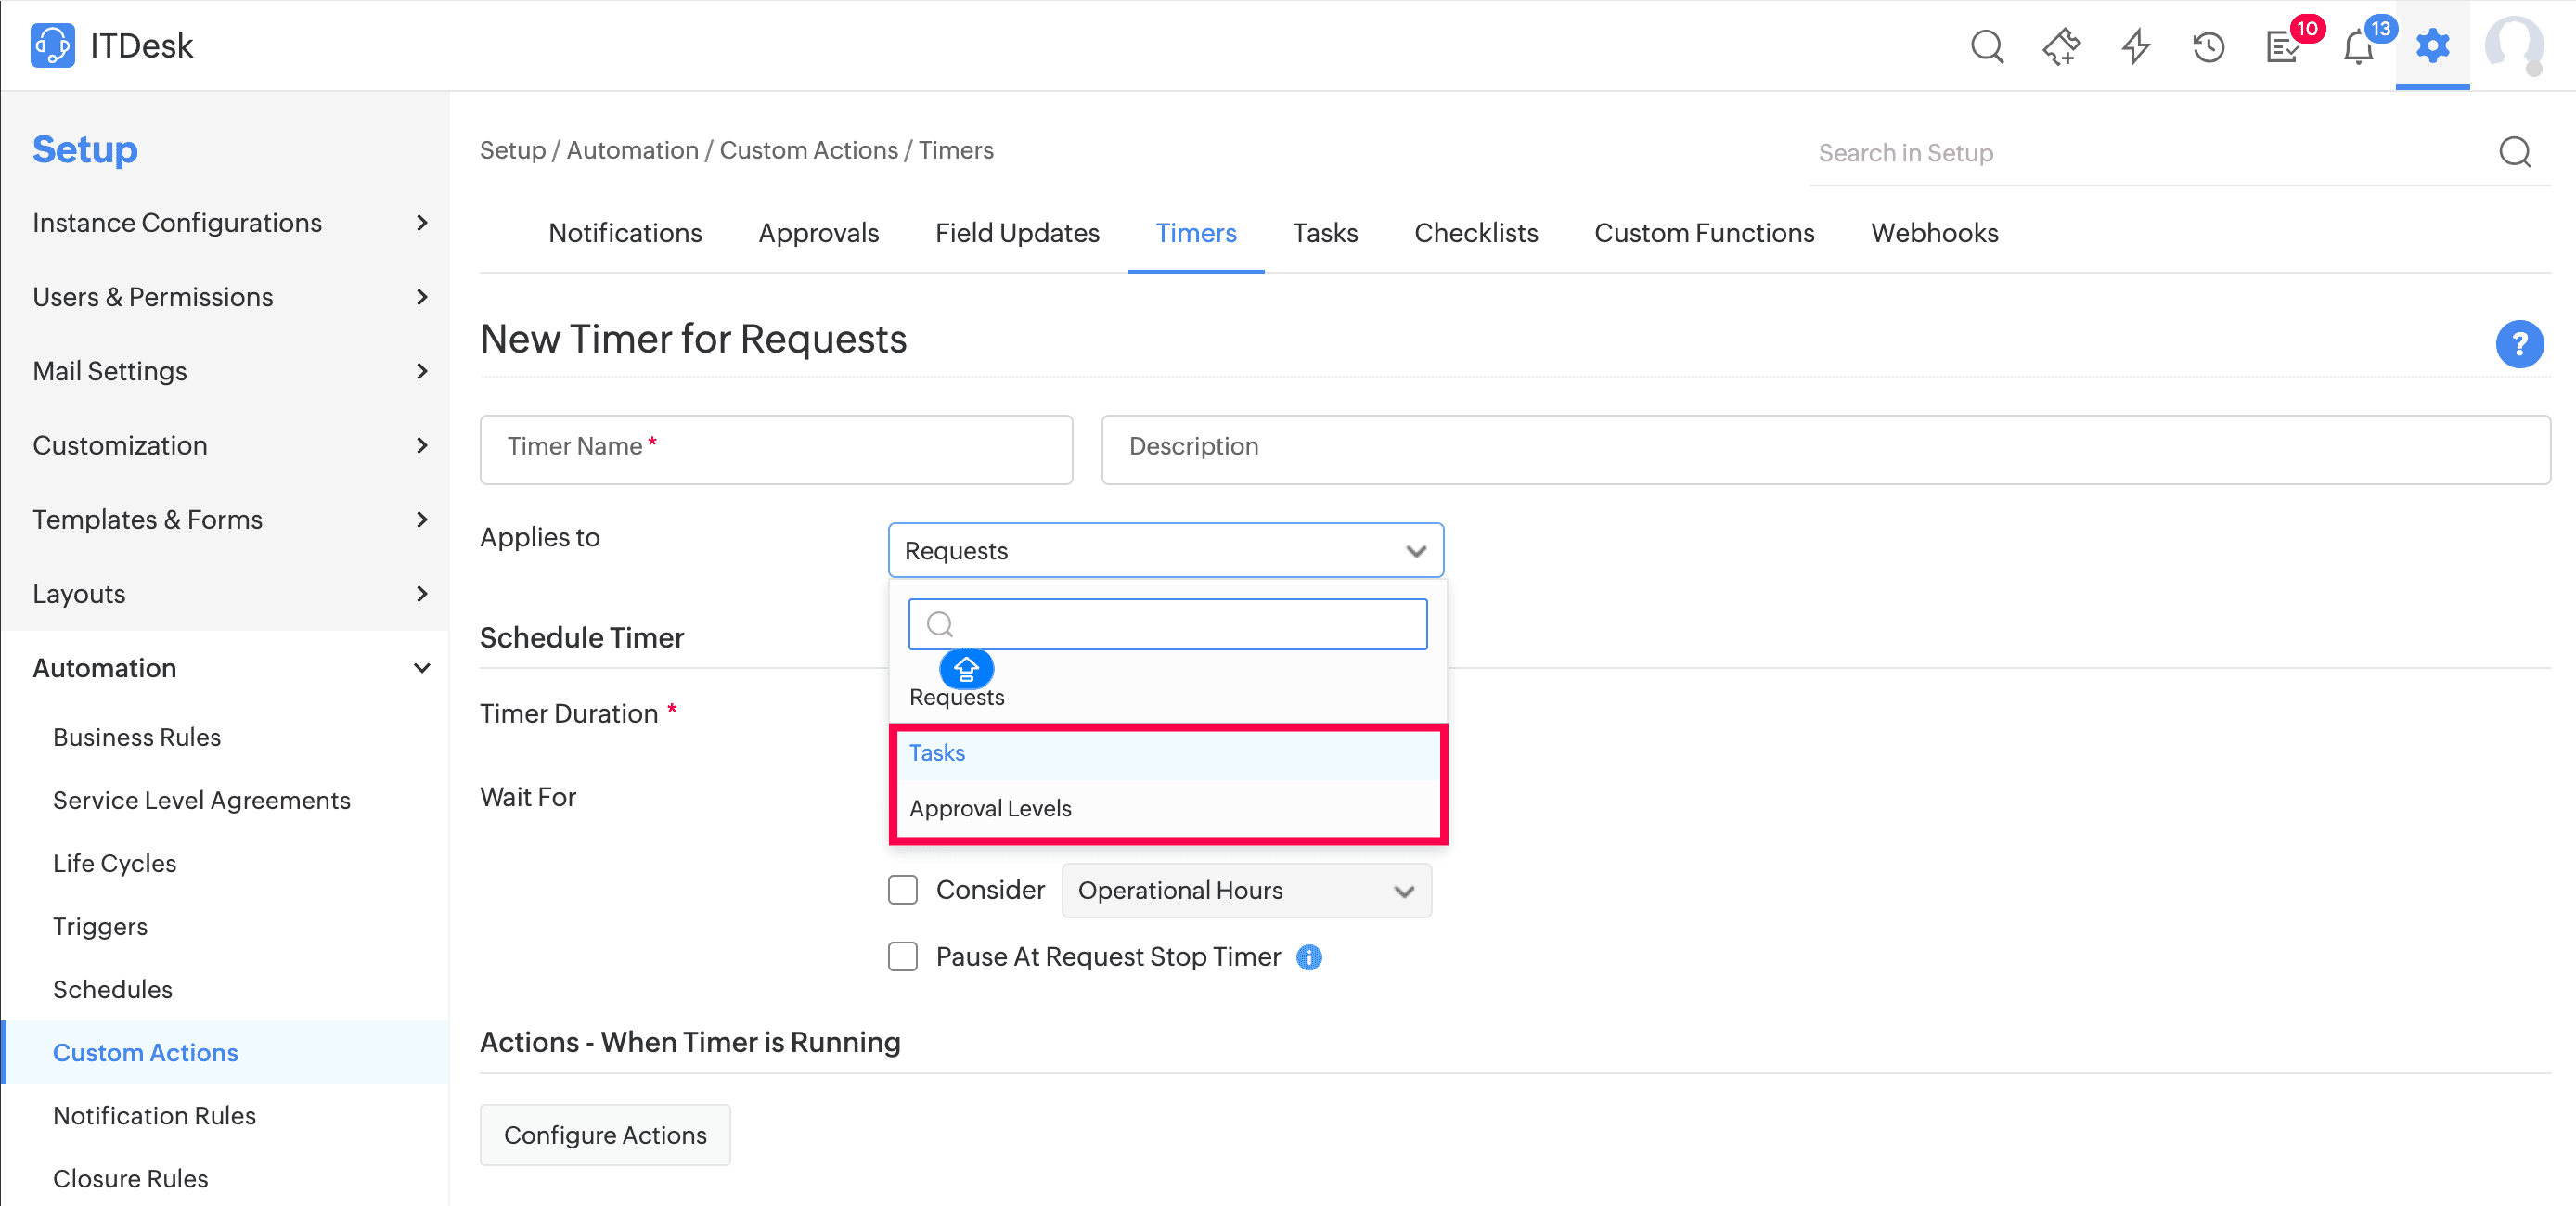
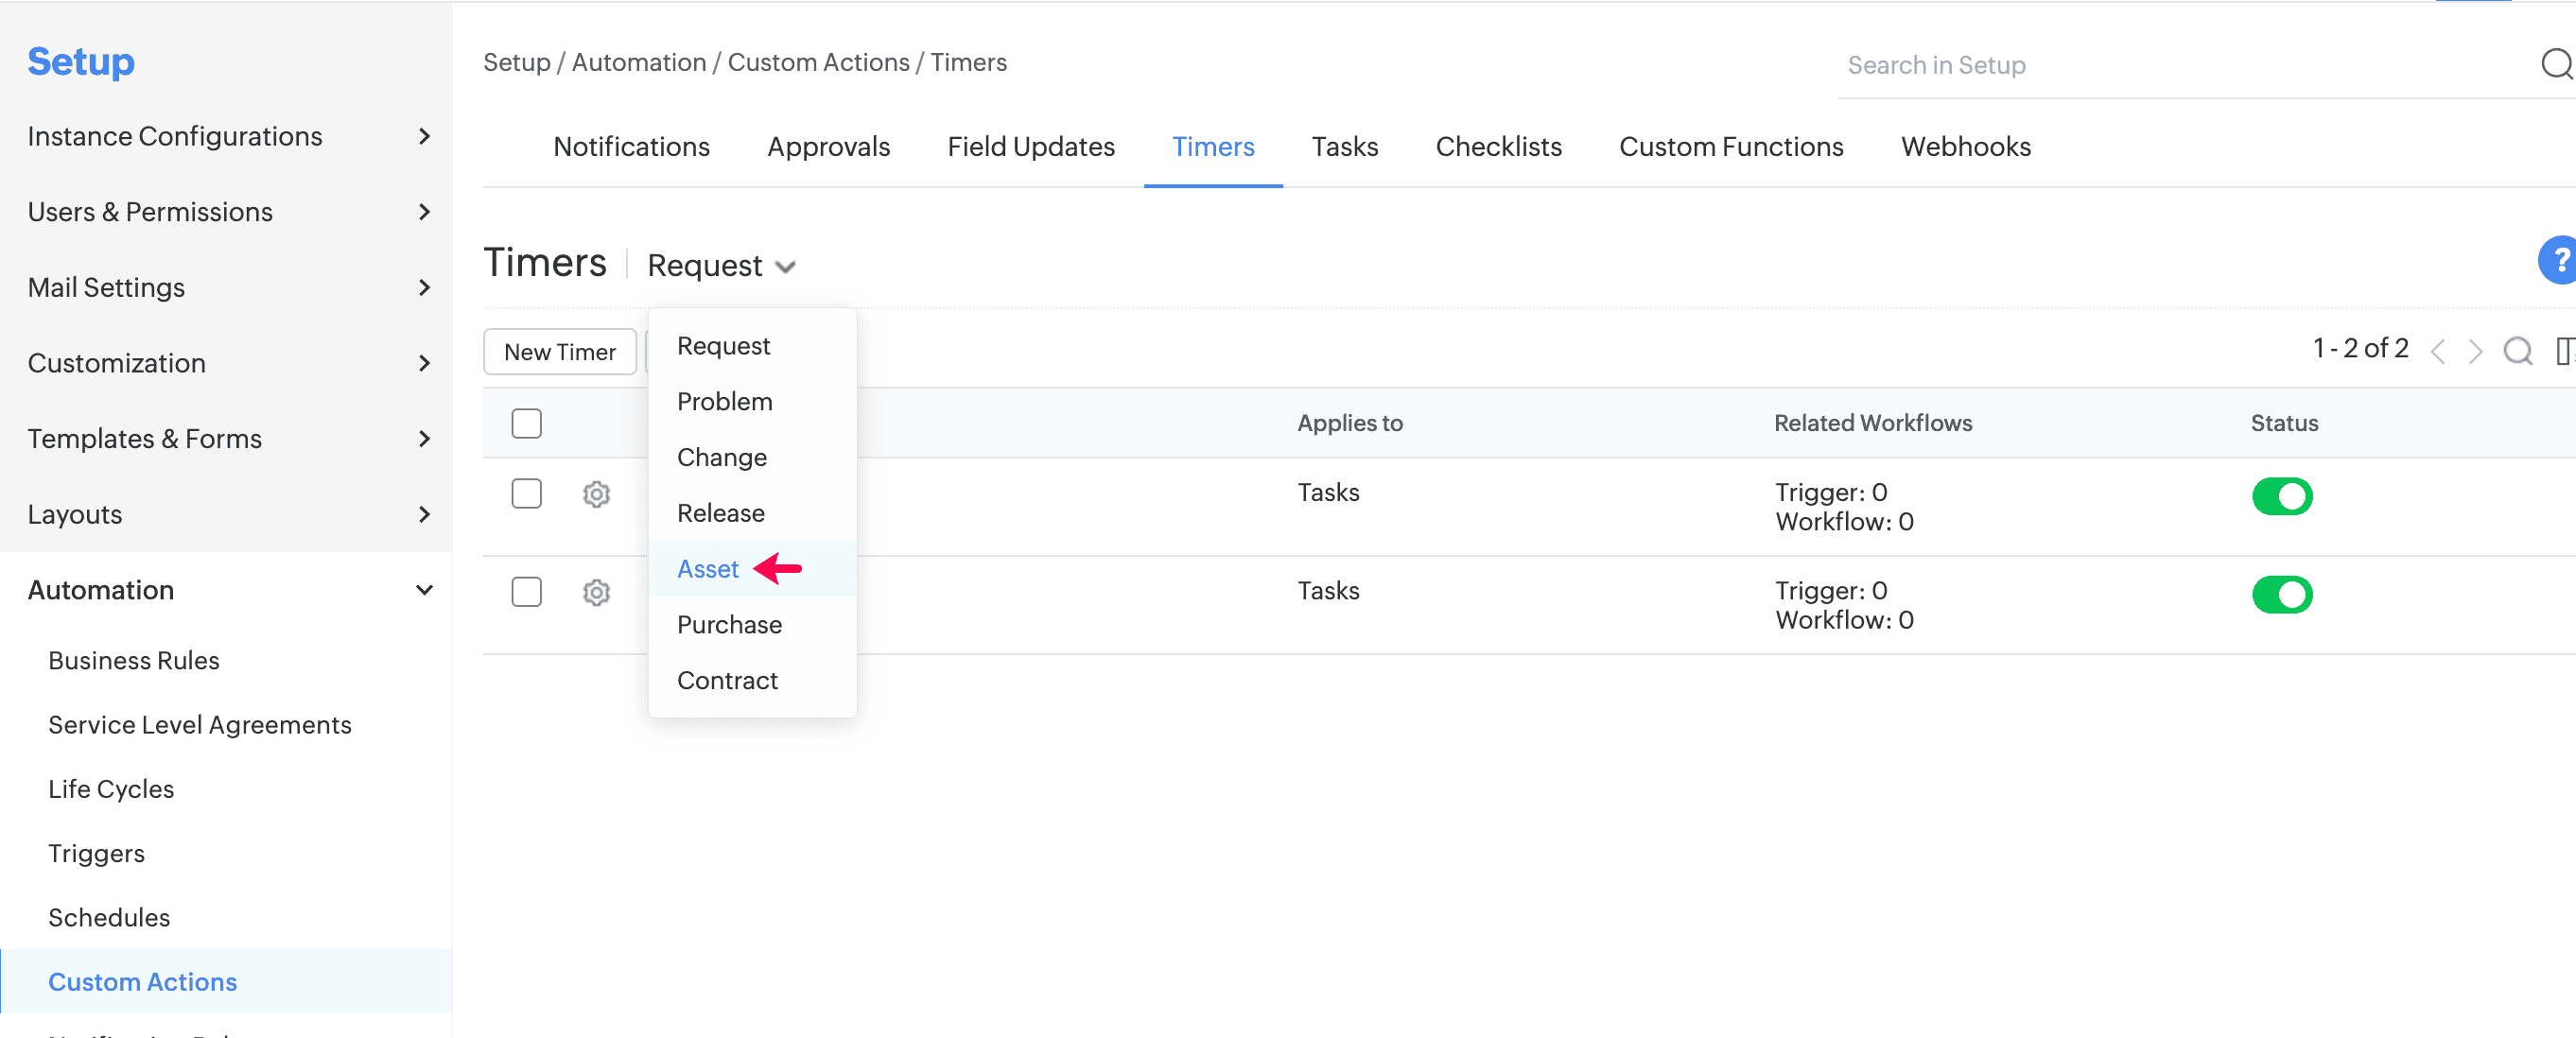
- Timer actions are also now supported for assets and can be associated with asset triggers and workflows to enable seamless asset automation.
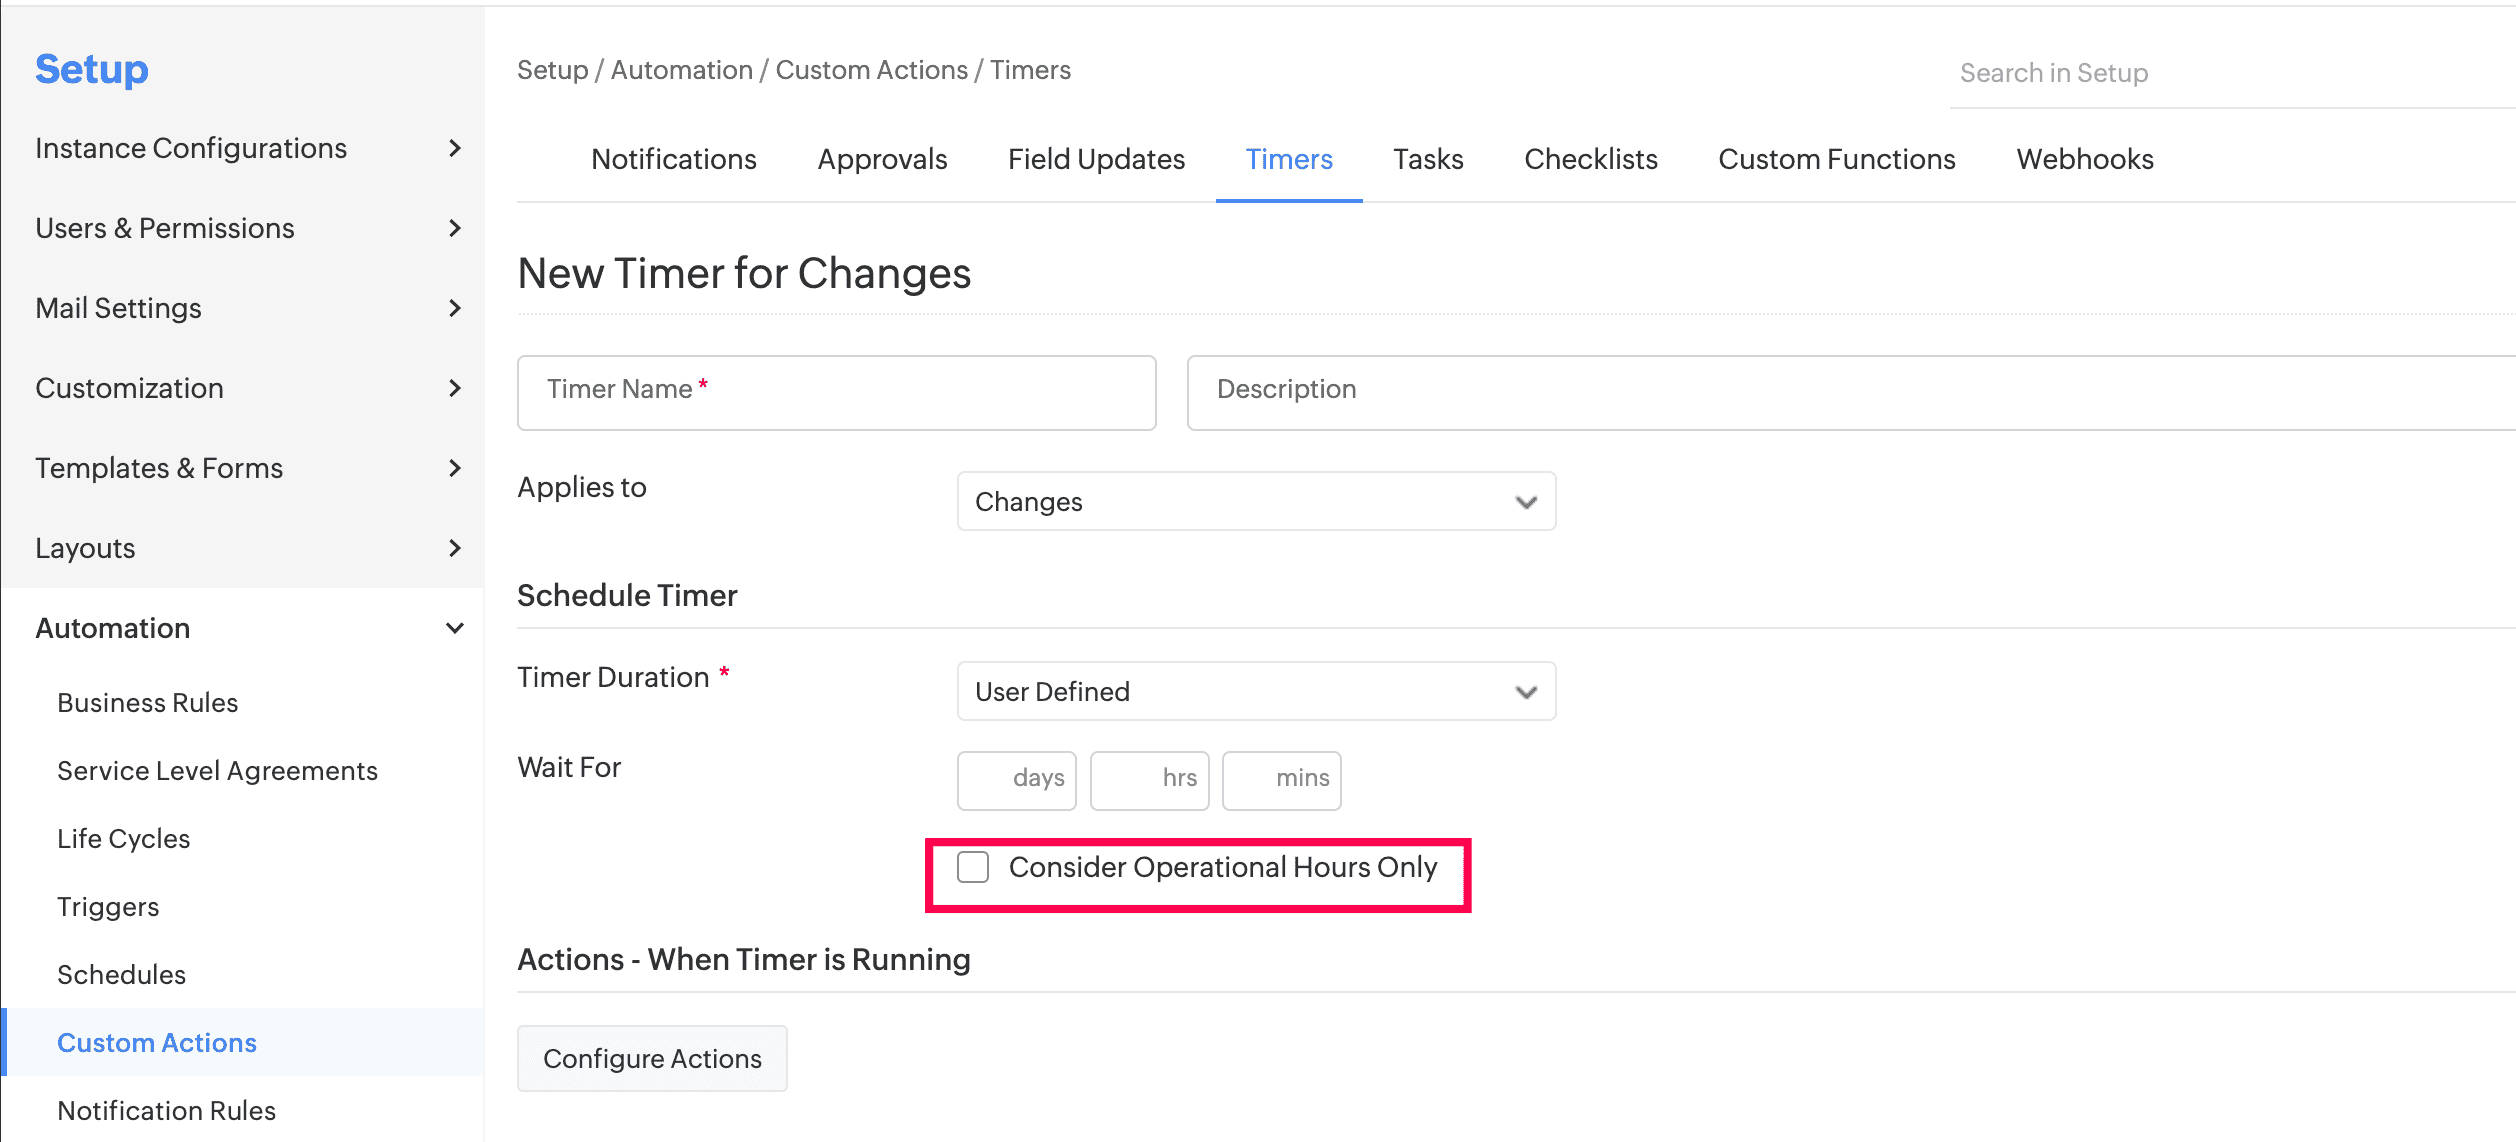
- Condition-based timers now support the Consider operational hours option, allowing actions to be executed based only on configured working hours. This enhancement applies to all modules that support operational hours. For existing condition-based timer actions, this option will remain unchecked by default to ensure no change in current behavior.
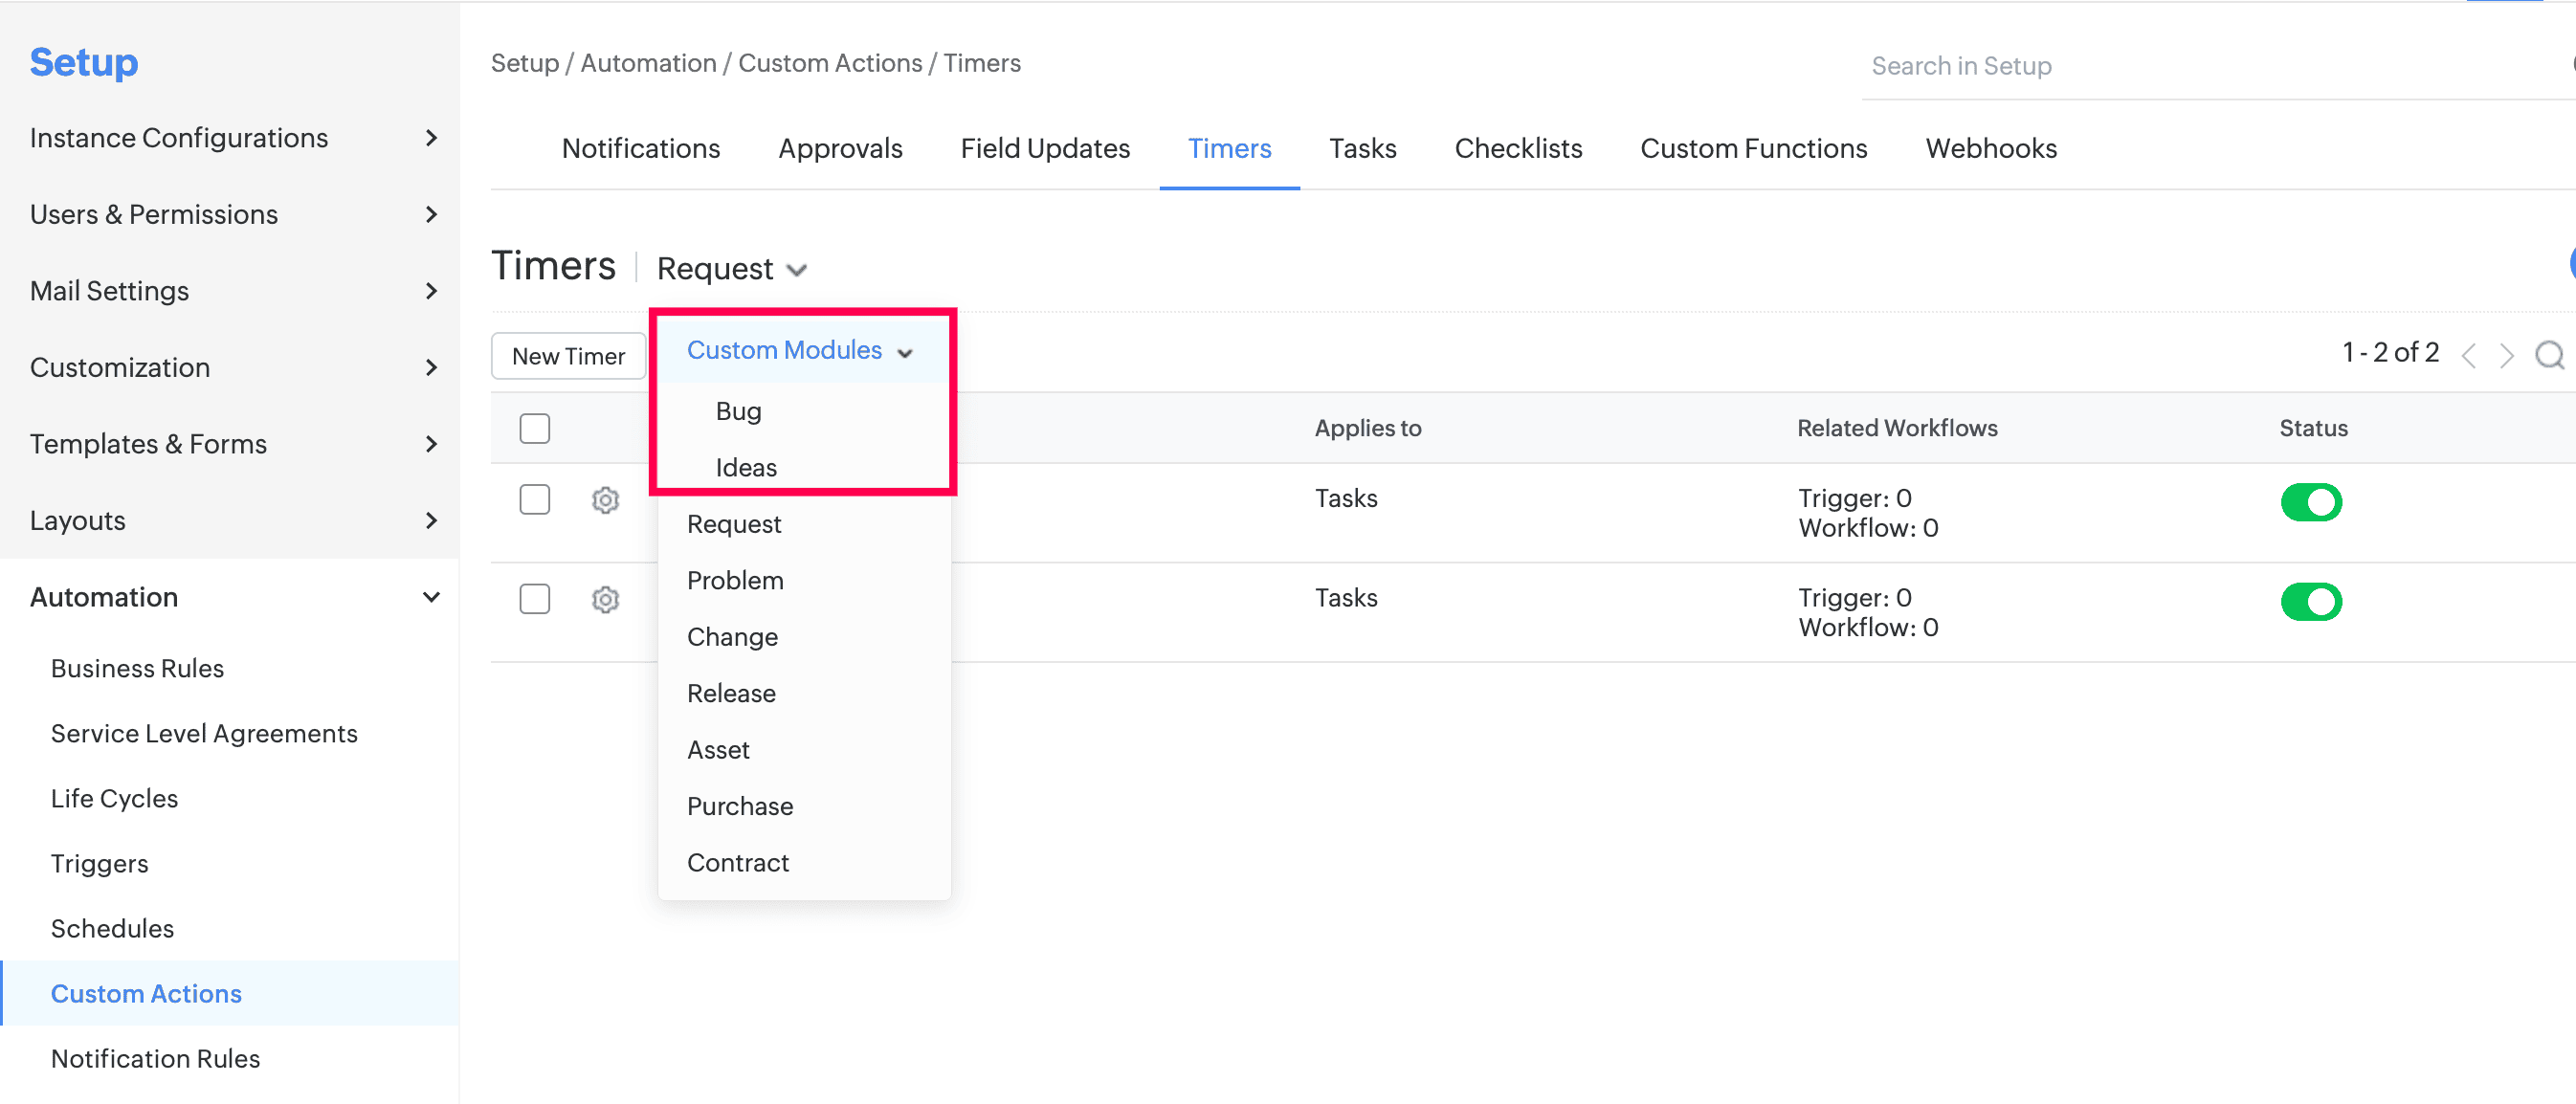
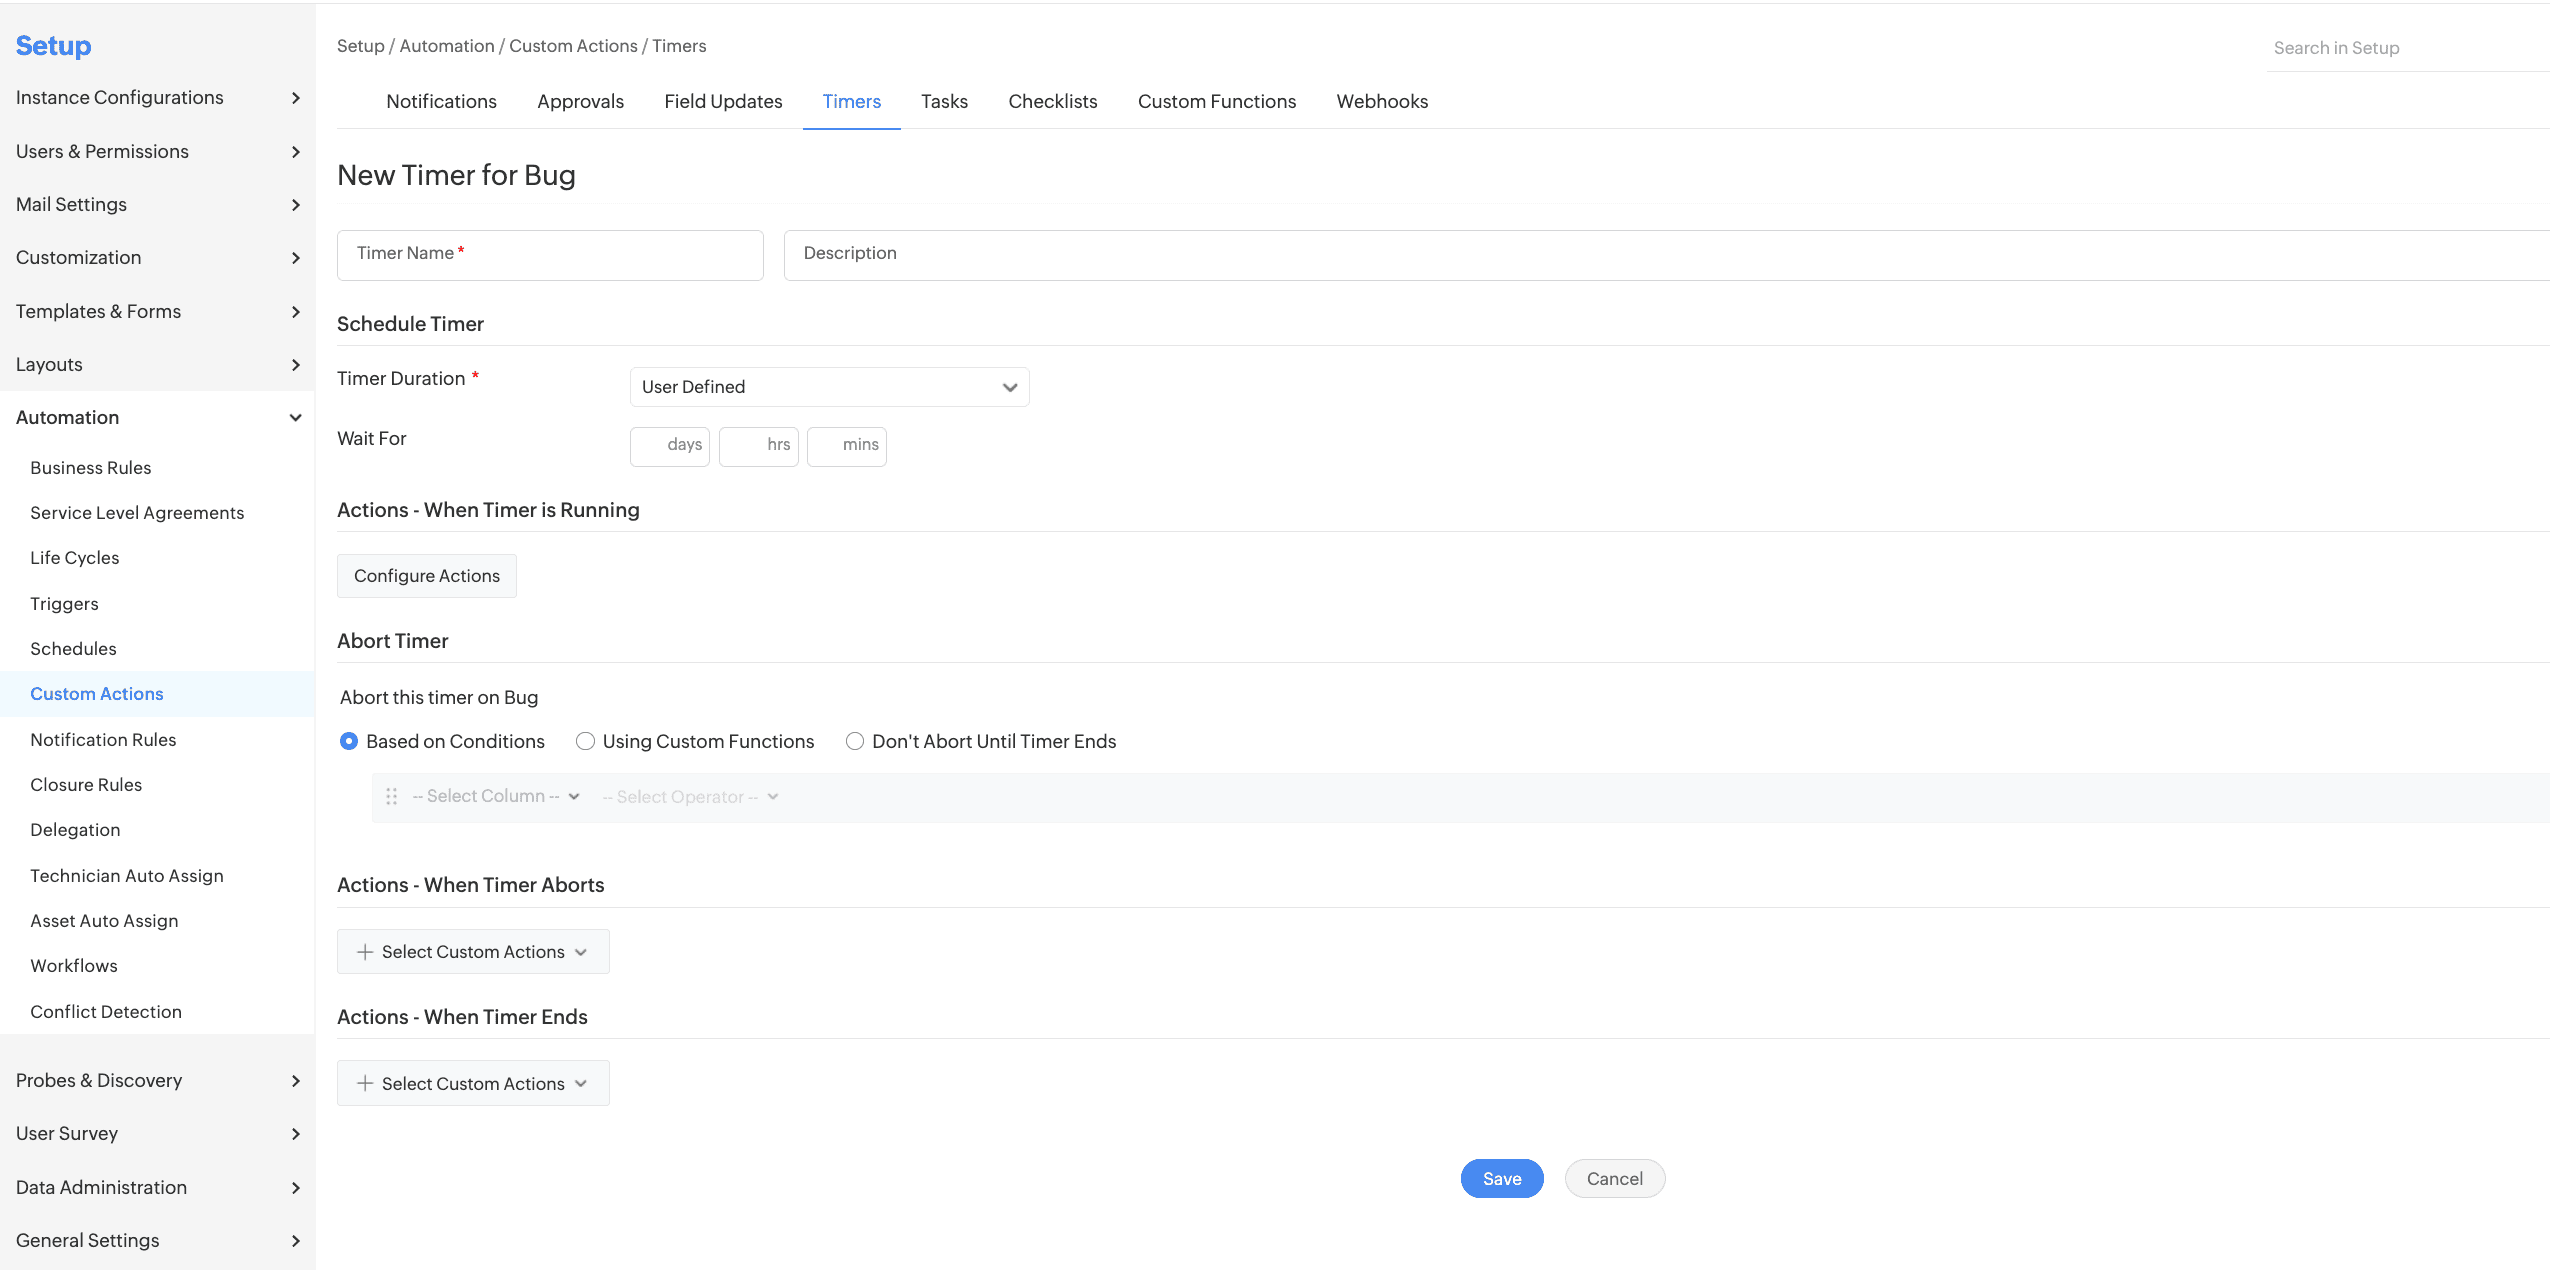
- Timer support is now available for Custom Modules configured through the Web tab. These timers can be associated with Custom Module triggers.
Notification Action Enhancement
- When configuring notifications for approval levels under Custom Actions, Pending Approvers and Rejected Approvers are now available as selectable recipients under Approval Level Users.

Behavior Changes
Request View Scope
- In the Requester Add/Edit page, the Requester Allowed to View option has been renamed as View Permissions and moved from the Department Details section to Advanced Permissions & Privileges section.
- If a requester is not associated with any specific department, the department related permissions, Own Department Requests and Own Department Requests - Across Sites, will not be shown in View Permissions when adding/editing requesters.
- Previously, Own Department Requests was shown to Requesters.
- In Configure View Permissions under requester list view, both options will be shown but only applied to the requesters who have a department associated with them.
- Technicians can no longer perform their associated actions on requests accessed through approval.
- Requesters scope of requests are renamed as follows:
| Requester Allowed To View | View Permissions |
|---|---|
| All Requests | All Requests |
| All their site requests | Own Site Requests |
| All their department requests | Own Department Requests |
| Only their own requests | Own Requests |
Checklists
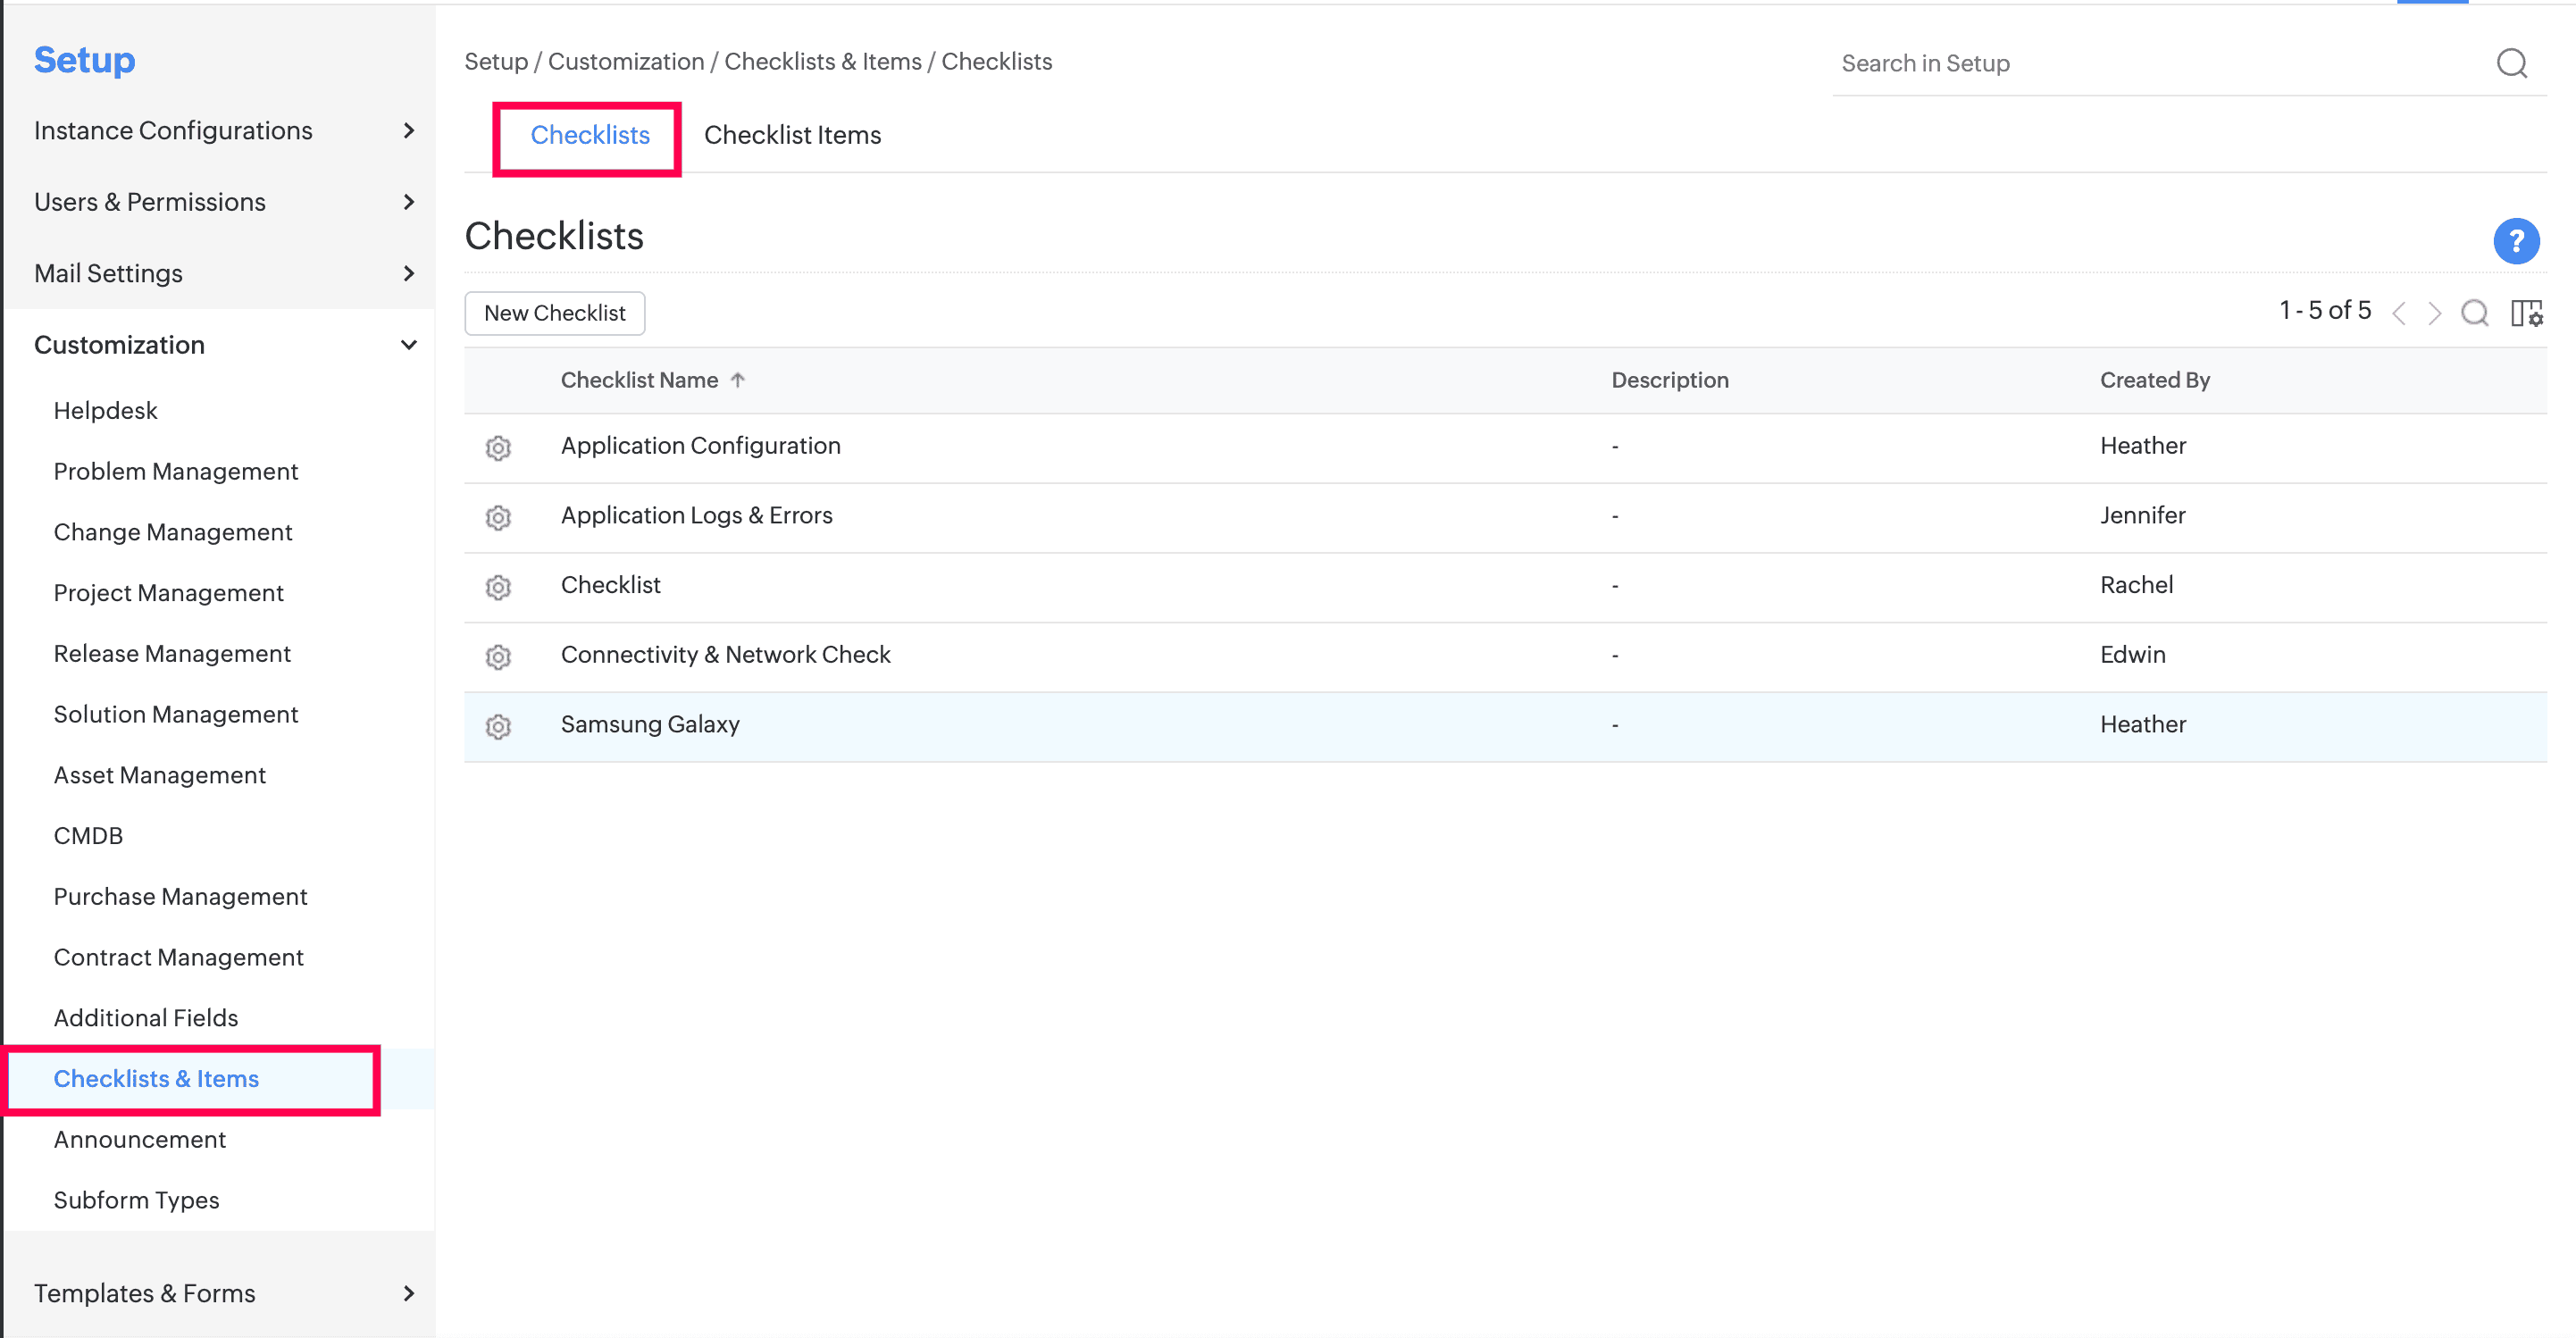
- Checklists under Setup > Customization is now renamed as Checklists & Items.
- Checklists Templates is now renamed as Checklists.
- The character limit of checklist item name is increased to 250.
- While changing a template, the option to copy checklists has been replaced with Delete checklists from previous template. This option removes checklists from the previous template; however, it does not remove checklists created within the request.
