How to audit a SharePoint site collection
SharePoint Server and SharePoint Online platforms let you track user actions on a site and site contents, such as lists and document libraries. The table below shows how you configure and audit a site collection using the native tool and SharePoint Manager Plus.
| Native SharePoint | SharePoint Manager Plus |
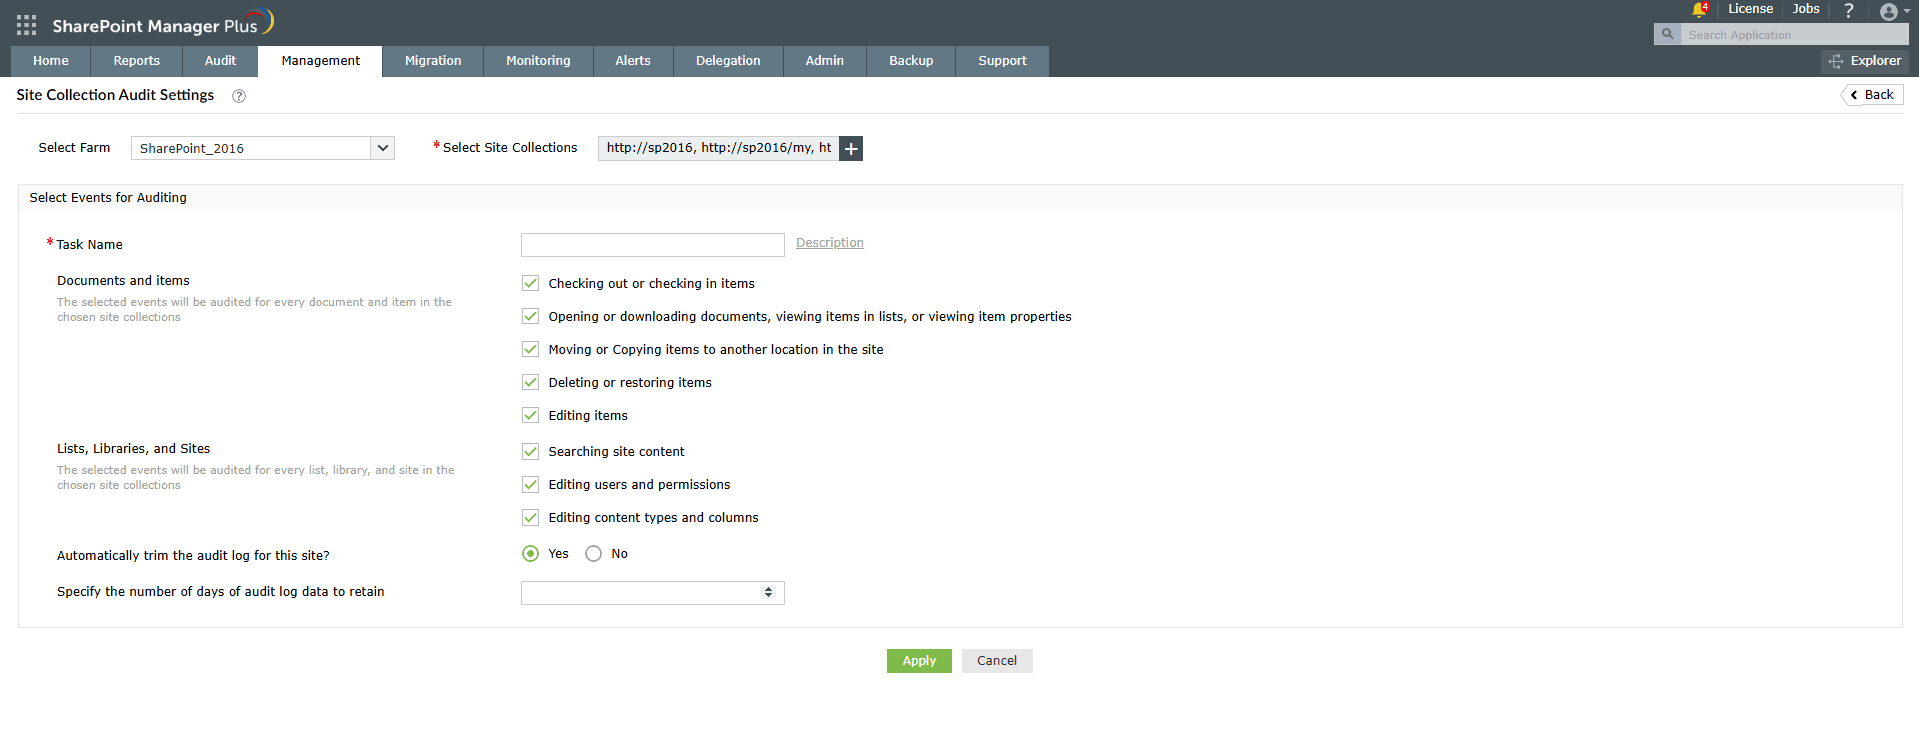
| Configuring site collection audit settings | |
|
|
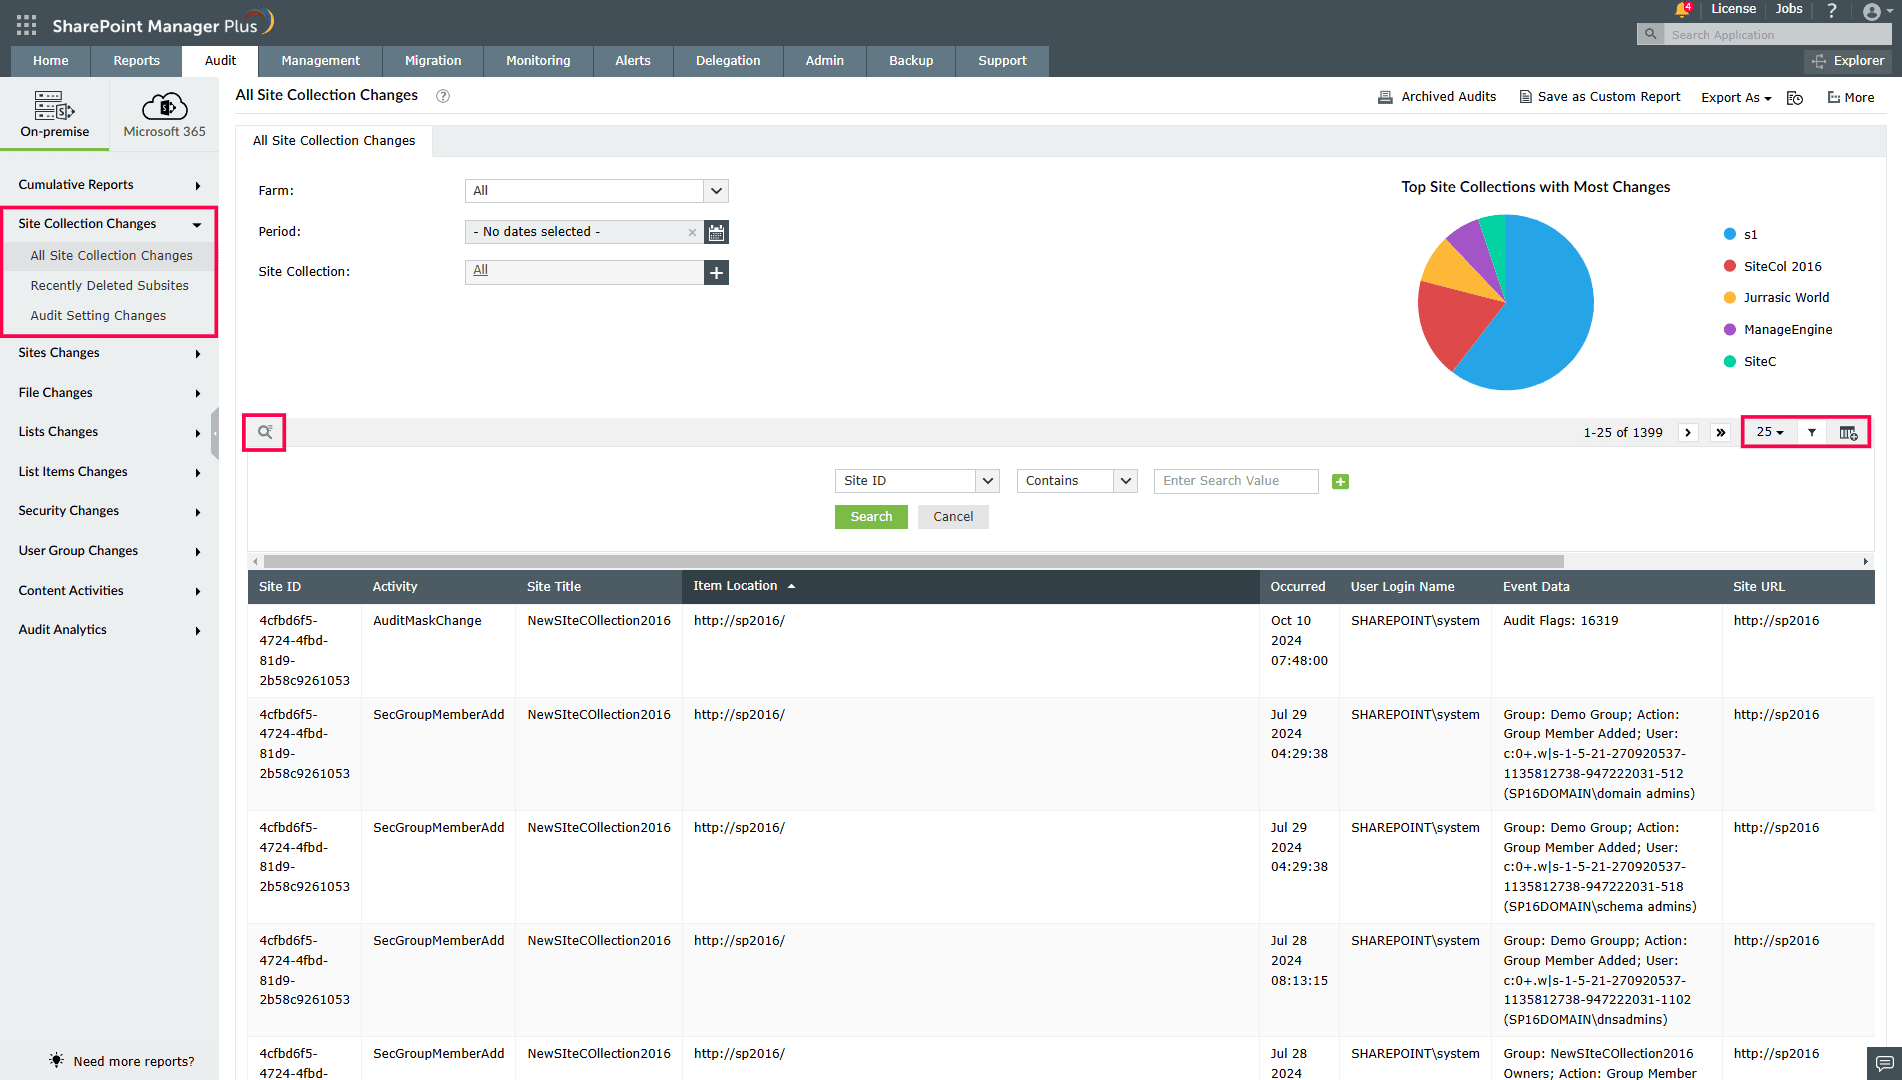
| Viewing the site collection audit log | |
To view audits in SharePoint Online:
|
|
Limitations of using native tools to audit a site collection
- Generating a report multiple times requires you to select and filter settings repetitively.
- Reports can only be exported in the Excel file format.
- Lack of any scheduling or automation features requires periodic manual effort.
Benefits of using SharePoint Manager Plus to audit a site collection
- Simplified reports: Get to your desired report in a few clicks and use filters to narrow down your search. Save as a custom report so you can quickly access it when necessary.
- Export reports: Export all reports to CSV, PDF, XLS, or HTML format based on your needs.
- Automate reports: Schedule reports to have them generated periodically or on a custom date. Get them sent to different email addresses of your choice.
- Hybrid reporting: Get reports for both SharePoint Online and on-premises versions (Subscription Edition, 2019, 2016, 2013, 2010) from the same console.
- Audit changes: Track every activity in your SharePoint environment with information on the occurred time and who made the change.
- Simplify management: Quickly grant, remove, or copy permissions to keep user and group access in check. Manage users individually or in bulk with a CSV file import.
- An overview of SharePoint
- How to add an user to a SharePoint site?
- How to change SharePoint group permissions?
- How to check permissions of SharePoint users and groups?
- How to configure audit logging for a SharePoint site collection?
- How to check the size of a SharePoint site?
- How to check the size of SharePoint storage?
- How to migrate sharepoint on premises to online?
- How to view audit log reports in SharePoint Online?
- How to audit file usage in SharePoint?
- How to configure audit log trimming?
- How to migrate list from one site collection to another site collection?
- How to use SharePoint migration tool?