How to assign roles to a new user with Entra ID (previously Azure Active Directory)?
After creating a user, the user will require roles to access resources and perform operations. Entra ID helps assign roles to existing users with the Access Control (IAM) page. M365 Manager Plus, a holistic Microsoft 365 administration and security solution, can also do the same but during the user creation process itself.
This table compares how you can assign user roles using Entra ID and M365 Manager Plus.
Entra ID
Steps to assign user roles using Entra ID:
Creating a new user
- Log in to the Microsoft Entra admin center with at-least a User Administrator account.
- Navigate to Identity > Users > All users.
- Click New user > Create new user.
- Fill in the required details and select Review + create > Create.
Assigning roles to the user
- Sign in to the Entra ID portal.
- In the Search box at the top, search for the scope you want to grant access to and select the specific resource for that scope.
- Click Access control (IAM) > Role assignments tab.
- Click Add > Add role assignment.
- On the Role tab, select a role that you want to use.
- If you want to assign a privileged administrator role, select the Privileged administrator roles tab to select the role and click Next.
- On the Members tab, select User, group, or service principal to assign the selected role to one or more Microsoft Entra users, groups, or service principals (applications).
- Click Select members > Select to add the users, groups, or service principals to the Members list. Click Next.
- Click Review + assign.
M365 Manager Plus
Steps to assign user roles using M365 Manager Plus:
Note: With M365 Manager Plus, you can assign roles during user creation.
- Navigate to Management > Azure Active Directory > User Management.
- Under User Creation, select Single User Creation.
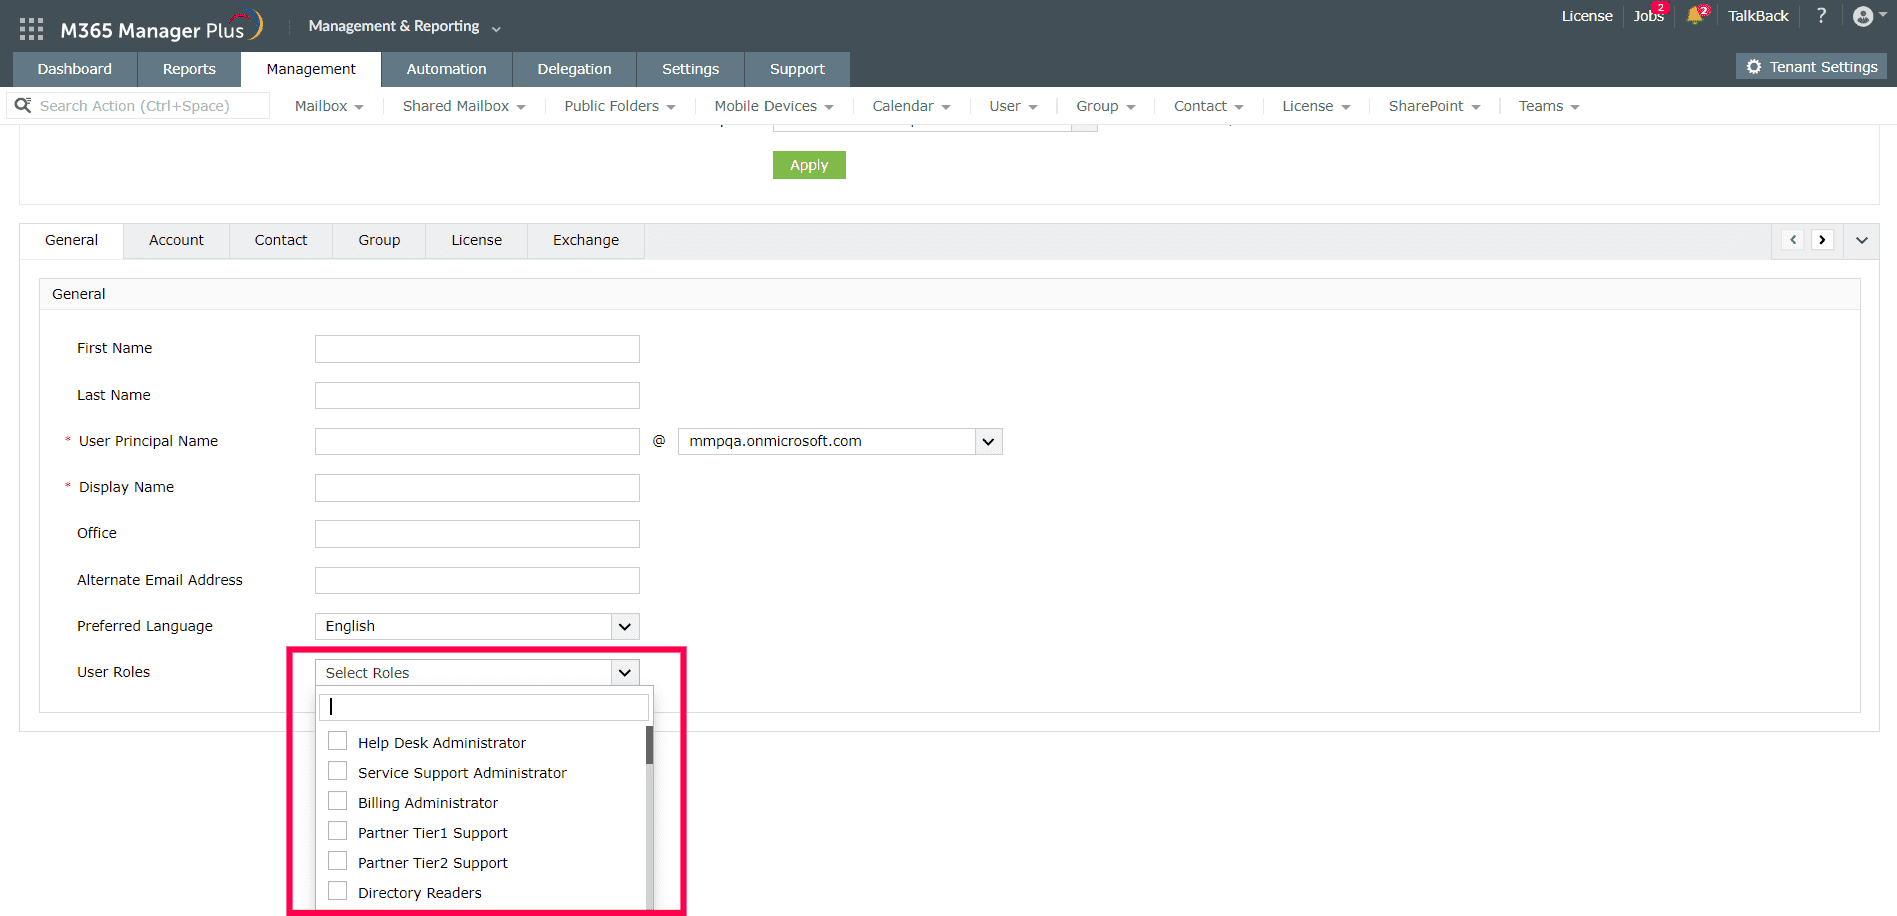
- In the General tab, use the User Roles drop-down to select the required role for the user.
- Fill in the other user details in the other tabs.
- Click Apply.

Limitations of using Entra ID to assign roles to a new user
- User creation and role assignment is done in different admin centers, which can be time-consuming.
- Administrators will require at least a User Administrator role to perform this operation.
Benefits of using M365 Manager Plus
- Manage mailboxes, users, groups, and contacts effortlessly in bulk.
- Create custom roles with any combination of reporting, management, and auditing tasks and assign them to non-administrative users to reduce the workload of Microsoft 365 admins.
- Gain a thorough understanding of your environment in Exchange Online, Entra ID, SharePoint Online, OneDrive for Business, and other Microsoft 365 services with detailed reports.
- Keep tabs on even the most granular user activities in your Microsoft 365 environment.
- Monitor the health and performance of Microsoft 365 features and endpoints around the clock.
One-stop solution for your Microsoft 365 management needs.
Try now for freeStreamline your Microsoft 365 governance and administration with M365 Manager Plus
Get Your Free Trial