AD Authentication
Identity and Access Management is an important part of network and data security for any organization. It helps you ensure compliance with policies, password management and acts as a means to administer access control to users.
The AD Authentication feature in OpManager helps you with just this. It allows you to authenticate users from within OpManager without using an external third party identity management tool. It allows you to grant / revoke access & security restrictions to users and also allows you to provide role based access control for accessing OpManager within your organization.
You can make Active Directory's password policy work for you if you have a Windows domain. Users login to OpManager using their domain login name and password. This will greatly minimize the risk of making others using your password to access the OpManager Web interface, thereby not just improving the security but also making it easier for users to login/create accounts. You can define a scope for users (AD groups, remote offices or all users), thereby restricting their access based on their roles.
With the increase in software applications, each with their own authentication and password complexity levels, this feature also saves you the trouble of having to remember way too many passwords.
Add an AD Domain
You can create Domains in OpManager and users manually in OpManager with the AD Authentication and User Management features.
To add a domain:
- Go to Settings → General Settings → Authentication → AD Authentication → Add Domain.
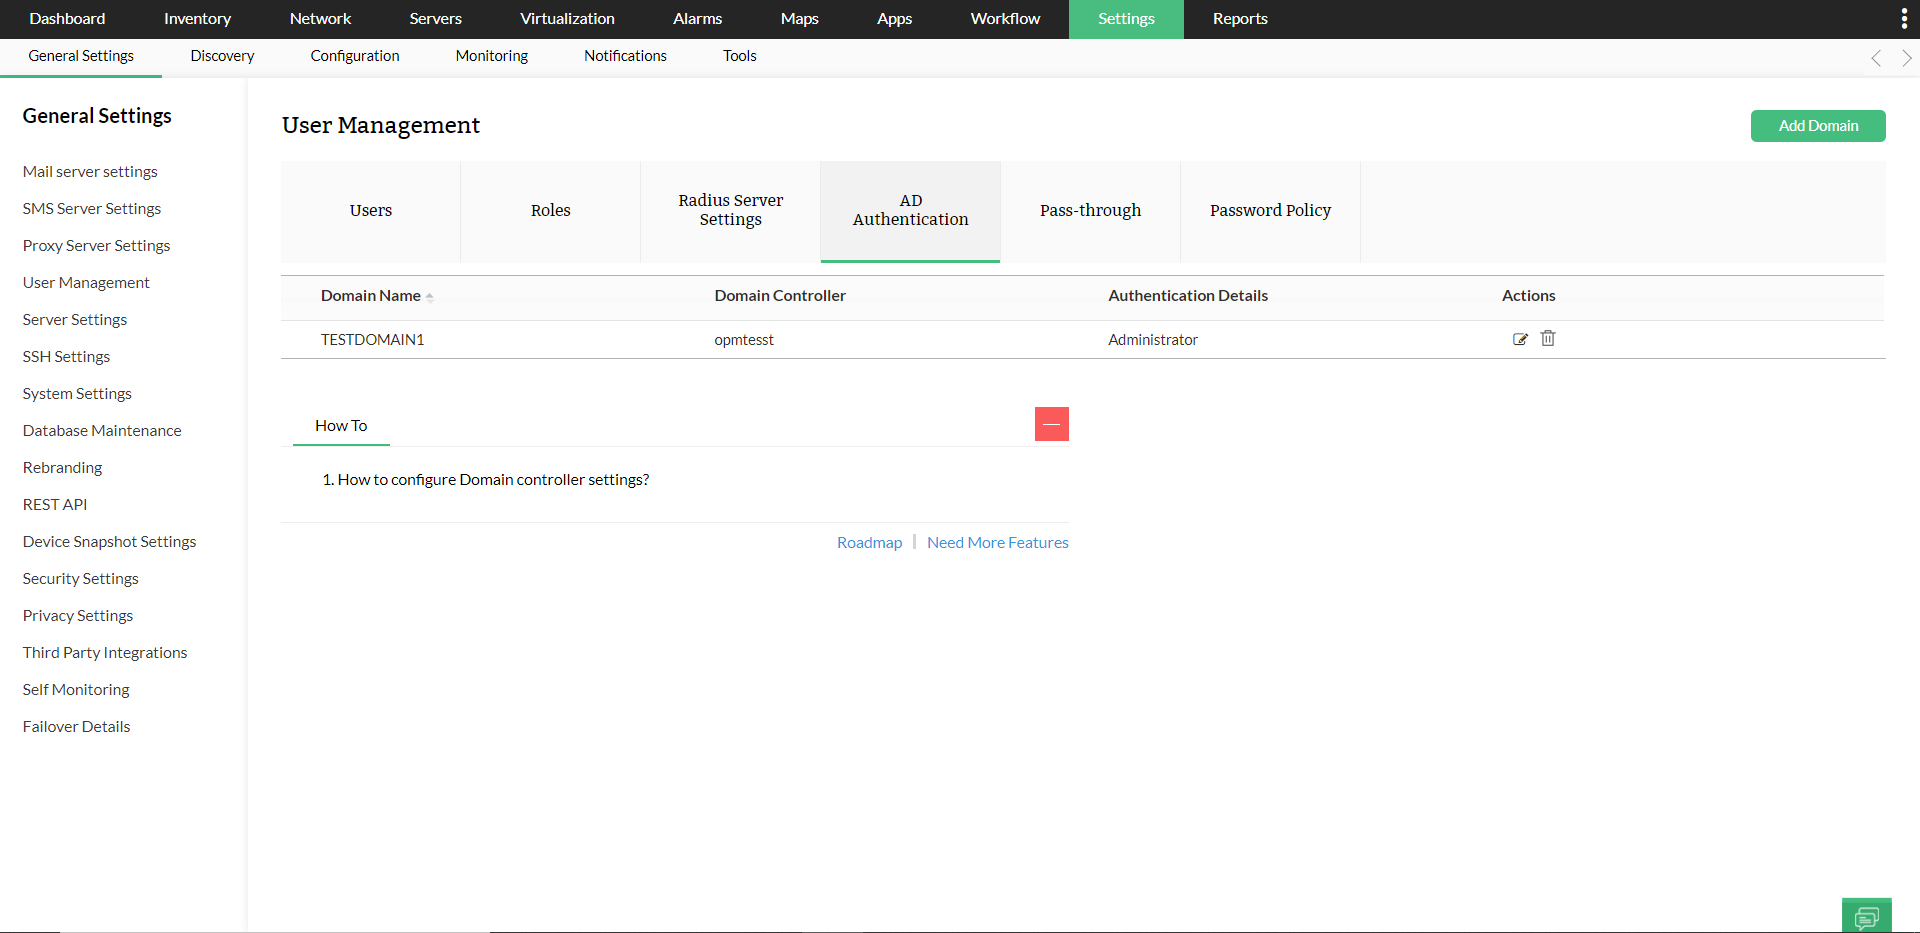
- Enter the Domain Name and the Domain Controller name in the respective fields.

- LDAPS is supported from version 125111, to ensure secure communication with the domain controllers. Simply click on the 'Import Certificate' button and select your domain controller's certificate to add it to OpManager.
To know more on how to export a certificate from your domain controller, check out these articles:
- Auto Login* is disabled by default.
- Save the Settings.
- Once the domain is added, you can manually add users in the Users tab.
Configure Auto-login
The auto-login feature allows you to add all/individual users or selected AD groups to any domain, and assign user permissions to them.
- Select Add/Edit under Actions for the domain you want to configure.
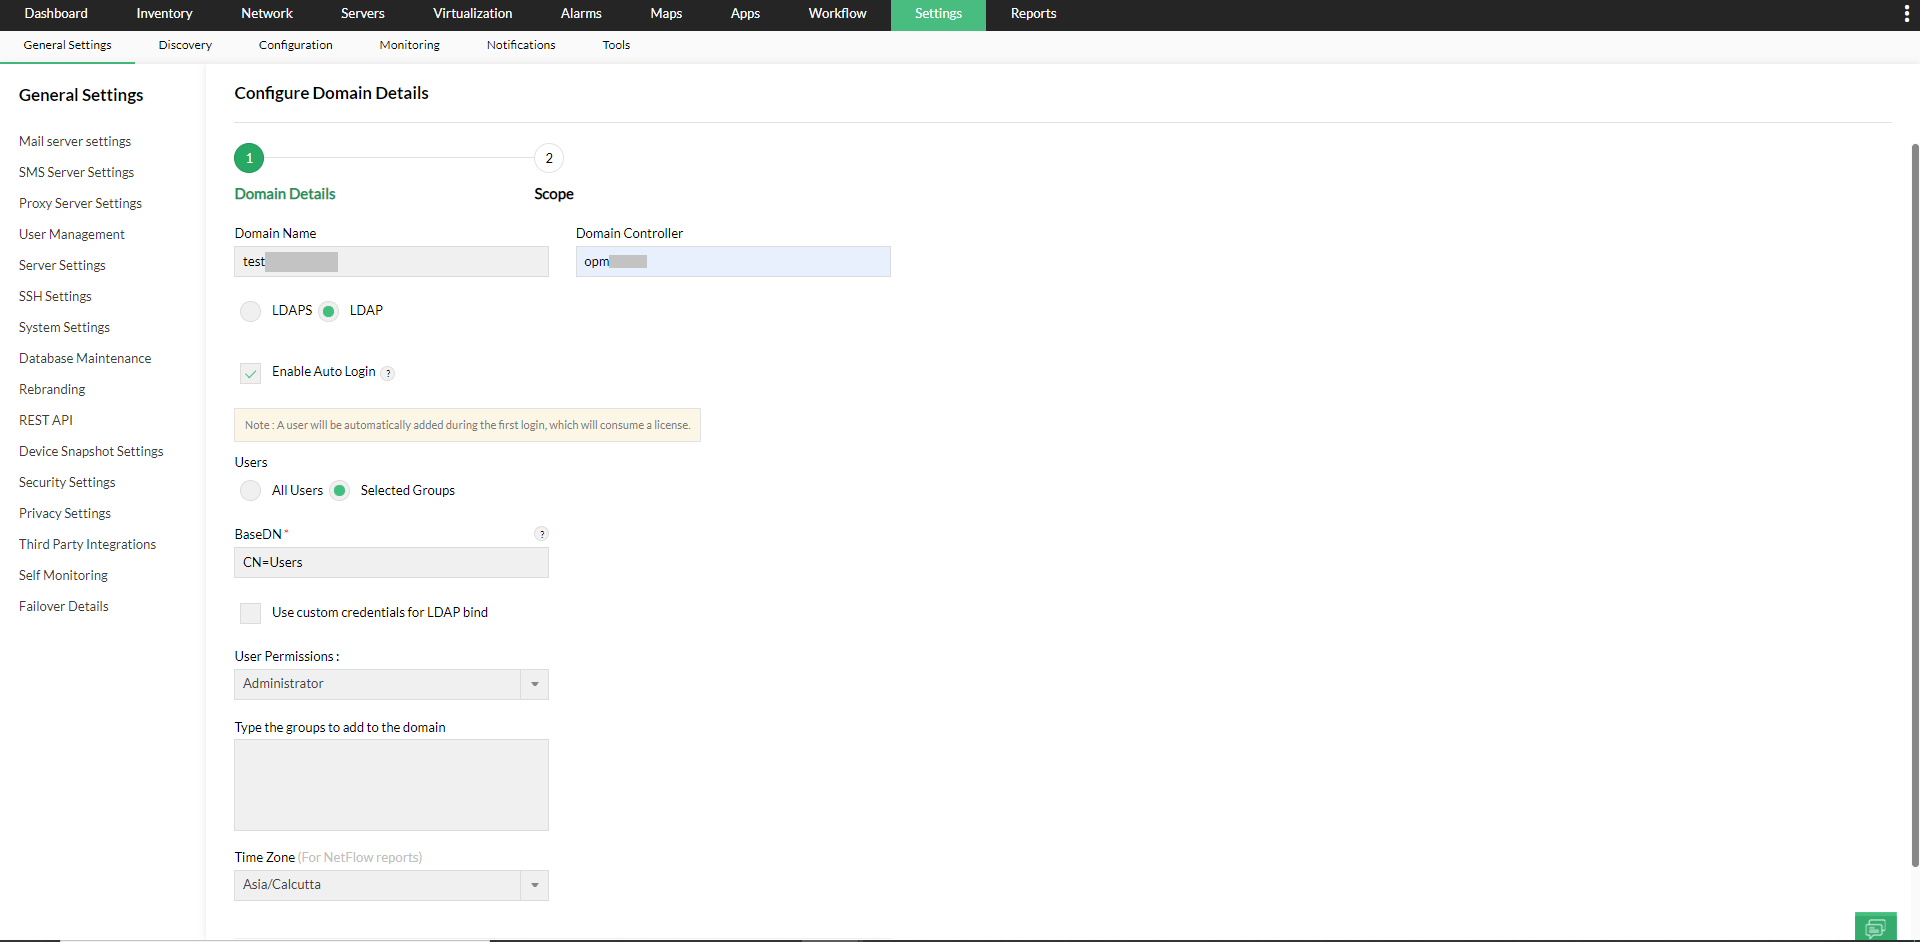
- Select the Enable Auto Login check box.
After enabling auto login, clickNext to configure the scope for the users in the selected domain. The scope will be auto-assigned to users logging-in for the first time. If Auto-login is not enabled, then the users must be added manually.
- To configure Auto-login
- For all users
To enable Auto-login for all users, select All Users under Users. The auto login will be enabled to all the users logging into that domain.
- FOr selected AD groups
To enable Auto-login for selected AD groups, select Selected groups under Users and type the names of the AD groups as comma separated values. The auto login will be enabled to the AD groups you specify.
- OpManager searches for the user's presence, under the BaseDN you enter. Under BaseDN field enter the container path to the top-level OU, under which the group's users are present in the AD. It should not point to the DN(path) of the group.
- For example:
- Say there are two groups to be configured, 'AdGroup1' and 'AdGroup2'. The users of these groups are present in multiple OUs
- CN=user1,OU=Admins,OU=TestOU,DC=local,DC=com
- CN=user2,OU=Operators,OU=TestOU,DC=local,DC=com
- CN=user3,OU=Guests,OU=Users,OU=TestOU,DC=local,DC=com
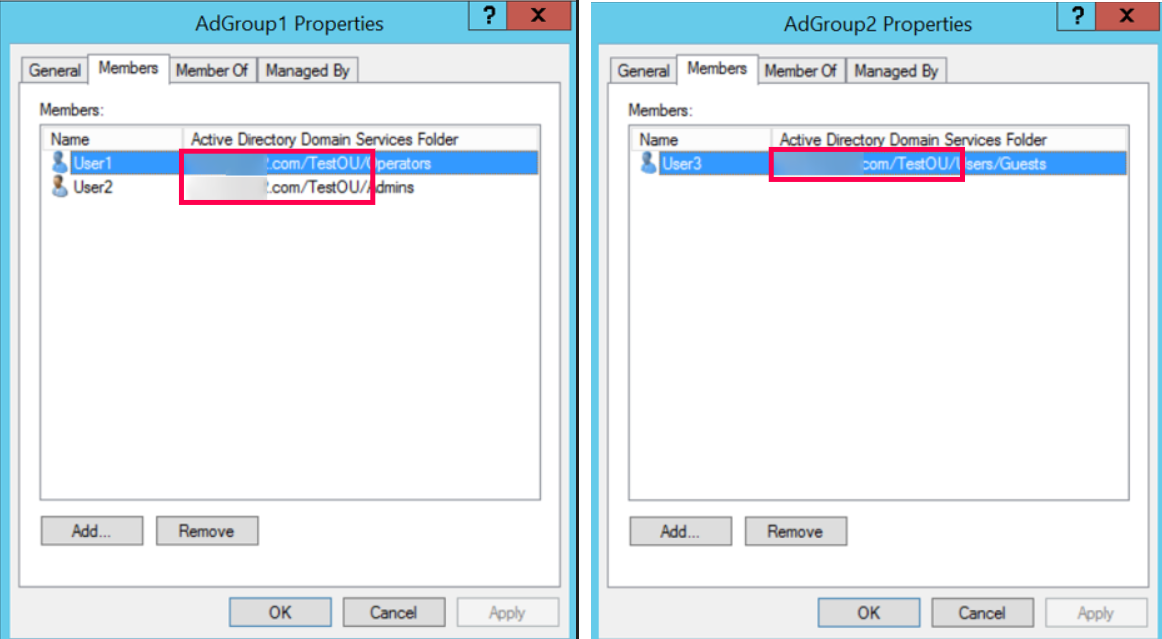
- You should enter 'OU=TestOU, DC=local, DC=com' in the BaseDN field (The common path in their hierarchy). The path must have at least one OU/CN, and the group names you configure under domain settings are case-sensitive.
- Sample query to get baseDN (Container path) for user:

- If LDAP access is not available for all users in your domain, you can configure custom credentials with the 'Use custom credentials for LDAP bind' option. These credentials will be used to execute LDAP queries.
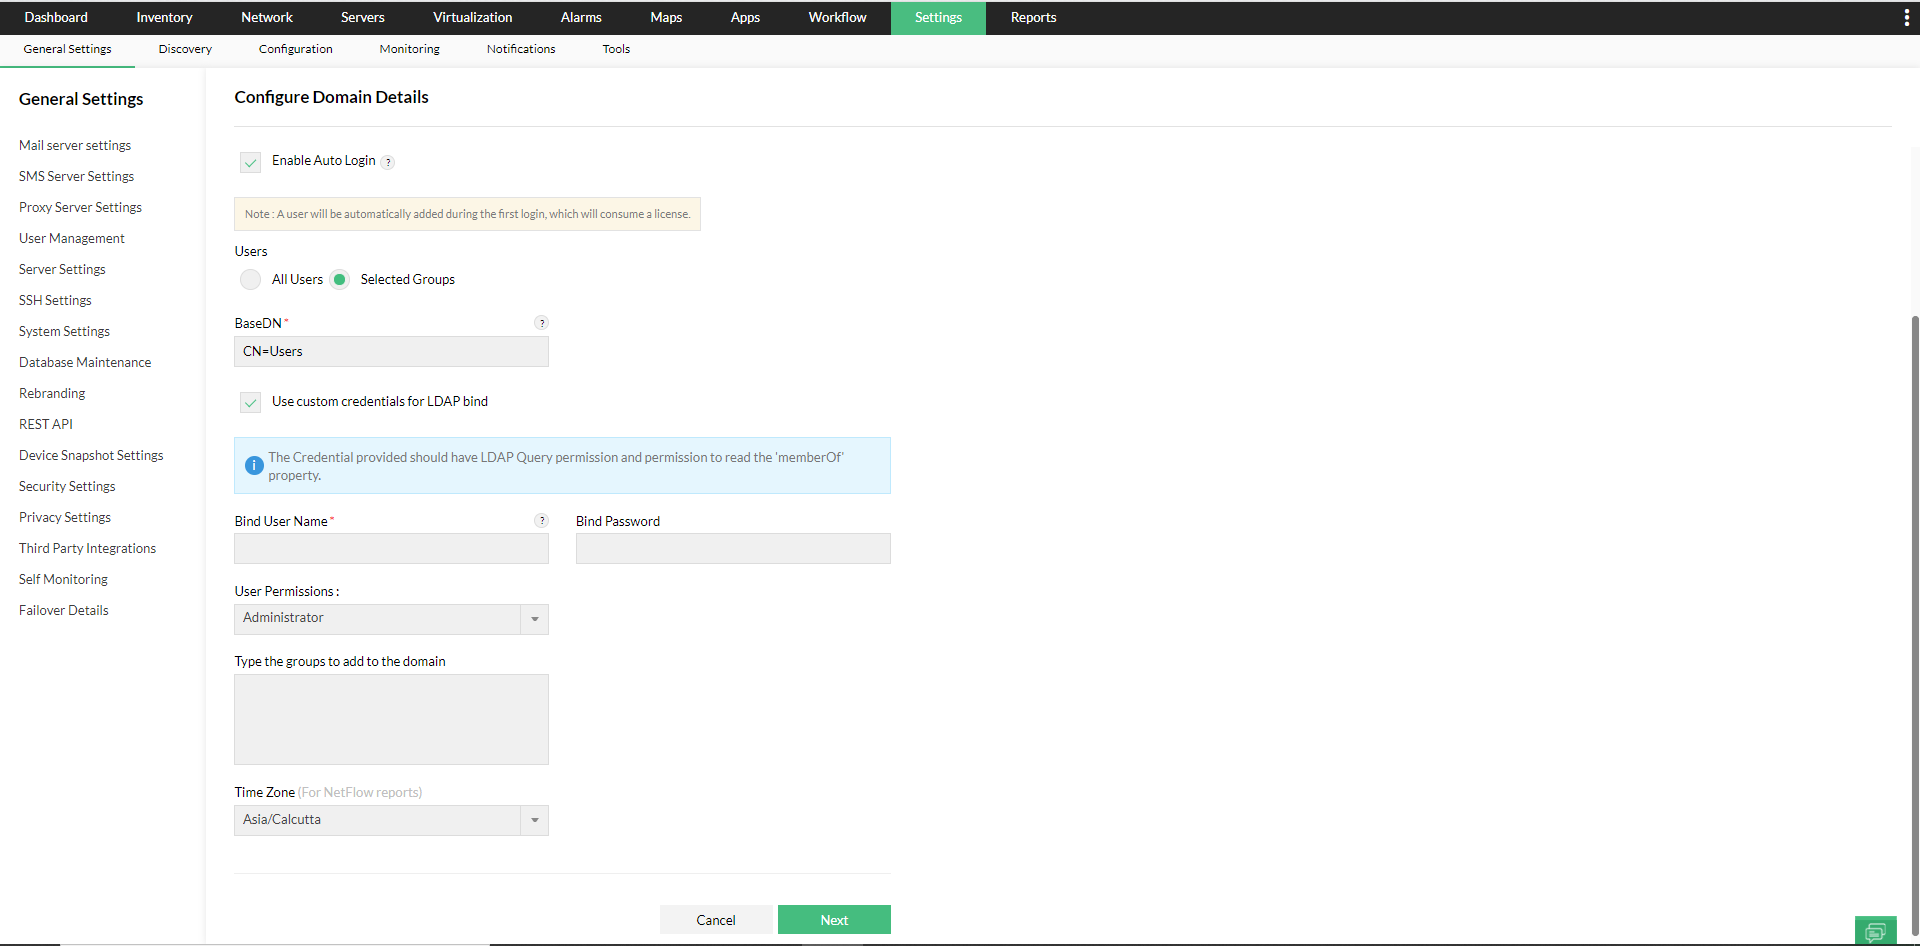
- Enter the user account (with the required permissions) in the active directory to execute LDAP Queries in the domain, under 'Bind User Name' and the corresponding 'Bind Password'.
- This is how the configuration details should look like for the example mentioned above,
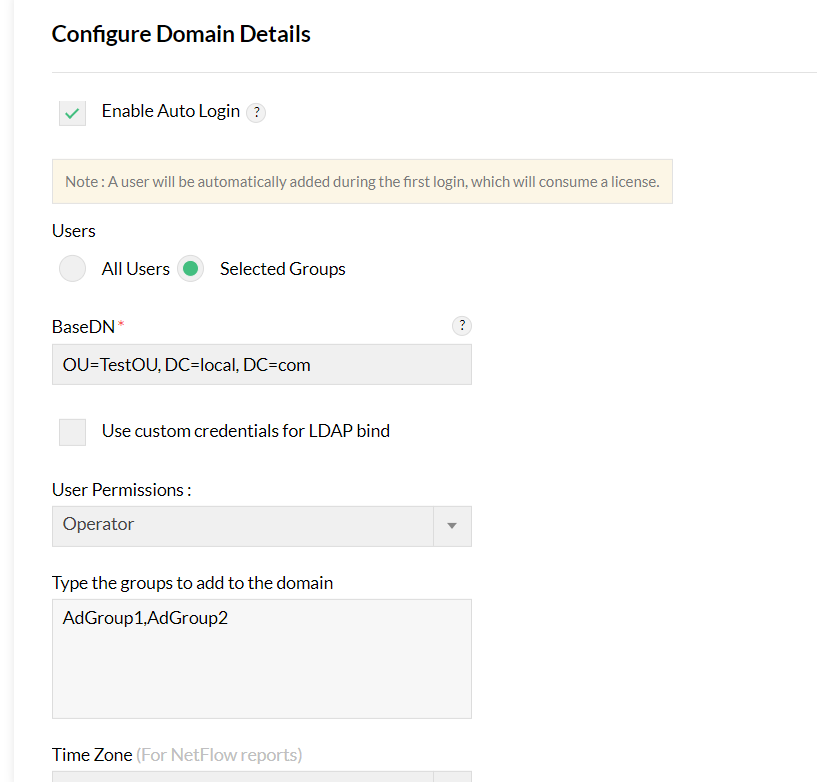
Note:
- Multiple AD Group names can be mentioned as comma seperated values. If a new group with a different scope to be added, make use of the '+' icon.

- The credential provided should have LDAP Query permission and permission to read the 'memberOf' property.
- Once you enable Auto-login, select the Users and User Permissions for the domain, edit the Time zone if required, and click Next. During autologin, the selected modules and scope can be assigned for the AD user.
- To configure Scope,
Modules - You can select the add-on modules that you want the user to have access for. Monitor - You can provide this user access to either All Devices, or only Selected Business Views. If All Devices is selected, the user will have access to all the devices in OpManager module. If Selected Business Views is selected, you can give the access to all business views with "Select All" option and business views without title with Untitled option.
- Save the settings.
Edit Domain Settings
Once you create a domain and assign users, you can edit the configurations as required any time. You can add or delete AD users/groups, edit the user permissions, and also edit the scope settings.
To add AD groups:
Click on the 'Plus' icon next to the domain of your choice to add new AD groups to it.
To edit timezone:
Select Edit under Actions for the domain you want to edit, change the timezone as per your requirement, and click 'Save'.
To Edit/Delete AD groups:
- Click on the arrow mark next to the name of your domain to display all AD groups under it.
- Click on the 'Edit' icon next to the group you wish to edit, select the Users and User Permissions for the domain, and click Next.
- To edit a particular user/group in a domain, select Edit under Actions for the domain you want to edit.
- User Permissions for the AD groups can be edited by selecting either Read Only (Operator User), Full Control (Administrator User) or selecting a Custom User Role with the chosen level of access.

- To configure Scope,
- Modules - You can select the add-on modules that you want the user to have access for.
- Monitor - You can provide this user access to either All Devices, or only Selected Business Views. If All Devices is selected, the user will have access to all the devices of NetFlow, NCM, and Firewall. If Selected Business Views is selected, you can give the access to all business views with Select All option and business views without title with Untitled option.
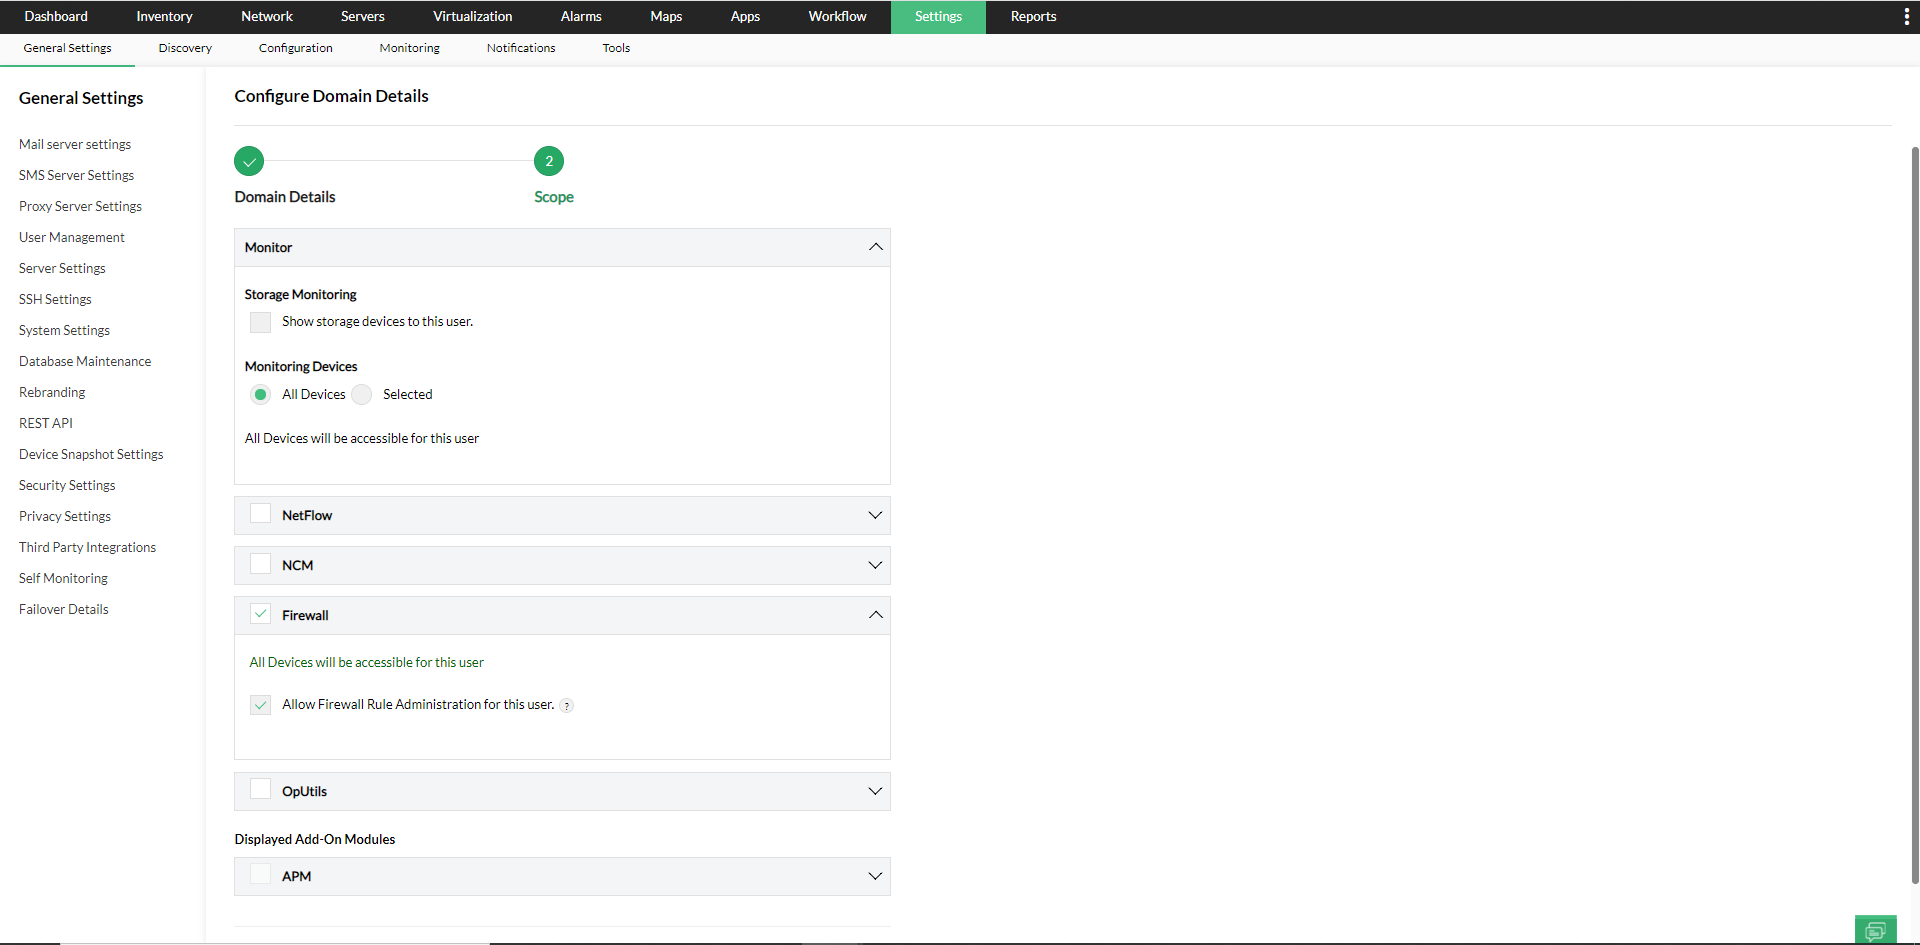
- Save the settings.
- To delete a group, just click on the 'Delete' icon next to it.
For AD Authentication, we support on-premise AD with LDAP query access to the domain controller in the network.
To know more about OpManager's Authentication methods, explore the following help documents.


