To configure notification profiles, go to Settings > Notifications > Notification Profiles, and click Add to create a new notification profile.
Select the relevant notification type listed below(Email, SMS, etc.) and enter the required details. The different types of notification profiles available are:
While configuring the notification profile details, you can select variables from the dropdown. Variables in OpManager let you include additional information in your alert message. You can select the dynamic subject, message, title or argument variable you want to include in the message based on the type of notification. Click here to learn more about variables.
Once you have specified the details, you have to configure the criteria based on which an alert notification will be triggered. This page lists the criteria and you can select one criterion or more so that OpManager will raise notifications.
For example, if you want to raise a notification for critical events, you can choose the Event Log Rule generate alarms box and choose the windows events for which you will receive notifications.
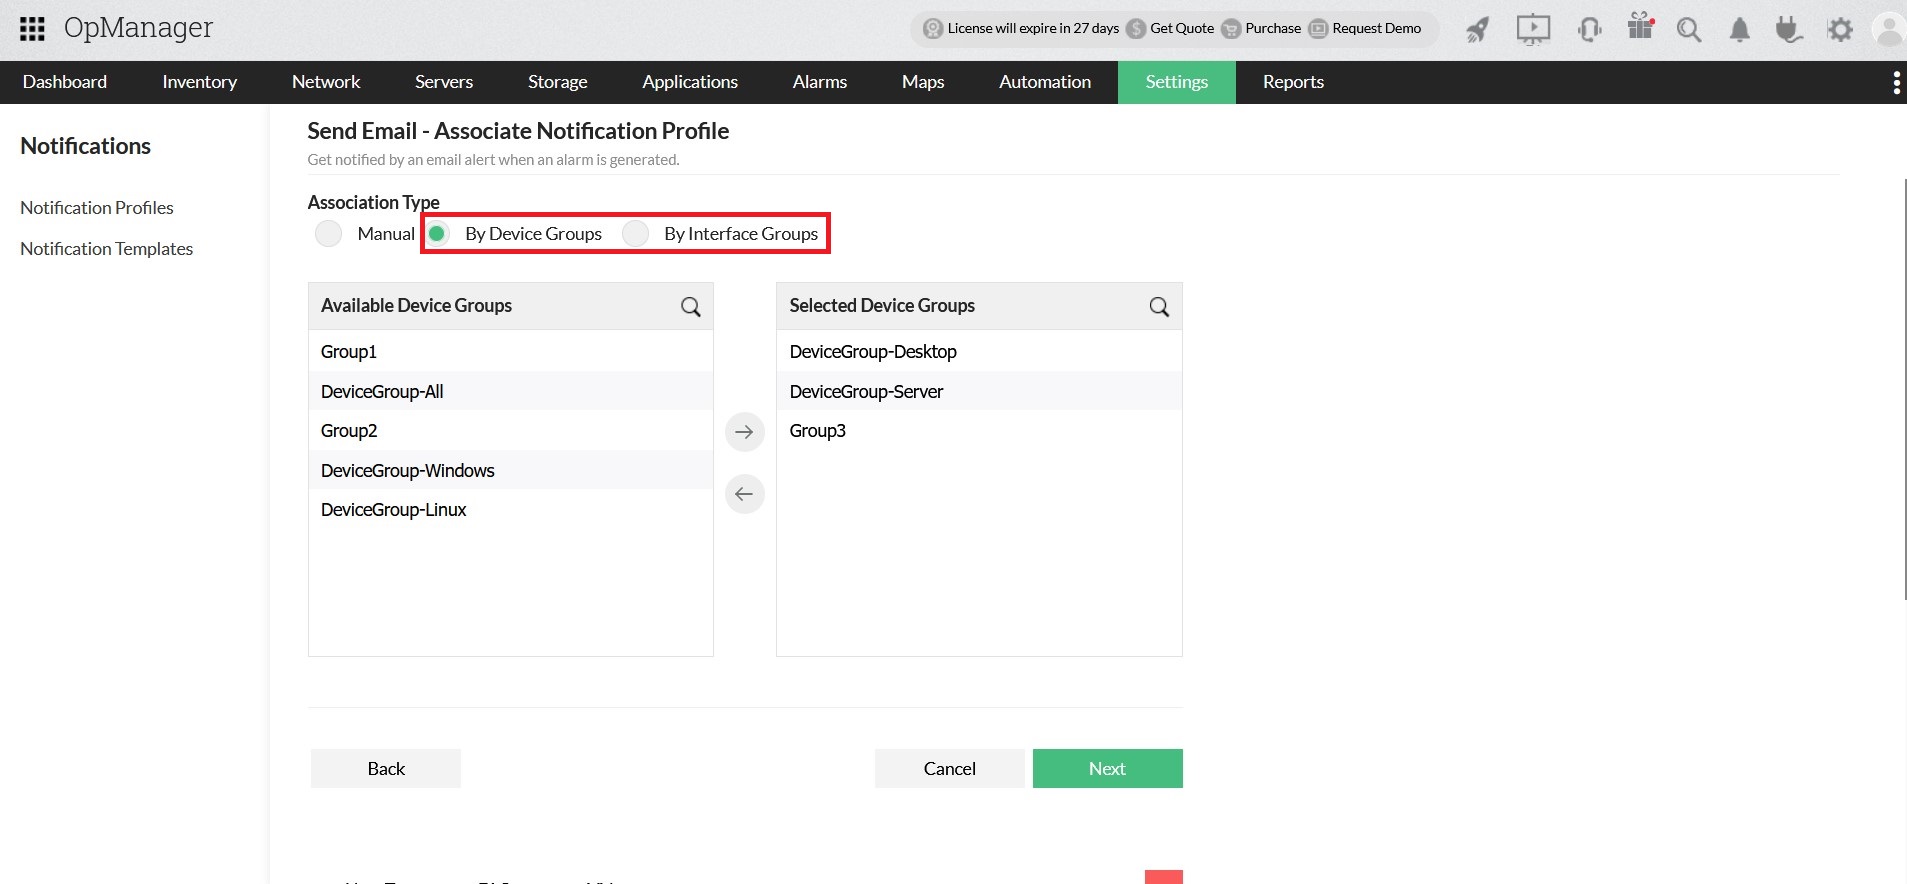
After configuring the criteria, you need to select the devices for which you want to configure the Notification Profile.
Push the devices to the Selected Devices column and click Next.
From version 128401, users have the option to configure Notification Profile with Device Groups or Interface Groups.

If a device belongs to two groups(say DeviceGroup-Desktop and Group3 -Ref screenshot above). The profile will be triggered only once even though the device that raised alarm belongs to more than one associated Group. This has been handled internally by default.
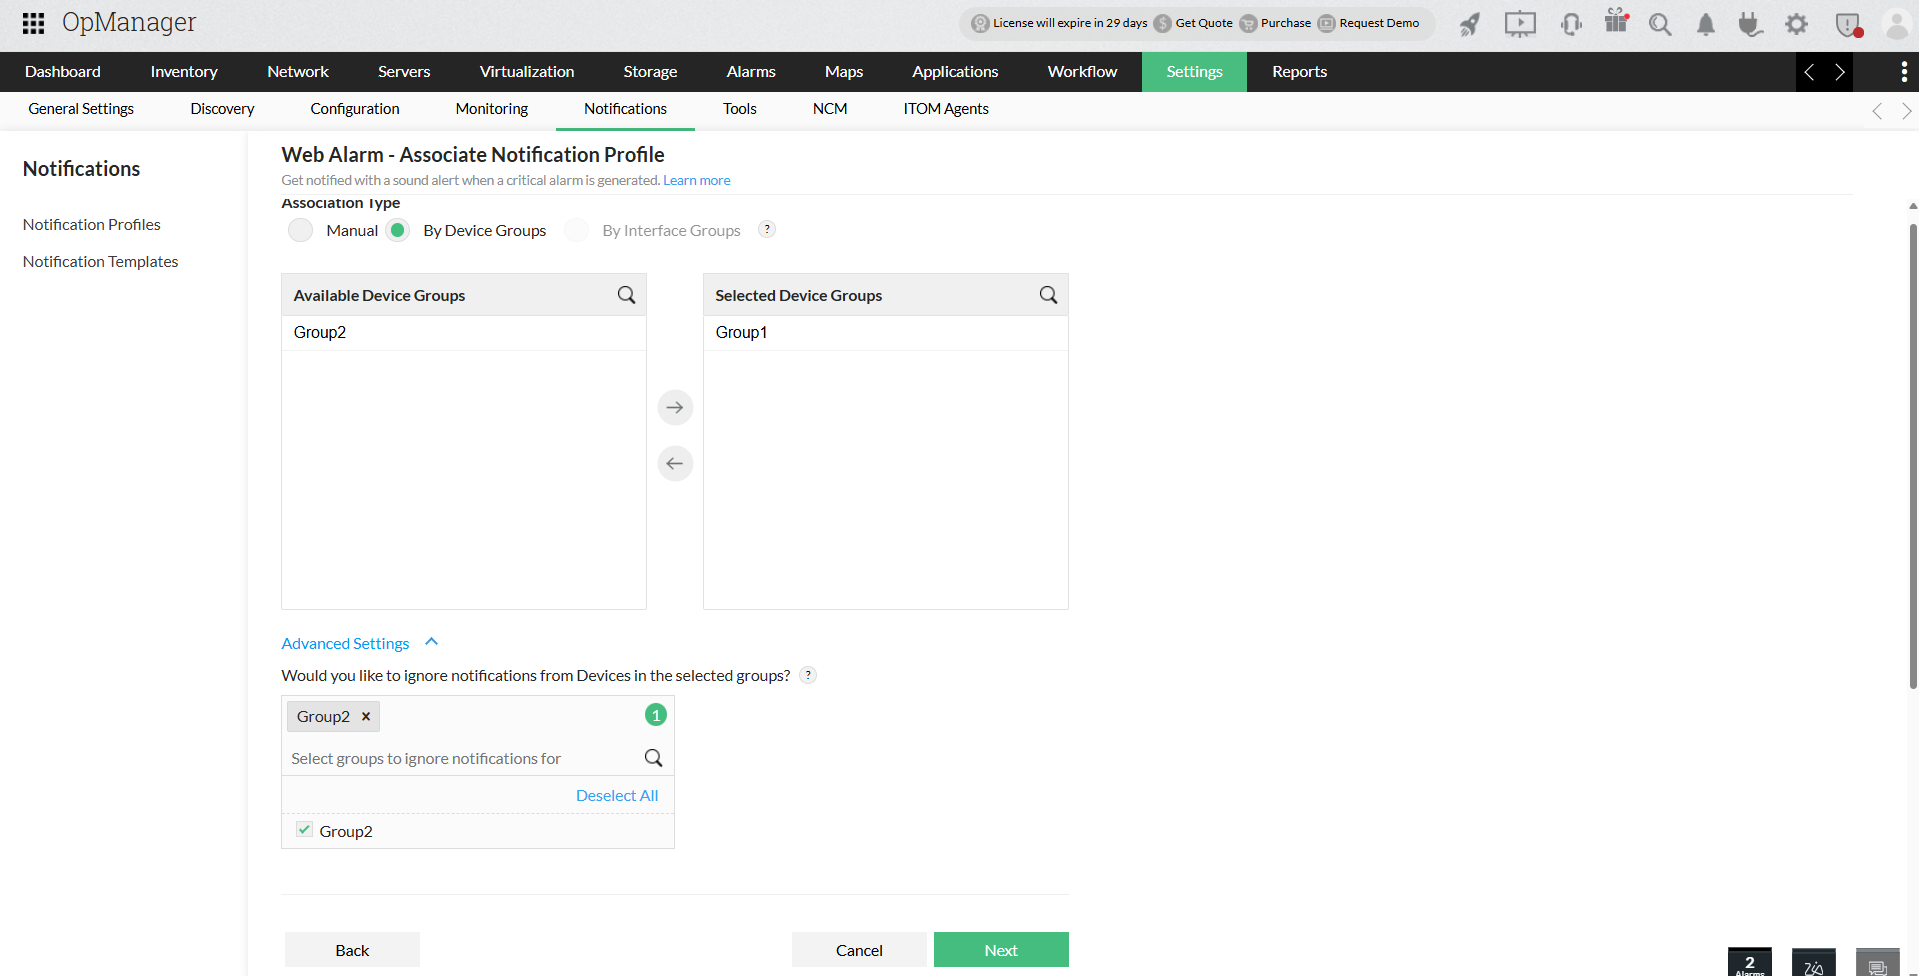
But when a device belongs to more than one Group and those Groups are associated to different Notification Profiles, Ignore Notifications for Group option has to be configured to avoid duplicates.(This option is available from Version 128608)


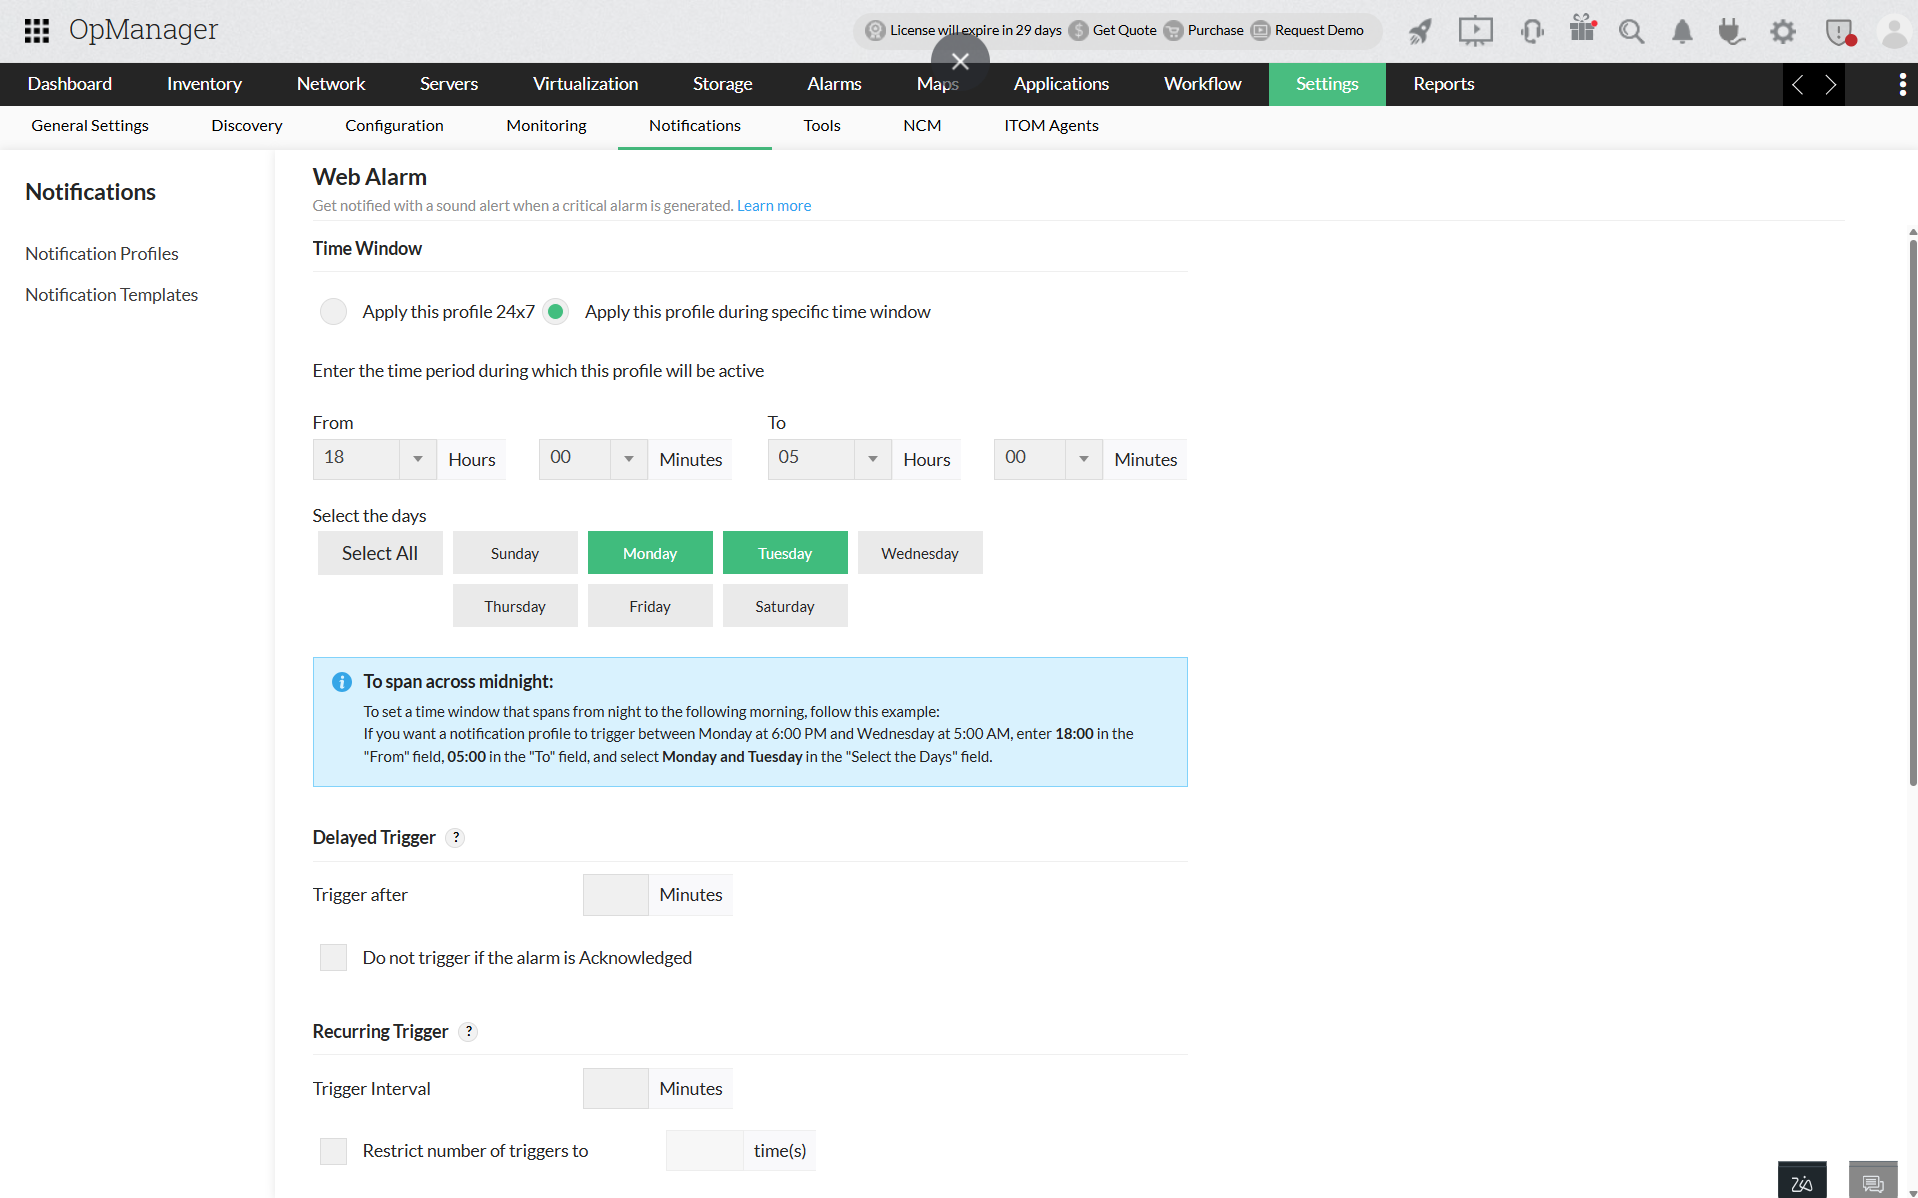
Time Window: Select one of the following options:
Delayed Trigger: If you want the notification profile to be triggered by a delay, enter the delay time in Trigger after (in minutes). If you don't want to trigger the notification profile if the alarm has been acknowledged in the meantime, you can select the 'Do not trigger if alarm is acknowledged' checkbox.
Recurring Trigger: This option helps you re-trigger the notification profile at regular intervals, till the alarm is cleared. Enter the Trigger interval and Restrict the number of triggers to. For instance, if you set trigger interval as 10 mins and restrict the number of triggers as 5 times, an alert will be notified every 10 mins, for 5 times or till alarm is cleared(Whichever is earliest). If the number of triggers is set as empty, then alert will be notified for given interval, till the alarm is cleared. If you don't want to trigger the notification profile repeatedly if the alarm has been acknowledged, you can select the 'Do not trigger if alarm is acknowledged' checkbox.

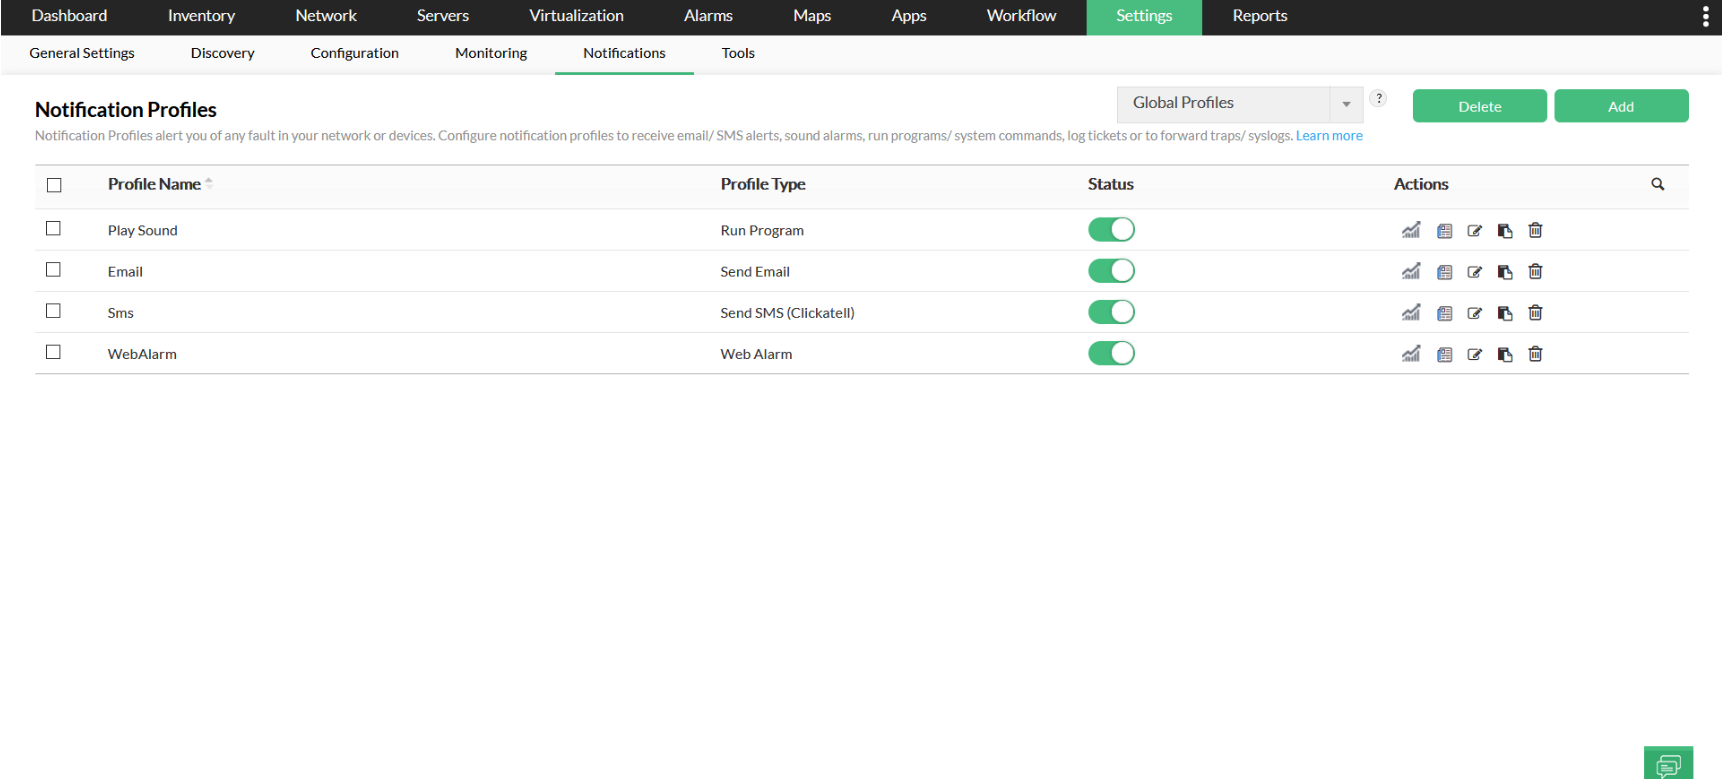
Enable/ Disable a Notification Profile
In case you want to temporarily disable a notification profile, you can follow the simple steps listed below.
 under 'Status'. This will prompt a confirmation message.
Now, you have successfully disabled a notification profile. If you wish to re-enable a notification profile, you simply enable it by clicking on the slider again.
Note: Click hereto learn about the scenarios in which multiple Notification Profiles need to be created.
Thank you for your feedback!