OAuth Authentication
In order to achieve the OAuth authentication for configuring the mail server, follow the steps given below:
- Login to Endpoint central and click Admin -> Server Settings -> Mail Server.
- Specify the information given below:
- Server Name : smtp.office365.com
- Port : 587
- Sender Email Address: Any email address with an independent mailbox (not a shared one)
- Test Email Address: Any Email Address
- Email Type: SMTP
- Enable TLS: Yes
- Username: Any Email address with an "Exchange Online License" and "App registration" is required.
Follow the instructions given below to view if the Exchange Online License and App registration is available for your account.
Exchange Online License
To check if the "Exchange online license" is available for your account, login to Microsoft admin center and navigate to Users-> Active User -> Select the name of the user -> Properties pane -> License and apps.
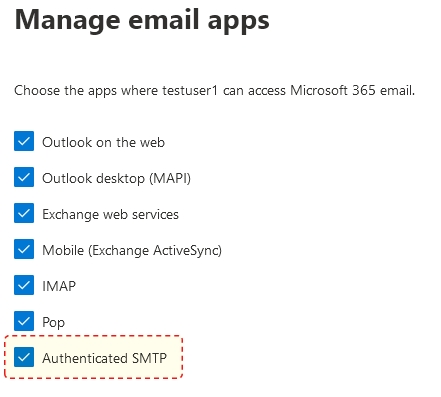
Once the License verification is done, enable Authenticate SMTP to access Microsoft 365 email. In the user properties page go to Mail -> Email apps -> Enable Authenticated SMTP
If the Username and Sender Email Address is the same
Verify the criteria given above before proceeding to save the mail server settings.
If the Username and Sender e-mail address is different:
If the username and sender email addresses are different, Ensure that the Username provided has permission to "send on behalf" Of the Sender e-mail address.
To add send on behalf permission, follow the steps given below:
- Login to the Microsoft admin center -> Go to Users -> Active Users page.
- Select the name of the user provided as Username to open their properties pane.
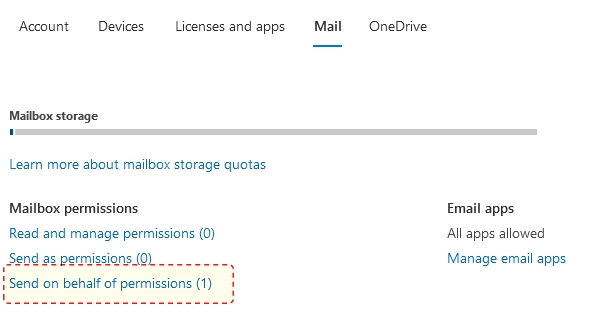
- In the properties pane, select mail tab -> send on behalf permissions.
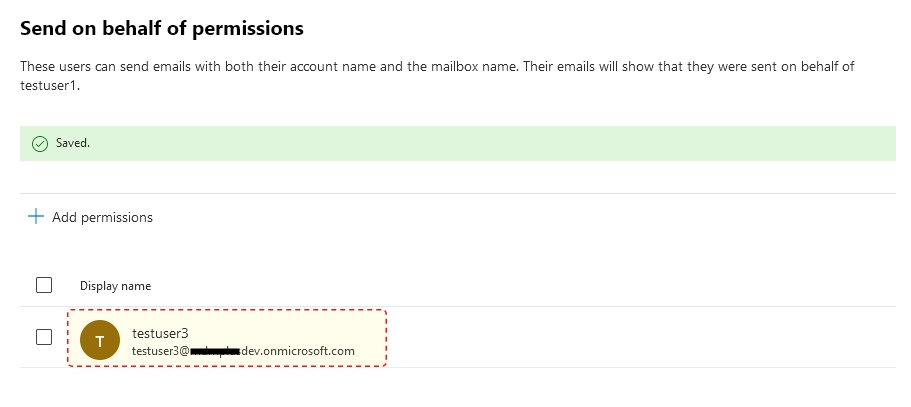
- Select Add Permissions -> Choose the name of the user provided in Sender e-mail address.
App Registrations
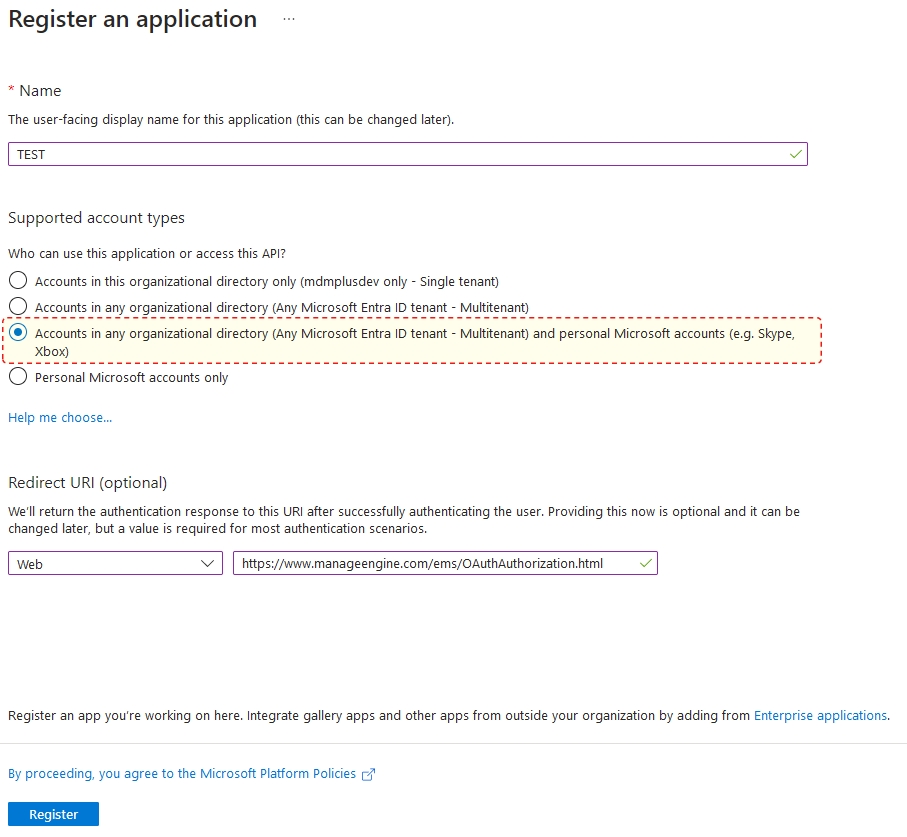
- Login using the username entered above and navigate to App Registrations -> New registration.
- Enter the name and choose the account type. The Accounts could be in any organizational directory (Azure AD directory or Multi-tenant) and personal Microsoft accounts (e.g. Skype, Xbox).
- Obtain the redirection URL from the Endpoint central server by navigating to Mail Server Settings -> OAuth -> Authorization Server Settings->Redirect URL.
Note: Authorization URL, Token URL and scope are automatically filled in based on the server name.
From the Authorization Server Details copy the redirect URL.
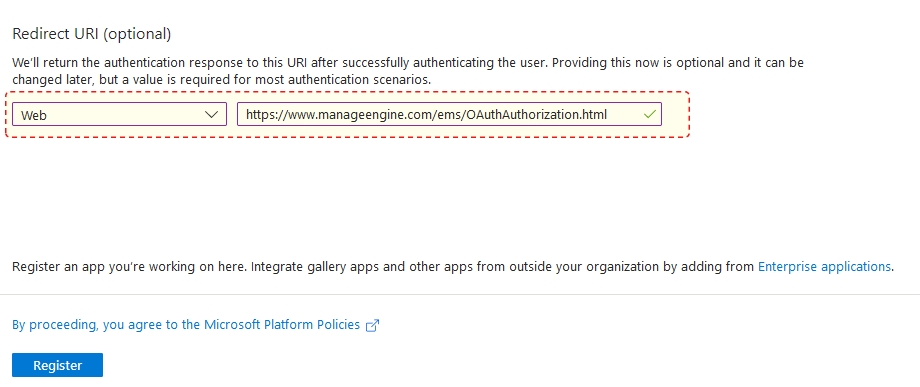
- Choose the type of platform and paste the Redirect URL and click on Register.
- You have successfully obtained the Client ID.
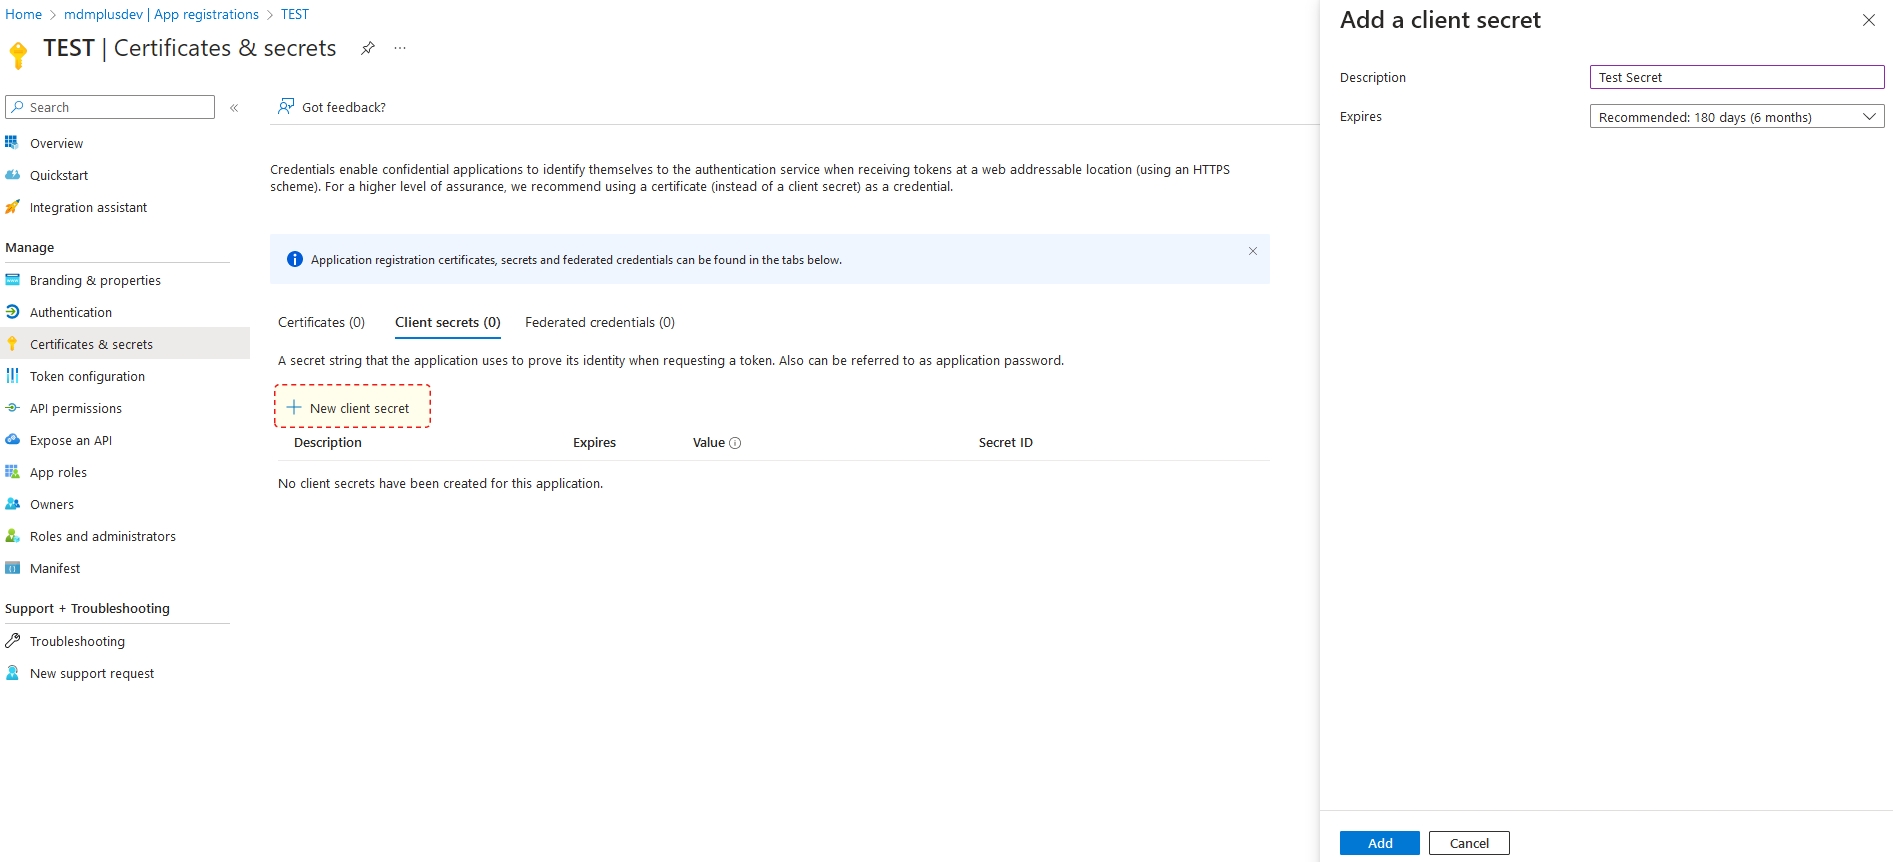
To create a Client secret, Navigate to Certificates and Secrets and click on New client secret.
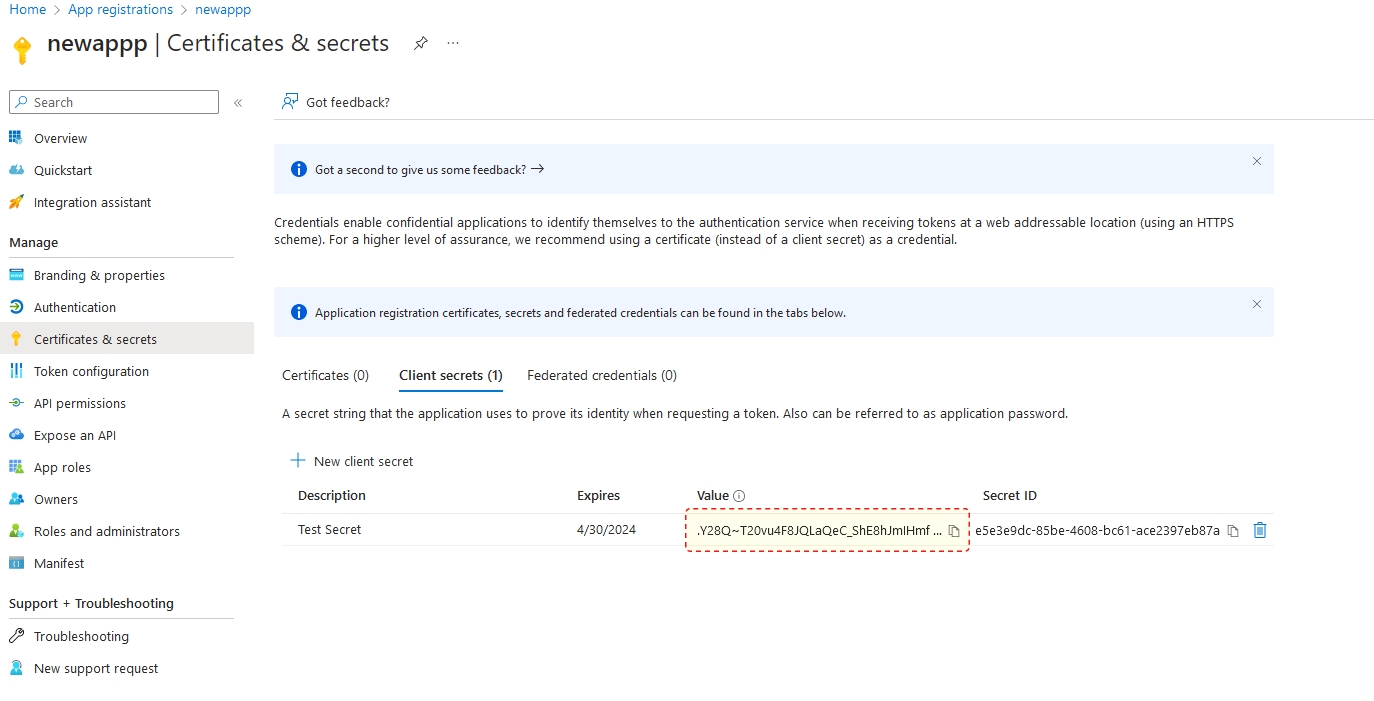
- Enter description and expiry period for secret and click Add to obtain client secret.
- Enter Client ID and Client Secret in Endpoint Central console and click Save.
Now, you have successfully configured OAuth Authentication for mail server settings.
Basic Authentication
Note: It is always recommended to configure office 365 in mail server settings through OAuth.
In order to achieve the basic authentication for configuring the mail server, follow the steps given below:
- Click Admin -> Server Settings -> Mail Server Settings.
- Specify the information given below:
- Server Name : smtp.office365.com
- Port : 587
- Sender Email Address: Any email address with an independent mailbox (not a shared one)
- Test Email Address: Any Email Address
- Email Type: SMTP
- Enable TLS: Yes
- Username: Any email address of the user with Send on Behalf permission
- Password: Specify your password
You have successfully configured Office 365 in the Mail Server Settings.


