

Workflows is a powerful, low-code IT orchestration platform that enables you to define step by step instructions of complex automations by utilizing resources such as Sensor, Remote Action and more.Use Workflows to automate routine tasks and troubleshoot common digital employee experience (DEX) issues. This minimizes the friction users encounter with company technology, improving overall productivity..
Automate common IT tasks with Workflows, such as:
Periodically scanning device disk space and remediate if disk space falls below threshold
Ensuring device stability by enforcing periodic restart based on uptime
Configuring bios passwords on devices
Perform any device property check and apply fix to bring them back to desired state.
And many more cases.
Note: Windows Operating System is only supported on DEX.
Workflows are built using three main components: Sensors, Switch, and Actions. Lets explore what each one does.
Sensor - It allows you to collect any custom data using powershell scripting language. For Example, User can query disk space from endpoints using powershell scripting and utilize it as one of stage in workflow.
Switch - User may need to deploy action in workflow using certain conditions defined in workflow. Switch can be used to define conditions for actions. Outcome of sensors can be used to define condition in Switch.
Complex condition require multiple AND and OR logical operators use in pattern definition. Add condition in case and define criteria pattern for it. For instance, a Switch condition could check if free disk space is less than 10%. If yes, the workflow proceeds to an action to clean up files. This can be configured similar to below.
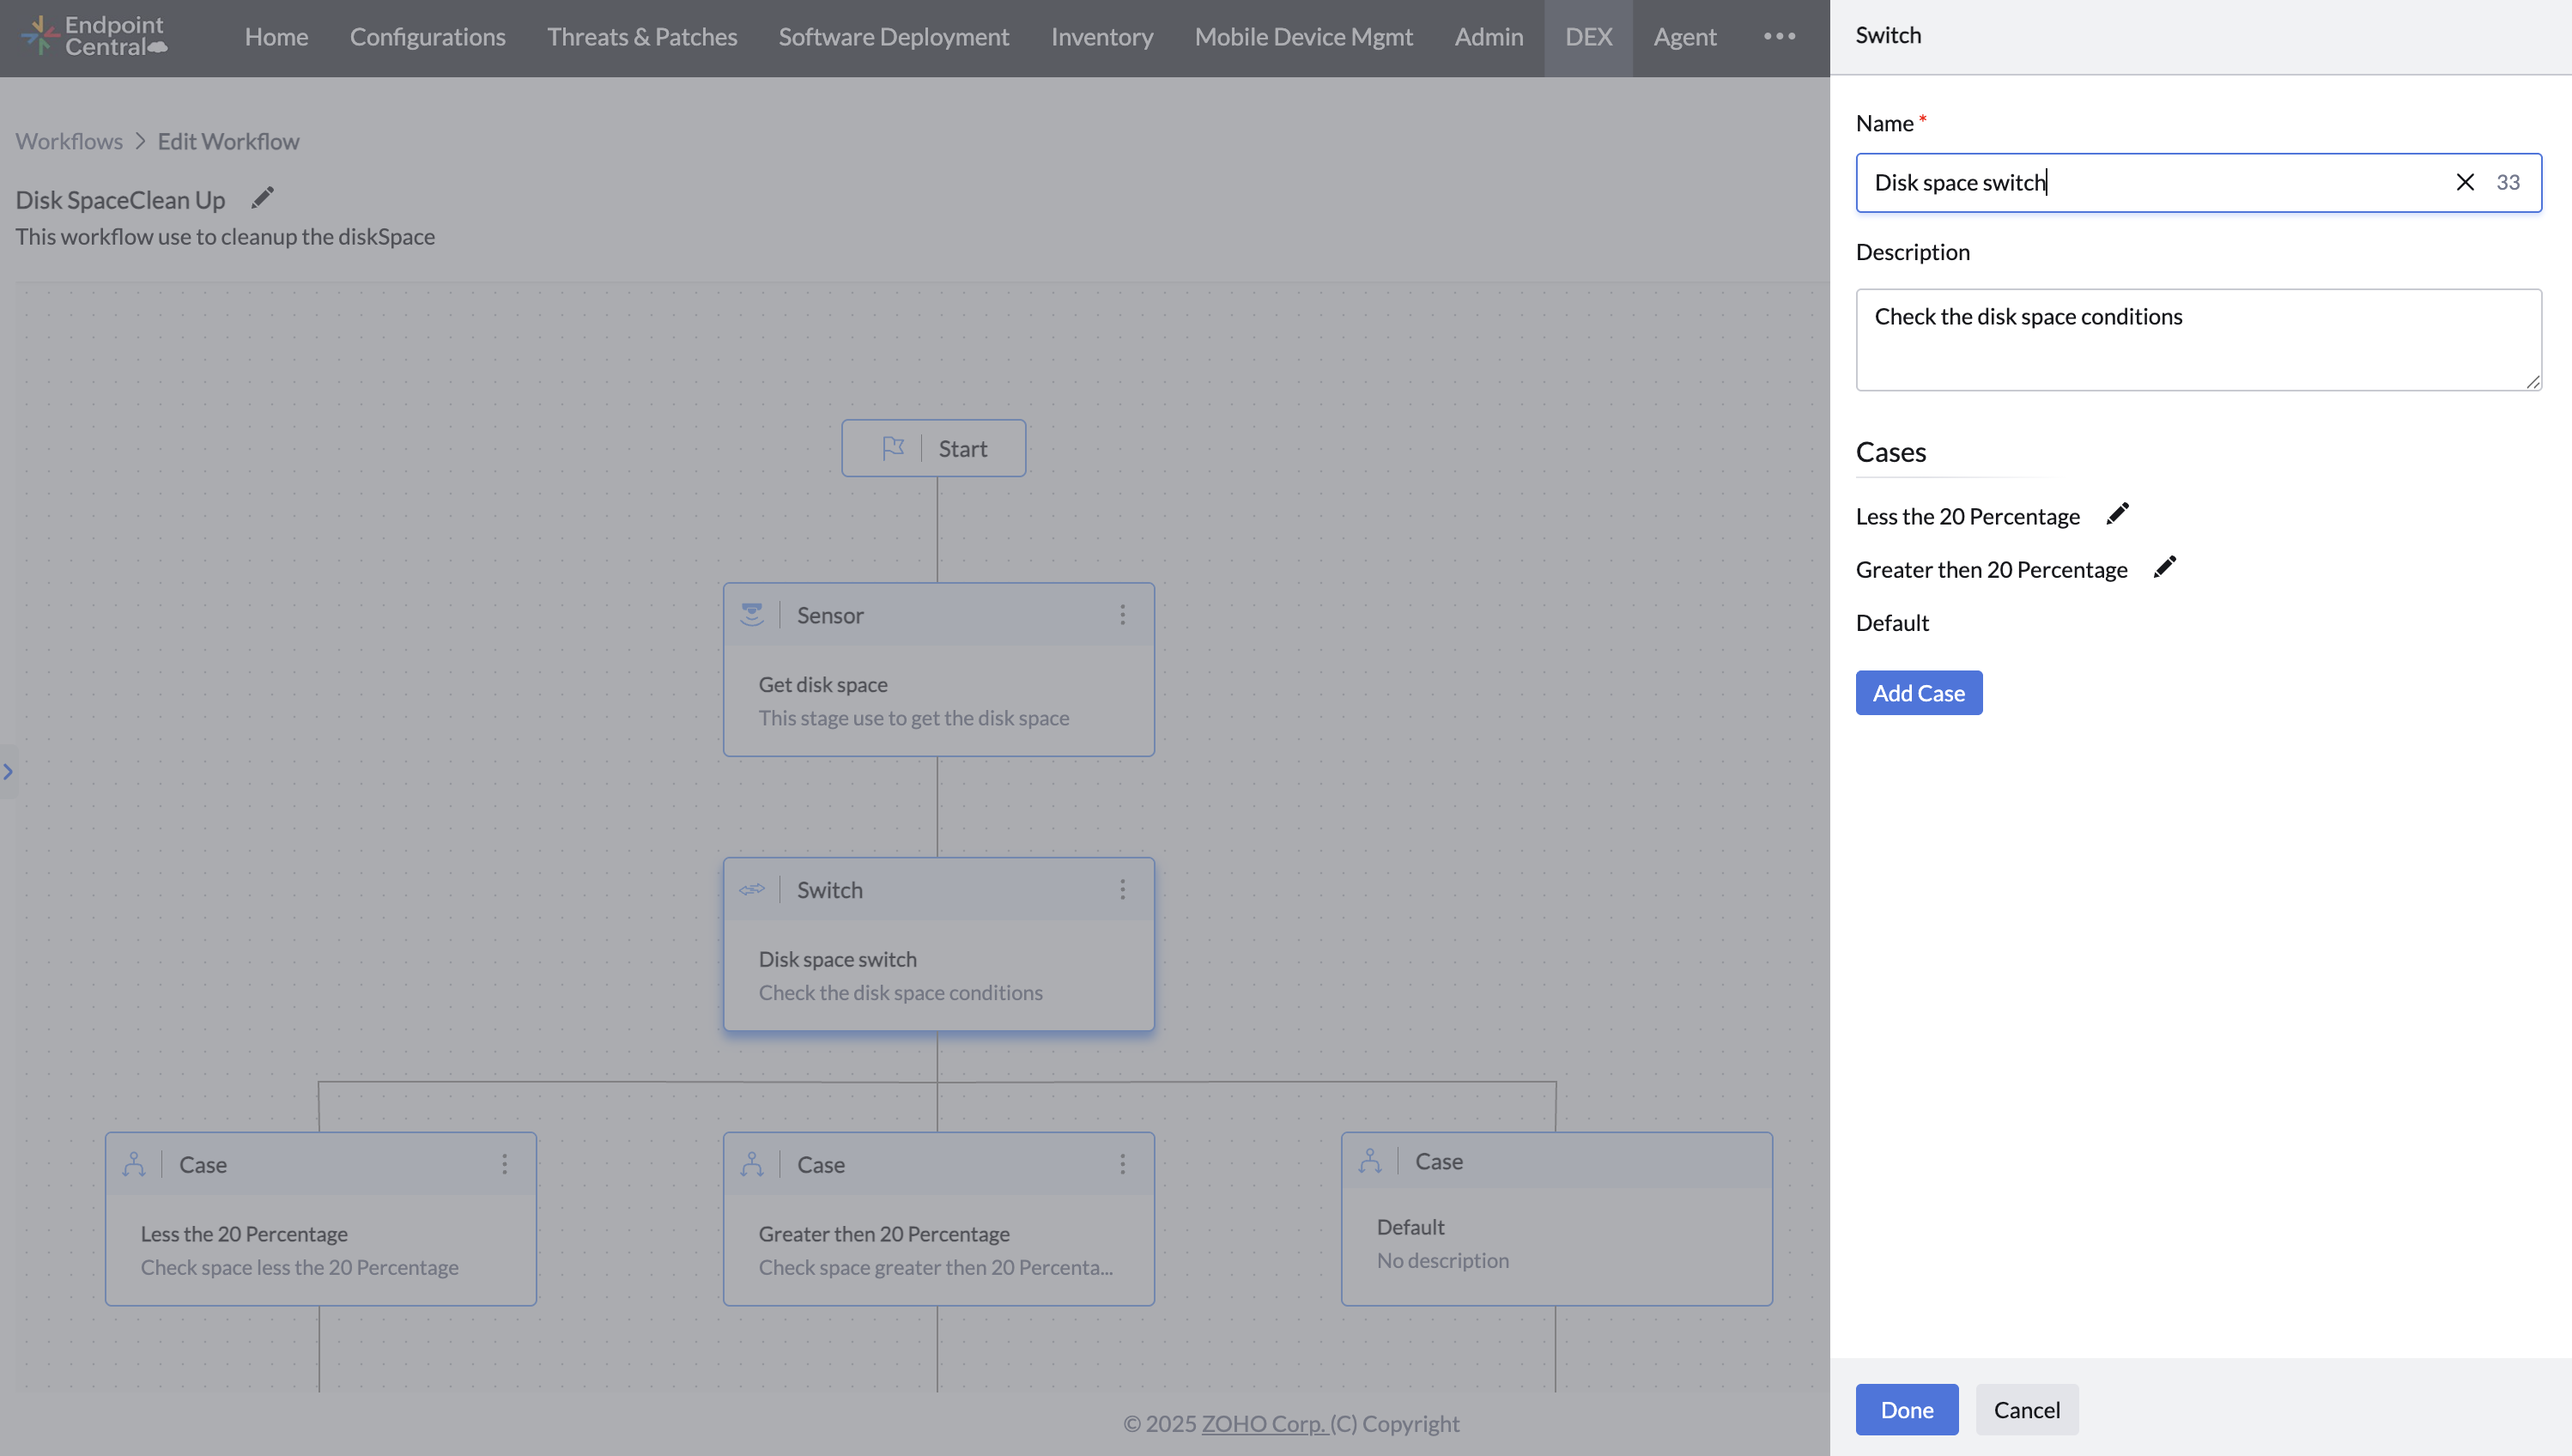
Case - Defines a condition within a switch (for example, “> 5 GB”) to create multiple execution paths based on different outcomes.
Remote Action - These are the tasks your workflow performs on endpoints. You can define these actions using scripts stored in the Script Repository. For example, you can create a script to clean up disk files and link it as an action in your workflow.
Engage - This stage enables interaction with end users during workflow execution. Use it to display messages, collect confirmations, or notify users before applying changes to their devices. Example - Prompt the user before performing file clean ups
Send Mail - Use this stage to send email notifications to relevant stakeholders during the deployment process. It helps keep teams informed about workflow status or actions performed. Example - Notify IT team on outcome of workflow execution
Delay - The Delay stage pauses workflow execution for a defined period.This is useful when waiting for something to complete.
Restart - Use this stage to restart the target device as part of your workflow.No additional configuration is required.
End - Marks the completion of a workflow branch and ensures all paths are properly closed.
To Create new workflow
Select Workflow from Left Navigation in DEX.
Click Create workflow to create new workflow
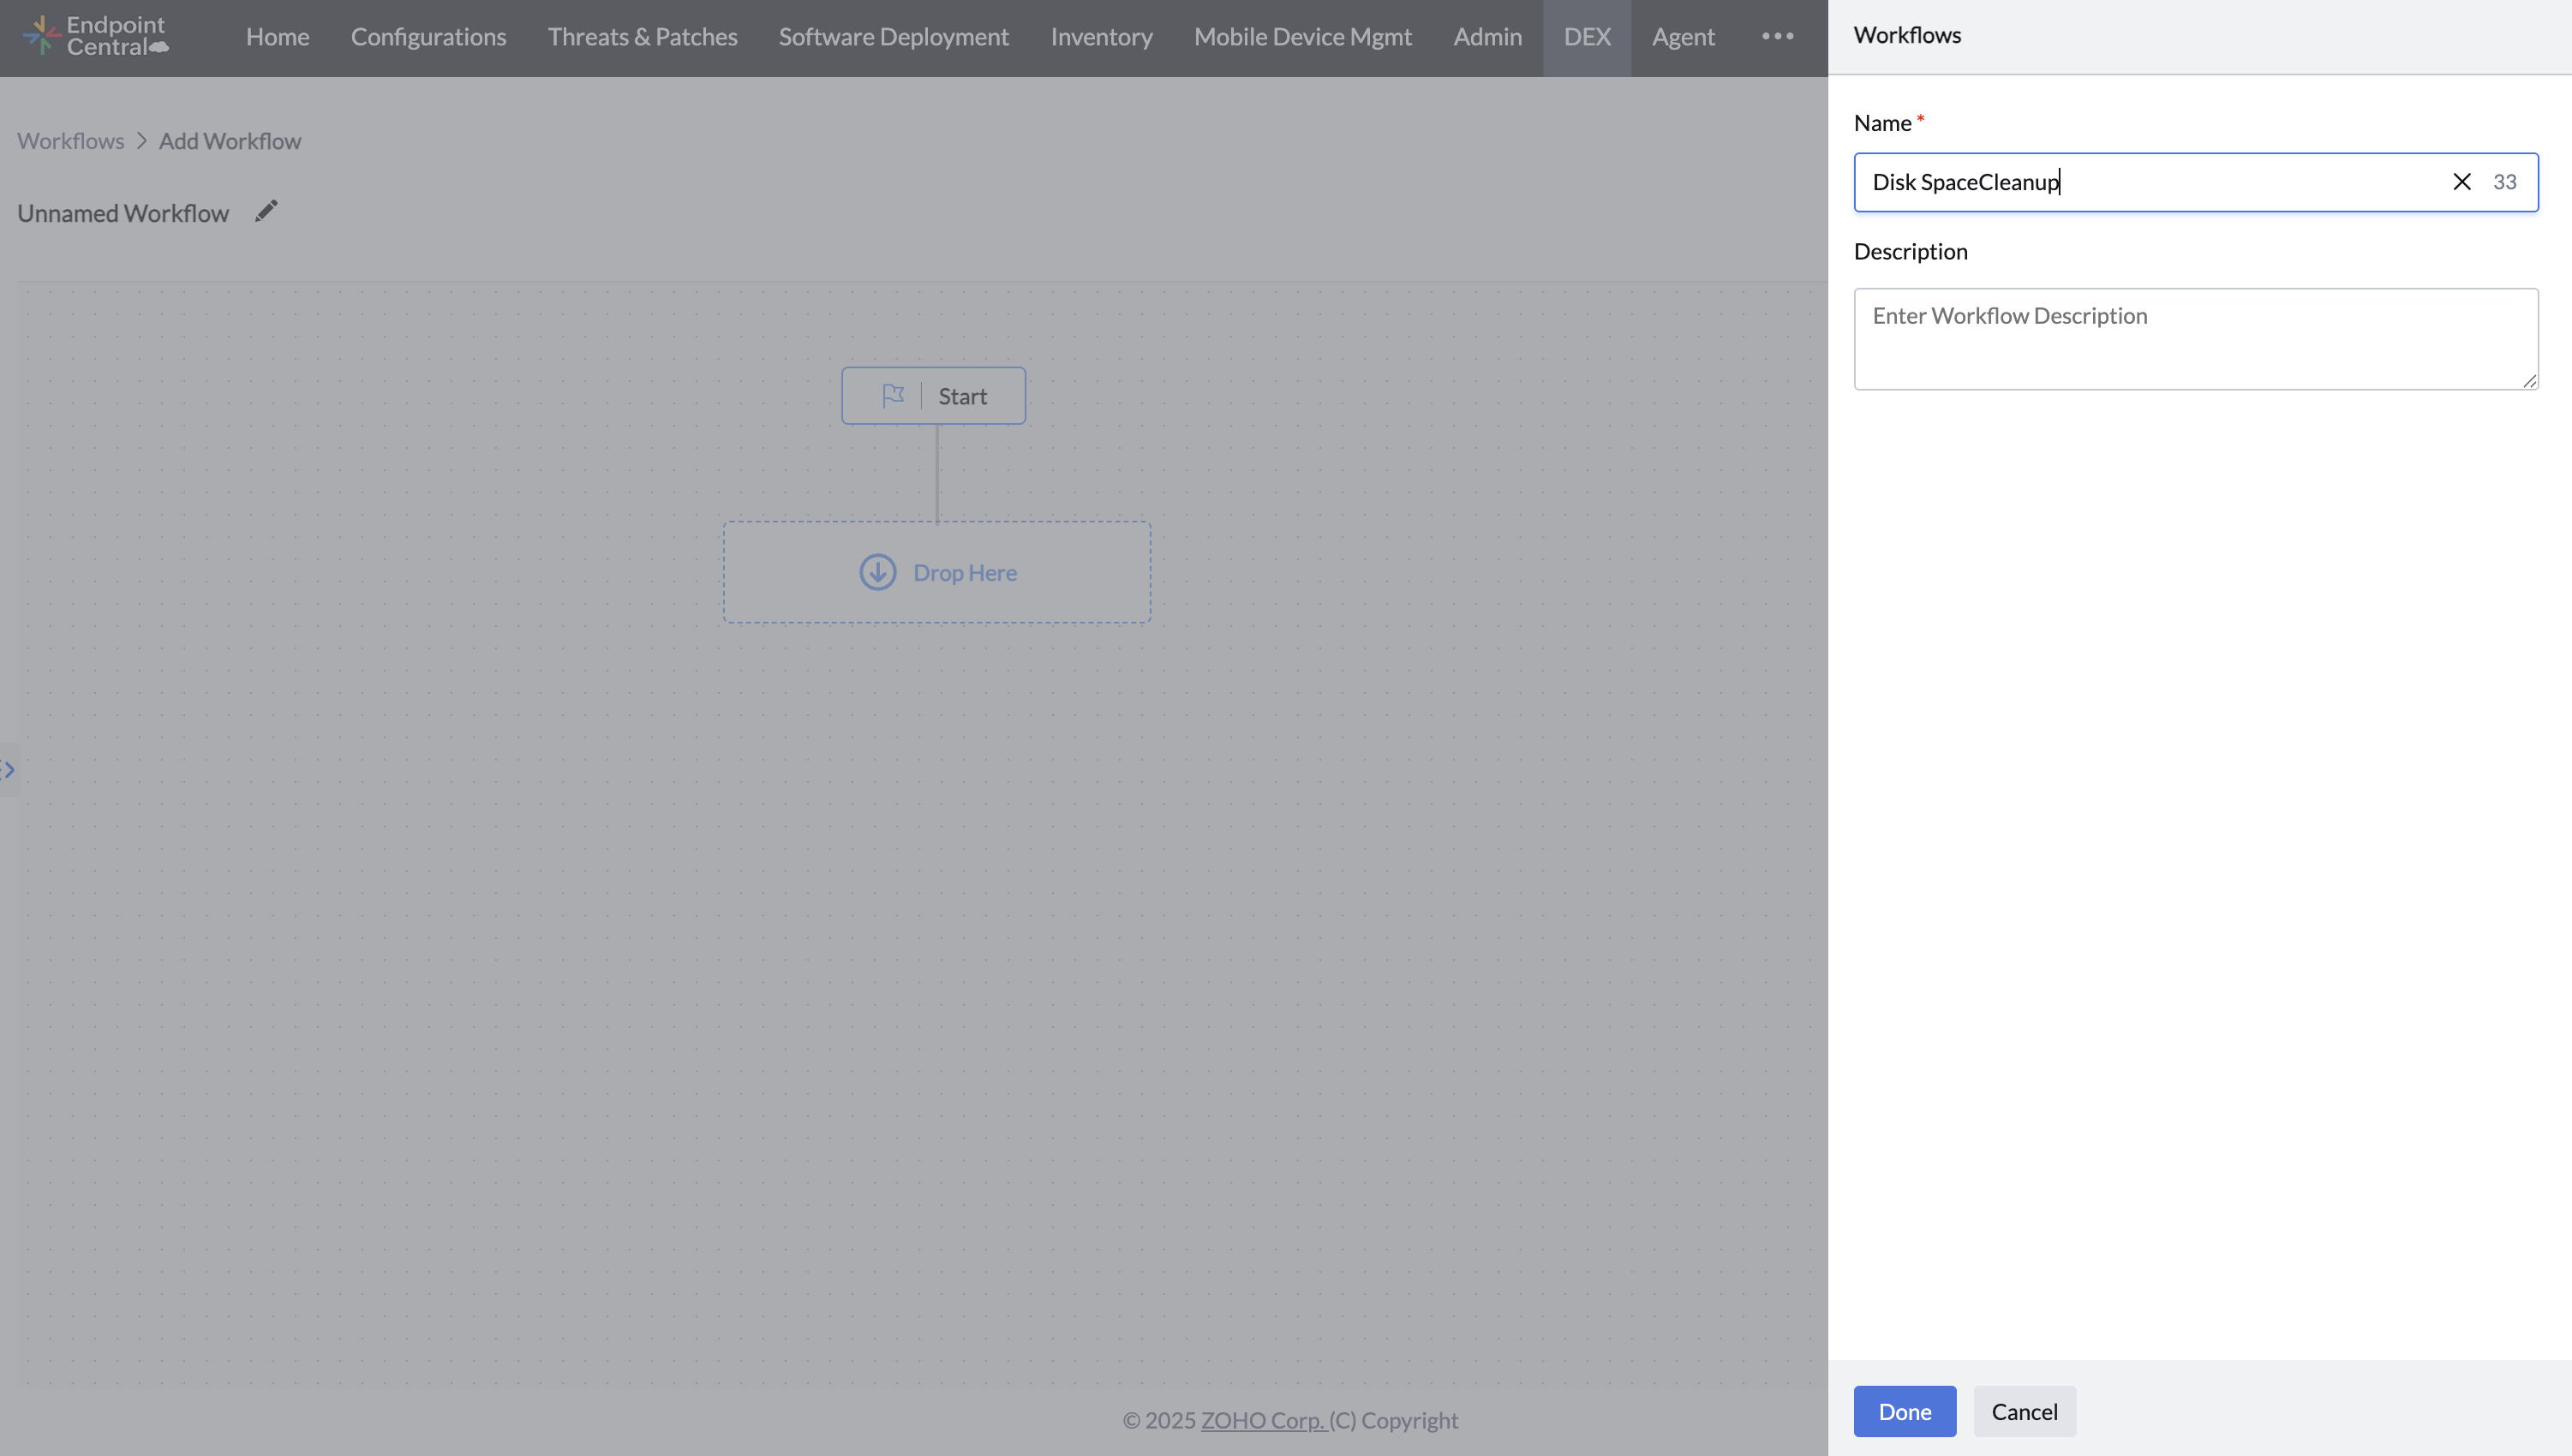
Enter descriptive name and description of Workflow
Drag and Drop required workflow stages from Right side of Builder View
Configure properties for each stage using stage Settings
Add End stage at the end of every workflow branch to mark it completed
Click Save to proceed for execution.
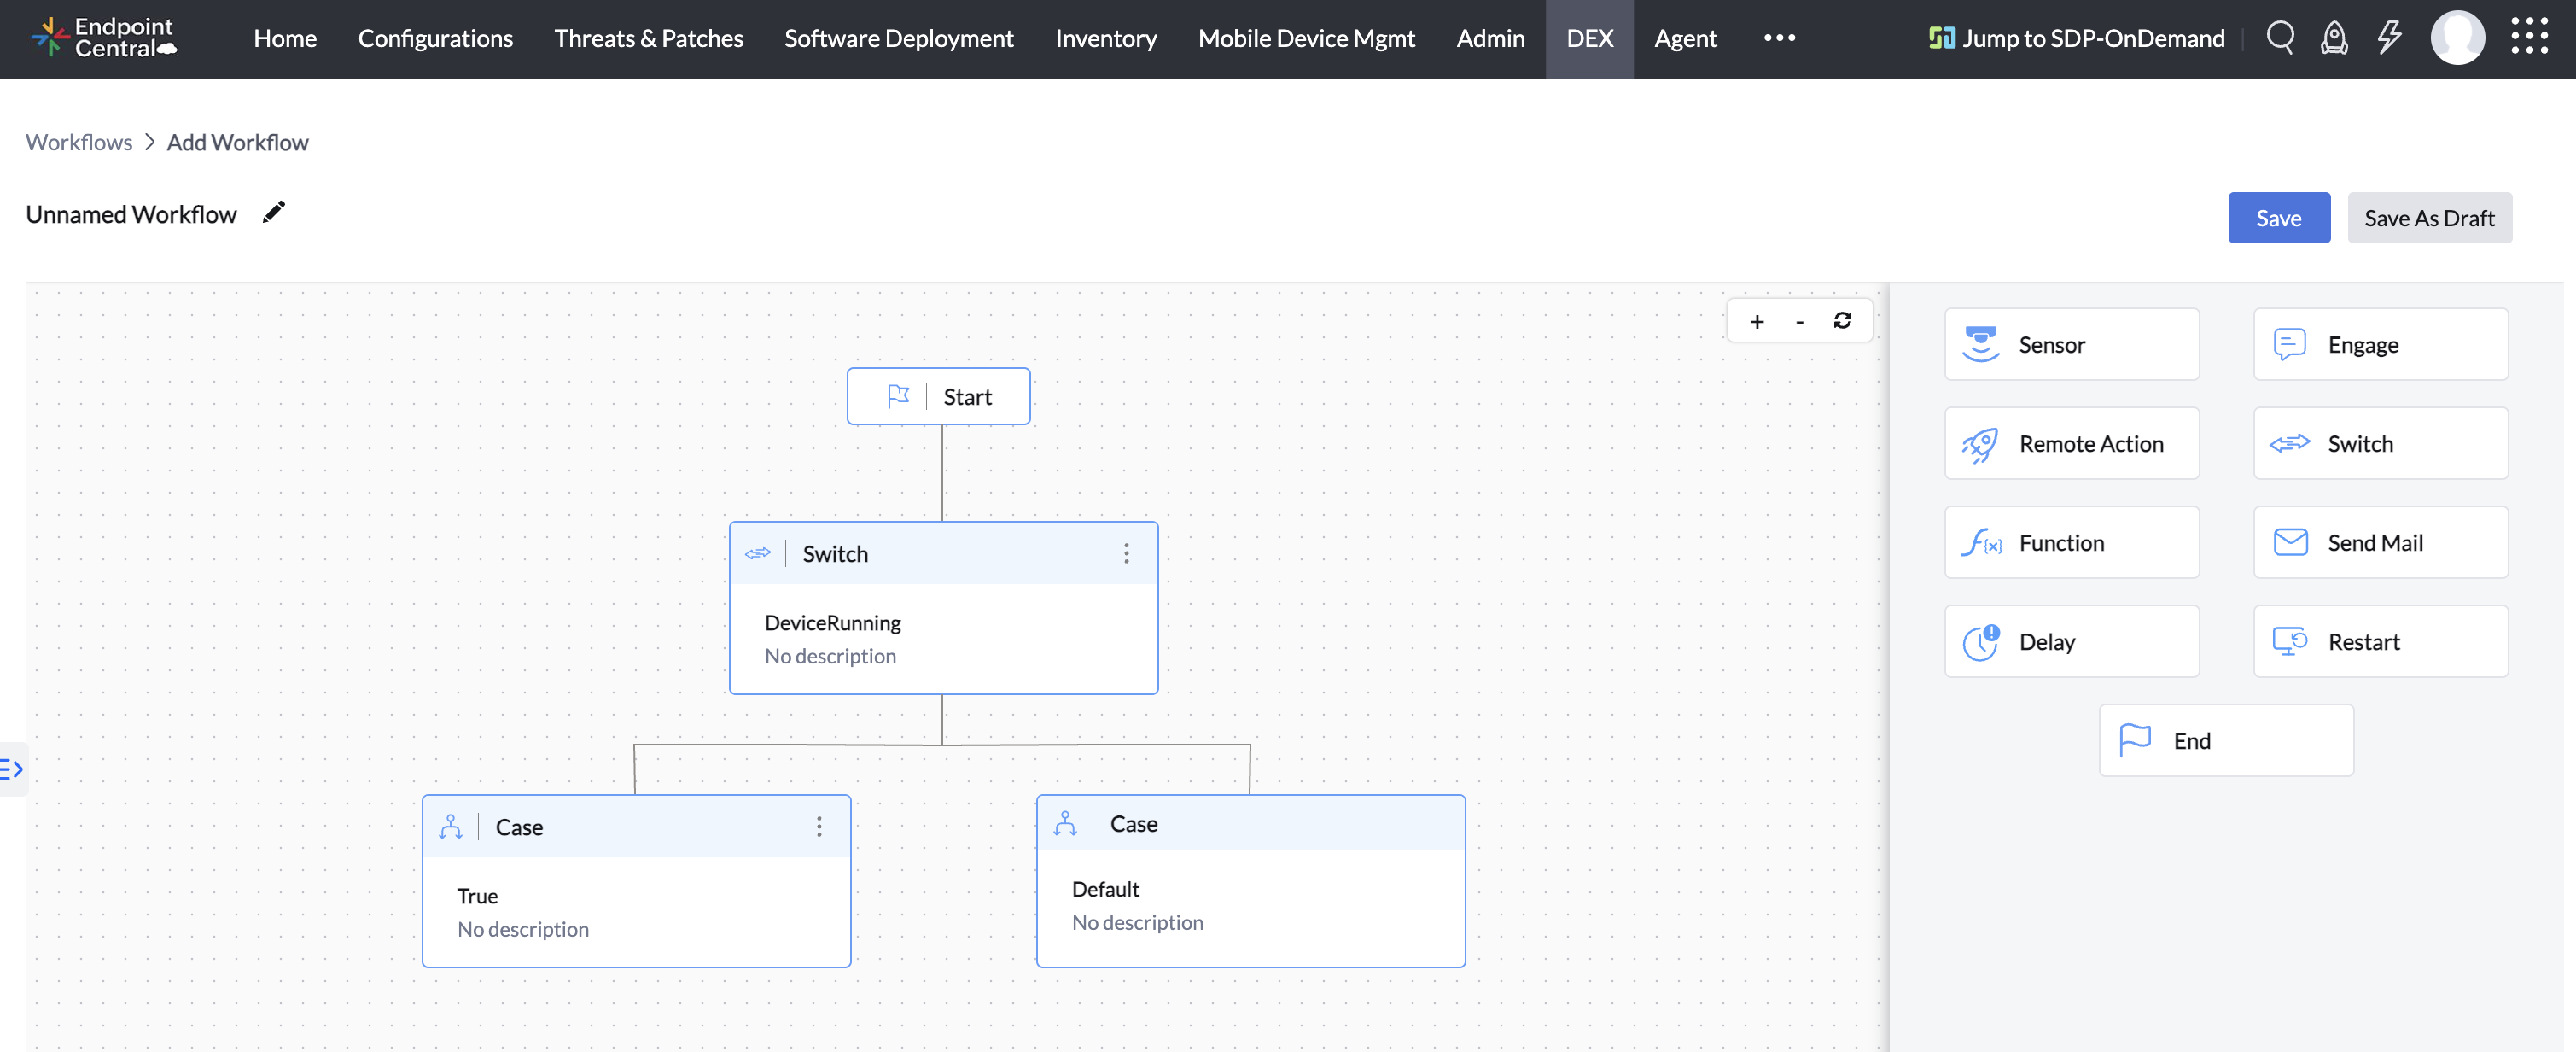
The Workflow Builder interface provides a visual workspace to design and build your automated workflows.Interface contains five main elements.
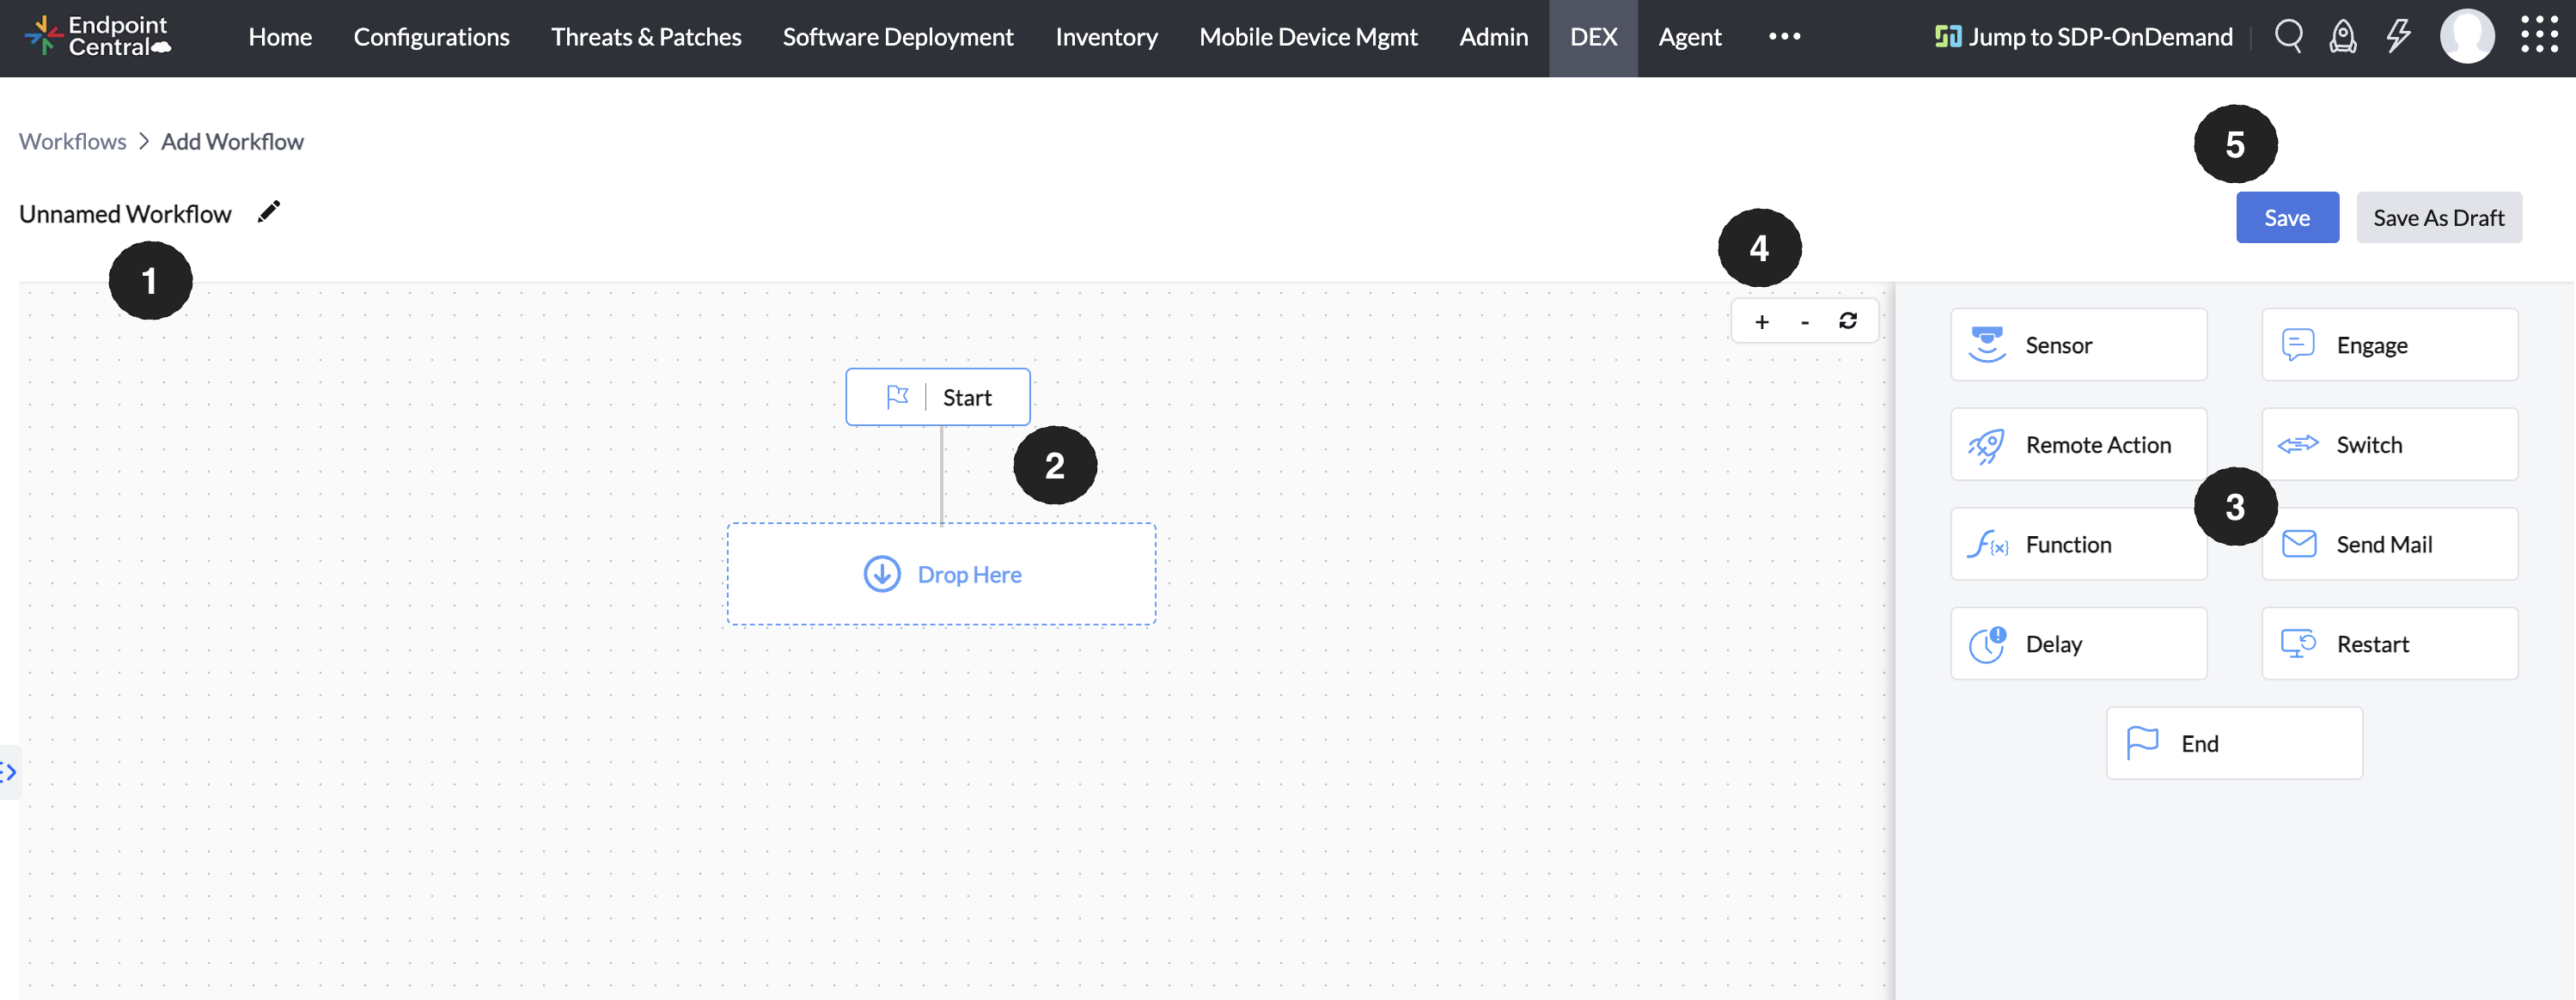
Name and Descriptions : Define descriptive name and optional description for your workflow.
Builder : Drag and drop pre-built workflow stages onto the builder to create your automation. Every workflow starts with a "Start" stage and ends with an "End" stage (or multiple ends for branching workflows)
Stage and Settings : Use Stage section to add stage to builder. Once a stage is added to the builder, the "Settings" section allows you to configure its specific properties.
Zoom and Arrange : Zoom in and out for better visibility of your workflow as you build it. Click the Auto-arrange icon to automatically center your workflow on the page.
Save Workflow : Click Save button to save workflow and create new version of workflow , Click Save as Draft button to save in Draft status without finalizing workflow
When you add a stage to your workflow builder, a settings window will appear. This window allows you to configure the properties of the specific stage you've chosen.
Sensor
Sensor lets you to get device attributes from endpoints. This output can be used in other stages of workflows.
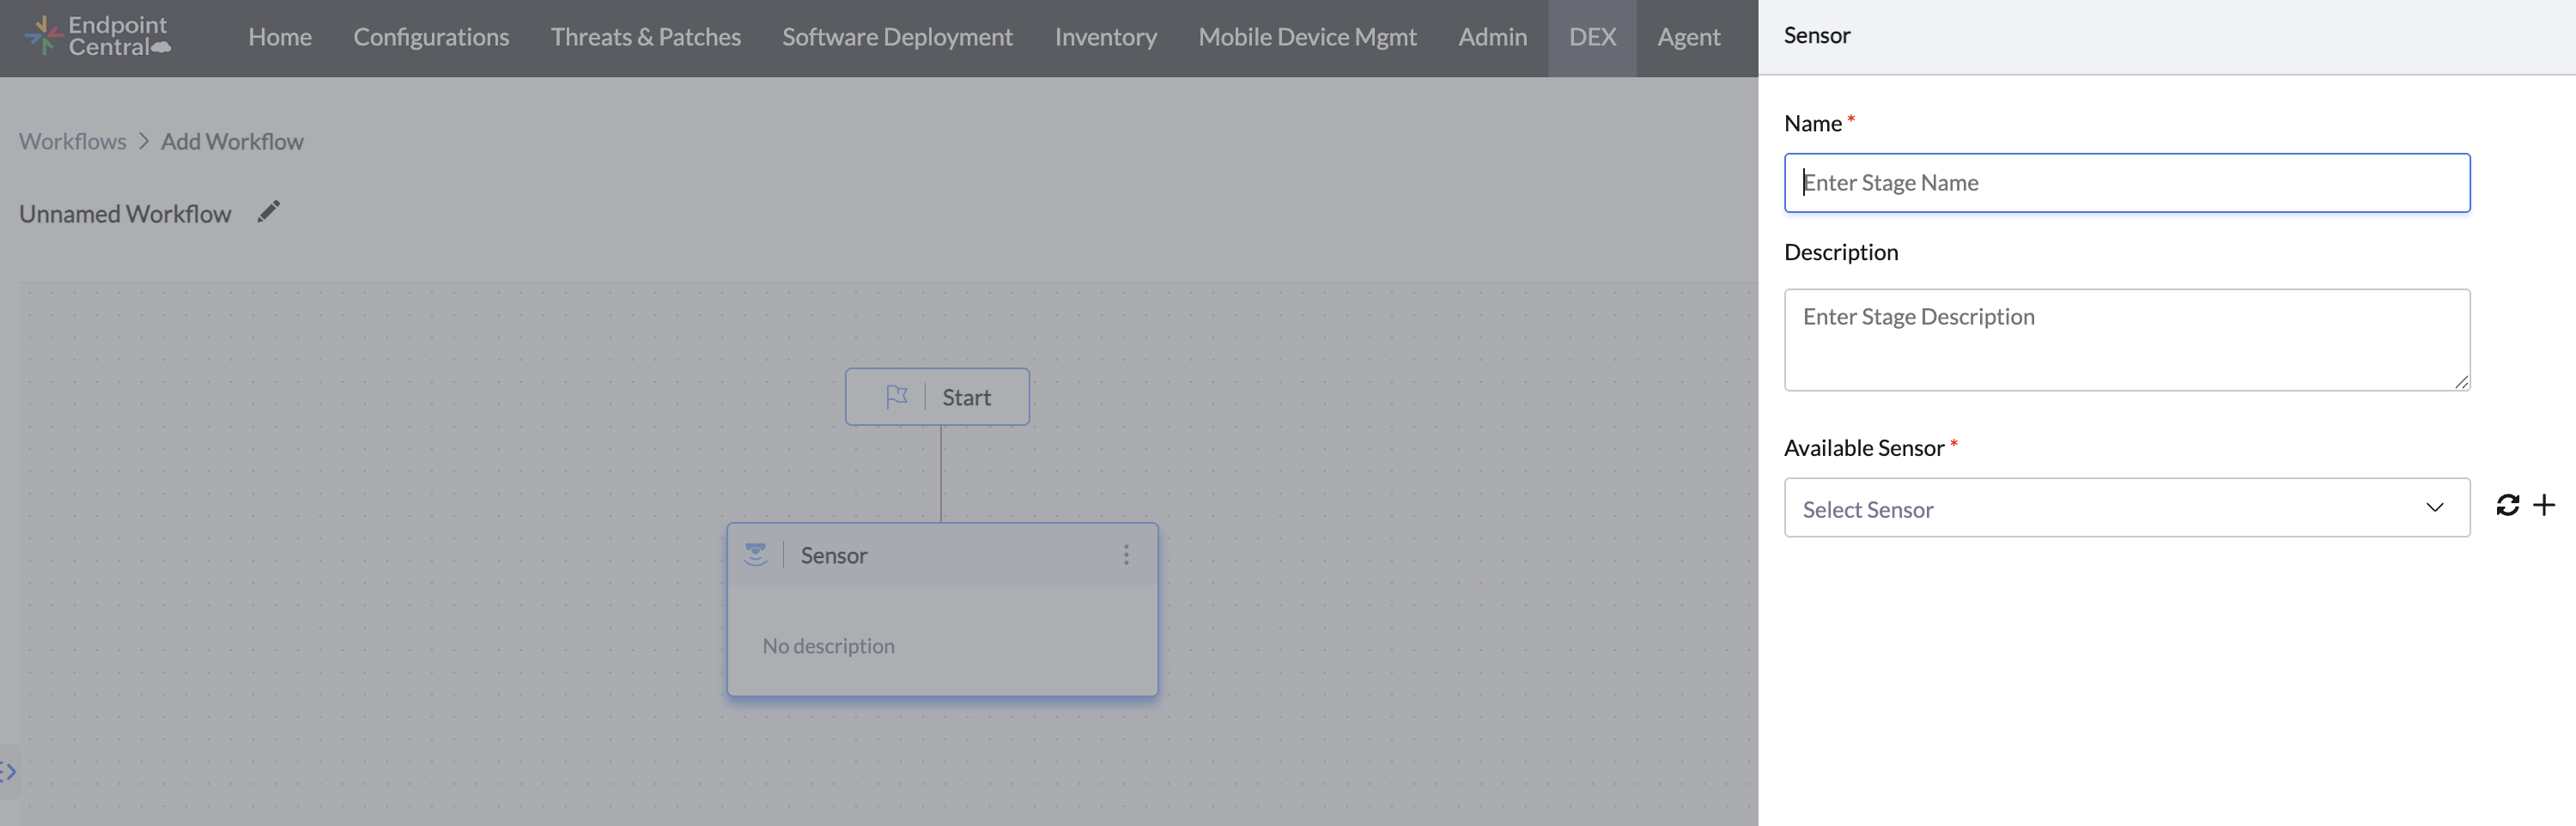
To add Sensor as a Stage, drag and drop Sensor and enter the following details
Name: Enter descriptive name for Sensor
Description:Enter description for Sensor
Select Script:Select Sensor that you want to collect from endpoints
Remote Actions
Remote Actions allows you to execute actions targeted by workflow.
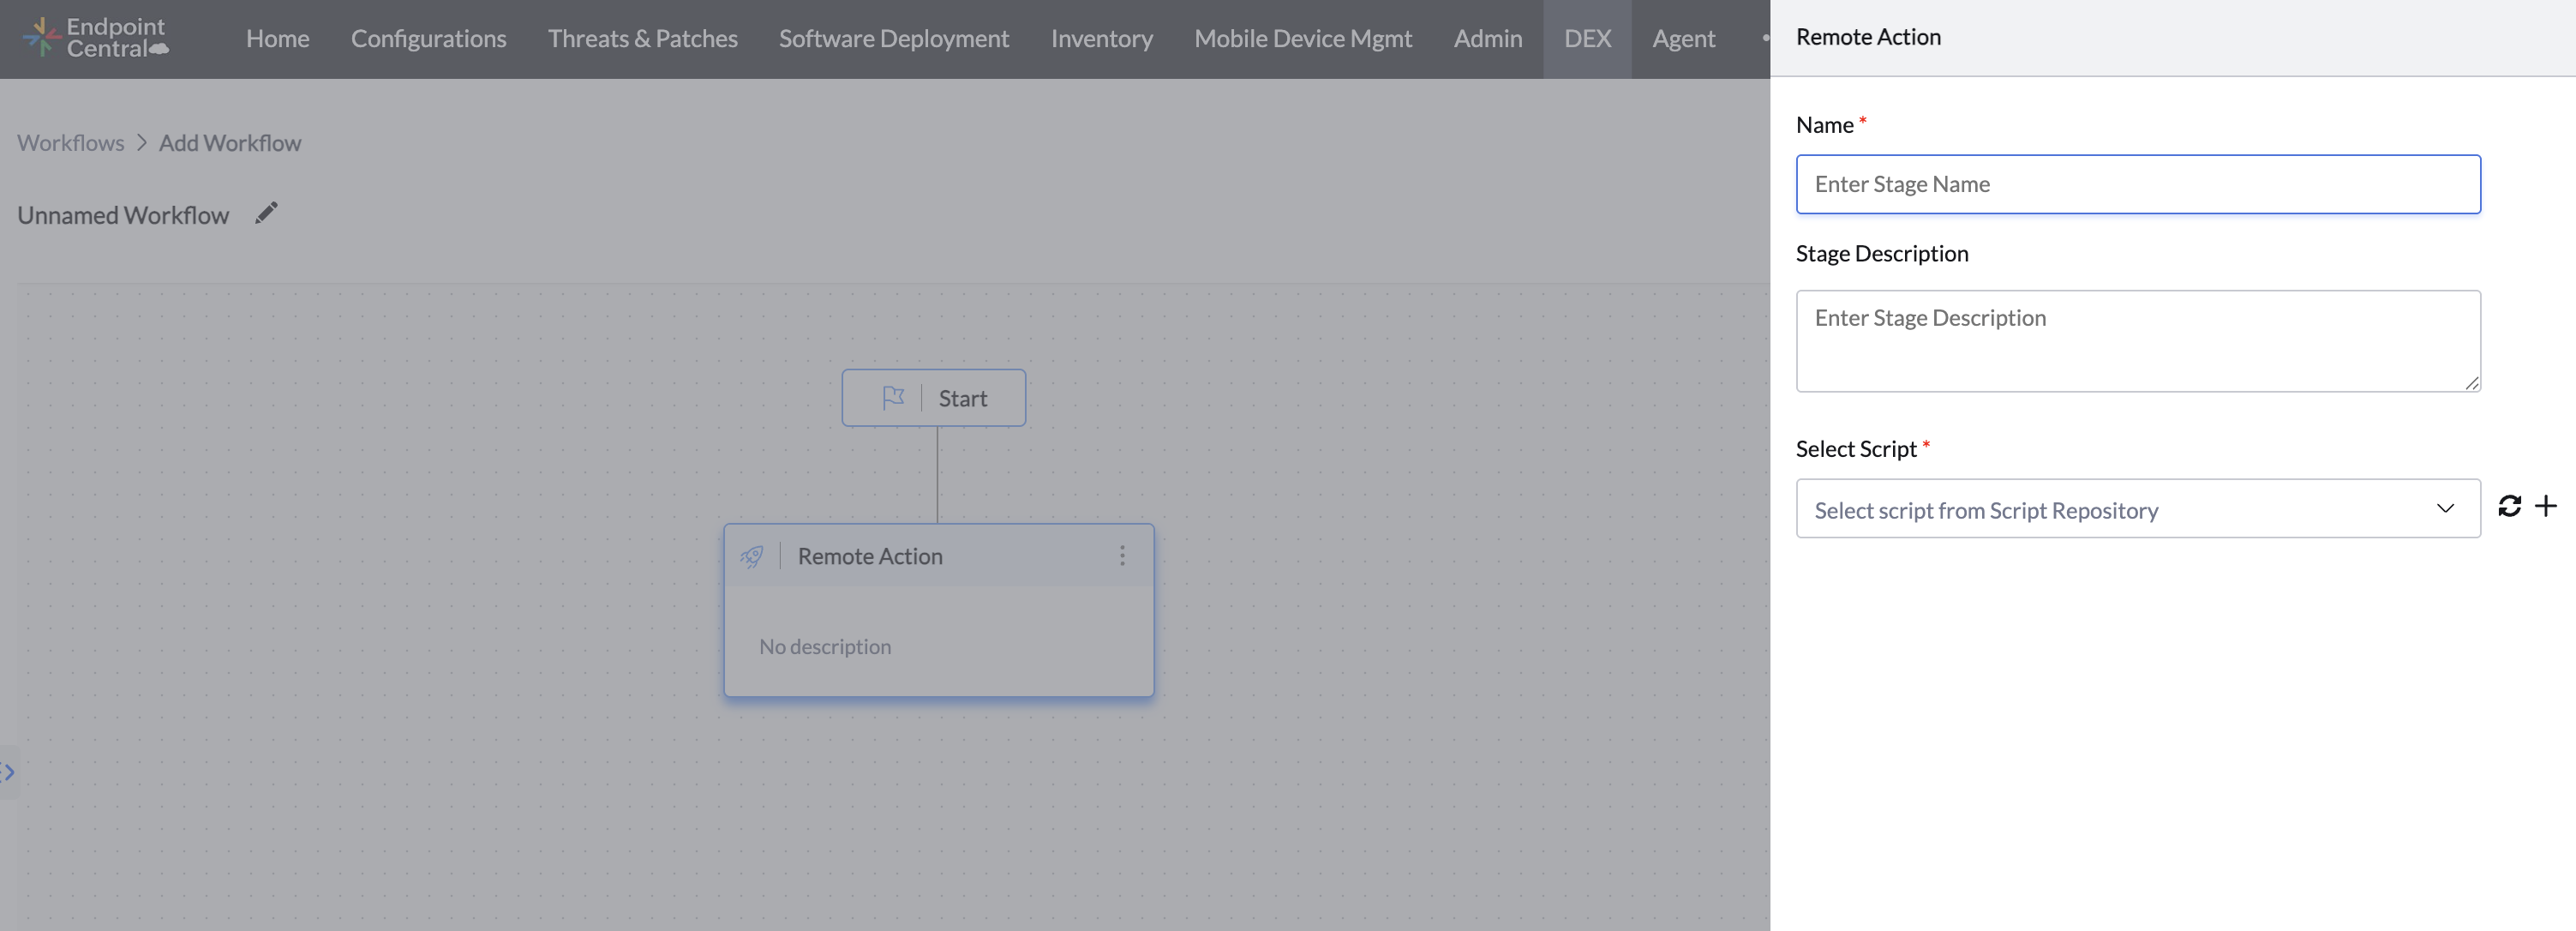
To add Remote Action as a Stage, drag and drop Remote Action and enter the following details
Name: Enter descriptive name for Remote Action Stage
Description:Enter description for Remote action stage
Select Script:Select Script from script repository that you want to execute
Switch
Switch allows branching workflows based on device attributes collected by Sensors. Agent evaluate cases in switch during workflow execution and decide further processing branch. If no case are matching during evaluation, Workflow will stop running.
Based on Sensor output variable type, Criteria is supported. To add Switch as a Stage, drag and drop Switch and enter the following details
Name: Enter descriptive name for Remote Action Stage
Description:Enter description for Remote action stage
Add Case: Click Add case . Provide name and description and Conditions for case.
Engage enables interaction with end users during workflow execution.
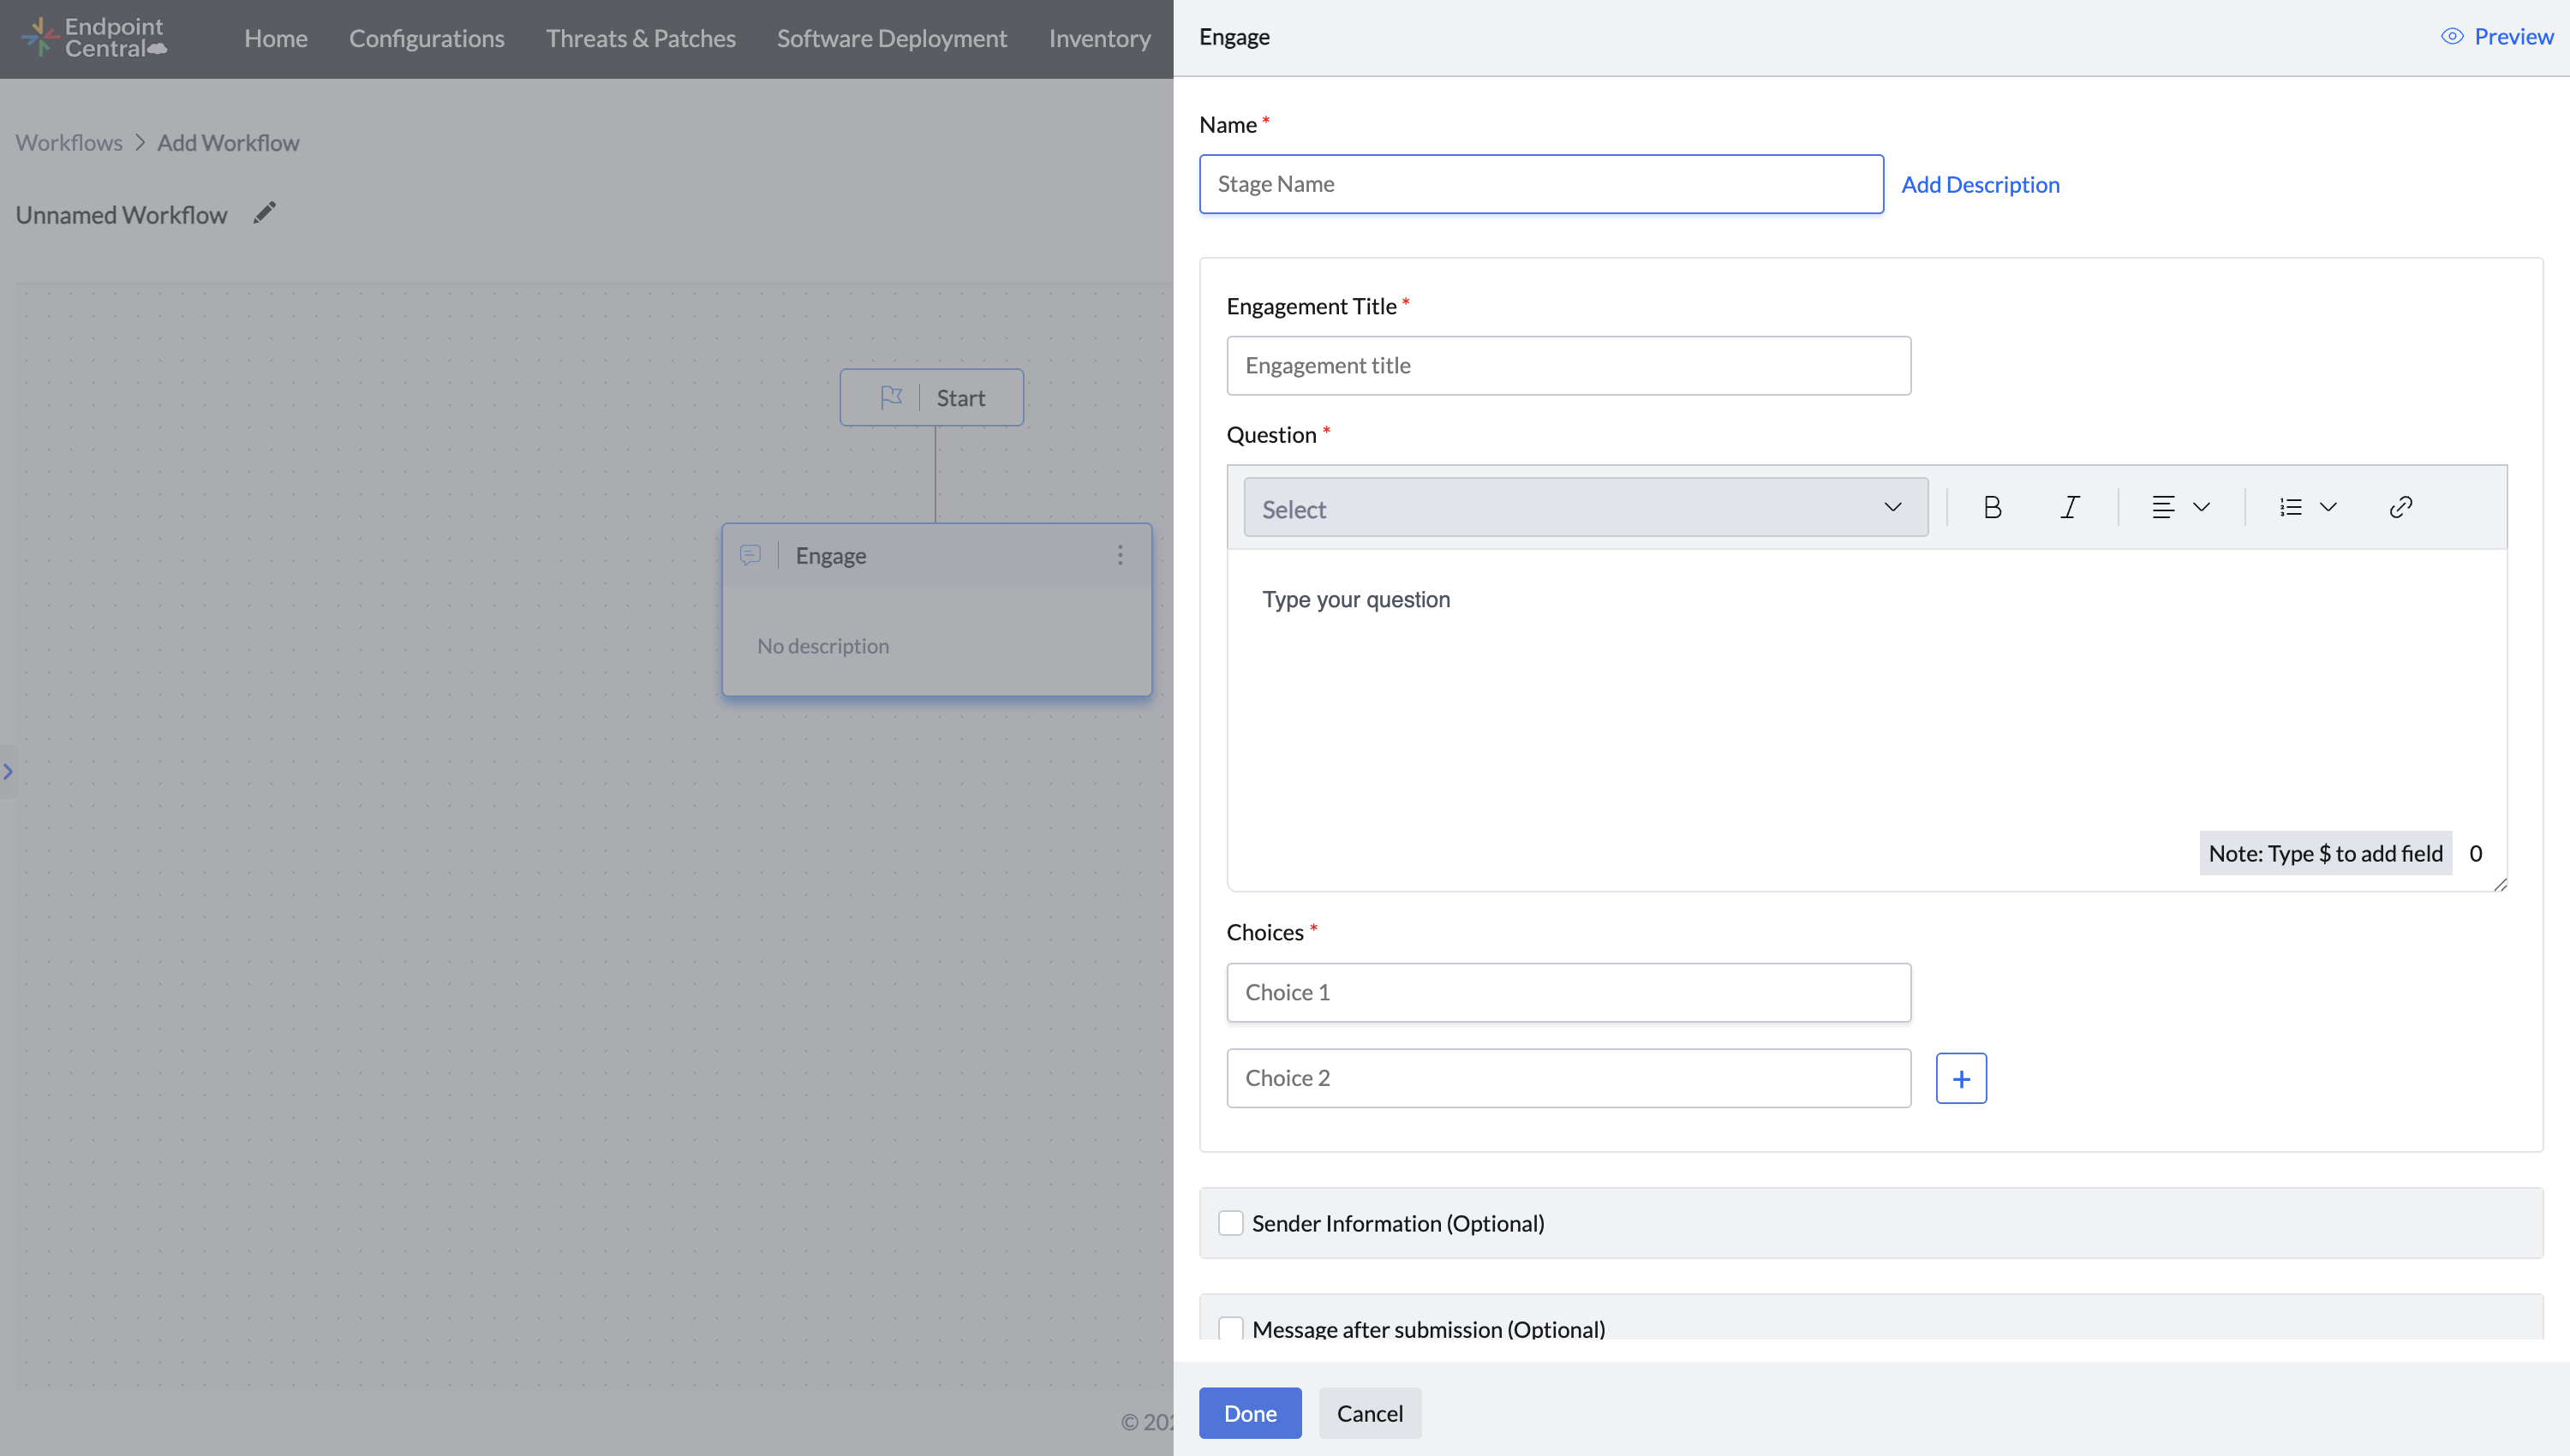
To add Engage Stage, Drag and drop the Engage block and fill in the following :
Name: Enter Descriptive stage name.
Description: Enter description for stage
Engagement Title: Title shown to the user.
Question: Enter Message or prompt for the user.
Choice: Add user response options. These can be used in conditions or branching logic.
Sender Information: Add sender details.
Message After Submission: Confirmation message shown after user responds.
Timeout: Time to wait for user input.
Default Action When No User is Logged In: Define how the workflow proceeds if no user is logged in devices during workflow execution
Send Mail
This stage enables to send notification to relevant stakeholders during workflow execution
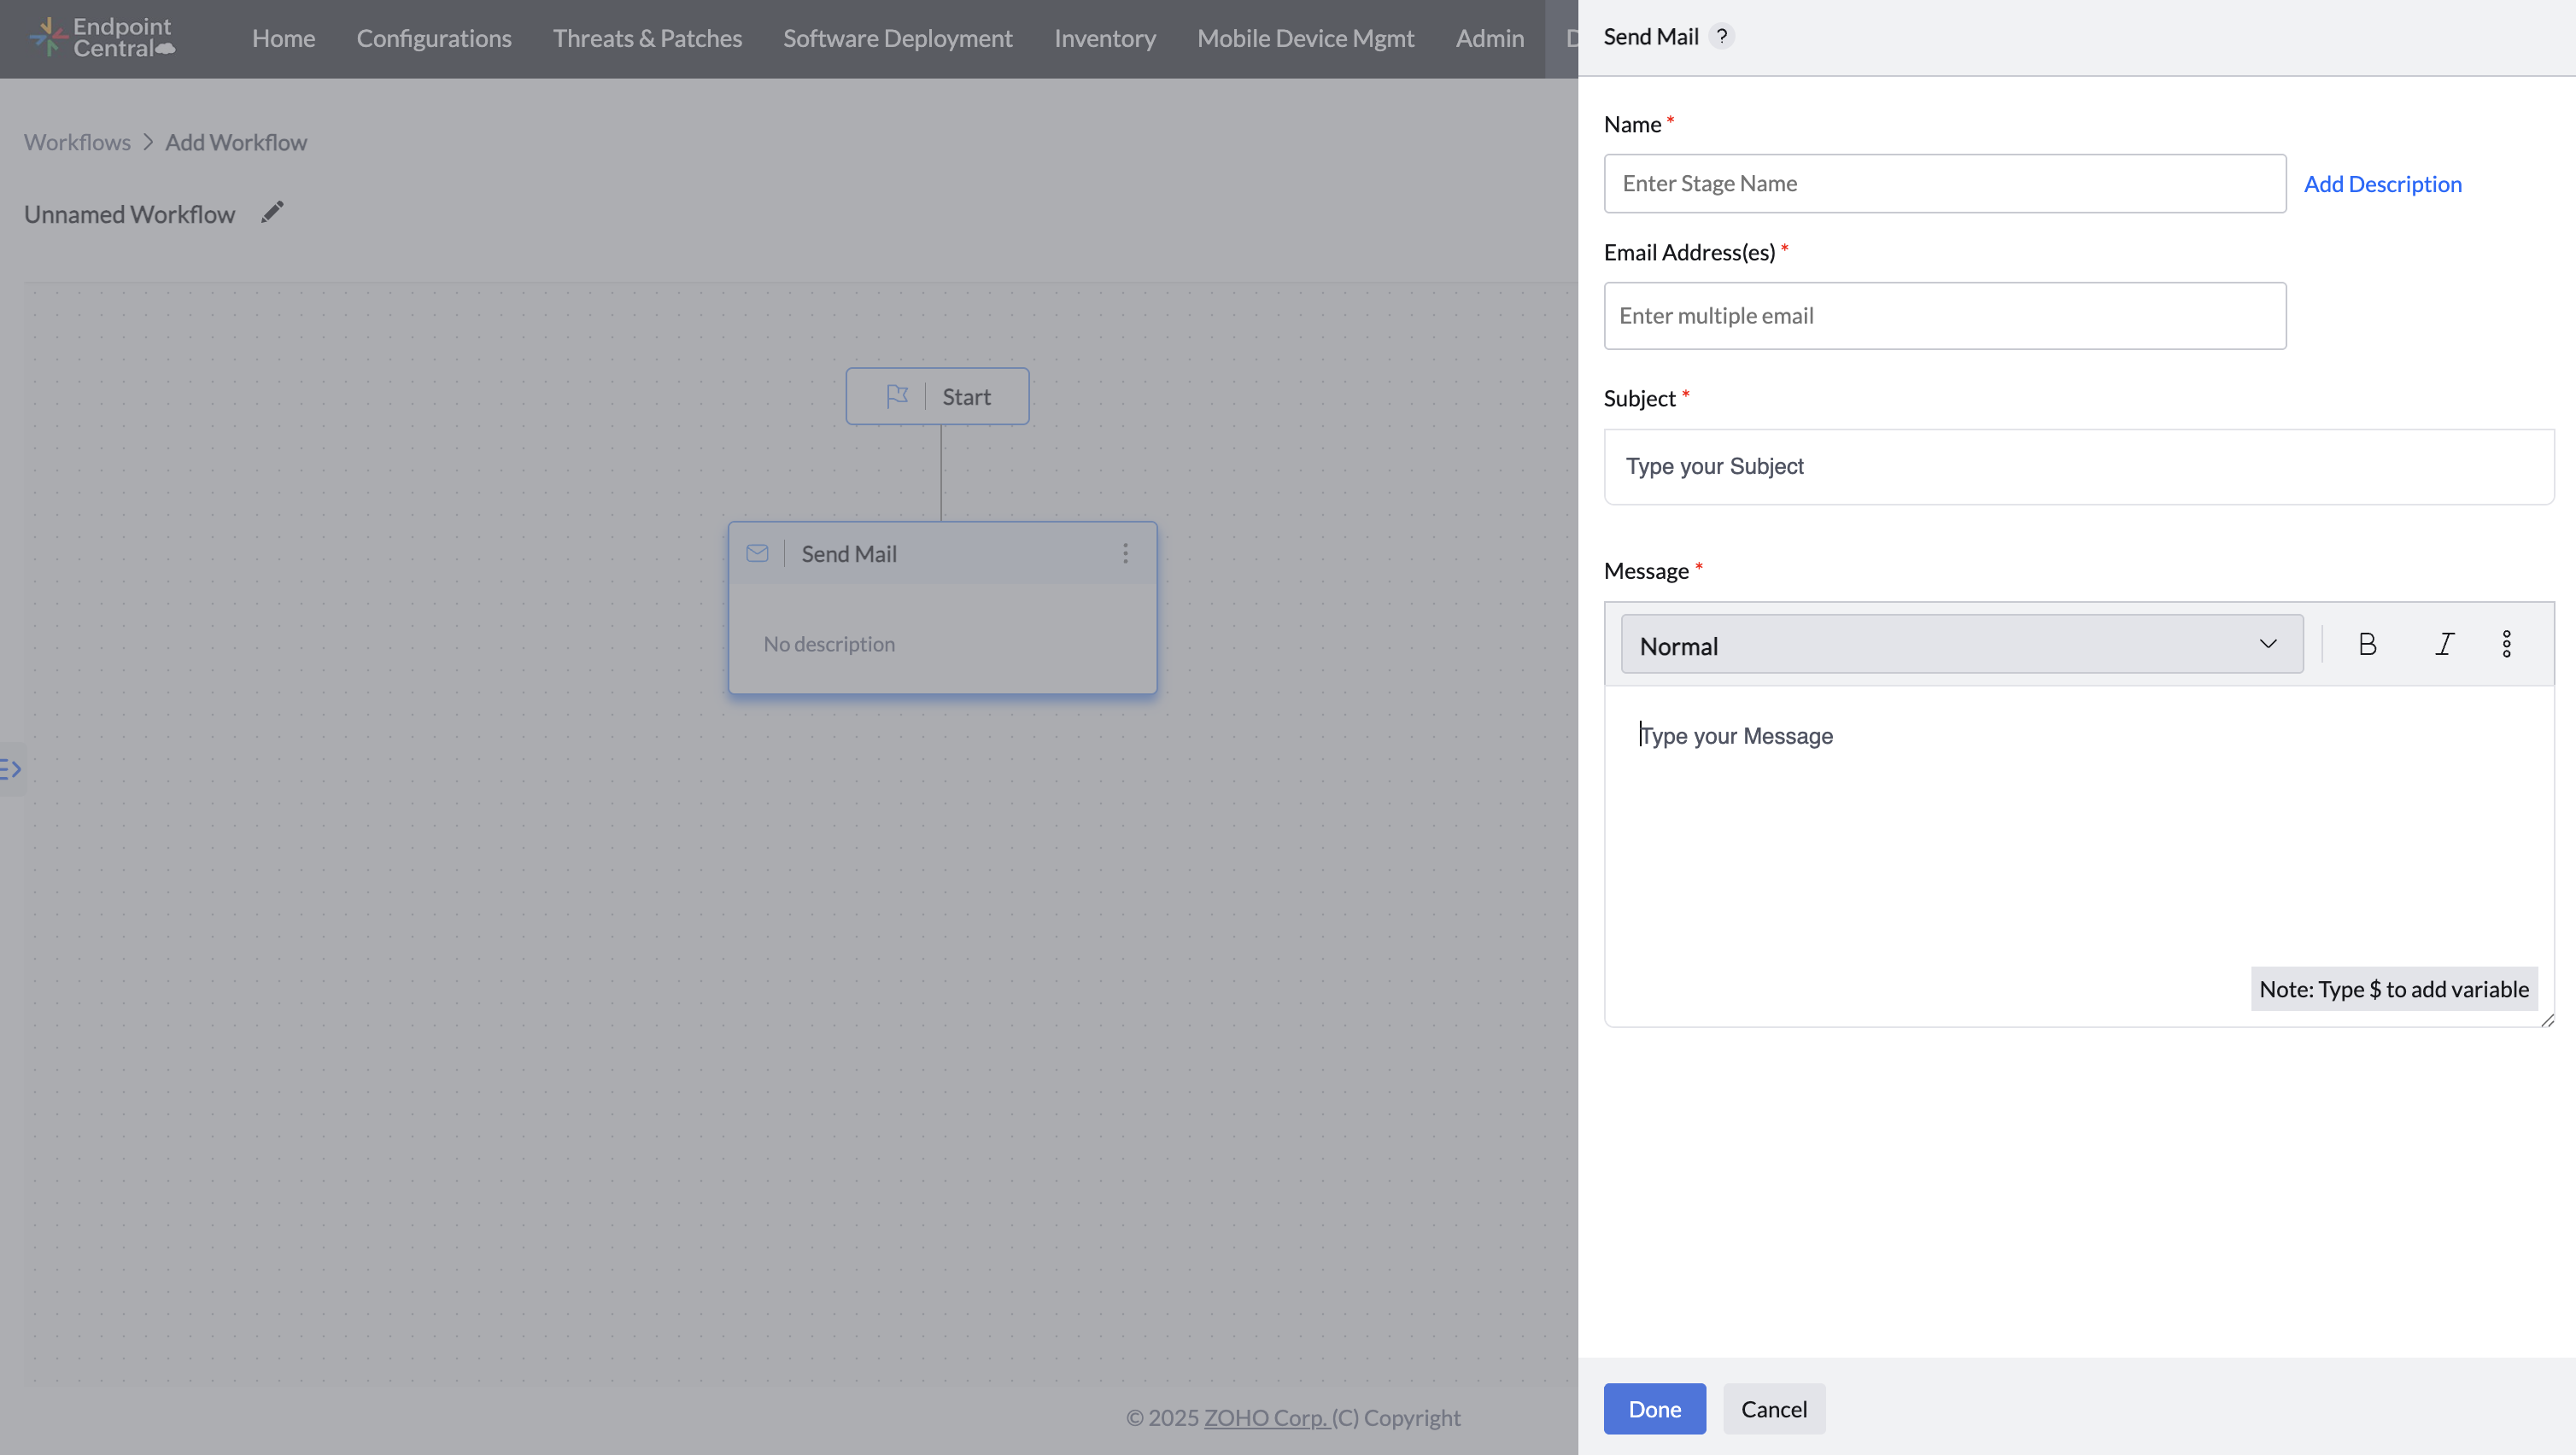
To add a Send Mail stage, Drag and drop the Send Mail block and Provide the following:
Name: Enter stage name
Description: Enter description for stage
Email Address: Specify recipients of the email.
Subject: Enter Email subject content
Message: Enter email body content.
You can use variables from earlier sensor outputs in the subject or message using the $ symbol (e.g., $deviceName).
Delay
Delay stage pauses workflow execution for a defined period.
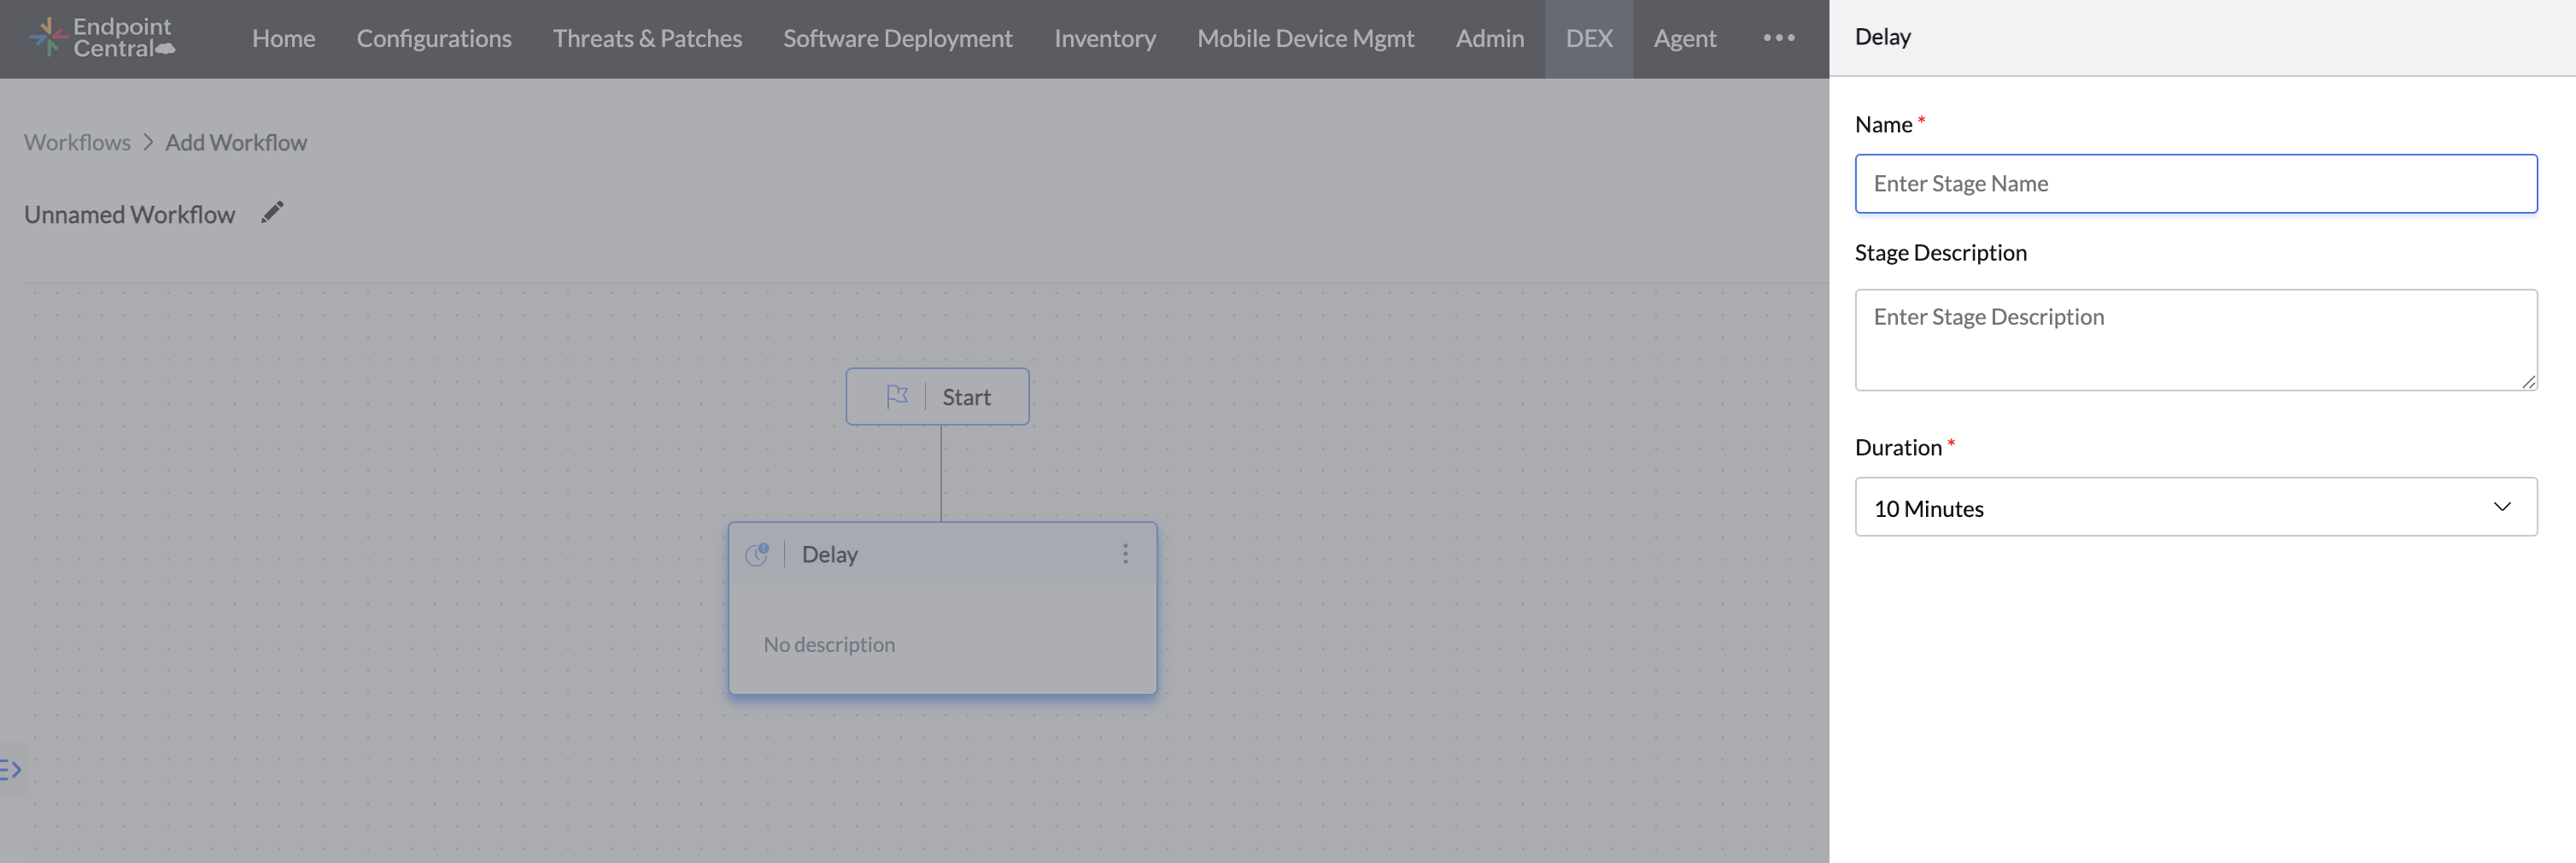
To add a Delay stage, Drag and drop Delay into workflow and provide following details :
Name: Enter a descriptive name.
Description: Enter stage description to explain why stage is added.
Duration: Specify how long the workflow should pause before proceeding.
Restart
Use this stage to restart targetted devices as part of workflow execution.
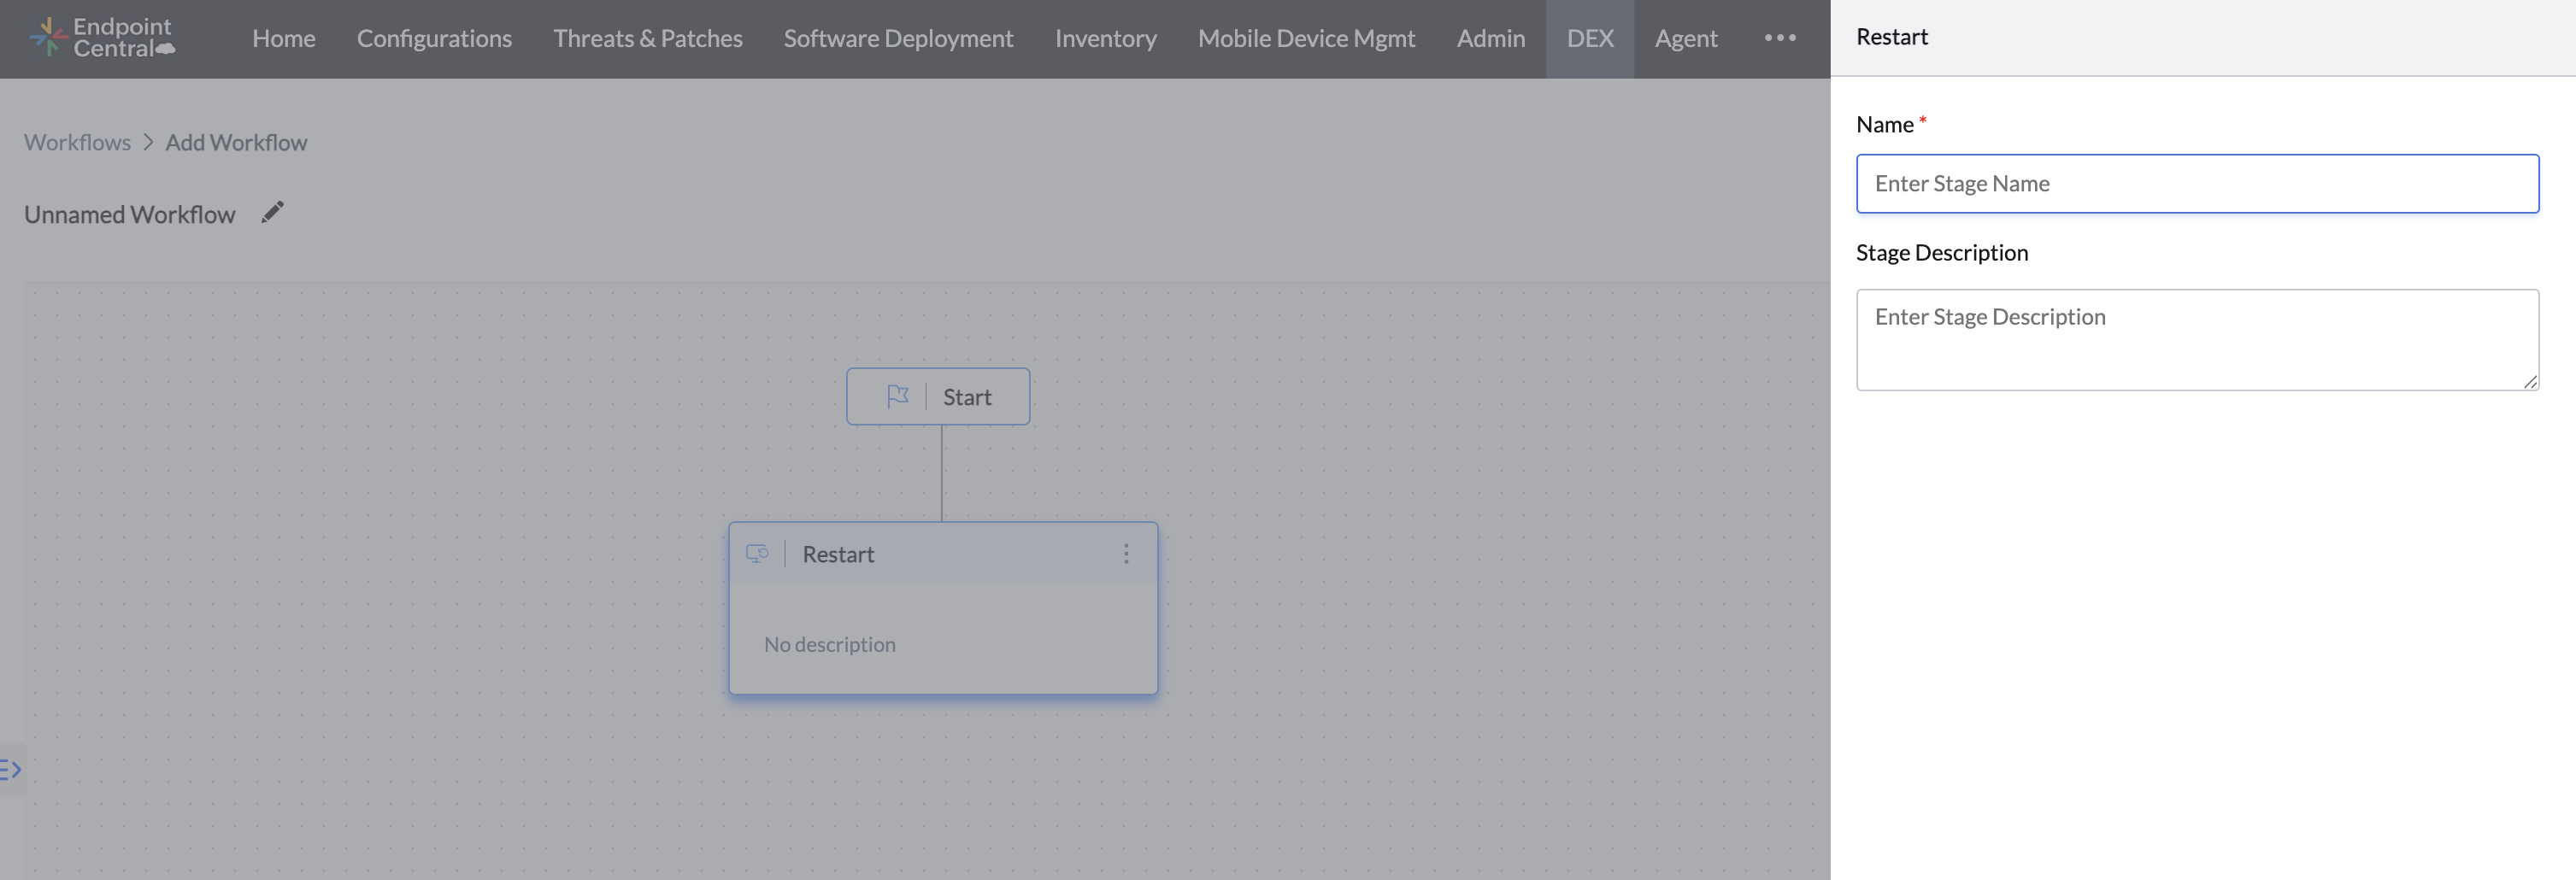
To add a Restart stage, Drag and drop Restart into workflow and provide following details :
Name: Enter a descriptive name.
Description: Enter stage description to explain why stage is added.
Note : No additional configuration is needed for this stage.
End
End stage specifies end of workflow execution. It is required to have End stage at the end of every branch.
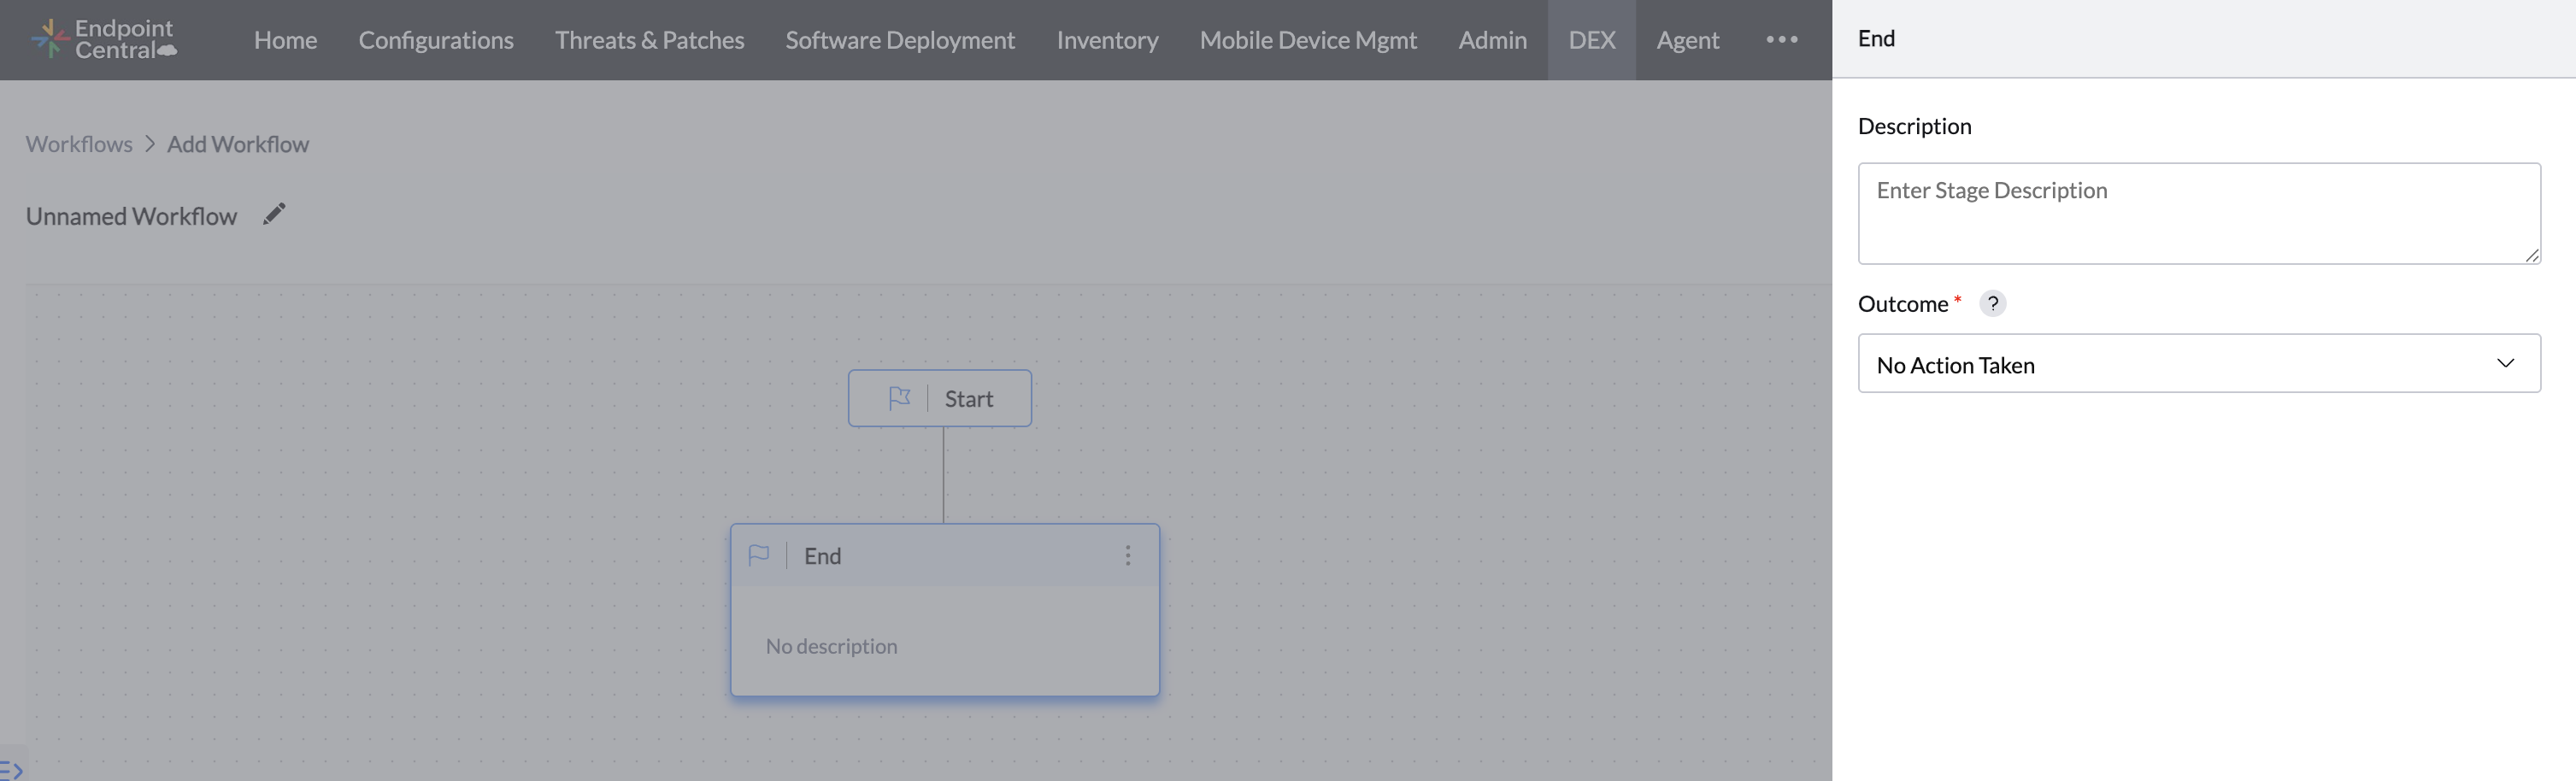
To add End as a Stage, drag and drop End. Enter Description for the End stage (if needed).
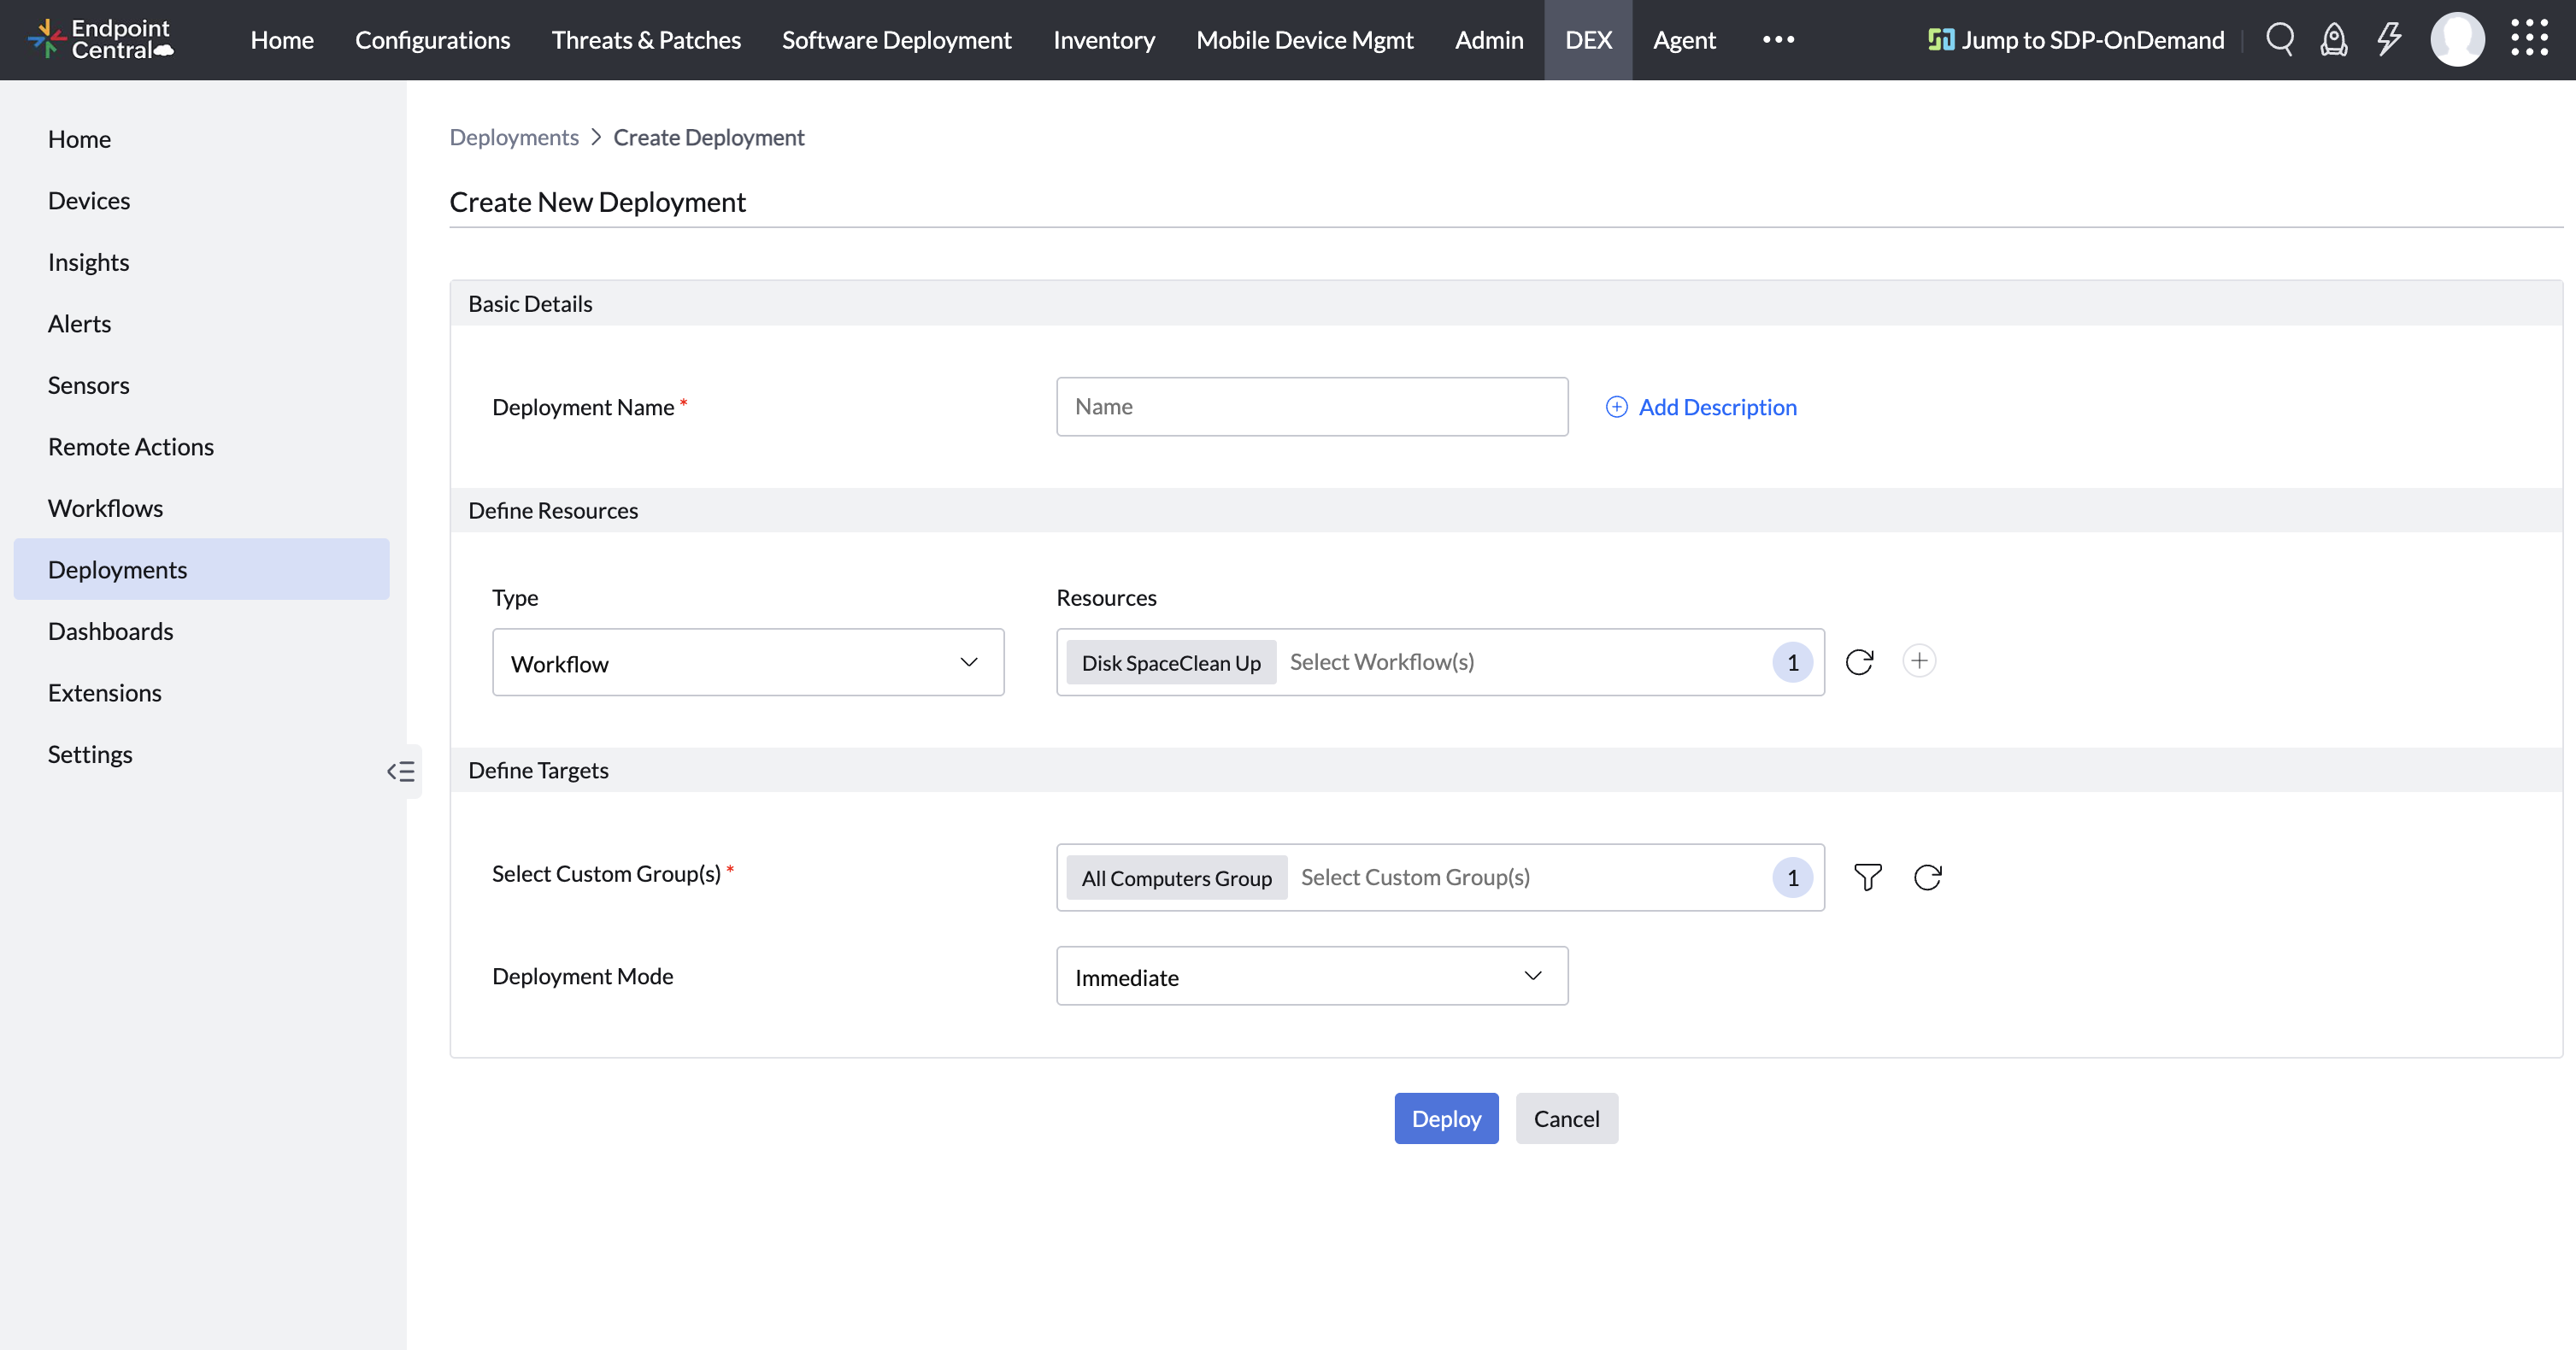
You can deploy workflows to managed endpoints using static or unique static groups. This deployments are applied to devices during agent refresh cycle or start up.
Steps to deploy workflow:
Go to Deployment from the left navigation under DEX.
Click Create Deployment
Fill in :
Name and Description for deployment
Select one or more workflows to be executed
Choose target custom groups
Use include / exclude filters to fine tune deployment scope
Click Deploy to complete creation
Monitoring Deployment Status :
After deployment is created, click on it from deployment list to view device level deployment status.
To track execution of workflows, go to the Workflows tab and click Runs to see individual run statuses.
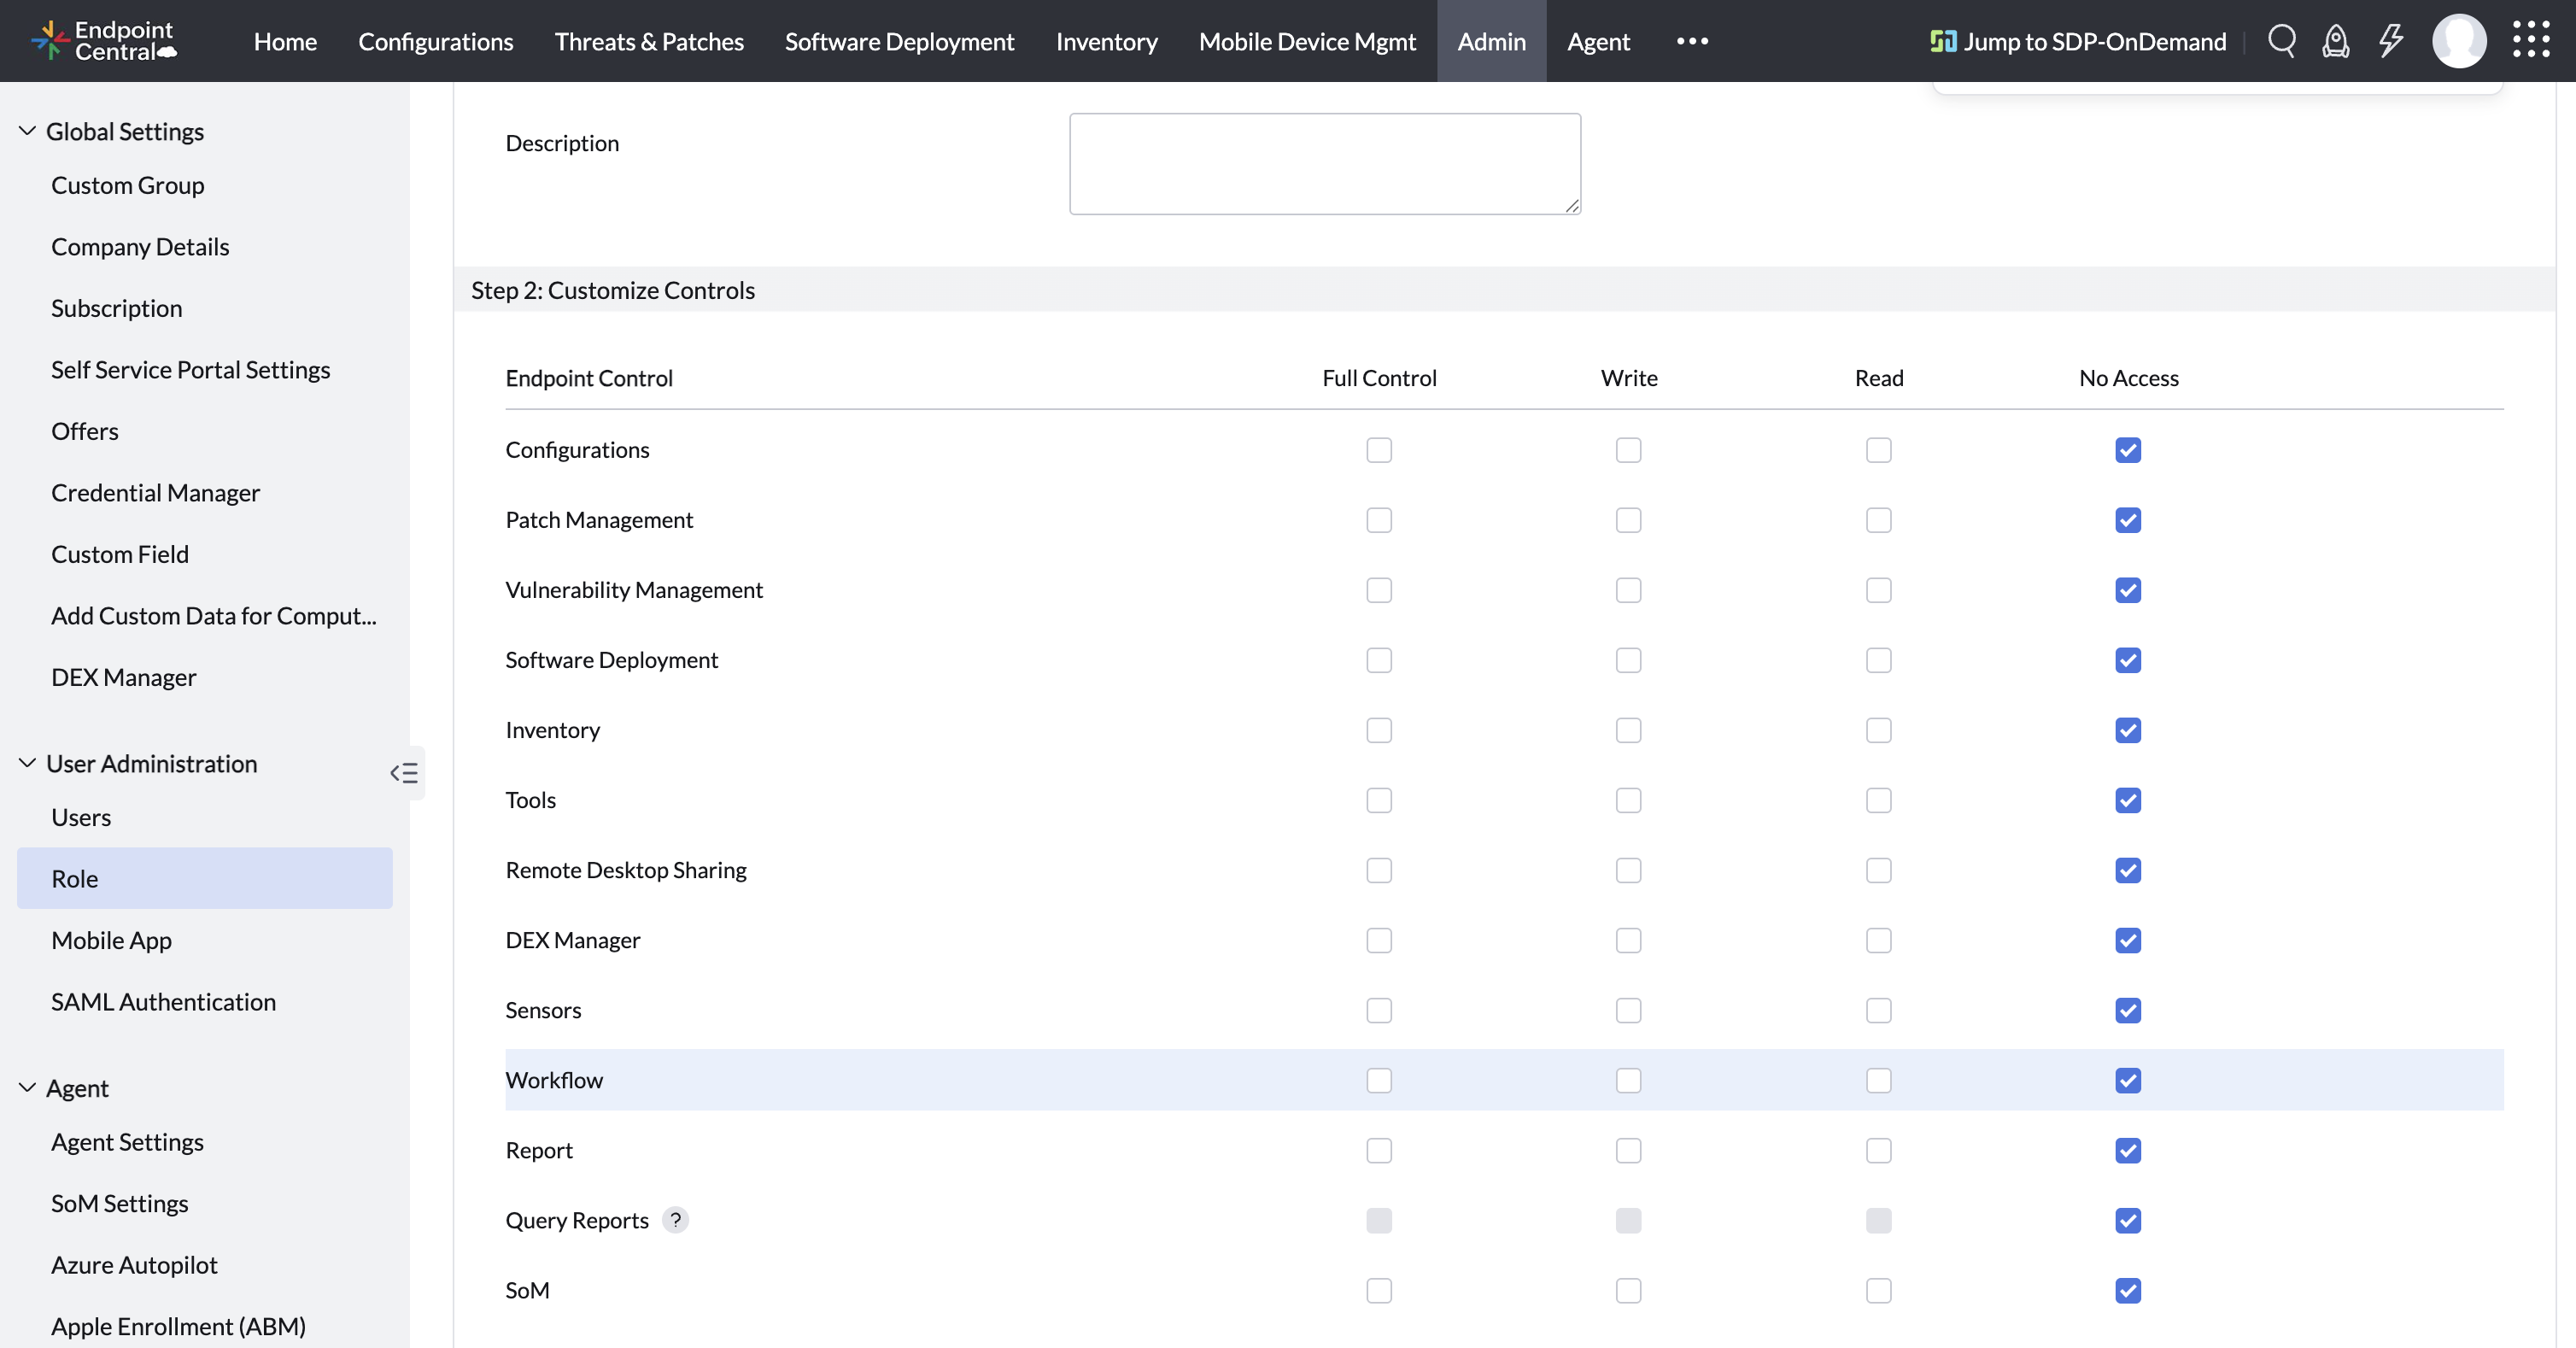
To grant user permissions for managing Workflow, follow these steps:
Select Admin from the top menu bar.
Under User Administration, click Role
Click on Add Role to create a new role or Modify existing role by clicking Modify from the action menu
In the Endpoint Central section, scroll down to the Workflow section and enable the appropriate permissions for the role.
Workflow Read to view Workflow
Workflow Write or Full Control to add/modify/delete Workflow
Use meaningful deployment names to improve traceability and make audits easier.
Test deployments on small groups first to reduce risk and validate workflow logic.
Schedule deployments during off-hours or change windows to minimize disruption to end users.


