What is Network Access Control (NAC) for Managed Endpoints?

Network Access Control is the process of filtering access to corporate data, by allowing only legit endpoints to access the data. With Endpoint Central's Network Access Control (NAC) policies, IT administrators can configure settings to quarantine an endpoint from their network when it is found susceptible/doesn't fall under your organization's compliance policy.

The network access control module is available for product build versions 10.0.595 and above

Advantages of Network Access Control policy

  1. Isolating devices help management to prevent the lateral movement of threat actors inside their network.
  2. Increases the security postures while accessing corporate data.
  3. Perceive better visibility on the security standards of your endpoint network.
  4. Regulate access while your endpoints use untrusted/open network.
  5. Proactive measure to eliminate threats.

Workflow of NAC

Network Access Control in Endpoint Central can be achieved by the following flow:

Quarantine settings

How to implement a Network Access Control policy?

  • IT administrators can define a compliance policy in the server tool - 'TrustAgent'.
  • This tool will probe the endpoints to check for the compliance policy standards defined in 'Quarantine policy generator'.
  • Once identified as a non-compliant device, this endpoint will be quarantined from the network and all its networking resources will be taken down.
  • IT administration team can remediate the problem by analyzing the cause and error and adhere to the policies defined.
  • The quarantine policy scan will take place during agent refresh cycle or when an IP address change is detected on endpoints.
  • Windows
  • Mac

How to deploy a NAC policy to endpoints?

    1. Download the TrustAgent file from this
    2. Open the Quarantine Policy Generator tool (QuarantinePolicyGenerator.exe) and create policies according to your organization's rules. The policy can be created based on:- software checks, service checks, custom checks, patch checks, Reg path checks. File path checks, and File version checks.
    3. Once the policy is defined, click on 'Generate New Policy' and save the file as quarantine.json.
    4. You can automatically add this file to the TrustAgent_x86.zip and TrustAgent_x64.zip files by clicking 'Yes' (as shown in image) or do it manually.
    5. You can deploy this file to endpoints using custom script configuration. To do so, save a script under the name TADeployer.exe and add TrustAgent_x86.zip and TrustAgent_x64.zip as dependency files during deployment.
    6. When an endpoint is found non-compliant (based on rules defined in quarantine.json), that endpoint will be isolated from the network by the restriction policies defined under quarantine settings.
    7. You can modify the policy using 'Load existing policy', if required.
    8. To generate the reports of the quarantine status, you can deploy a script with EPStatusTester.exe. This will show if an endpoint is quarantined or not along with the remarks.
    9. Note: You can quarantine an endpoint irrespective of the compliance status. To do so, include the -ondemand switch while deploying the above configuration. Though policies are not configured, ensure to upload the quarantine.json for the endpoints to be quarantined.

Quarantine settings

How to create a compliance policy?

IT admins can create a compliance policy according to various standards supported by Endpoint Central. A policy can be defined when:

Adding Software checks:-

  1. Navigate to Control panel -> Programs and Features
  2. Select an application and choose a keyword to name that application. Ensure the name chosen is a distinct value
  3. Use this keyword in the policy generator tool. (note: Enter the value in lowercase)
  4. Select the type as 'Software' and status either as 'Exists' or 'NotExists'

Adding Patch criteria checks:-

  1. In the tool console, specify the patch details, which includes PatchType, SeverityType, and the number of patches violated the rule. Any endpoint, falling under this criteria will be quarantined.

Adding PatchID checks:-

  1. You can quarantine an endpoint when it is missing important security patches. To do so, define the PatchID in the patch column (In the policy generator tool). An endpoint which is missing the specified patch will be quarantined.

Adding Service checks:-

  1. Open services.msc and select a service
  2. Copy the full name of the service from the 'Name' column
  3. Paste the same in the Name/keyword column in the policy generator
  4. Select the type as 'service' and status as per your requirement.

Adding custom checks:-

  1. Custom tags are used to name/identify the conditions that are checked. These tags can be named according to the user's convenience
  2. The custom tags are treated as individual checks and the system is considered non-compliant even if one of these tags is satisfied
  3. If you wish to run a group check, then specify the various conditions under a single tag

Registry Value Check:

  • Name the custom tag as per your convenience.
  • Check Type : Registry Value
  • Check Path : Registry path (ex: HKEY_LOCAL_MACHINE\SOFTWARE\WOW6432Node\AdventNet\DesktopCentral\DCAgent)
  • Applicable Check Mode : value equals / Value not Equals / Value Lesser Than / Value Greater Than / Exist / Not Exist
  • Value : Reg Value.

Registry Path Check

  • Name the custom tag as per your convenience.
  • Check Type : Registry Path
  • Check Path : Registry Path (ex: HKEY_LOCAL_MACHINE\SOFTWARE\WOW6432Node\AdventNet\DesktopCentral\DCAgent)
  • Applicable Check Mode : Exist / Not Exist

File Path Check

  • Name the custom tag as needed
  • Check Type : File path
  • Check Path : File path (ex : C:\Program Files (x86)\DesktopCentral_Agent) if you are using Endpoint Central below 11.2.2309.01 and file path( ex : C:\Program Files (x86)\UEMS_Agent)if you are using Endpoint Central 11.2.2309.01 and above
  • Applicable Check Mode : Exist / Not Exist

File Version Check

  • Name the custom tag as needed.
  • Check Type : File Version
  • Check Path : file Path (ex: C:\Program Files (x86)\DesktopCentral_Agent\dcconfig.exe) if you are using Endpoint Central below 11.2.2309.01 and file Path (ex: C:\Program Files (x86)\UEMS_Agent\dcconfig.exe) if you are using Endpoint Central 11.2.23090.1 and above
  • Applicable Check Mode : Value equals / Value not Equals / Value Lesser Than / Value Greater Than
  • value : File Version

Quarantine Settings

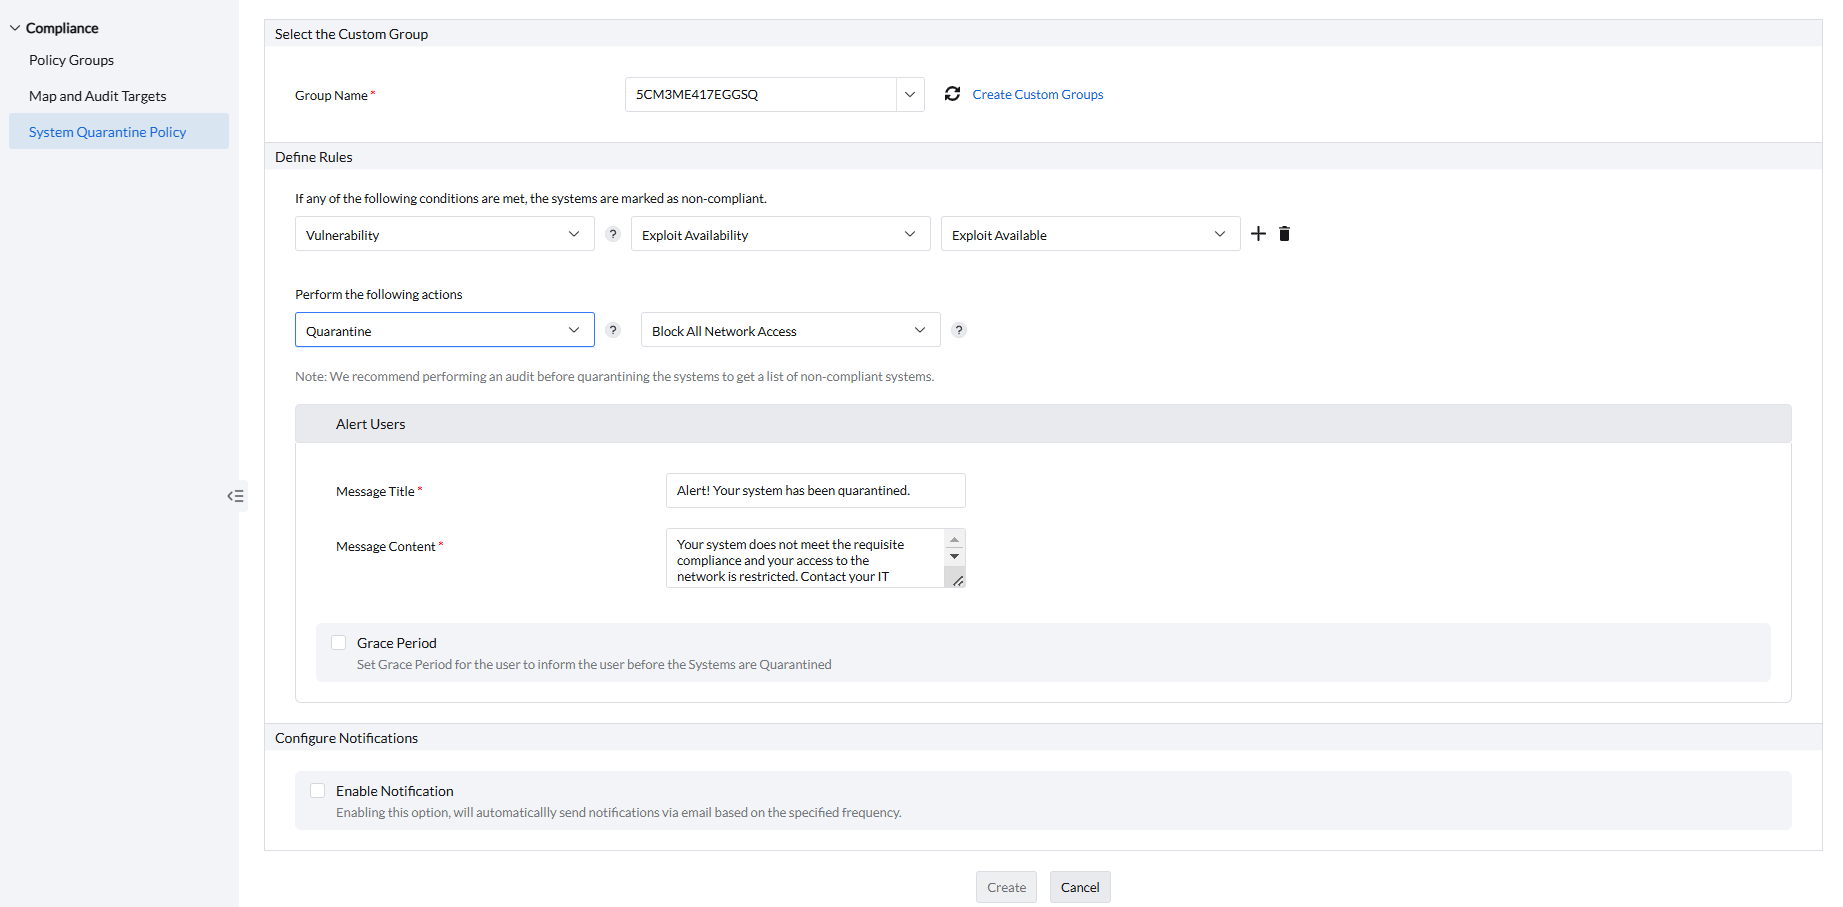
If the system is found non-compliant, the following quarantine measures can be undertaken.

  • You can choose to block all network access (Internet/Intranet) or choose to block the Intranet access in the range that you desire.
  • You can also set the domains or IP addresses that you wish to allow the quarantined machine to access.
  • Further you can also set to automatically revoke the quarantine, when the quarantined machine loses connectivity to all the heartbeat machines (Machines that establish connectivity and forms a network).

How to revoke a deployed quarantine policy?

  • Create a new configuration with the script TAUninstaller.exe
  • Deploy it to the machines that have been quarantined
  • The remarks section in the configuration will show the results of revoking the quarantine.

Points to remember:-

  • This feature is supported for Windows 10 and above versions of the OS.
  • If you are running this module on Windows Server 2016 systems, it should have 'secure boot' disabled.
  • If a request to a URL shortener service is made, via proxy, it is blocked.
  • System wide proxy settings are automatically applied.
  • Any application-specific proxy that is to be allowed must be added to the list.

Due to privacy reasons, Endpoint Central will not fetch the Personally Identifiable Information (PII) or browsing data by default.

NAC Policy Deployment Guide for macOS

How to Deploy a NAC Policy to Endpoints

    • Download the provided NetworkAccessControlForMac.zip file and extract it. It will contain a zip file named dcNacFirewall.zip and MacQuarantinePolicyGenerator.exe.
    • Use the MacQuarantinePolicyGenerator.exe to generate the policy to be applied to the corresponding Mac machine.
    • The policy can be created based on the following checks:
      • Software checks
      • Custom checks
      • Patch checks
      • File path checks
      • Application version checks
    • Save the encrypted policy JSON file, which can be used later to import and modify the policy for future use.
    • Secondly, the deployable zip generation window will open. Provide "yes" to create the deployable zip file. The zip file will be created in the extracted folder, named TrustAgentMac.zip.
    • You can deploy this file to endpoints using custom script configuration.
    • On the EC server, navigate to the Configurations -> Script repository -> Templates. Select TrustAgentMacScript.sh and add it to the script repository. Then using the TrustAgentMacScript.sh script, create Computer Configuration. Attach the deployable zip file (TrustAgentMac.zip) as the dependency file.
    • Use the --load argument to deploy the configuration. (For initial setup, prerequisite required for NAC in macOS, refer to configure pre-requisites for Network Access Control in Mac).
    • When an endpoint is found non-compliant (based on rules defined in the policy), that endpoint will be isolated from the network by the restriction policies defined under quarantine settings.
    • To update the quarantine policy, re-execute the configuration with the updated deployable zip file (TrustAgentMac.zip) as the dependency file.
Note:
  • If no compliance rules are defined, the machine will be quarantined based on the quarantine rules without checking for compliance.
  • To verify that the installation is complete, use the --installationStatus argument and deploy the configuration to the required machines along with the deployable zip file (TrustAgentMac.zip) as the dependency file.
Quarantine Deployment Notification

How to configure pre-requisites for Network Access Control in Mac?

Type 1: Configure pre-requisites via MDM

1. To complete the prerequisites, you can utilize an MDM solution. Download the Privacy and Security

  • Once the system extension has been allowed, the second prompt will open to seek access for "Filter Network Content." The user must allow this. If the user neglects or ignores it, the prompt will be shown during the next installation attempt.

    NAC Firewall Notify

How to create a compliance policy

IT admins can create a compliance policy according to various standards supported by Endpoint Central. A policy can be defined when:

Adding Software Checks

Specify the exact installation location of the application on your Mac that needs to be checked. Select the type as 'Software' and status either as 'Exists' or 'NotExists'.

Adding Patch Criteria Checks

In the tool console, specify the patch details, which include PatchType, SeverityType, and the number of patches that violated the rule. Any endpoint falling under this criteria will be quarantined.

Adding PatchID Checks

You can quarantine an endpoint when it is missing important security patches. To do so, define the PatchID in the patch column (In the policy generator tool). An endpoint that is missing the specified patch will be quarantined.

Adding Custom Checks

Custom tags are used to name/identify the conditions that are checked. These tags can be named according to the user's convenience. The custom tags are treated as individual checks, and the system is considered non-compliant even if one of these tags is satisfied. If you wish to run a group check, then specify the various conditions under a single tag.

File Path Check

  • Name the custom tag as needed
  • Check Type: File path
  • Check Path: File path (e.g., "/Library/ManageEngine/UEMS_Agent")
  • Applicable Check Mode: Exist / Not Exist

Application Version Check

  • Name the custom tag as needed
  • Check Type: Application Version
  • Check Path: (e.g., "/Applications/Safari.app")
  • Applicable Check Mode: Value equals / Value not Equals / Value Lesser Than / Value Greater Than
  • Value: Application Version

Quarantine Settings

If the system is found non-compliant, the following quarantine measures can be undertaken:

  • You can choose to block all network access (Internet/Intranet) or choose to block the Intranet access in the range that you desire.
  • You can also set the domains or IP addresses that you wish to allow the quarantined machine to access.
  • Further, you can also set to automatically revoke the quarantine when the quarantined machine loses connectivity to all the heartbeat machines (Machines that establish connectivity and form a network).

How to revoke a deployed quarantine policy?

In macOS, the quarantine policy revocation can be performed in two ways:

Case 1: Disable NAC Without Uninstalling the NAC Agent

Execute the script with the argument --stop alongside the dependency file and apply the configuration to the relevant machine.

Case 2: Uninstall the NAC Agent Completely

Execute the script with the argument --removeNAC along with the dependency file and apply the configuration to the respective machine (Uninstalling will remove the permissions given for Network Access Control for Mac if they are given manually).

Note: For both cases, the TrustAgentMac.zip dependency file is mandatory.

Points to Remember

  • This feature is supported on macOS Catalina version 10.15 and above.
  • System-wide proxy settings are automatically applied.
  • Any application-specific proxy that is to be allowed can be either whitelisted fully by giving their team ID and path, or the IPs or hostname, or just the application names that are to be whitelisted.
  • Active directory domains must be whitelisted so that the machine can reach them.
  • VPN apps that are being used must be whitelisted so that they can make connections. It can be whitelisted in three ways:
    • By giving the team ID of the VPN app to be whitelisted. Note: All the apps associated with the team ID will also be whitelisted.
    • By giving only the paths of the VPN app. Note: All binaries and apps in that location will also be whitelisted.
    • By giving both the team ID and path. Note: Only the apps and binaries for the given team ID will be whitelisted only if they are located in the specified path.
  • If any help links are given, the corresponding hostname or IP must be whitelisted.
  • Domains must be whitelisted if needed.
  • To check the team ID, use the command codesign -dv <application path> in the terminal. It will list the corresponding team ID of the application.

NAC Policy Deployment Guide for macOS

How to deploy a NAC policy to endpoints

  • Download the provided NetworkAccessControlForMac.zip file and extract it. It will contain a zip file named dcNacFirewall.zip and MacQuarantinePolicyGenerator.exe.
  • Use the MacQuarantinePolicyGenerator.exe to generate the policy to be applied to the corresponding Mac machine.
  • The policy can be created based on the following checks:
    • Software checks
    • Custom checks
    • Patch checks
    • File path checks
    • Application version checks
  • Save the encrypted policy JSON file, which can be used later to import and modify the policy for future use.
  • Secondly, the deployable zip generation window will open. Provide "yes" to create the deployable zip file. The zip file will be created in the extracted folder, named TrustAgentMac.zip.
  • You can deploy this file to endpoints using custom script configuration.
  • On the EC server, navigate to the Configurations -> Script repository -> Templates. Select TrustAgentMacScript.sh and add it to the script repository. Then using the TrustAgentMacScript.sh script, create Computer Configuration. Attach the deployable zip file (TrustAgentMac.zip) as the dependency file.
  • Use the --load argument to deploy the configuration. (For initial setup, prerequisite required for NAC in macOS, refer to configure pre-requisites for Network Access Control in Mac).
  • When an endpoint is found non-compliant (based on rules defined in the policy), that endpoint will be isolated from the network by the restriction policies defined under quarantine settings.
  • To update the quarantine policy, re-execute the configuration with the updated deployable zip file (TrustAgentMac.zip) as the dependency file.
Note:
  • If no compliance rules are defined, the machine will be quarantined based on the quarantine rules without checking for compliance.
  • To verify that the installation is complete, use the --installationStatus argument and deploy the configuration to the required machines along with the deployable zip file (TrustAgentMac.zip) as the dependency file
Quarantine Deployment Notification

How to configure pre-requisites for Network Access Control in Mac.

Type 1: Configure pre-requisites via MDM

  1. To complete the prerequisites, you can utilize an MDM solution. Download the pre-configured profile and deploy it to the Mac endpoints requiring management through Network Access Control.
  2. If you encounter any difficulty using the provided pre-configured profile, you can manually enter the details to your MDM solution and deploy it to the Mac endpoints. Below are the necessary details for configuring both prerequisites manually using an MDM solution.

System Extension Policy

  • Payload Scope: System
  • Target Device Type: Mac
  • Allow System Extension:
    1. Team identifier - TZ824L8Y37
    2. Extension bundle identifier - com.manageengine.dc.nac
  • Allowed System Extension Type:
    1. Team identifier - TZ824L8Y37
    2. Extension type: NetworkExtension

Allow Web Content Filter

  • Filter Type: Plug-In
  • User Defined Name: dcNacFirewall
  • Plugin Bundle Id: com.manageengine.dc.nac.app
  • Enable Socket Filtering: true
  • Filter Data Provider System Extension Bundle Id: com.manageengine.dc.nac
  • Filter Data Provider Designated Requirement: identifier "com.manageengine.dc.nac" and anchor apple generic and certificate 1[field.1.2.840.113635.100.6.2.6] /* exists */ and certificate leaf[field.1.2.840.113635.100.6.1.13] /* exists */ and certificate leaf[subject.OU] = "TZ824L8Y37"

Type 2: Configure pre-requisites manually

During a fresh install, two prompts will be shown to the user seeking permission:

    1. The first prompt is for the system extension. A prompt will be displayed for access, and by clicking "Open System Settings," it may directly open the settings page. The user must allow access for the application dcNacFirewall. Allowing it will prompt for user credentials with administrator privileges. If the user ignores the prompt or clicks "OK," they must manually allow the application dcNacFirewallby going to "Settings" -> "Privacy & Security.".

      Security Extension BlockedPrivacy and Security

    2. Once the system extension has been allowed, the second prompt will open to seek access for "Filter Network Content." The user must allow this. If the user neglects or ignores it, the prompt will be shown during the next installation attempt.

      NAC Firewall Notify

How to create a compliance policy

IT admins can create a compliance policy according to various standards supported by Endpoint Central. A policy can be defined when:

Adding Software Checks

Specify the exact installation location of the application on your Mac that needs to be checked. Select the type as 'Software' and status either as 'Exists' or 'NotExists'.

Adding Patch Criteria Checks

In the tool console, specify the patch details, which include PatchType, SeverityType, and the number of patches that violated the rule. Any endpoint falling under this criteria will be quarantined.

Adding PatchID Checks

You can quarantine an endpoint when it is missing important security patches. To do so, define the PatchID in the patch column (In the policy generator tool). An endpoint that is missing the specified patch will be quarantined.

Adding Custom Checks

Custom tags are used to name/identify the conditions that are checked. These tags can be named according to the user's convenience. The custom tags are treated as individual checks, and the system is considered non-compliant even if one of these tags is satisfied. If you wish to run a group check, then specify the various conditions under a single tag.

File Path Check

      • Name the custom tag as needed
      • Check Type: File path
      • Check Path: File path (e.g., "/Library/ManageEngine/UEMS_Agent")
      • Applicable Check Mode: Exist / Not Exist

Application Version Check

      • Name the custom tag as needed
      • Check Type: Application Version
      • Check Path: (e.g., "/Applications/Safari.app")
      • Applicable Check Mode: Value equals / Value not Equals / Value Lesser Than / Value Greater Than
      • Value: Application Version

Quarantine Settings

If the system is found non-compliant, the following quarantine measures can be undertaken:

      • You can choose to block all network access (Internet/Intranet) or choose to block the Intranet access in the range that you desire.
      • You can also set the domains or IP addresses that you wish to allow the quarantined machine to access.
      • Further, you can also set to automatically revoke the quarantine when the quarantined machine loses connectivity to all the heartbeat machines (Machines that establish connectivity and form a network).

How to revoke a deployed quarantine policy?

In macOS, the quarantine policy revocation can be performed in two ways:

Case 1: Disable NAC Without Uninstalling the NAC Agent

Execute the script with the argument --stop alongside the dependency file and apply the configuration to the relevant machine.

Case 2: Uninstall the NAC Agent Completely

Execute the script with the argument --removeNAC along with the dependency file and apply the configuration to the respective machine (Uninstalling will remove the permissions given for Network Access Control for Mac if they are given manually).

Note: For both cases, the TrustAgentMac.zip dependency file is mandatory.

Points to Remember

    • This feature is supported on macOS Catalina version 10.15 and above.
    • System-wide proxy settings are automatically applied.
    • Any application-specific proxy that is to be allowed can be either whitelisted fully by giving their team ID and path, or the IPs or hostname, or just the application names that are to be whitelisted.
    • Active directory domains must be whitelisted so that the machine can reach them.
    • VPN apps that are being used must be whitelisted so that they can make connections. It can be whitelisted in three ways:
    • By giving the team ID of the VPN app to be whitelisted. Note: All the apps associated with the team ID will also be whitelisted.
    • By giving only the paths of the VPN app.Note: All binaries and apps in that location will also be whitelisted.
    • By giving both the team ID and path.Note: Only the apps and binaries for the given team ID will be whitelisted only if they are located in the specified path.
    • If any help links are given, the corresponding hostname or IP must be whitelisted.
    • Domains must be whitelisted if needed. Additionally, ensure that the DNS server IP address is also whitelisted.
    • To check the team ID, use the command codesign -dv <application path> in the terminal. It will list the corresponding team ID of the application.