An alert profile is created to set the thresholds for generating alerts. The parameters to be set for creating an alert profile are:
Netflow Analyzer calculates the bandwidth utilization of the specified interfaces/ IP Groups / Interface Group every minute. If the utilization exceeds the threshold value, the time when it exceeded is noted. Subsequently when it exceeds, the corresponding times are noted. If the number of times the utilization exceeds the specified limit, in the specified time duration, an alert is generated. When an alert is generated, you can also send an email to one / more people or send an SNMP trap to a manager application.
The Alert Profile Management option lets you create and manage alert profiles. The Alert Profiles page lists all existing alert profiles, along with the number of alerts generated for each profile. The application comes loaded with a preconfigured alert that can trigger an email alert when a link goes down or when there are no flows for more than 5 minutes.
The various columns displayed in the Alert Profiles page are described in the table below:
| Column | Description |
| Profile Name | The name of the alert profile when it was created. Click on the alert profile's name to see more information about the alert profile. |
| Description |
Descriptive information entered for this alert profile to help other operators understand why it was created. |
| Category |
The category defines, to what type of alert an alert profile belongs to. The pre-loaded and pre-configured "Link Down" alert belongs to the "Link Status" category. All other alerts created by the user fall under the "Utilization"category. |
| Status (Enabled/Disabled) | This lists whether an alert profile is currently enabled or disabled. Click the  icon to disable an alert profile. When this is done, alerts will no longer be generated for that alert profile. Click the icon to disable an alert profile. When this is done, alerts will no longer be generated for that alert profile. Click the icon to enable the alert. The Link Status alert becomes enabled only after the mail server settings have been set. icon to enable the alert. The Link Status alert becomes enabled only after the mail server settings have been set. |
| Actions | Actions allows to make changes to the existing Alert Profile with options like Edit, Copy and Delete. The option helps editing an Alert Profile from name and description to criteria and filters. One can also duplicate an Alert Profile with Copy or using Delete, they can remove all the alerts created for the profile altogether. |
| Search | Allows to find a particular Alert Profile from the list by entering either Profile Name, Description or Category. |
Alerts List of the Alarms page will display the alert profiles created, based on its severity, device, and time.
This is a preconfigured alert to send an email or log an SDP ticket when the link goes down or when there are no flows for more than 5 minutes. By default this profile is disabled. This is similar to other alerts that are manually configured except that it can't be deleted. It is possible to have emails sent by this alert whenever no flows are received for over 5 minutes. It becomes activated only after the mail server settings are configured. You can also create a custom notification template to get alerts every time the link goes down or no flows are received for a time period of 3 minutes to 30 minutes.
You can create new alert profiles, modify, or delete existing ones from the Alert Profiles page.
Remember to set the active timeout value on the router to 1 minute so that alerts are generated correctly. Refer the section for more information on router settings. |
The steps to create an Alert Profile are:
| Field | Description |
| Alert Profile Name | Enter a unique name to identify this alert profile |
| Description |
Enter descriptive information for this alert profile to help other operators understand why it was created. |
| Select Source | By default all Interfaces / IP Groups/ Interface Group sending NetFlow exports are selected. If you want this alert profile to apply to certain interfaces/ ip groups / Interface Groups only, click the Modify Selection link. In the pop-up window, select the required devices and interfaces or select the IP Group Names and click Update to save your changes. |
| Define Alert Criteria | Select whether alerts need to be generated based on incoming traffic, outgoing traffic, or both. The default setting is for both(combined). |
| Then select the application / port for which the alert has to be generated. This criteria can be very general - Any application traffic can be profiled - or it can be highly specific - Generate the alert only when a specific application, protocol, and/or port is used. To identify the overall link utilization the "No Criteria" option has to be chosen | |
| Define Threshold and Action | Enter the threshold conditions (threshold utilization, no. of times it can exceed and the time duration) exceeding which the alert will be generated. You can also specify an action to be taken during the alert creation.
- Email - to send a notification to one or more people. - SNMP Trap - to send a trap to the manager application (specify the <server name>:<port>:<community>). For details on configuring trap forwarding, refer to SNMP Trap Forwarding section under Appendix To add more threshold values, click 'Add Row' and add values |
| Business Hour Alerts | This option enables alerting only during the configured time range of a day. Alerts will not be generated outside this time range. |
You can configure the way you want to receive alerts by creating a notification template that suits your preference.
The new alert profile is created and activated. The system watches the utilization and raises alarms when the specified conditions are met.
An alert is generated whenever the configured threshold conditions are met. For example, consider an interface where the utilization threshold is set to 60%, the violation count is set to 3 times, and the evaluation period is 30 minutes. If the interface utilization exceeds 60% on any three occasions within the 30-minute window, an alert is triggered immediately at the time of the third violation. Once the alert is generated, a new 30-minute monitoring window begins from that moment.
Note: To prevent a second alert from being triggered within the same 30-minute duration, please contact support.
An aggregated alert is generated based on a defined time frame and threshold. Say if you select an interface, and you want to get an alert when the OUT traffic crosses 80 GB volume within a time frame of your choice, like custom or periodic.
When and if you choose custom time period, you get an alert if the volume crosses 80 GB within provided start and end time. On the contrary, if you select periodic time period, and specify the interval as 10 days, the traffic will be monitored every 10 days. You will get an aggregated alert for every time interval.
Select an alert profile, and click on Modify to modify its settings. You can change all of the alert profile's settings except the profile name. However, it is possible to modify the "Link Down" alert profile's name. There is also an option to clear details of all alerts created for this profile from this page itself. Once you are done, click Save to save your changes.
Select an alert profile, and click on Delete to delete the profile. Once an alert profile is deleted, all alerts associated with that profile are automatically cleared. However it is not possible to delete the "Link Down" alert profile.

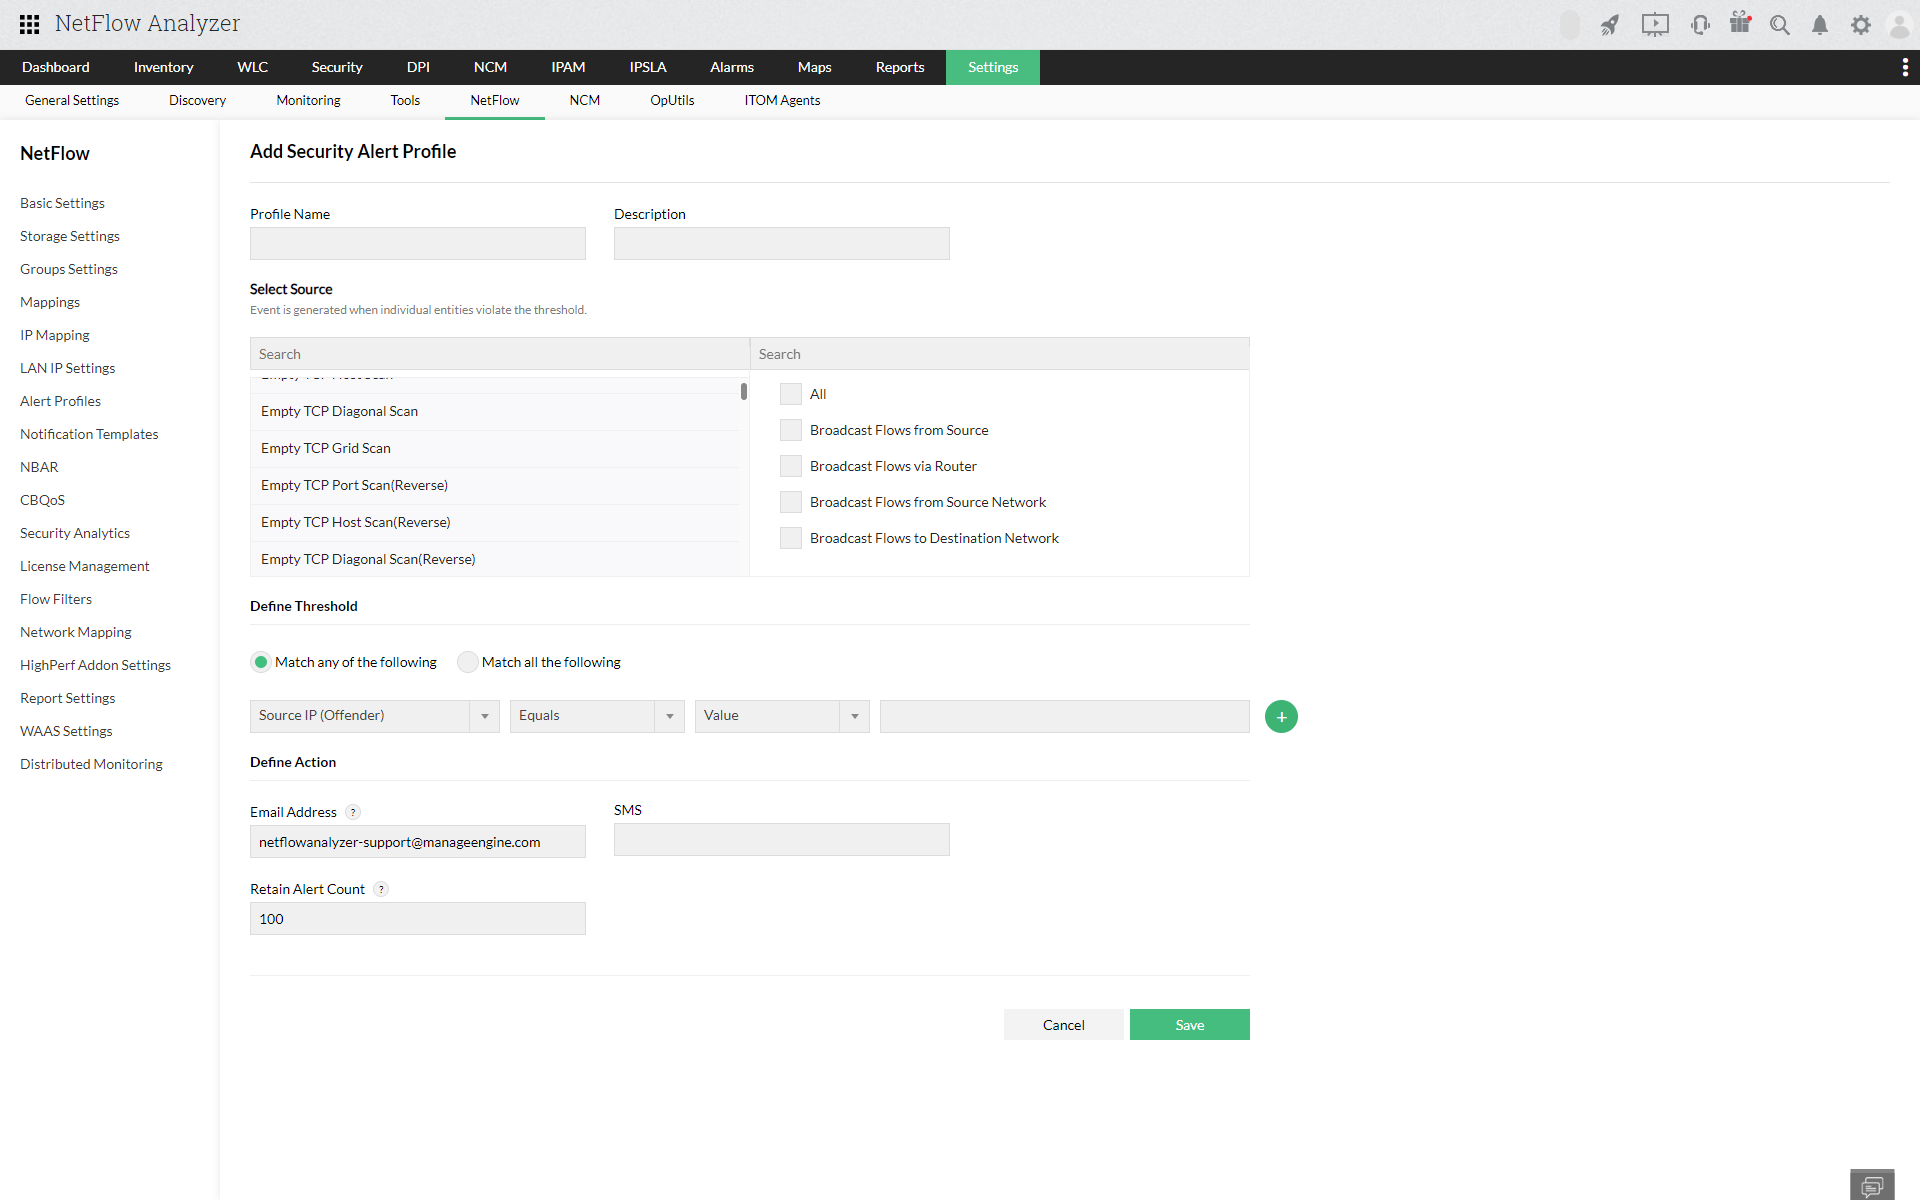
NetFlow Analyzer allows you to create alerts based on the ASAM security events that occur in the network. You can create Alerts based on the algorithm and the problem for the required criteria. Once the threshold is violated you will receive an alert and notification in real time. By default, there is no Alert profile created for ASAM. Click on Add button on the right top to create an Alert profile for ASAM.
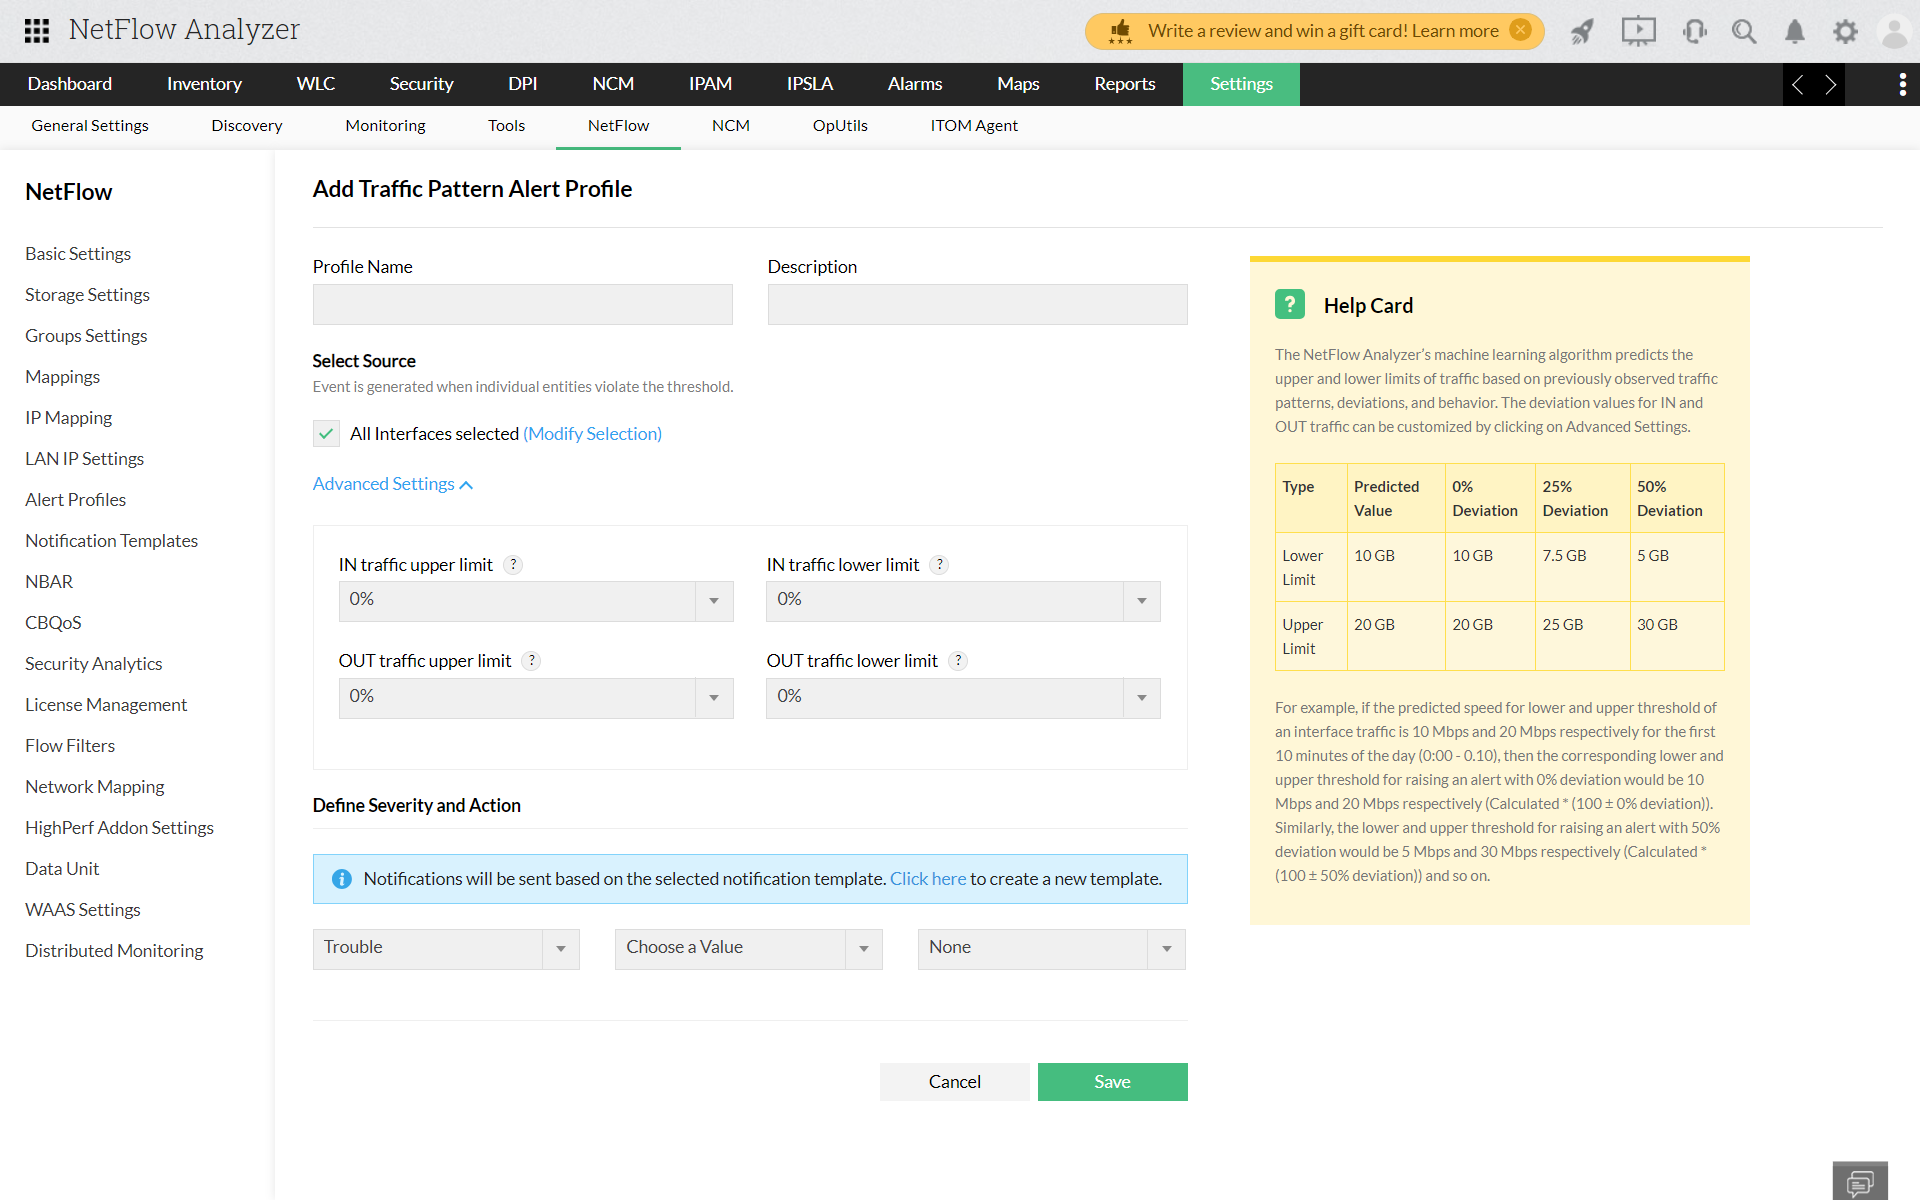
Traffic pattern alerts are generated from the anomalies on a real-time basis.Traffic patterns are analysed with historic data using ML models and limits are established based on the traffic patterns. You can additionaly set deviations for the established limits. Any violation from these limits ( upper and lower limit ) will be flagged as an anomaly and will generate an alert. To receive the notifications, you can configure the alerts with the selected notification templates available.

Thank you for your feedback!