Smart Card Authentication
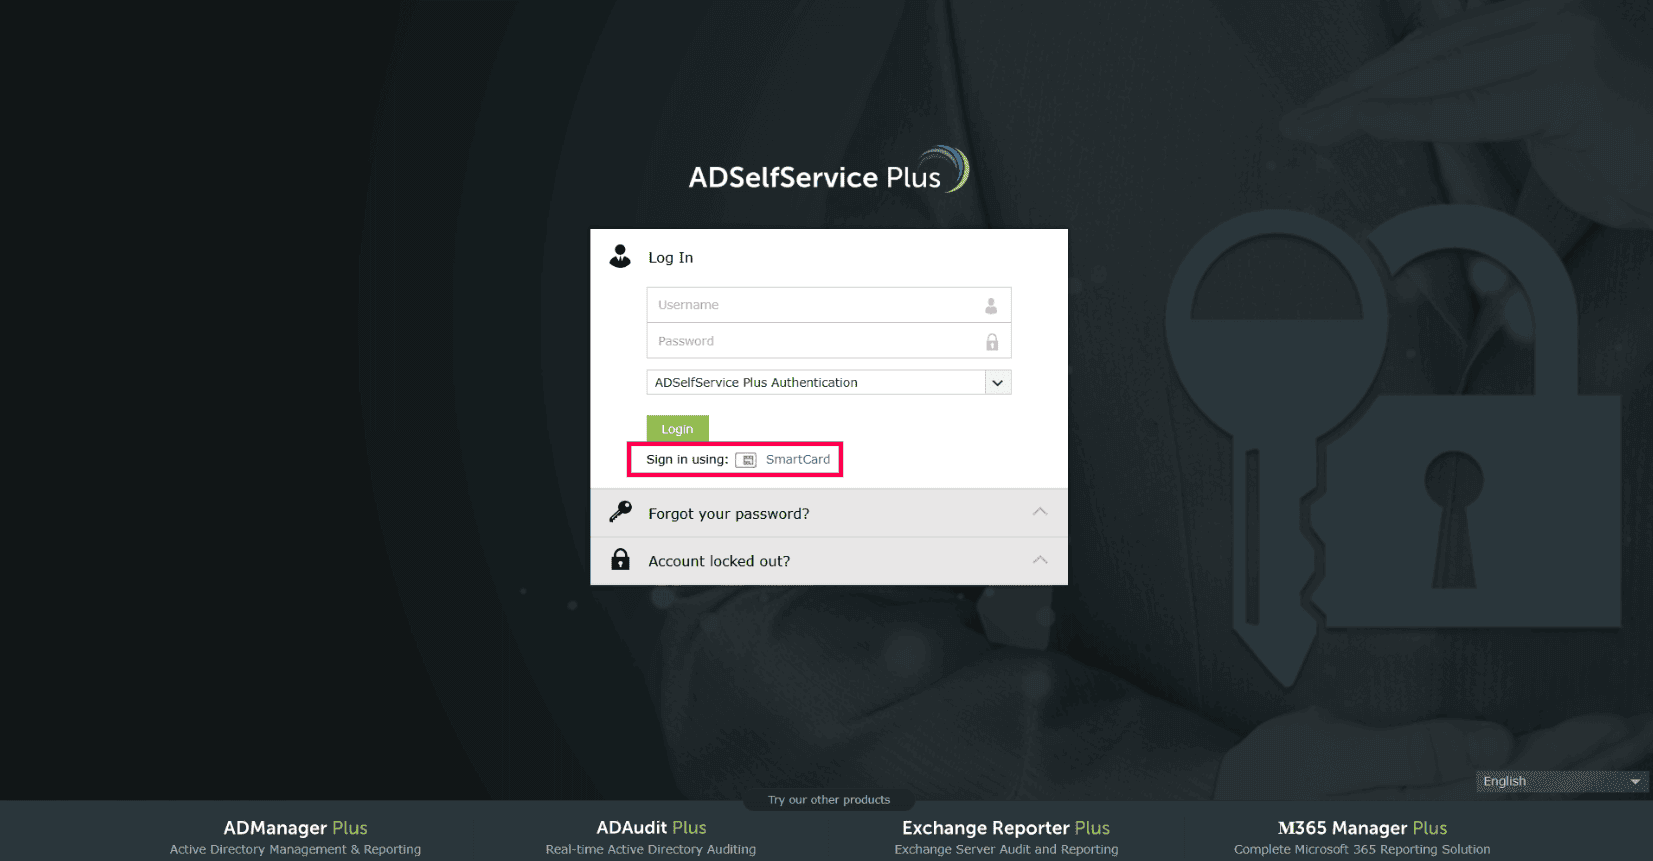
ADSelfService Plus allows admins to add a Smart Card button to the login screen, enabling users to
access the self-service portal and applications securely without a username or a password.

Note: Smart card authentication can also be used as an MFA method to protect
enterprise apps, Windows machines, self-service actions like password resets and account unlocks,
Outlook on the web logins, VPN logins via secure verification links, and logins to ADSelfService Plus.
To learn about what smart cards are, how the authentication process works, and other ways to leverage
the smart card authenticator using ADSelfService Plus, click
here.
Configuring smart card authentication for ADSelfService Plus
Preparing your smart card authentication environment
Enrolling in smart card authentication can be done by users as well as the admin. The general steps are
as follows:
- Users need to be issued a digital certificate and a private key by your organization's certificate
authority (CA).
Note: Ensure that supported AD user attributes that have unique values,
such as
employeeID, sAMAccountName, or userPrincipalName, have valid values that can be
mapped to the corresponding certificate attributes, like SAN.OtherName,
SAN.RFC822Name, SAN.DirName, SAN.DNSName, SAN.URI, emailaddress,
distinguishedName, or CommonName, in the user's certificate. The values in both the
attributes that are linked must be the same for mapping to be successful.
- If you are using AD's CA, you can refer to the Microsoft
guide on requesting and granting certificates.
- If an external CA is used for smart card enrollment, the certificates must be imported into AD and linked to the respective user's userCertificate attribute.
- Now, the certificate and the private key (usually issued together as a PFX file) from your CA should
be enrolled into the smart cards to complete the preparation steps.
- For smart cards on machines:
- Windows: Import the PFX file directly into the user's personal store via the
Certificate Manager tool (certmgr.exe).
- macOS: Not applicable (only physical smart cards are compatible with macOS).
- Linux: Using your browser settings, import the PFX file via the Certificate
Manager tab, and the CA root certificate via the Authorities tab.
- For physical smart cards, please refer to the documentation provided by your smart card
vendor on how to enroll the certificates with the hardware.
Prerequisites
- ADSelfService Plus must be using an HTTPS connection. Learn
more.
- Obtain the CA root certificate from a CA.
Configuration steps
Now that the certificates are in the user's personal certificate store or on their physical devices, and
the prerequisites for ADSelfService Plus have been met, let us configure passwordless authentication
using smart cards for the ADSelfService Plus portal.
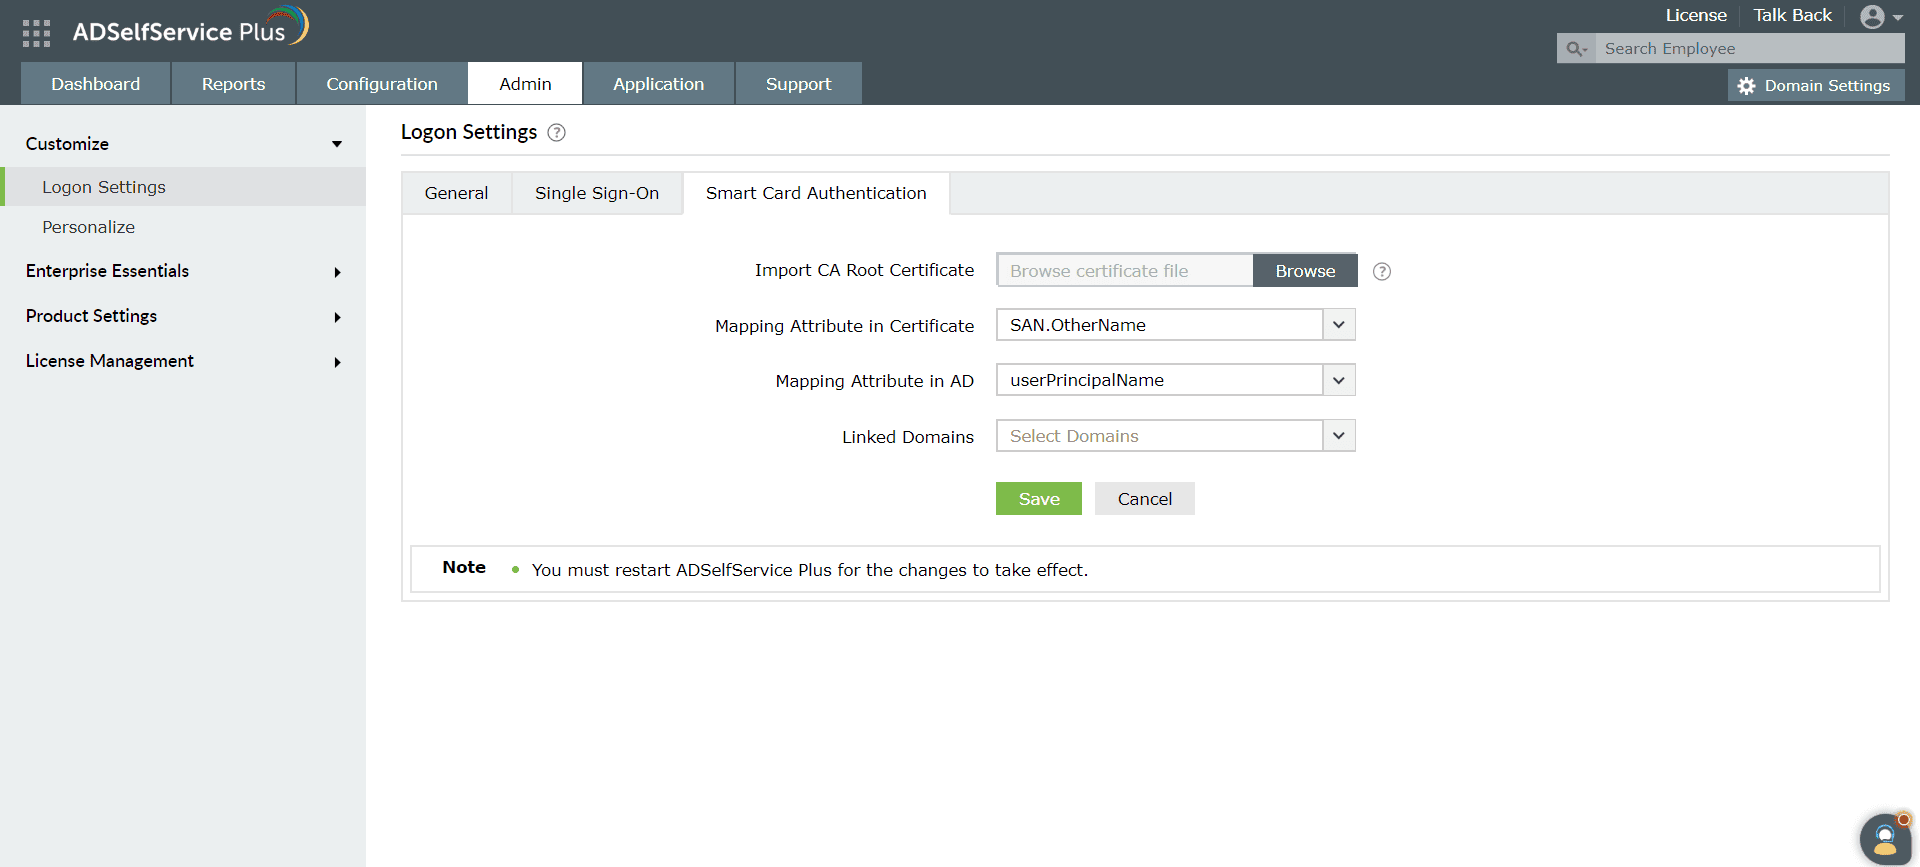
- Log in to the ADSelfService Plus web console with admin credentials.
- Navigate to Admin > Customize > Logon Settings.
- Click the Smart Card Authentication tab.

- In the Import CA Root Certification field, click Browse to import the required root
certification file (X.509 certificate) obtained in step two of the
prerequisites.
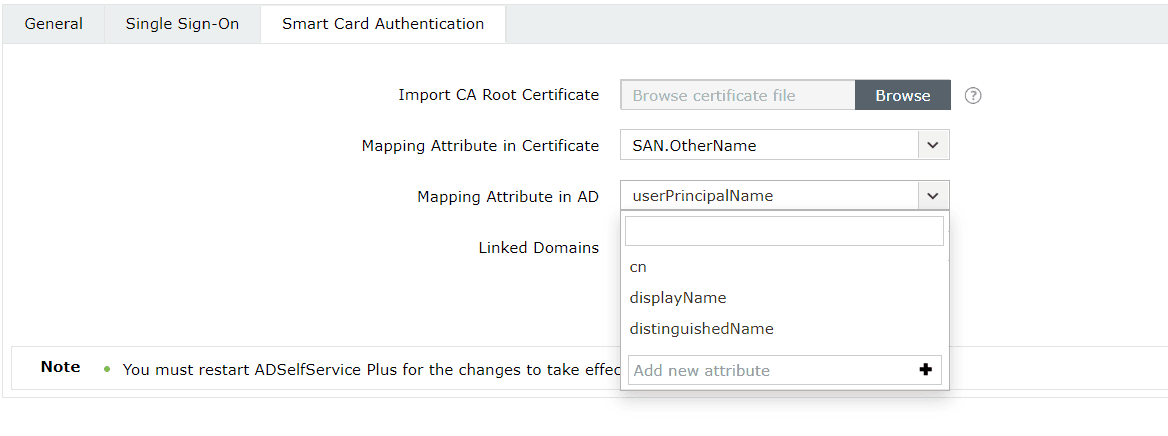
- In the Mapping Attribute in Certificate field, select a unique attribute in the certificate
for mapping.
- Ensure that a unique attribute from the certificate is mapped to a unique attribute in AD.
Both attributes must have the same values.
- ADSelfService Plus provides the ability to select any attribute of the smart card
certificate that uniquely identifies a user. You can choose SAN.OtherName,
SAN.RFC822Name, SAN.DirName, SAN.DNSName, SAN.URI, email,
distinguishedName, or CommonName. In case other attributes are used to
uniquely identify the user in your environment, enter the attribute name in the text box
provided and click the + icon.

- In the Mapping Attribute in AD field, specify the LDAP attribute that should be matched with
the specified certificate attribute.
- Here, you need to specify the particular LDAP attribute that uniquely identifies the user in
AD (e.g., sAMAccountName).
- During authentication, ADSelfService Plus reads the value corresponding to the certificate
attribute that you specified in the certificate's mapping attribute and compares it with the
specified mapping attribute in AD.
- In the Linked Domains field, select the domains for which you want to enable smart card
authentication from the drop-down.
- Click Save.
- Restart ADSelfService Plus for the changes to take effect.
Note: Smart card authentication is not supported when Load Balancer or
Reverse Proxy is enabled for ADSelfService Plus.
Managing smart card authentication configurations
After you have added a smart card for authentication, you can perform any of the following functions:
Adding a new smart card
- Navigate to Admin > Customize > Logon Settings > Smart Card Authentication.
- Click the Add a New Smartcard button in the top-right corner.
- Enter all the required details and click Save.
Modifying a configured smart card
- Navigate to Admin > Customize > Logon Settings > Smart Card Authentication.
- Click the pencil icon (
 ) corresponding to the smart
card
whose configuration you wish to edit.
- Modify the settings you wish to change.
- Click Save.
Enabling or disabling a configured smart card
- Navigate to Admin > Customize > Logon Settings > Smart Card Authentication.
- To enable or disable a configured smart card, click the red icon (
 ) or green check icon (
 ) located in the action column of a particular
smart card.
Deleting a configured smart card
- Navigate to Admin > Customize > Logon Settings > Smart Card Authentication.
- Click the delete icon (
 ) on the smart card
which you wish
to delete.
- Click Yes to confirm the deletion.
Don't see what you're looking for?
-
Visit our community
Post your questions in the forum.
-
Request additional resources
Send us your requirements.
-
Need implementation assistance?
Try OnboardPro


