Password Synchronization with Zoho
Prerequisite
IMPORTANT:
- Install the Password Sync Agent to synchronize built-in password changes and resets.
- Make sure you have configured Zoho to use token authentication before proceeding with the steps below.
Steps to generate the authentication token
To configure your Zoho domain with ADSelfService Plus, you need to generate an authentication token for your account.
-
Copy the code given below and save it as an HTML file.
Note:
<form action="https://accounts.zoho.com/getauthtoken/fetchtoken" method="POST">
<input type="text" name="login">
<input type="password" name="password">
<input type="submit" value="Submit">
</form>
-
Open the HTML file in a web browser.
-
Enter your username and password. Click Submit.
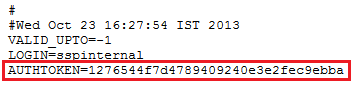
-
Save the value of AUTHTOKEN as shown below for future reference.
Important:
The authentication token is user-specific and is a permanent token. It will become invalid if the user is deactivated.
Steps to configure your Zoho domain with ADSelfService Plus
-
Log in to the ADSelfService Plus admin console with admin credentials.
-
Navigate to Configuration → Self-Service → Password Sync/Single Sign On → + Add Application.
-
Select the Zoho application.
Note:
You can also find the Zoho application that you need from the search bar located on the left pane or the alphabet-wise navigation option on the right pane.
-
Enter the Application Name and Description.
-
Enter your Zoho Domain Name.
-
In the Assign Policies field, select the policies for which password sync needs to be enabled.
Note: ADSelfService Plus allows you to create OU- and group-based policies for your AD domains. To create a policy, go to Configuration → Self-Service → Policy Configuration → + Add New Policy.
-
Select Enable Password Sync.
-
Enter the API Auth Token that you have saved earlier.
-
Click Add Application.
Don't see what you're looking for?
-
Visit our community
Post your questions in the forum.
-
Request additional resources
Send us your requirements.
-
Need implementation assistance?
Try OnboardPro
 ADManager Plus
 ADAudit Plus
 Exchange Reporter Plus
 M365 Manager Plus