Accounts
Accounts tab helps you to view and manage all accounts in ServiceDesk Plus MSP. You can find all requests, changes, and problems associated with accounts from the accounts details page. From this tab, you can perform the following actions,
- Create New Accounts
- View Account Details
- Import Accounts from CSV
- Delete Accounts
- Archive accounts
- Edit Accounts
- Assign Solutions to Accounts
- Assign Notification Rules to Accounts
- Search for Accounts
- Configure Accounts Per Page
Create a New Account
To create an account,
-
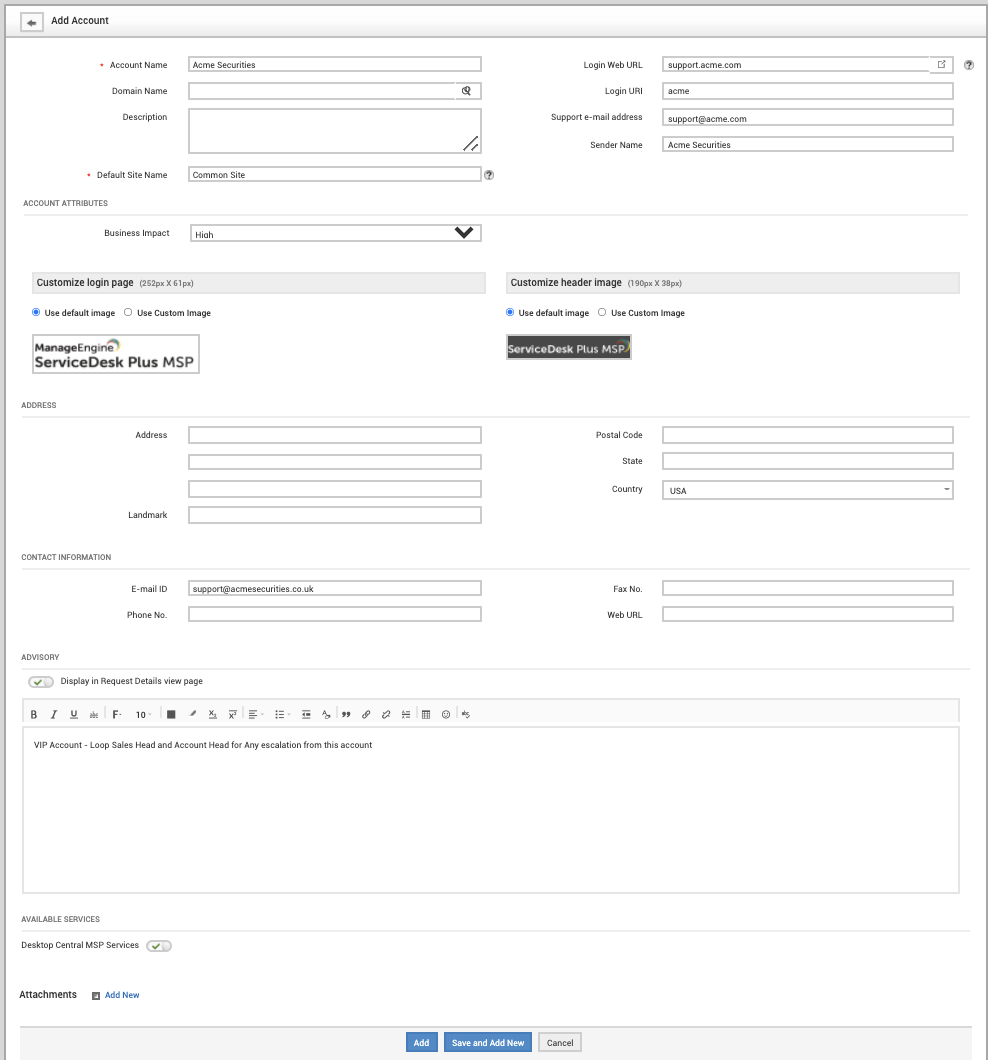
Under Accounts, click New.
-
Fill out the displayed form using the pointers given below:
-
Account Name: Name of the account to be created.
-
Login Web URL: The web address using which end users can access the account.
-
Domain Name: Domain associated to this account. The domain name provided here will be used to identify the incoming email requests and parse them. Learn more about email parsing here.
-
Login URI: An identifier for the account to be added to the Login URL. Users can access the account-specific login page by adding this URI to the web address of the helpdesk.
-
Description: Additional information about the account.
-
Support email address: Email address to which account-specific requests should be sent.
-
Sender Name: The sender name to be mentioned in emails related to the account.
-
Default Site Name: The site to which the account is associated.
-
Account Attributes: The business impact of the account in the organization.
-
Customize Login Page: The image that is displayed on the login page of the account. You can choose to retain the default image or add a custom image.
-
Customize Header Image: The header image of the application displayed in account-based user login.
-
Address: Account-specific address to be used for billing, shipping, etc.
-
Contact Information: Contact details of the account such as Email ID, Fax No., Phone No., and Web URL.
-
Advisory: Account-specific information to share with users before logging in.
-
Available Services: Option to restrict/enable synchronizing users imported via Endpoint Central (Formerly Desktop Central) integration.
-
Attachments: You can add multiple attachments not exceeding 10MB in size. Enable/disable a specific attachment to be displayed to the associated technicians using the corresponding toggle button. You can also show/hide all the attachments.
-
-
Finally, click Save.

Importing Accounts from CSV file
Instead of adding accounts manually every time, you can make use of this feature to import accounts from your existing database. ServiceDesk Plus provides an easy-to-use CSV import option to import all relevant account and contact information from your existing database or even from other applications. The application also provides, Scheduling a CSV import to keep its database in sync with the customer's database.
To import contacts from CSV file,
-
Click the Accounts tab in the header pane to open the accounts list view page.
-
Click Import Accounts from CSV link.
Step 1: Upload CSV file
-
Click on the Browse button to select the CSV file.
-
On locating the CSV file from the file chooser window, click Submit.
Step 2: Map Columns
From this section, you can import both account and contact information at the same time.
-
Map fields under Account Details, Address, Contact Information, Support e-mail address, and with the field names from the CSV file.
Step 3: Import
-
Click the Import Now button. The account details from the CSV file is imported.
-
Once the import is complete, a list of imported/ failed records is displayed in a pop-up.
Delete Accounts
You can delete accounts you no longer use from this tab as well.
- Bulk select the accounts using the radio button and use the Delete option at the top to remove those accounts.
Note: If requests are raised for an account, then that account cannot be deleted.
Archive Accounts
Archive inactive accounts and retain them in the application for audits.
-
The archived account data can be accessed only via query reports.
Note: Archived account(s) cannot be activated again.
Edit Accounts
Update an account with the latest contact and other information by editing an account.
- Click on the edit icon
 present alongside accounts in the account list view.
 - Update the fields and click save.
Assign solutions to accounts
If you use specific solutions for specific accounts, you can assign solutions to a particular account from this page.
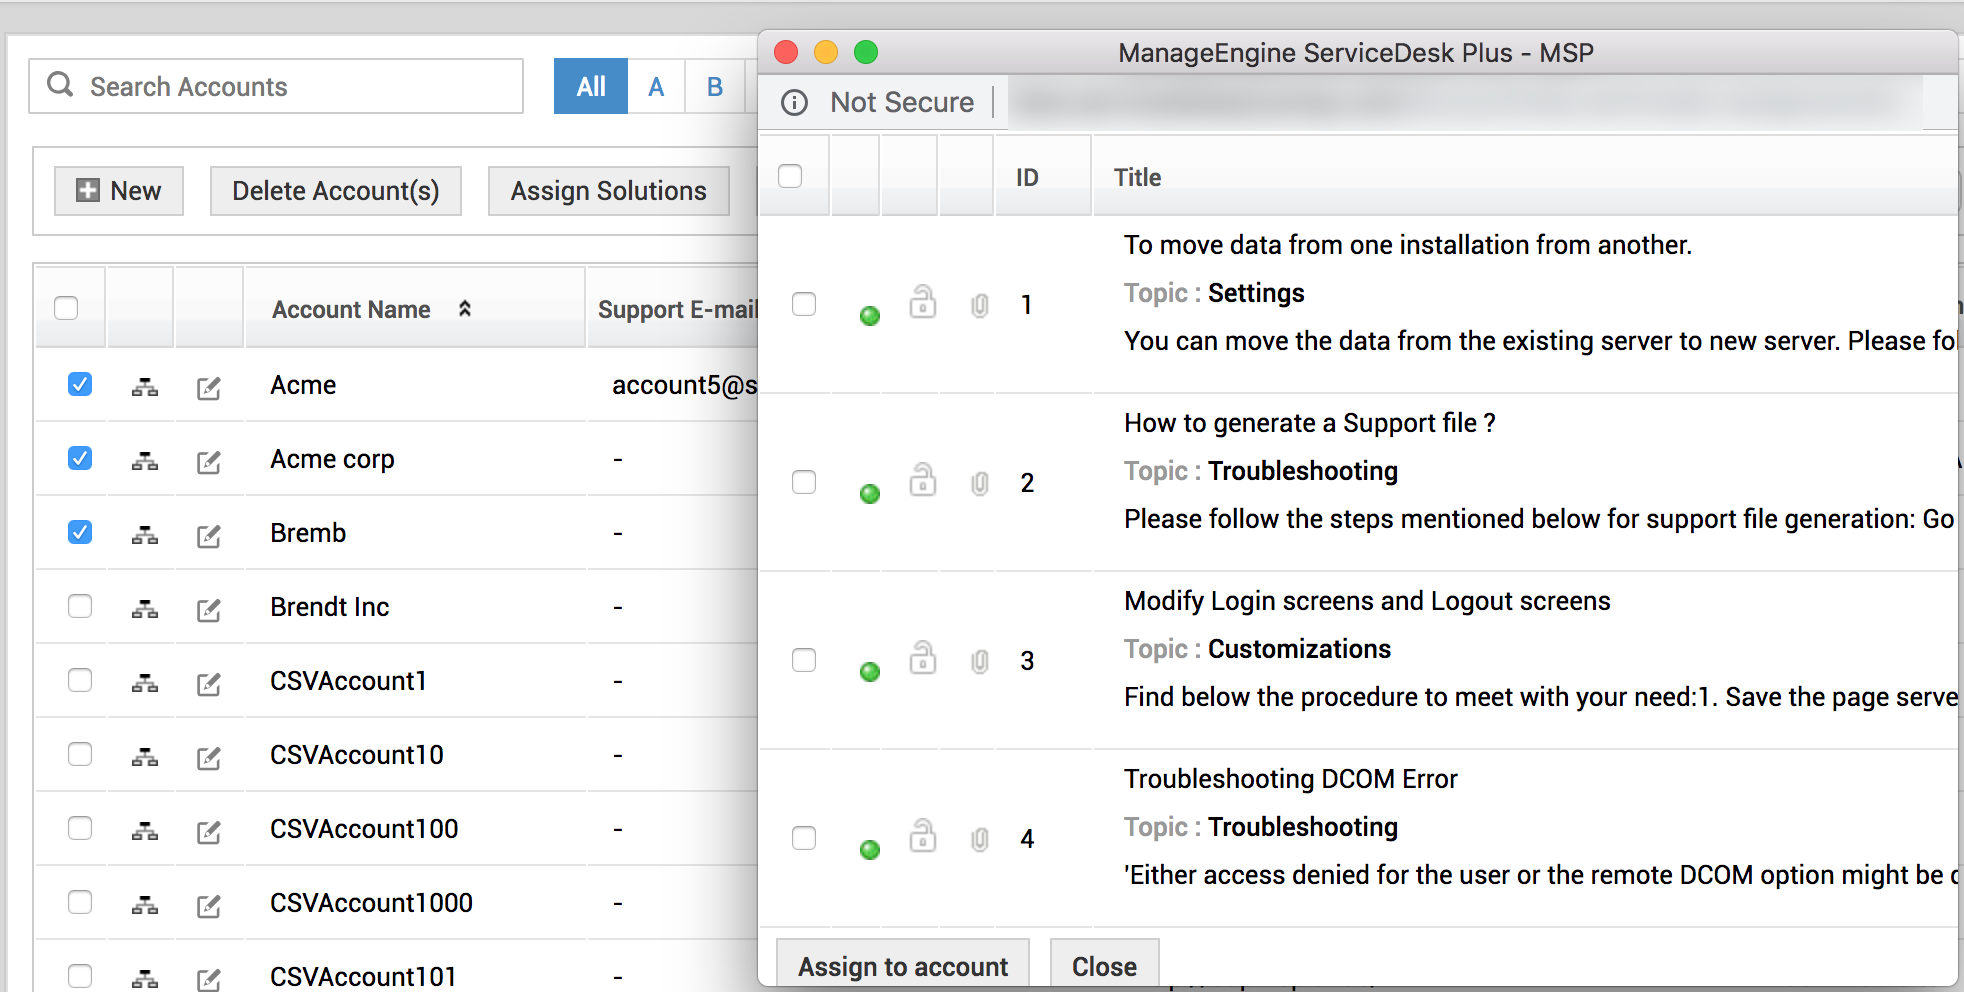
- Select an account from the accounts list view page.
- Click on Assign Solutions at the top. Solutions will be listed in the drop-down.
- Select the ones you want to assign to the account.
- Click Assign to account. The solutions will be assigned to the selected account.

Assign notification rules to accounts
Similar to solutions, you can assign specific notification rules to be applied for requests/changes/problems under a particular account.
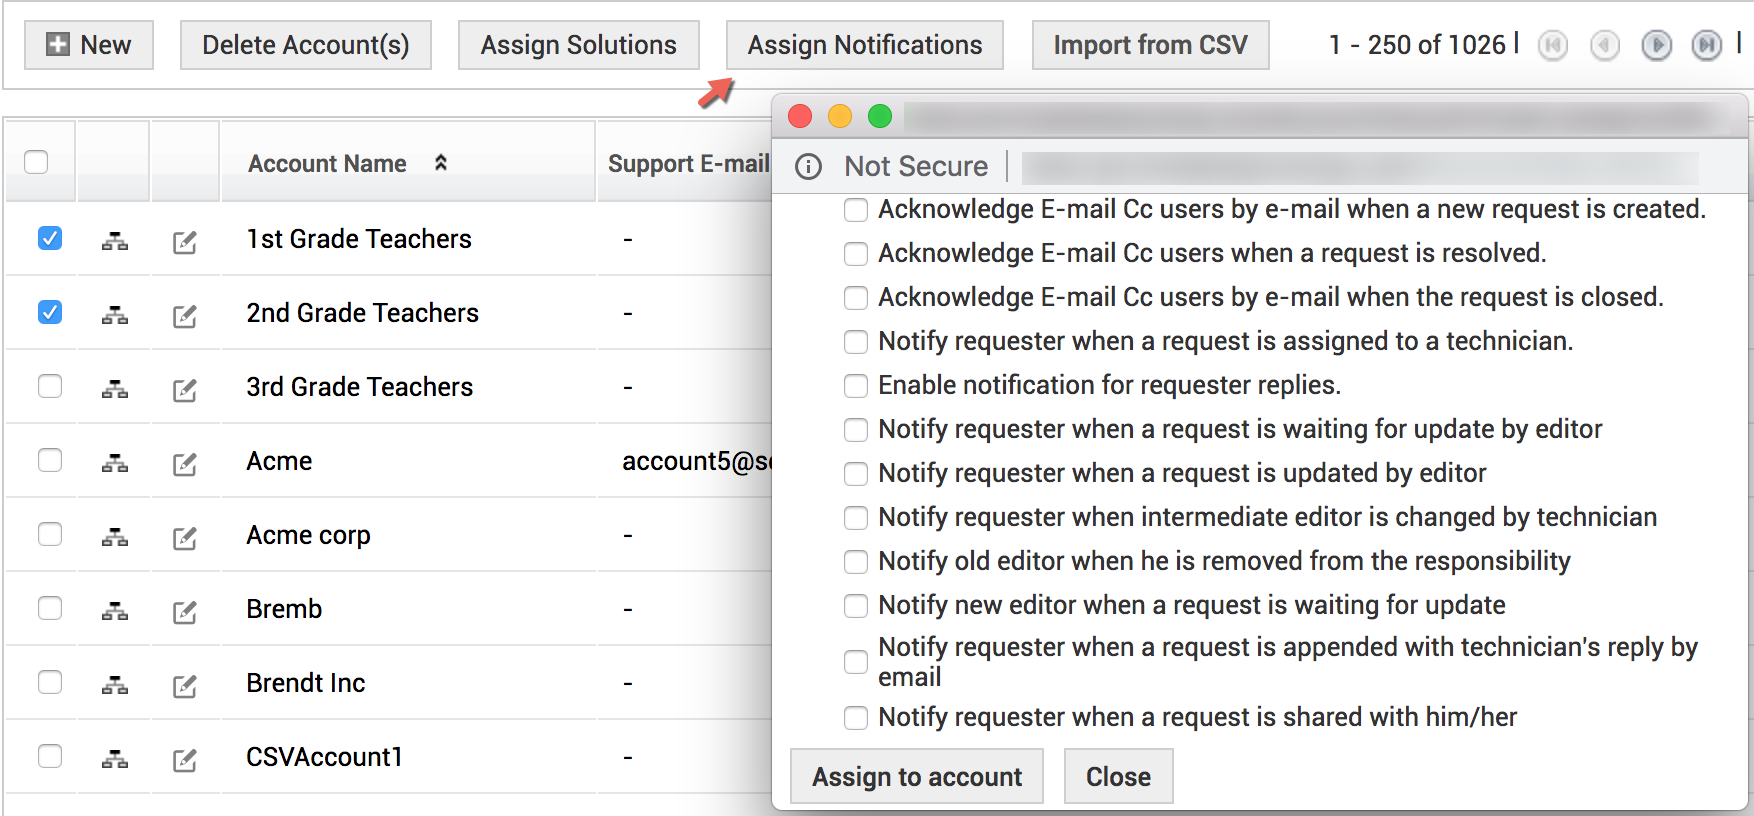
- Select the accounts and click Assign Notifications at the top.
- Notification rules will be listed. Select the ones you want to associate and click assign to account. Notification rules will be associated with the selected accounts.
Search accounts
Use the search bar at the top to find out specific accounts. Keywords, alphabet or column-wise search option can also be used to narrow down on accounts.
Configure accounts displayed per page
Use this option to load 25, 50, 100, 150, 200, or 250 accounts per page in the list view.
Show/hide attachments to technicians
-
Go to the respective Accounts details page.
-
Under Details > Attachments, click the Attach Files icon to attach the respective file.
-
SDAccount Admins and SD Admins can show / hide the attachments to other technicians using the below option.

To view the attachments
-
Go to Accounts.
-
From the Accounts list view, choose the respective Account and find the attachments listed in the Accounts details page.


