Employee onboarding process: Example in ITSM software
One of the key challenges that most IT service desks face is transitioning ITSM best practices from the drawing board to daily practice. And seldom do teams realize that this hurdle can be handled effectively by leveraging the capabilities offered by ITSM tools like ServiceDesk Plus. This session is a blend of the recommended industry best practices and ManageEngine's 15 years of ITSM experience, all aimed at helping service desk teams implement best practices in their day-to-day ITSM processes.
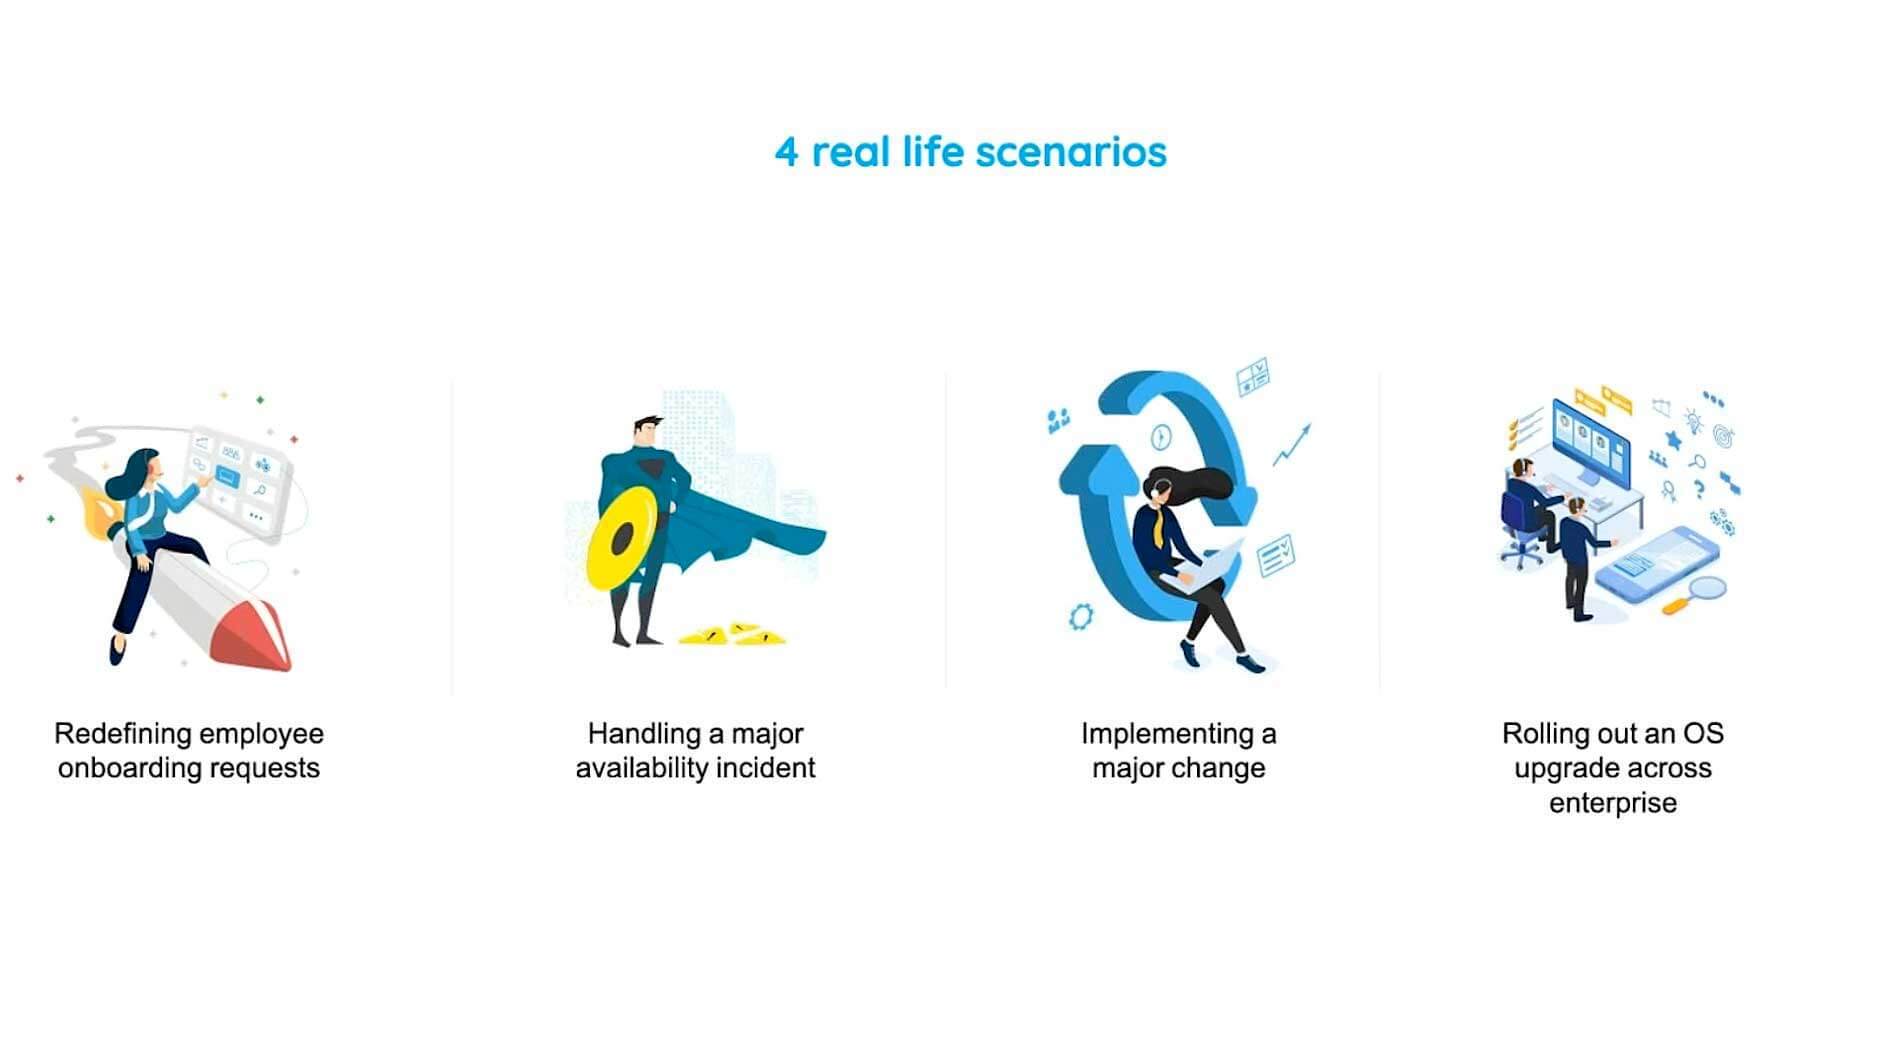
In this session, we will discuss four real-life ITSM situations:
- A major availability incident that brought down half of the world's websites and services
- A streamlined employee onboarding process to cope with organizational expansion
- A minimal-risk change implementation to transition from an on-premises model
- A five-step ITAM process for an organization-wide OS upgrade
What's inside the video
- 4 real life scenarios
- How to turn every service request into an experience to boost your ITSM maturity
- Case study: New hire request - to fill 8000 open positions
- For employee onboarding to function smoothly, how it should work
- KPIs that matter
- Take your major incident management (MIM) process up to notch
- Case study: Major availability incident hits a web performance company
- Their incident team debugging the situation
- Major availability incident management framework
- Major availability incident management framework with ServiceDesk Plus
- A structured approach to effectively roll out a major change
- Case study: How do you roll out a change effectively and help your company embrace change?
- The SMB embraces change with ServiceDesk Plus
- Is the change process effective?
- Use case: Build a rock solid ITAM strategy and grow your organization's ITAM maturity
- An educational institution has to upgrade from Windows 8 to the latest version
- Major challenges
- How to easily solve these challenges
- Track metrics that matter
Chapter-1
Chapter-2
Chapter-3
Chapter-4

Download your free copy of the presentation
Video transcription
Hello, everyone. Good morning and thank you for joining me today in this webinar. I'm Siddharth, a product consultant with ServiceDesk Plus, which is the flagship ITSM tool from ManageEngine. For those of you who don't know, ManageEngine is the enterprise IT management division of Zoho Corp. We have over two dozen applications that help organizations to manage their IT better.
So why are we here today? A lot of talks revolve around ITSM best practices and how to utilize them to handle real-life IT situations. So, a subject matter expert comes up with a lot of blogs, webinars, and seminars talking about the adoption of these best practices, but it's easier said than done because organizations need to bring the right people together, follow the right process, and leverage the right technology. So that's what we'll be focusing on in this webinar.
4 real life scenarios

So these are the four real-life scenarios that organizations commonly face. So, we'll start off with how you can redefine your employee onboarding request, which is another most common form of service request. And then we'll move on to how you can handle a major incident and get your services back online as quickly as possible. Thirdly, we'll see how you can implement a major change with minimal risk, and finally, we'll see how you can roll out an OS upgrade across your enterprise in the context of IT asset management.
So we came up with these four case studies based on situations faced by other organizations as well as those derived from our interactions with our customers. And needless to say, even at Zoho, we have faced these situations ourselves. So building on all of that experience, we have crafted these workflows to help you with your transition to best practices in your ITSM tool. So, without further ado, let's dive right into our first scenario for today, which is redefining your new journey requests.
How to turn every service request into an experience to boost your ITSM maturity
So, we'll see how you can turn your service request into a very satisfactory experience for your end-users, for your hiring managers, and your new journeys.
Case study: New hire request - to fill 8000 open positions
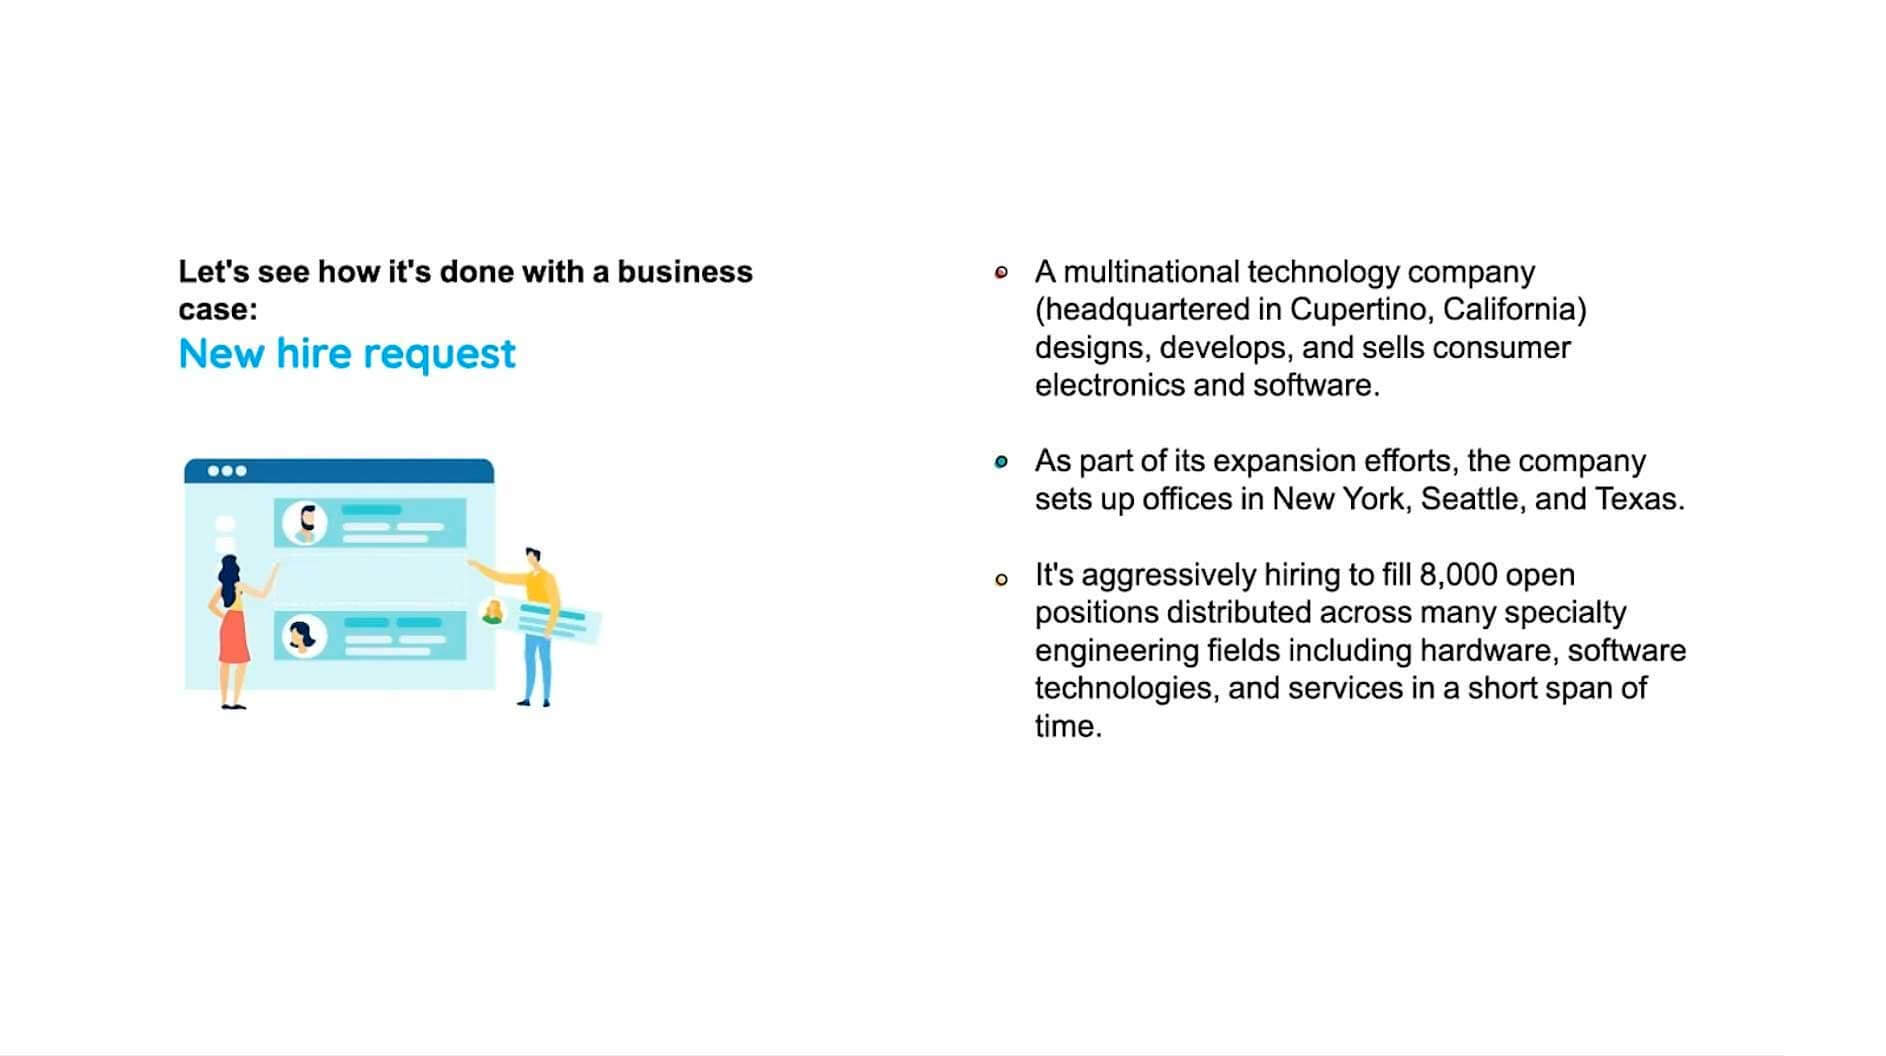
So, this is the case study that we have here with us. We have this multinational tech company in California, which designs, develops, and sells consumer electronics. So, this company is right now in a phase of rapid expansion. So as to support this rapid expansion, they are aggressively hiring to fill almost 8,000 open positions, and these 8,000 open positions are spread across different geographical locations like New York, Seattle, and Texas and are also distributed across different fields like hardware, software, and services. Keep in mind that this onboarding...let me rephrase it, this large-scale onboarding needs to be performed in a very short span of time.
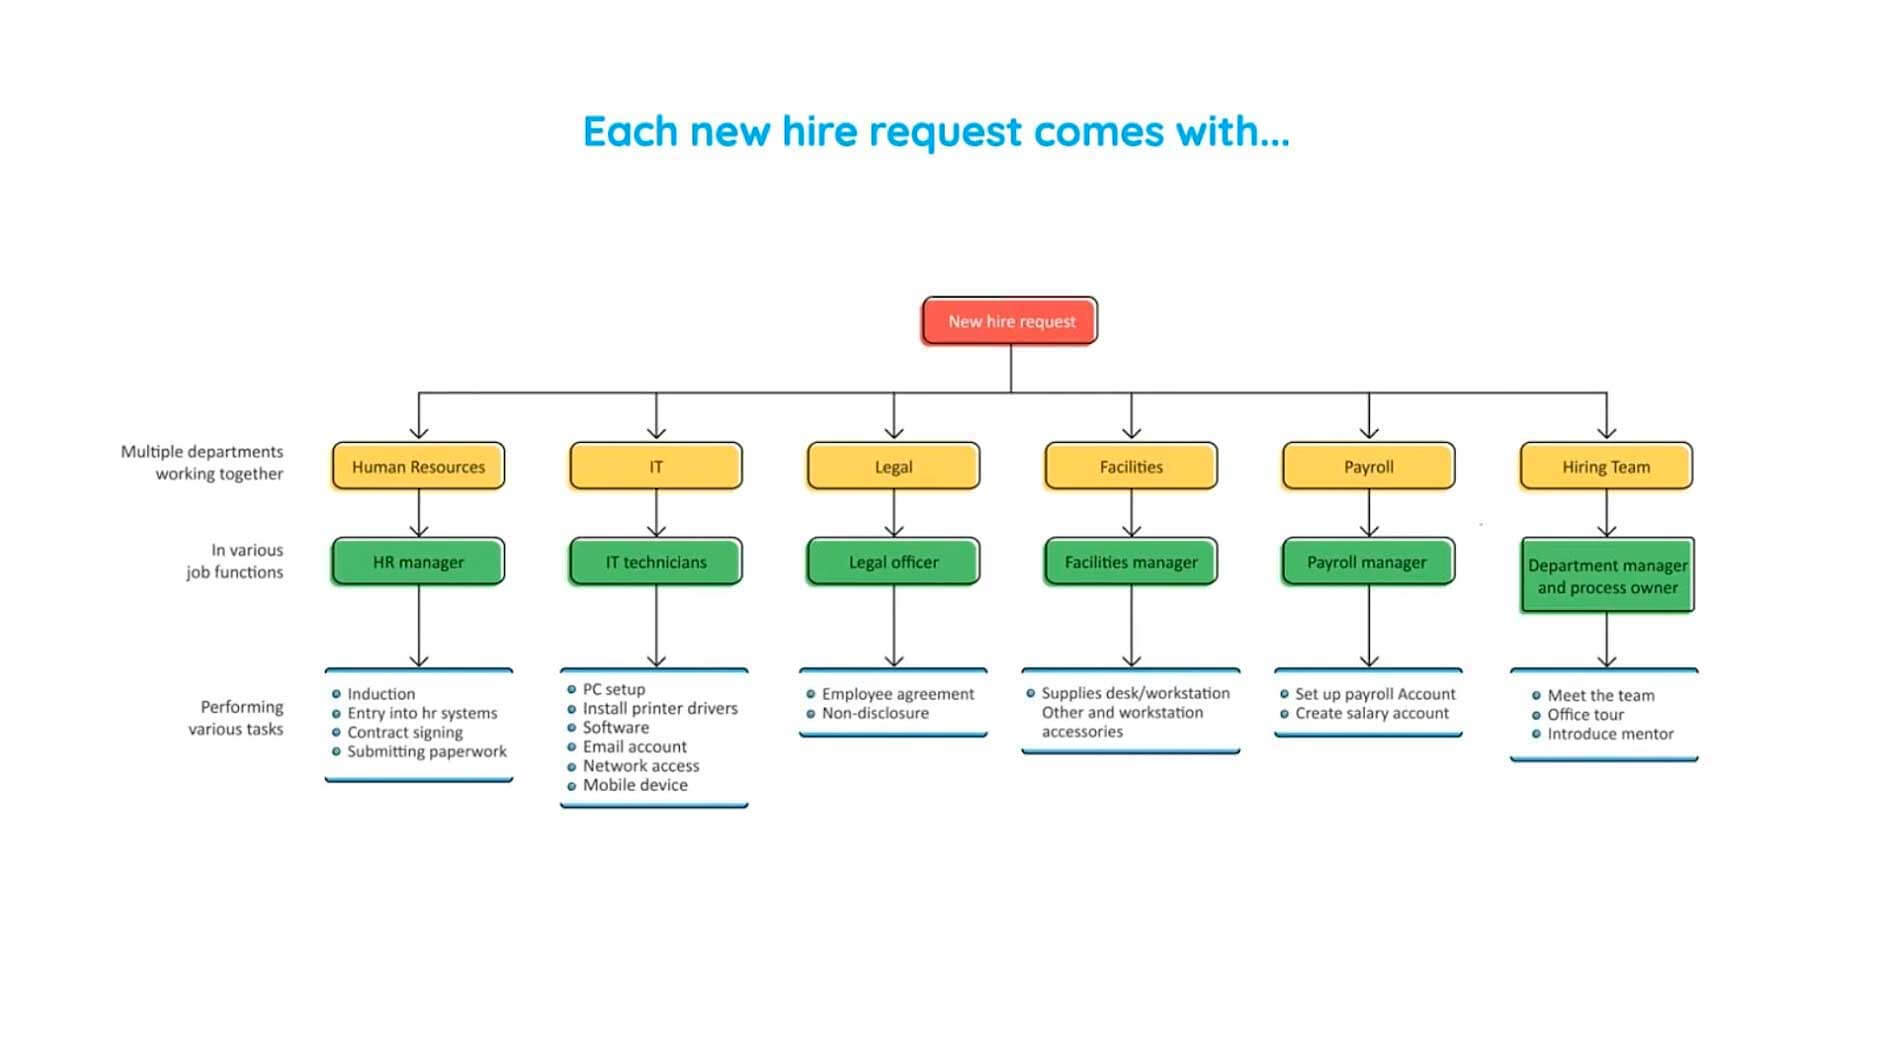
To put it in perspective, this is what a single new journey request entails. You have all these different departments like HR, IT, legal, facilities who all have to perform their own set of tasks. And there are also a lot of interdependencies involved in the execution of these tasks.
For example, the IT department would be able to provision IT devices and IT services only after the facilities department has provided the new journeys, supplies desk, and workstation. So, in the absence of an onboarding strategy or a platform to implement it, organizations would have to manage all this with legacy solutions like spreadsheets and email. So, on an average, for a single new journey request, your organization would send about five to six emails.
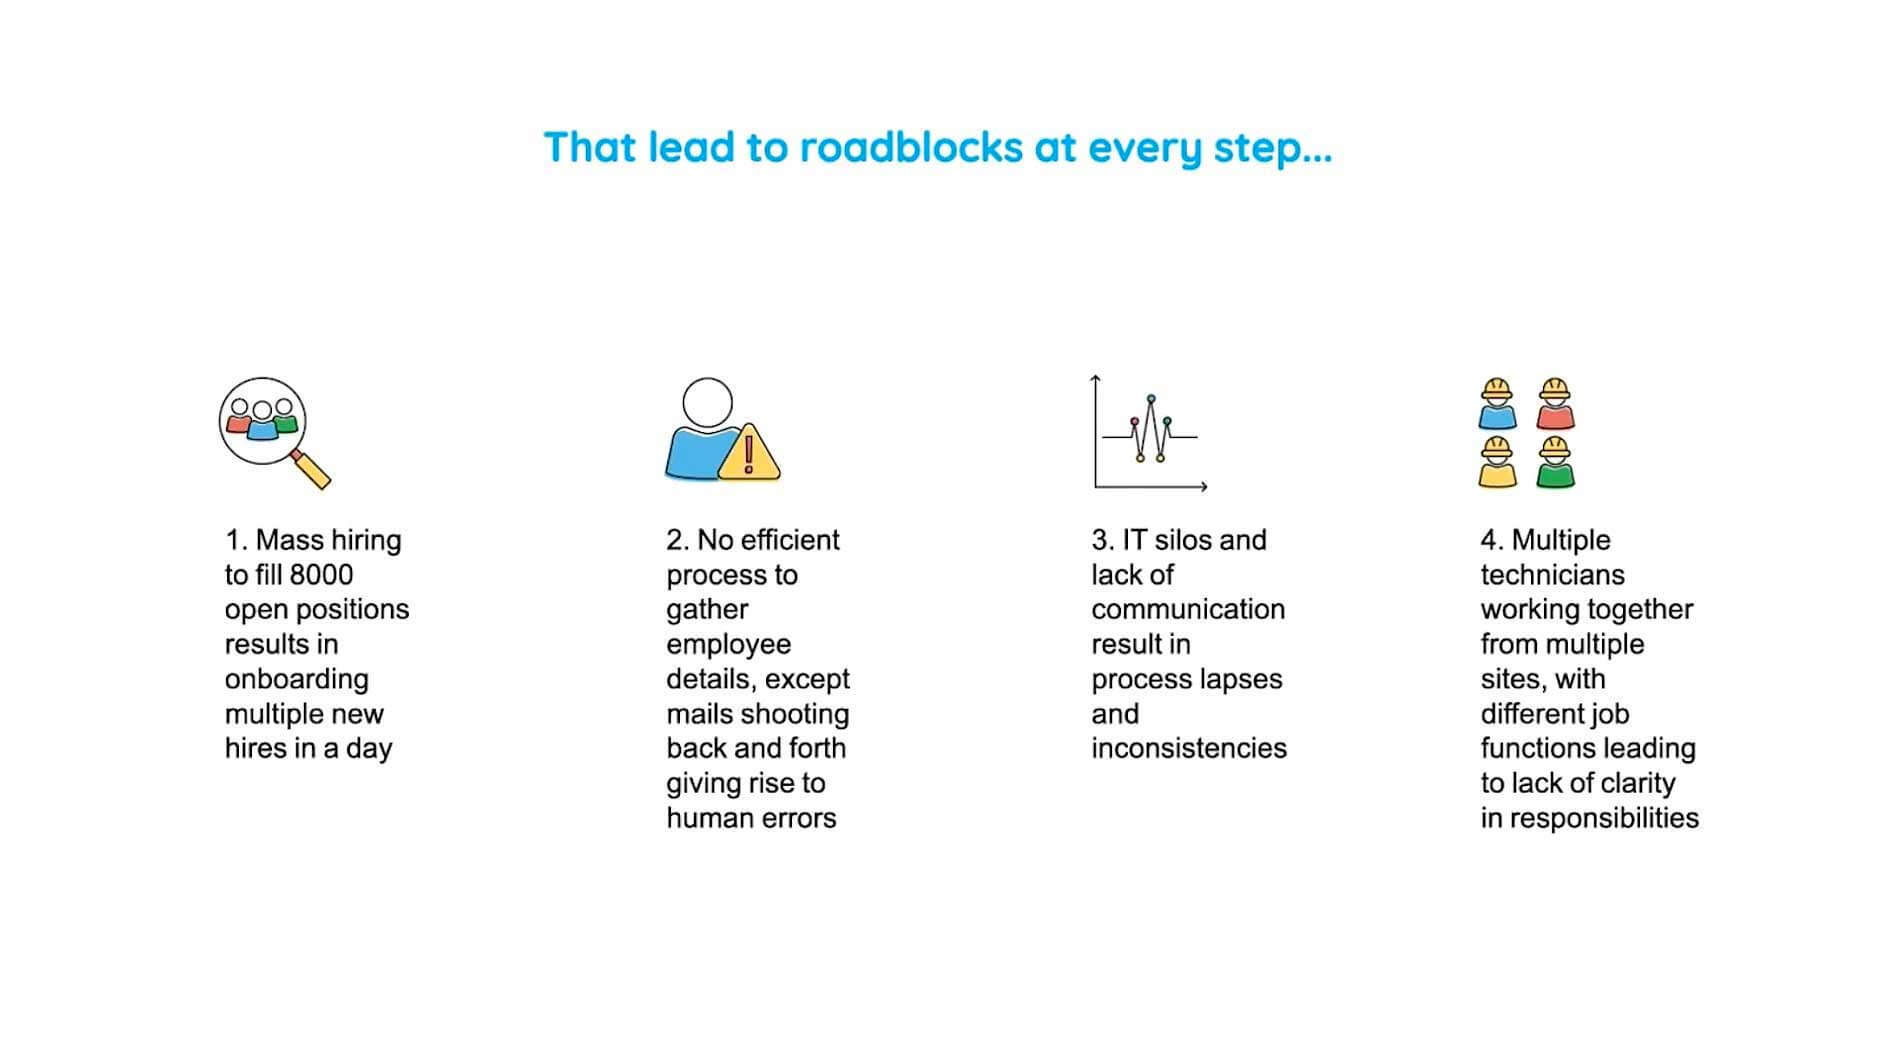
Now, extend that to 8,000 new journey requests. That's a lot of data to handle via email, and it's entirely possible that you'd encounter all these different roadblocks starting with you lose a lot of essential data because it's quite possible and it's very human to make errors while tracking a lots of emails that come through to your inbox. And we talked about how there are multiple departments and multiple technicians involved in the execution of tasks. So, in the absence of effective communication and coordination, a lot of IT silos may crop up resulting in process lapses and inconsistencies in your onboarding process.
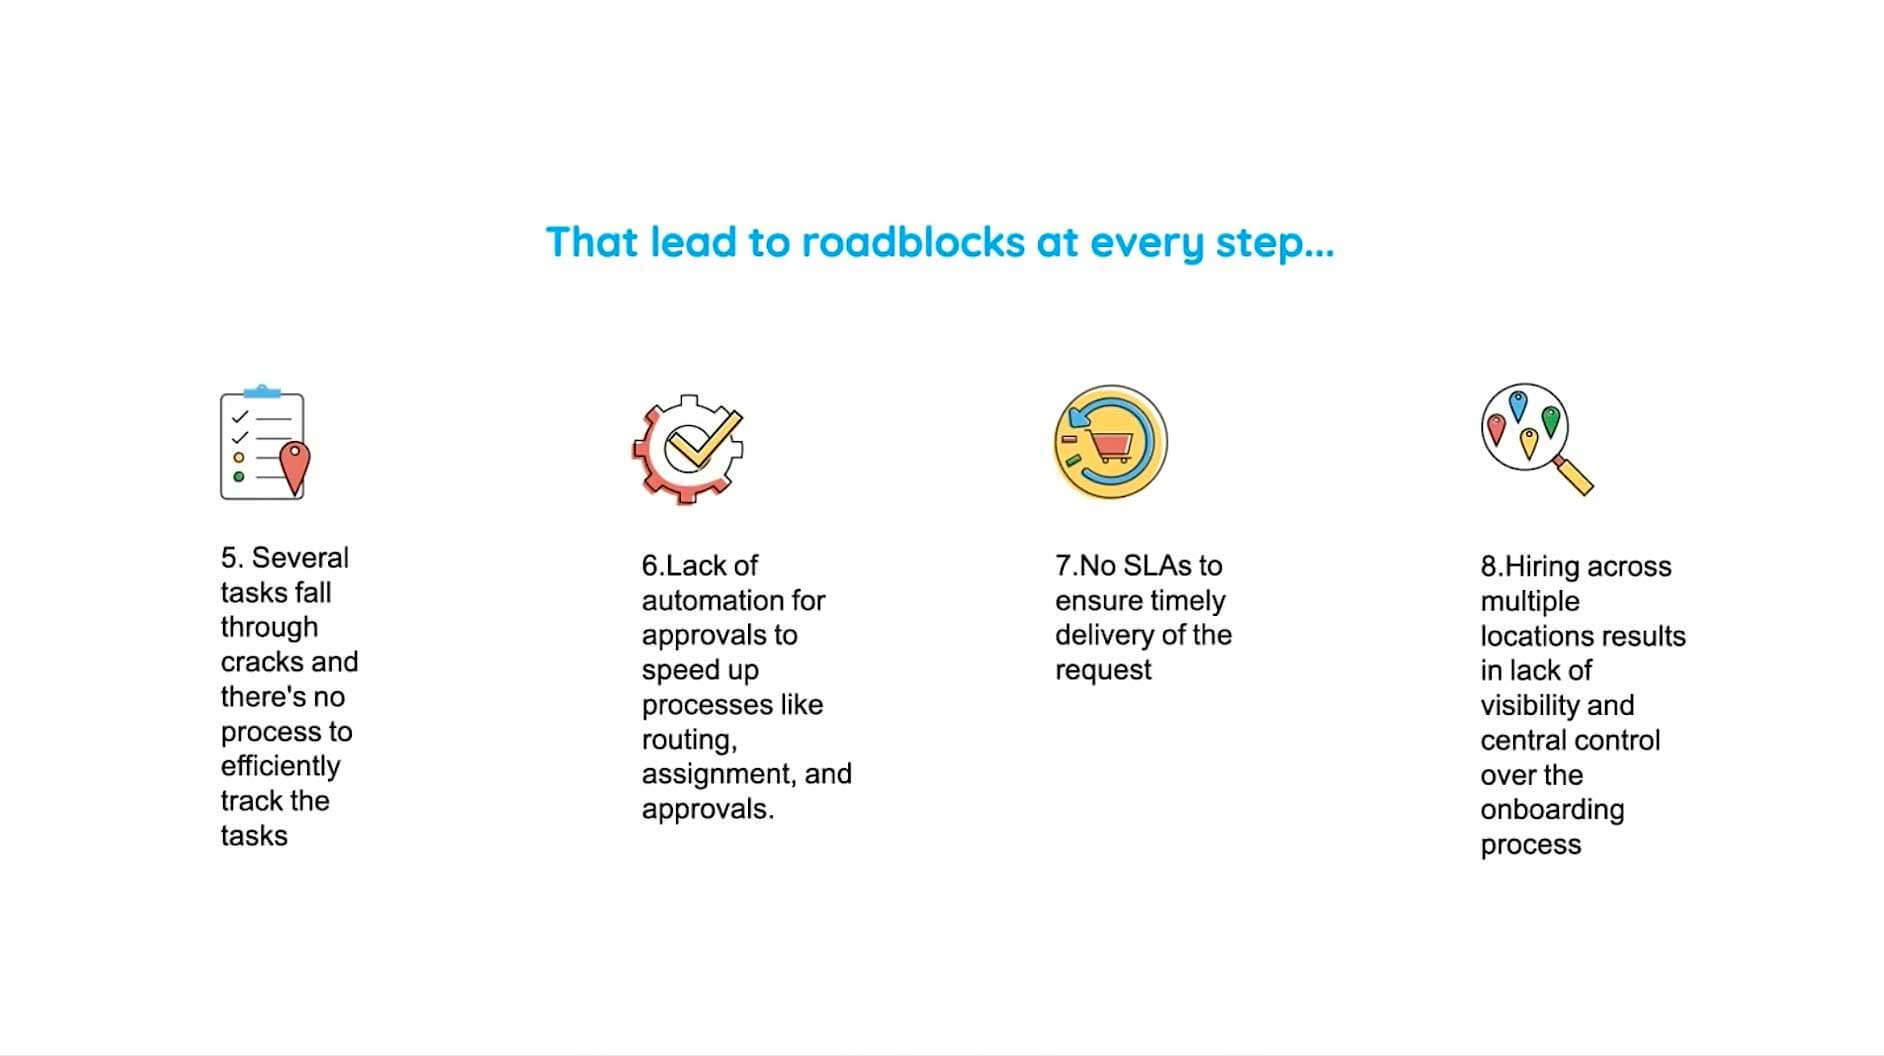
So this results in your service desk losing track of some tasks so that they fall through the cracks. And lack of automation for routine tasks such as approvals, routing,
assignment results in a lot of delays. And not having an SLA is a cardinal sin in my opinion because SLAs ensure that you establish the customers' expectations and meet them in time. So, all these roadblocks will result in a very unsatisfactory experience for your hiring managers, for your new joinees, and for your service desk productivity itself. So how do you overcome all these roadblocks?
For employee onboarding to function smoothly, how it should work
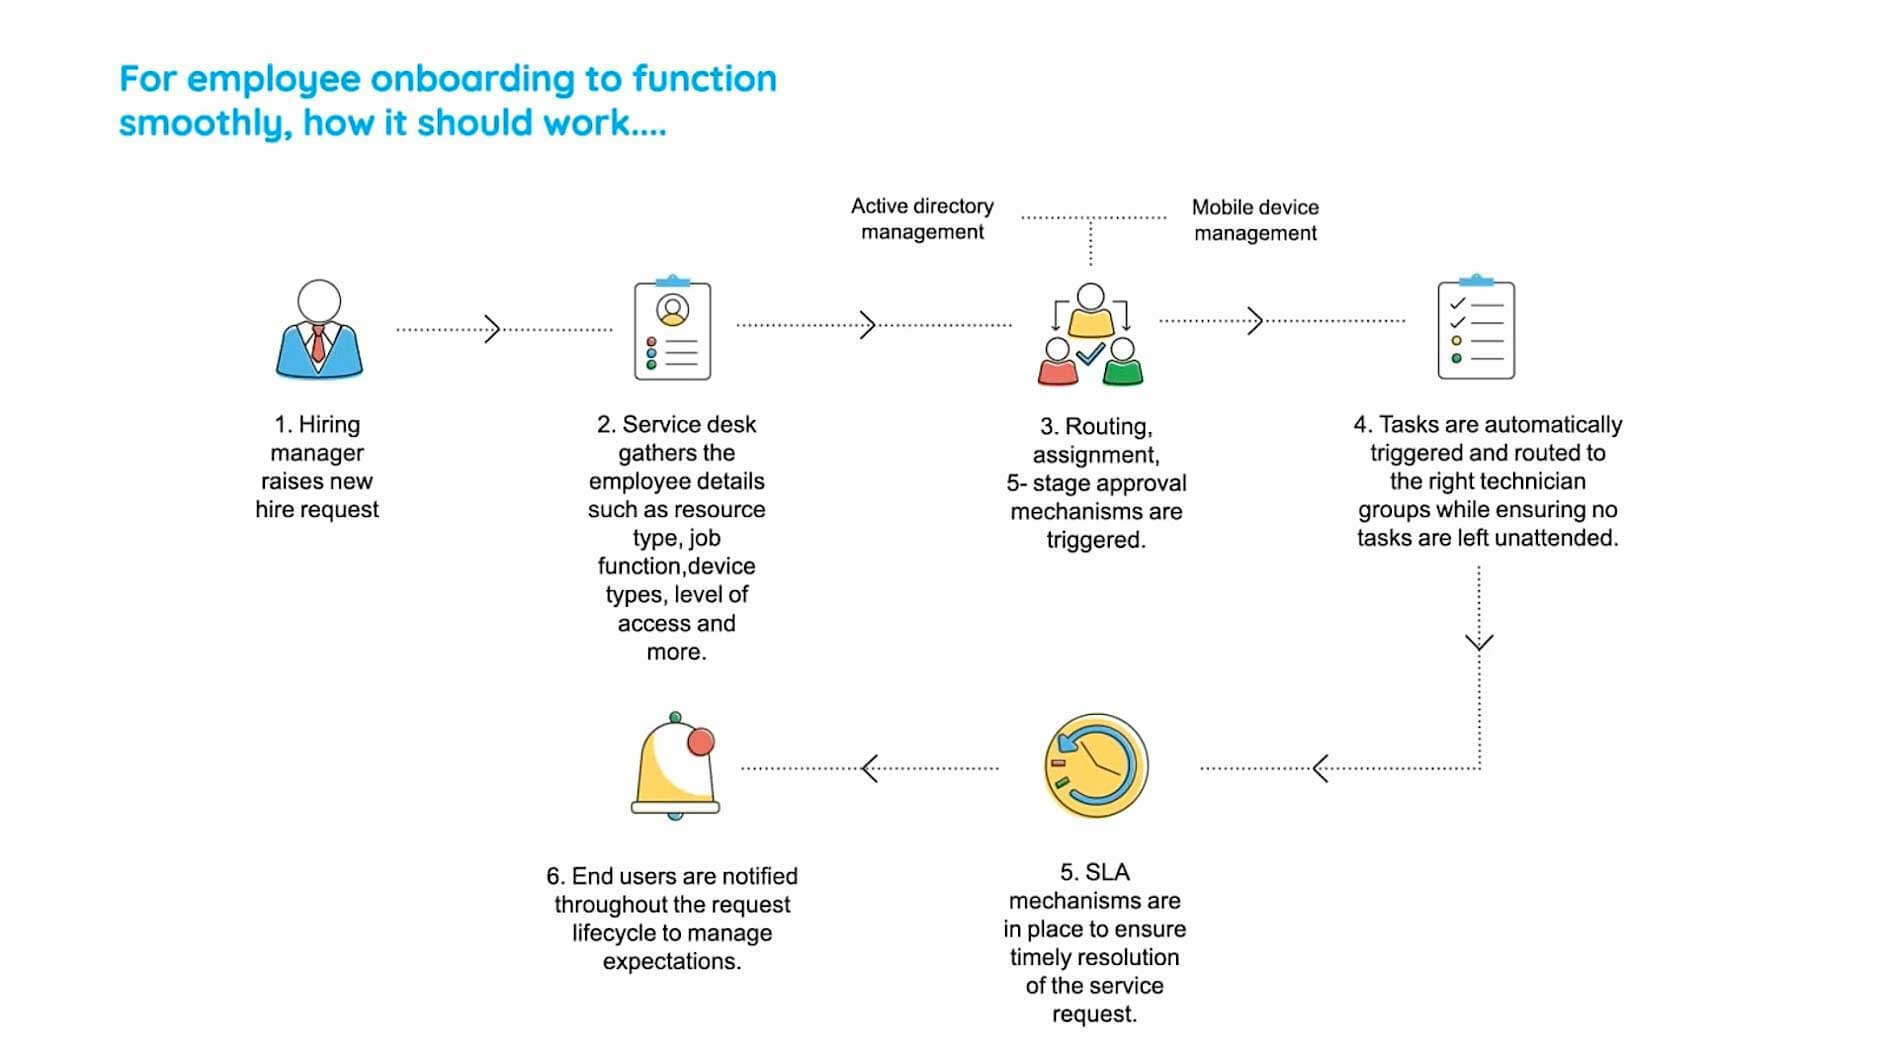
Here is a best practice framework that we follow here at Zoho. So, we have your hiring manager who raises a new hire request. The service desk then gathers just the essential details of the new journey's requirements. Then automation kicks in, a five-stage approval mechanism is triggered, following which the service request is routed to the right technician who performs various tasks on them. And throughout this entire process, you have the clock ticking in the background in the form of a watertight SLA.
So this is how you take your service request right from its initiation to its fulfillment, and this is in the service desk side of things. Throughout this entire process, you need to have your end-user in the loop by sending constant notifications about the progress of his or her service request.
So this ensures that they don't badger you with, help desk calls or create duplicate requests. So that's how the best practice works theoretically, and let's see how you can implement it in an ITSM tool with the right capabilities.
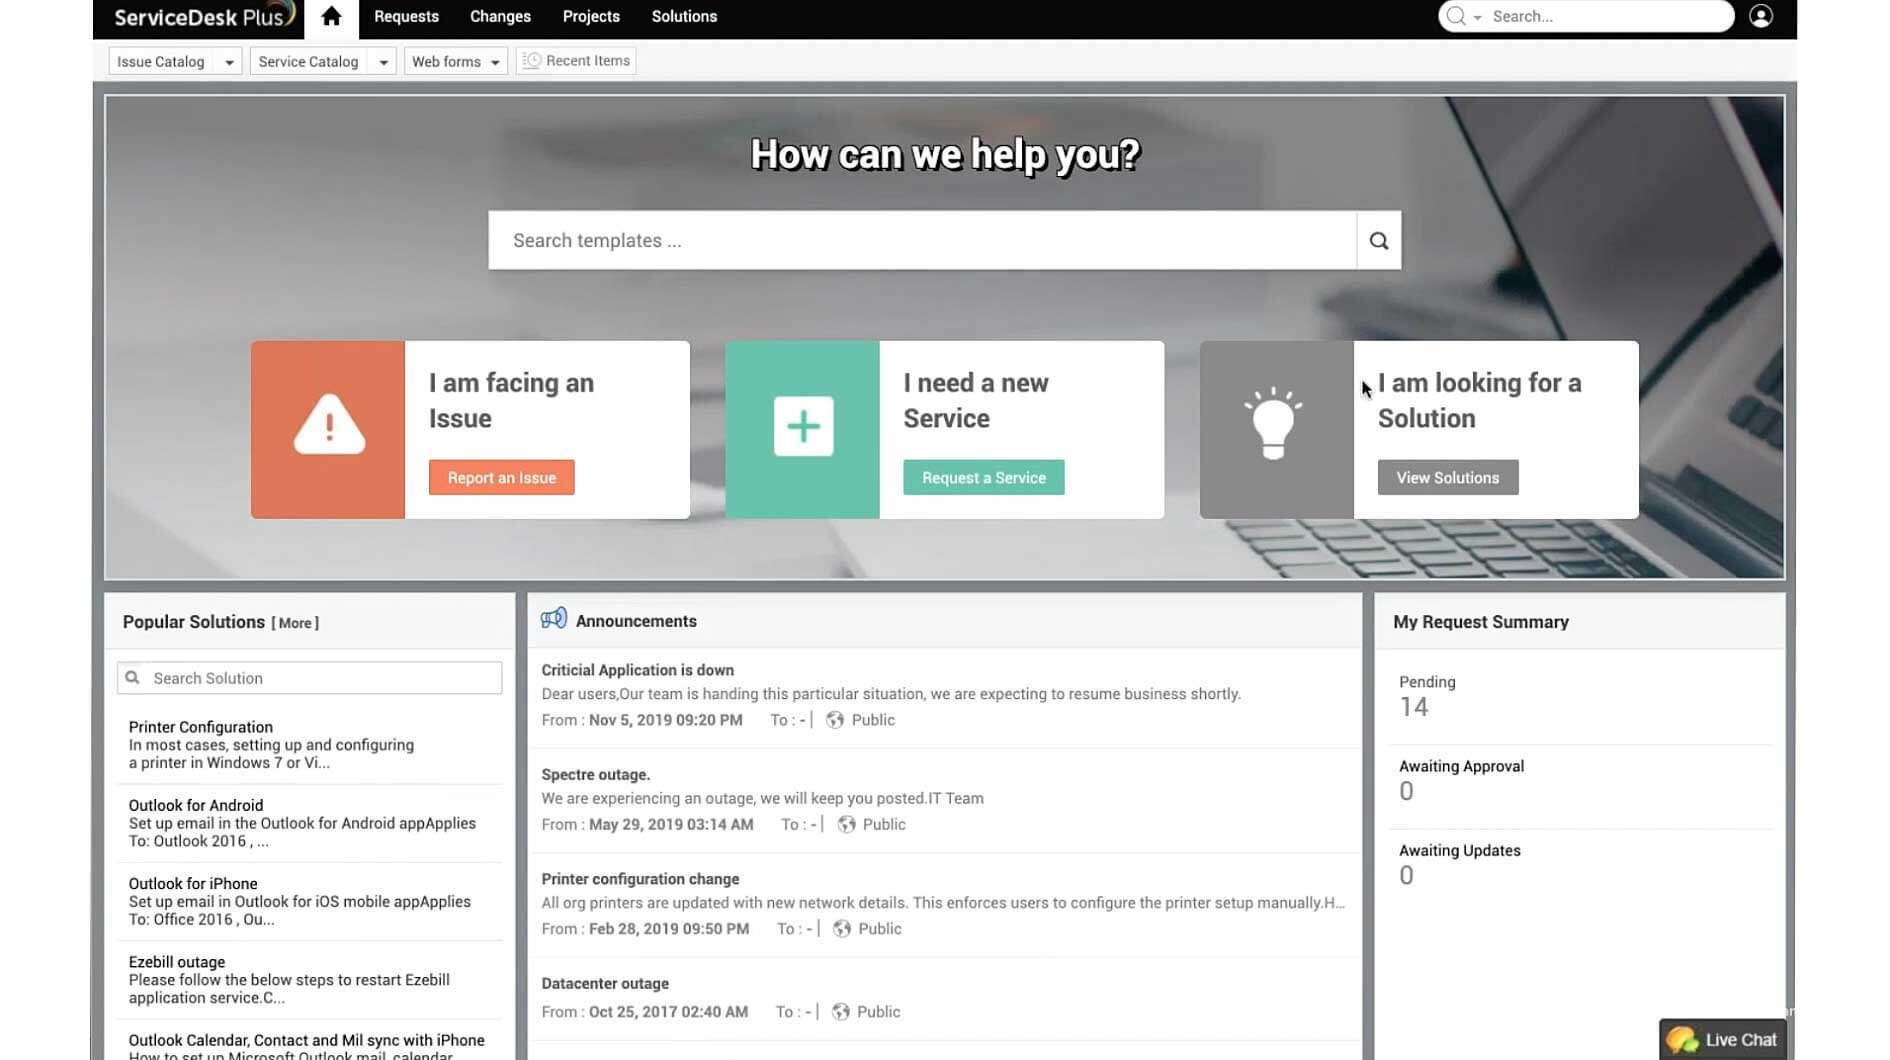
For this, we'll look at ManageEngine ServiceDesk Plus. What you're seeing on your screen right now is a self-service portal of the hiring manager. As you can see, the hiring manager could go ahead and report an issue, request for a new service, or browse existing solutions in the knowledgebase. So let's have the hiring manager request a new service.
So, as I click on request a service, the service catalog of the organization pops up. Let's select User Management and click on Single User Onboarding. So what you see in front of you is a very typical web form that you've seen in any organization including yours. Right at the top, we have the SLA, which sets the hiring manager's expectations. Right at the beginning, we have some basic details like name, site, description, and scrolling down, we see there's just one field left. Now, that is really surprising because we talked about how there were a lot of requirements with respect to the new journey, and they're just one field to capture them all.
So, let's see what's going on over here. I go ahead and select this field as permanent. So as soon as I click on permanent, a new set of fields pop up.
So this is what we call a dynamic form. Dynamic forms ensure that your end-users don't have to fill out long and lengthy forms, and it also helps your service desk to capture the right and concise information pertaining to the service request itself. So, as you can see, once I select a role such as a regional field manager, another different set of fields pop up.
So, now that we've seen how the web form looks like in the hiring manager's portal, let's go ahead and see how the technician views it in his or her portal. So this is the technician's portal of the organization, and let's go to Service Catalog over here, click on User Management, and select the same Single User Onboarding.
So as you can see, this is the same web form that the end-user or the hiring manager viewed but with noticeable differences. As you can see, the total cost is displayed over here, and a lot of fields are visible now, which previously weren't, such as approvals, group, etc.
Scrolling down, we see that there are resources, a breakdown of cost, and most importantly, the selection of tasks. So, you see that the technician has the independence or the ability to pick and select those tasks that need to be performed for a particular service request. So how do you do this? How do you create such customized forms separately for the hiring manager and the technician for the same service? Let's go ahead and find out.
So I click on Admin Module over here, and at your right, you'll be able to see the Service Catalog. So, this is where we create the service templates. So, as you can see, all the service offerings are categorized neatly. Let me scroll over to User Management and click on Single User Onboarding template. So, as you can see, this is where we construct our web form. So we have this drag-and-drop canvas where you can just drag, the fields which you would require on your template, and you can arrange them in a very visually appealing manner. And you can even add new fields if you'd want to with different data types.
And as you can see, there are various sections ordered neatly, and scrolling down, we see a section named as Resource Info where you can add questions, which you'd want to ask your hiring manager with respect to your new joinees requirements. And then again, we saw the cost details. You can also associate various support groups to specific service templates. And finally, we see that you can expose a creative template to just the right group of users.
For example, you might have an HR-specific template, which could be accessible just to the HR team. As you can see, this template takes everything into consideration and helps you to design a web form.
And finally, let's make the webform dynamic. So as you can see, we have the field and form rules feature, which helps you to perform condition-based actions when the hiring manager is filling up the web form.

So, let's go back to our best practice workflow and see where we are. So as you can see, we have the hiring manager raising a new hire request and the service desk gathering the employee details through customized dynamic web forms. Now, all that is left is to configure the workflow, which this service request would progress through. So that could be done from within the template in a single tab.
So let me click on workflow over here, and as you can see, this tab contains the approval mechanism, the SLA, as well as the different task which need to be performed for the fulfillment. You can add up to five stages of approvals in ServiceDesk Plus, and these approvals could either be named approvals or role-based approvals.
Let's go ahead. Now, now that we have configured our approval process, let's go ahead and add a new SLA. So, you create your watertight SLAs over here by defining or mandating the time limits for response and fulfillment. And in case of any violation of these mandated time limits, you could go ahead and configure your escalation mechanisms.
Now, after creating an approval mechanism and configuring your SLA, you need to go ahead and define the various tasks which need to be performed for the fulfillment of this service request. So you could add different tasks over here and assign them to different support groups or particular technicians and ensure that they are performed in the right order. So, we saw how there were a lot of inter dependencies involved. So this is where you take them into consideration and ensure that they are effectively tracked and none of the tasks fall through the cracks so that we leverage the dependencies feature.
So, when you configure the task dependencies, you ensure that they are executed in just the right order. For example, these two tasks such as the provision of external accessories and installation of software takes place only after the required hardware is procured. Only after all these tasks are completed, the induction process for the new joinees will take place. So this is how you ensure that none of the tasks fall through the cracks and the inter dependencies are taken care of.
So, now we have created the workflow, define the SLA, and ensure that a service template is in action. Now, let's go back to our best practice workflow. As you can see, we went through each and every step such as routing, the five-stage approval mechanism, the SLA, and the task. Now, all that is left is to see the service request in action. This is the service request which has been created, and as you can see, once that's created, all the details of the new journey are gathered, represented in a very neat format. As you can see in front of you, the service cost is displayed. Scrolling further down, we have the conversations tab.
So, from here, you will be able to initiate a conversation with your hiring manager in case of any clarifications. So, as you can see, this is done from within the service ticket itself, and further down, we have the ticket specific properties such as classification, categorization, and assignment.
So, let me quickly navigate through all these different tabs present in the service request. So, we saw a lot about tasks. So all of the tasks configured in the template are carried over here, and if your technicians are performing work on the service request, they could record the effort and time they spent through the workloads.
So this is how the approvals will be reflected on a service request itself. As you can see, there are different stages of approvals, which are both named as well as role-based. The time analysis helps you to keep track of essential metrics related to your service request. And finally, the History tab provides you a detailed audit on all the actions performed on your service request, and all those actions are also timestamped.
So, let me again go back to our best practice workflow. As you can see, we followed each and every step took the service request right from its initiation to its fulfillment. Now, there's just one step remaining, which is to notify the end-users regarding the progress made on the service request.
With this, let's leverage automation. Notification rules, which is over here, helps you to send automated notifications based on the actions performed on service requests. As you can see, you could choose to send an acknowledgment to your requester by email when a new request is received. Similarly, whenever a technician is assigned, when it is closed, you can choose to send similar notifications. And all of these notification templates are customizable so that you would be able to add ticket-specific information. So, that is how easy it is to onboard 8,000 employees in a very short span of time using a best practice workflow.
So, now we've created a strategy, and we've seen how an ITSM platform comes in so that we could implement the best practice workflow.
KPIs that matter
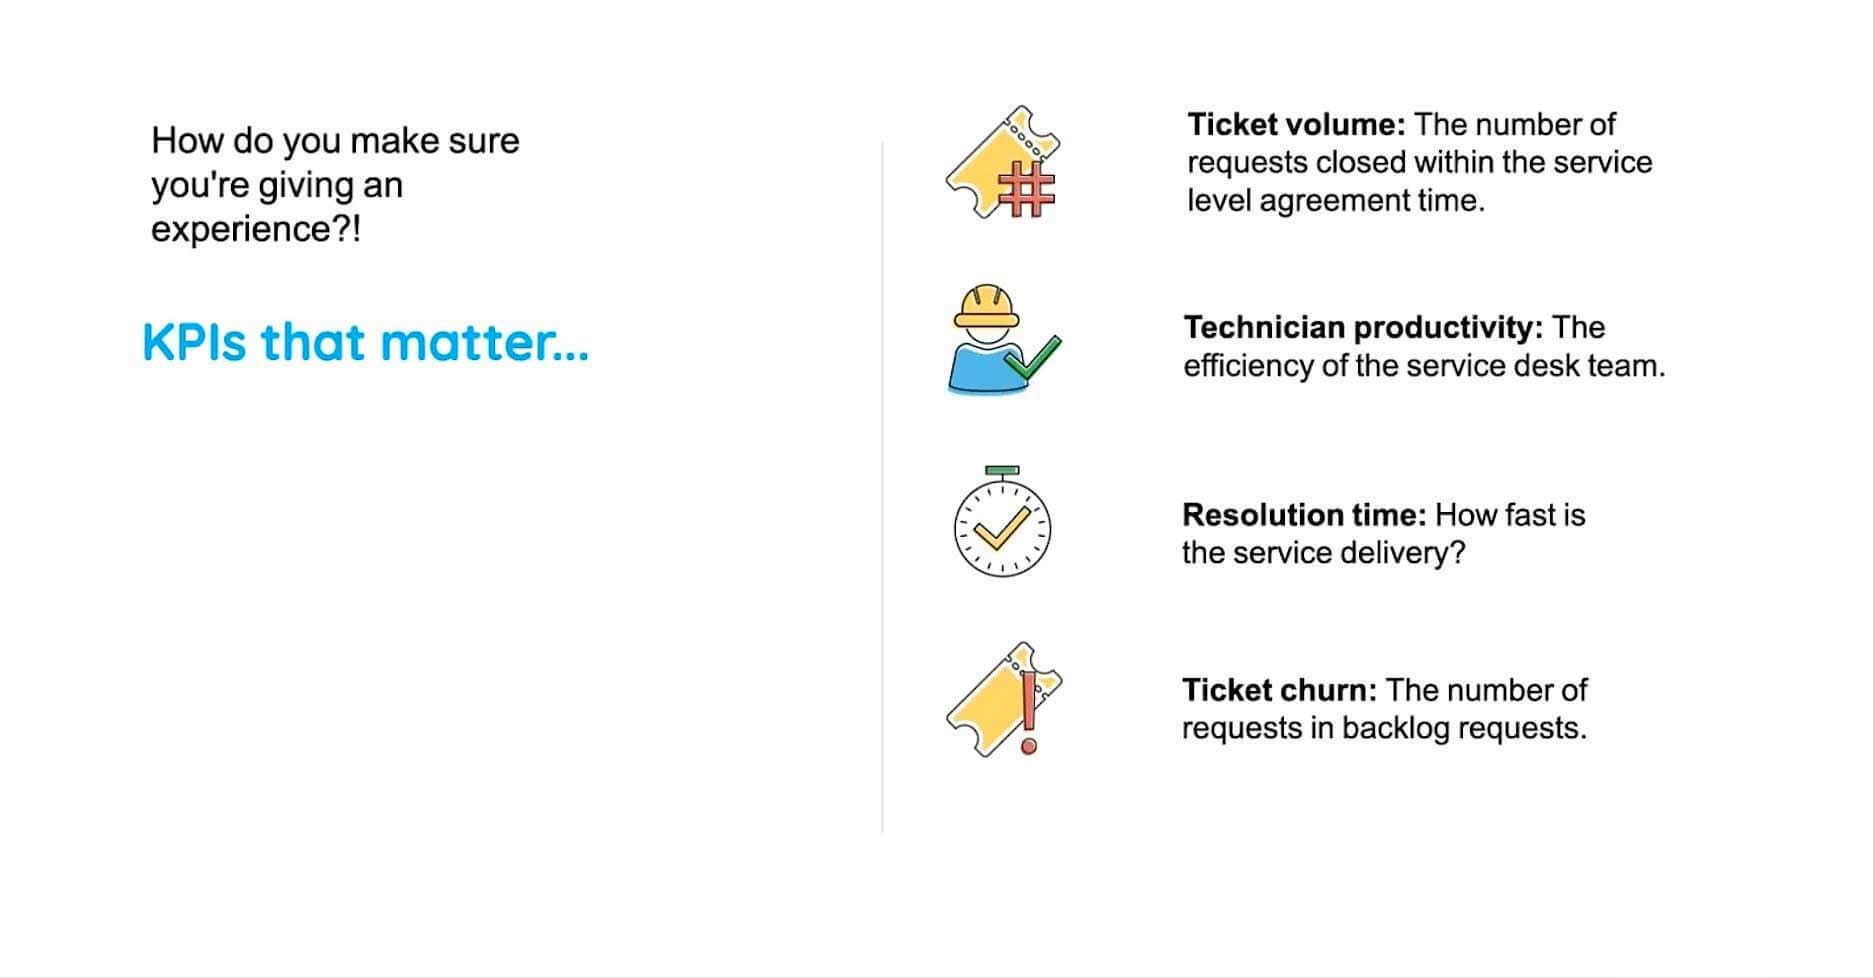
Now, all that is left is continual service improvement. For that, we'll make use of some of these KPIs. This is not an exhaustive list, but these are some of the major KPIs that we feel you should keep tabs on. So, it starts with ticket volume, you should measure your technician's productivity, your resolution time, and the number of requests in the backlog. So that could be measured using the reporting module in ServiceDesk Plus.
You have over 150-plus pre-configured reports which help you to keep tabs on different kinds of metrics, and if that's not enough, you could go ahead and create your own custom reports and schedule them and email them to specific stakeholders. Apart from that, you have our graphical dashboards, which present information in real-time that helps you to keep track of how well your service desk is performing. So, that brings us to the end of our first scenario for today.

