Configuring OAuth with Google
Follow the below steps to configure OAuth with Google
Click on NEW PROJECT, to create a new project.

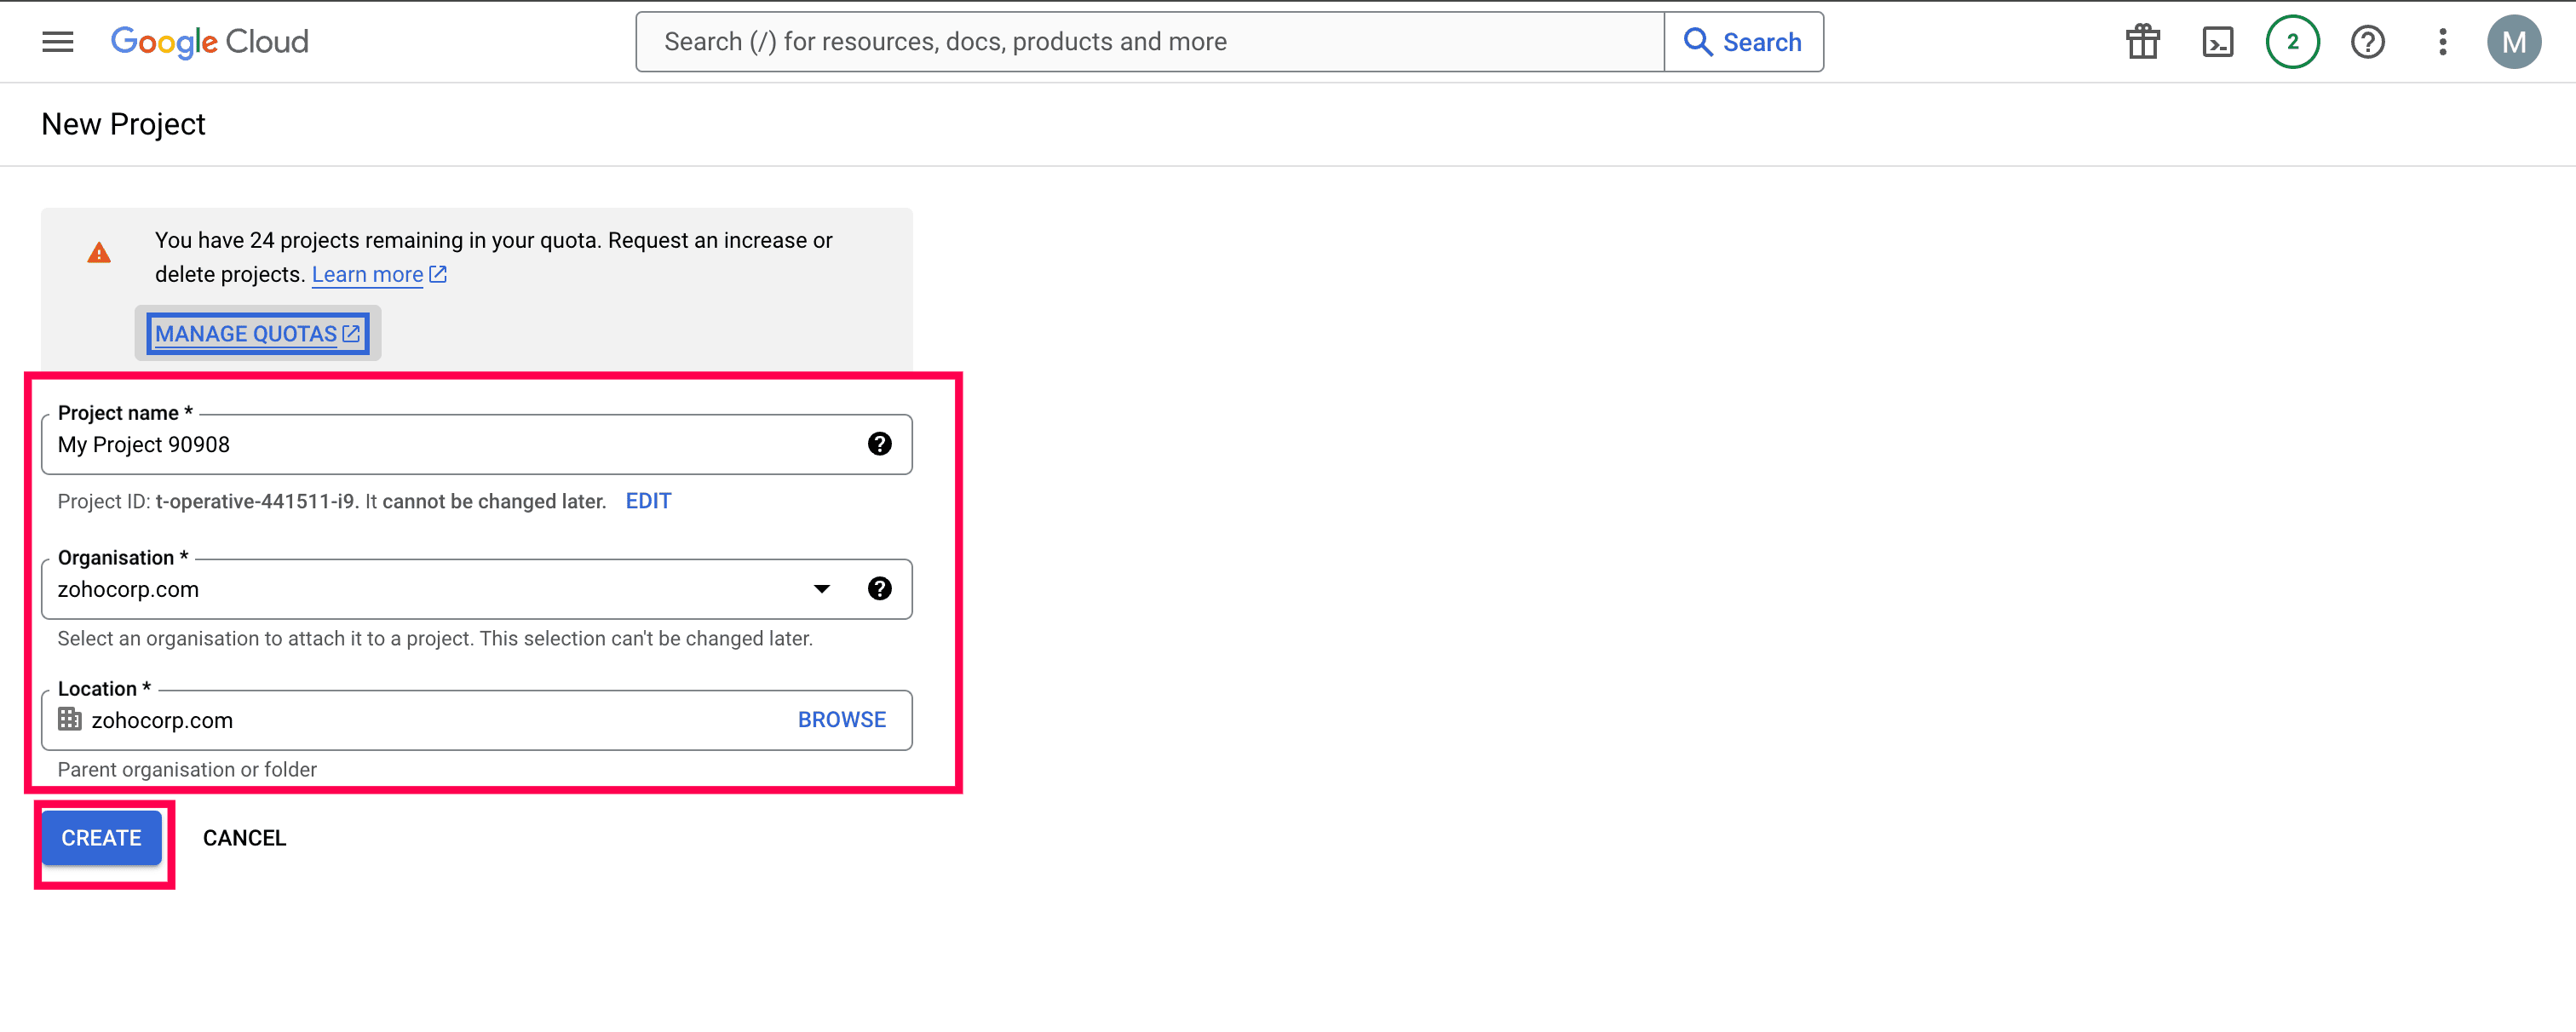
Assign a name to your project, ensuring it is descriptive and clearly identifies the project's purpose. This will make it easier to differentiate it from other projects in your account. Next, specify the organization to which the project will be linked and select the parent organization or folder under which the project will be created. Once all the details are entered, click Create. You will then be redirected to the new project's home page.
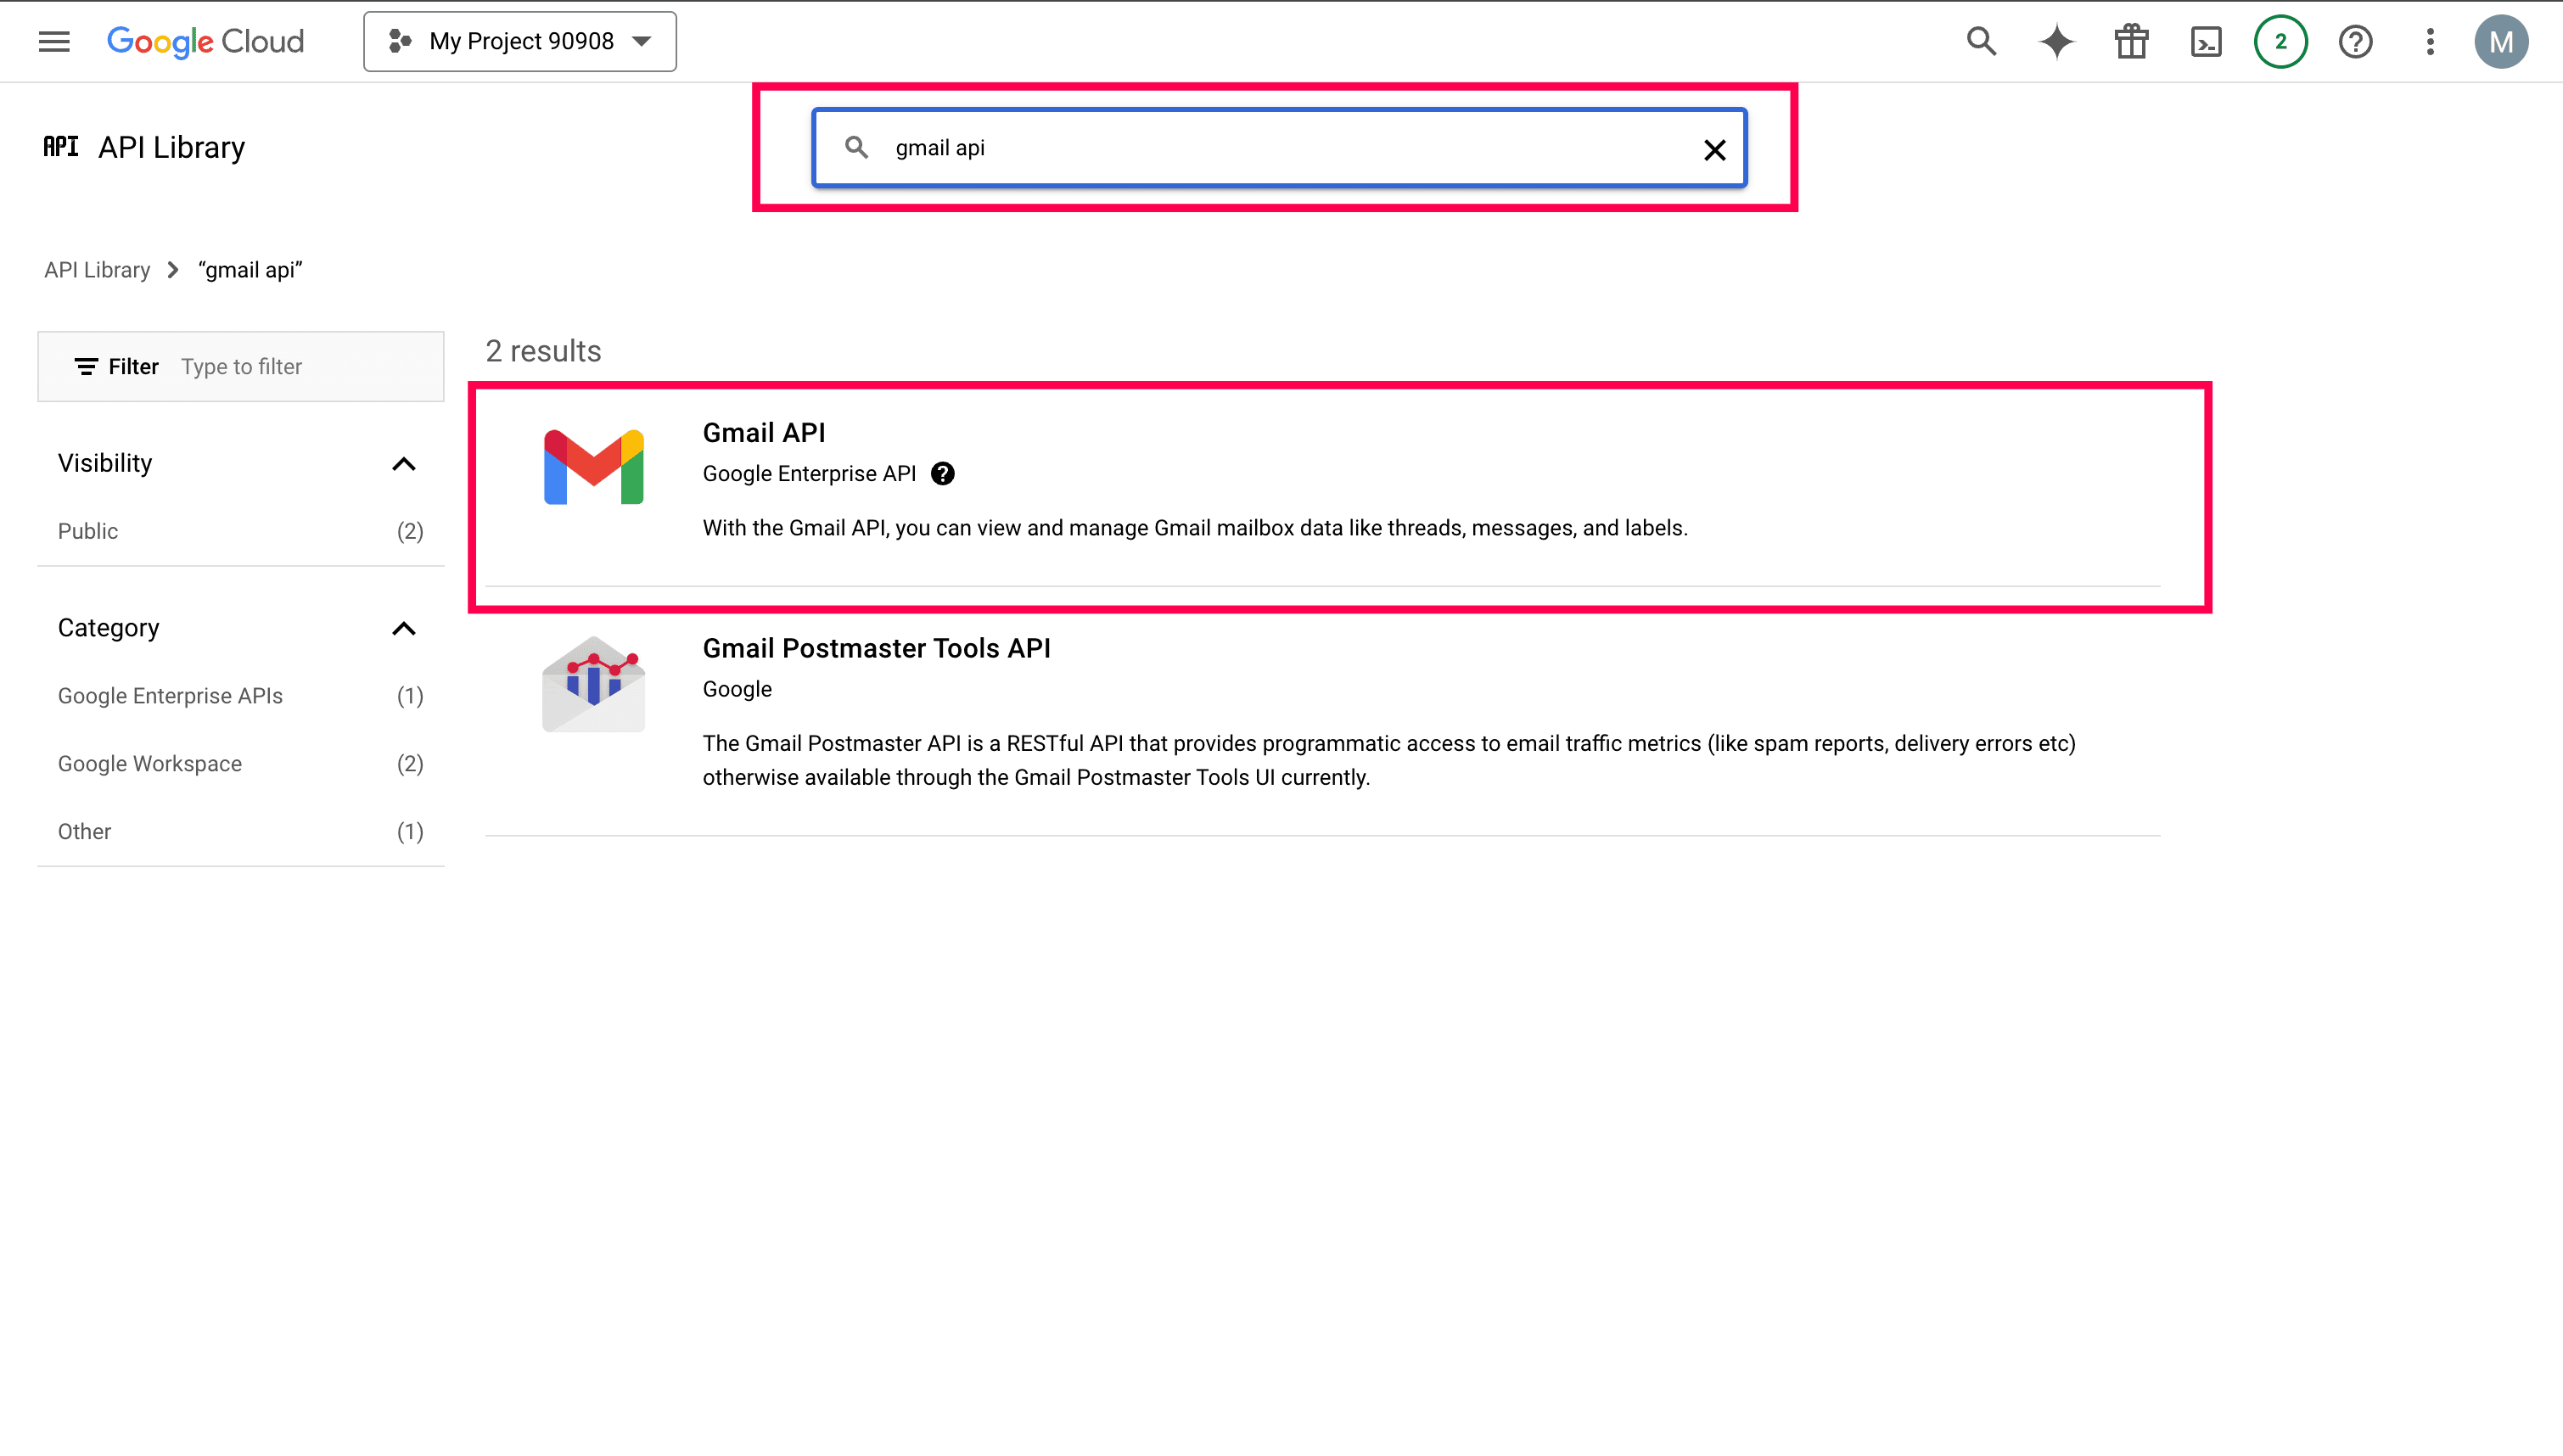
Now, select the Library menu from the left menu bar. The API Library page appears on the screen. Use the search bar to search for the required Gmail API in Google's API Library. Click on the desired API/service that appears in the search results.
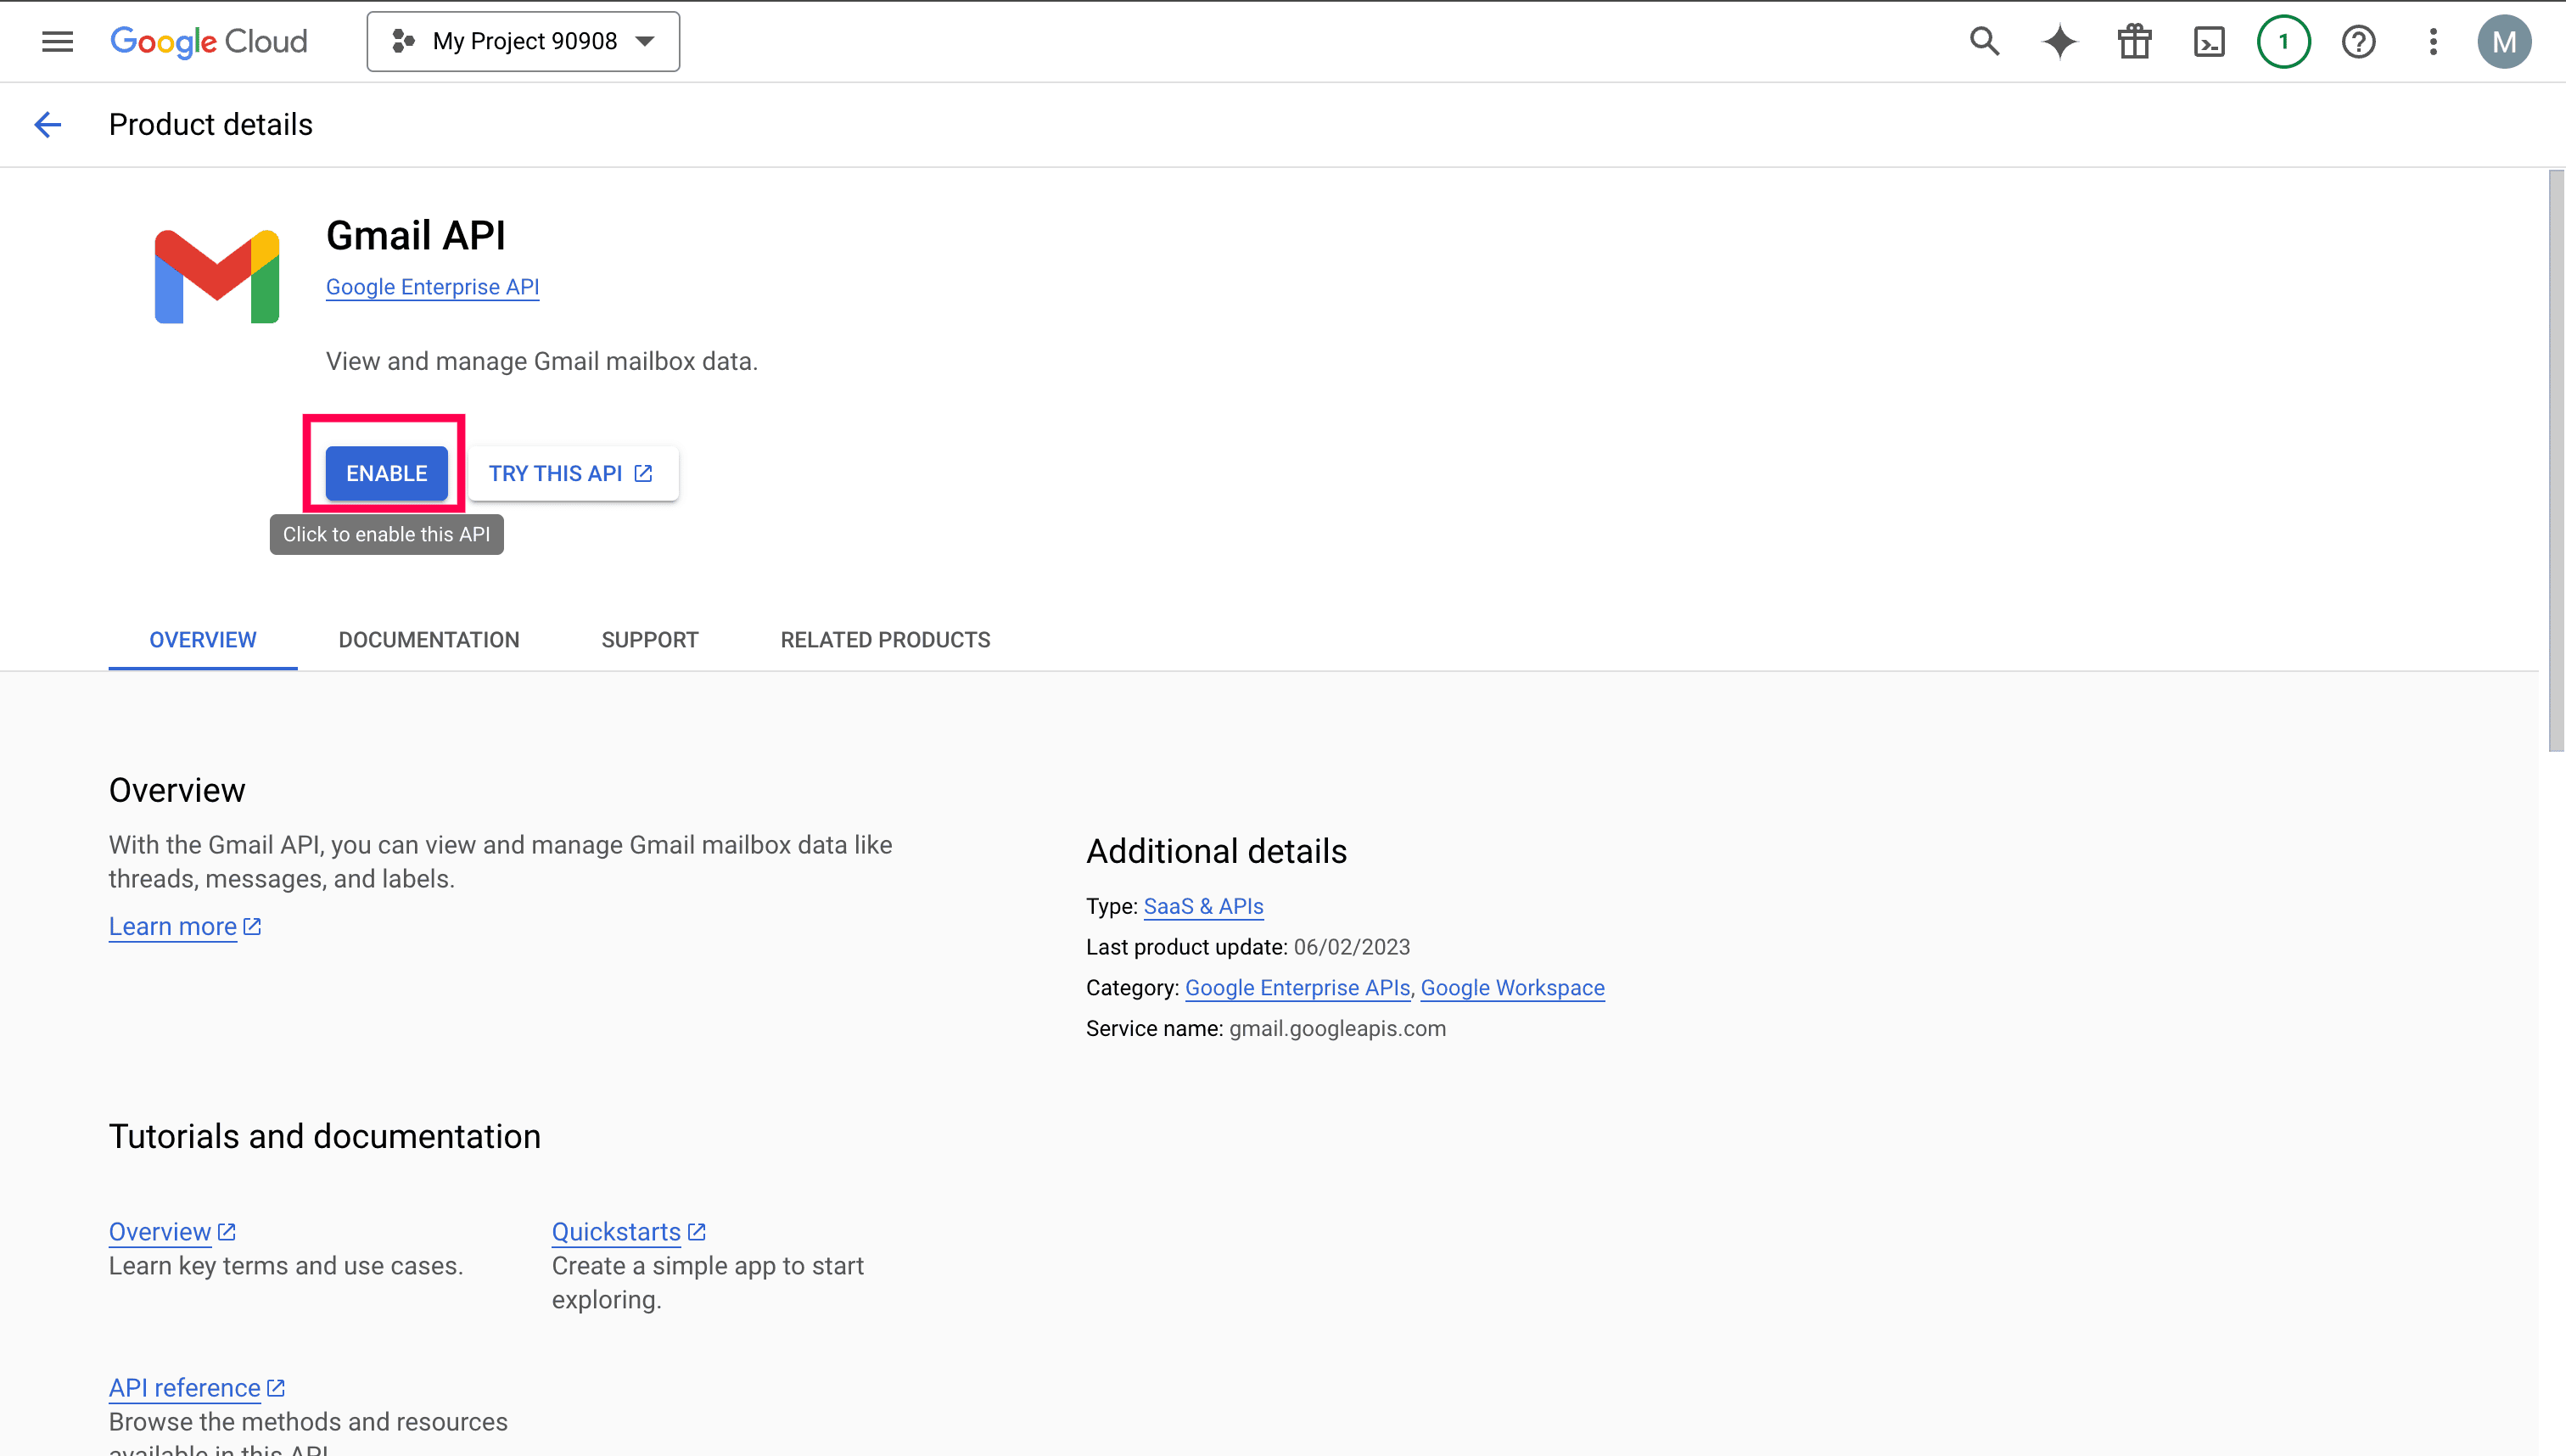
Once the API details page opens, click the Enable button to activate the Gmail API/service.
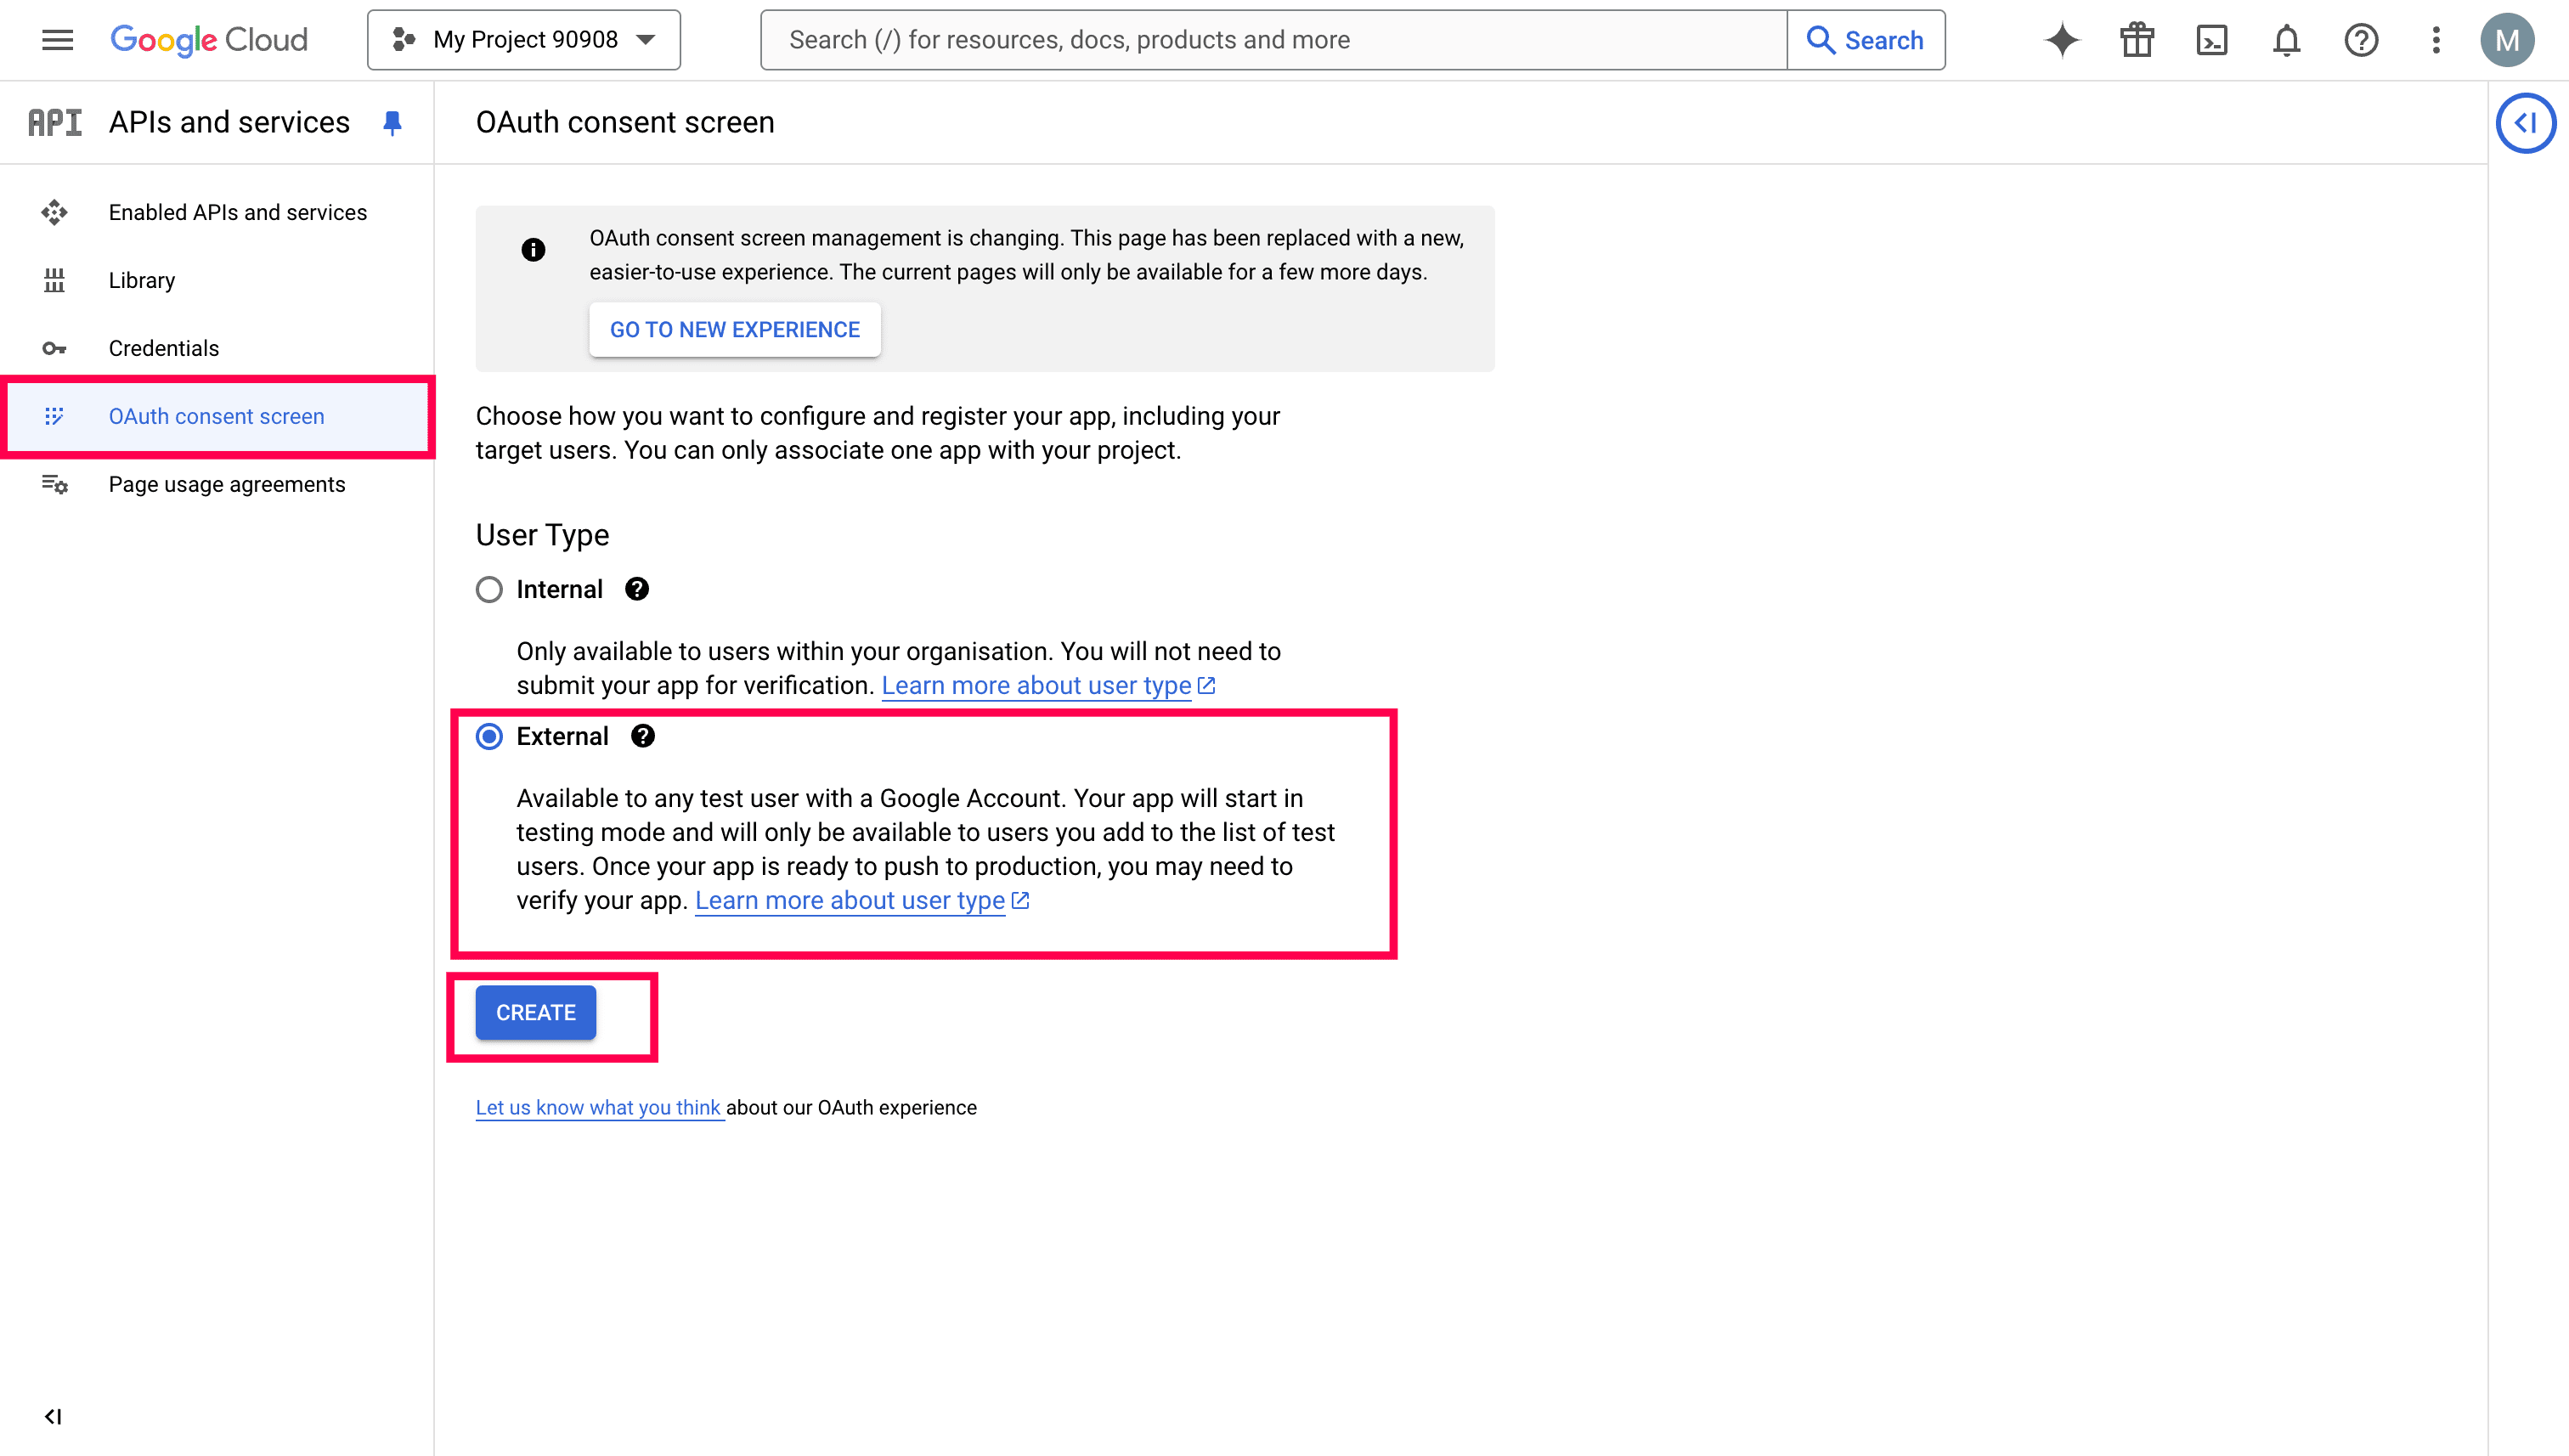
Next, select the OAuth consent screen menu. On the page that appears, choose User Type as External and click Create to create the application.
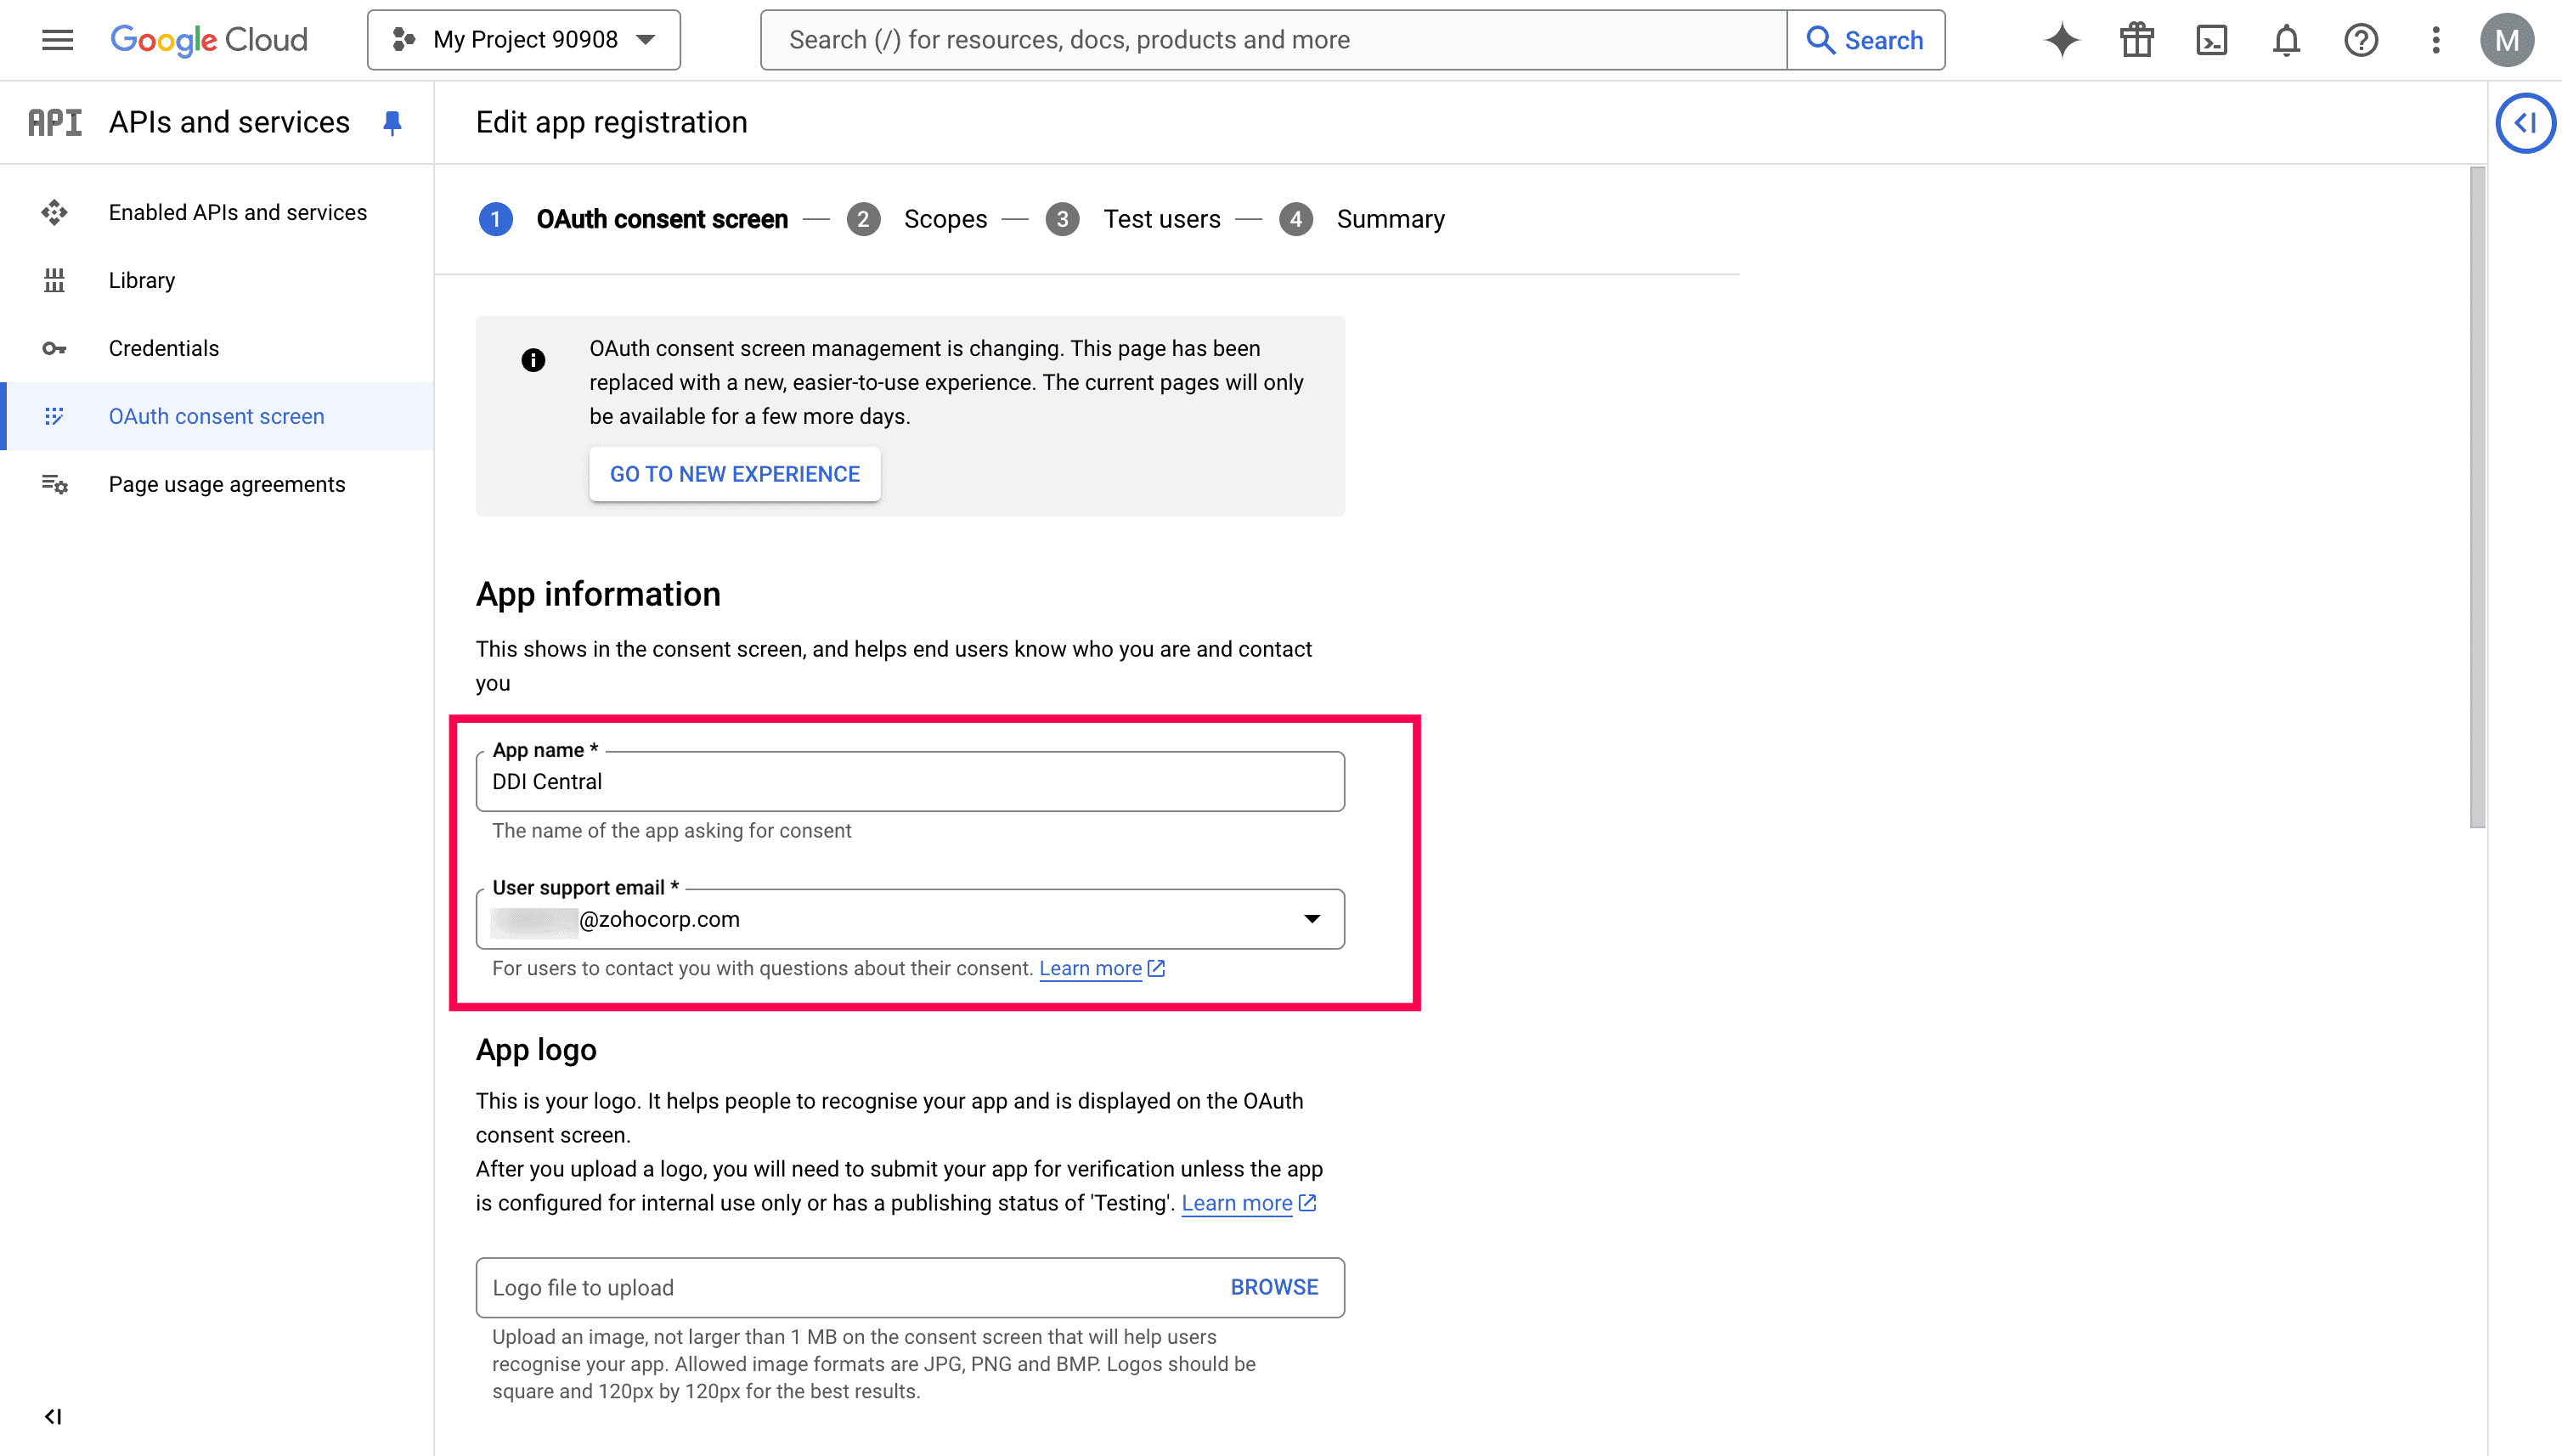
Once the app is created, it redirects to the Edit App Registration page, where you provide the app information, including the App Name, User Support Email, and Developer contact information (mandatory fields), along with the other required details. After completing the necessary fields, click Save and Continue.
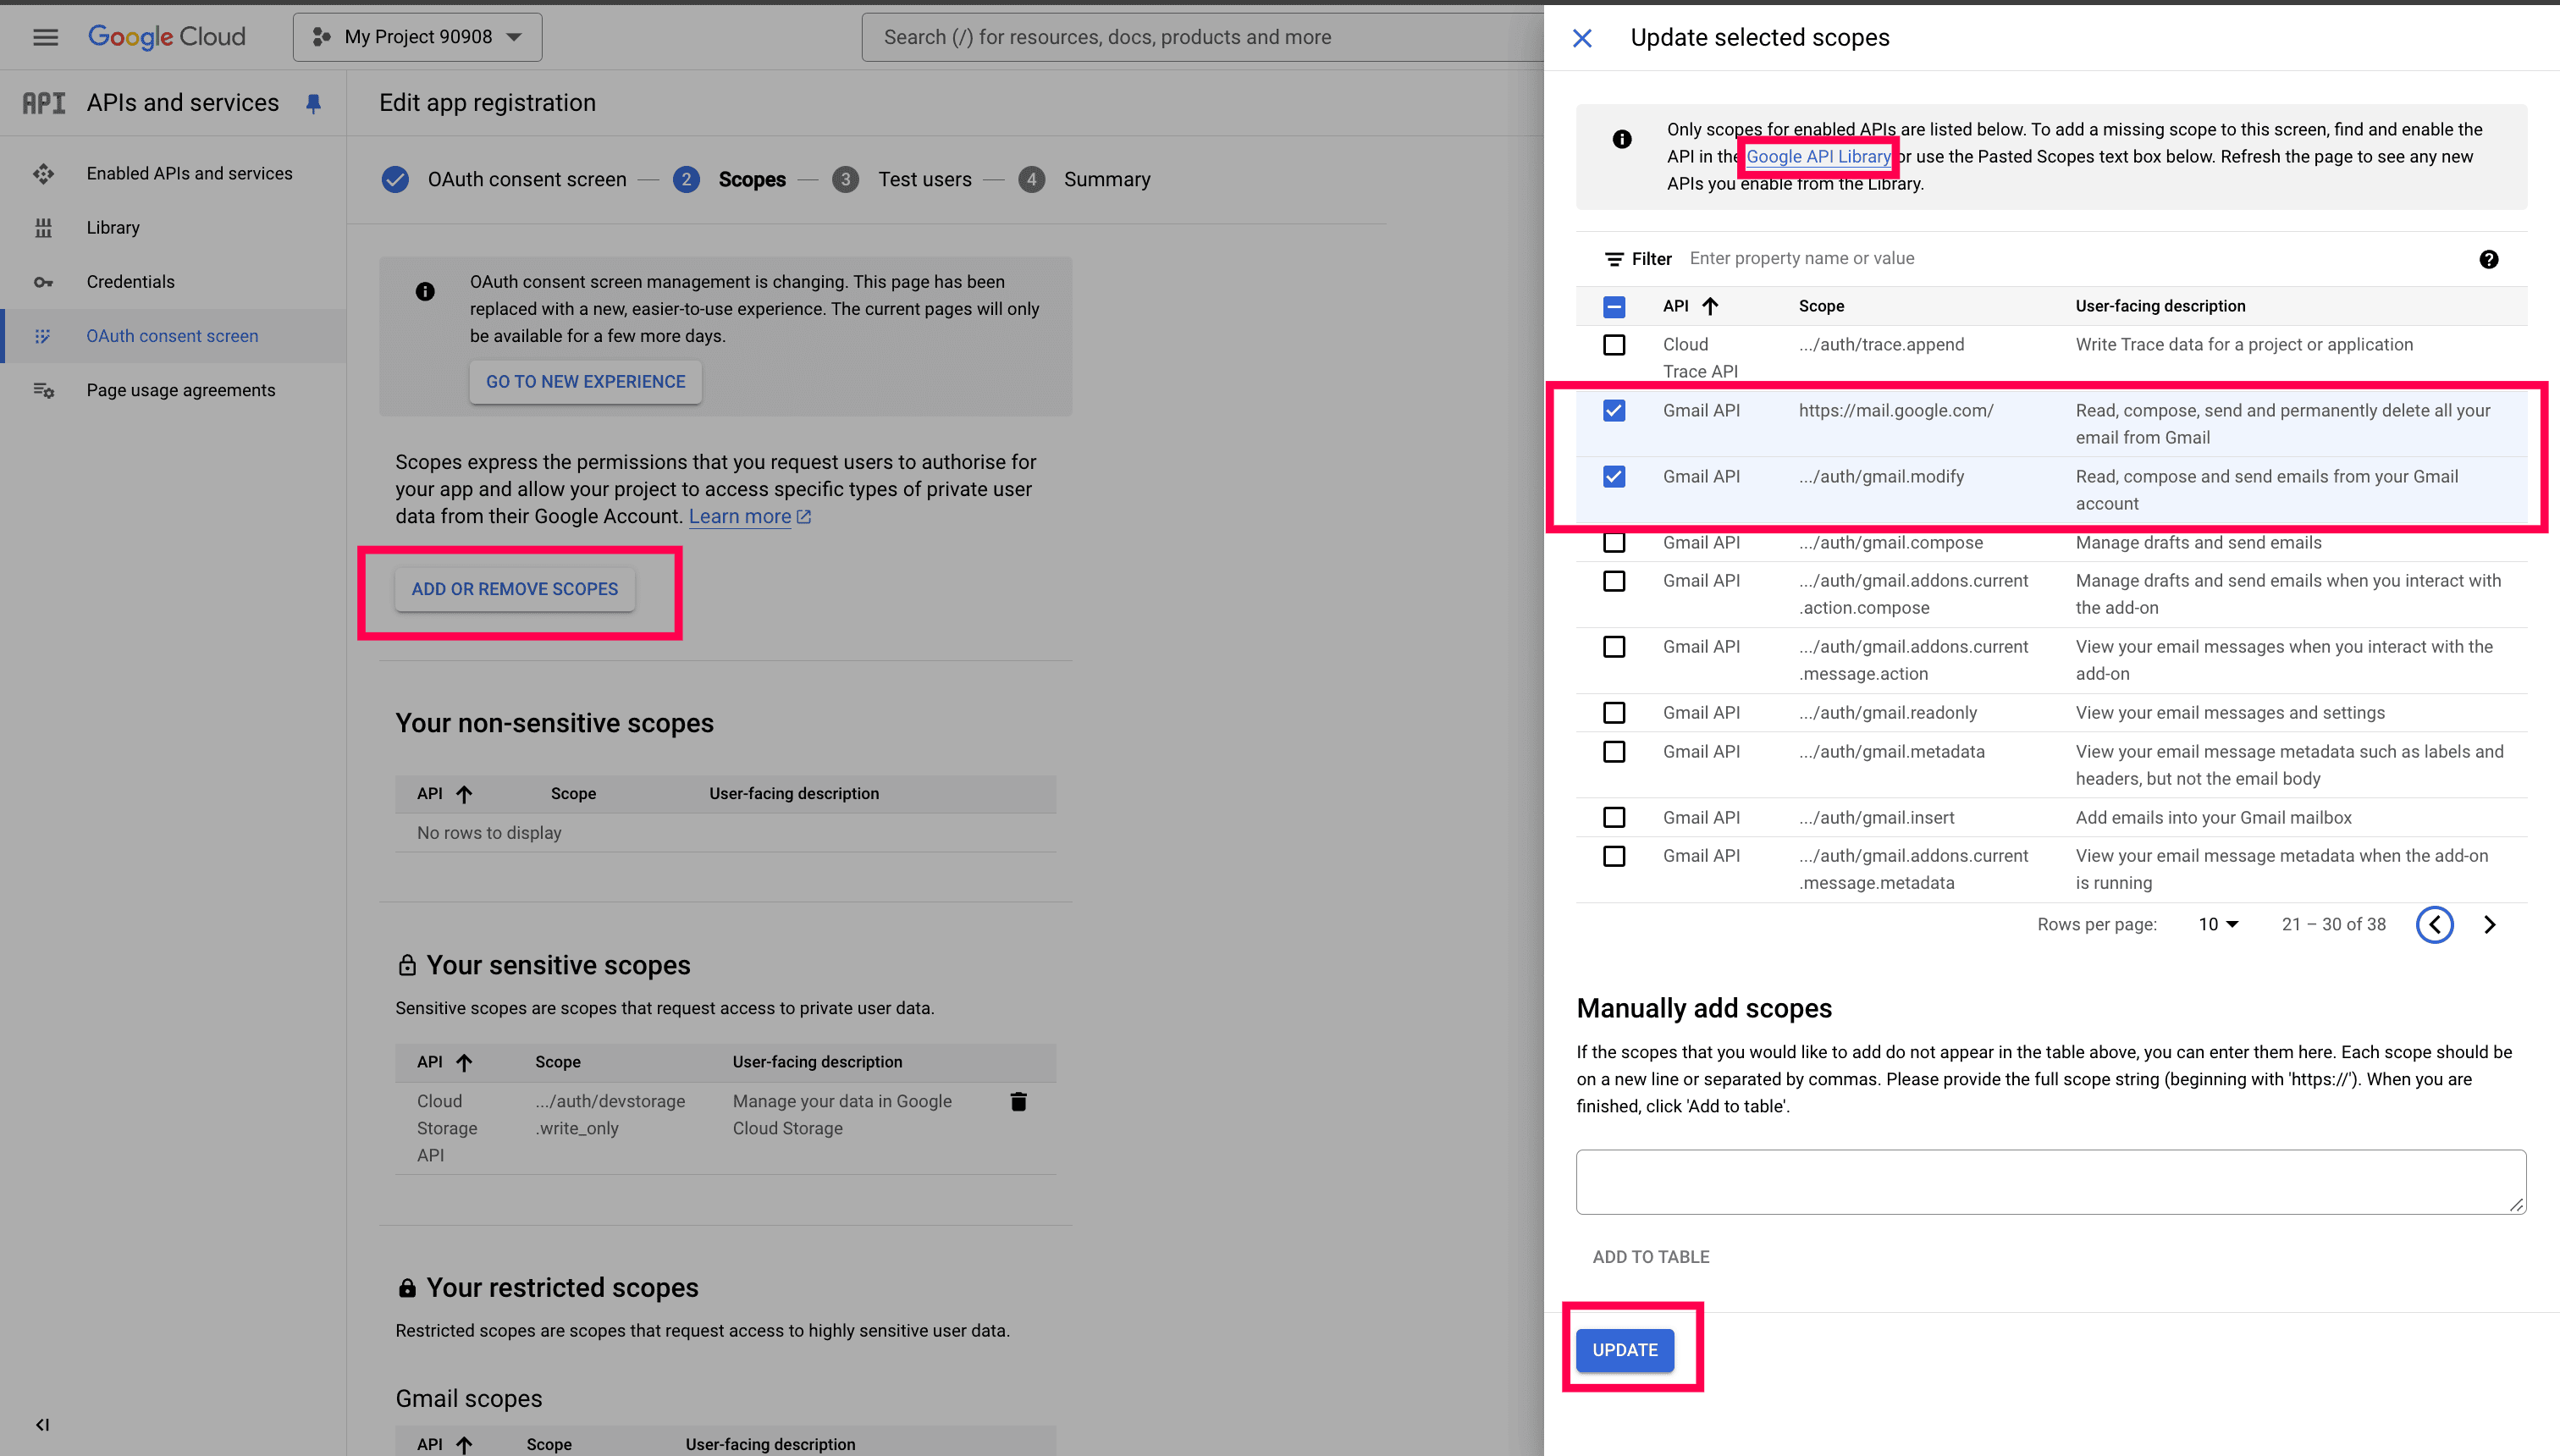
Next, the Scope page appears on the screen. To configure the required scopes, click Add or Remove Scopes. If a specific scope is not available in the list, navigate to the Library, search for the specific API, enable it, and then try adding the scope again. While adding scope, it is important to add and use the scope "https://mail.google.com" under Gmail API. The recommended Gmail scopes are highlighted in the image below—ensure they are added. Once all the required scopes are added, click Update, and then click Save and Continue to proceed to the next step in configuring the app.
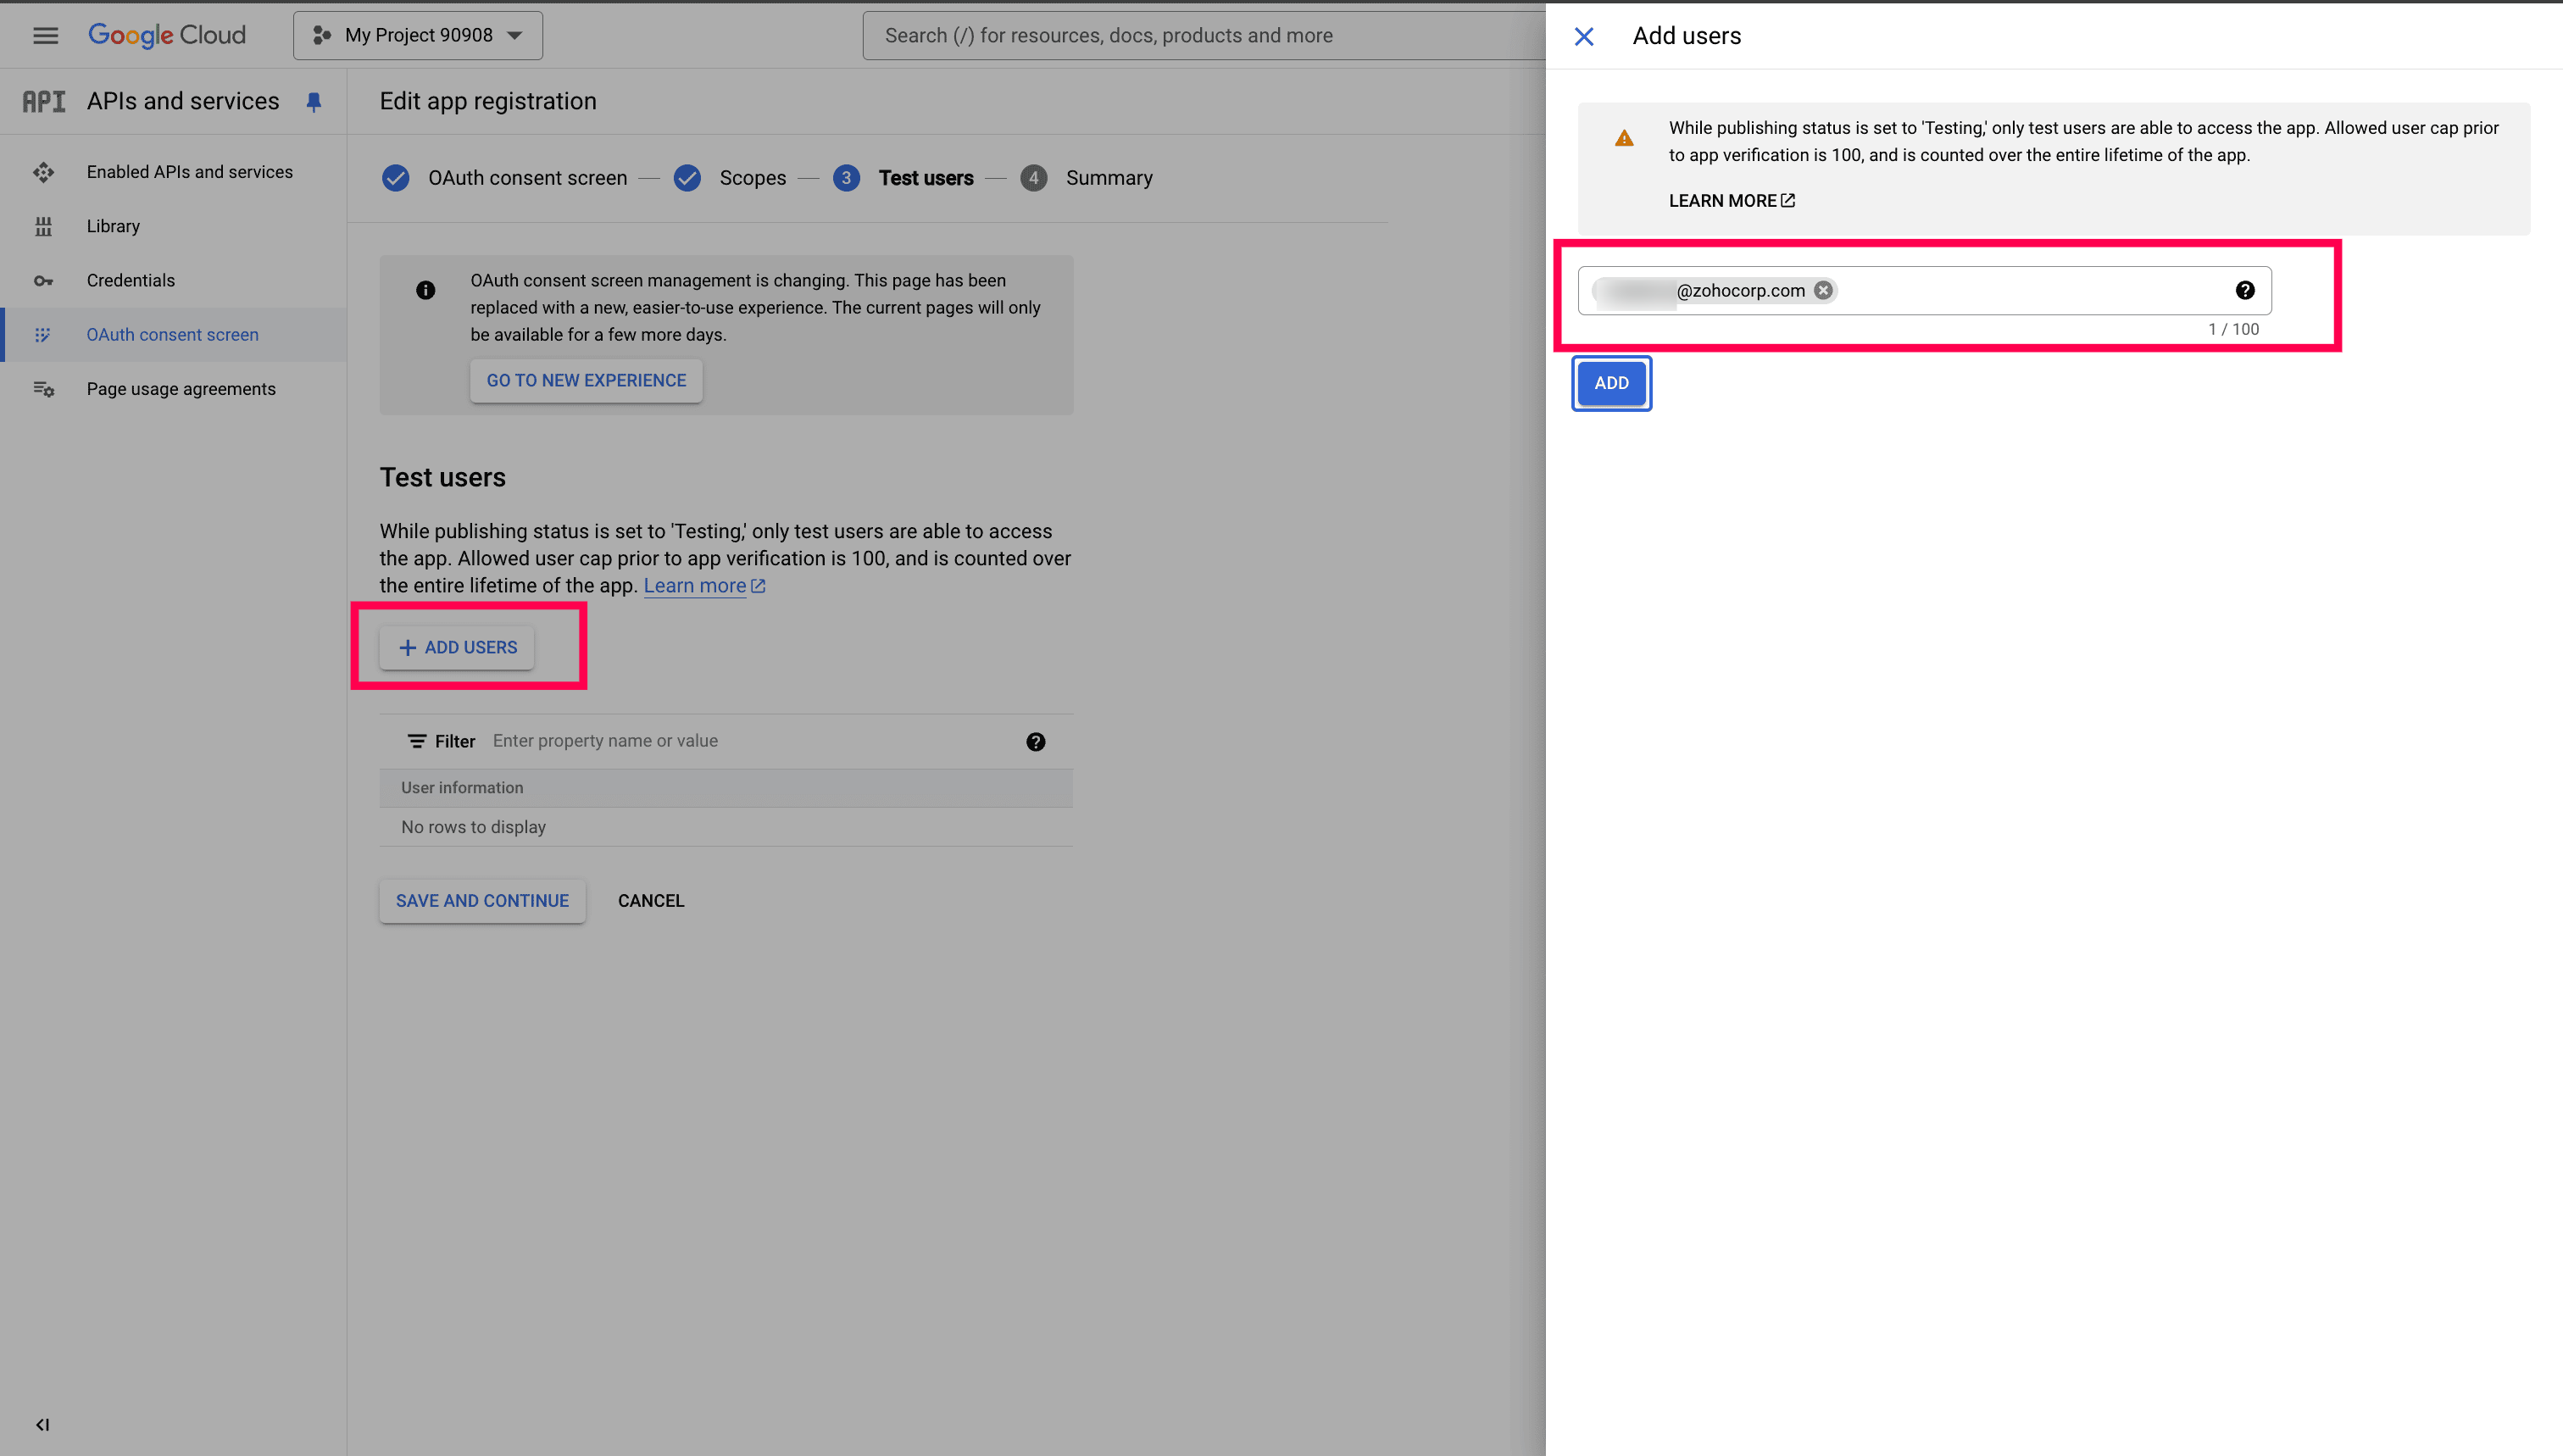
To add users who can authenticate through this application, click the Add users button and add the users one-by-one.Then click Save and Continue, it will show the summary of the created application.
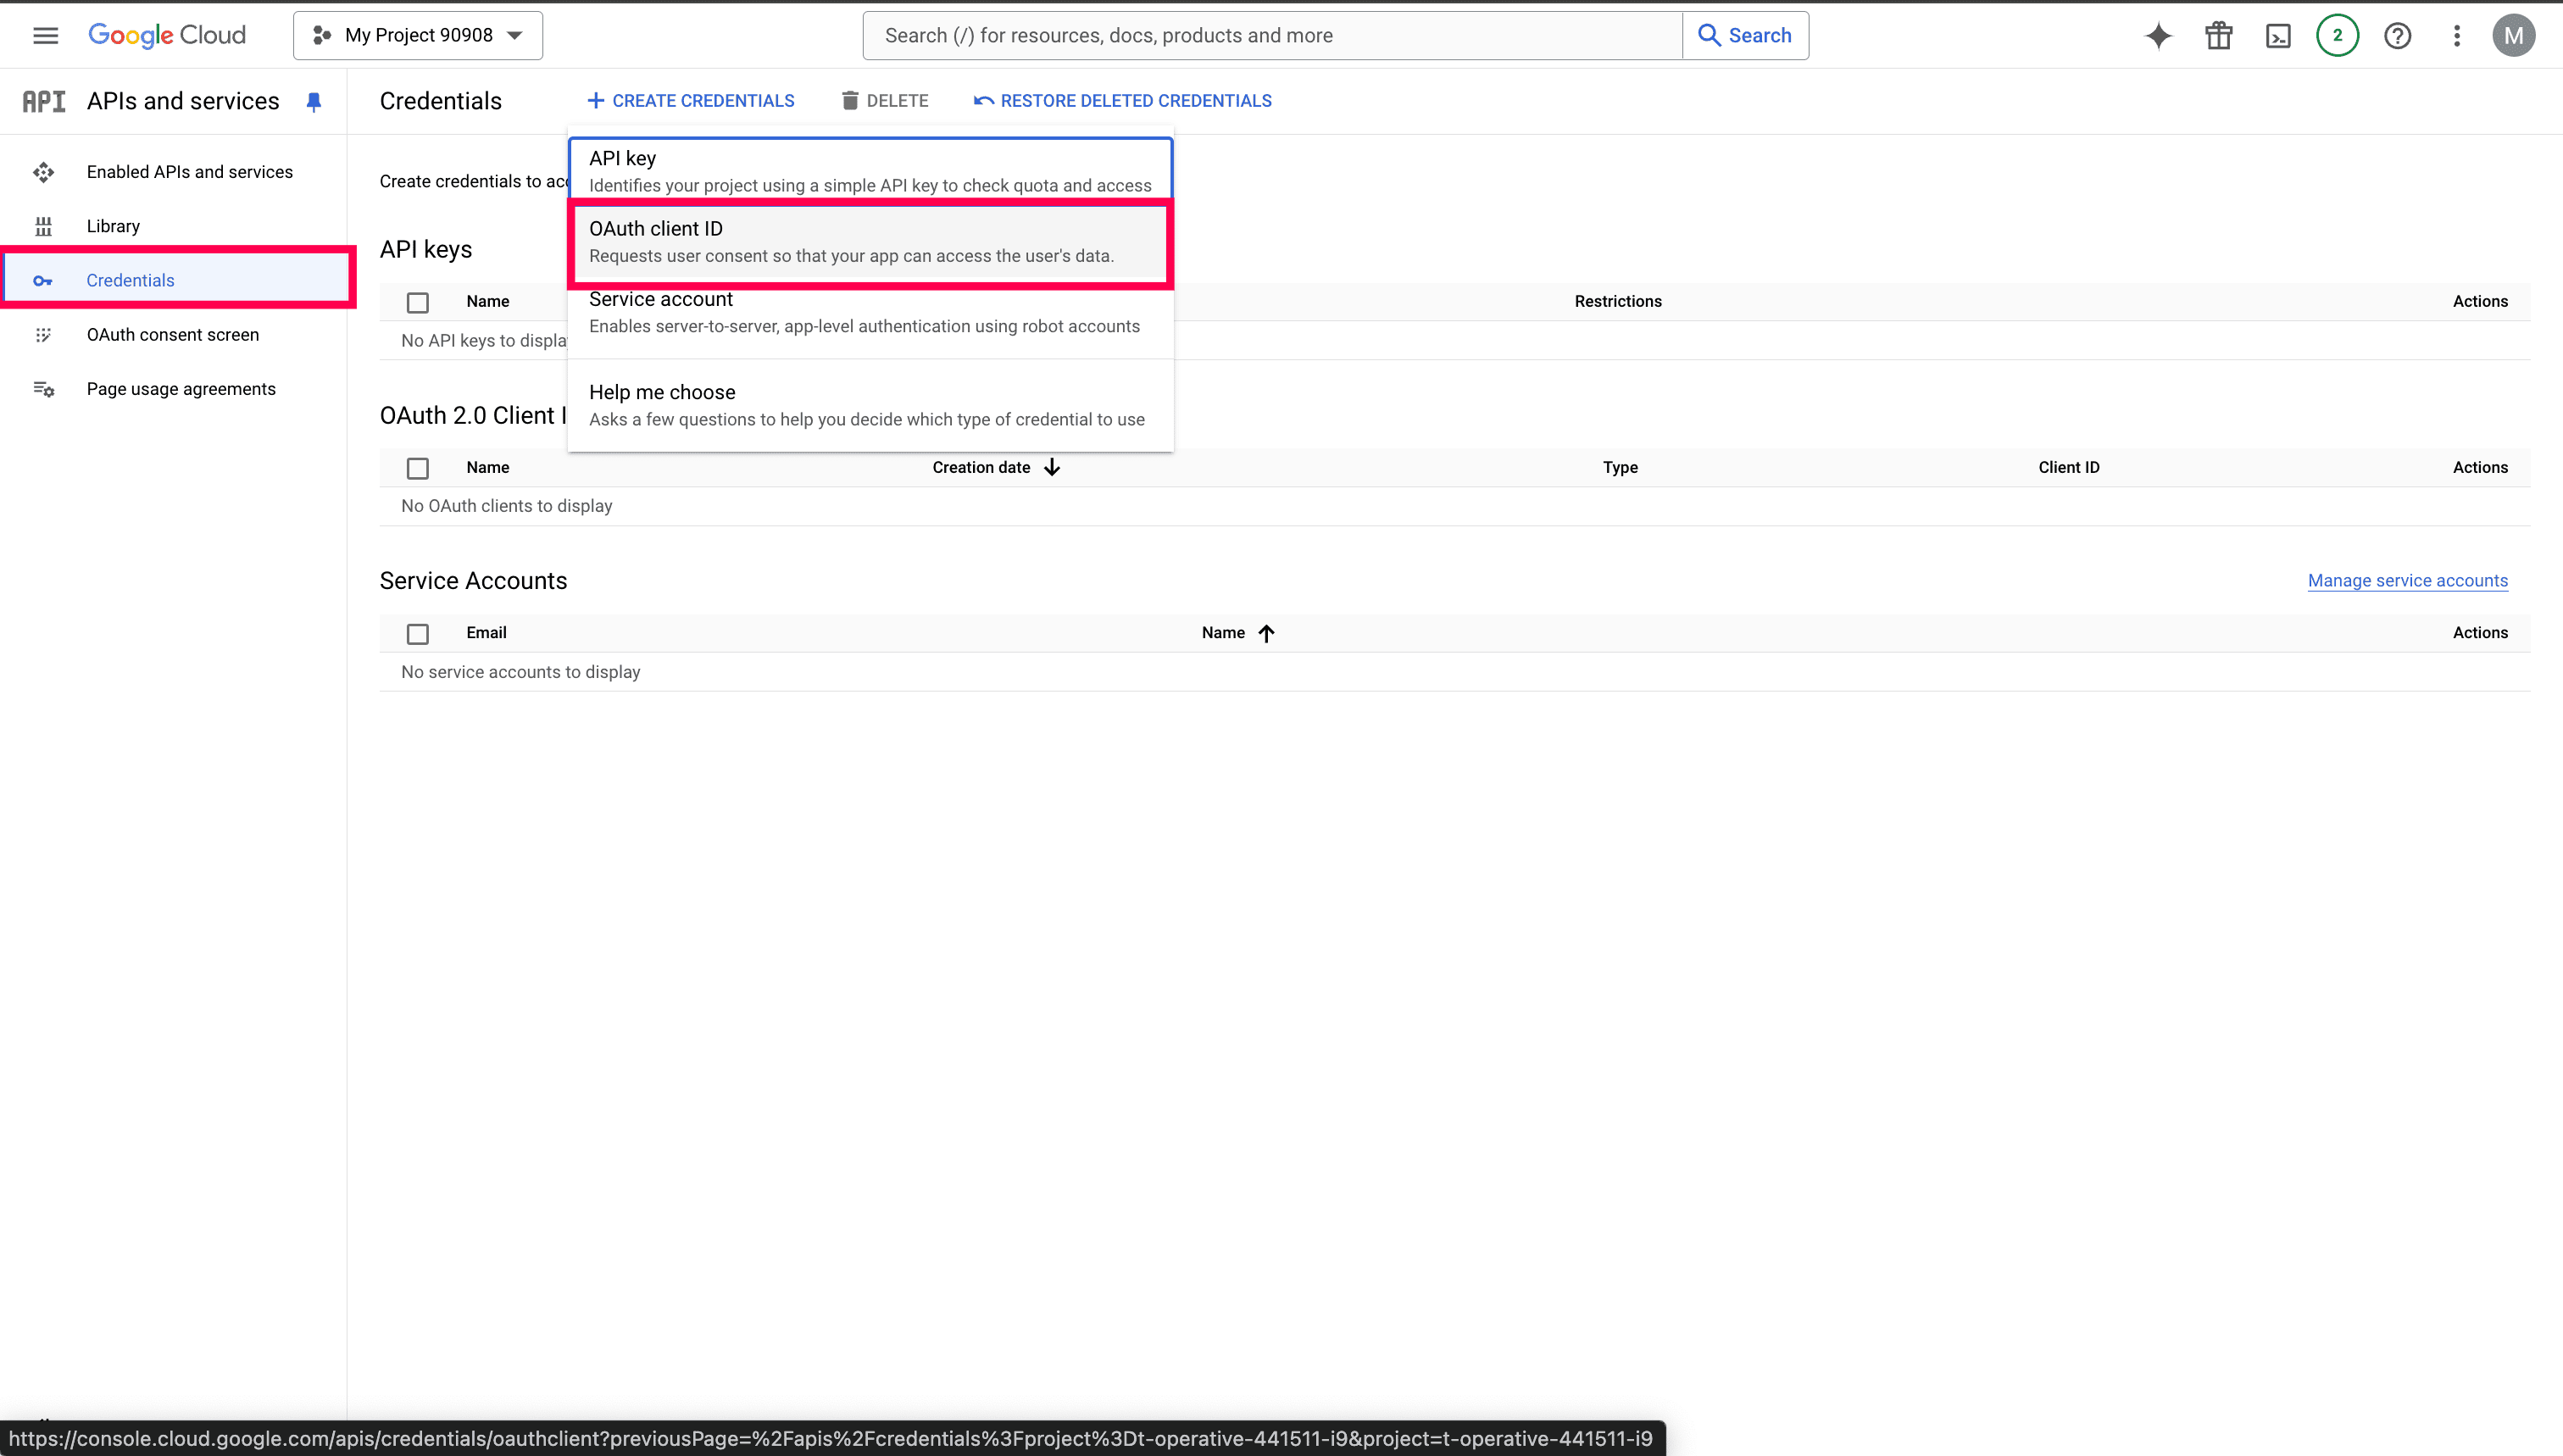
After adding the application details, navigate to the Credentials menu in the left menu bar and create a new OAuth client ID by clicking on Create Credentials and selecting OAuth Client ID.
Select the Application Type as Web Application and provide a name for it. Then, add the redirect URL as "http://localhost/authorization/smtp_google_oauth/" and click Create.
Note: The redirect URL in Google can be entered as "http://localhost/authorization/smtp_google_oauth/". Alternatively, you can use the IP address of the host, such as "https://10.16.45.239:9443/authorization/smtp_google_oauth/", but ensure the entire URL is managed as a DNS zone. Additionally, it must be configured as a trusted zone with an SSL certificate added to it. Without proper SSL certification, Google will not recognize the redirect URL.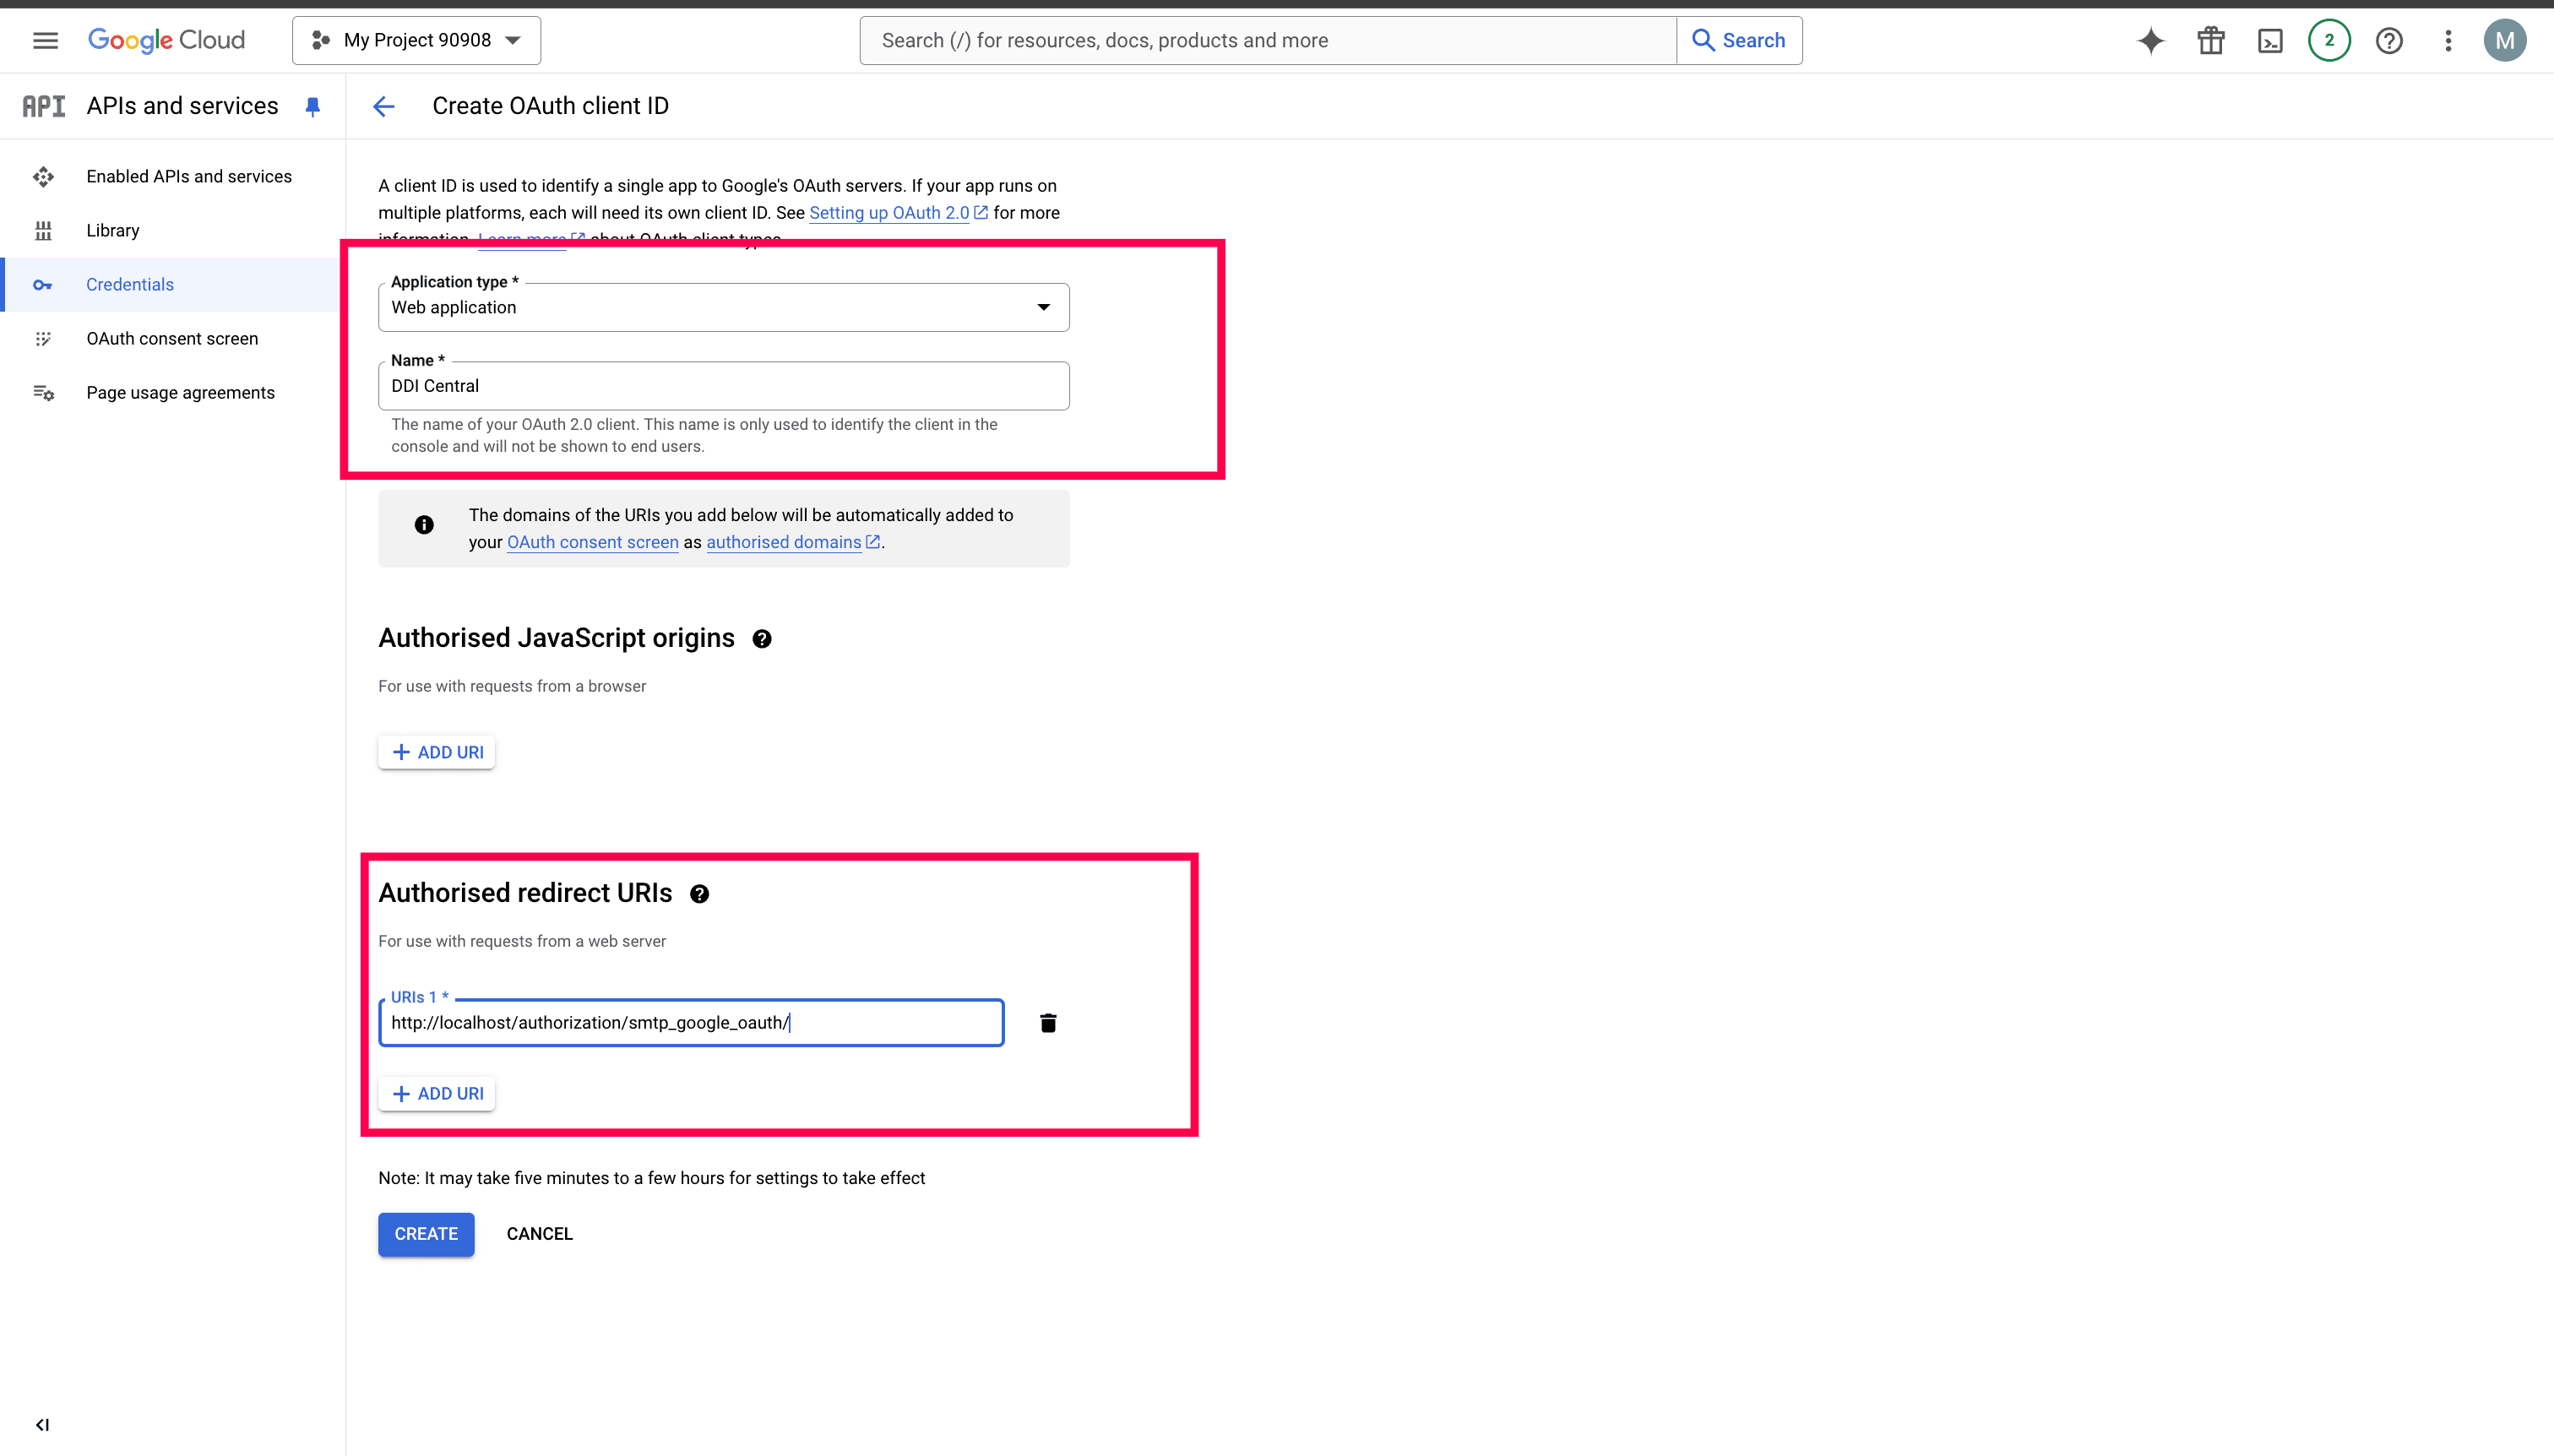
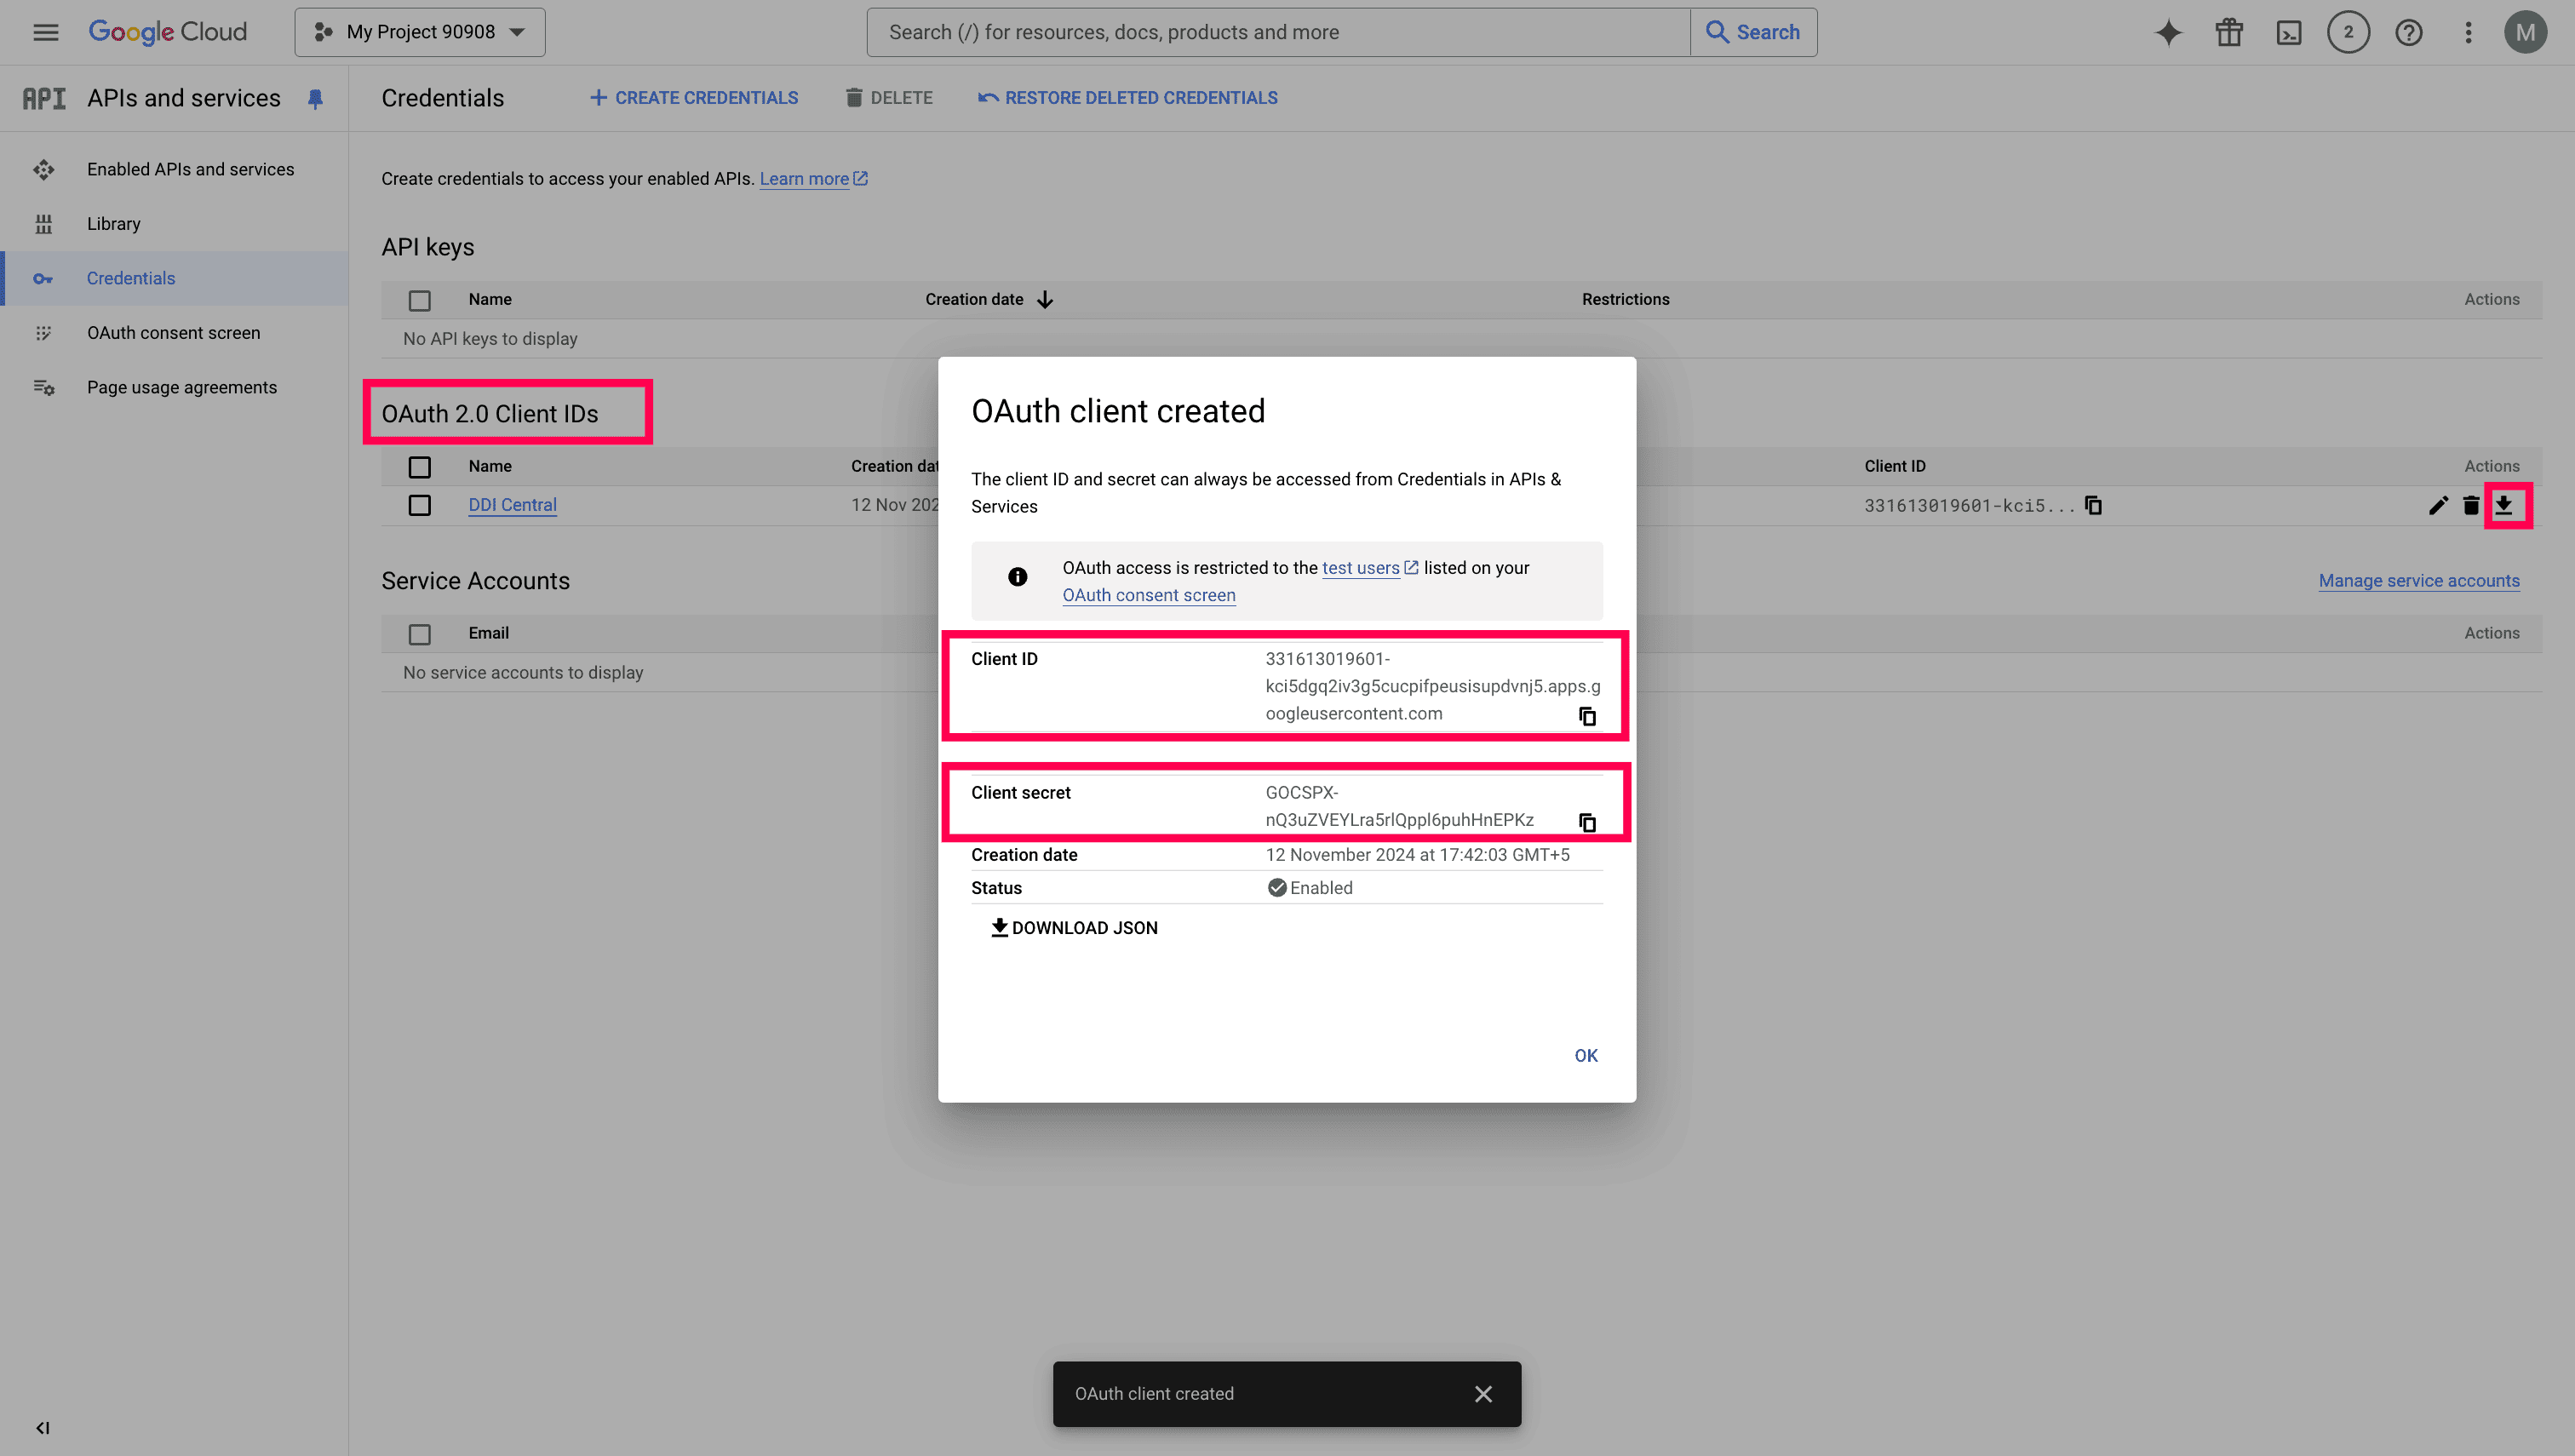
Once the credentials have been created, the Client ID and Client secret can be accessed by clicking on the download button along the App name under the OAuth 2.0 Client IDs section as shown in the dialog box. Copy both the values to configure OAuth provider settings in DDI Central's Management UI Console
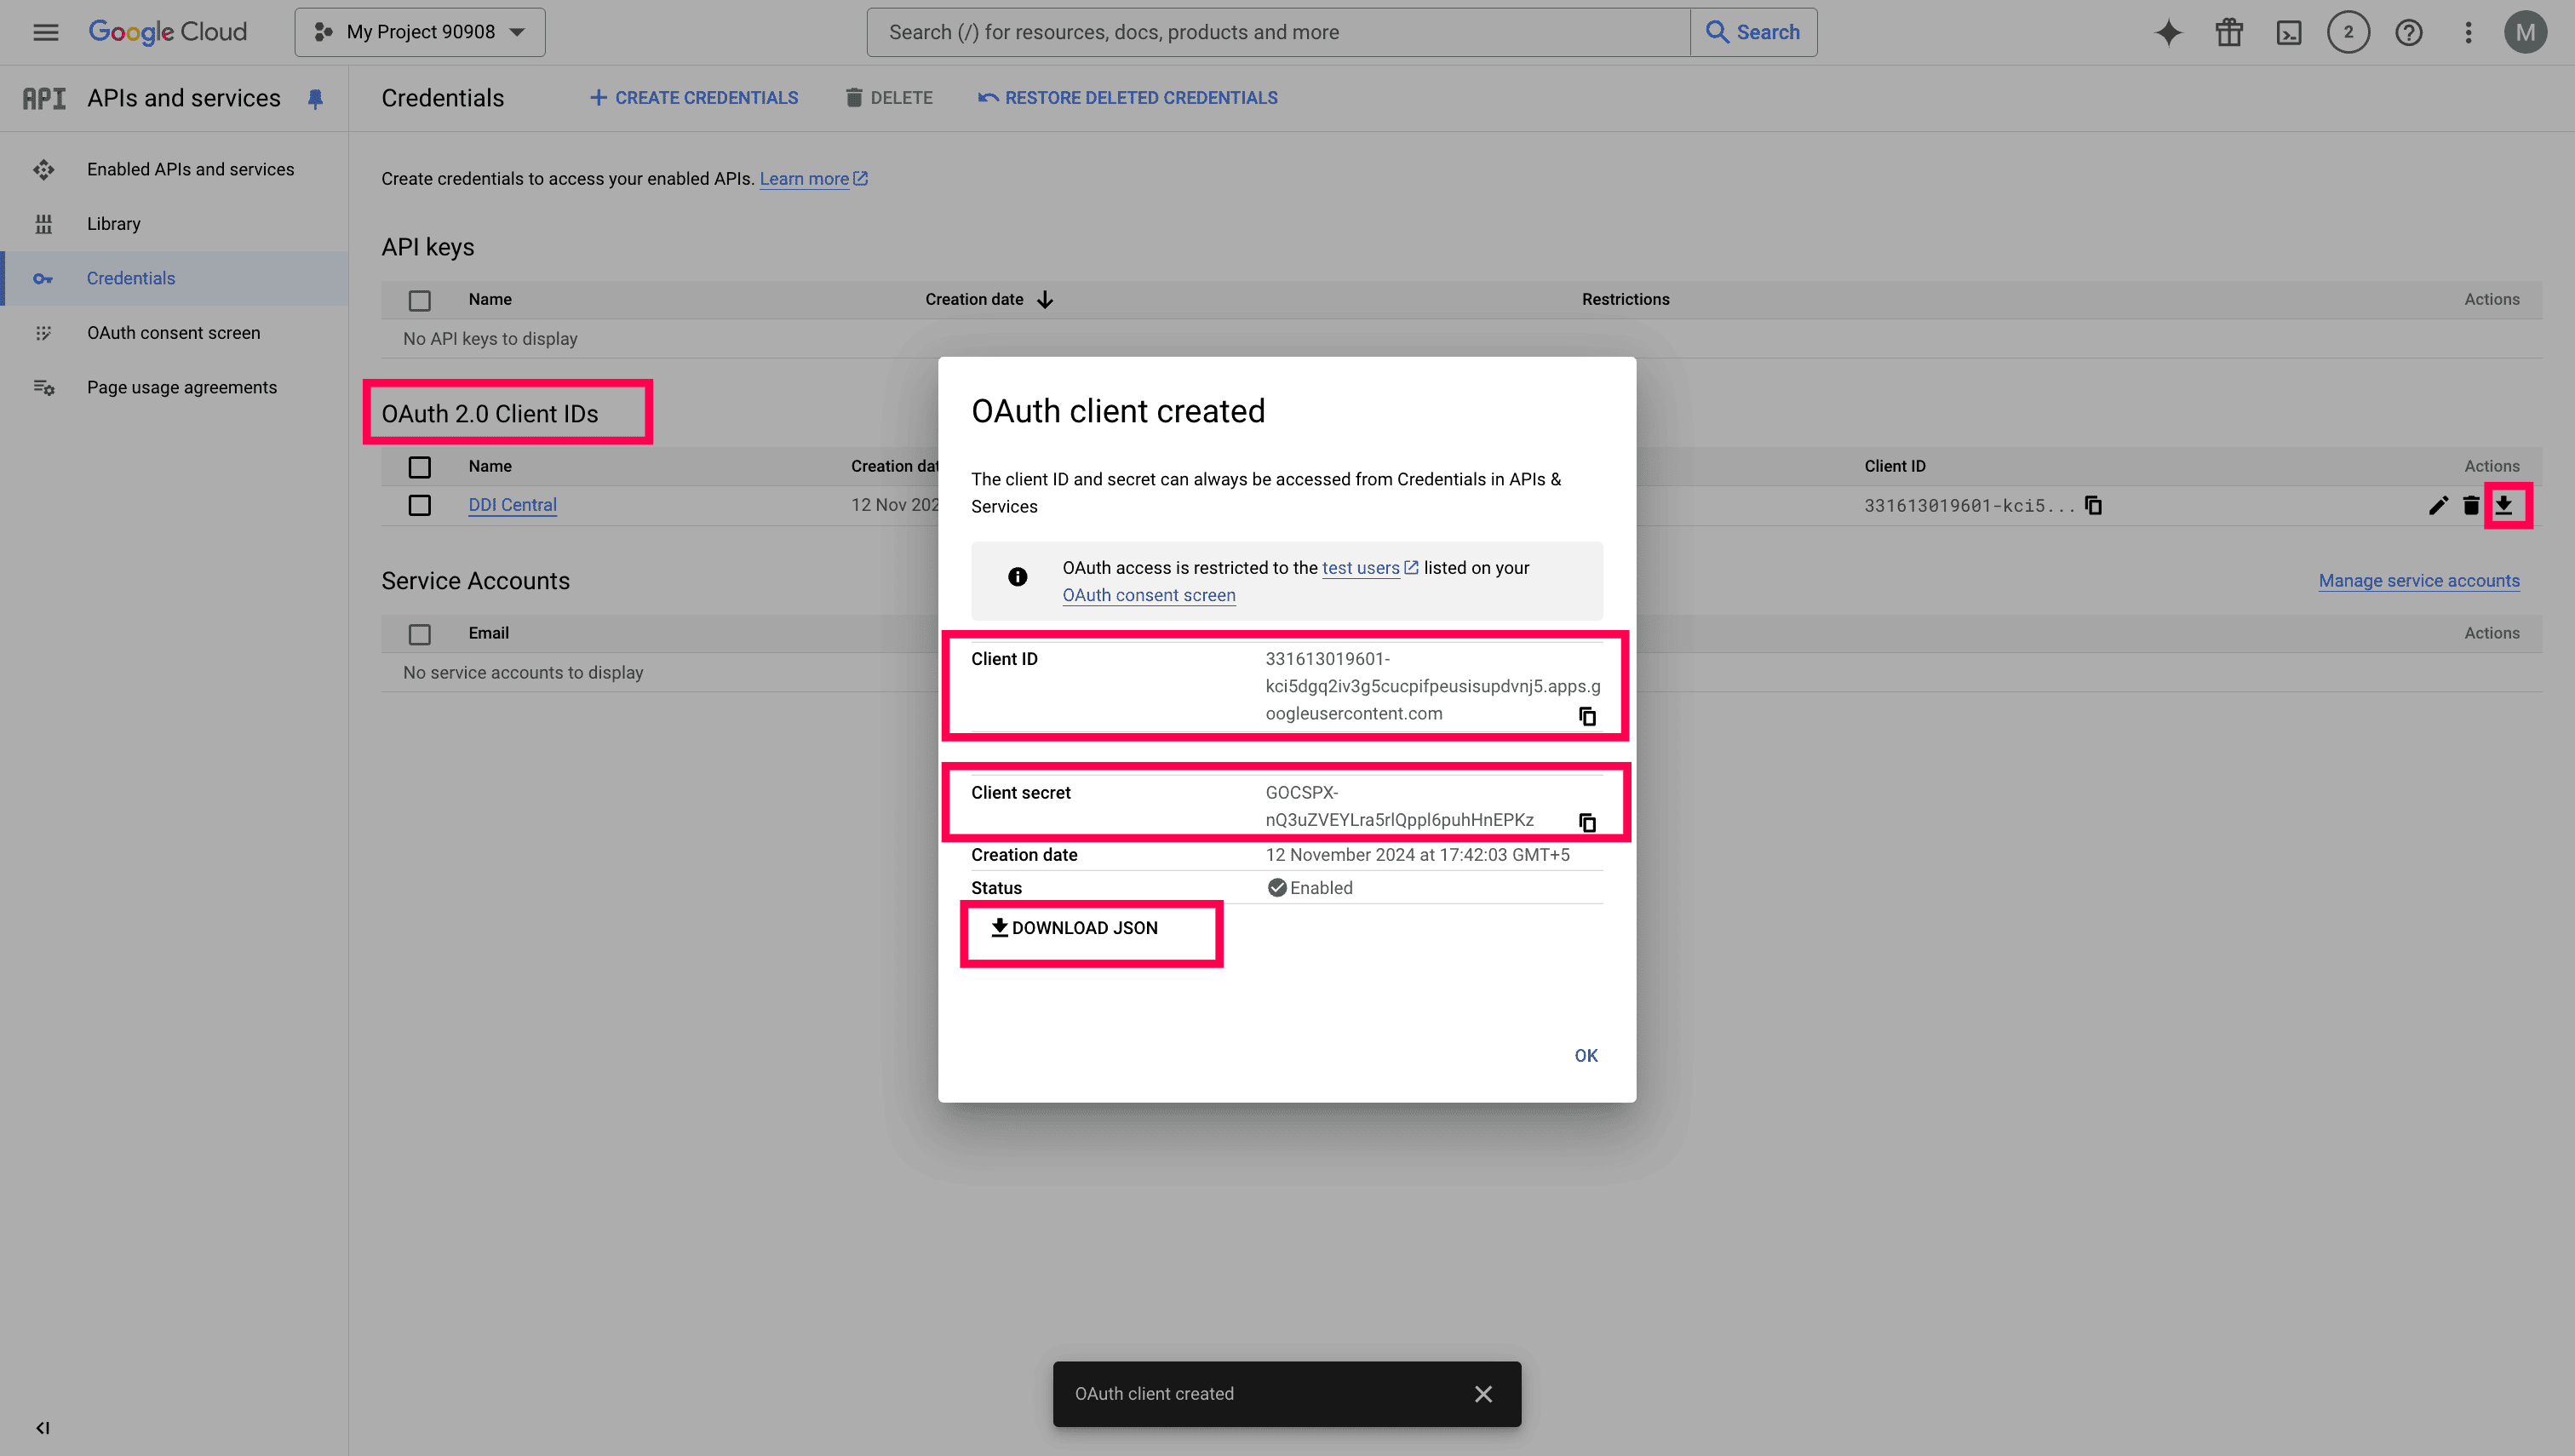
Download the JSON file available in the dialog box, where you can find the Authentication URL and Token URL listed as auth_url and token_url, respectively. Copy these values to configure the OAuth provider settings in DDI Central's Management UI Console.
After providing the above details, save it. You will be redirected to Google Sign in page. Provide Email and Password to Sign in. Then click 'Continue' to provide consent for accessing the application you created with Google console for authenticating with DDI Central.
Note that the Access Token will be generated at this moment for the email provided here. The status of verification will be unverified if you can't proceed through this step.
So, if this OAuth configuration is chosen as the OAuth provider for Authentication, make sure to use the same email address as username. This completes the OAuth verification process.
Now that you have successfully added an OAuth Provider, you can select that it while configuring SMTP server settings for OAuth Authentication with DDI Central.
Configuring OAuth provider settings in DDI Central
Follow the below steps to configure OAuth provider settings in DDI Central
In the DDI Central Management UI Console interface, navigate to Settings > Auth > OAuth. To add an OAuth provider click on Add OAuth provider. The Add OAuth provider page appears.
Fill the OAuth Provider details
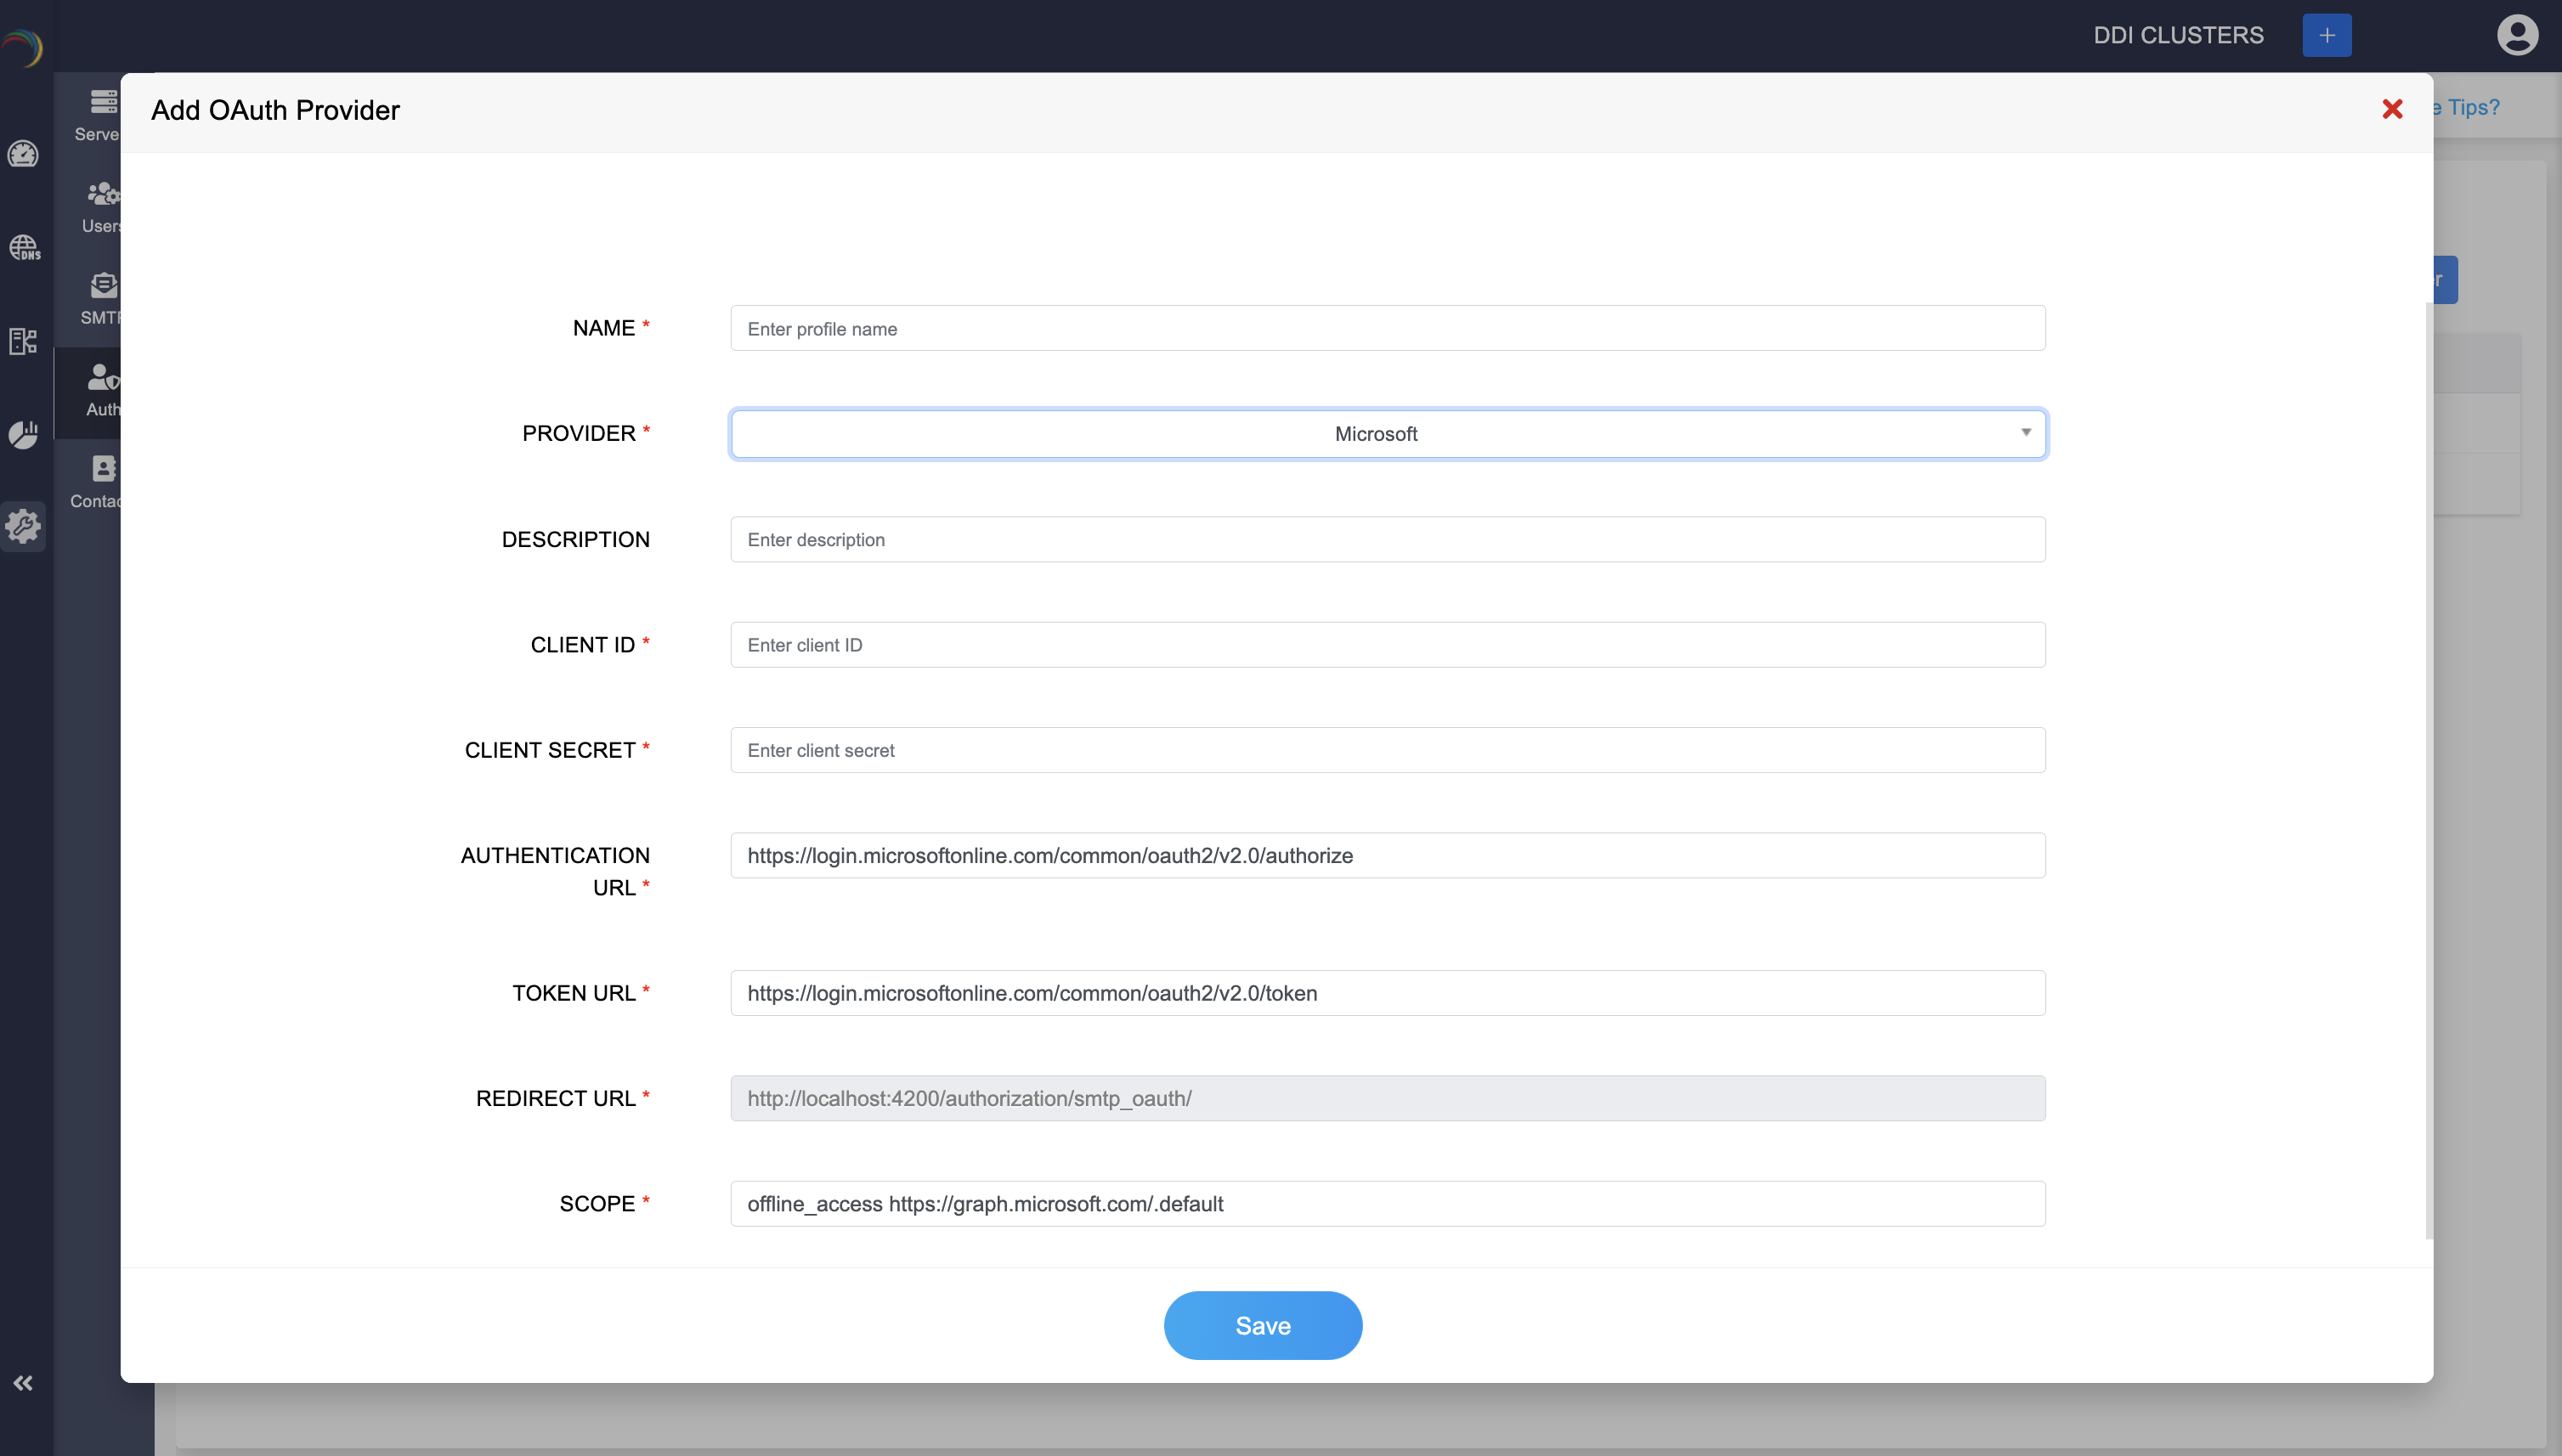
Name: Enter a profile name for the OAuth provider configuration. This name will help you identify the profile.
Provider:Select the OAuth provider of your choice from the dropdown list, Microsoft or Google.
Description: (Optional) Enter a description for this configuration profile to clarify its purpose.
Client ID: Enter the Client ID provided by the chosen OAuth provider.
Client Secret: Enter the Client Secret provided by the chosen OAuth provider.
Authentication URL: Enter the URL for user authentication with the provider.
Token URL: Enter the URL for obtaining tokens from the provider.
Redirect URL: Specify the redirect URL, which is the URL where the OAuth provider will send the authentication response. Make sure the Redirect URL is of the format "http://localhost:{port_number}/authorization/smtp_oauth/".Or if you intend to use the actual IP address of your machine make sure you manage the whole URL as a DNS Zone and add an SSL certificate for it. Only then the URL will be treated as a valid redirect URL. Here's an example URL "https://10.16.13.2:9443/authorization/smtp_oauth/".
Scope: The value for the scope is automatically filled in for you as:"https://mail.google.com/ https://www.googleapis.com/auth/gmail.modify https://www.googleapis.com/auth/devstorage.write_only".
Once all the details are filled in, click the Save button at the bottom of the form to save your OAuth provider configuration. This completes the setup of an OAuth provider in DDI Central, enabling secure OAuth-based authentication for integrated services.