Version 6001ddiconsole.ppmVersion 6001ddinodeagent.ppm
Choose your upgrade path for DDI Central's Management UI Console
Identify your build number and follow the sequence as given in the table below to move to the latest version. ( How can I find my Build number?)
| Current build | Service Pack | Move to Build |
|---|---|---|
| 4001 | Upgrade Pack | How to Install | Read Me | 4002 |
| 4002 | Upgrade Pack | How to Install | Read Me | 4100 |
| 4100 | Upgrade Pack | How to Install | Read Me | 4200 |
| 4200 | Upgrade Pack | How to Install | Read Me | 4250 |
| 4250 | Upgrade Pack | How to Install | Read Me | 4300 |
| 4300 | Upgrade Pack | How to Install | Read Me | 5001 |
| 5001 | Upgrade Pack | How to Install | Read Me | 5100 |
| 5100 | Upgrade Pack | How to Install | Read Me | 5500 |
| 5500 | Upgrade Pack | How to Install | Read Me | 5600 |
| 5600 | Upgrade Pack | How to Install | Read Me | 6001 |
Choose your upgrade path for DDI Central's Discovery Node Agent
Identify your build number and follow the sequence as given in the table below to move to the latest version. ( How can I find my Build number?)
| Current build | Service Pack | Move to Build |
|---|---|---|
| 4001 | Upgrade Pack | How to Install | Read Me | 4002 |
| 4002 | Upgrade Pack | How to Install | Read Me | 4100 |
| 4100 | Upgrade Pack | How to Install | Read Me | 4200 |
| 4200 | Upgrade Pack | How to Install | Read Me | 4250 |
| 4250 | Upgrade Pack | How to Install | Read Me | 4300 |
| 4300 | Upgrade Pack | How to Install | Read Me | 5001 |
| 5001 | Upgrade Pack | How to Install | Read Me | 5100 |
| 5100 | Upgrade Pack | How to Install | Read Me | 5500 |
| 5500 | Upgrade Pack | How to Install | Read Me | 5600 |
| 5600 | Upgrade Pack | How to Install | Read Me | 6001 |
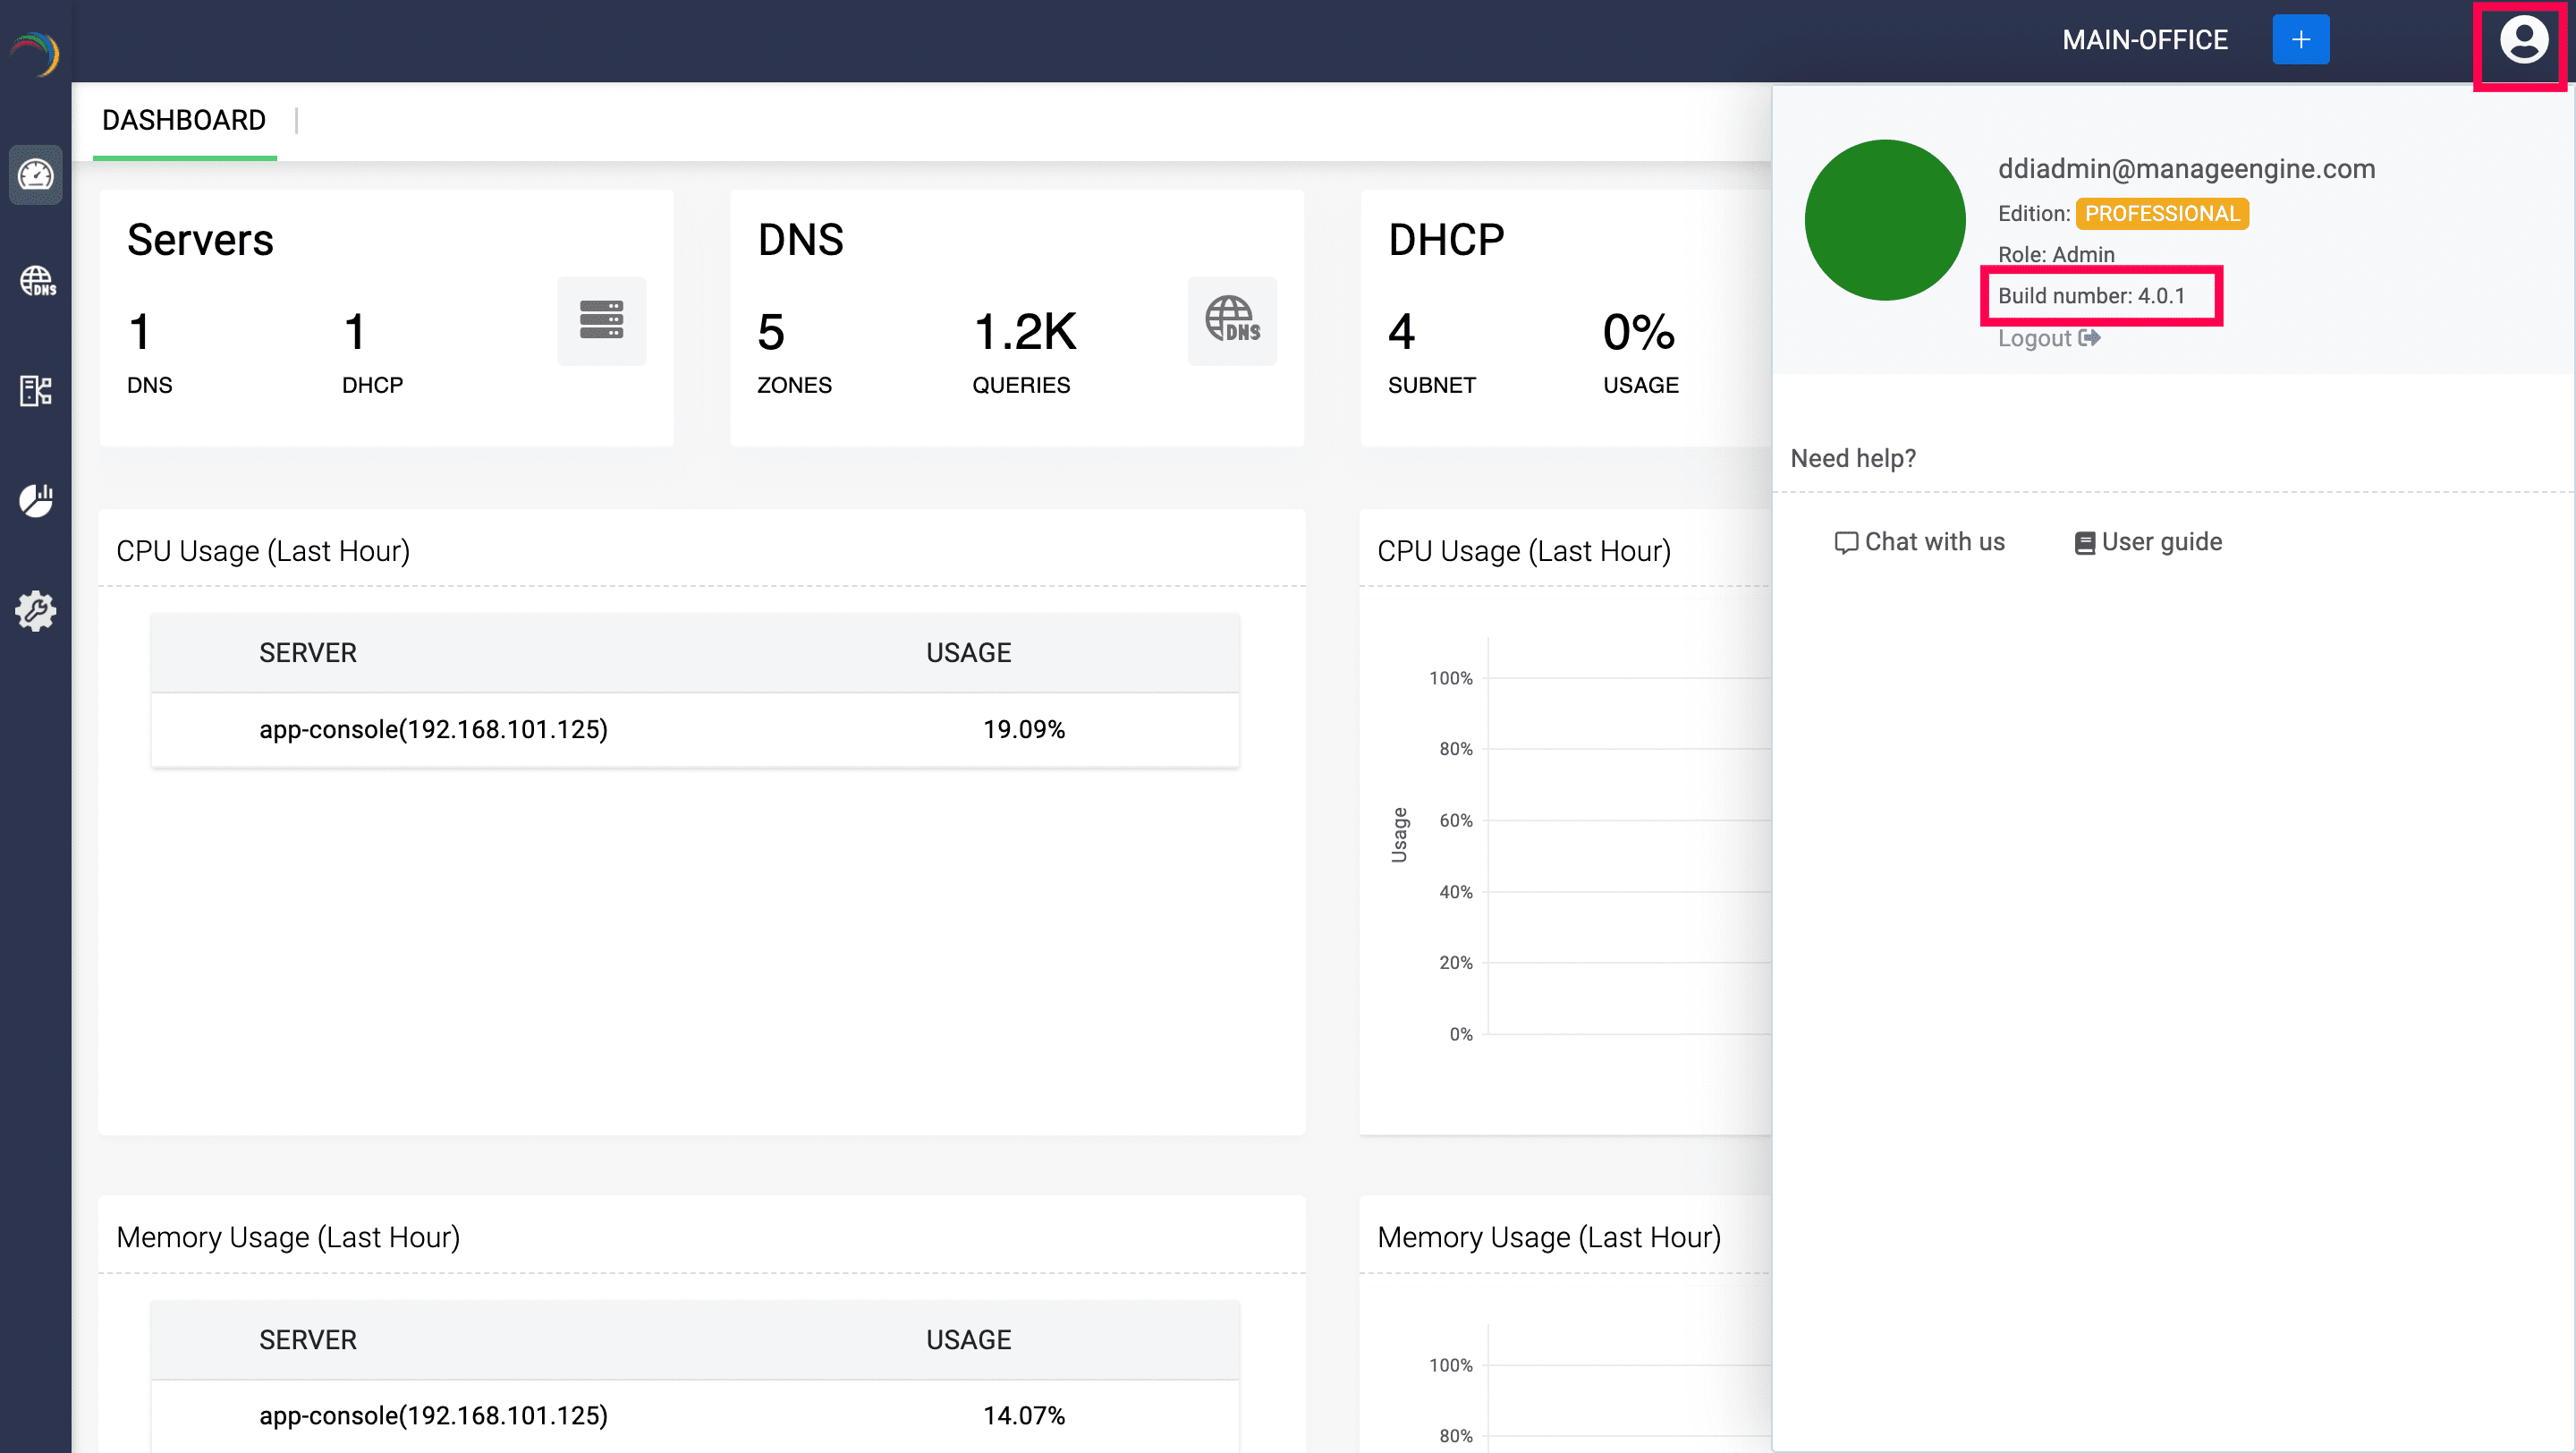
How do I locate the current version and the build number for DDI Central?
Locate your profile icon in the top right corner of the page.
- Search for the 'Build Number' and 'Version Number' among the product details listed.
Check the following image guide to locate the build and the version number.

Steps to upgrade to a targeted service pack
- Download the upgrade service pack.
- Open the terminal as a root user. Shut down DDI Central using the command:
systemctl stop DDI - Important: Take a manual backup of the DDI Central installation directory. The database inside this directory will be automatically backed up. (Ex: /opt/ManageEngine/ddi)
- Change the current directory to the 'bin' directory located within the current directory using the command:
cd bin - Run the script 'UpdateManager.sh under the <DDI Central Home>/bin folder using the command:
sh UpdateManager.sh Subsequently, enter the absolute service pack file path in the next command line as shown below:

- To install all the required new packages and libraries, execute the script PackageManager.sh from the same directory using the command:
sh PackageManager.sh - Start DDI Central using the command:
systemctl start DDI
Need help ?
Want help with upgrading DDI Central to the latest version? Kindly mail us at ddi-support@manageengine.com .
Choose your upgrade path for DDI Central's Management UI Console
Identify your build number and follow the sequence as given in the table below to move to the latest version. ( How can I find my Build number?)
| Current build | Service Pack | Move to Build |
|---|---|---|
| 4200 | Upgrade Pack | How to Install | Read Me | 4250 |
| 4250 | Upgrade Pack | How to Install | Read Me | 4300 |
| 4300 | Upgrade Pack | How to Install | Read Me | 5001 |
| 5001 | Upgrade Pack | How to Install | Read Me | 5100 |
| 5100 | Upgrade Pack | How to Install | Read Me | 5500 |
| 5500 | Upgrade Pack | How to Install | Read Me | 5600 |
| 5600 | Upgrade Pack | How to Install | Read Me | 6001 |
How do I locate the current version and the build number for DDI Central?
Locate your profile icon in the top right corner of the page.
- Search for the 'Build Number' and 'Version Number' among the product details listed.
Check the following image guide to locate the build and the version number.

Steps to upgrade to a targeted Windows service pack
- Download the upgrade service pack
- Download the required service pack for the upgrade.
- Stop the DDI Central service
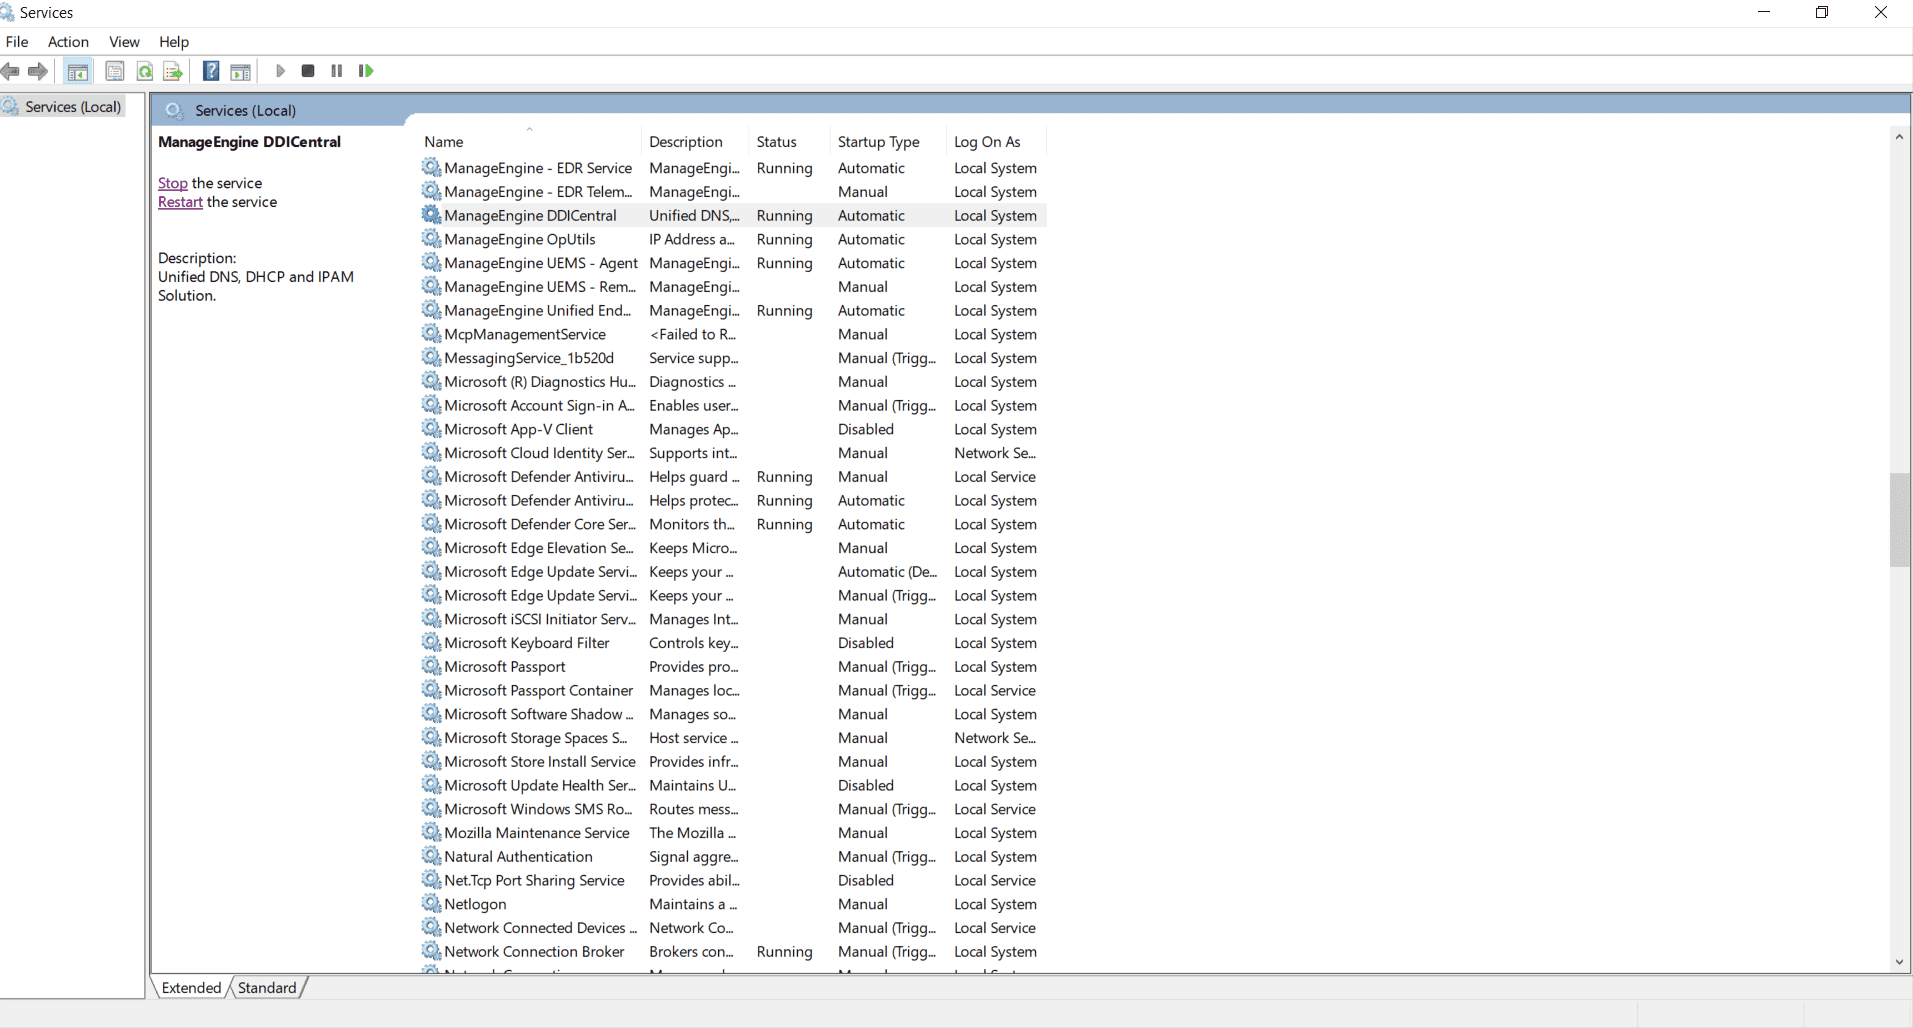
- Open the Services panel on your Windows desktop.
- Search for and select the ManageEngine DDICentral service.
- On the left side of the panel, click the Stop hyperlink to stop the selected service.

- Important: Take a manual backup of the DDI Central installation directory. The database inside this directory will be automatically backed up. (Ex: C:\>Program Files\ManageEngine\ddi)
- Open Command Prompt in Administrator mode
- Open Command Prompt in Run as Administrator mode.
- Navigate to the Application Directory
- In the Command Prompt window, navigate to the root directory of the application where it is stored.
- Within the application root directory, navigate to the bin folder.

- Run the Update Manager
- In the bin folder, run the command
UpdateManager.bat. - The Command Prompt window will prompt you to enter the absolute path of the downloaded PPM file. Enter the absolute file path. This will bring you automatically to the application's root folder


- In the bin folder, run the command
- Change directory to the application's bin folder
- Change to the bin directory within the product's root folder using the command
cd bin.
- Change to the bin directory within the product's root folder using the command
- Run the Package Manager
- In the bin folder of the PPM file, run the command
PackageManager.bat. On completion, it automatically brings you back to the product's folder.

- In the bin folder of the PPM file, run the command
- Restart the service
- After completing the upgrade, navigate back to the Services panel.
- Select the ManageEngine DDICentral service and click Restart to restart the service.
Need help ?
Want help with upgrading DDI Central to the latest version? Kindly mail us at ddi-support@manageengine.com .
 Linux
Linux