Configuring DHCP failover
To configure the DHCP failover configurations:
- Go to DHCP ->Config-> DHCP Failover
- Click on the Add DHCP Failover button on the top right corner.
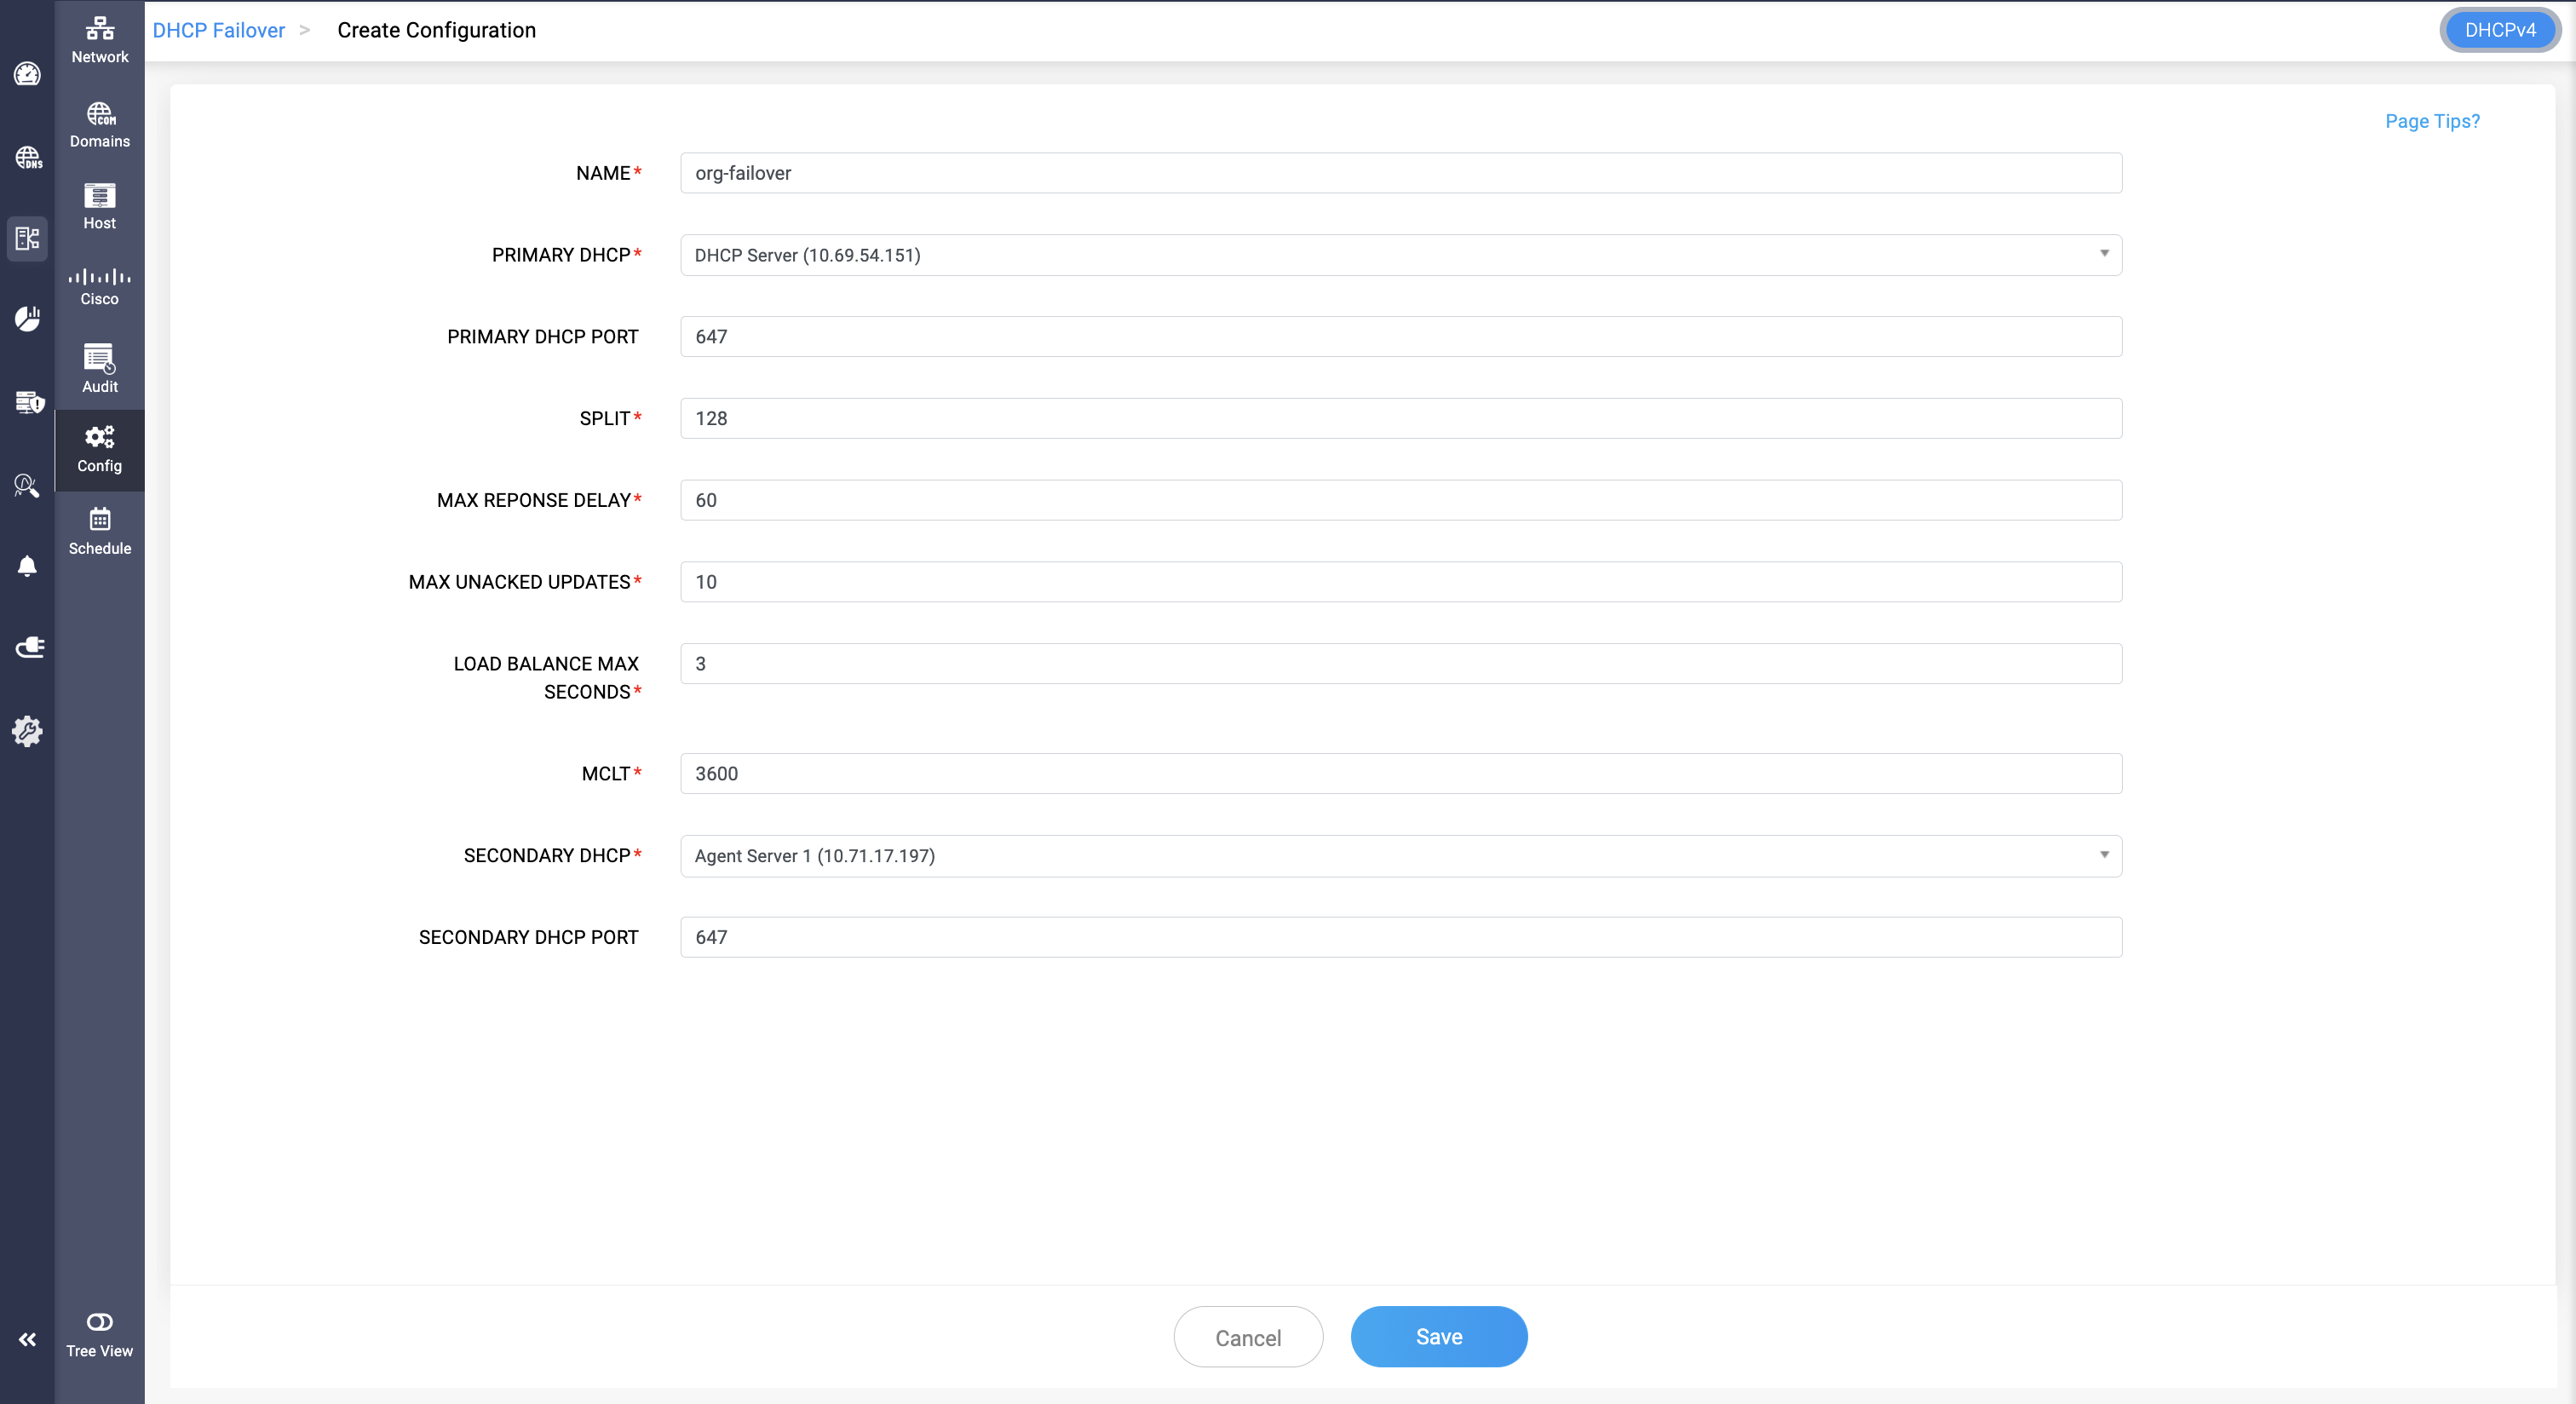
- The Create Configuration page appears on the screen. Here enter the values for the fields as shown in the image

Primary DHCP
The primary DHCP server is the main server responsible for handling DHCP requests and managing IP address leases. It works in conjunction with a secondary server to provide redundancy and high availability. The primary server typically handles the majority of DHCP requests and coordinates with the secondary server to ensure lease database synchronization and service continuity.
Primary DHCP Port
Specify the network port number that the primary DHCP server will use for its operations. The default port for DHCP services is typically 67 for servers. However, in certain network configurations or for specific security or operational reasons, you might choose to customize this port number. It's important to ensure that this port is consistent and properly configured in both the primary and secondary DHCP servers to facilitate smooth communication and service operation.
Secondary DHCP
Specify the configuration of the backup DHCP server. In a DHCP failover setup, there are typically two servers: a primary and a secondary. The secondary server is on standby to take over the DHCP responsibilities if the primary server becomes unavailable. This ensures continuity of service.
Secondary DHCP Port
Allows you to specify the network port number that the secondary DHCP server will use for communication. The standard port for DHCP is 67 for servers and 68 for clients, but this setting can be customized if needed.
MCLT (Maximum Client Lead Time)
MCLT is a crucial parameter in DHCP failover configurations. It defines the maximum time that a DHCP client can extend its lease on an IP address without contacting the server. This setting is important for ensuring consistency between the primary and secondary DHCP servers in terms of lease information. It is defined only on the primary DHCP server.
Split
Split is a special property that enables you to specify the percentage of the IP traffic to be handled by your Primary and Secondary Servers as a means of load balancing. It is defined only on the primary DHCP server. Its values range from 0 to 256.
A value 256 indicates no load balancing. Even if the failover is enabled for a DHCP server. The primary DHCP Server is the one solely responsible for listening and serving the address requests.
A value 0 indicates that most of the requests are handled by the Secondary DHCP server configured to handle the Failover .
A value of 128 means 50-50 load balancing where both the primary and the secondary DHCP servers configured for a specific range of IP addresses equally listen and serve the IP resources.
Max Response Delay
Determines the maximum time a DHCP server will wait before responding to a client request. This parameter is important for efficient allocation of IP leases and ensures that clients are not left waiting too long for a response, which could lead to network access issues.
Max Unacked Updates
In a DHCP failover configuration, the primary and secondary servers synchronize lease information with each other. This setting controls the maximum number of updates (regarding lease information) that can be sent from one server to another without receiving an acknowledgment. It's important for ensuring that both servers have consistent and up-to-date lease information.
Load Balance Max Seconds
This parameter sets the maximum time a DHCP server in a failover pair will wait to receive a response from its partner during load balancing operations. It ensures that if one server is not responding (possibly due to being down or overloaded), the other server can take over more of the load to maintain service continuity.

Click Save to bring the failover configurations into effect. Select the failover server you create while enabling failover for each scope you define in DDI Central.