How to Enroll Zebra Devices Using StageNow for Full Device Management?
Description
This guide provides step-by-step instructions for enrolling Zebra devices as Device Owner in ME MDM using the StageNow application. Follow these steps to ensure a smooth enrollment process.
Pre-requisites
- A Windows machine with the latest version of the StageNow tool installed.
- The MDM app file (MDMAndroidAgent.apk).
- The Zebra device must be running Android 7.0 or later with MX 6.5 or higher.
Steps to Enroll Zebra Devices
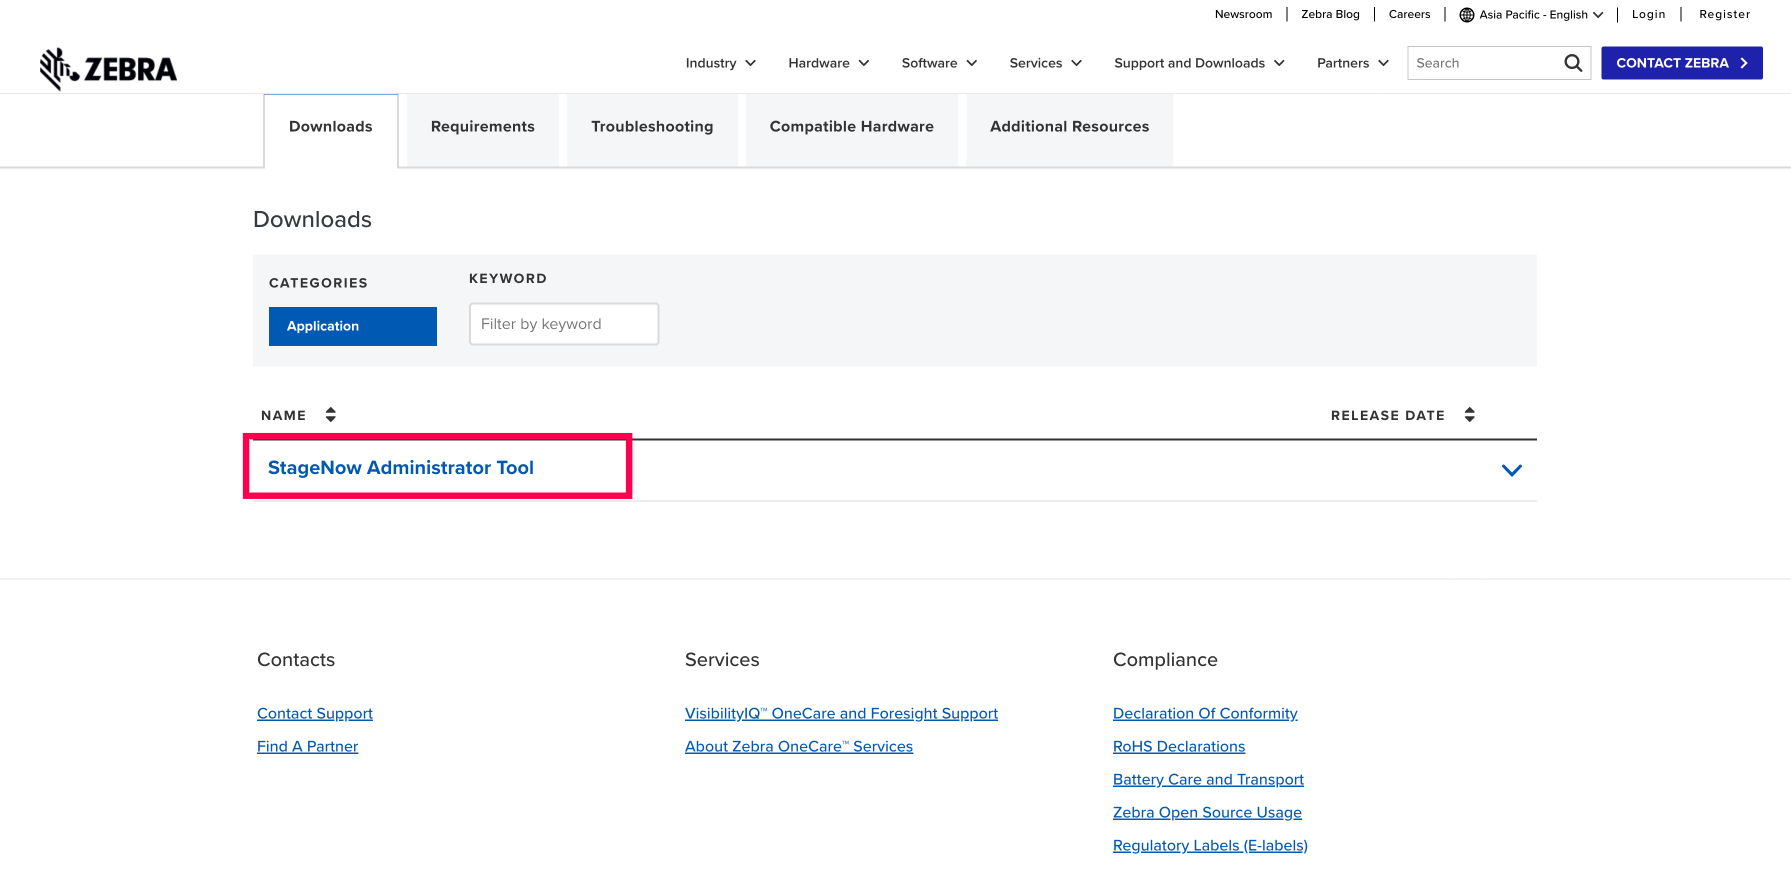
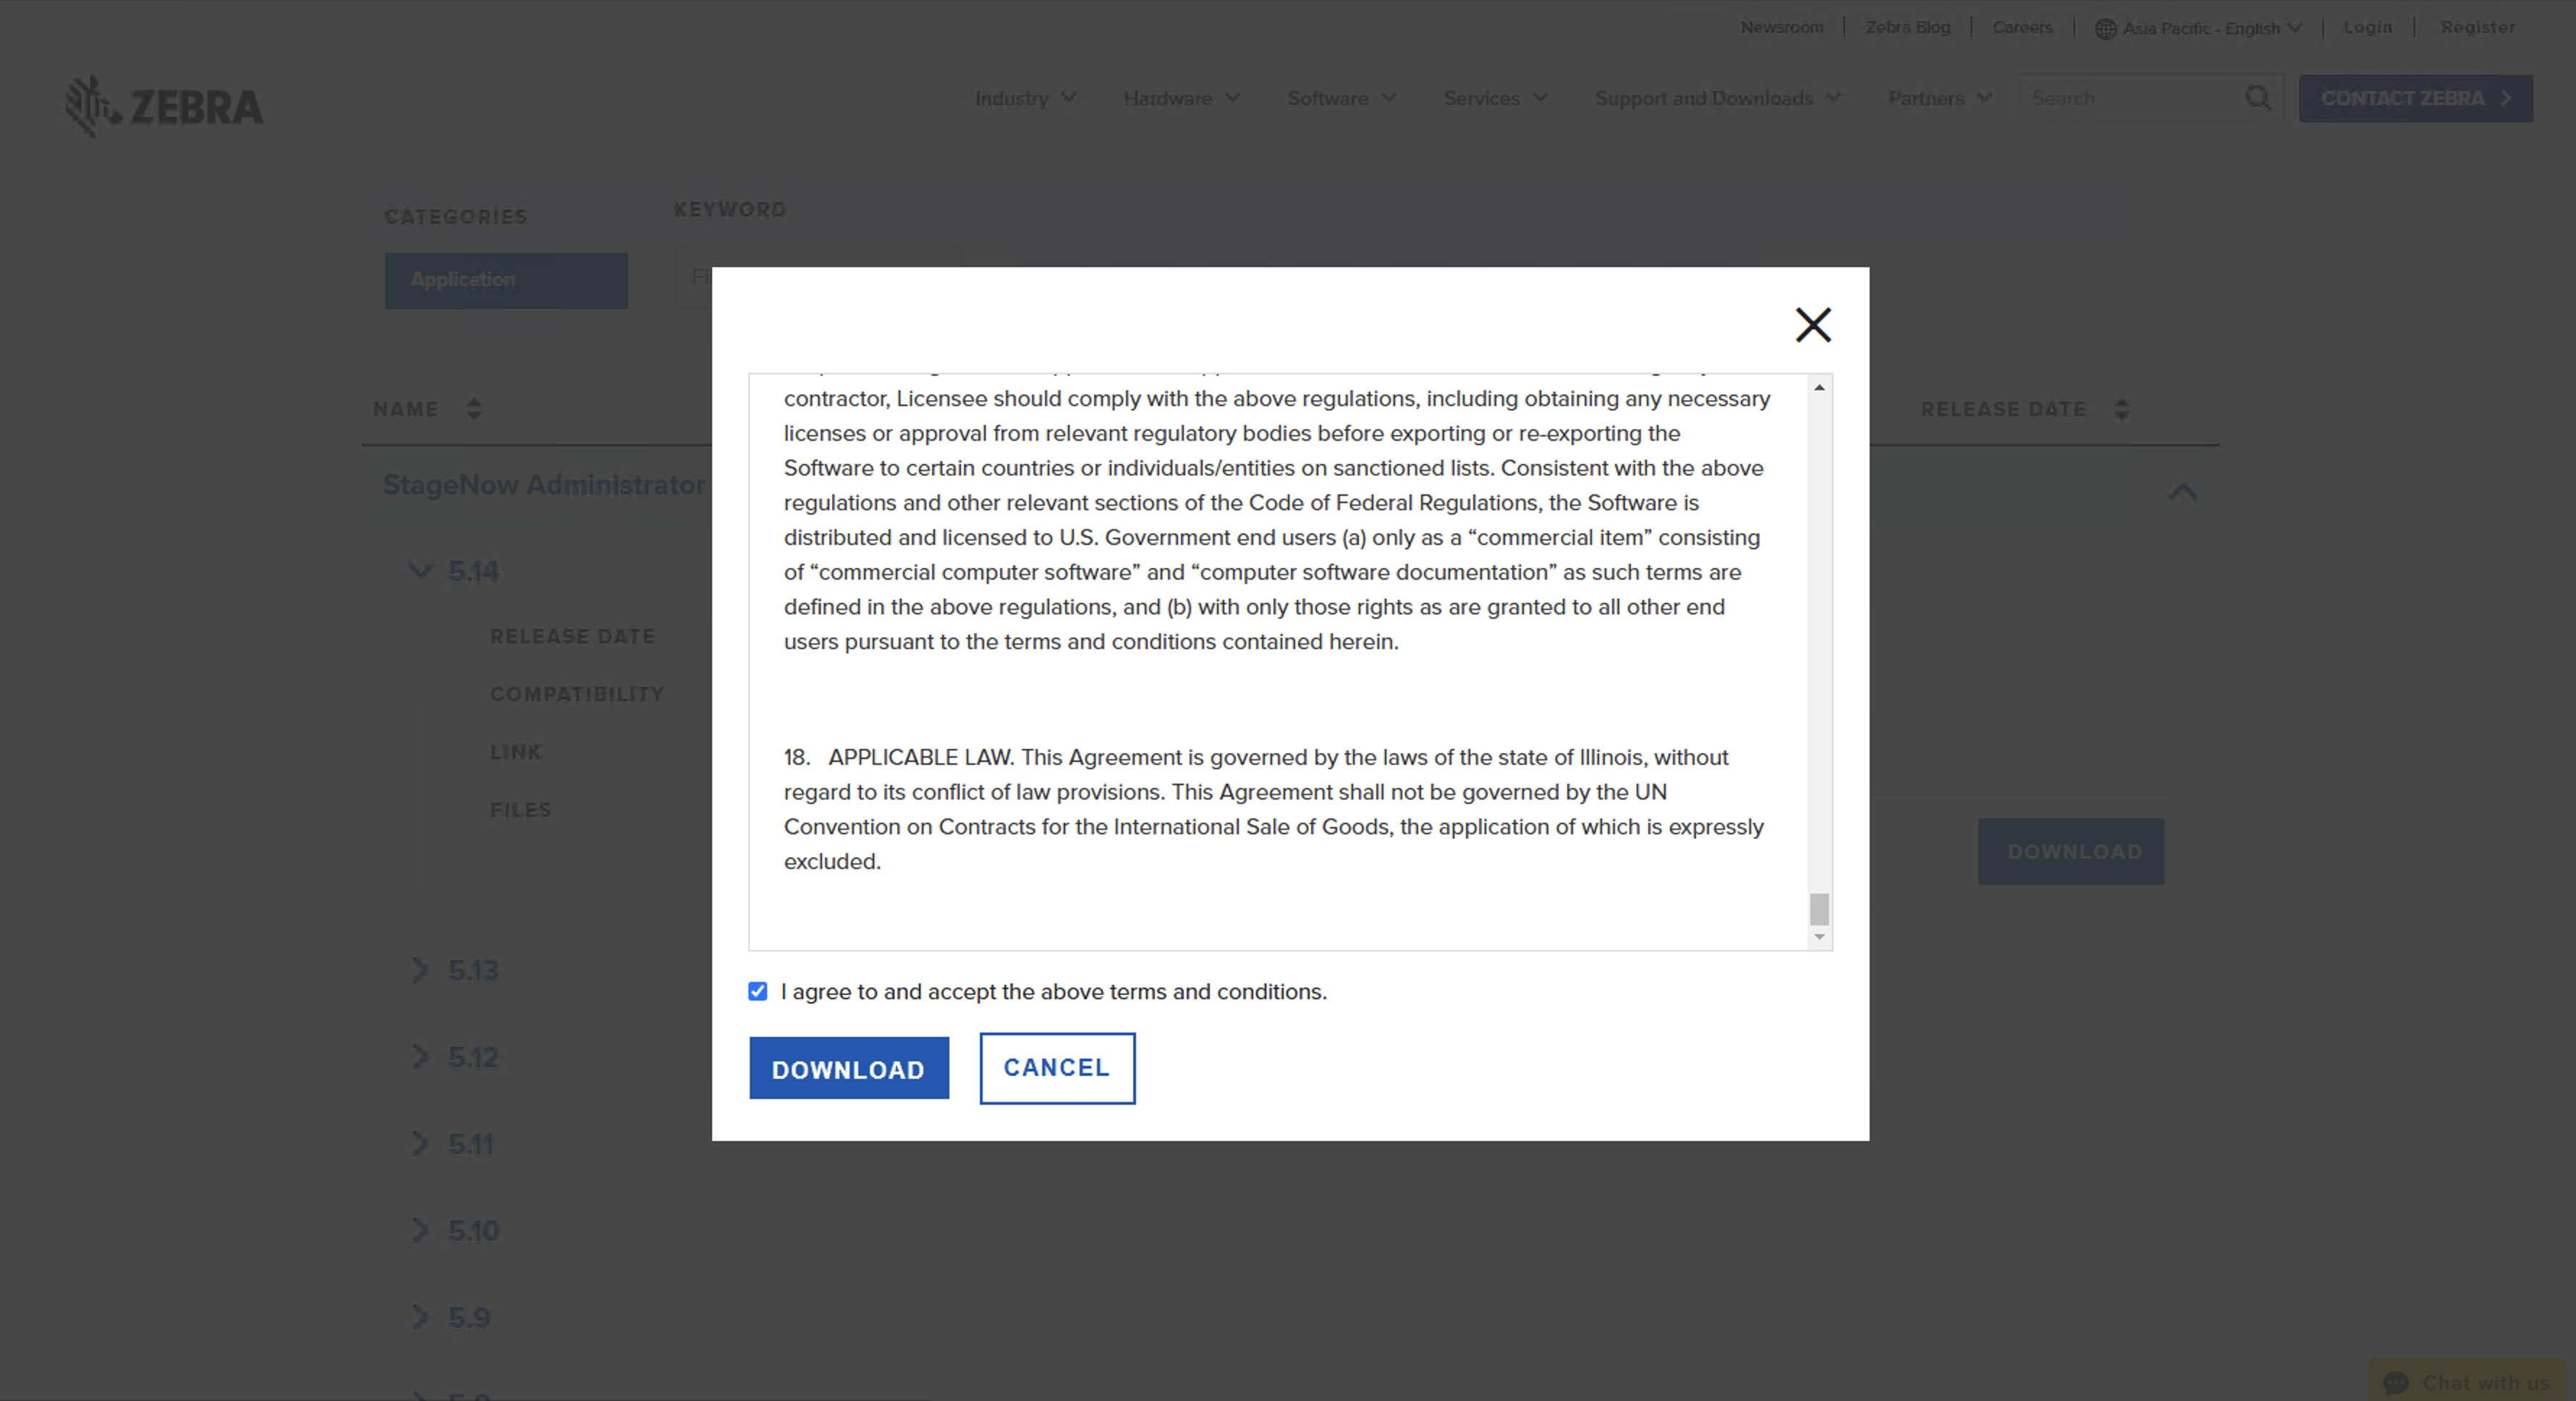
- Download the latest version of the StageNow tool from the official Zebra website.
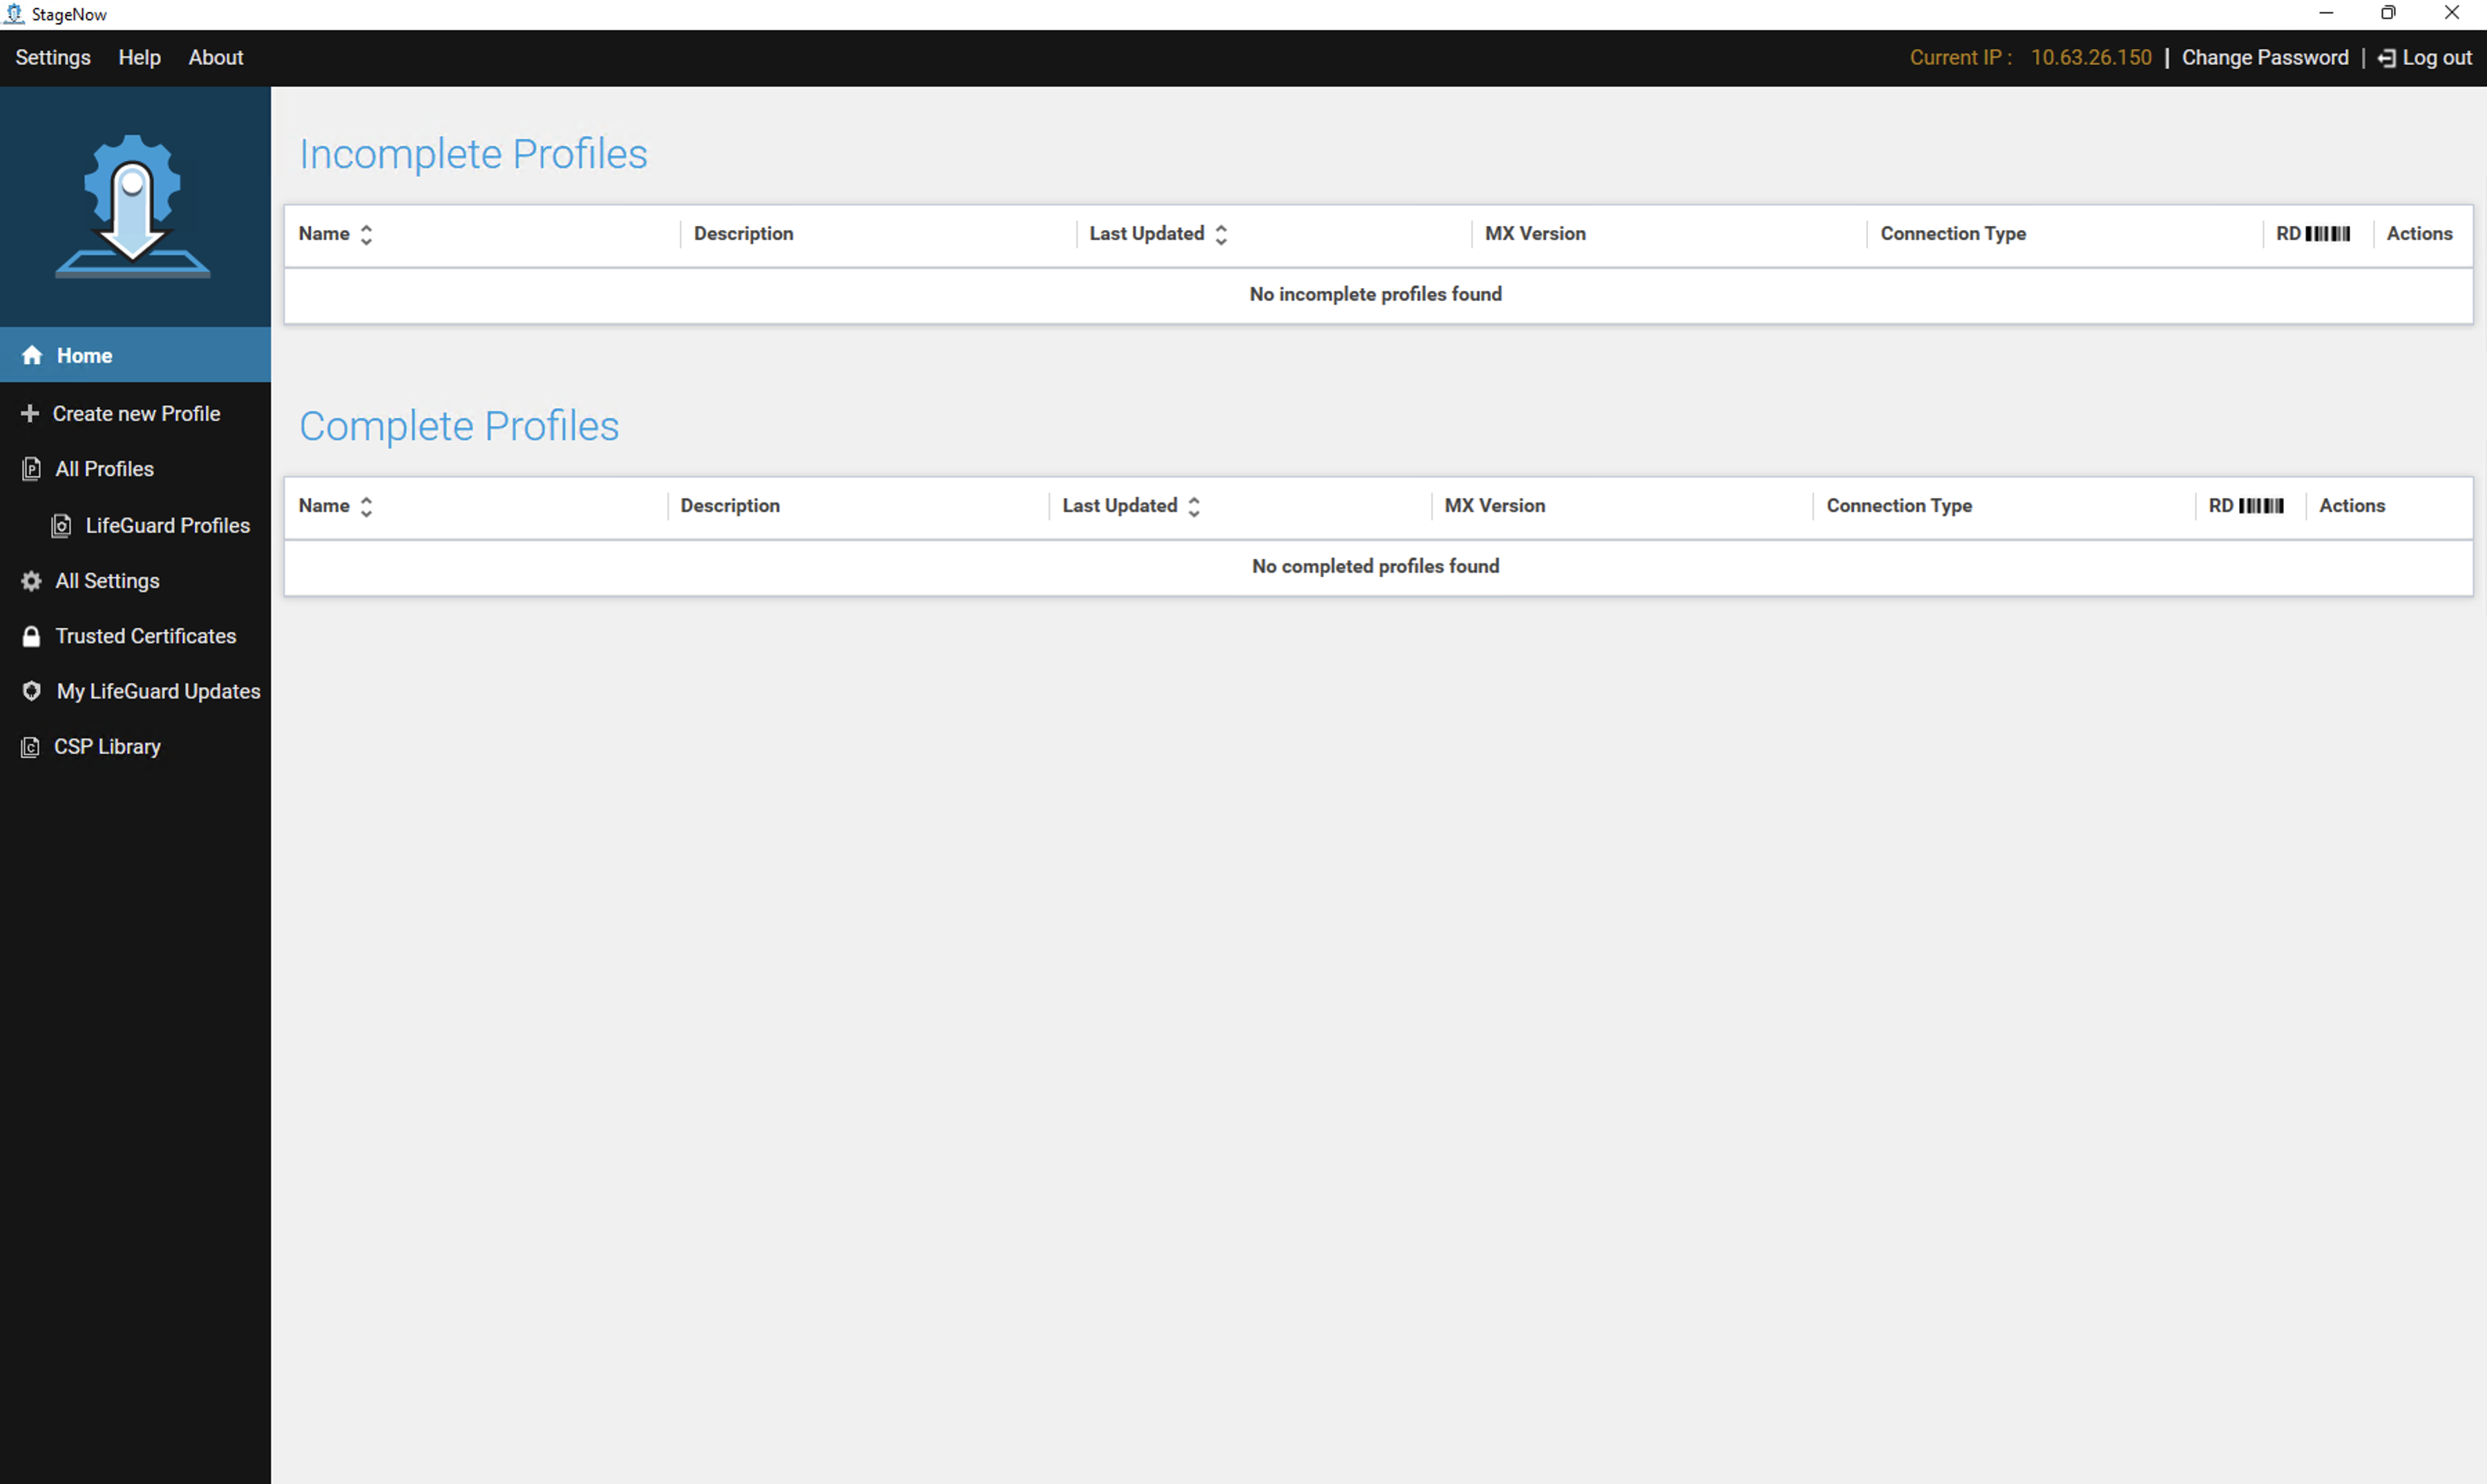
- Install and set up StageNow on your Windows machine.
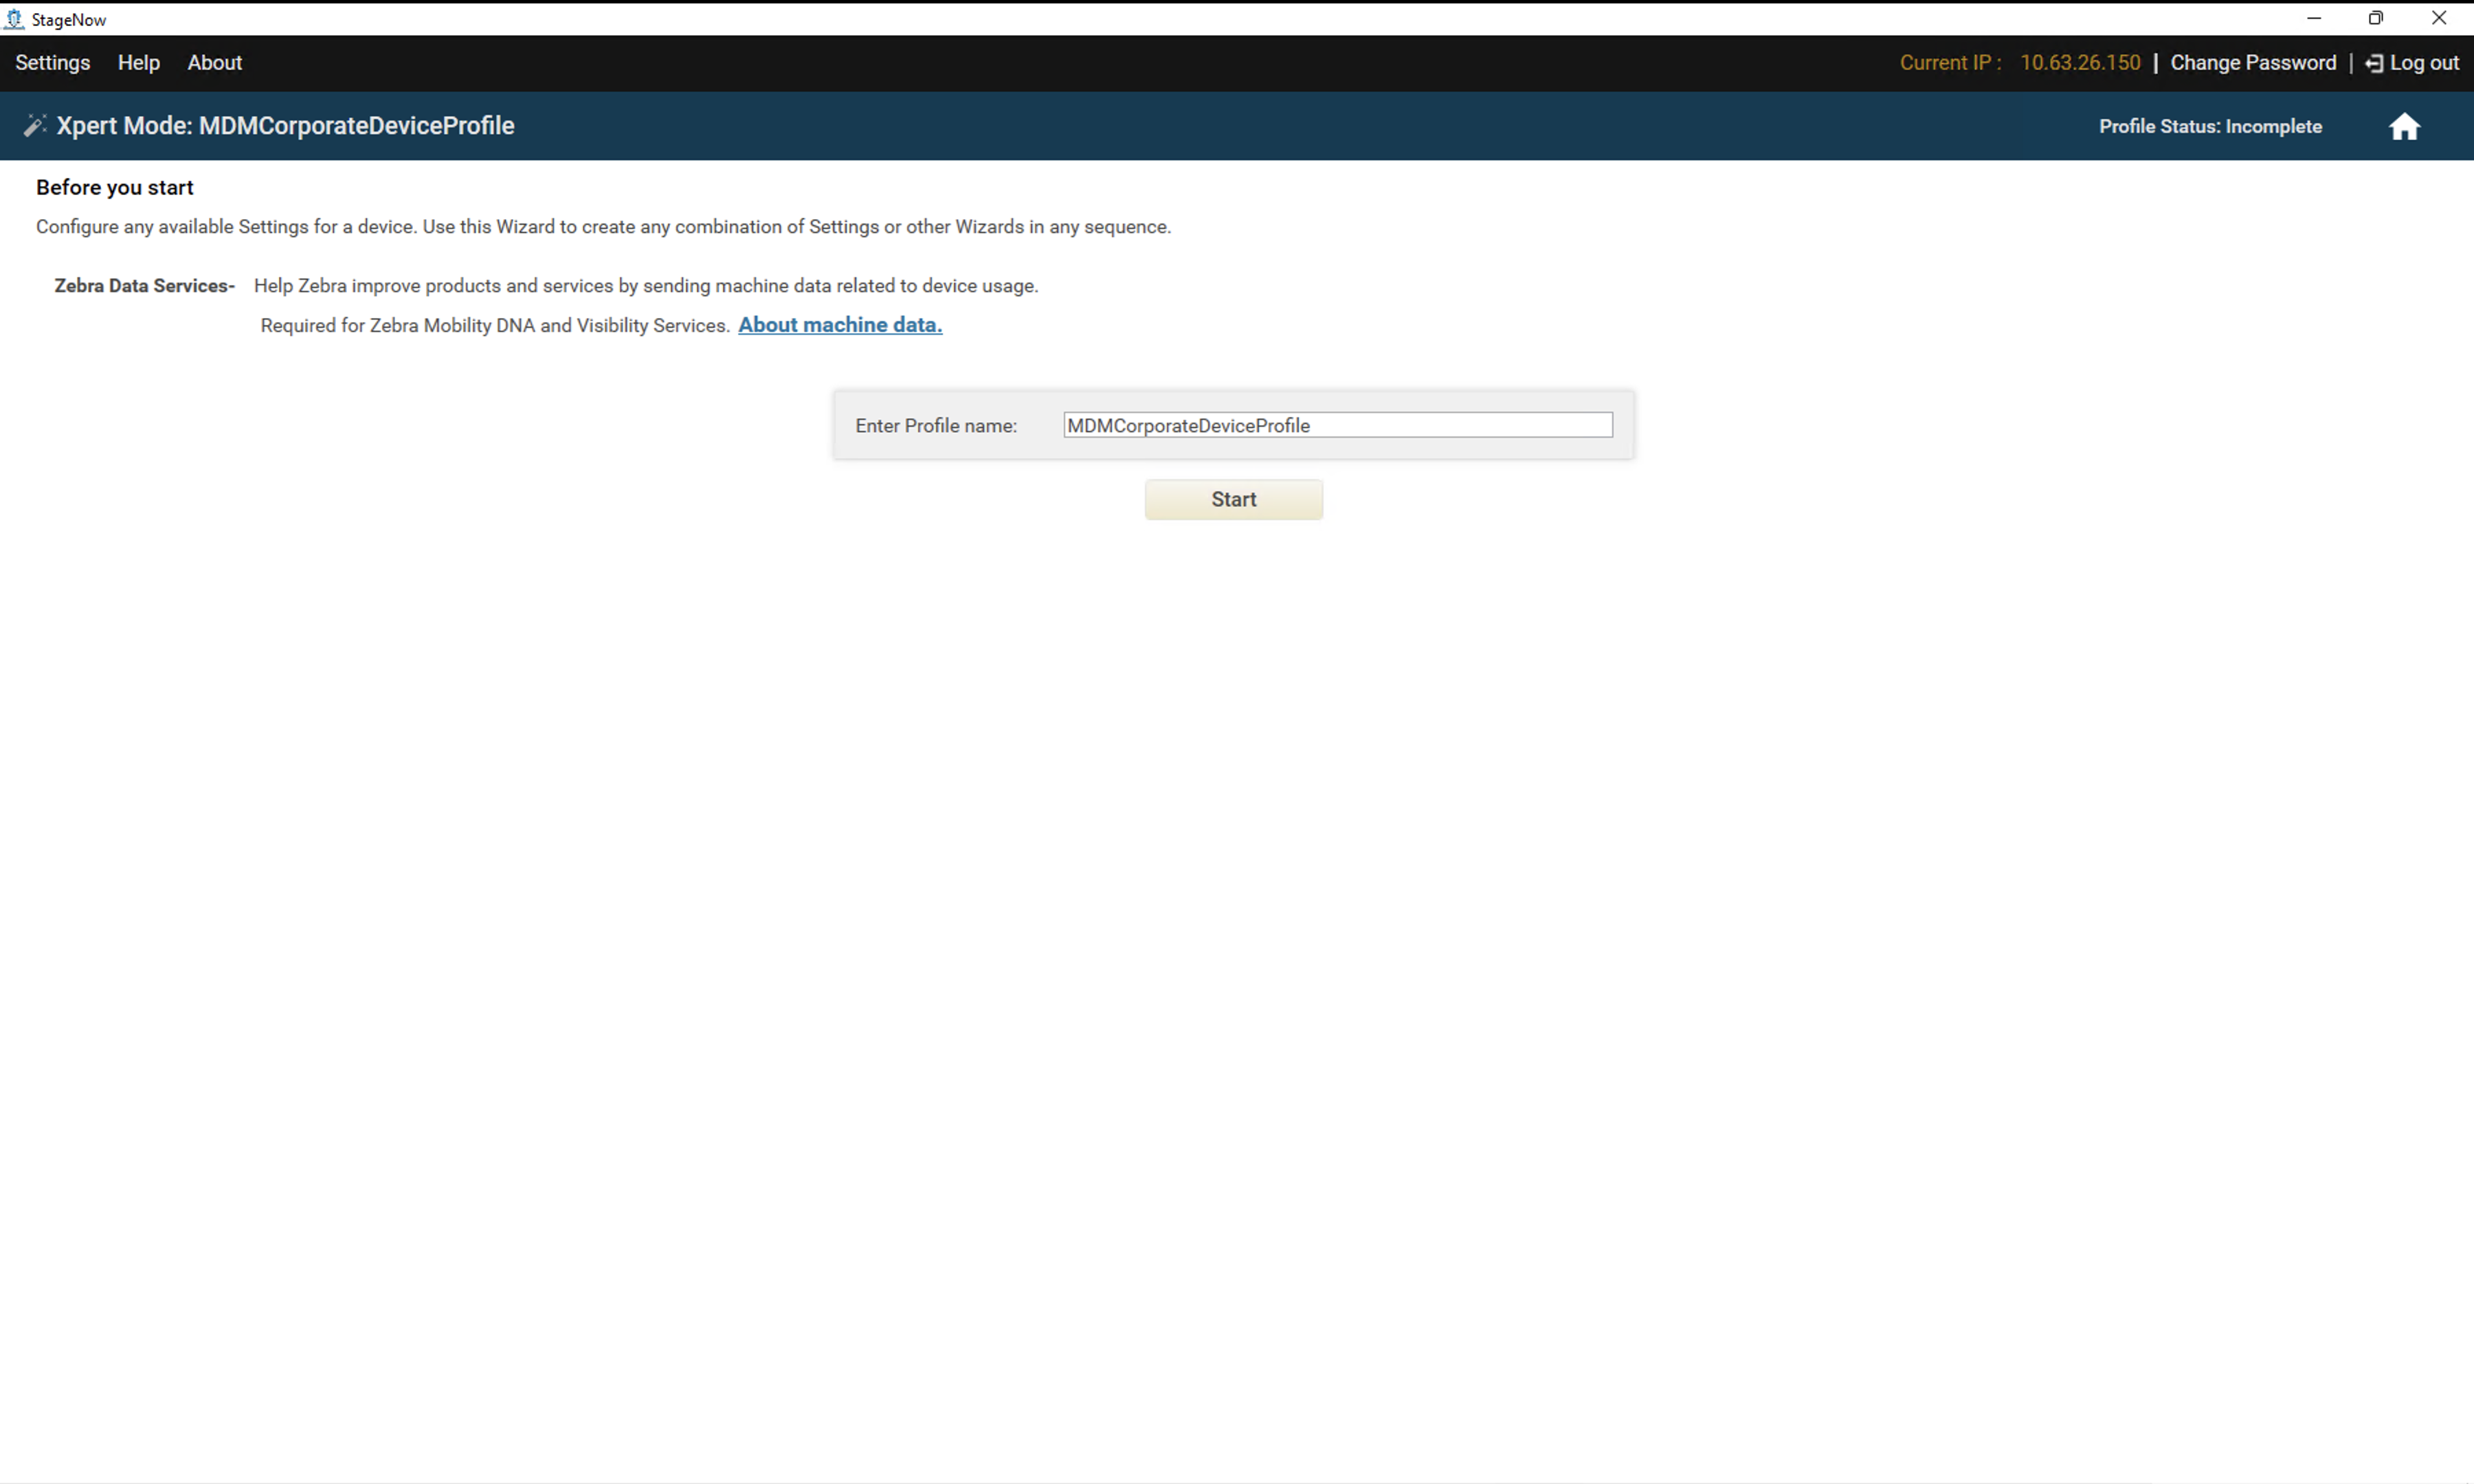
- Open the StageNow tool. Create a new profile with a name of your choice.
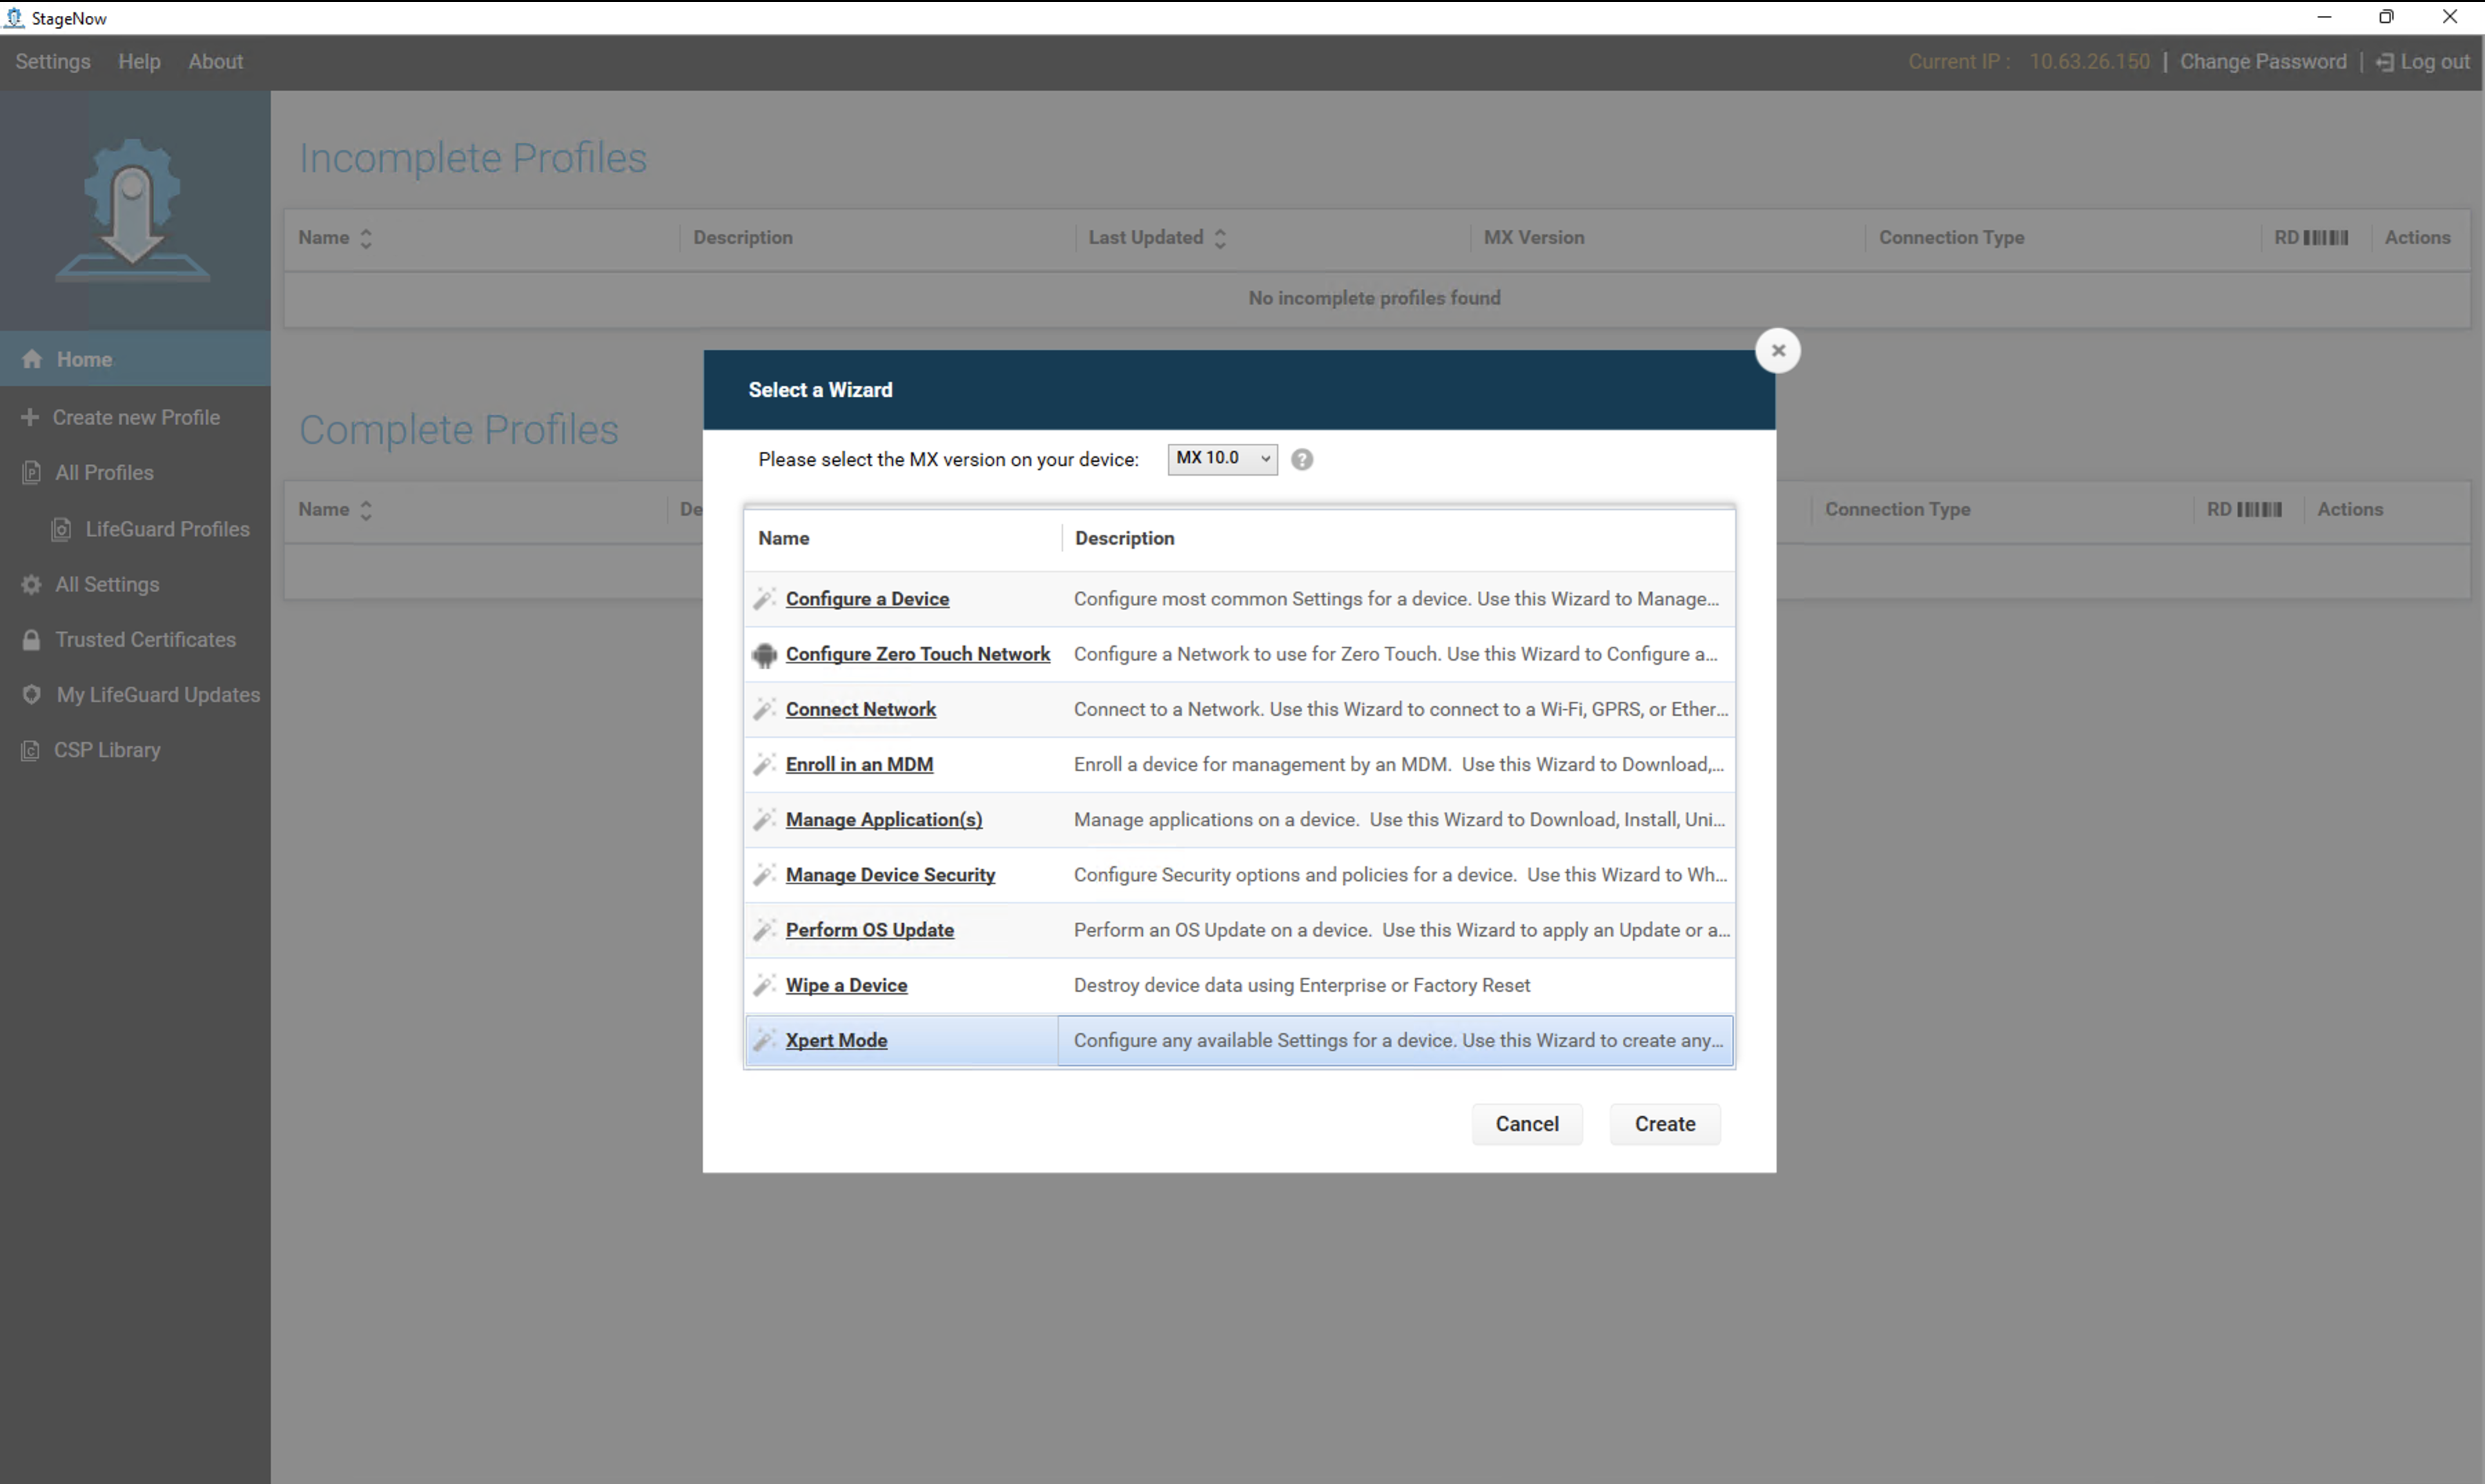
- After entering the profile name, select the XpertConfig option from the wizard dialog. Click Continue.
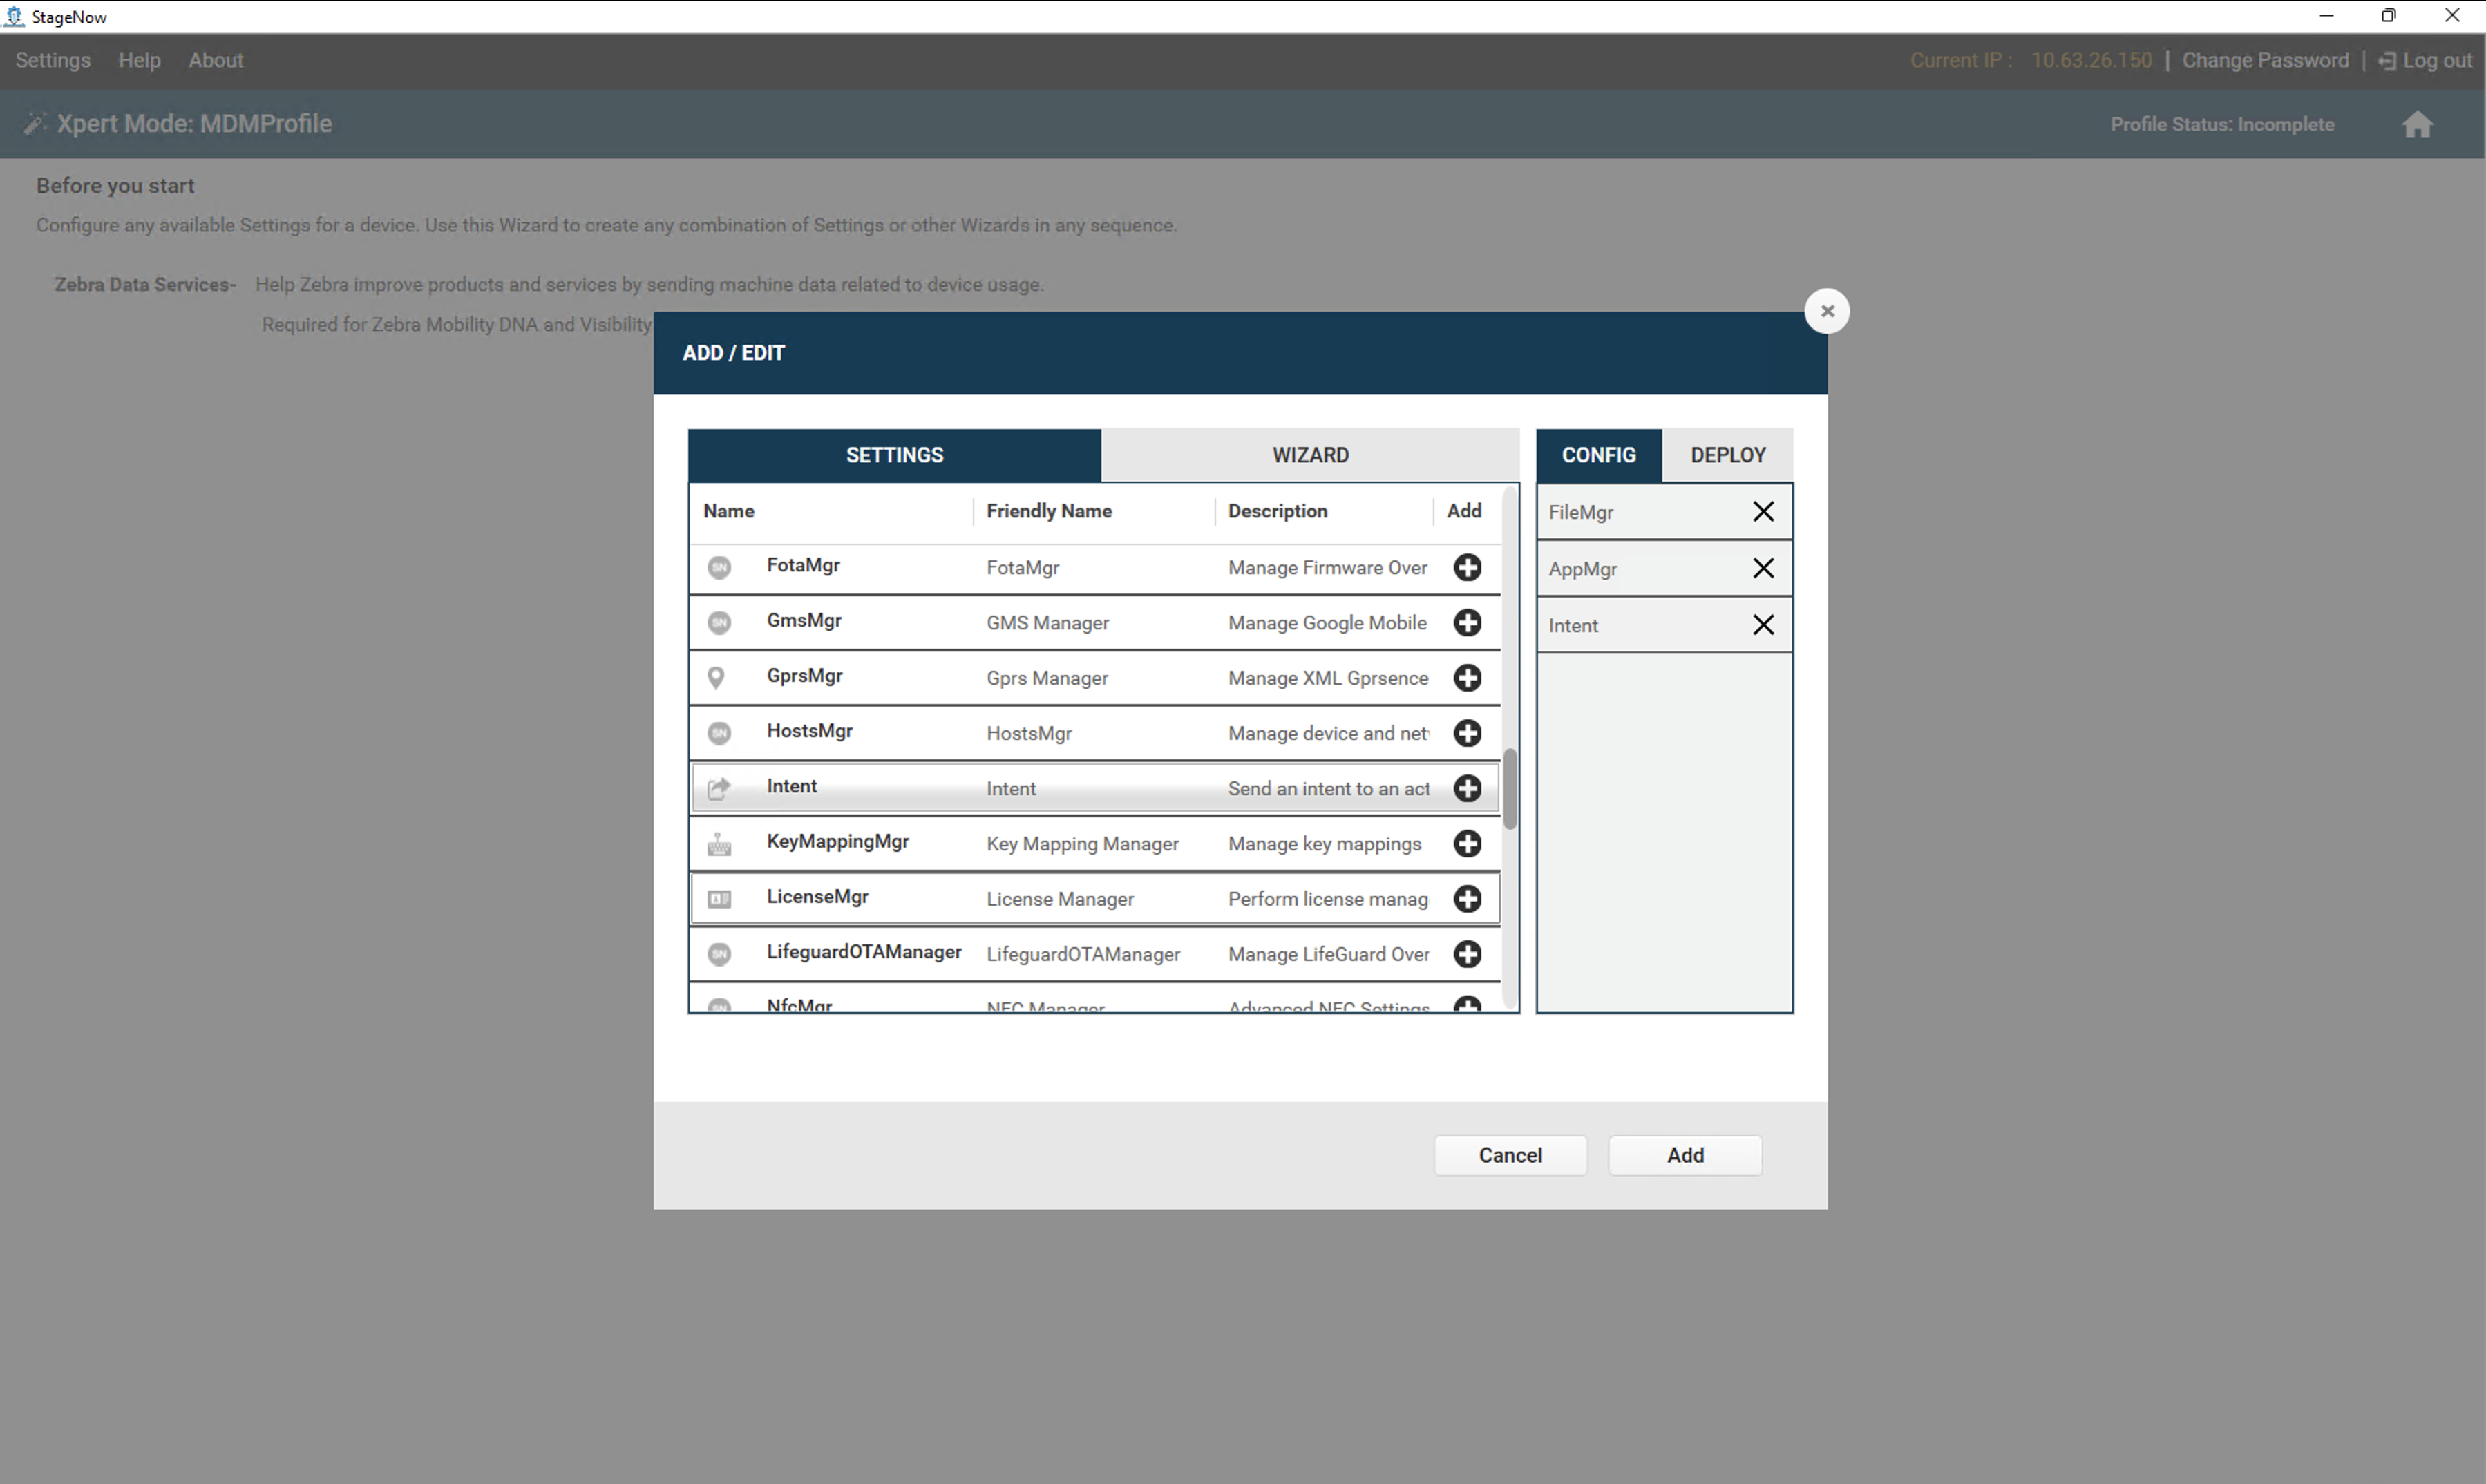
- From the list of settings, select FileMgr, AppMgr, and Intent in the exact order mentioned. Click Add.
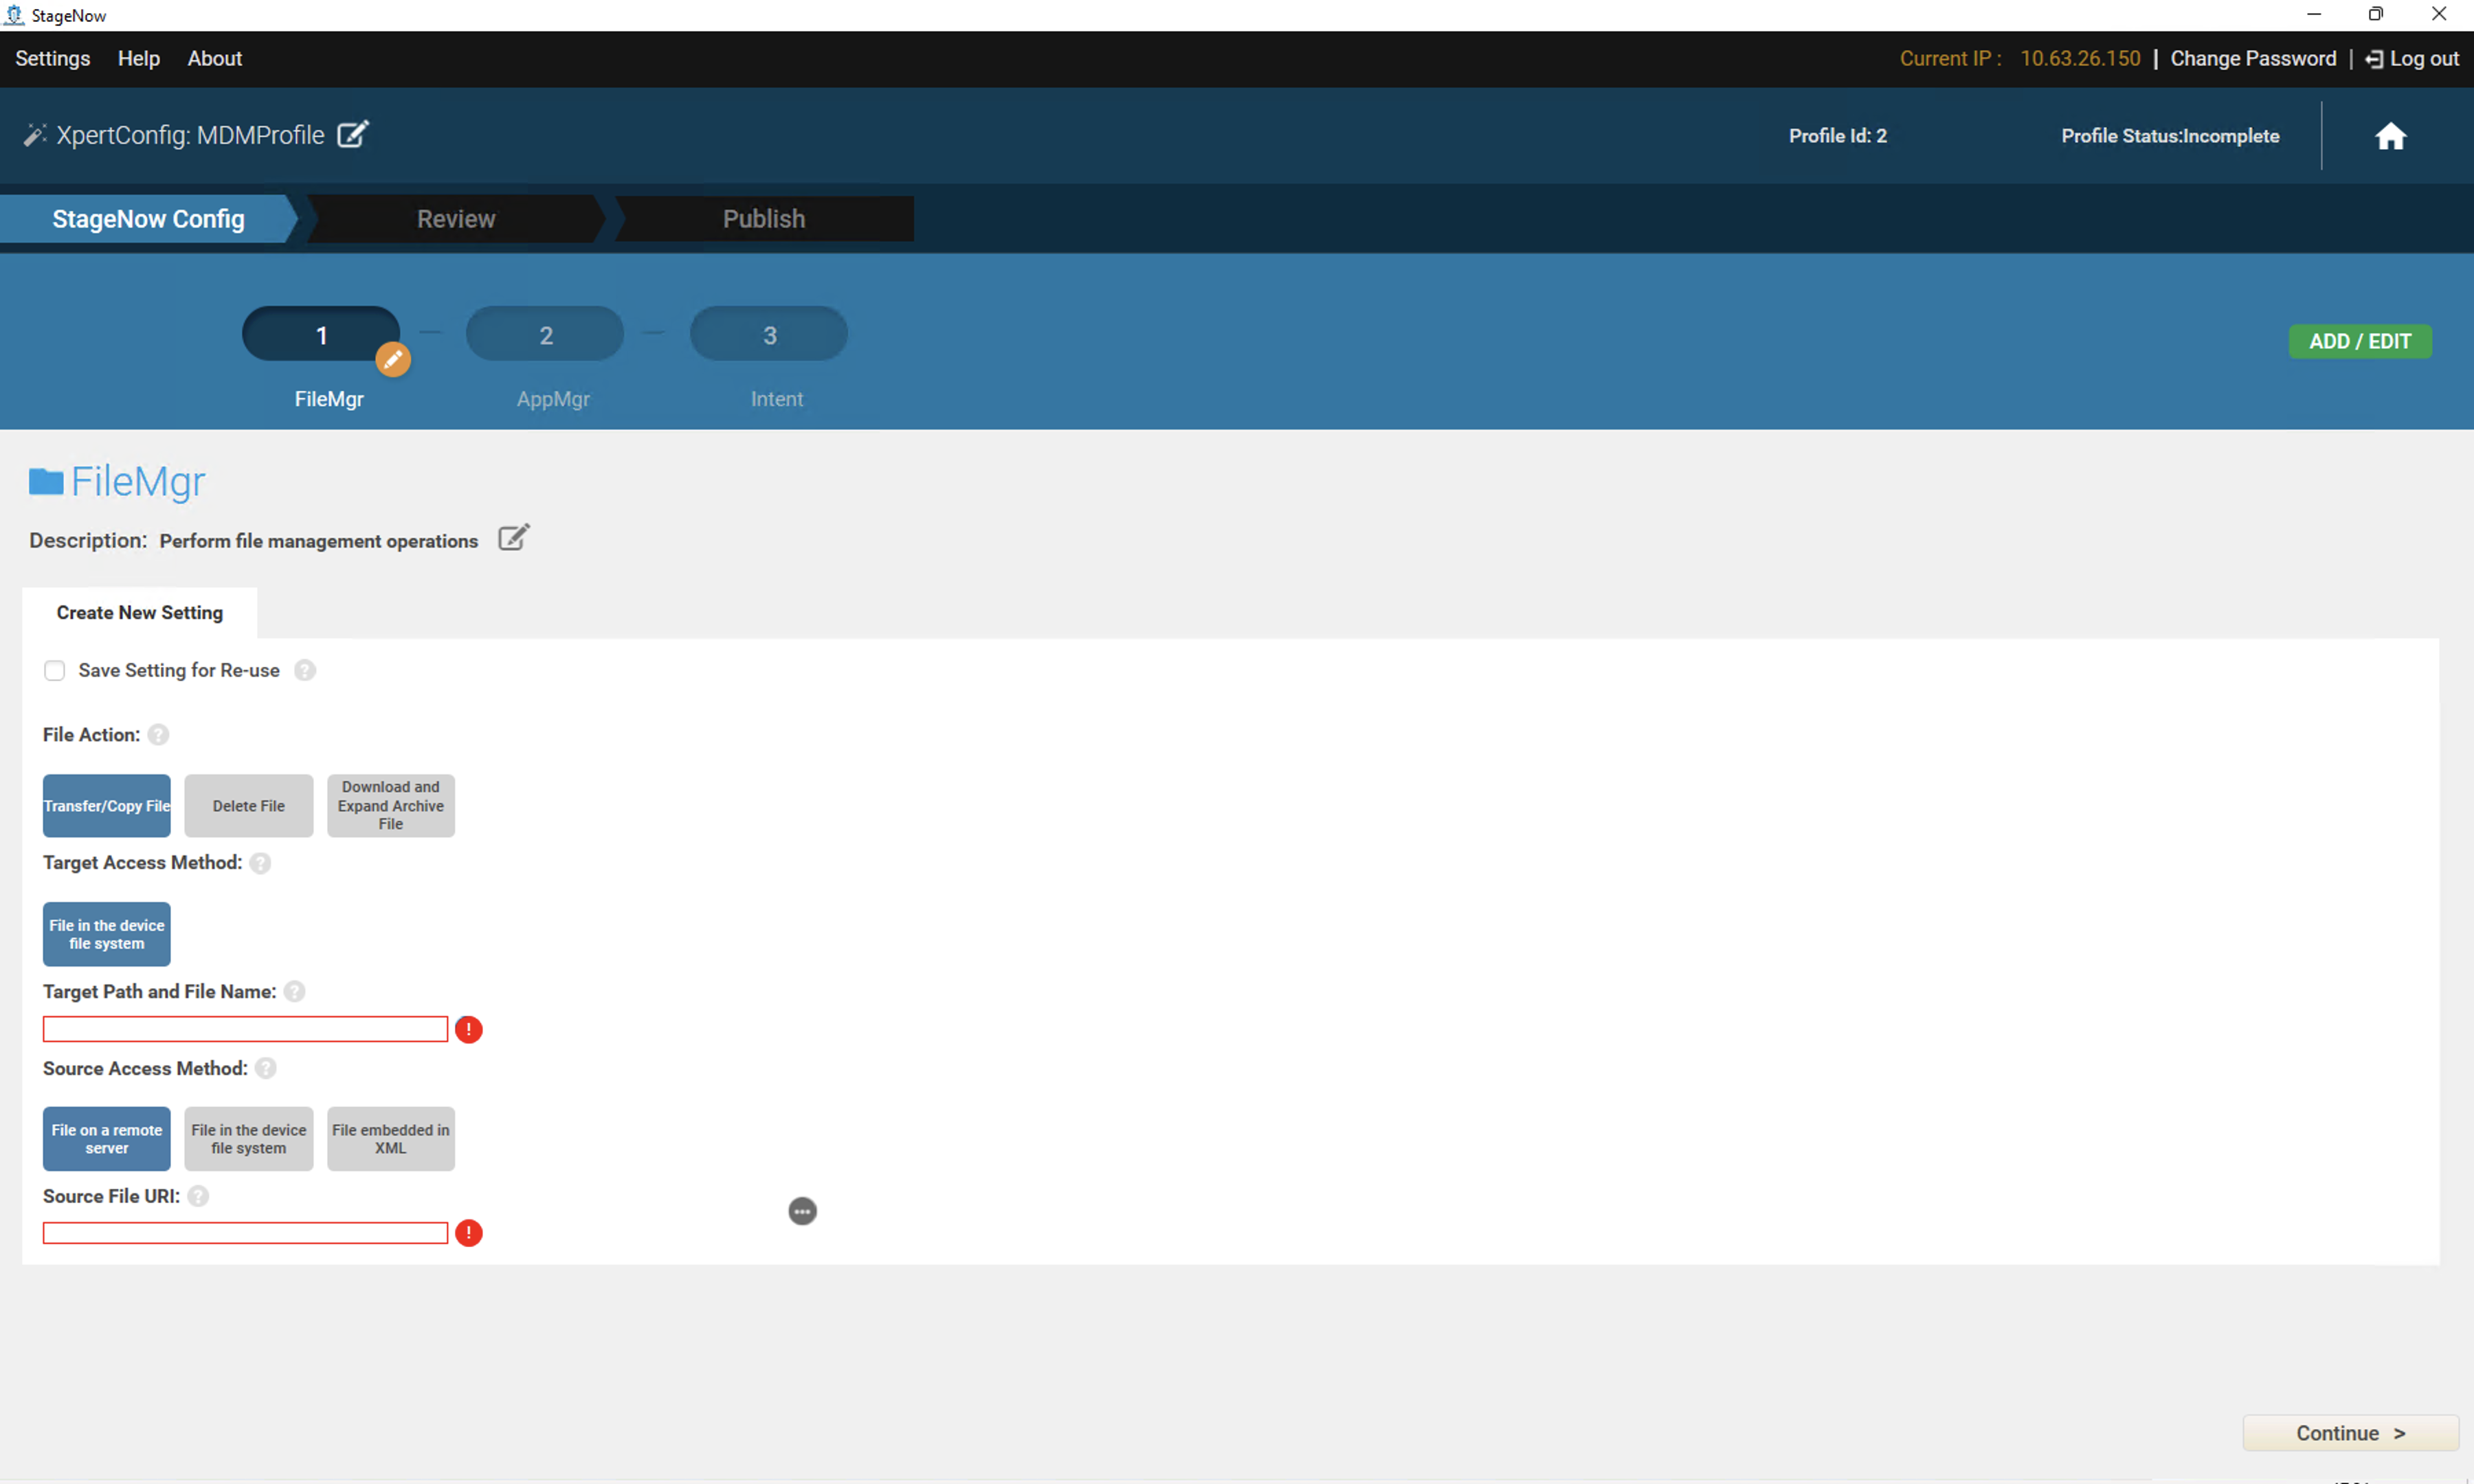
- Enter the target path and file name as /data/tmp/public/MDMAndroidAgent.apk
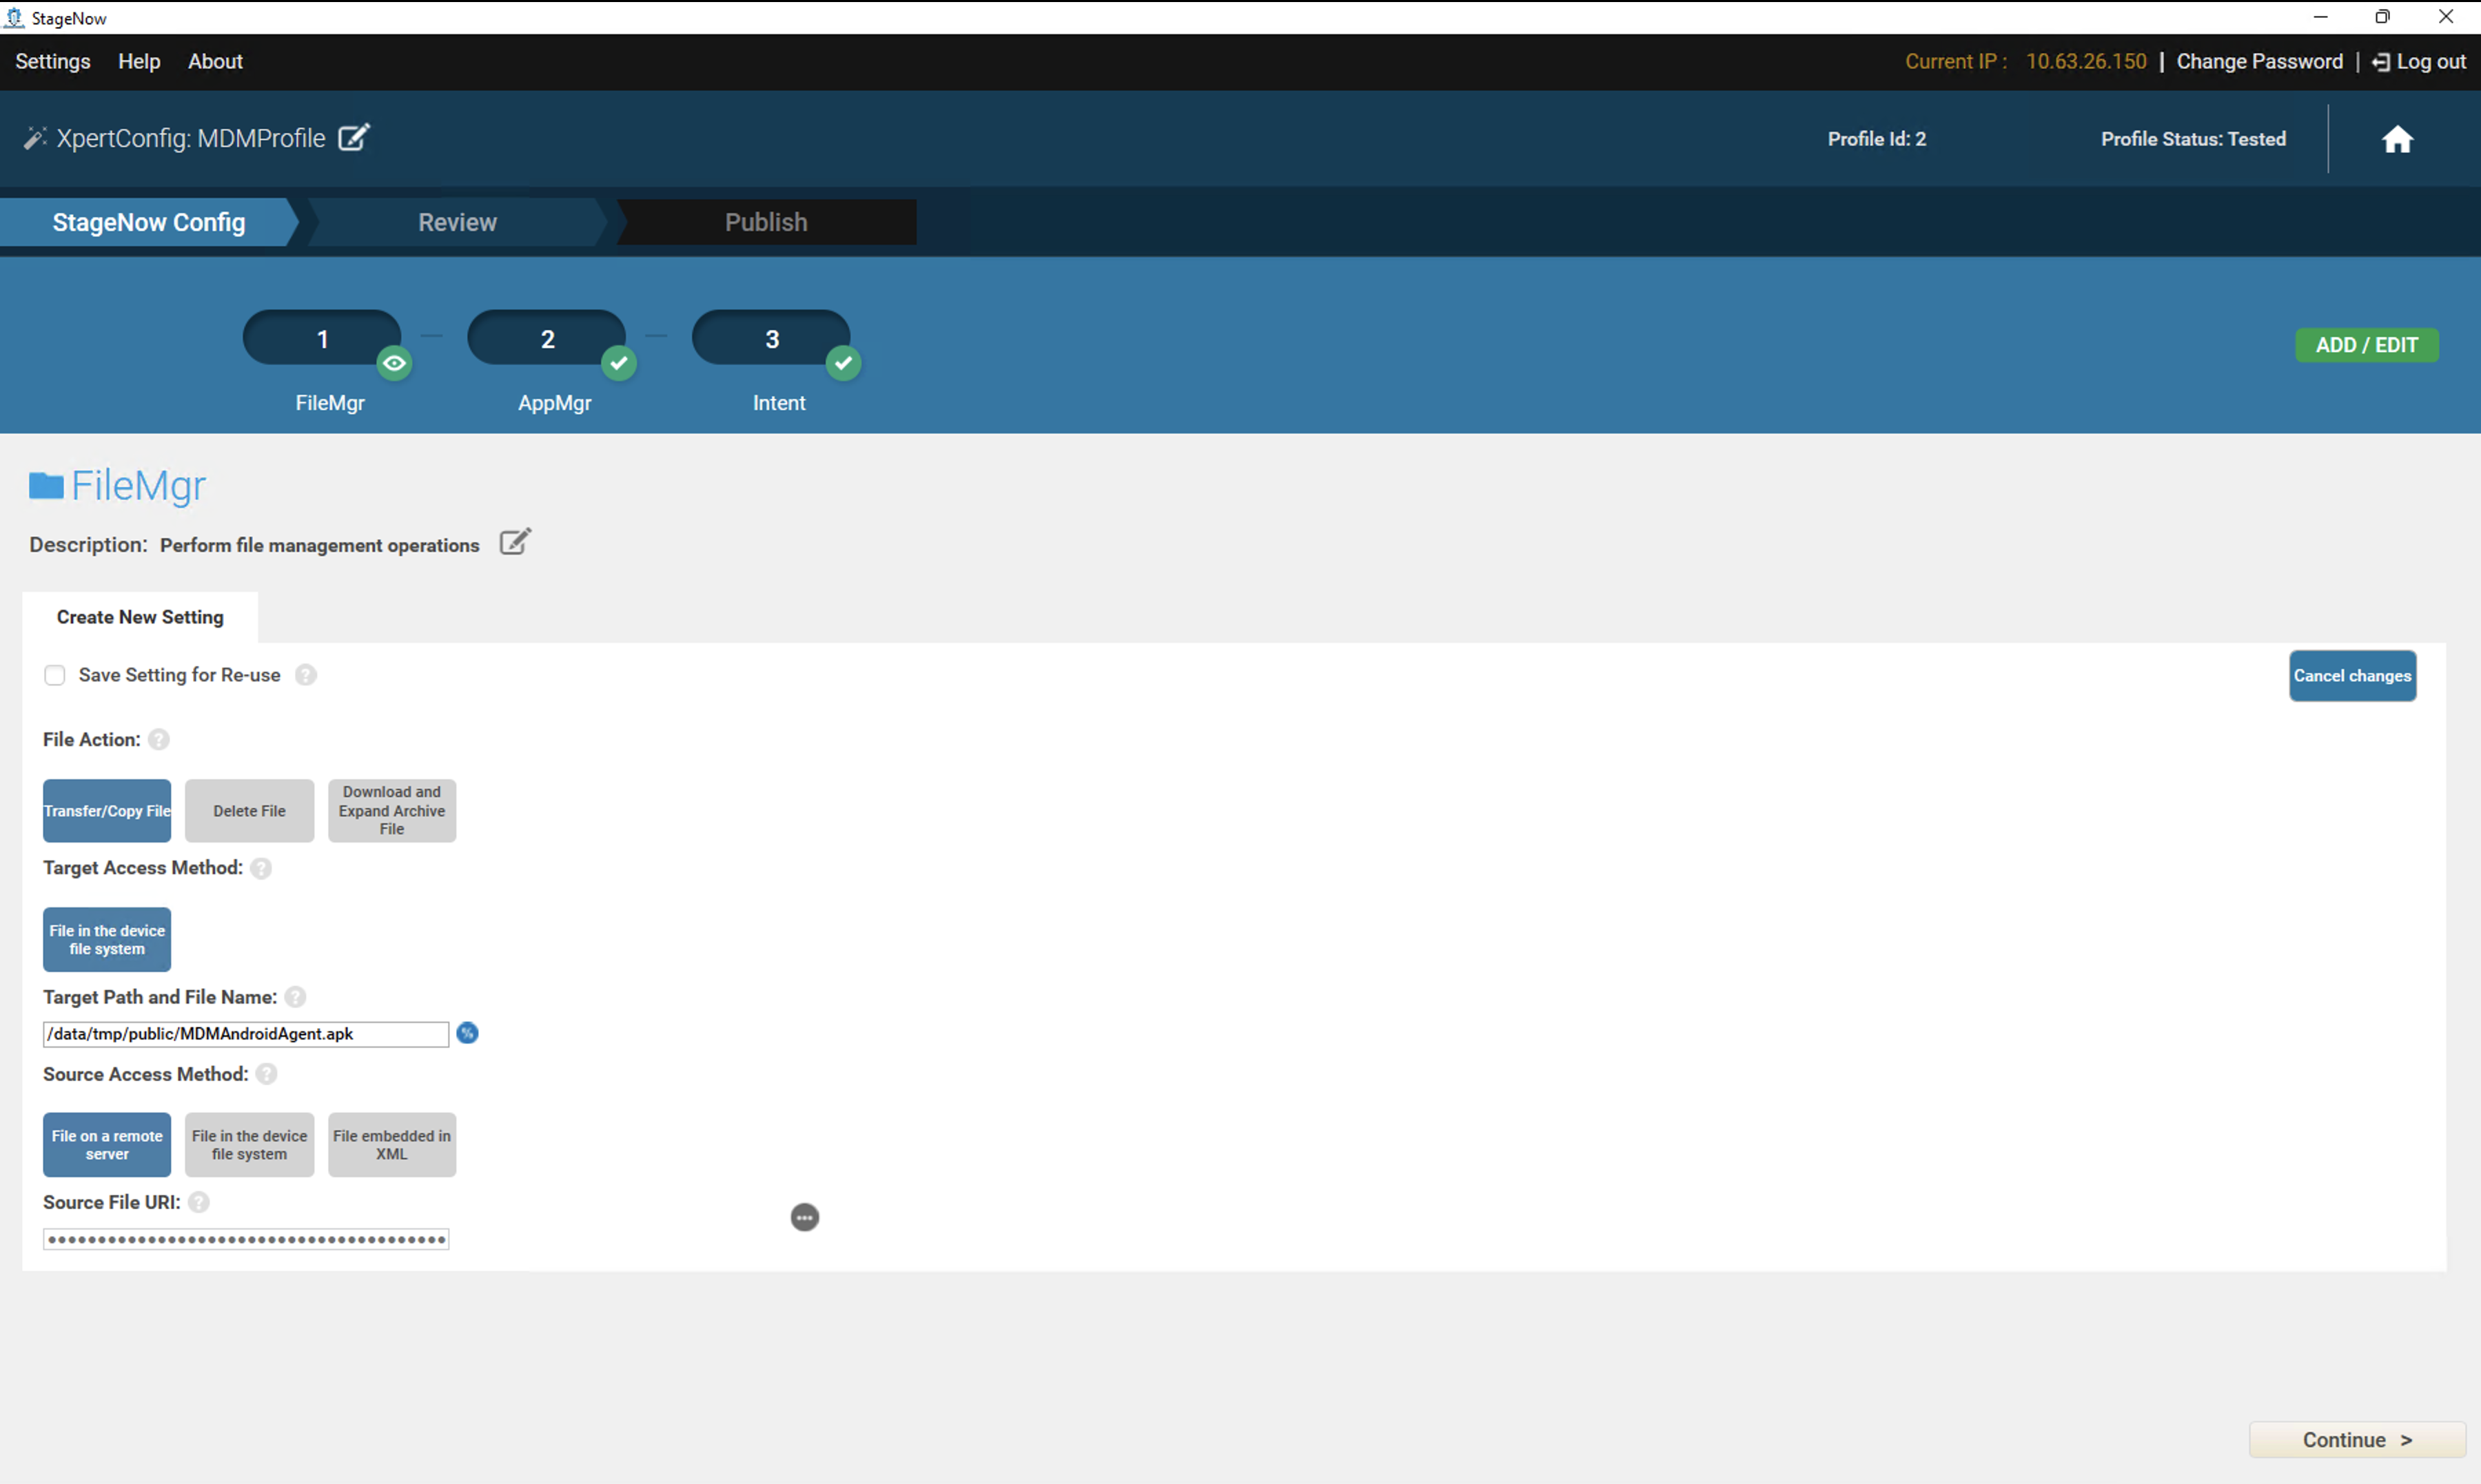
- Choose one of the following methods to push the MDM app to the device:
- Direct Transfer:Push the app directly from the StageNow tool to the device (both must be on the same network).
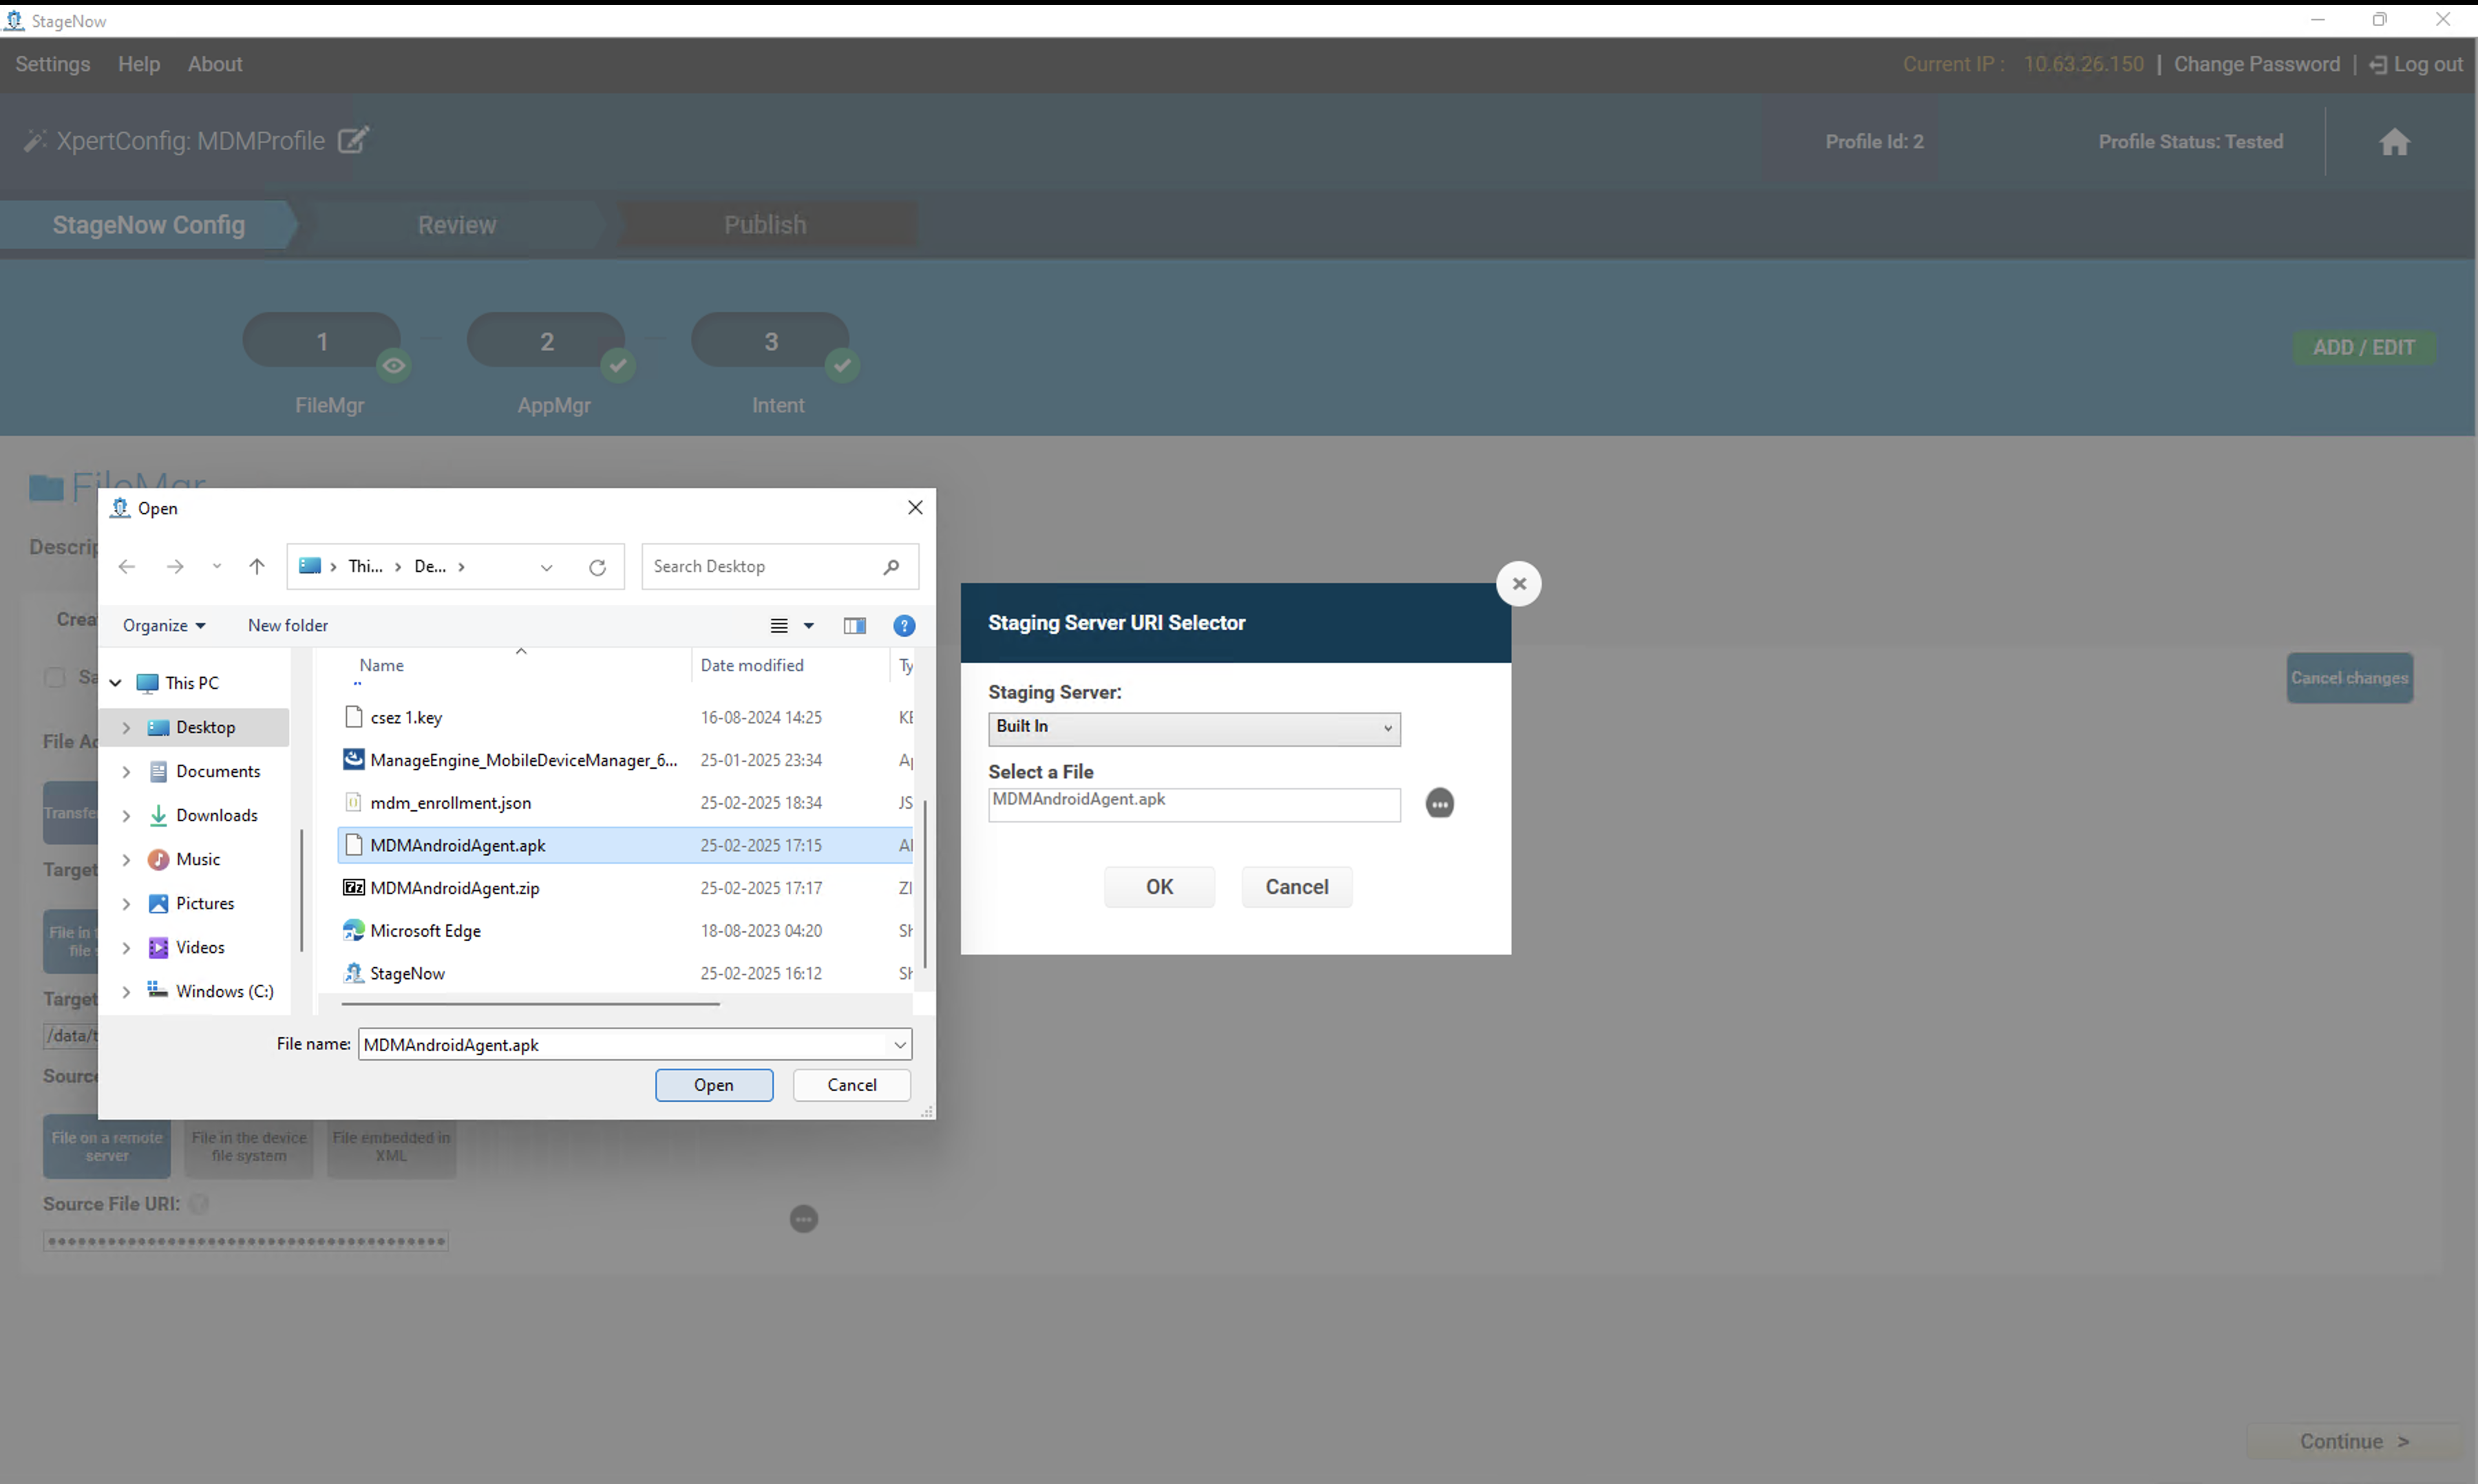
- Click the elipsis icon next to "Source File URL."
- Select Built-in and choose the MDM app file present locally on your Windows machine.
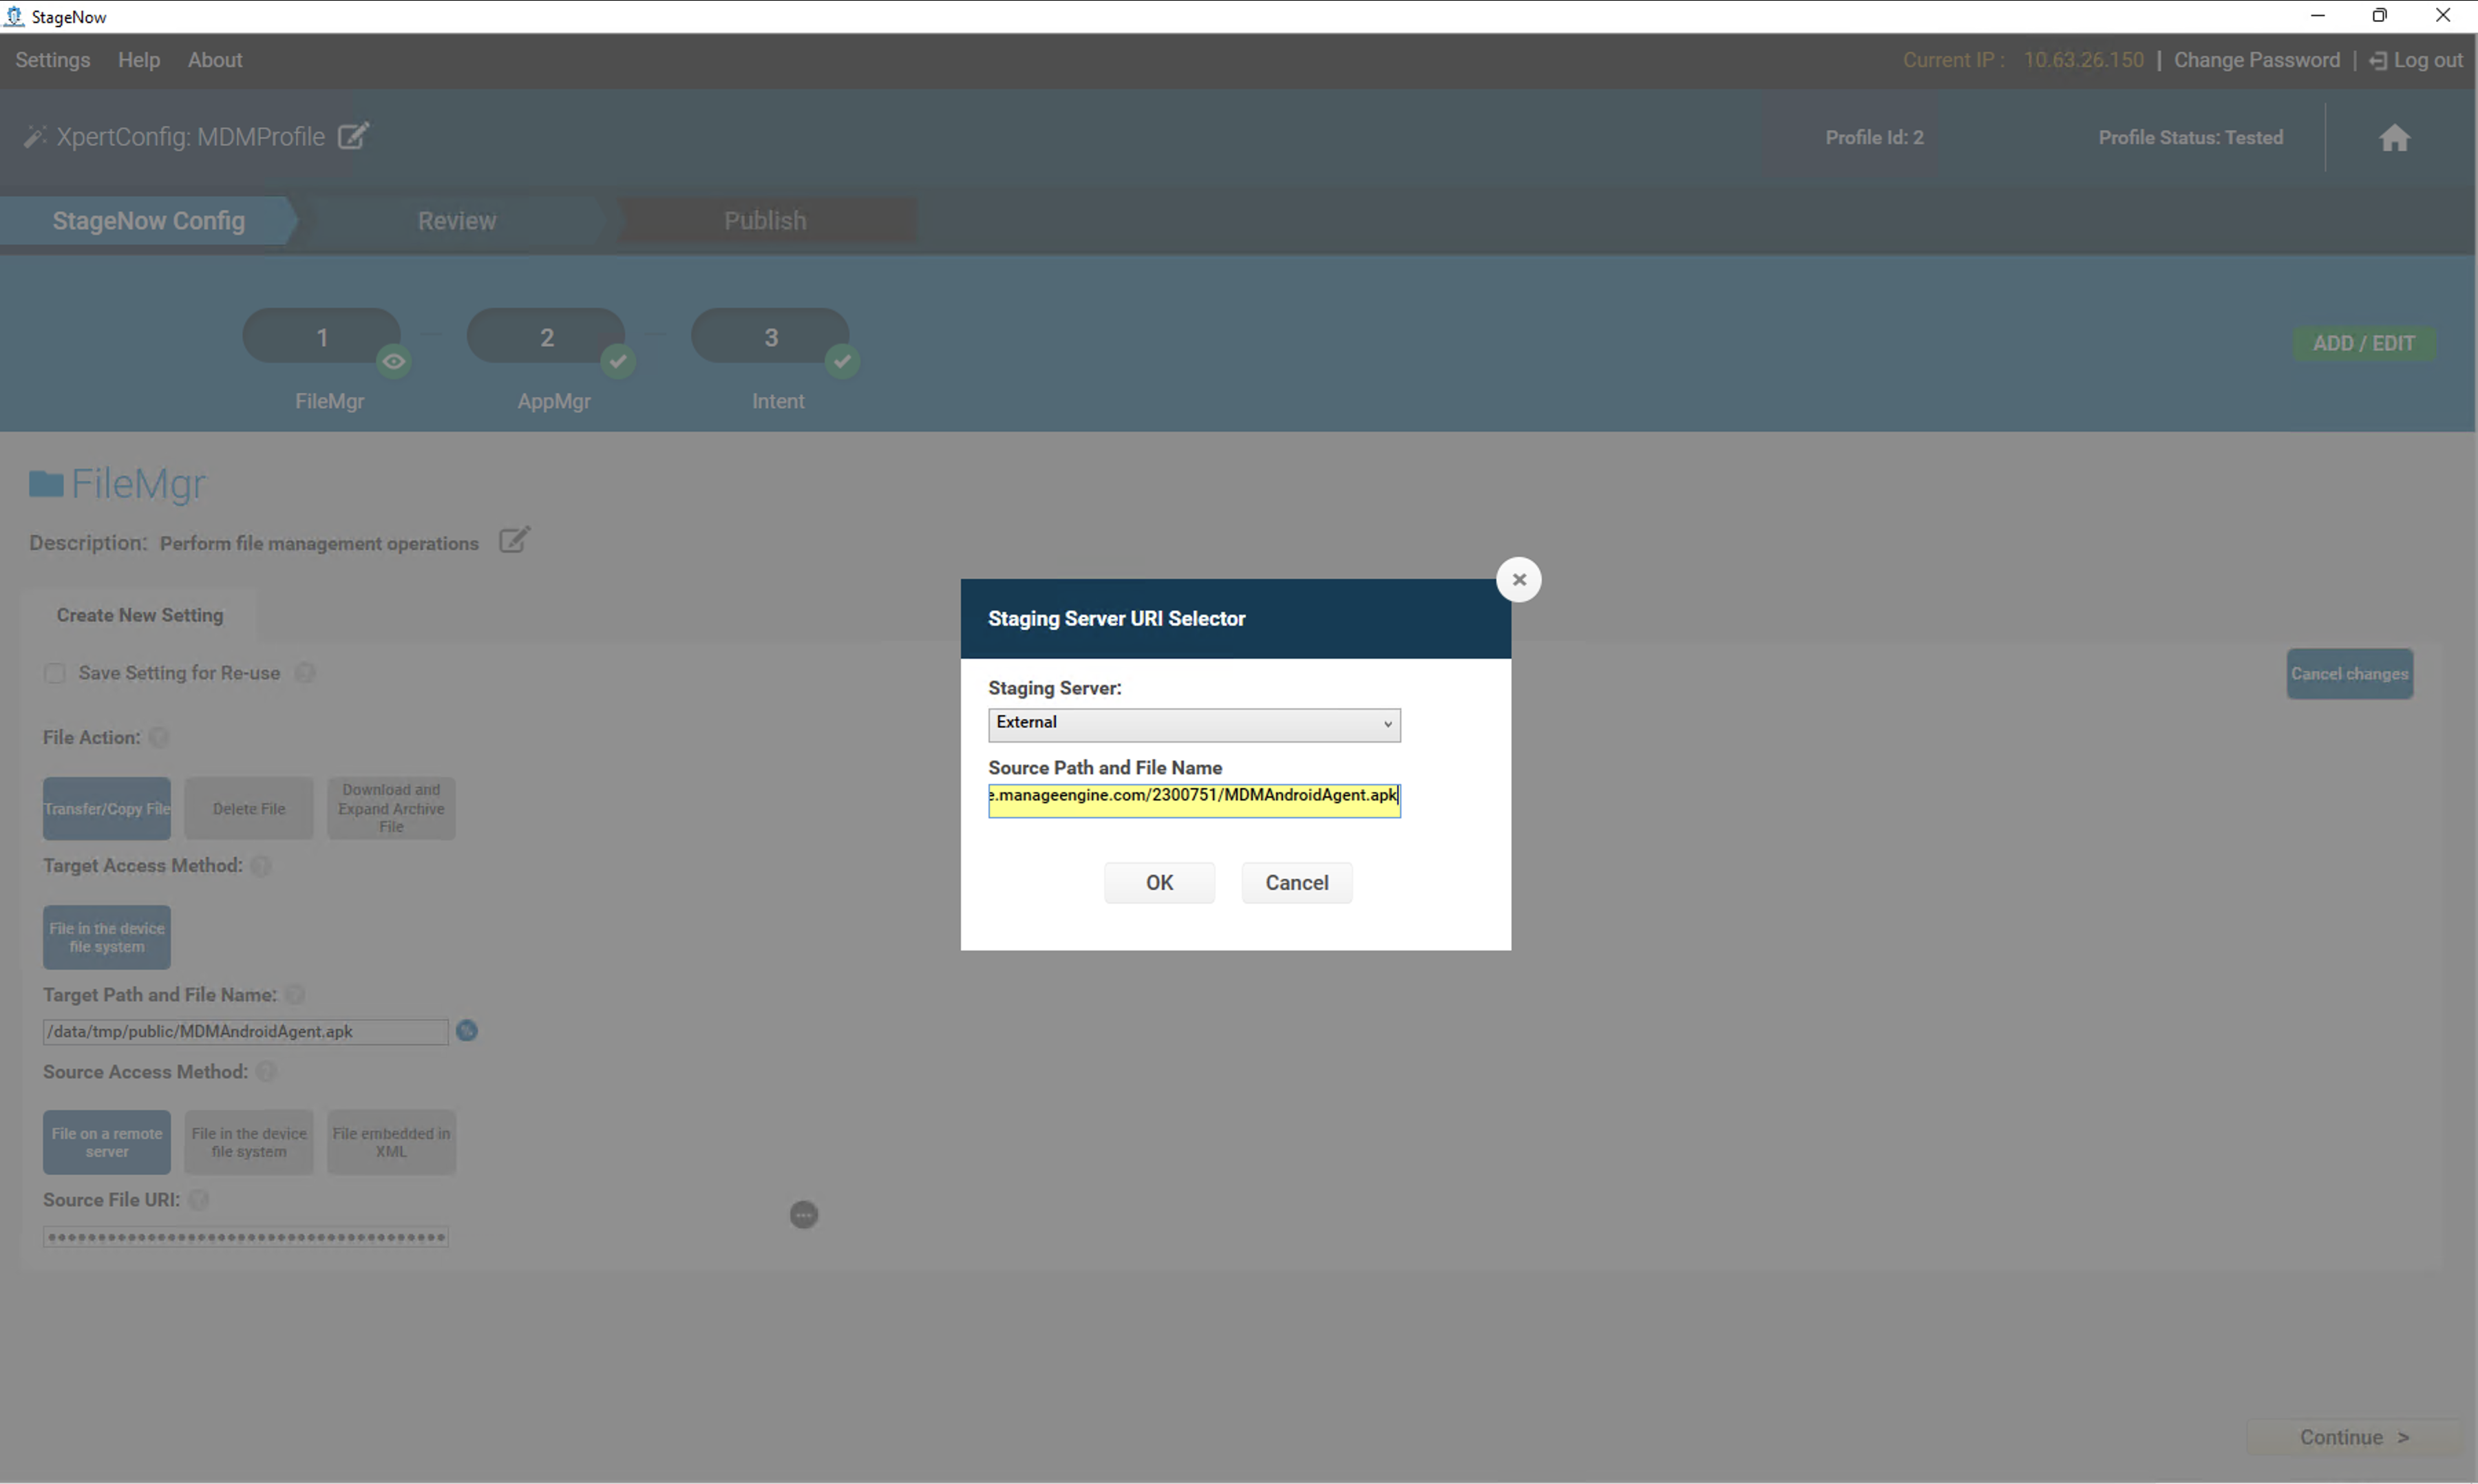
- Download via URL:Provide a download URL, and StageNow will download the file directly from the given link.
- Click the elipsis icon next to "Source File URL."
- Select External and enter the direct MDM app download link.
- Click Continue to save the FileMgr settings.
Note:You can download the MDM app file and Store the MDM app file on your FTP server and generate a direct download link for this step.
- Direct Transfer:Push the app directly from the StageNow tool to the device (both must be on the same network).
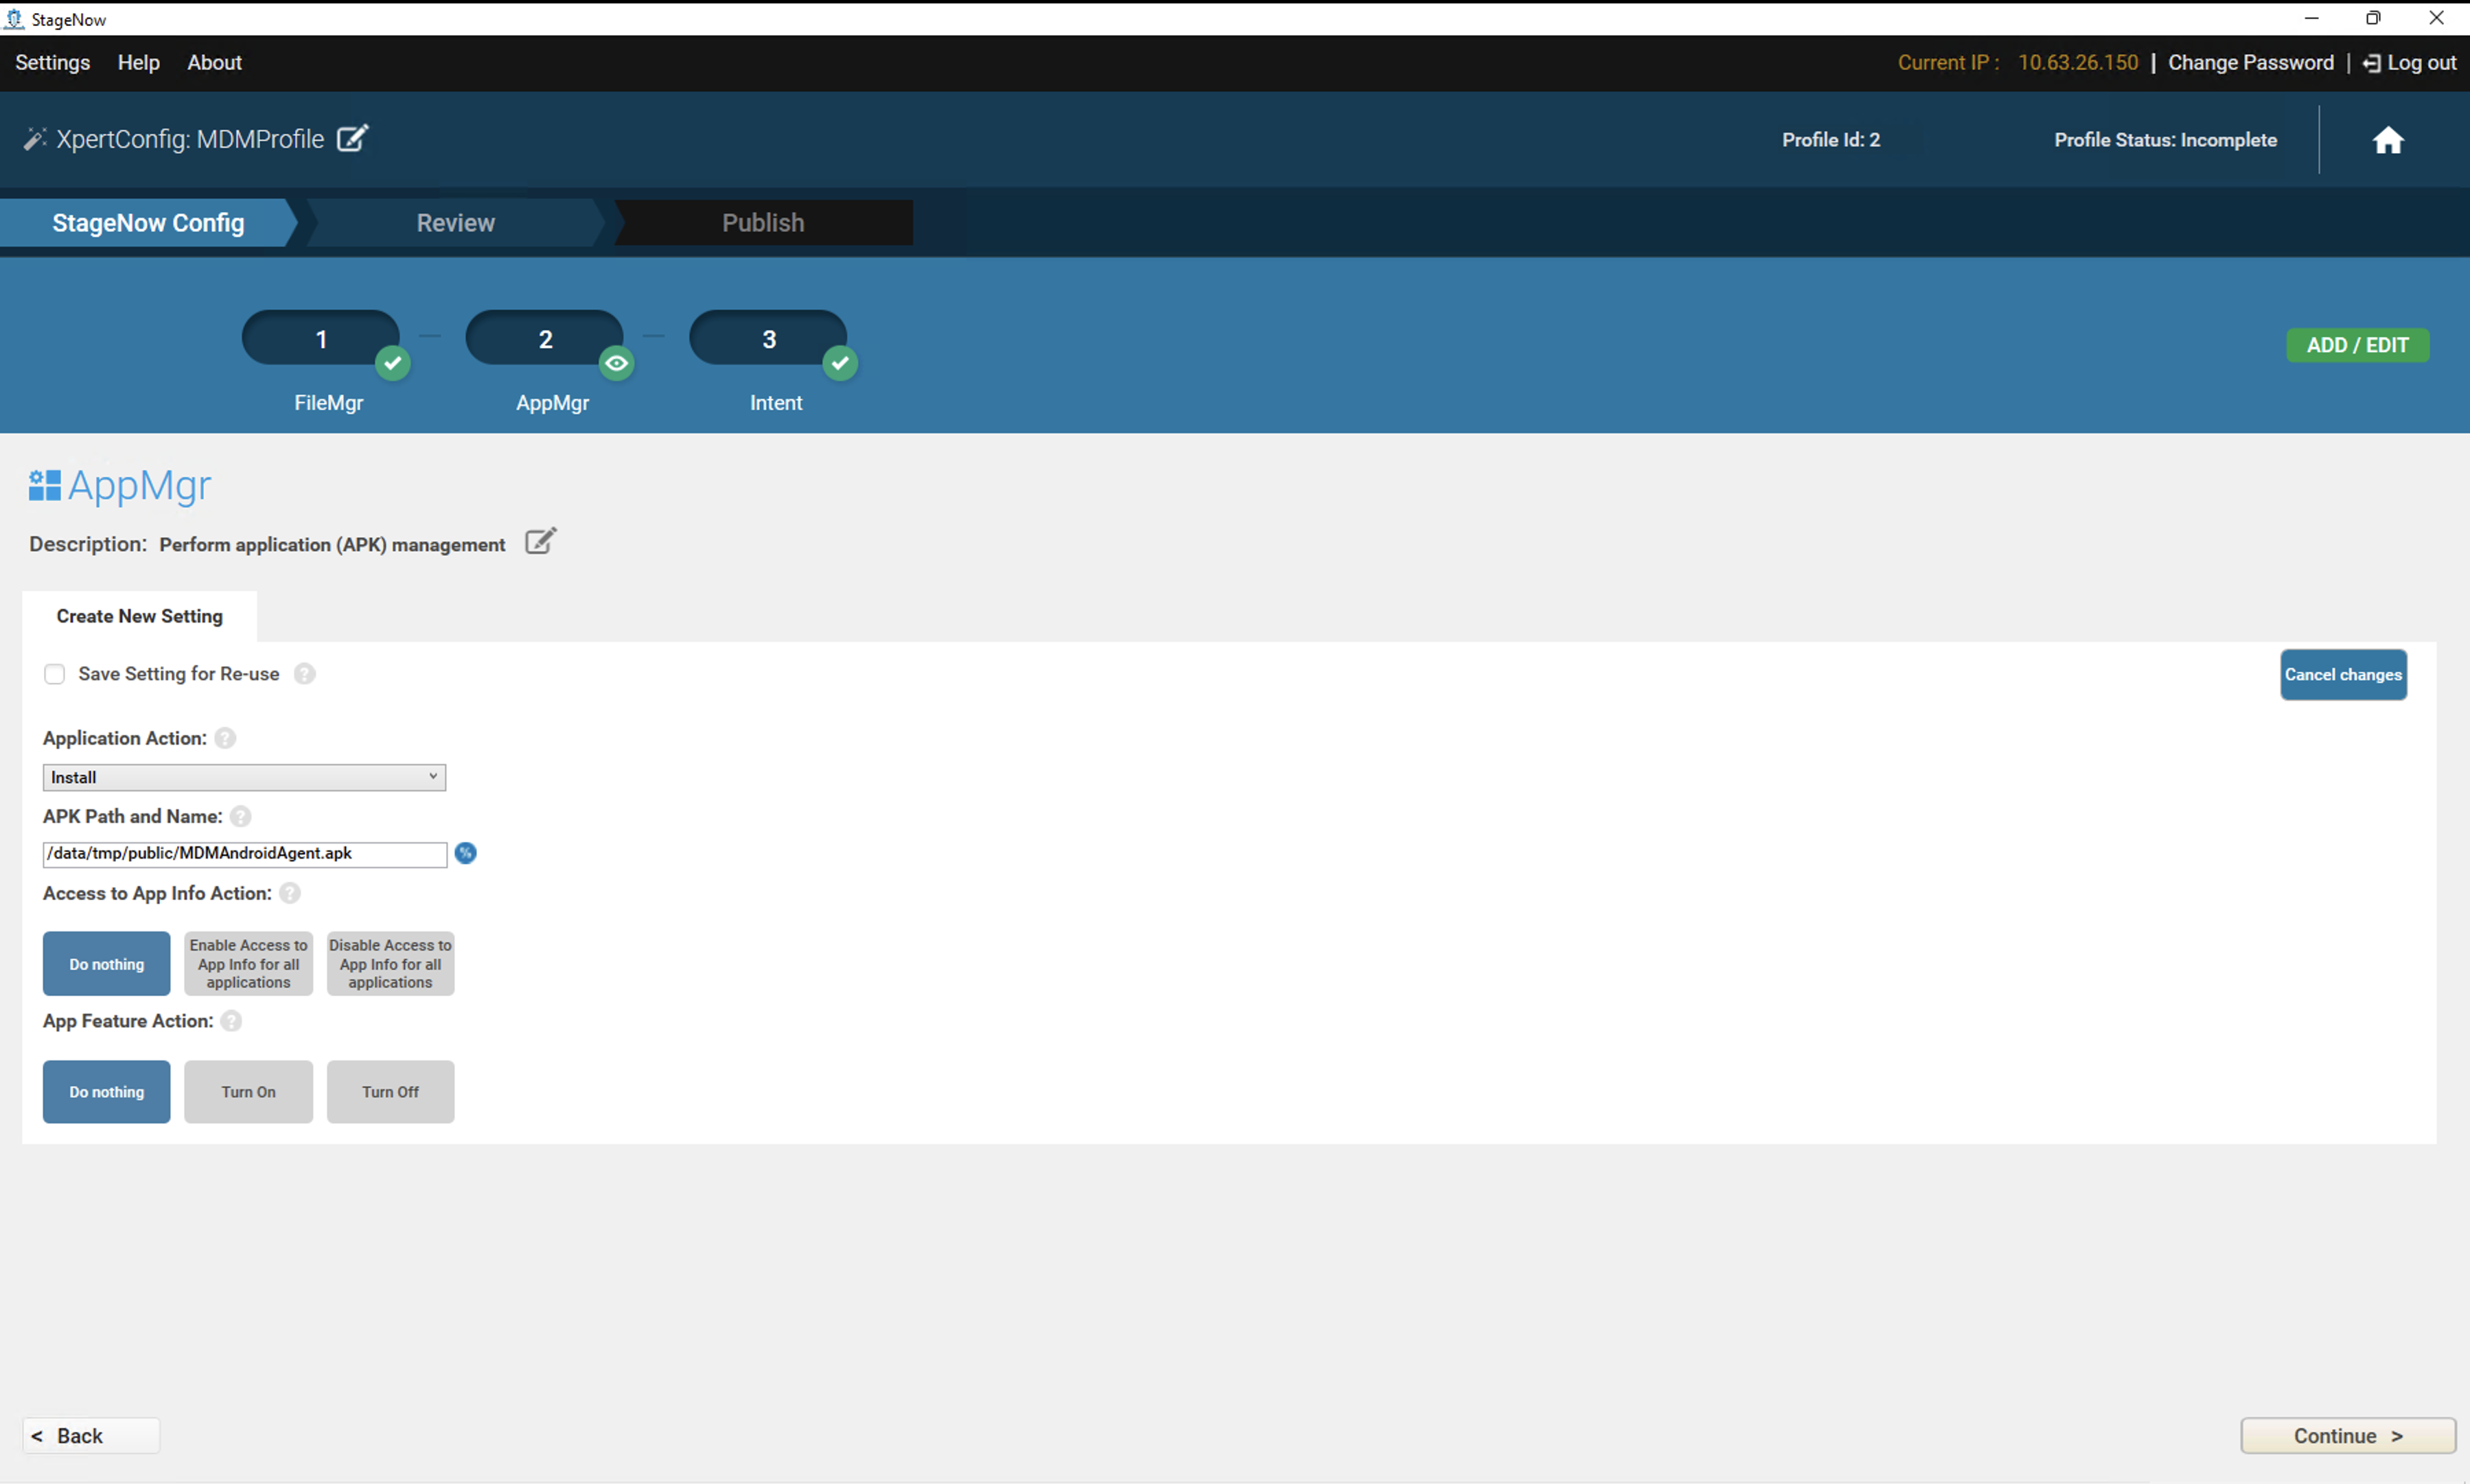
- Select the Install option under Application Action.
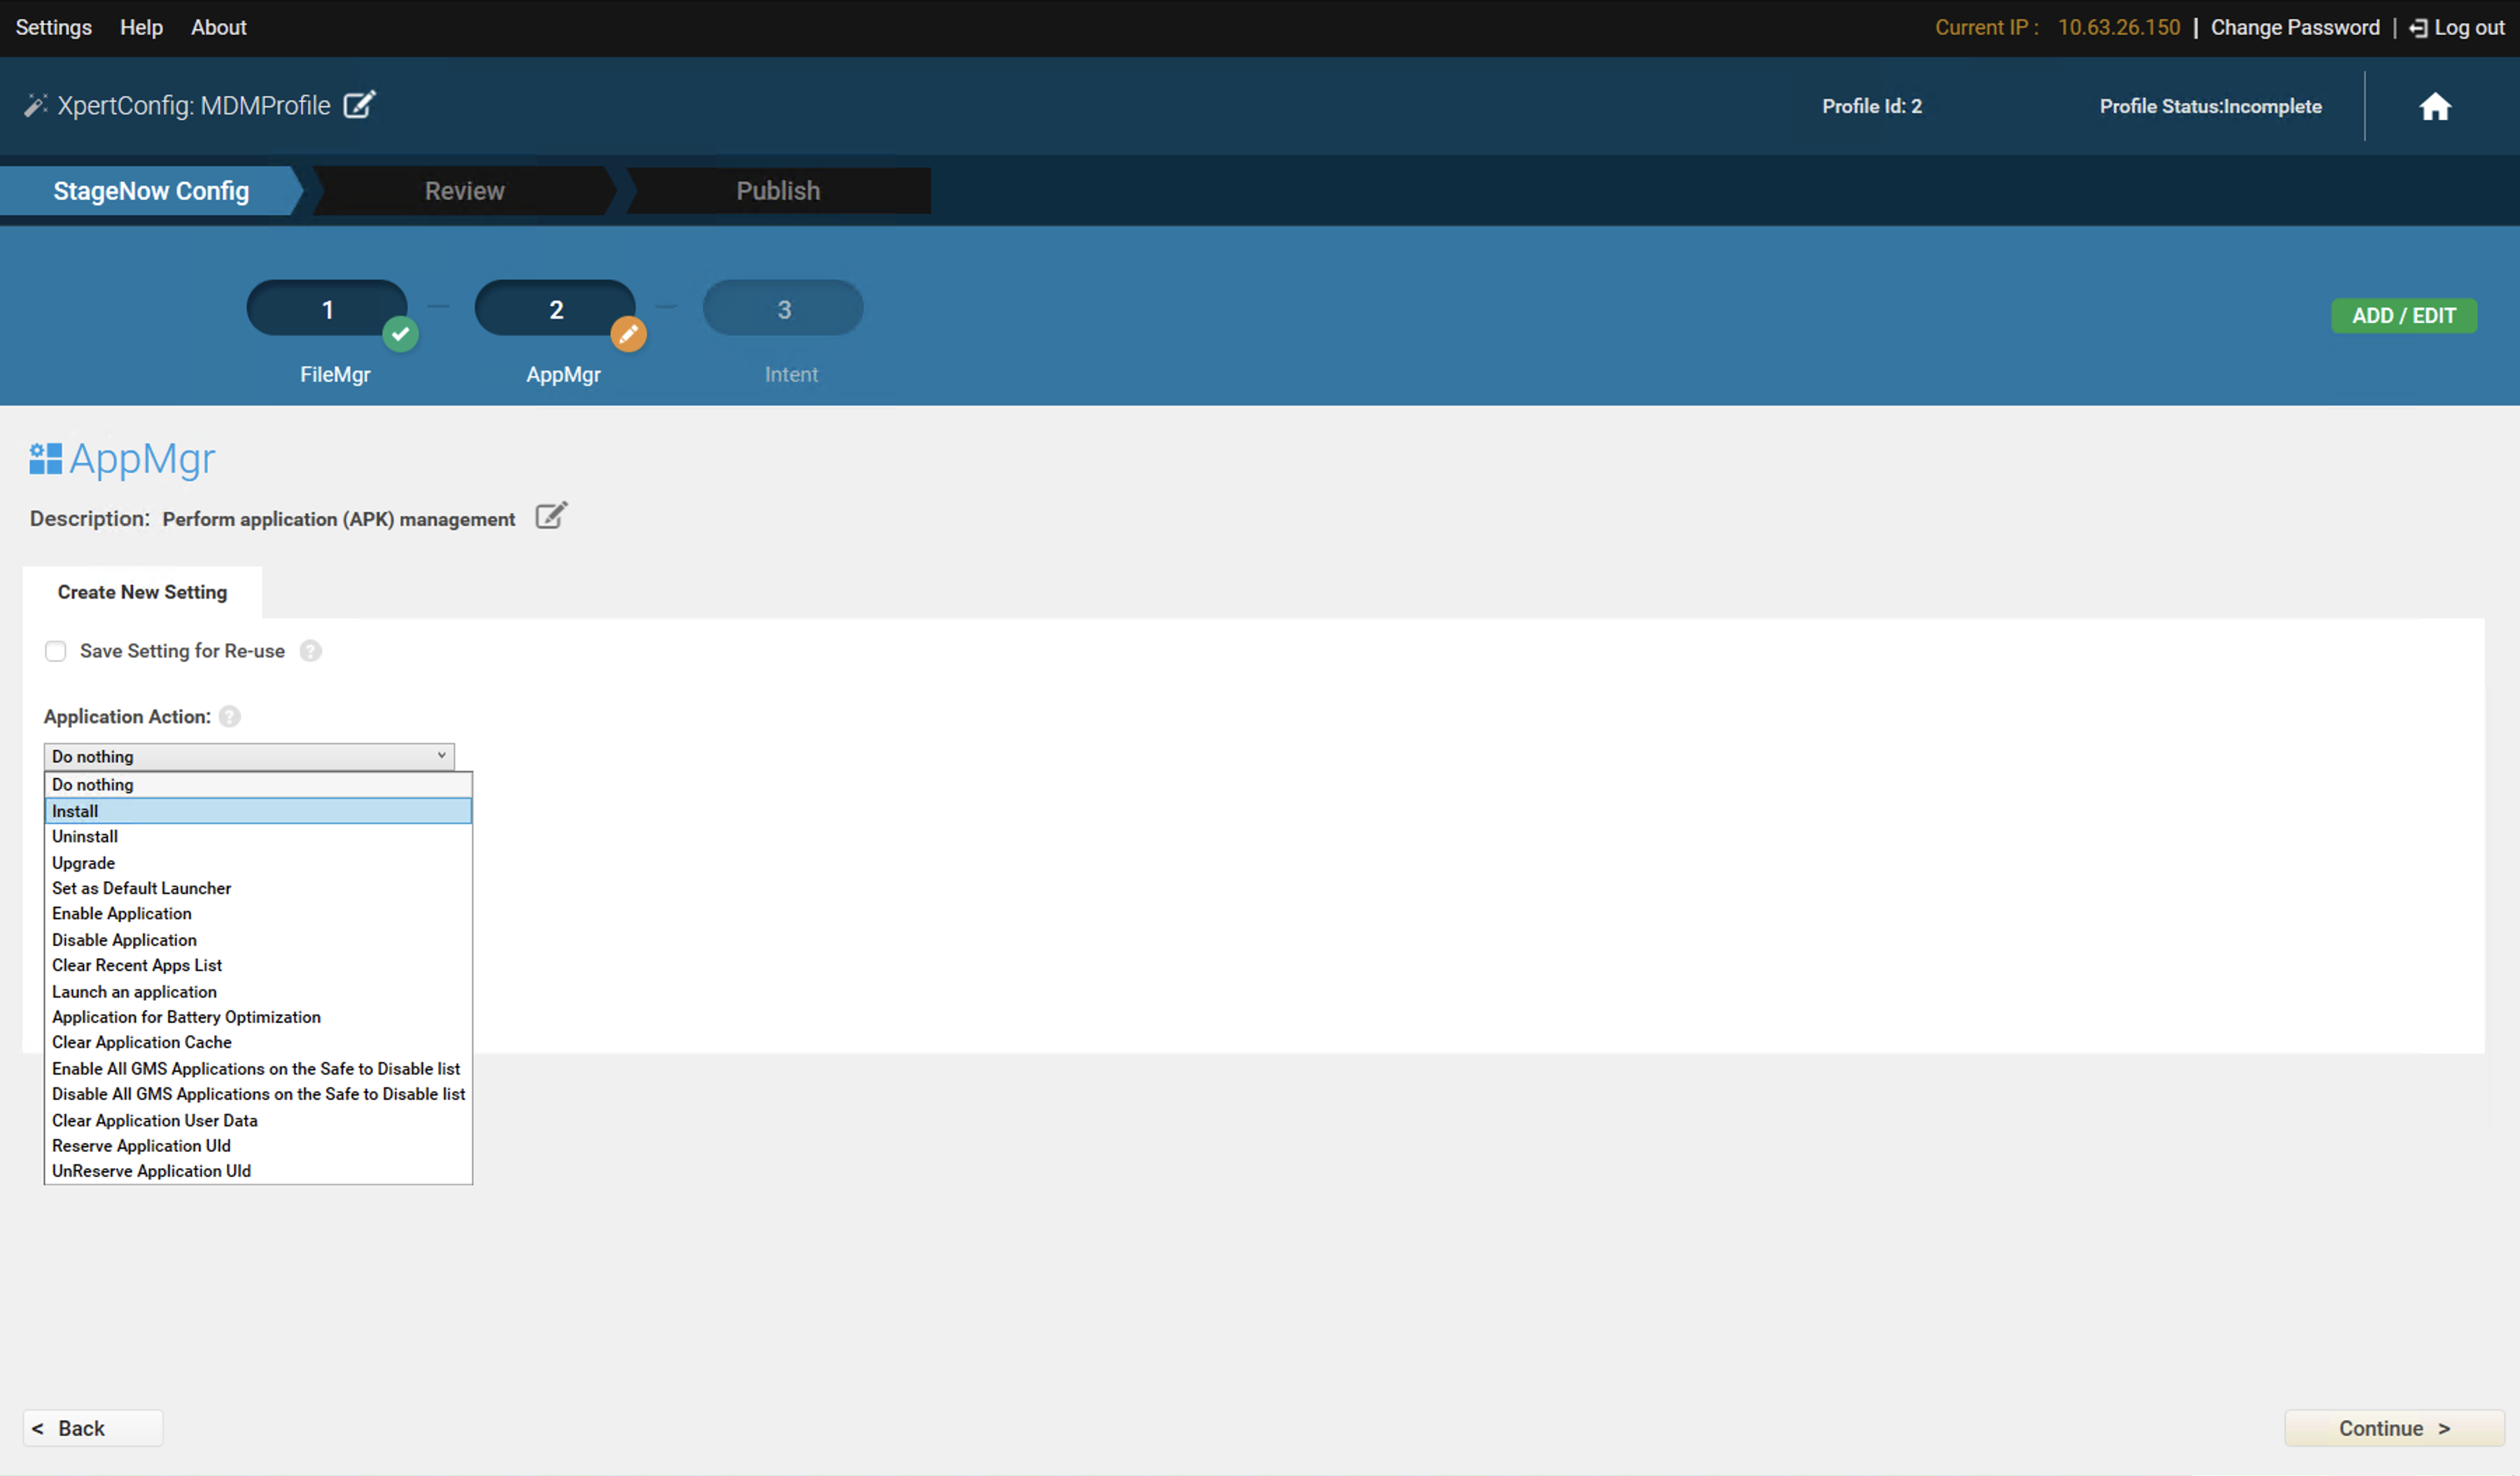
- Set the APK path and name as /data/tmp/public/MDMAndroidAgent.apk then Click Continue to save the AppMgr settings.
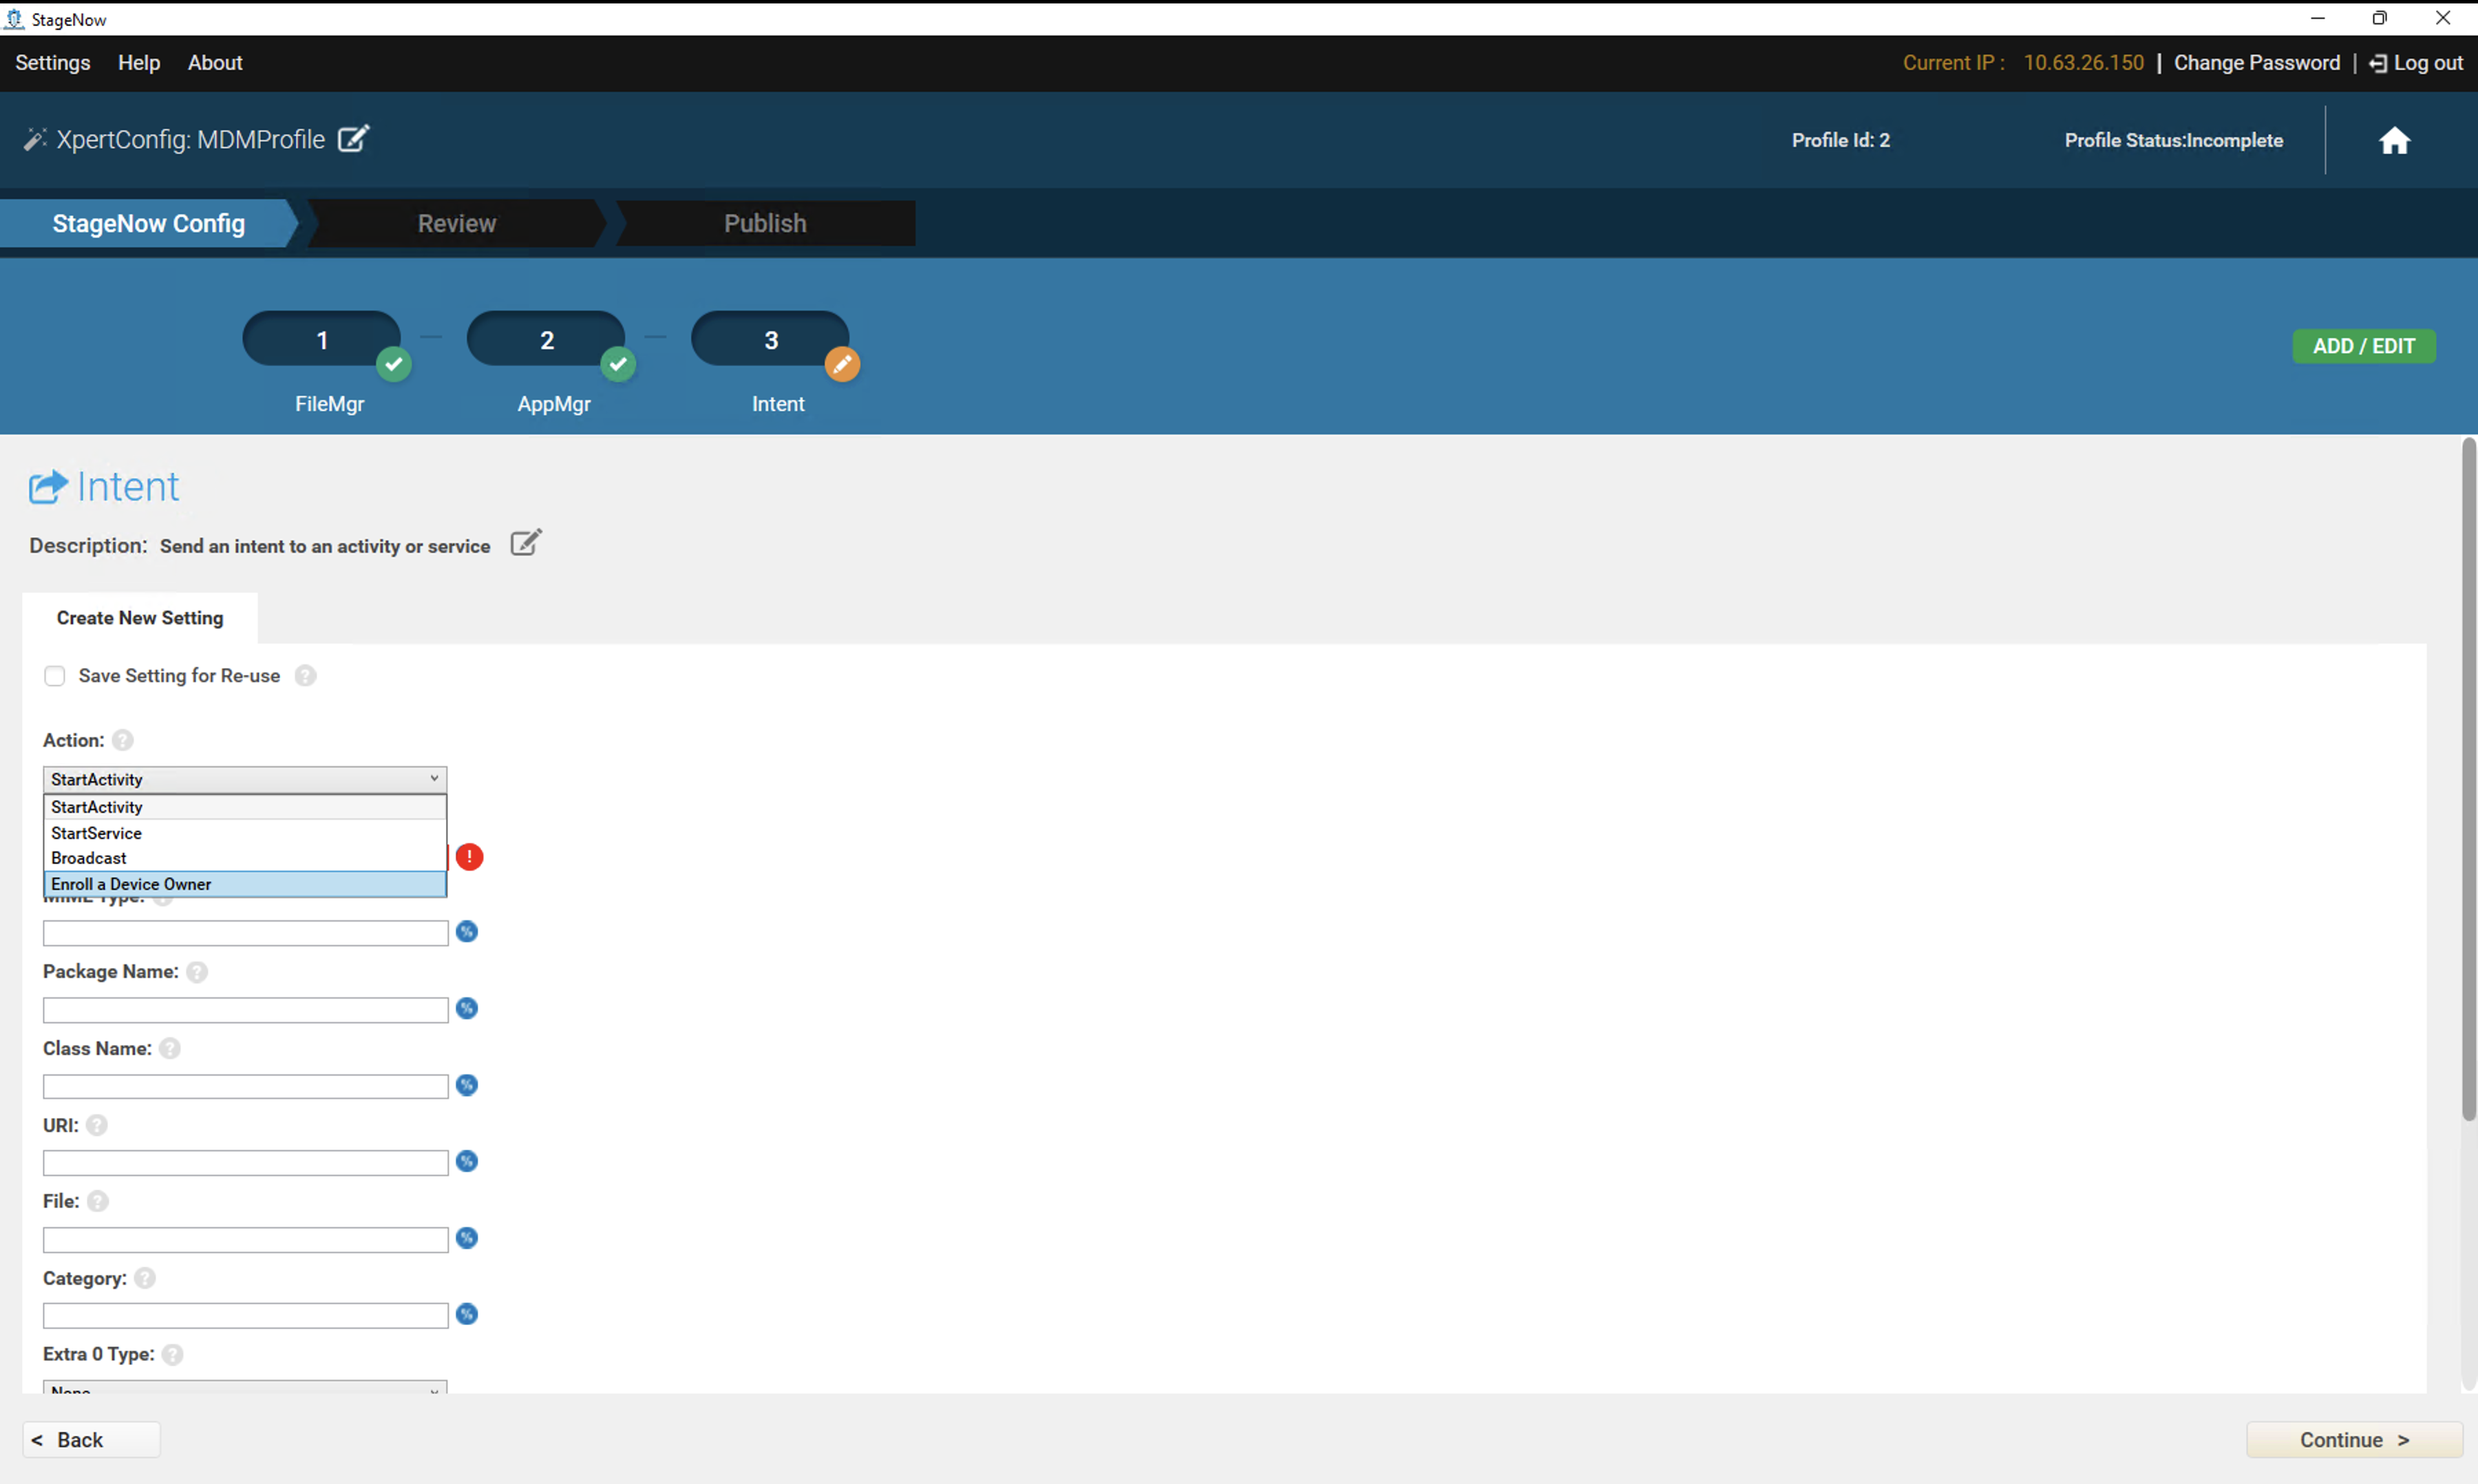
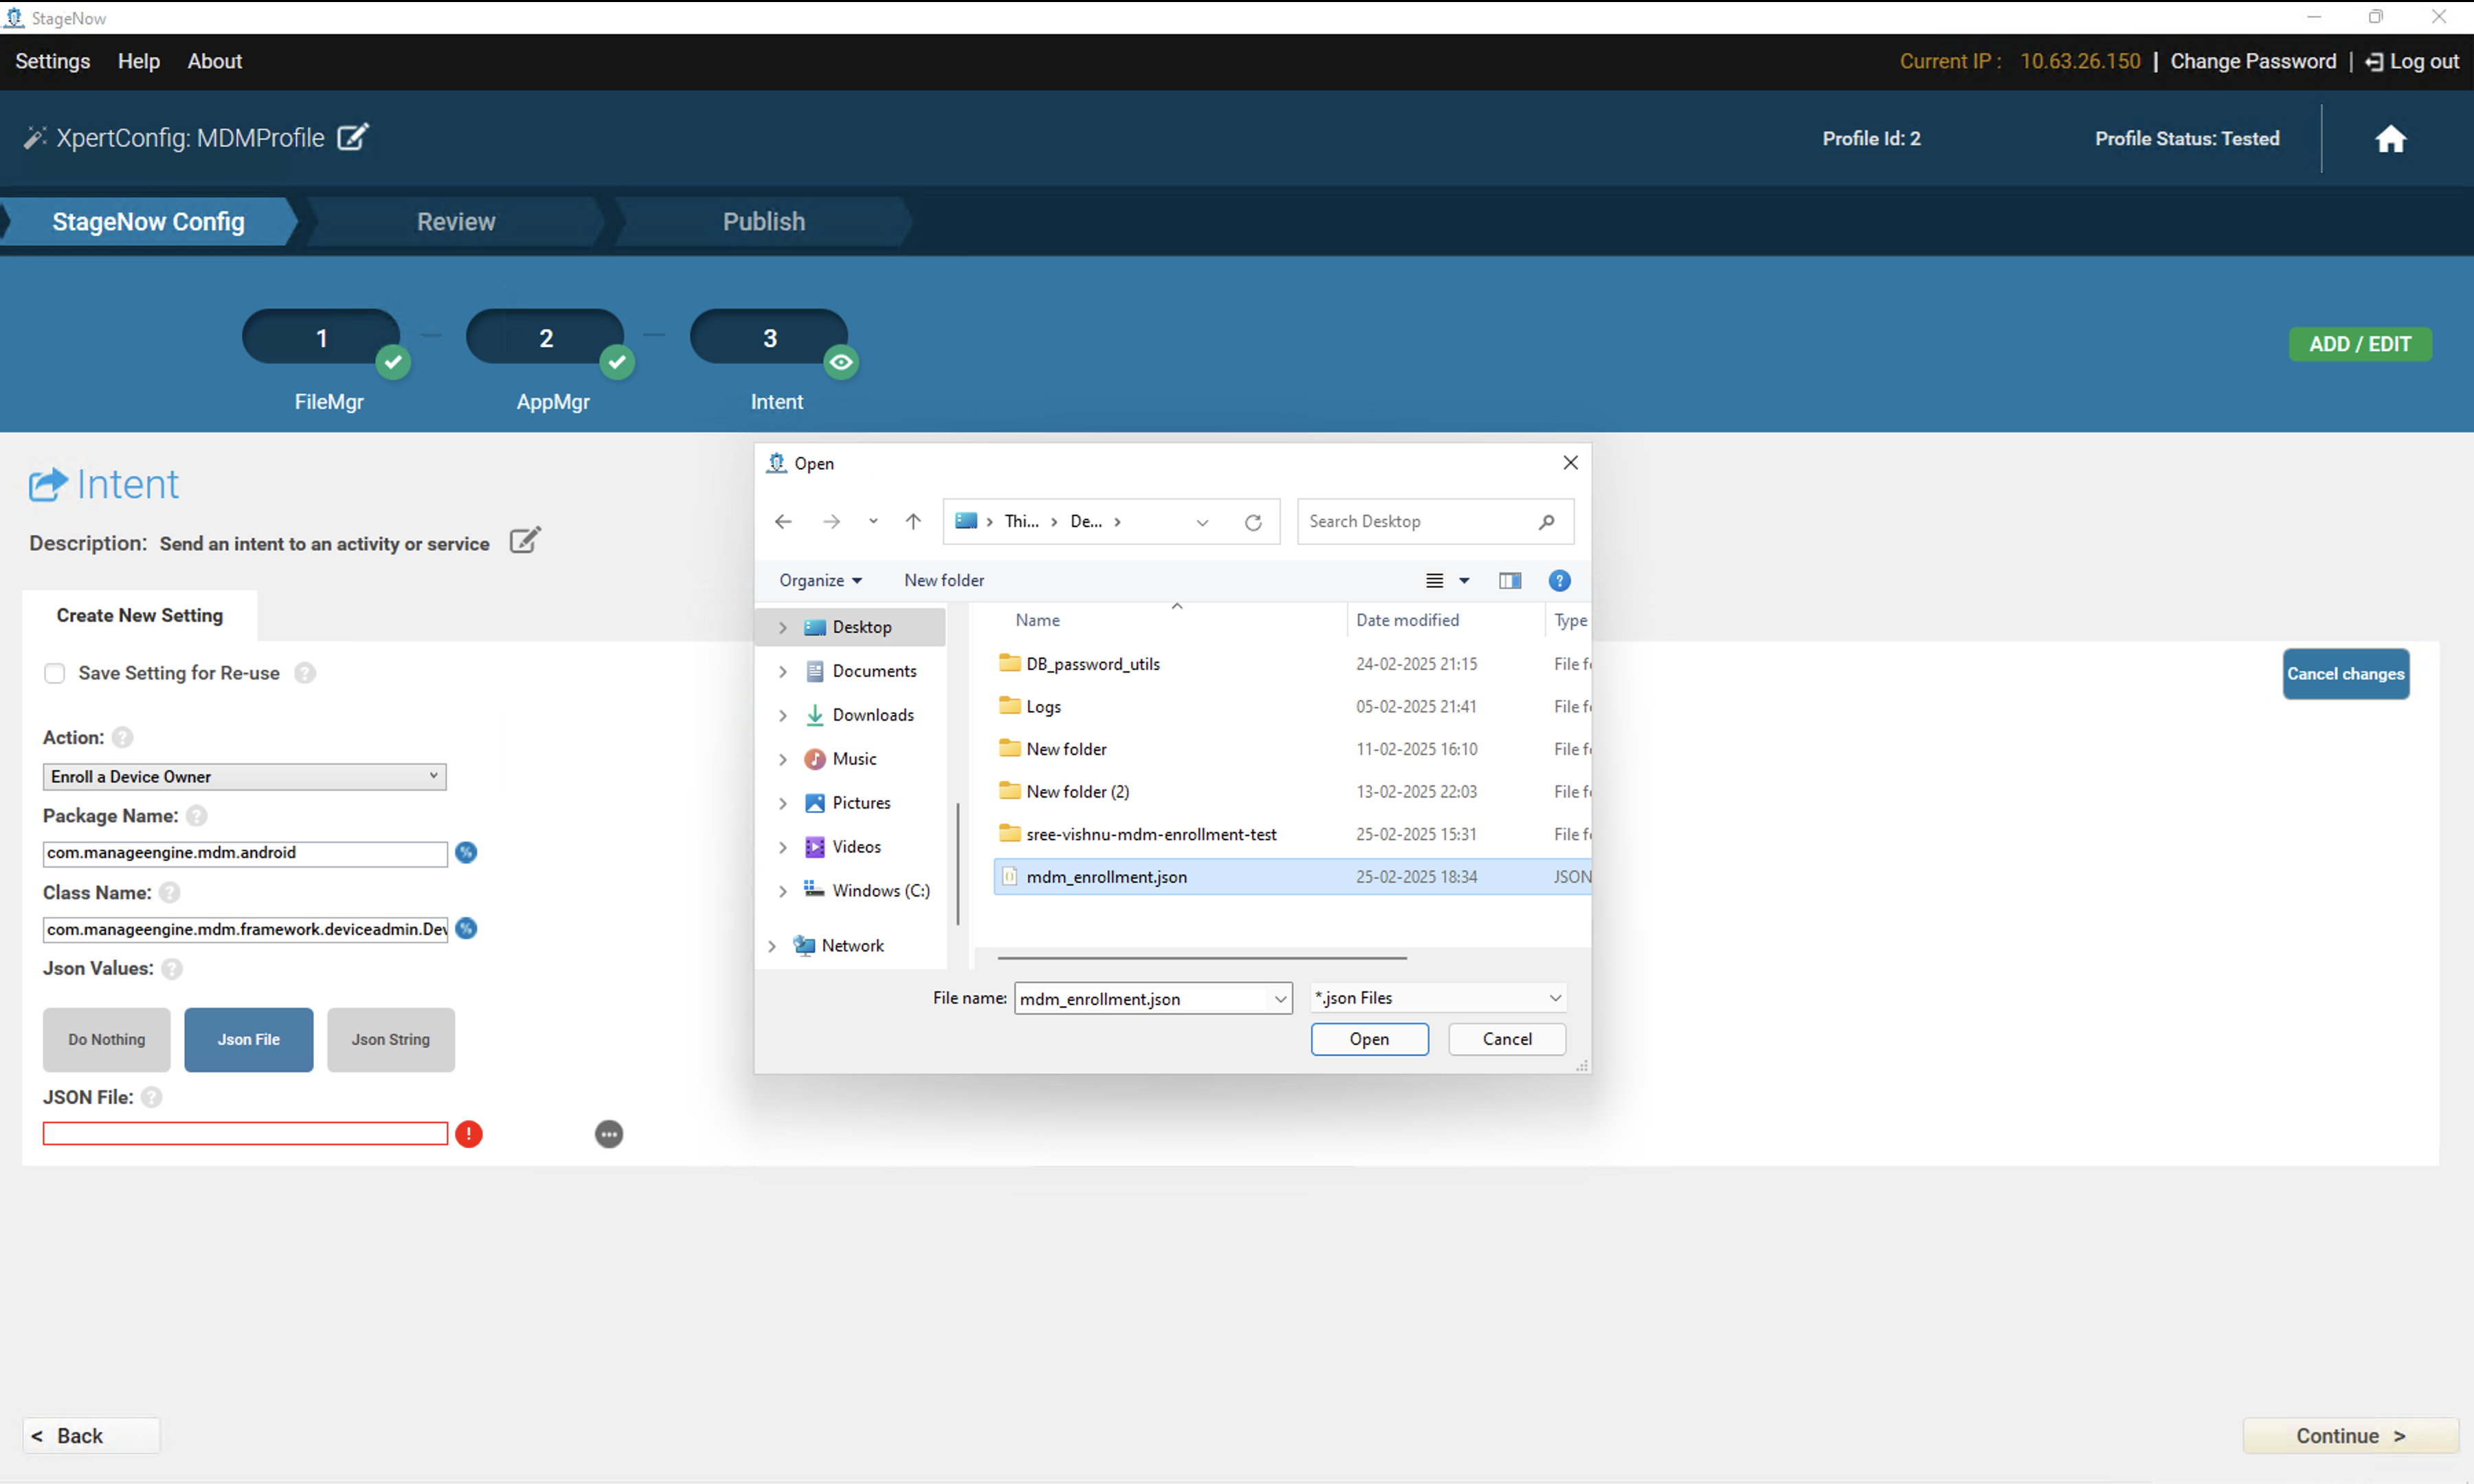
- Select the Enroll a Device Owner option under Action.
- Set the package name as com.manageengine.mdm.android and the class name as com.manageengine.mdm.framework.deviceadmin.DeviceAdminMonitor.
- Copy the following JSON template into Notepad:Enrollment Template:
{
"android.app.extra.PROVISIONING_DEVICE_ADMIN_PACKAGE_DOWNLOAD_LOCATION":
"https://play.google.com/managed/downloadManagingApp?identifier=memdm",
"android.app.extra.PROVISIONING_SKIP_ENCRYPTION":true,
"android.app.extra.PROVISIONING_ADMIN_EXTRAS_BUNDLE":
{"DPM":1,
},
"TV":"Sample=",
"Fqdn":"mdm.manageengine.in",
"CI":true,
"Port":"443",
"Token":"sample",
"TN":"encapiKey"
"android.app.extra.PROVISIONING_DEVICE_ADMIN_SIGNATURE_CHECKSUM":
"qdbQoq_bFYSbjNMdUf5zuOGxcLqlcML48qP4ZSgpy70=",
"android.app.extra.PROVISIONING_LEAVE_ALL_SYSTEM_APPS_ENABLED":true,
"android.app.extra.PROVISIONING_DEVICE_ADMIN_COMPONENT_NAME":
"com.manageengine.mdm.android/com.manageengine.mdm.framework.deviceadmin.DeviceAdminMonitor"
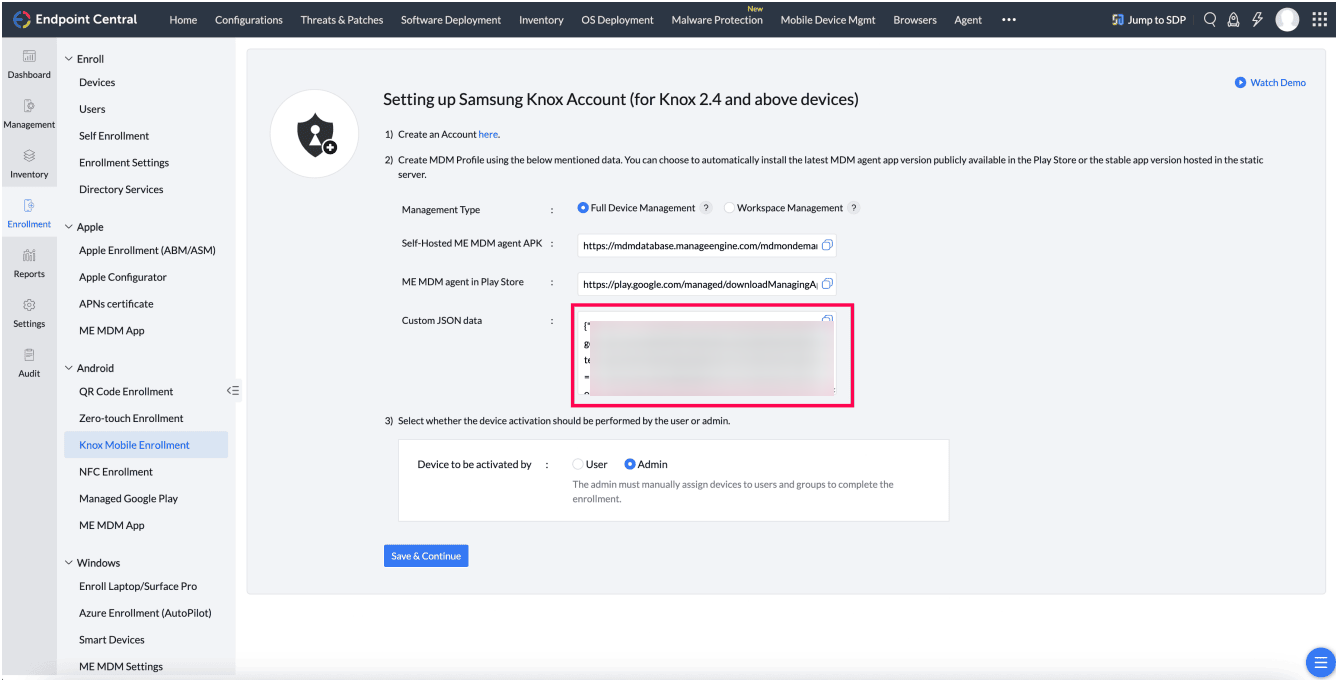
} - Replace the red-marked text with your server enrollment data. You can find this data in the MDM server console under Enrollment Tab > Knox Enrollment > Copy Knox JSON. Save the file as mdm_enrollment.json.
- In the StageNow tool, click the JSON File option. Click the elipsis icon to open a file selection dialog.
- Select the mdm_enrollment.json file you just created. Click Continue to save the settings.
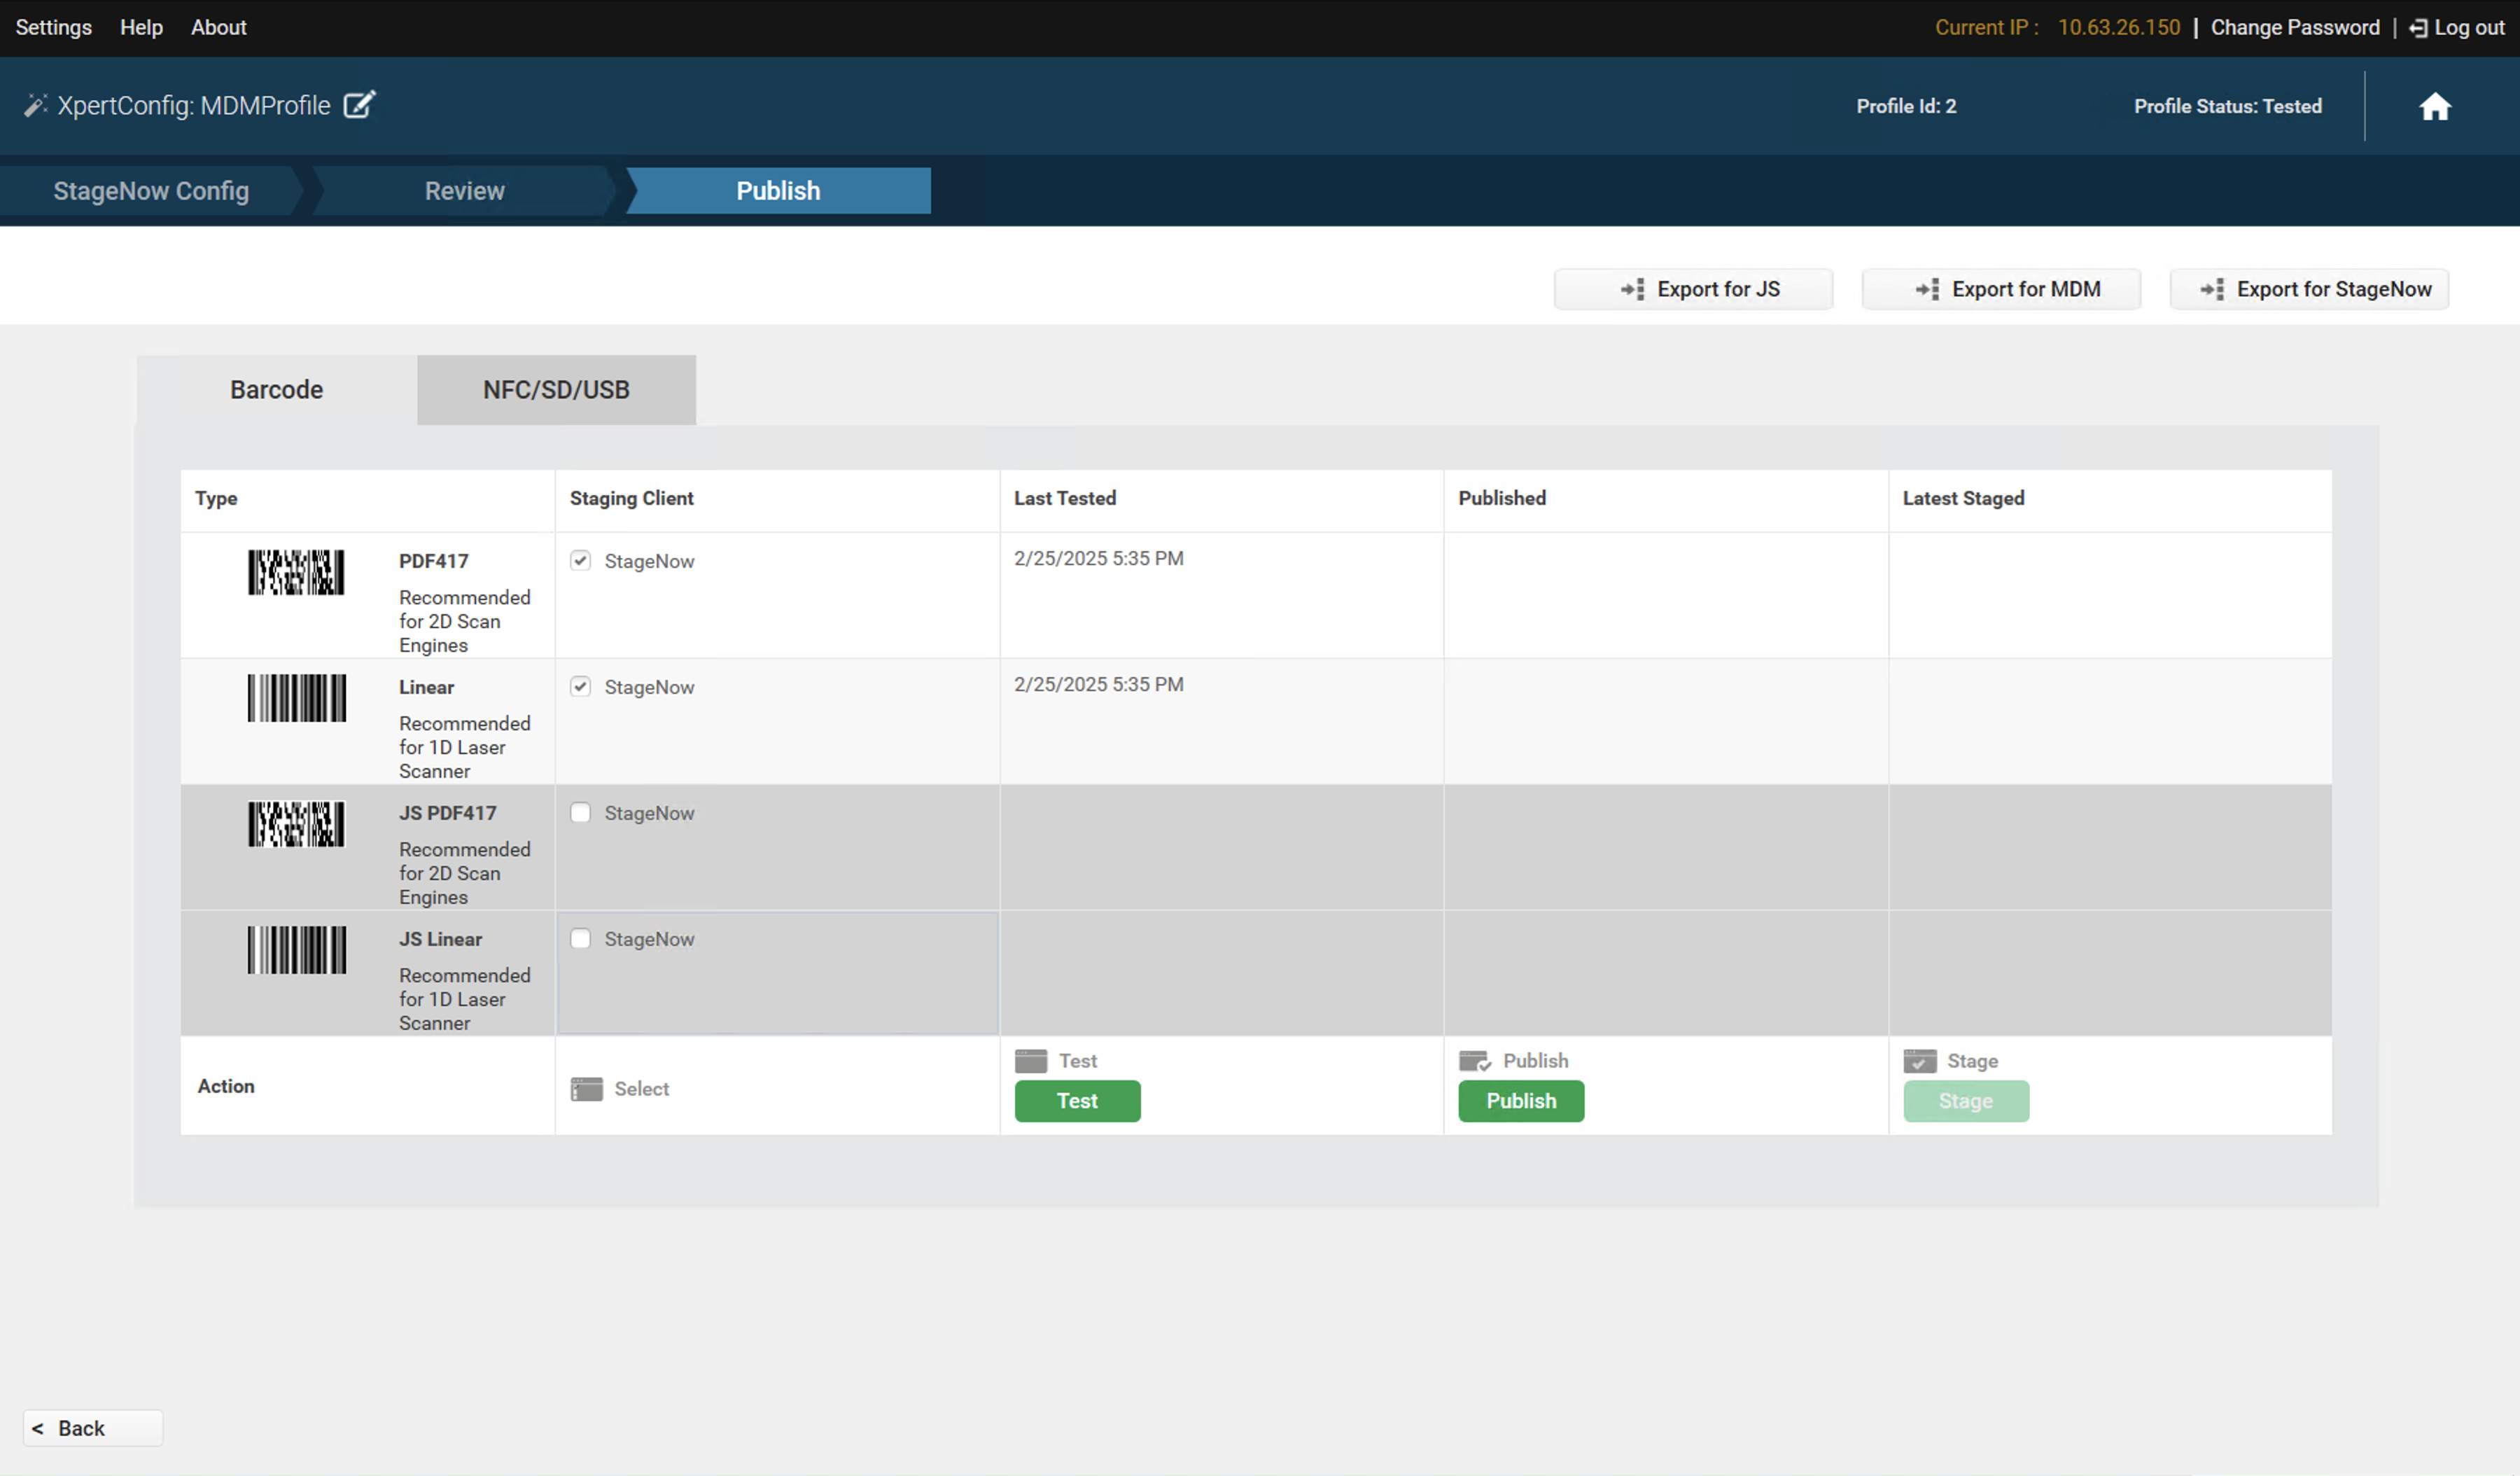
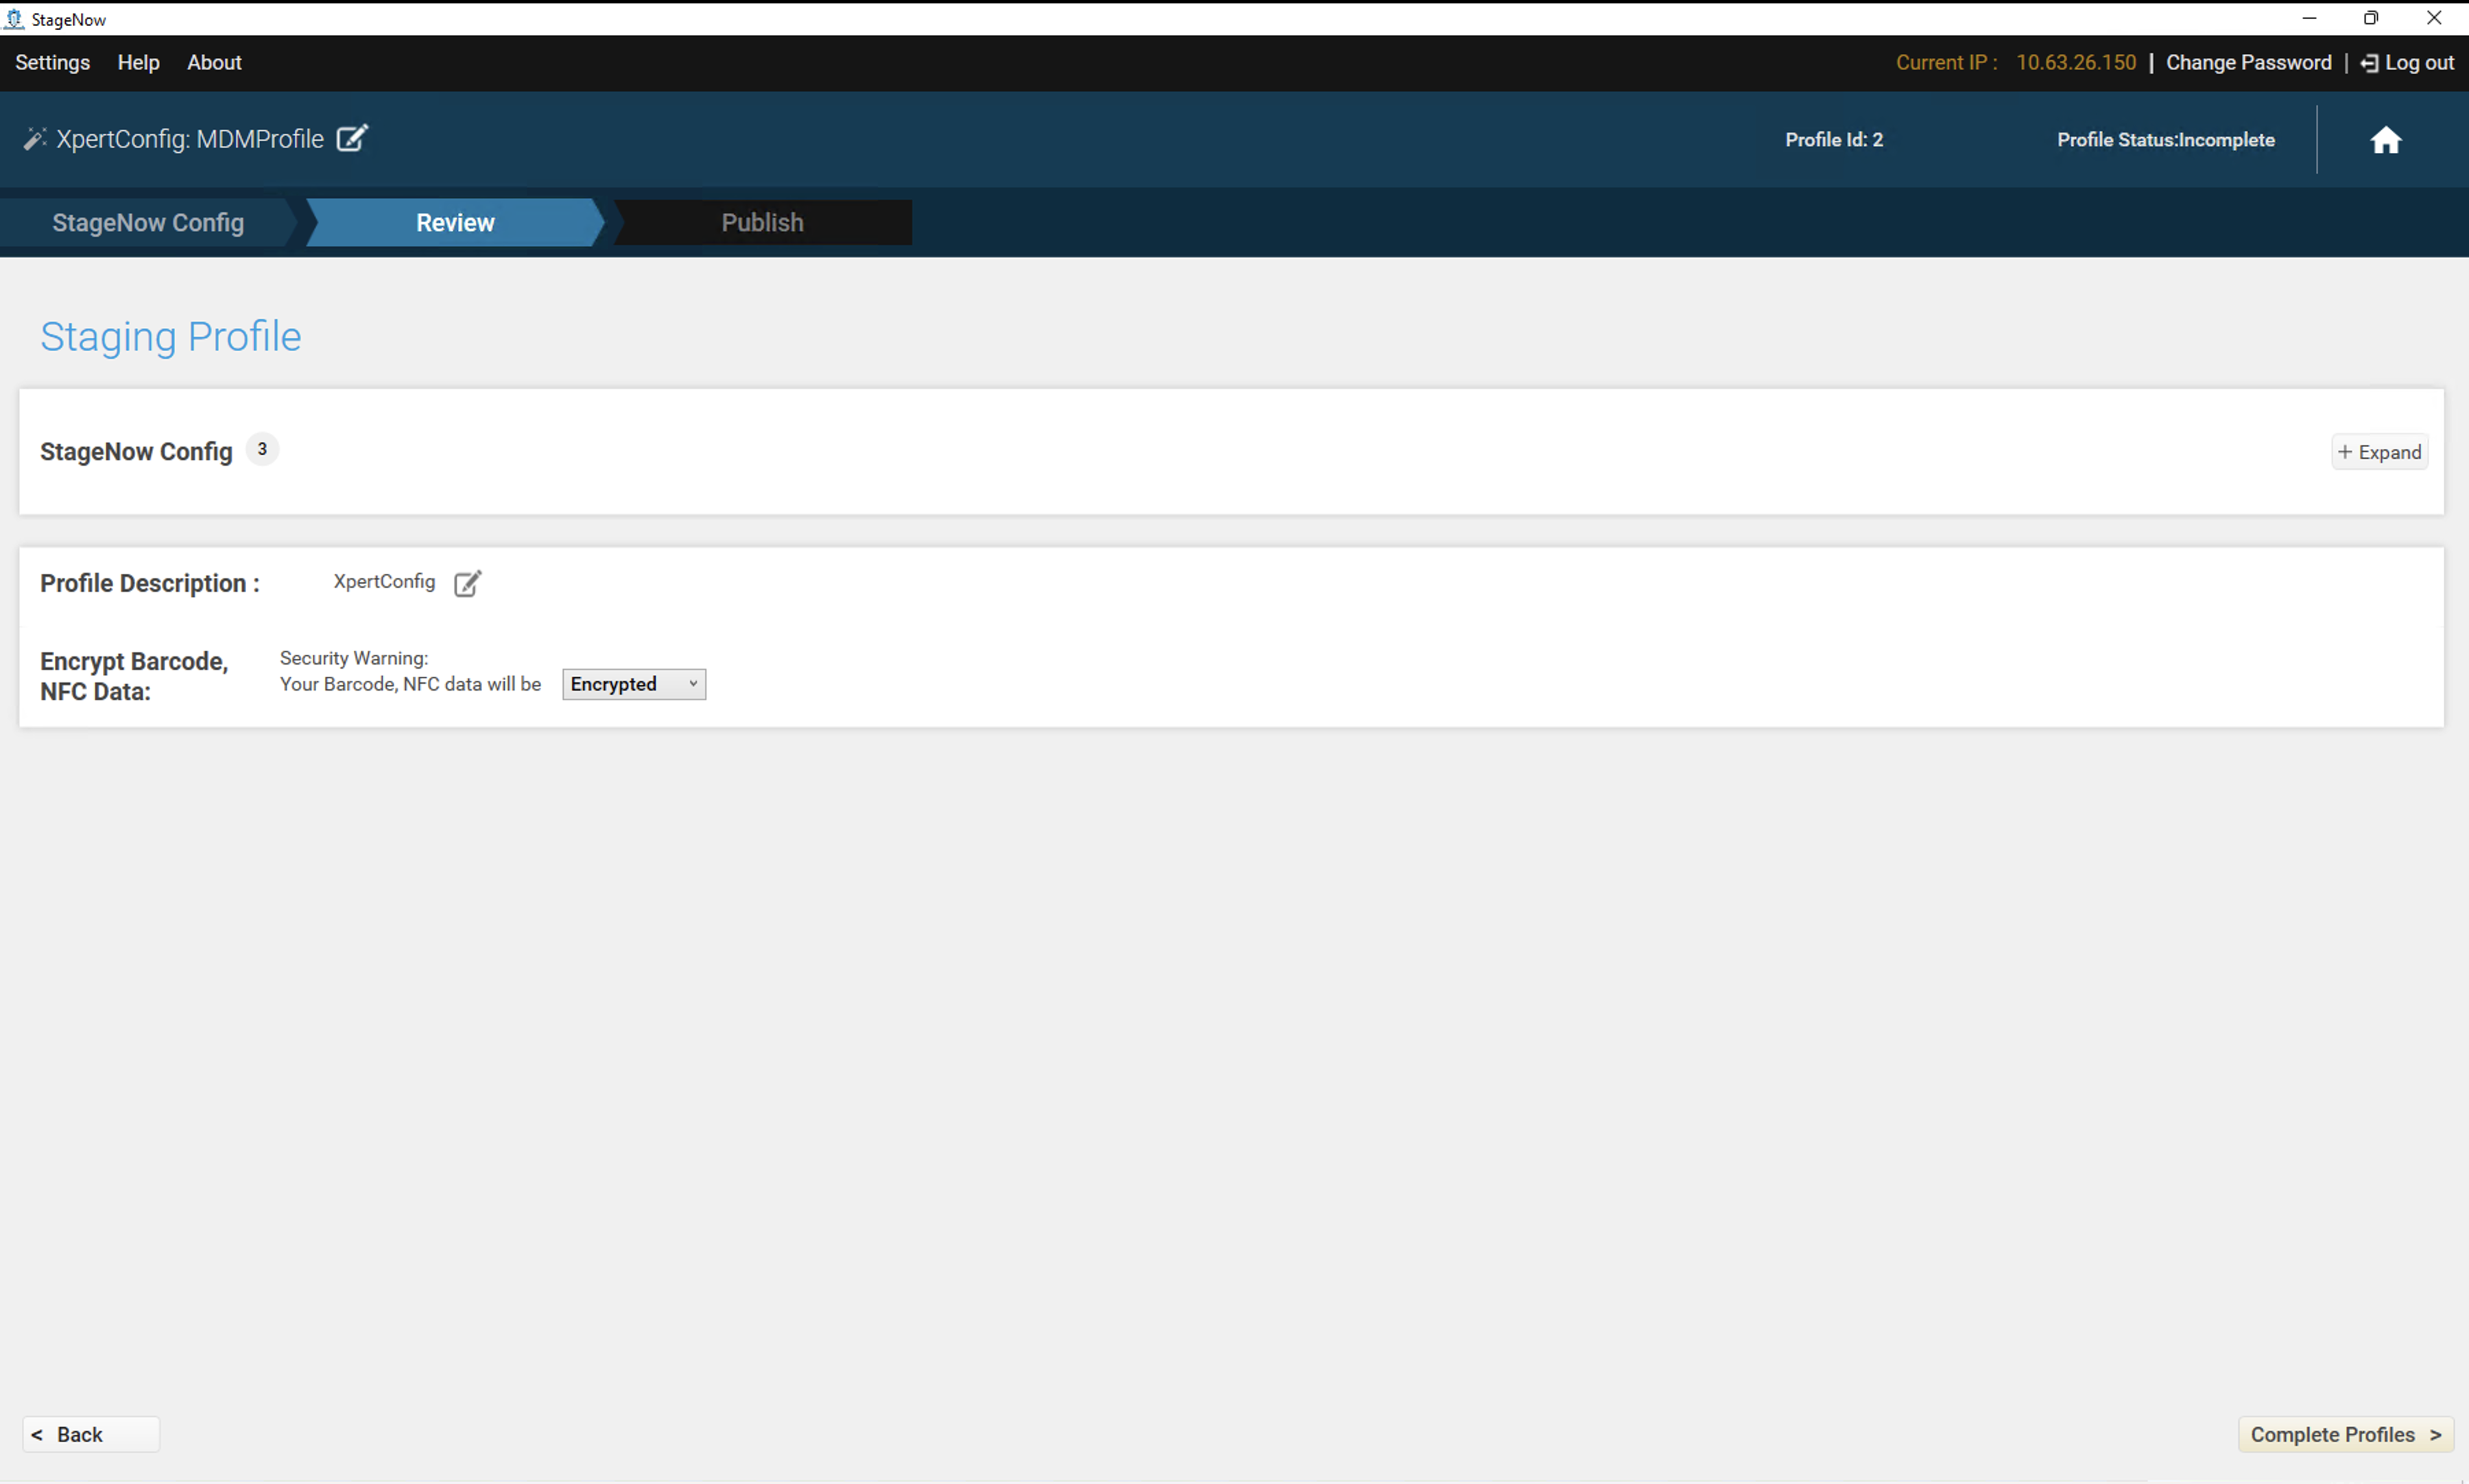
- Click Complete Profiles to save the profile.
- Select the barcode option that your device supports. Click Test to generate a PDF containing barcodes. Scan the barcode using the StageNow app on the Zebra device to verify if the enrollment works correctly.
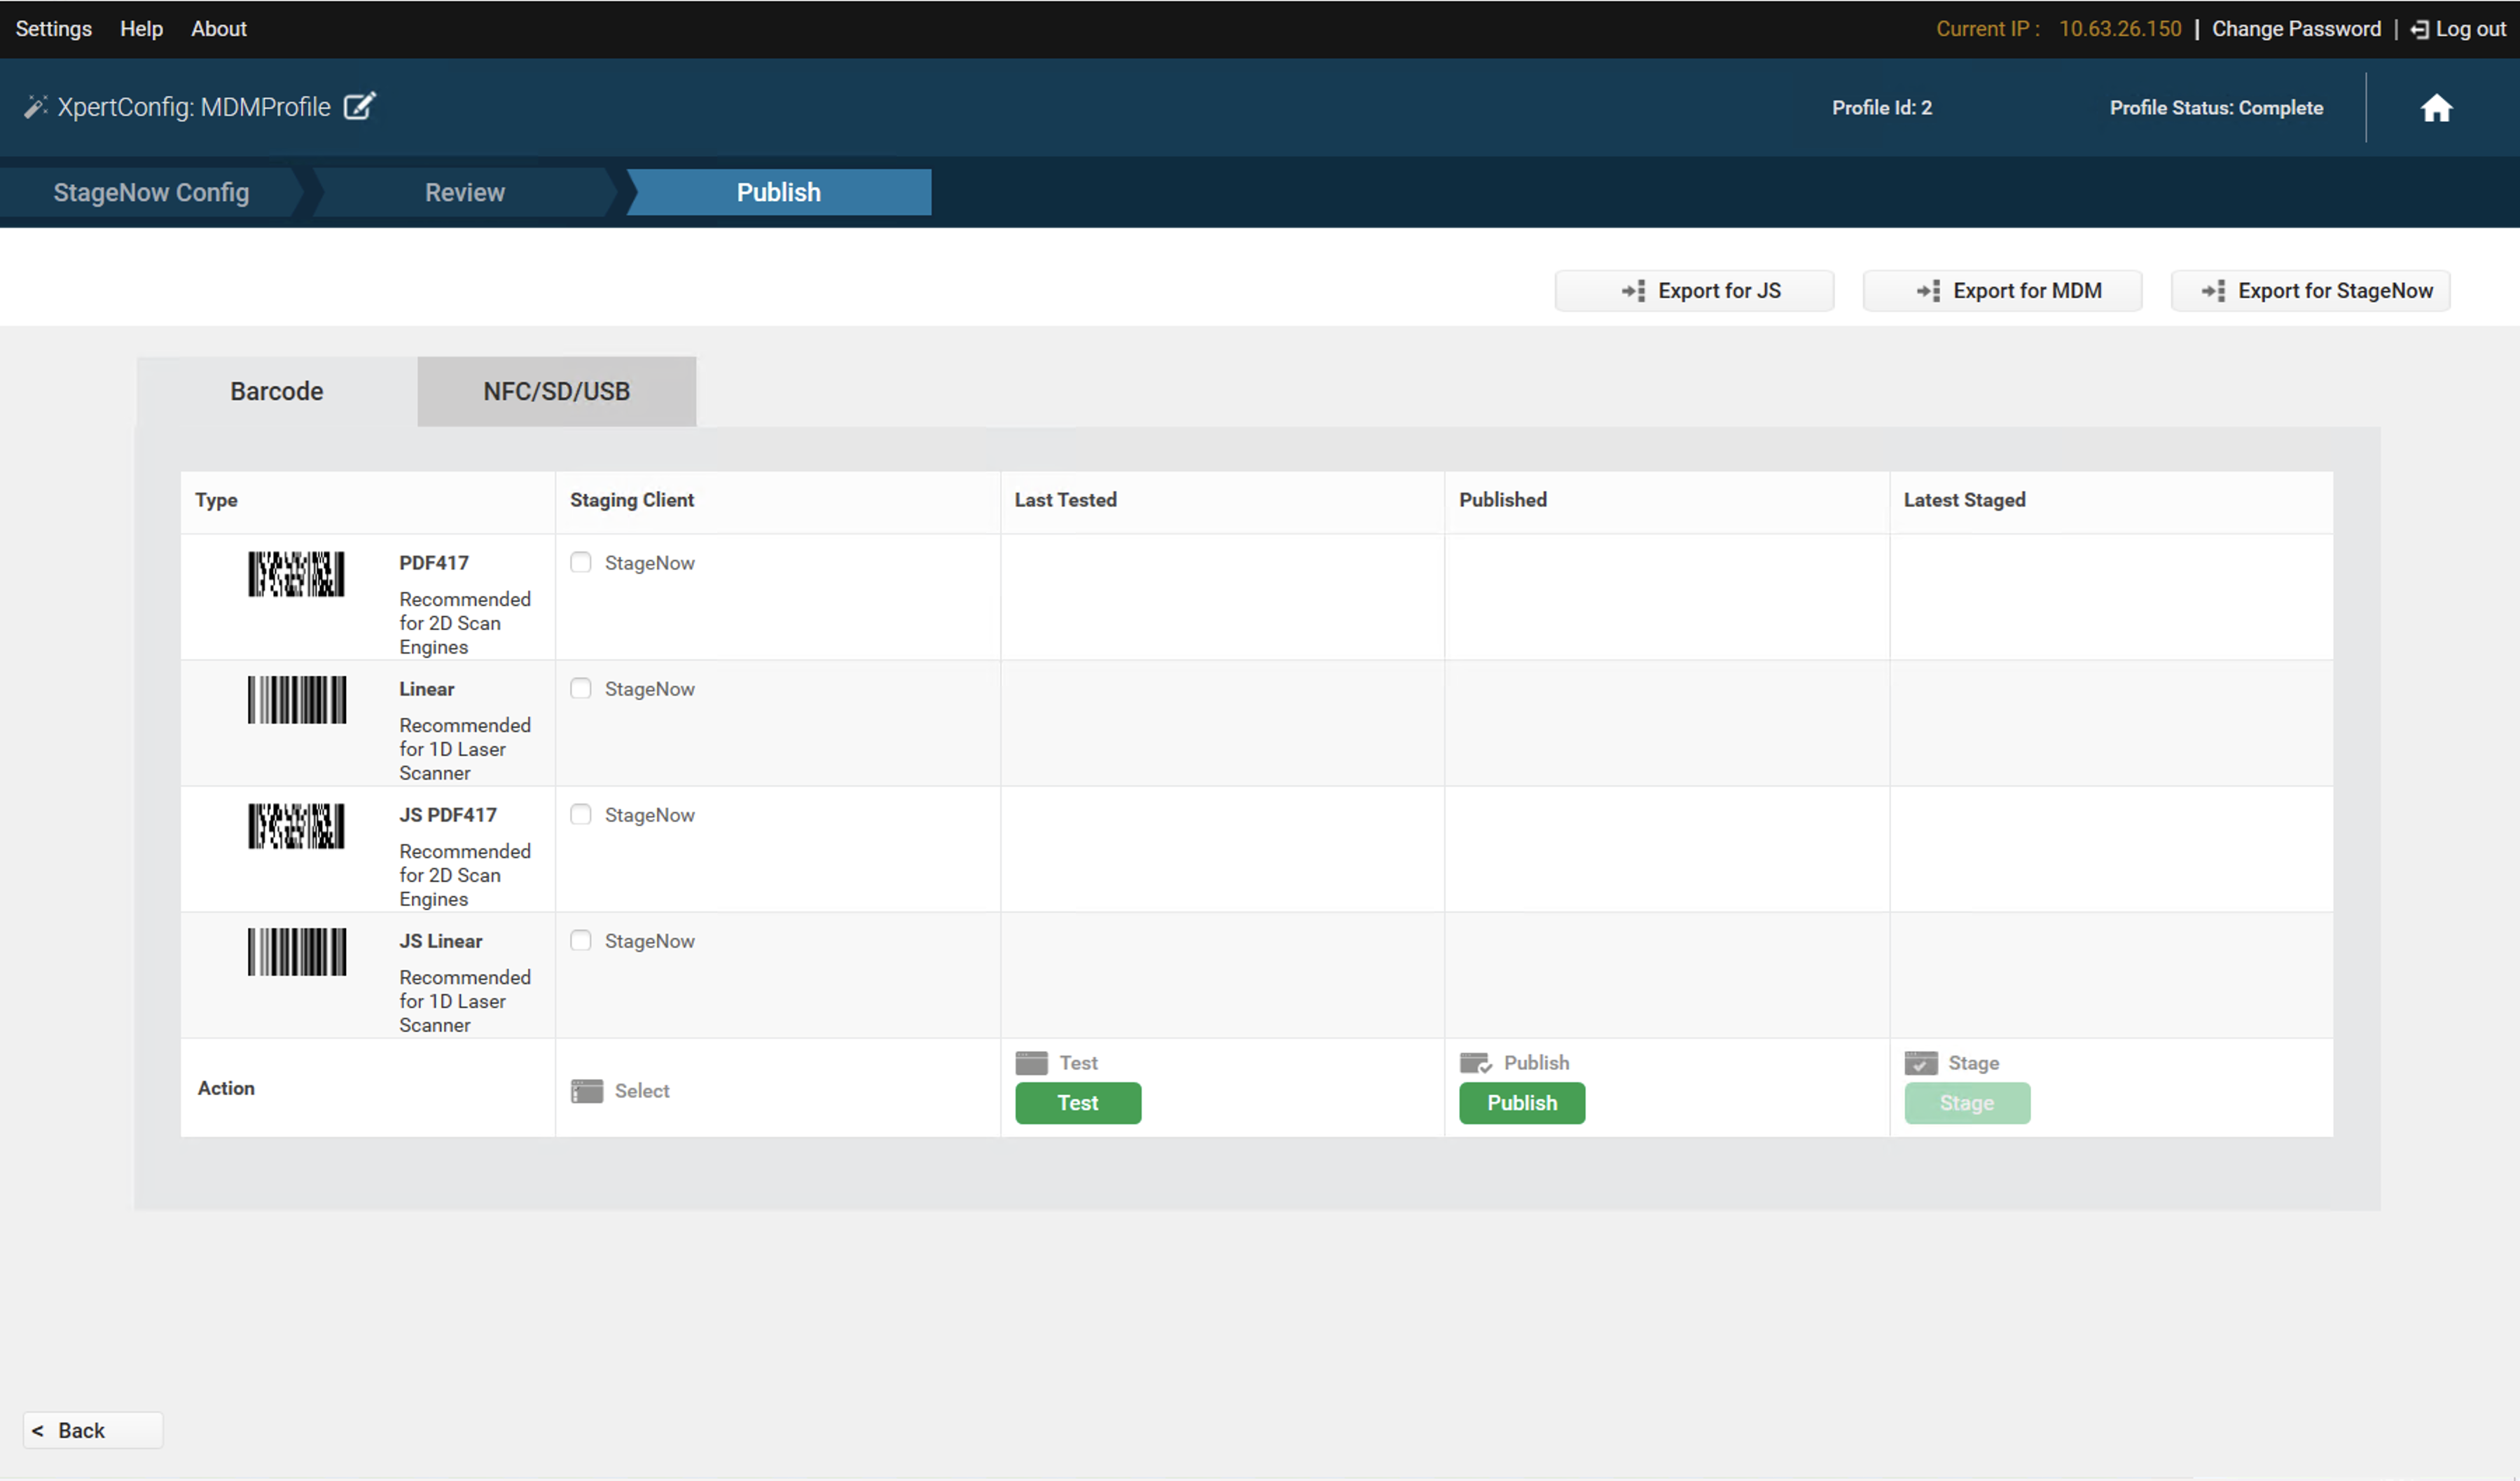
- Once the barcode test is successful, proceed with Publish and Stage to complete the enrollment process.