- Related Products
- AD360
- Log360
- ADManager Plus
- ADSelfService Plus
- EventLog Analyzer
- Exchange Reporter Plus
 Click here to expand
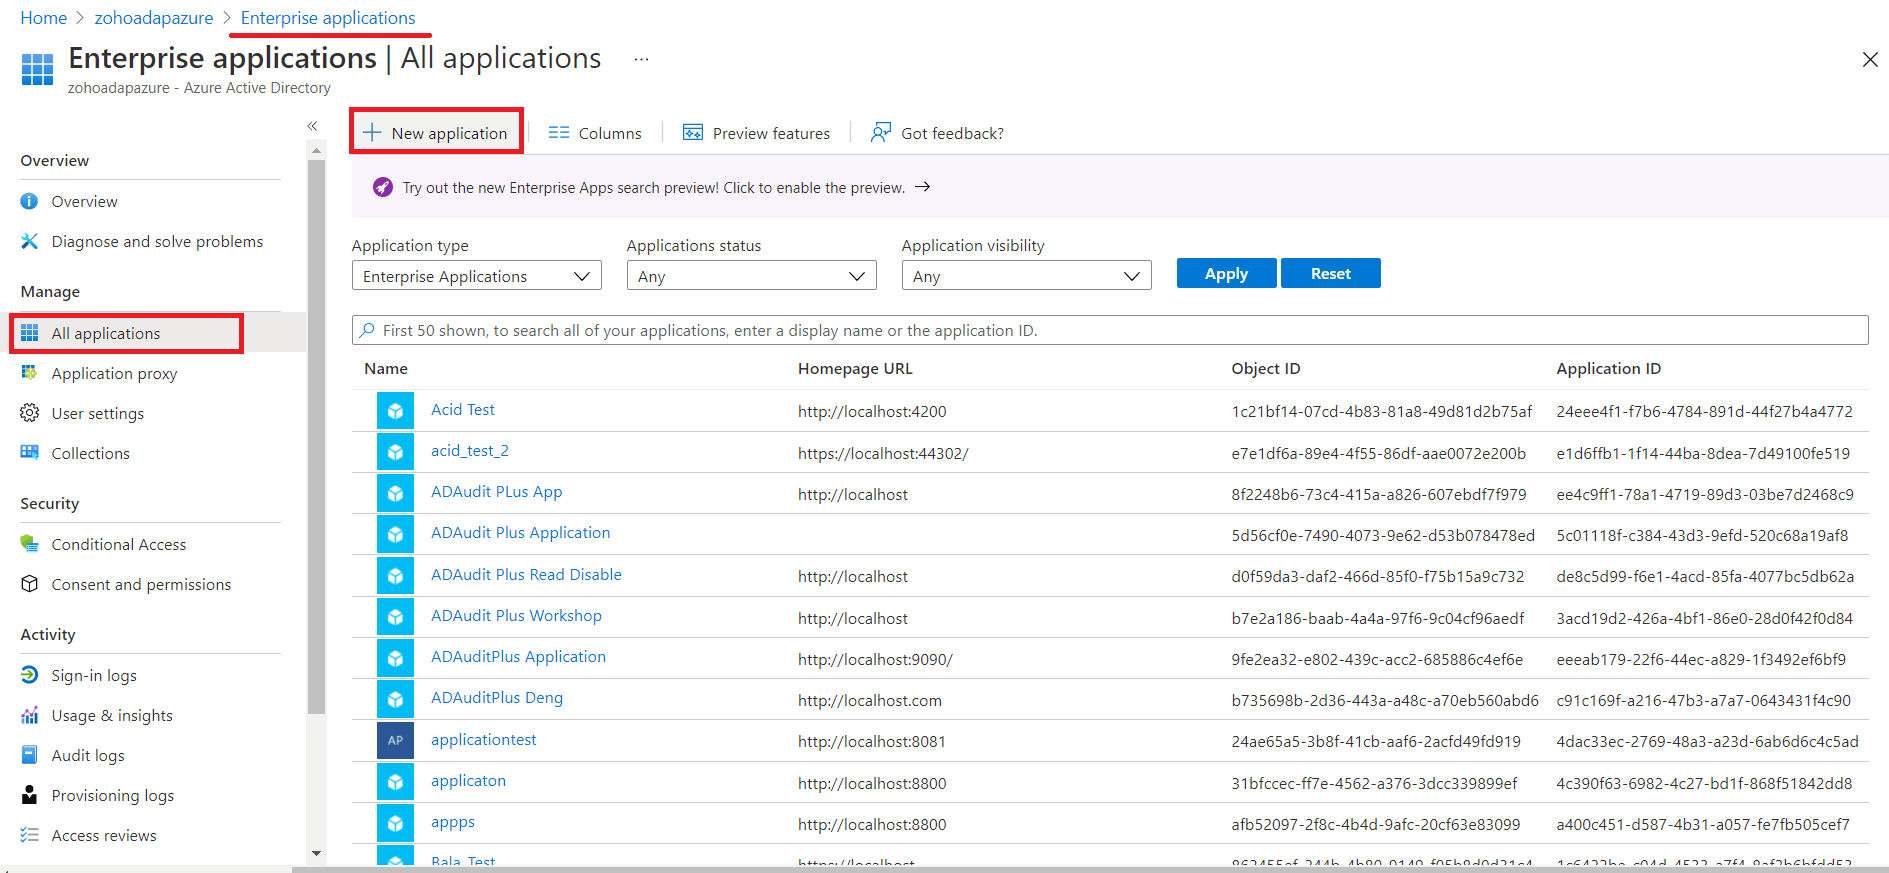
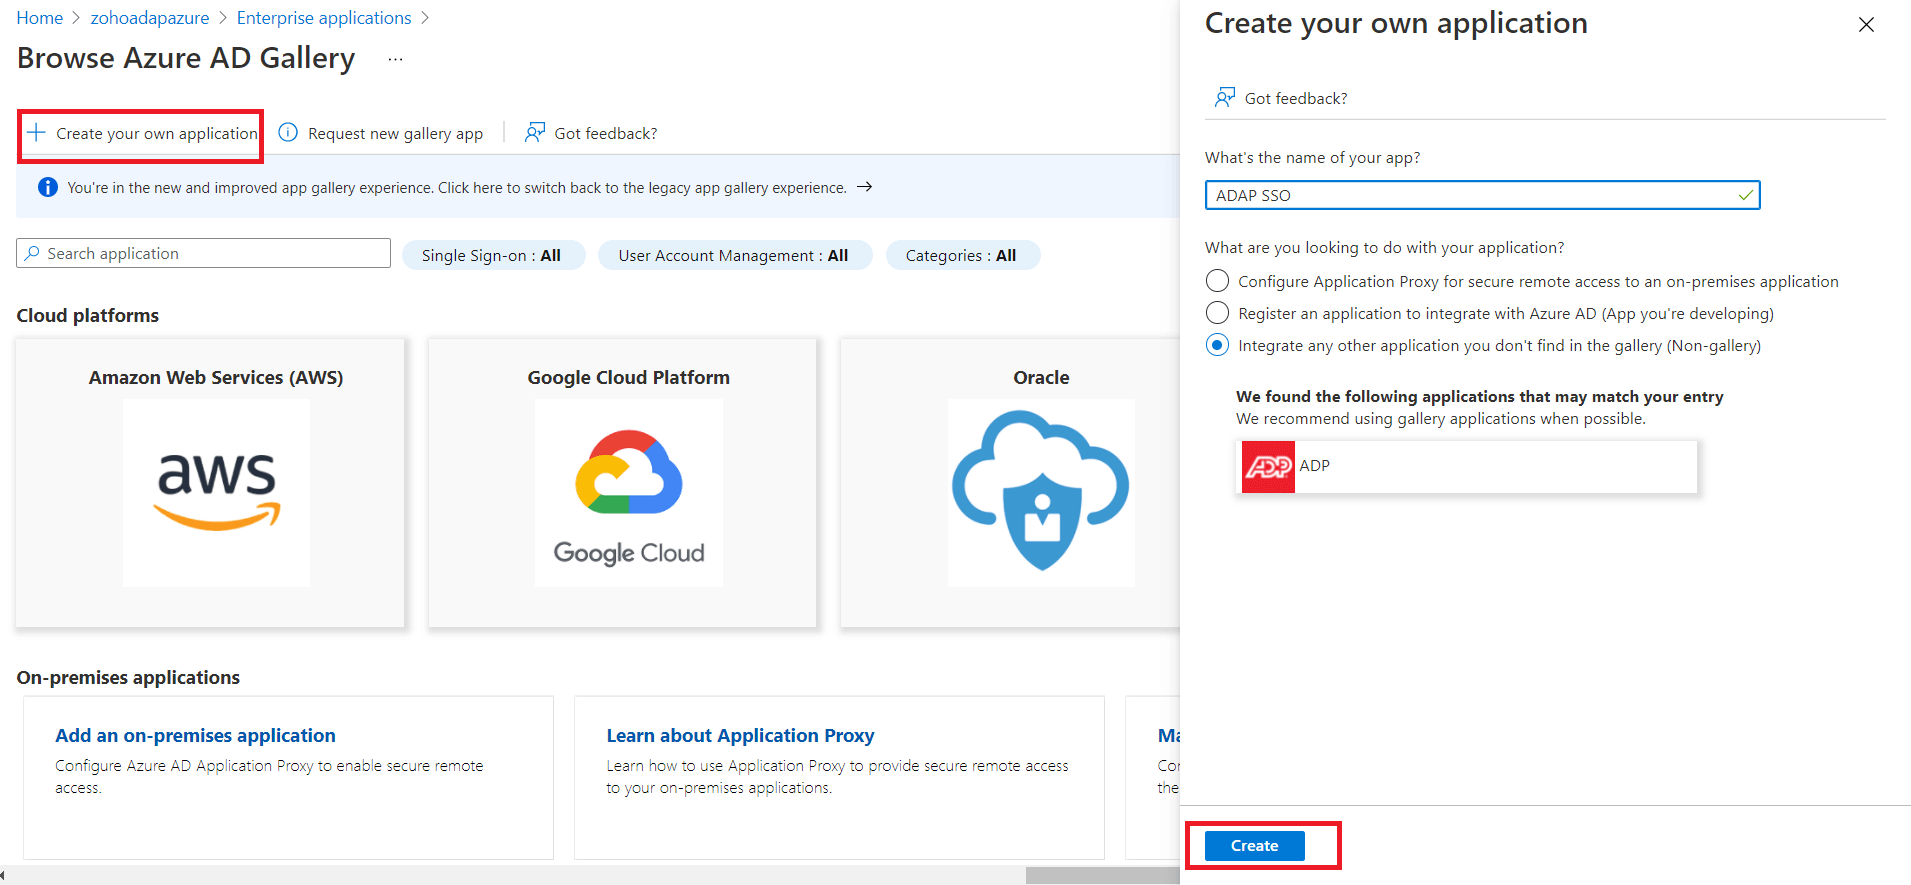
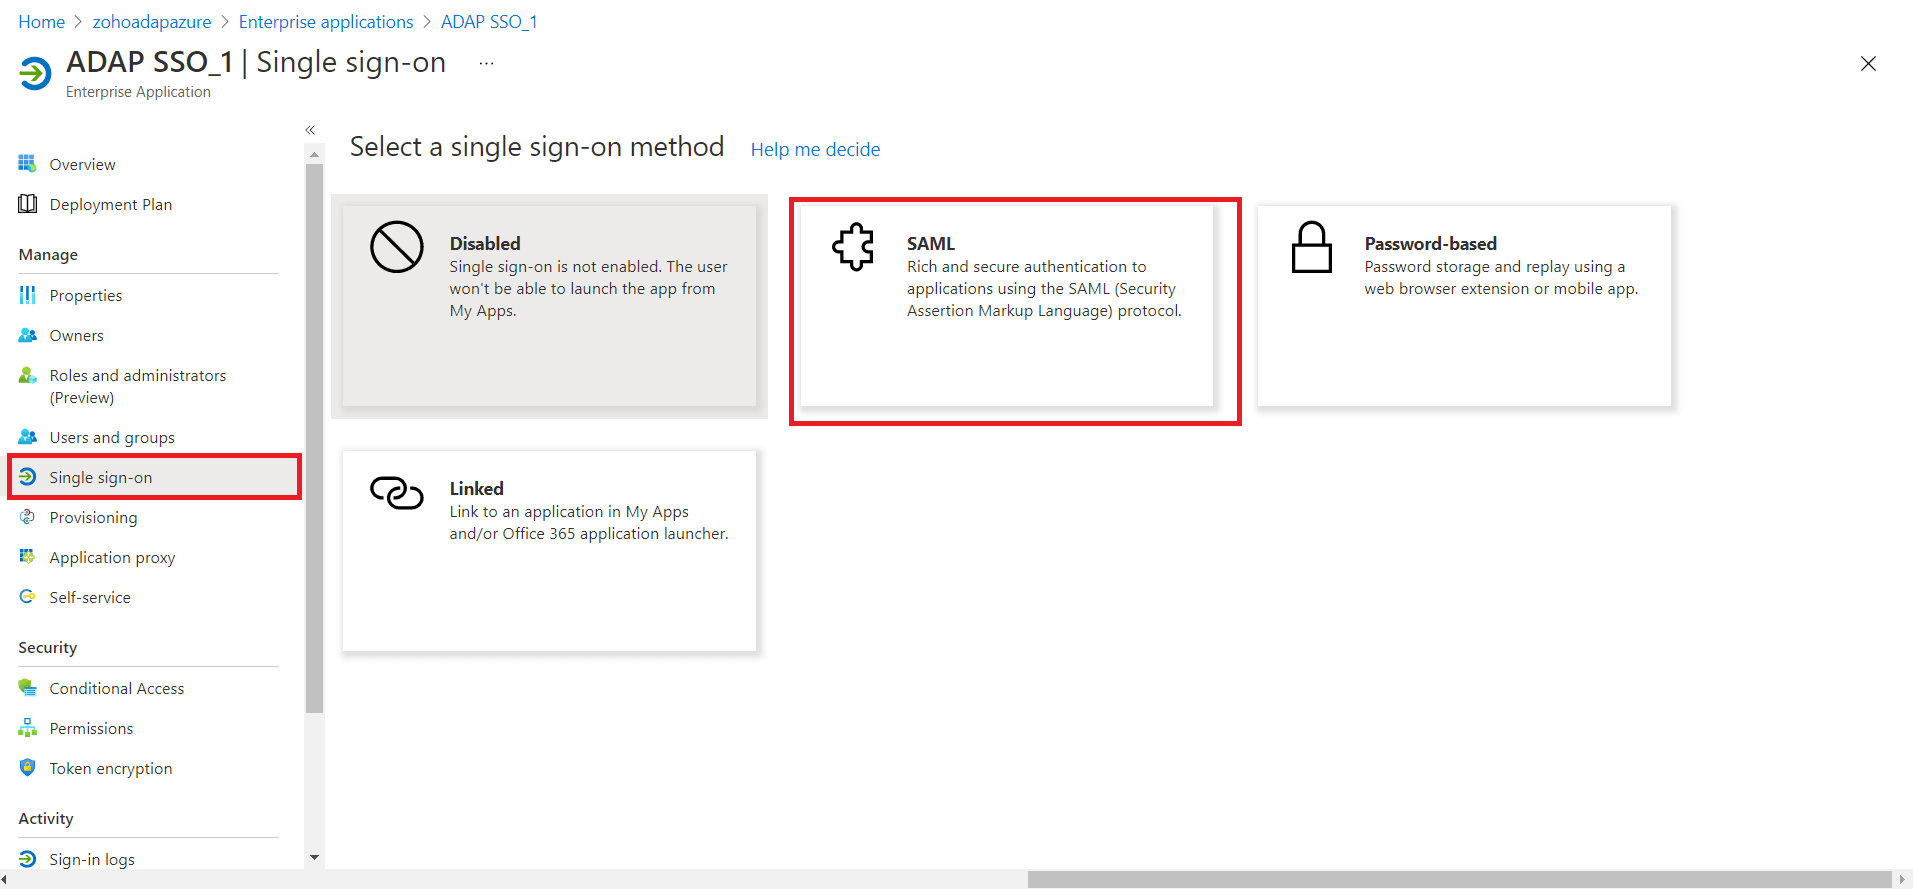
You can configure any custom identity provider of your choice to enable single sign-on to access ADAudit Plus. To do this, follow these steps:
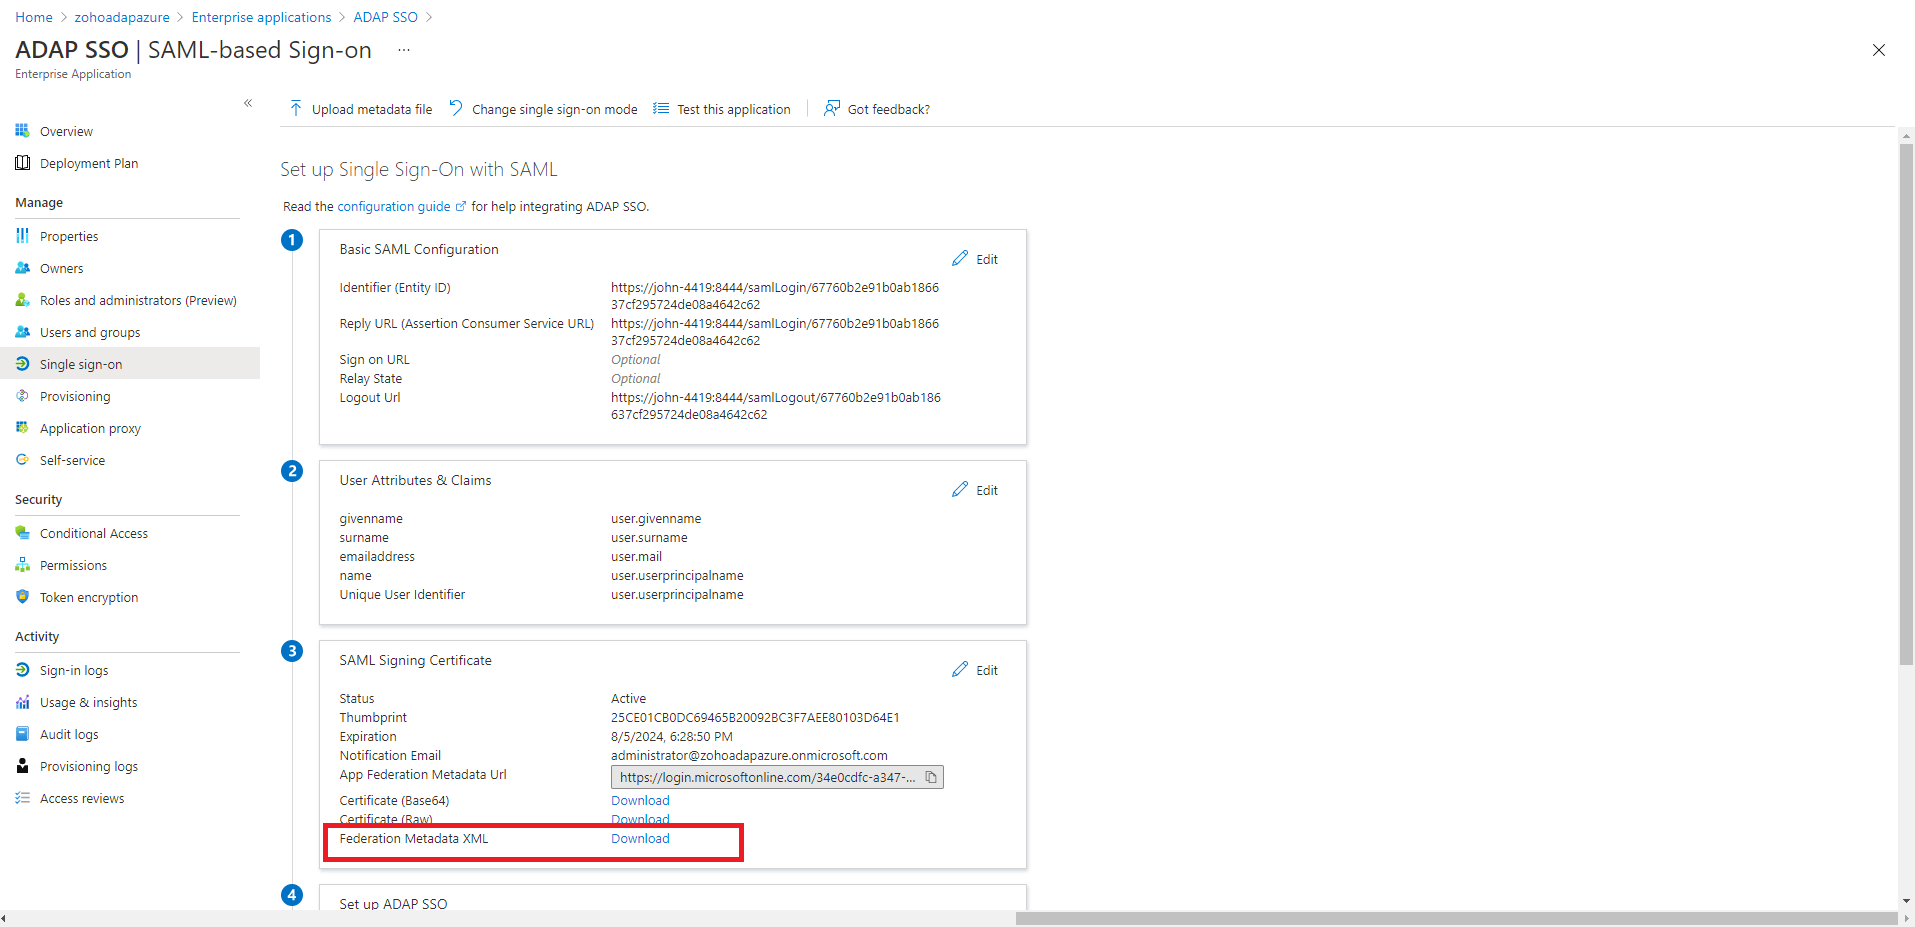
Log in to the ADAudit Plus web console with admin credentials, and navigate to Admin → Administration → Logon Settings → Single Sign-On. Check the box next to Enable Single Sign-On, and select SAML Authentication → Identity Provider (IdP) → Custom Identity Provider. Upload the metadata file of the custom identity provider.

Authentication Request Configuration
| Setting | Description | Available values |
|---|---|---|
| SAML Request | Defines whether the authentication request sent to your custom identity provider is digitally signed |
|
| Authentication Context Class | Specifies the method your custom identity provider should use to authenticate users |
|
SAML Response Configuration
| Setting | Description | Available values |
|---|---|---|
| SAML Response | Specifies whether the overall SAML response from your custom identity provider is signed |
|
| SAML Assertion | Specifies whether the SAML assertion inside the response is signed |
|
| Signature Algorithm | Defines the algorithm used for generating digital signatures in SAML responses |
|
Encryption Configuration
| Setting | Description | Available values |
|---|---|---|
| Assertion Encryption | Determines whether the SAML assertions returned from your custom identity provider are encrypted |
|
| Encryption Certificate | Certificate used for encrypting the assertion |
|
If you want to mandate domain technicians to log into ADAudit Plus only through SAML authentication, check the Force SAML Login box in the bottom-right corner.
Note: Once enabled, accessing ADAudit Plus' login page will redirect domain technicians to the single sign-on URL. However, administrators and technicians with ADAudit Plus authentication credentials can access the ADAudit Plus login page by using the /adminLogin tag after the login page URL.

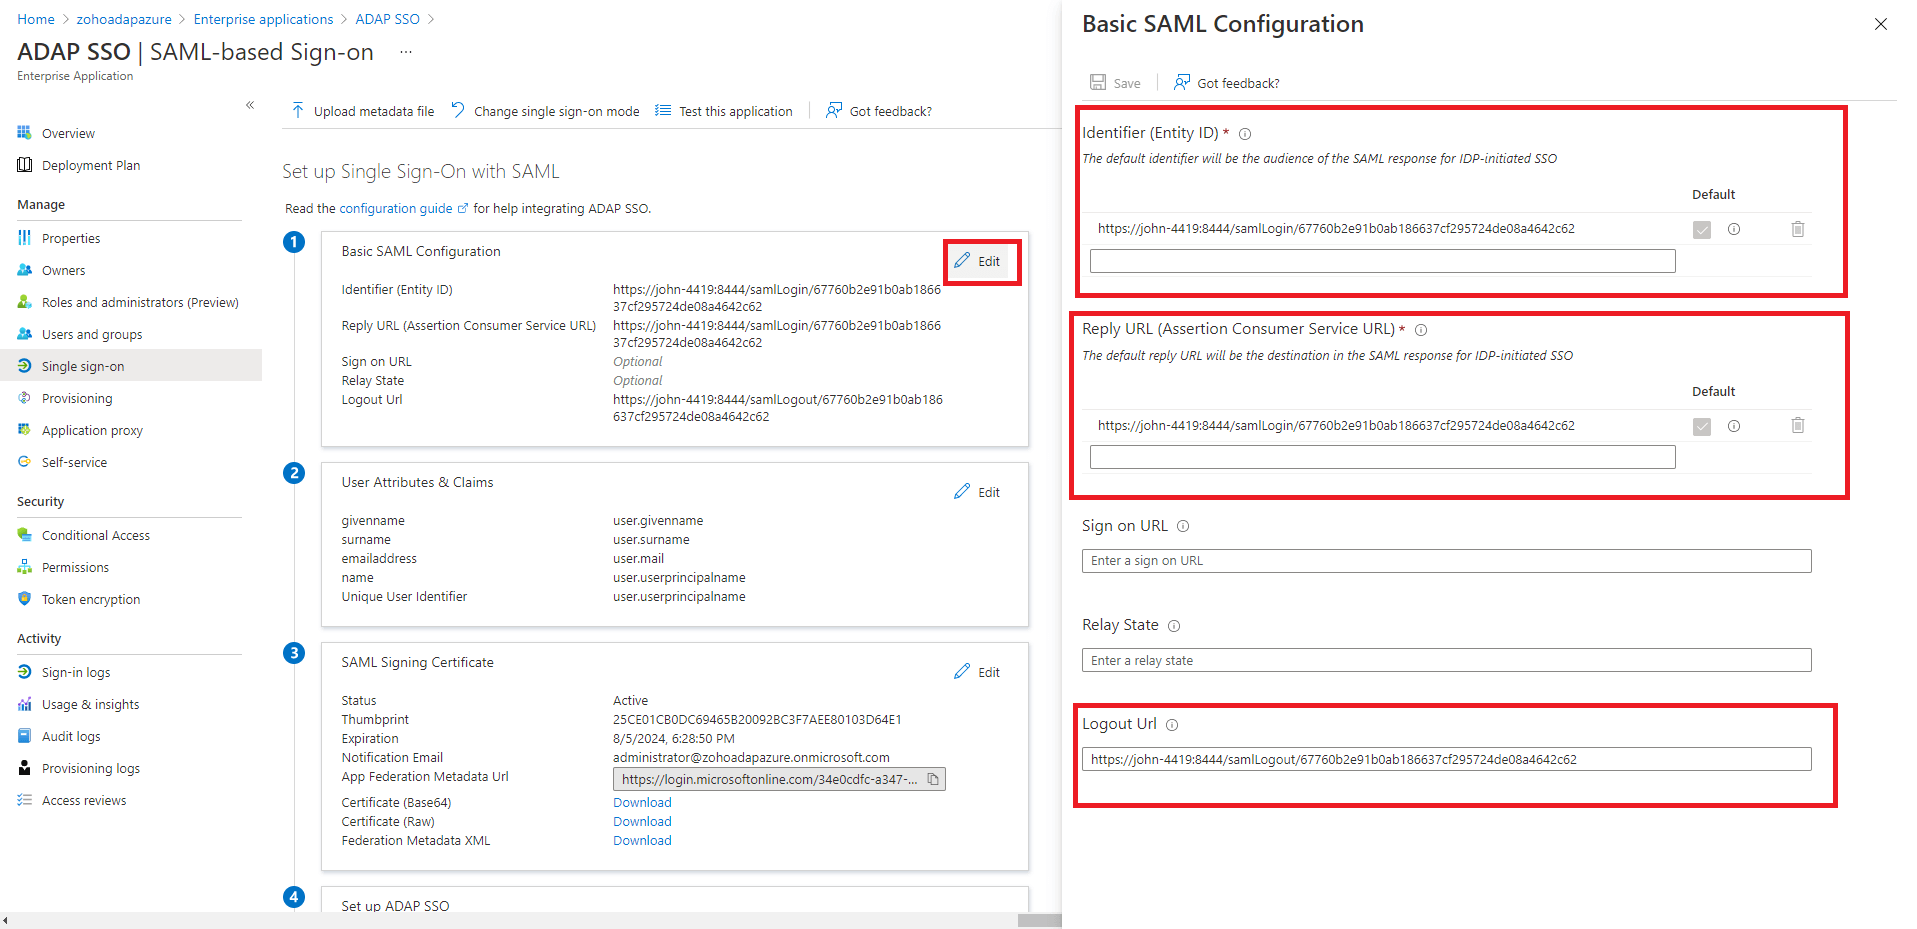
Note: To find the values for the ACS URL, log in to the ADAudit Plus console, navigate to Admin > Administration > Logon Settings > Single Sign-On. Check the box next to Enable Single Sign-On, and select SAML Authentication > Identity Provider (IdP) > Custom Identity Provider. You can find the ACS URL value here.
Note: To get the Logout URL, log in to the ADAudit Plus console, navigate to Admin > Administration > Logon Settings > Single Sign-On. Check the box next to Enable Single Sign-On, and select SAML Authentication > Identity Provider (IdP) > Custom Identity Provider. You can find the Logout URL value here.
Authentication Request Configuration
| Setting | Description | Available values |
|---|---|---|
| SAML Request | Defines whether the authentication request sent to your Azure identity provider is digitally signed |
|
| Authentication Context Class | Specifies the method your Azure identity provider should use to authenticate users |
|
SAML Response Configuration
| Setting | Description | Available values |
|---|---|---|
| SAML Response | Specifies whether the overall SAML response from your Azure identity provider is signed |
|
| SAML Assertion | Specifies whether the SAML assertion inside the response is signed |
|
| Signature Algorithm | Defines the algorithm used for generating digital signatures in SAML responses |
|
Encryption Configuration
| Setting | Description | Available values |
|---|---|---|
| Assertion Encryption | Determines whether the SAML assertions returned from your Azure identity provider are encrypted |
|
| Encryption Certificate | Certificate used for encrypting the assertion |
|
If you want to mandate domain technicians to log into ADAudit Plus only through SAML authentication, check the Force SAML Login box in the bottom-right corner.
Note: Once enabled, accessing ADAudit Plus' login page will redirect domain technicians to the single sign-on URL. However, administrators and technicians with ADAudit Plus authentication credentials can access the ADAudit Plus login page by using the /adminLogin tag after the login page URL.
Copyright © 2020, ZOHO Corp. All Rights Reserved.