- Related Products
- AD360
- Log360
- ADAudit Plus
- ADSelfService Plus
- EventLog Analyzer
- Exchange Reporter Plus
Migrating data from an existing PostgreSQL/Microsoft SQL database to the bundled PostgreSQL database
ADManager Plus supports the migration of data from external PostgreSQL databases or Microsoft SQL databases to the bundled PostgreSQL database through ADManager Plus' database setup wizard. Data can be migrated either between two different machines or within the same machine.
Steps to migrate data to the bundled PostgreSQL database within the same machine
- Find the ADManager Plus build number by clicking the License button on the top-right corner.
- Stop ADManager Plus.
- Install a fresh instance of ADManager Plus of the same build after downloading it from here. If you want to migrate the data between bundled databases on different machines, follow this step, and then proceed.
- Open the Command Prompt and enter <New ADManager Plus installation folder>\bin\startDB.bat to start the database of the new installation.
- To initiate the migration of data in the old installation, enter <Old ADManager Plus installation folder>\bin\ChangeDB.bat in the Command Prompt. Make sure that the user running the Command Prompt is the user with full control of the ADManager Plus installation folder as well.
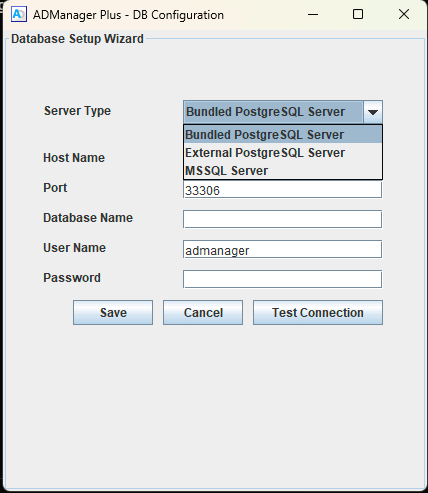
- In the Database Setup Wizard pop-up that appears, select Bundled PostgreSQL Server as the Server Type.
- Enter the required details as given below:
- Host Name: Enter the local host address, the machine hostname, or the IP address of the newly installed ADManager Plus build.
- Note: If the data migration is within the same machine, enter the local host name. Otherwise, enter the machine hostname or IP address in the Host Name field.
- Port: 33306
- Database Name: adsm
- User Name: admanager
- Password: admanager
- Click Test Connection and check if the connection is established successfully.
- Click Save.
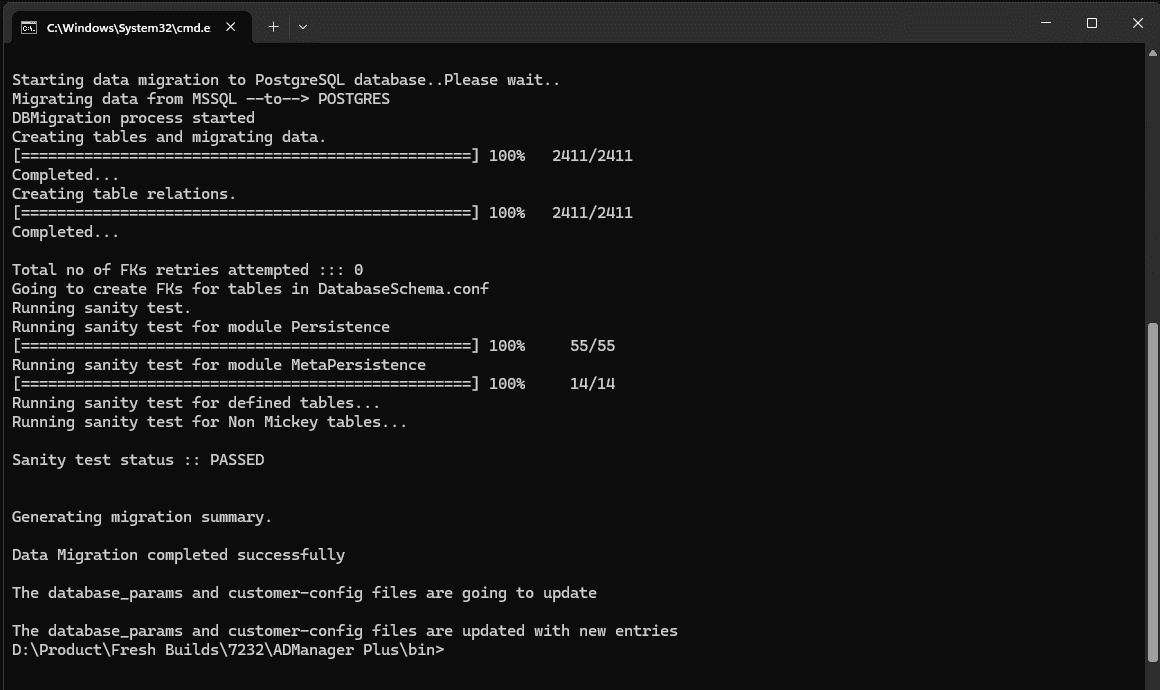
- Once the migration is completed successfully, you will get a window as shown here. Do not start the product immediately. Copy the customer-config.xml from the <Old ADManager Plus installation folder>/conf folder and replace the customer-config.xml in the <New ADManager Plus installation folder>/conf folder, and start the product.
- If you are migrating the data from Microsoft SQL database and the parameters such as DBName, StartDBServer, and DSAdapter are available in the new instance's customer-config.xml file, remove these values from it as shown below.

<configuration name="DBName" value="mssql"/>
<configuration name="StartDBServer" value="false"/>
<configuration name="DSAdapter" value="mssql"/>


Data migration between two different machines
In a scenario where ADManager Plus has been installed on two different machines, before migrating the data from an existing bundled PostgreSQL database to another bundled PostgreSQL database, follow the steps given below to set up a remote connection between the source machine and the target machine (the machine to which data will be migrated) after step 3.
Enable remote connection in the PostgreSQL database server by making the following changes in the pg_hba.conf and postgresql.conf files located in <ADManager Plus installation folder>\pgsql\data. We recommend that you back up these files before modifying them.
- In the pg_hba.conf file, under the heading IPv4 local connections, replace the IP address 127.0.0.1/32 with all and save the file.
- In the postgresql.conf file, find this text: #listen_addresses = localhost. Replace it with listen_addresses = * and save the file.
Once completed, proceed with the remaining steps given above.
