Setting up v2 Real Browser Monitor (RBM)
The V2 RBM includes a simpler and smoother onboarding process by allowing users to record and add Real Browser Monitor directly from Applications Manager UI.
Follow the steps below to set up Real Browser Monitoring (RBM) in Applications Manager.
Step 1. Configure the EUM Agent.
Refer to the installation guide and install the EUM Agent at the location where you would like to perform RBM playback.
Follow the steps in the table given below to enable playback:
| Description | Firefox | Edge | Chrome |
|---|
| 1. Install the playback browser. |
Bundled by default, no additional steps are necessary. |
Edge Browser (versions 17 and above) |
Google Chrome (versions 65 and above) |
| 2. Find the playback browser version and download a compatible driver. |
Open Edge browser → More options → Settings → Scroll down to find the version. Edge driver download link. |
Open Google Chrome → Settings → About Chrome → Find Chrome version. Chrome driver download link . |
3.Configure the driver path in the EUM Agent web client.
(EUM Agent web client → Web driver settings) |
Provide the driver installation path in the Microsoft Edge WebDriver Path and restart EUM Agent. |
Provide the driver installation path in Google Chrome WebDriver Path and restart EUM Agent. |
| Still facing issues? Refer to the troubleshooting link. |
Troubleshooting link |
Troubleshooting link |
Troubleshooting link |
Step 2. Configure the Recorder
The browser extension captures all transactions in your application in the exact order they occur. These transactions are saved as web scripts and can be replayed at regular intervals.
To install the browser extension for the recorder, follow the steps given below:
- Login to Applications Manager.
- Navigate to Home → New Monitors → Add New Monitor → Real Browser Monitor.
- Click on the Install Recorder button, which will take you to the extension store link. Add the extension to your browser. Alternatively, you can get the extension from the below links:
- Chrome/Edge web store link (for Applications Manager version 175600 and above)
- Chrome web store link (for Applications Manager version below 175600)
Step 3. Add the RBM Monitor
- Once Recorder is installed, enter the full URL of the web page you would like to monitor. Eg: https://www.manageengine.com
- Select the appropriate resolution based on the type of device (Desktop, Tablet, or Mobile).
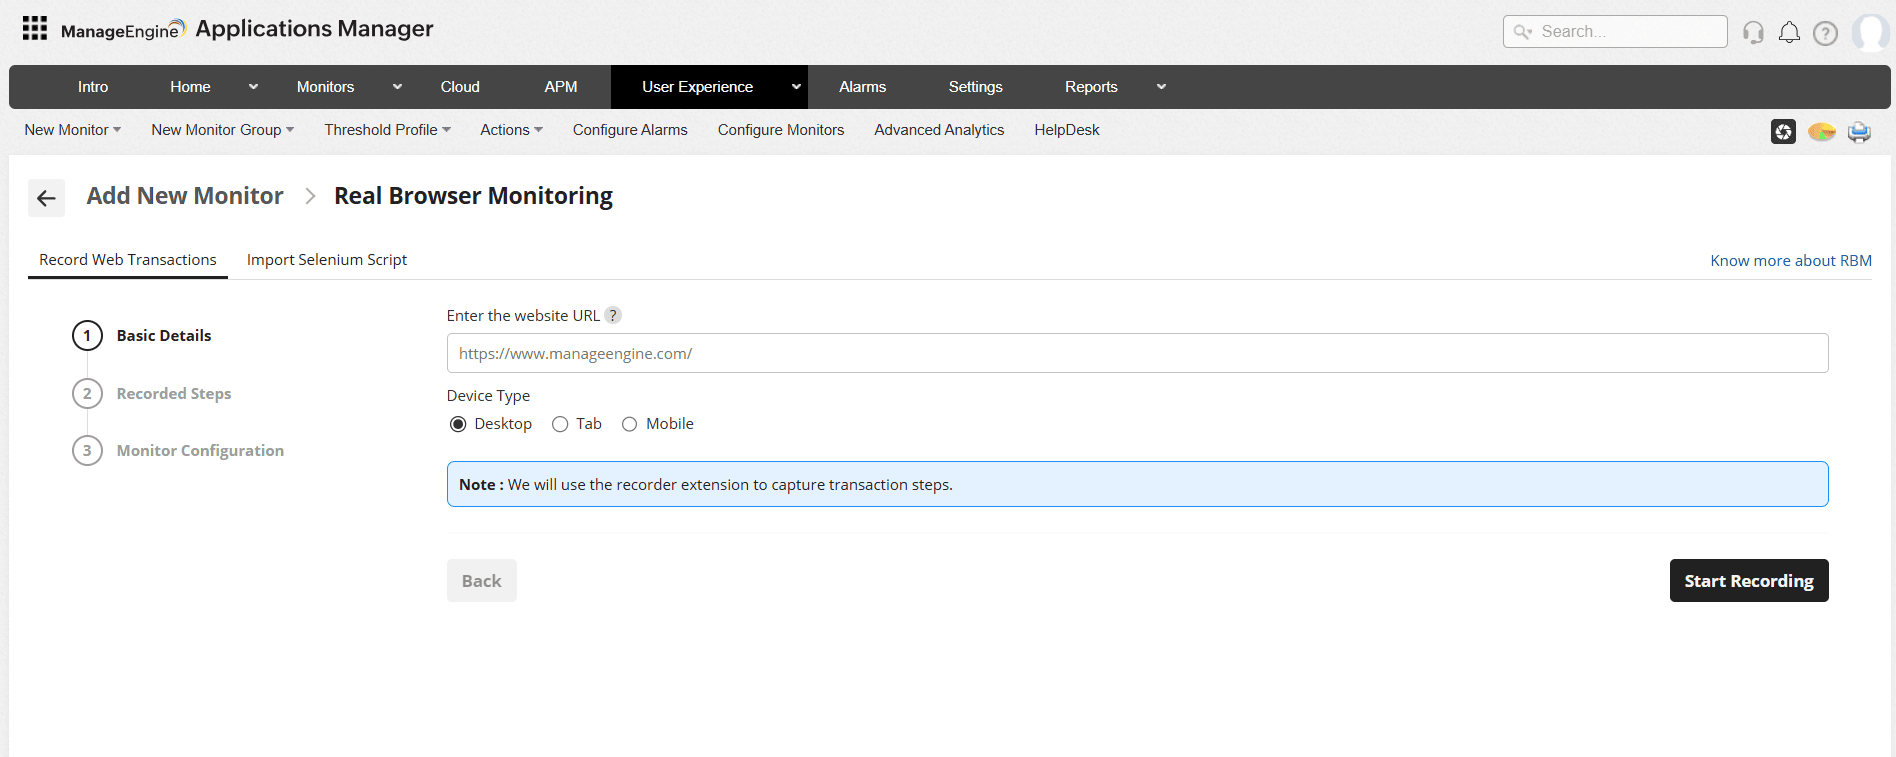
- Click on Start Recording and proceed to perform the list of transactions to be monitored in the web application.
- Click on the Stop Recording on the top right to stop the recording. You can now view all the recorded transactions.

- Edit the steps of the transactions under the Recorded Steps:
- You can edit the step details by clicking a step and modifying the Step Details, Step Actions and Content Checks.
- Step Details: Provide the Step Name and Step URL.
- Step Action: Provide the Action, Identifier, and Value. Clicking the Add Wait icon lets you add a wait time, and clicking the Delete Action icon lets you delete the action. Wait time is the duration that each action is required to pause for.
- Advanced Configuration -> Content Checks: Configure the Content Check settings as per your requirements.
- Keywords to be present: Get alerted when the specified keywords are not present in the website. Mention the keywords in the keywords to be present text box and check the check box to stop the playback when the keyword check fails. To check multiple keywords or a phrase, specify these inside double quotes (""). Example: "Applications Manager".
- Keywords not to be present: Get alerted when the specified keywords are present in the webpage content. Mention the keywords in the keywords not to be present text box and check the check box to stop the playback when the keyword check fails.
Note:You must adhere to the following conditions while adding keywords in the given field:
- A single string or keyword can be configured with or without any double quotes (e.g., Applications).
- If there are two strings, which comprise a single keyword, add a space in between the two strings and enclose it with double quotes. (e.g., "Applications Manager").
- If you have more than two individual keywords configured, you will have to separate them with a space and also use double quotes for each of them. (e.g., "Applications Manager" "Manageengine").
- Click Save step to update the Step.
- Click on Next.
- Specify the following details under Monitor Configuration:
- Display Name: The name of your web browser transaction monitor. Save the monitor with this name.
- Poll Interval (minutes): The frequency in which the monitor is polled. The polling interval can be set from 10 mins to 1440 mins (one day).
- Page Load Timeout(in seconds): The total estimated time taken to load the HTML and all its associated components, including javascript and images. Page load timeout can be anywhere between 1 and 60 seconds.
- Think Time (in seconds): The delay between two consecutive steps during transaction execution. Think time can be anywhere between 1 and 10 seconds.
- Browser Type: Choose Firefox, Chrome, or Edge for playback.
- Select Agents: Select the agents from the list displayed where the playback has to be replayed periodically.
- Show Screen shot: Enable it to capture screenshots of each step.
- Show Performance Metrics: Enable it to capture performance metrics of each step.
- Accept untrusted/expired certificate: Enable it to accept the untrusted/expired certificates.
- Click on Add Monitor to add Real Browser Monitor.
Thank you for your feedback!