Importing Resources
Apart from adding resources manually, you can also import them. There are a few ways by which you can import your resources into Password Manager Pro:
- Importing Resources from a File
- Importing Resources from KeePass
- Importing resources from Active Directory
1. Importing Resources from a File
You can import resource details from a CSV/TSV/Excel file using the import wizard. Click here to view sample files and learn more about the file formats supported for importing.
Note: When importing resources, TOTP Secret Keys for accounts with configured TOTP cannot be mapped. You must manually configure TOTP for these accounts after import.
Note: Earlier, it was possible to import a .txt file containing comma-separated data, and in step 2, the data would be listed as expected. However, from build 12330 onwards, if the entries are comma-separated, the file format must be .csv. Files with tab-separated values should be saved as .txt or .tsv for importing.
- Navigate to the "Resources" tab.
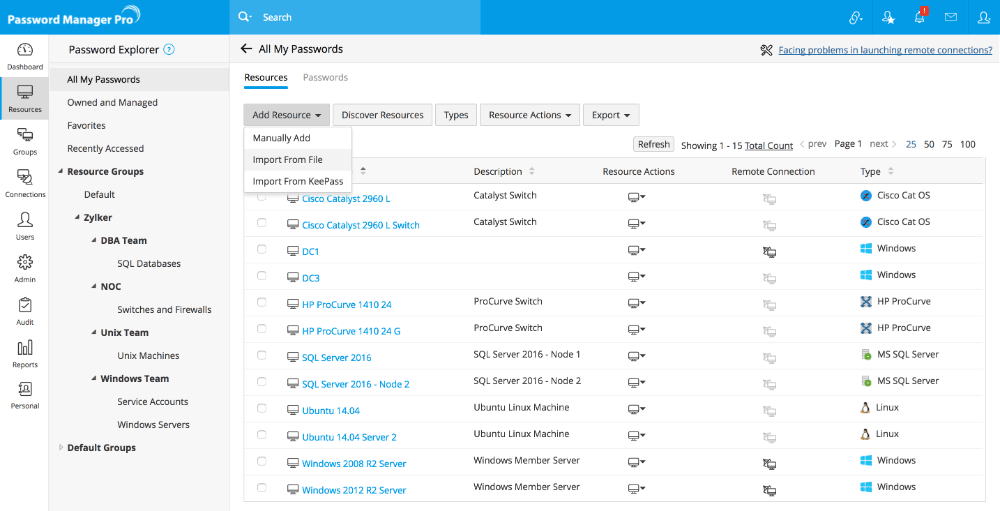
- Click the "Add Resource" button and select "Import from File" from the drop-down list.
- In the dialog box that opens, select Comma Separated, Tab Separated, or Excel as your file type before you browse and import the file. You can choose from two different file formats:
- Normal File: This option can be used to upload a plain text CSV/TSV file or entries in an Excel file directly.
- Password Protected ZIP File: This option can be used if you wish to upload a password protected ZIP folder containing the CSV/TSV/Excel file, for enhanced security. If you choose this file format, you must also provide the password and specify the name of the target file in the 'File Name' field. In case the 'File Name' field is left empty, Password Manager Pro will automatically import information from the first file that it accessed in the unzipped folder.


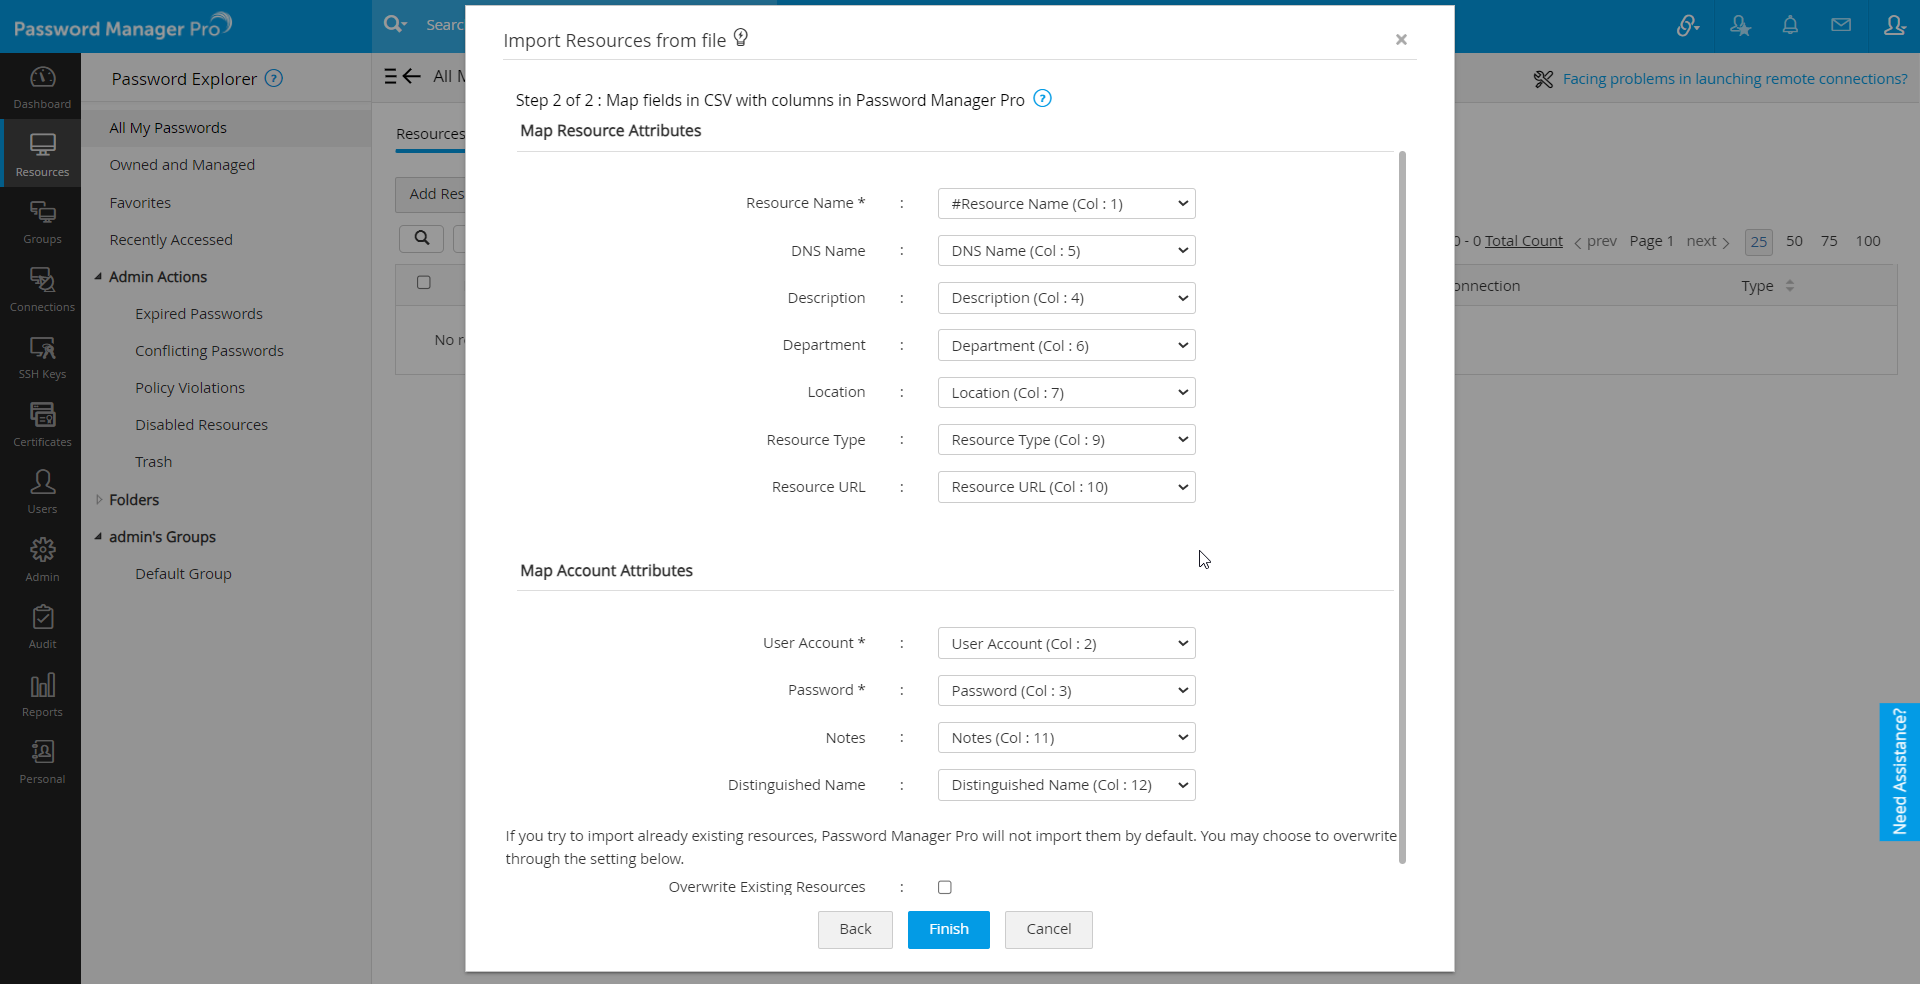
- In your CSV/TSV/Excel file, the entries could be present in any order. The data from the imported file will autofill the fields matching the column names. You can choose which field in the file maps to the corresponding attribute of the Password Manager Pro resource and account. Both the default and the user defined attributes will be listed in the wizard. The user defined attributes should have been defined before the import operation. If a resource contains multiple user accounts, then the resource fields will have to be repeated for each user account in the file.
- If you have resources with attributes that can not be placed in the file (like file types for the File Store resource type), you can leave those entries blank in the file and later edit the resource and update the attribute value.
- If the list of resources imported by you contains any of the already existing resources, they will not be added to Password Manager Pro by default. If you want them to be overwritten, you need to select the option "Overwrite Existing Resources".
- Click "Finish" to complete the resource import process.
- The successful/failed import process will be logged as an audit with detailed information. Navigate to the "Resource Audit" section in the "Audit" tab for details.


Notes: If you are unable to find the reason for import failure from the "Audit" tab, set the log level to "Debug" mode and perform the import operation again.Now, you will get the detailed failure traces from the log file available in the <Password Manager Pro Installation Folder>\logs\pmp0.txt directory.
Notes: After importing resources, if you want to configure password reset for the target systems, you need to do it by editing the resources.
- Importing resources takes time ...
When you try to import a large number of resources, it would take a while to import all of them to Password Manager Pro inventory. Once, it is done, you will notice the message "Resources Imported Successfully".
- My resources have additional fields...
You can import the additional fields too. But, prior to importing the resources, you need to add those custom fields to Password Manager Pro.
- I do not have some of the fields that are listed as mandatory for Password Manager Pro in my CSV file...
That is not a problem. Only 'Resource Name' and 'Account Name' fields are mandatory. So, you can import whatever you have.
2. Importing Resources from KeePass
You can also import resource details (IT resources, their accounts, and passwords) directly from KeePass (both 1.x and 2.x) using the import wizard. The import file should be a KeePass database file, either .kdb or .kdbx.
To import resources from KeePass;
- Navigate to the "Resources" tab.
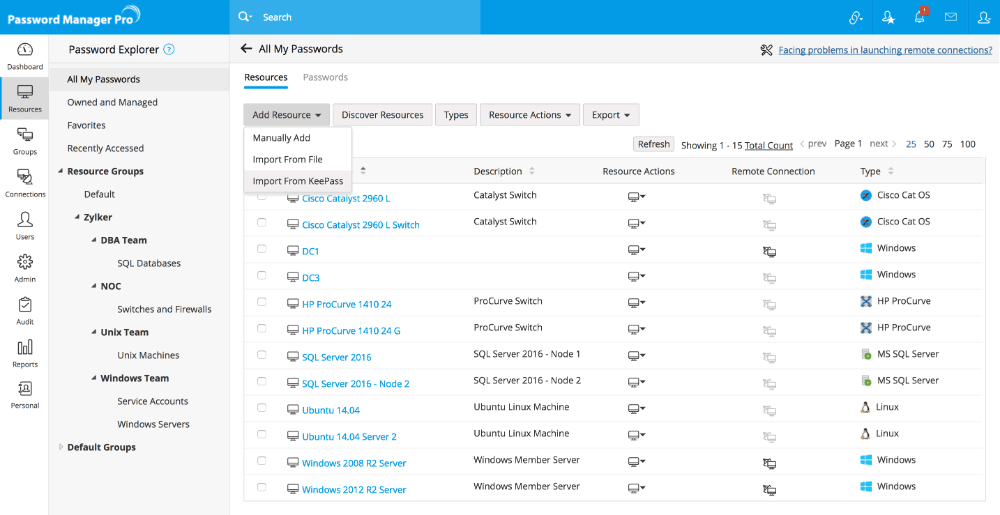
- Click the "Add Resource" button and select "Import from KeePass" from the drop-down list.
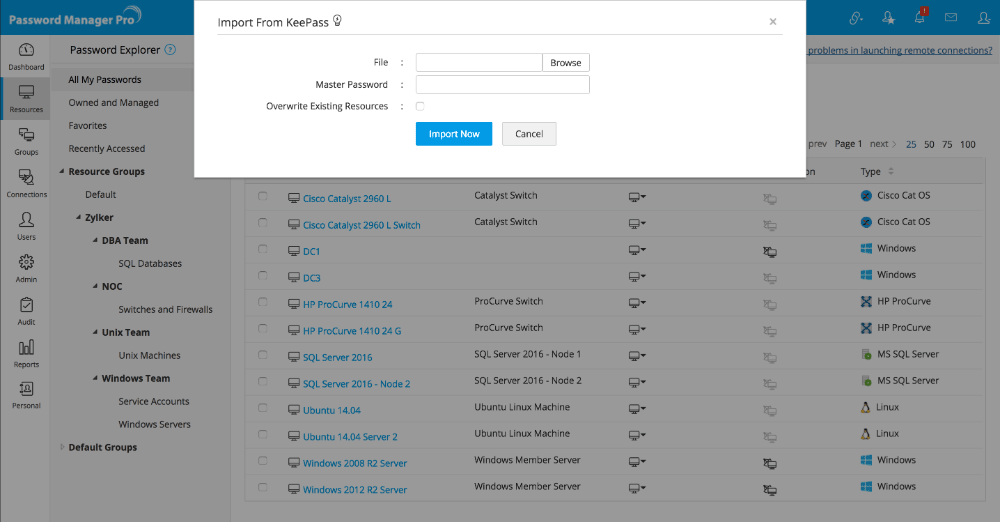
- In the pop-up form that opens, browse and select the required KeePass Database file for "Import File." Usually, the file will be available at the location chosen by you while saving the file in KeePass after its creation.
- After selecting the file, enter the Master Password you have set for the file.
- "Overwrite Existing Resources": Check this option if you want the import operation to overwrite resources that already exist in Password Manager Pro. If this option is off, resources already existing in Password Manager Pro database will not be imported from KeePass.
- Click "Import Now." The result of every line imported will be logged as an audit record.

Note: Currently, you can import resources from KeePass only using Master Passwords, and not Key Files. So, ensure the selected file has a Master Password.

Notes:
- During the import operation, resource details such as resource URL, user accounts, passwords, and notes will be automatically mapped and imported from KeePass. For DNS Name/IP Address, the details in the file be imported only if they match with the inbuilt regular expressions. Also, if you have stored the resources within different static groups such as Windows, Linux, etc, in the database file, the groups will also be automatically created in Password Manager Pro while importing the resources.
- Once the resources and groups are imported, the Resource Type of all the resources will, by default, be marked as "Unknown" in Password Manager Pro. You can edit the resources and sort them under desired types. In case of web site accounts alone, the resources will be automatically sorted as "Web Site Accounts", if the site URL is provided in the import file.
- After importing the resources, if you want to configure remote password reset for the target systems, navigate to "Resources >> Resource Actions >> Configure Password Reset".