Custom Reports
ServiceDesk Plus-MSP enables you to create reports that meet your need if you are unable to find them from the list of out-of-the-box reports already available. To create your custom reports,
-
Click Reports tab in the header pane.
-
Click New Custom Reportbutton in the reports home page.
-
Specify the relevant Report Title in the given text field. This is a mandatory field.
-
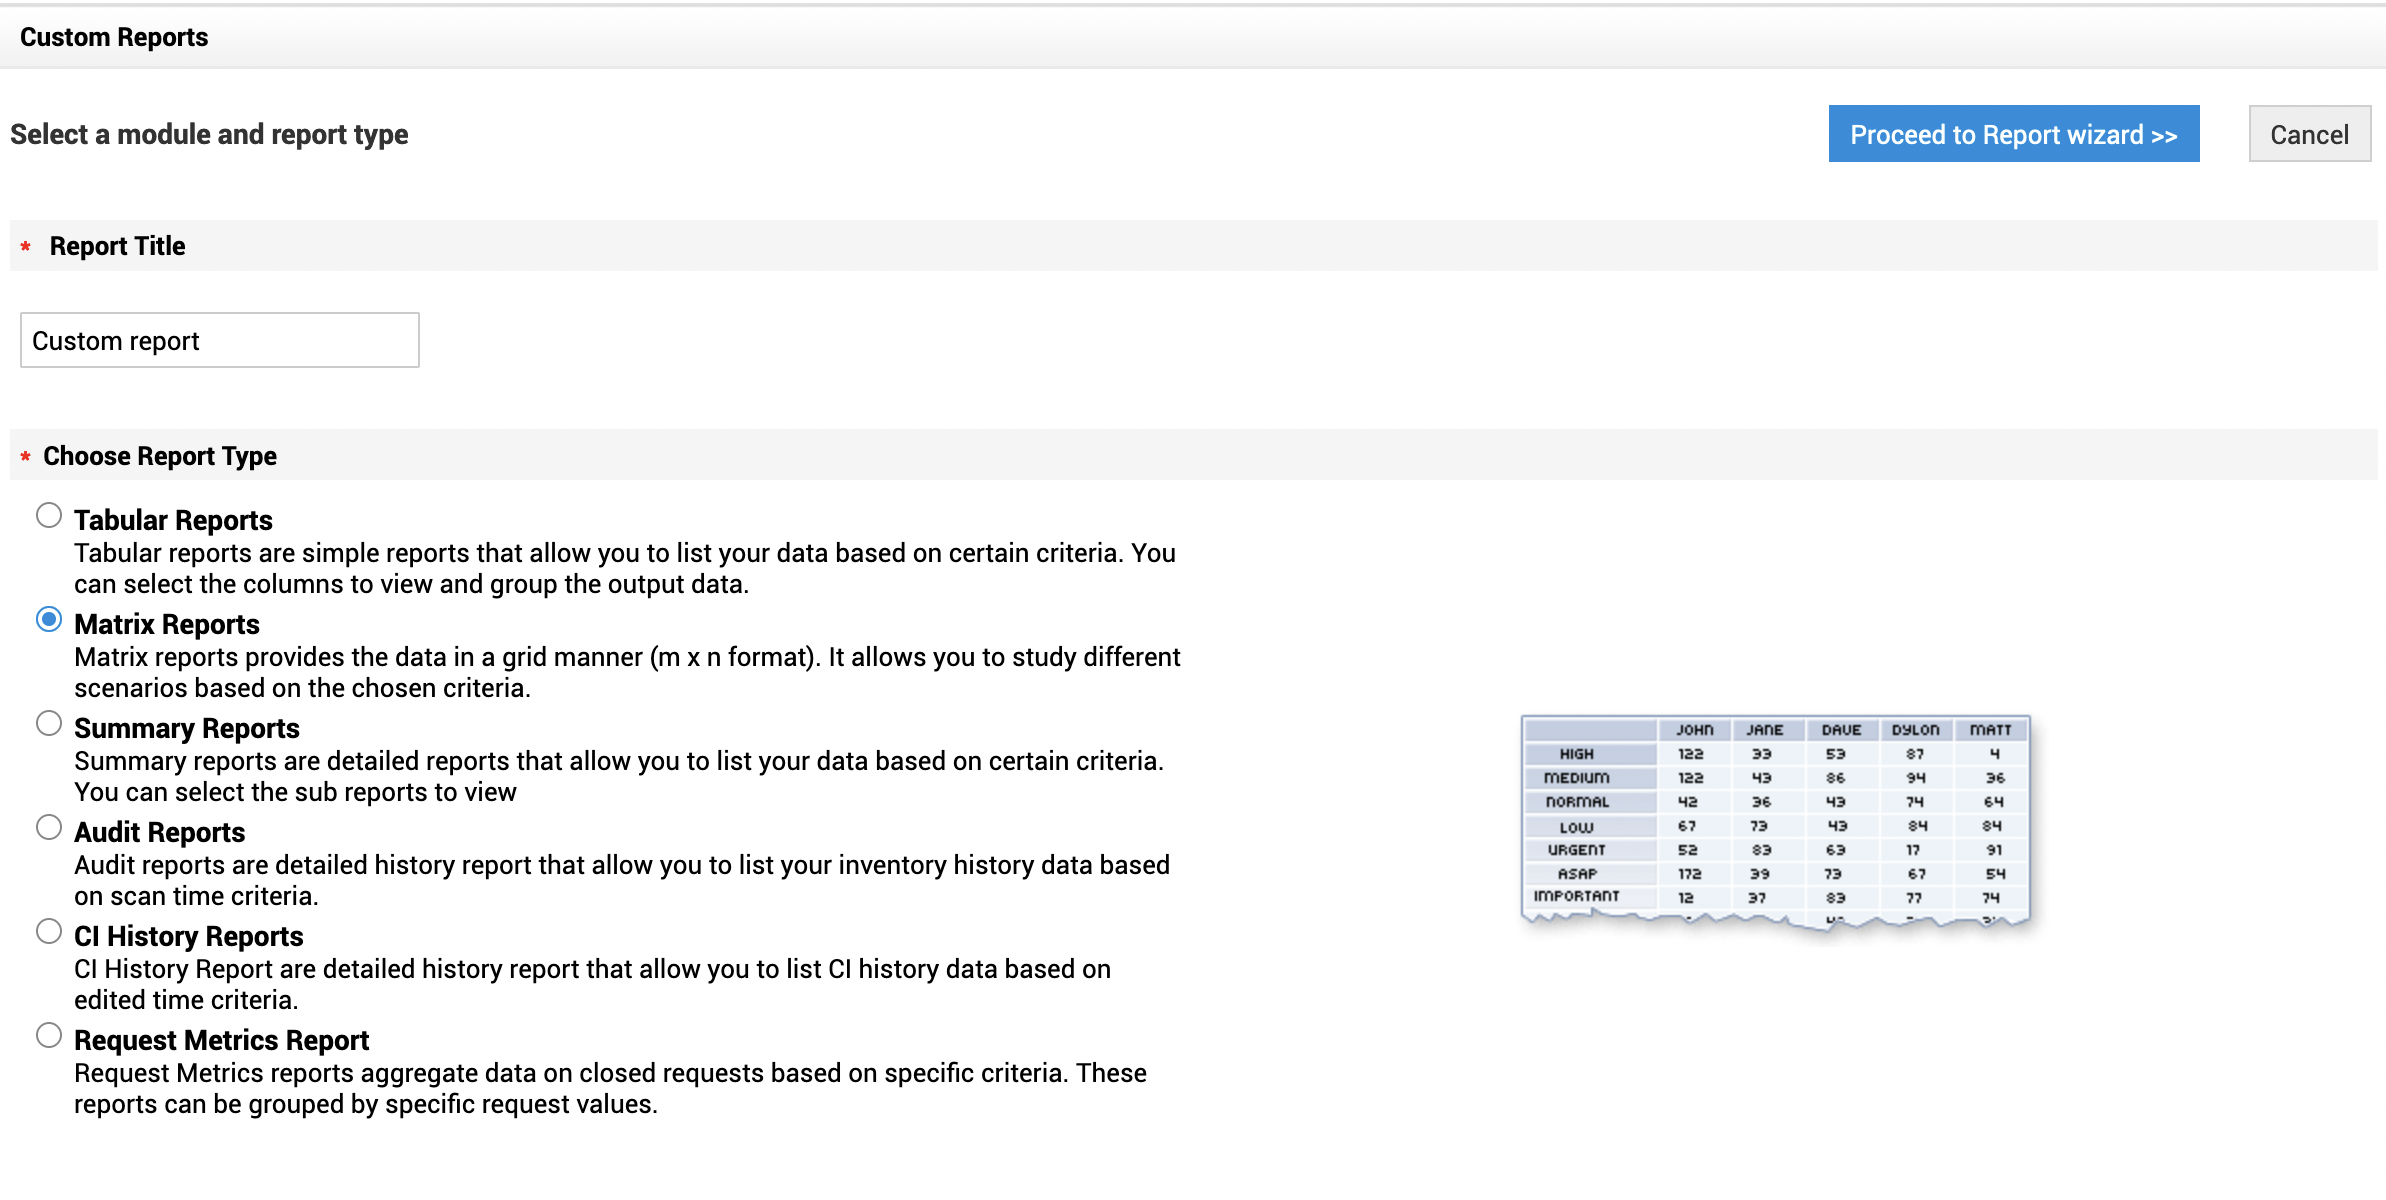
Choose the Report Type by selecting the radio buttons. You can create Tabular Reports, Matrix Reports, Summary Reports, Audit Reports.
-
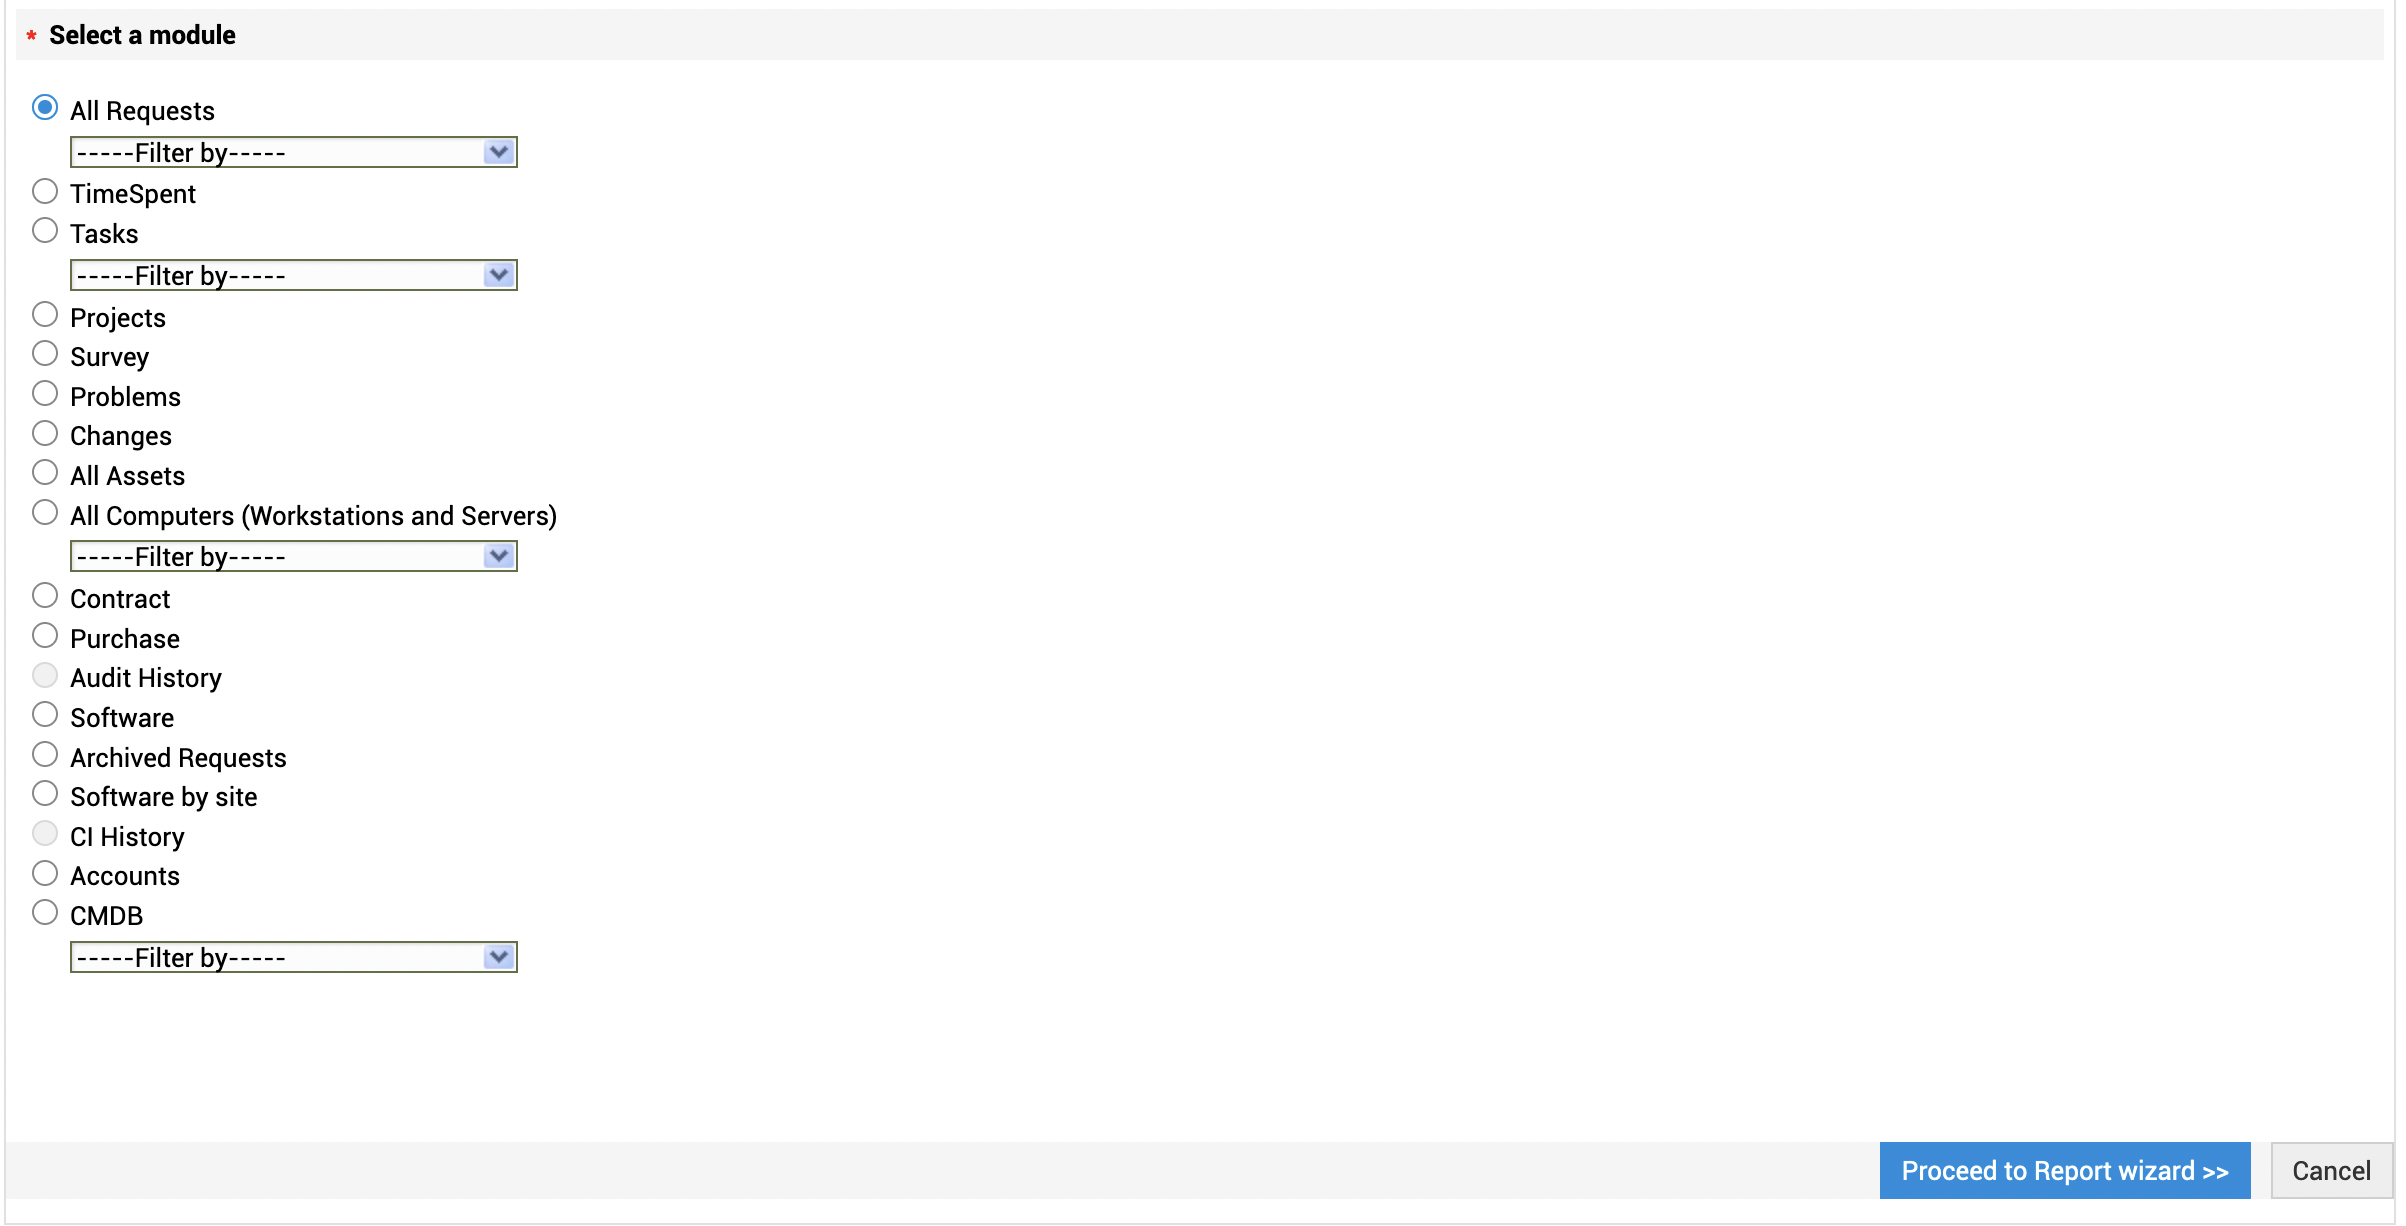
Choose the module (Request, TimeSpent, Problem, Change and so on) for which you wish to create the report. The audit History module will be enabled only for audit reports. This is applicable only for the tabular and matrix reports. For summary reports, audit reports default modules will be selected.
-
Click Proceed to Report Wizard >> button. This opens the Display Columns page. This page differs for each report type. Each report type has to go through various steps before generating it as a customized report.
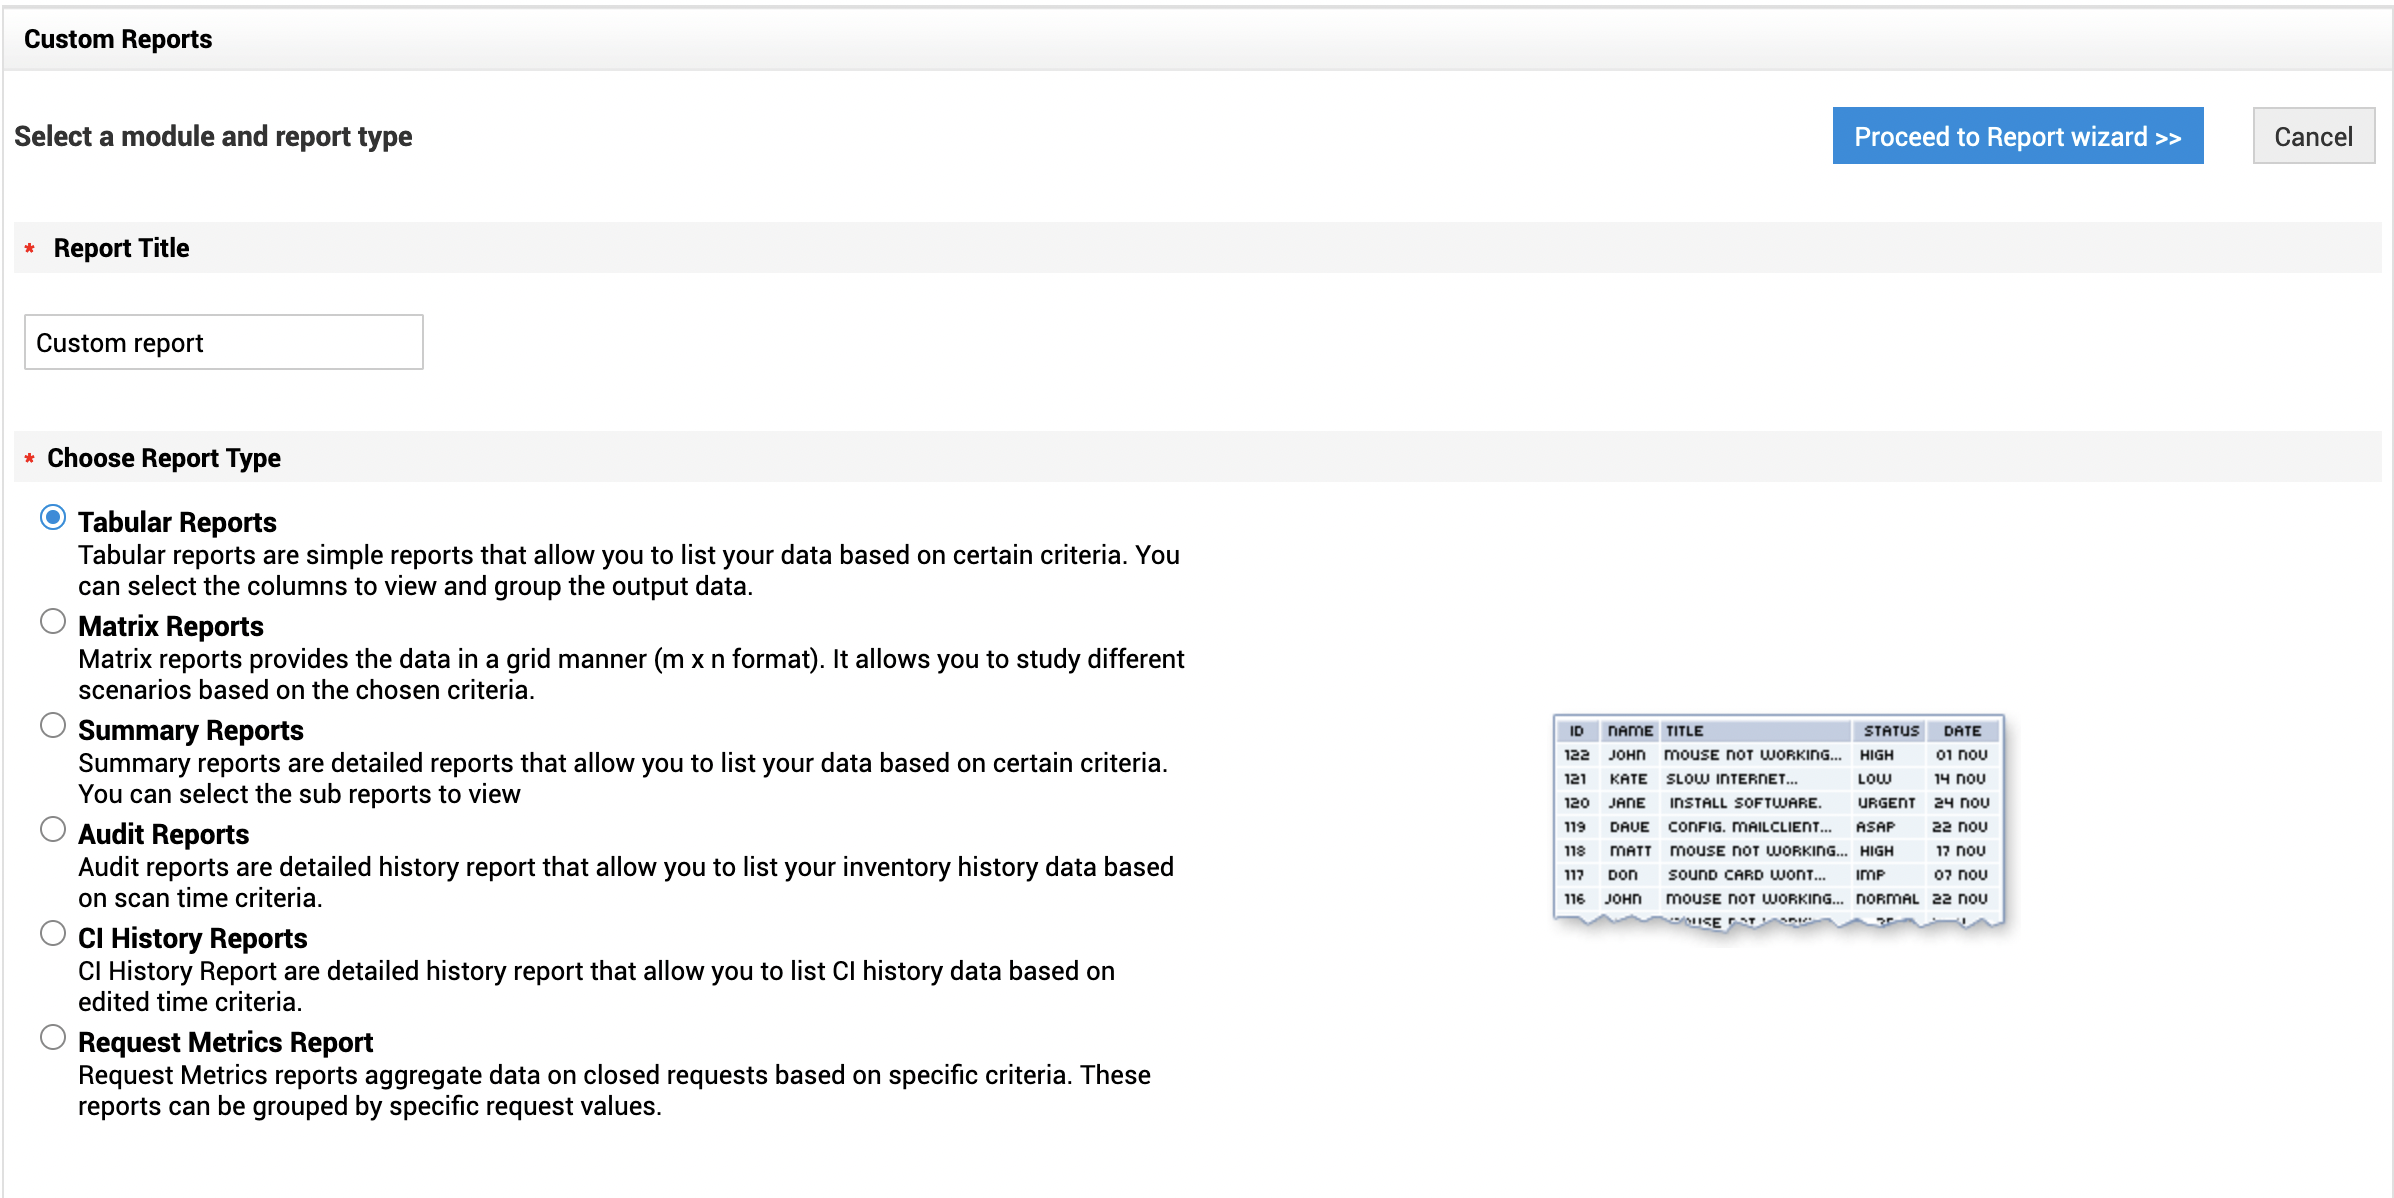
Tabular reports are simple reports that allow you to list your data based on certain criteria.
To create a tabular report,
Click New Custom Report.
Choose the report type as Tabular Reports.
Display Columns
The first step to create tabular reports is to select the display columns which need to be displayed in the tabular report. Select the columns from the Available Columns list box and click >> button to move them to Display Columns list box. Click the << button if you want to remove any column from the Display Columns list box.
Click Next button. This leads you to the grouping of columns, where you can choose two levels of grouping.
Filter Options
- If you are using the date/time filter criteria, select the date column name from the Select Column combo box.
- Select the period for which you want to generate the report. If you would like to generate report during this week, last week, this month, last month, this quarter, last quarter or today, yesterday then select the During radio button and select the time period from the combo box. (OR) If you wish to provide a custom period, then select the From and To date using the calender button.
To use Advanced Filtering, select the column name such as, Requester name, region site and so on from the combo box. Select the criteria (is, is not, contains and so on) from the combo box. You can pick a value by invoking![]() . Select AND or OR option from the combo box to add more than one criteria. You can delete a criteria by clicking
. Select AND or OR option from the combo box to add more than one criteria. You can delete a criteria by clicking ![]() .
.
NOTE: You can use $Loggedinuser as the value of a filter criteria if the column name is Requester, Created By, Technician, or On Behalf of User.
- Click the Choose button and select the value for the column to add as a filter condition.
- Click as Add to Filter button to add the filter condition to the filter set which gets listed under the Filter Set title.
- Click Next buttonto go to the grouping of data.
Grouping Data
From the Group by combo box, select the column based on which you wish to group the data.
Select the Order by from the combo box.
Click the Next button to go to the next stage.
Column Summary
You can get the column summary for all the columns in the report. If you wish to have the column summary displayed in the report, select the column summary options available for each column. The summary options differs for each column you have selected.
Click the Next button to go the next option.
Charts
In addition to the tabular chart, if you wish to have a chart displayed for a particular column then, or you can skip this option and directly run the report.
- Select the chart type to be displayed from the combo box.
- Select the Axis column from the combo box to be displayed in the chart . This is a mandatory field. The data will be grouped in the chart based on the column selected.
- Select the Display Format from the combo box. For ex: in numbers or in percentage.
- Click Run Report button.
On running the report you get a tabular report as well as the graphical view for the selected column data.
Use matrix reports to display the data in rows and columns. You can further group the data based on the criteria chosen. If you have selected matrix reports you have two steps to generate a complete matrix report. Click the Proceed to Report Wizard button to go to next page.
Grouping Data
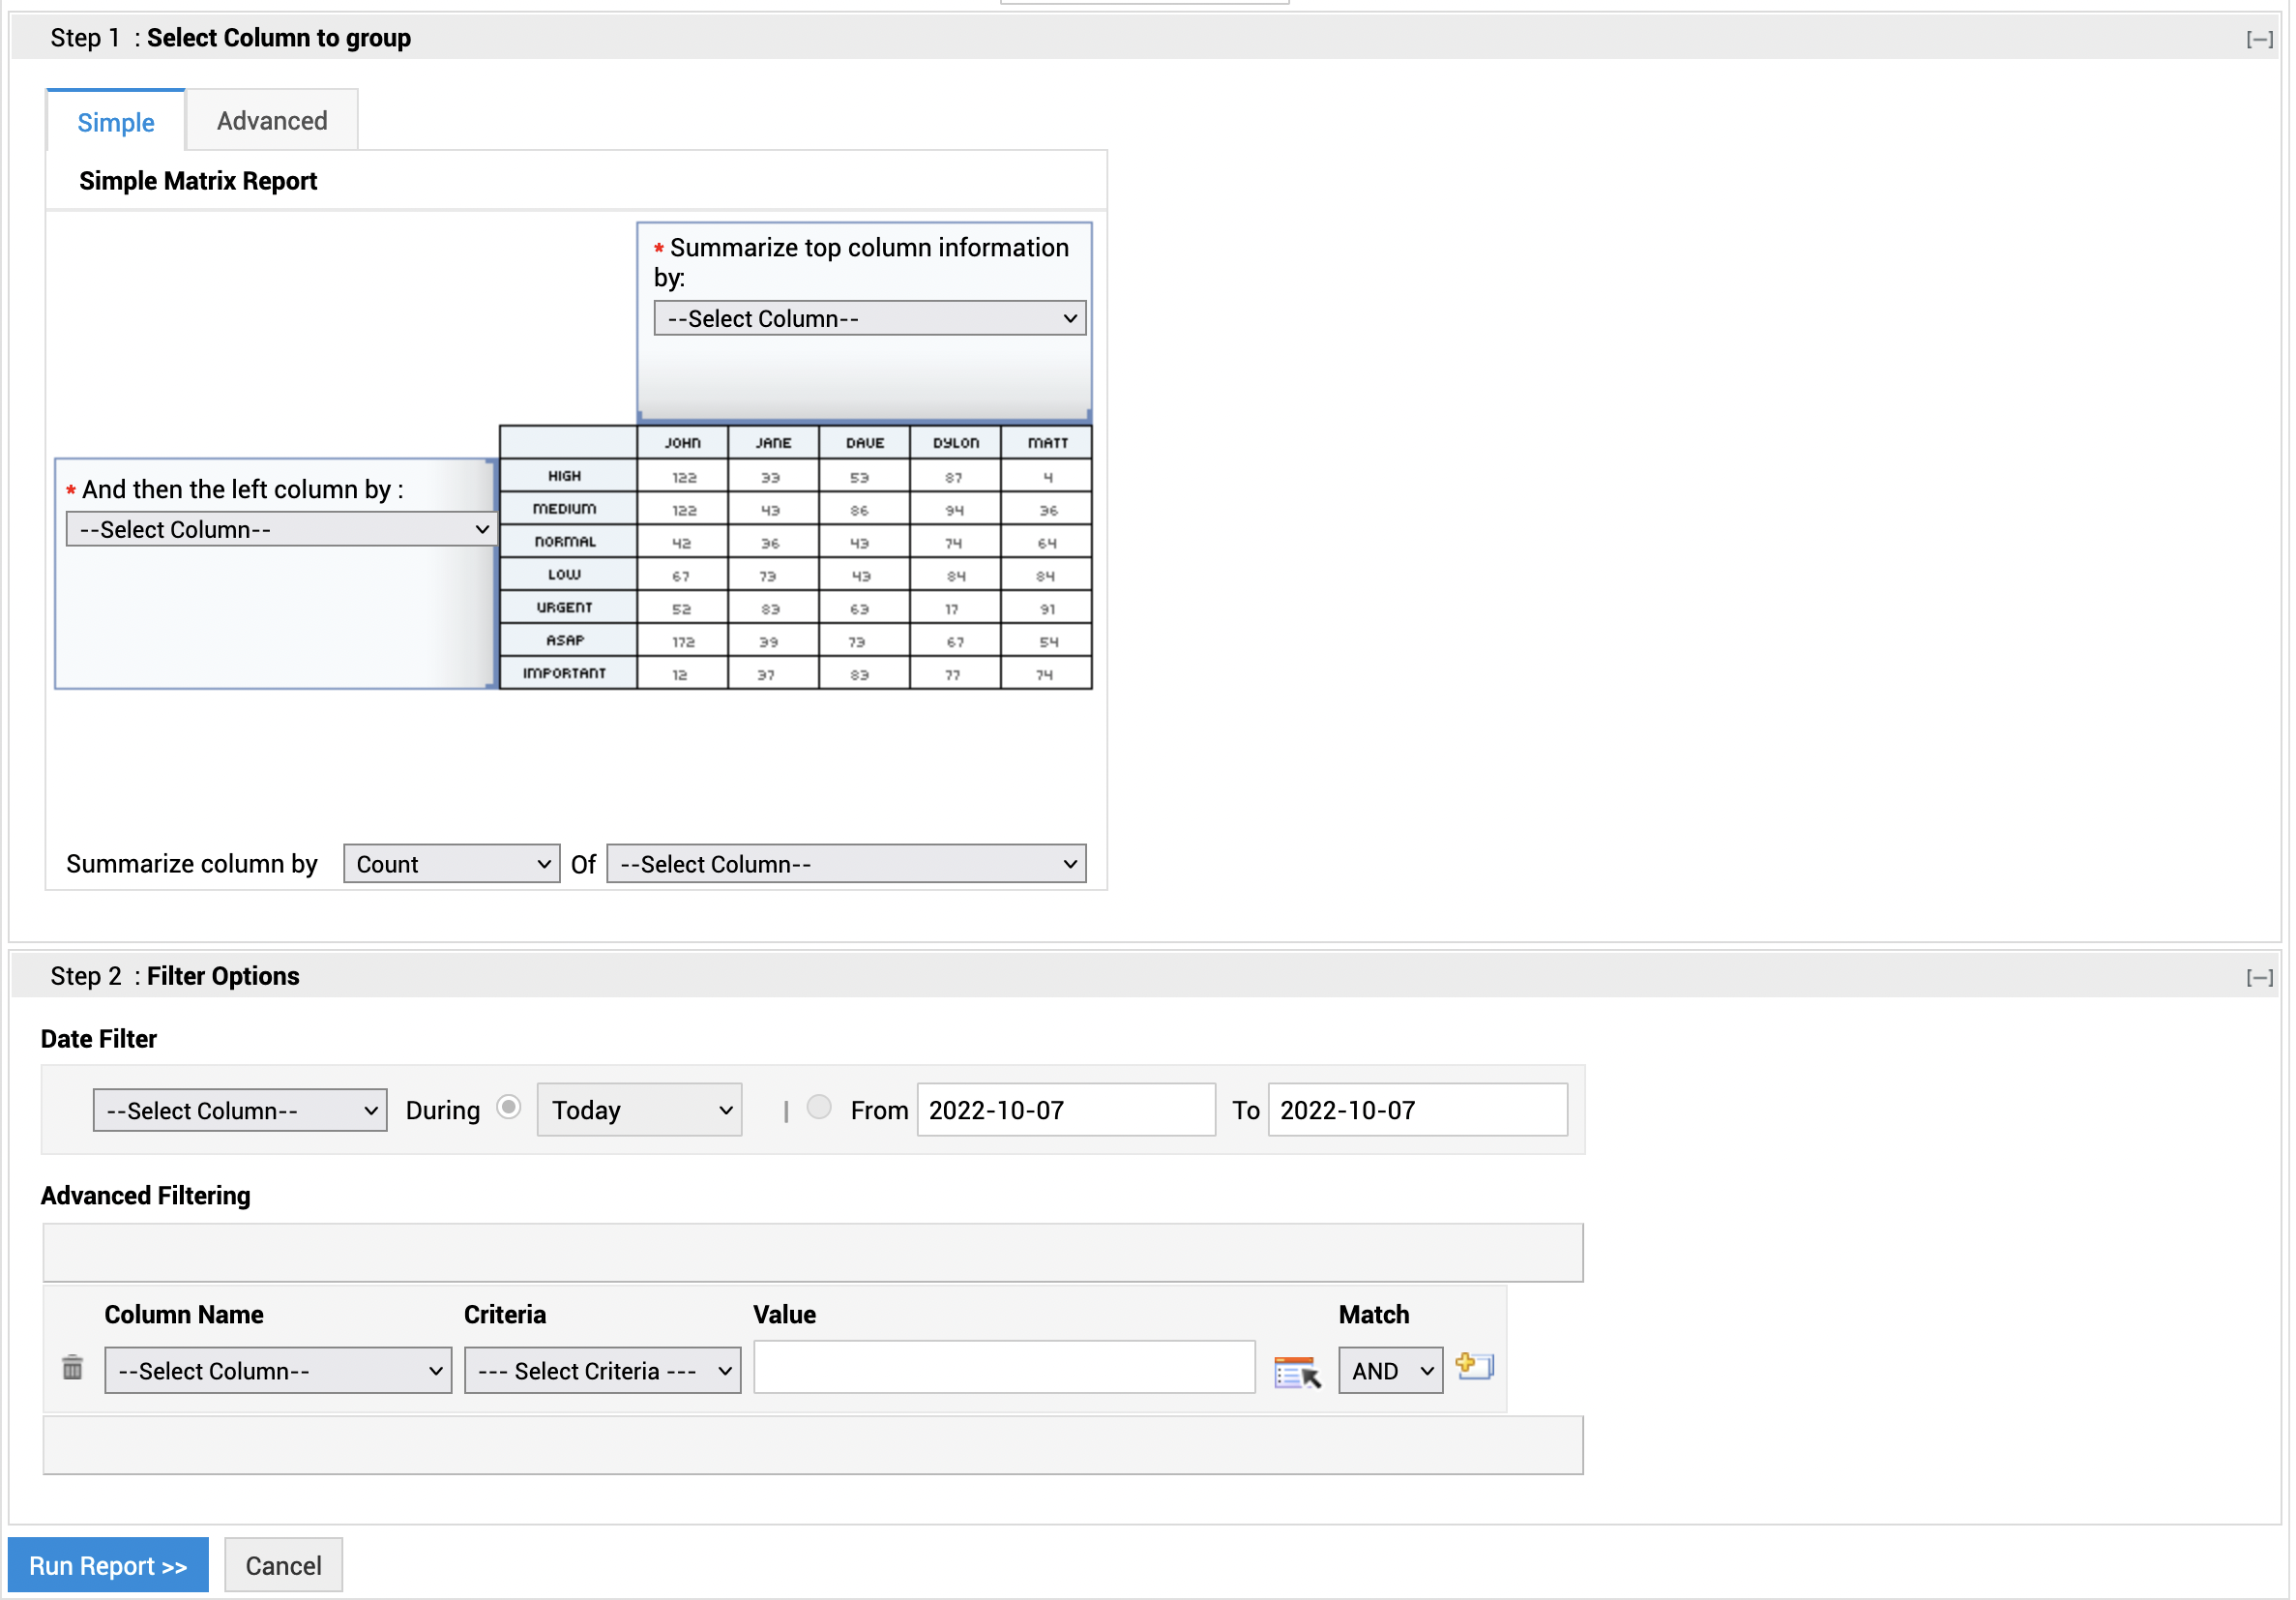
You have simple grouping and advanced grouping option for matrix reports.
Simple Grouping
- Click the Simple grouping tab. You have two options Top column information and left column information. Select the top column information from the combo box. This is a mandatory field.
- Select the left column information from the combo box. This is a mandatory field.
- Select the summarize column count from the combo box to get the column summary.
- Click the Advanced grouping tab. You have two options Column grouping and Group by.
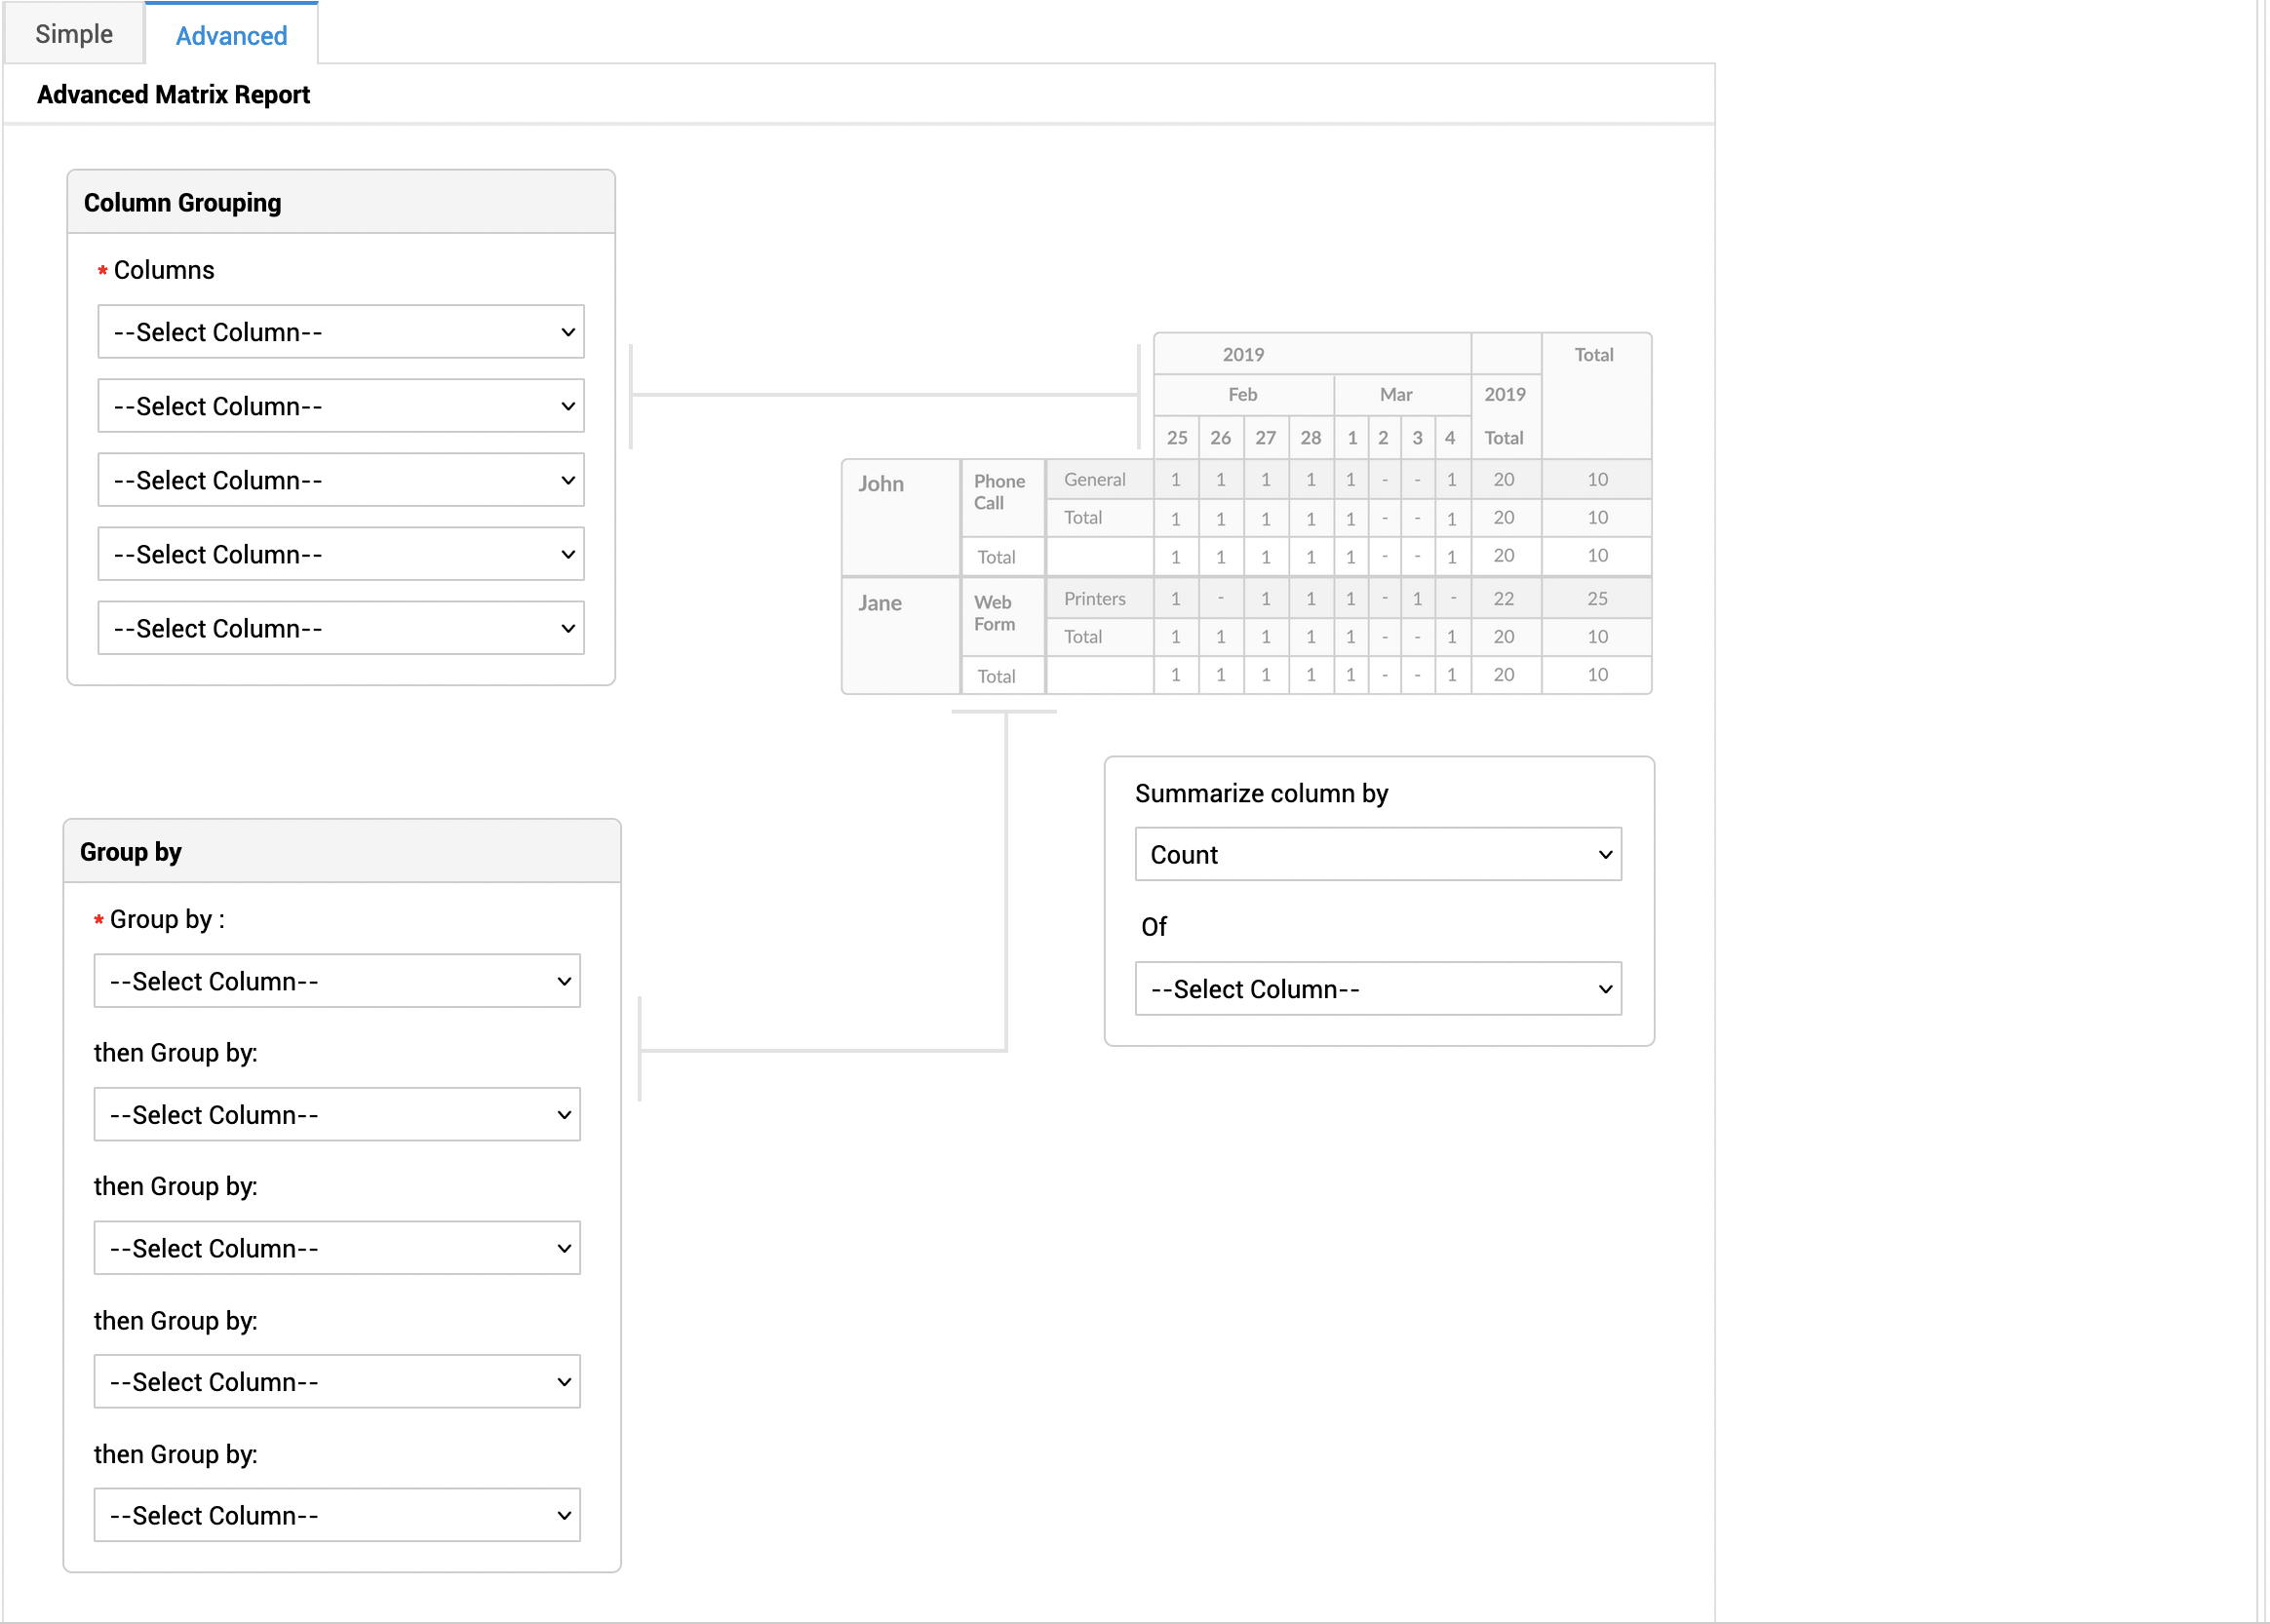
- In the Column Grouping section, you can select up to 5 columns to display in a report. This is a mandatory field.
Note: The date format drop-down is displayed only when a date/time field is selected as a column grouping criteria.
- In the Group by section, you can select up to 5 criteria to group the data displayed in the report. This is a mandatory field.
- Choose the criteria to summarize columns using the Summarize column by drop-down fields.
- To use Advanced Filtering, you first need to select the radio button for matching all the selected criteria or any one of them. Then from the column listing, select the various columns and set the match operator and mention the values for matching.
Filter Options
- If you are using the date/time filter criteria, select the date column name from the Select Column combo box.
- Select the period for which you want to generate the report. If you would like to generate a report during this week, last week, this month, last month, this quarter, last quarter or today, yesterday then select the During radio button and select the time period from the combo box. (OR) If you wish to provide a custom period, then select the From and To date using the calendar button.
- To use Advanced Filtering, you first need to select the radio button for matching all the selected criteria or any one of them. Then from the column listing, select the various columns from the list and set the match operator and mention the values for matching the column as (is, is not, contains and so on) from the combo box.
- Click the Choose button and select the value for the column to add as a filter condition.
- Click as Add to Filter button to add the filter condition to the filter set which gets listed under the Filter Set title.
- Click Run Report button. You get a matrix report.
Summary reports are detailed reports that allow you to list your data based on certain criteria. To create a request summary report, select the corresponding radio button from the custom reports page and click the Proceed to Report Wizard button to go to next page. You have two steps to generate a complete request summary reports.
Display Columns
The first step to create request summary reports is to select the display columns which need to be displayed in the request summary report. Select the columns from the Available Columns list box and click >> button to move them to Display Columns list box. Click the << button if you want to remove any column from the Display Columns list box.
Click Next button. This leads you to the grouping of columns, where you can choose two levels of grouping.
Filter Options
- If you are using the date/time filter criteria, select the date column name from the Select Column combo box.
- Select the period for which you want to generate the report. If you would like to generate report during this week, last week, this month, last month, this quarter, last quarter or today, yesterday then select the During radio button and select the time period from the combo box. (OR) If you wish to provide a custom period, then select the From and To date using the calender button.
- To use Advanced Filtering, you first need to select the radio button for matching all the selected criteria or any one of them. Then from the column listing, select the various columns from the list and set the match operator and mention the values for matching the column as (is, is not, contains and so on) from the combo box.
NOTE: You can use $Loggedinuser as the value of a filter criteria if the column name is Requester, Created By, Technician, or On Behalf of User.
- Click the Choose button and select the value for the column to add as a filter condition.
- Click as Add to Filter button to add the filter condition to the filter set which gets listed under the Filter Set title.
- Click Next buttonto go to the grouping of data.
Audit reports are detailed history report that allow you to list your inventory history data based on scan time criteria. Click Proceed to Report Wizard button to go to the next page. This opens the Audit History Report page.
You have three audit history reports options, on scanning the workstation you get the updated version of all the audit reports.
-
Audit history by workstation.
Audit history by workstation gives a complete audit reports of the hardware and software details of the workstation.
-
Audit history by time line.
Audit history by time line gives a detail overview of all the actions taken place in a workstation for a specific time period.
-
Audit history by changes.
Audit history gives a complete report on all changes taken place in a workstation.
Select any of the three audit history report options. Specify the scan date from the combo box.
Click Run Report button. You get the audit history report.
Request Metrics Reports
With Request Metrics Reports, you can generate reports on completed requests based on grouped request values. This report provides a bird's eye view of various metrics in completed requests that help you identify areas where request completion ceased and led to delayed completion.
After entering the report name, click Proceed to Report Wizard to configure the following request settings:
-
Display Columns: Select the columns whose data must be fetched while generating the report. Select the columns from the Available Columns list box and click the >> button to move them to the Display Columns list box. Click the << button to remove any column from the Display Columns list box.
-
Filter Options: In the filter options section, you can choose to filter the report data based on:
-
Date/time criteria - Select the column to apply the date/time filter from the Select Column combo box. Select the period for which you want to generate the report. You can choose the time for a specific period using During drop-down or you can select custom dates using From and To calendar fields.
-
Advanced criteria - You can filter the report data based on request properties. Select the request property from the Column Name combo box. Select a criteria and add the value. Finally, select the operator to apply (AND/OR). You can add more than one criteria using the
 icon.
icon.
-
Grouping Data: You can group the report data into columns for easy comparison. Choose up to 5 request properties to group the data from the Select Column drop-down fields.
Click Run Report to generate the report.

