☰
Related Products
 ADManager Plus
 ADAudit Plus
 ADSelfService Plus
 Exchange Reporter Plus
 M365 Manager Plus
Here are the step-by-step instructions on how to deploy Identity360's IDSecurity Agent for Windows using ManageEngine Endpoint Central.
This page will guide you through the steps involved in installing the Identity360 IDSecurity Agent using Endpoint Central. This document is written with the assumption that you are a system administrator with basic knowledge of ManageEngine Endpoint Central.
The different platforms supported by the IDSecurity Agent are listed below.
| Windows Server versions | Windows OS versions |
|---|---|
| Windows Server 2022 | Windows 11 |
| Windows Server 2019 | Windows 10 |
| Windows Server 2016 | Windows 8.1 |
| Windows Server 2012 R2 | Windows 8 |
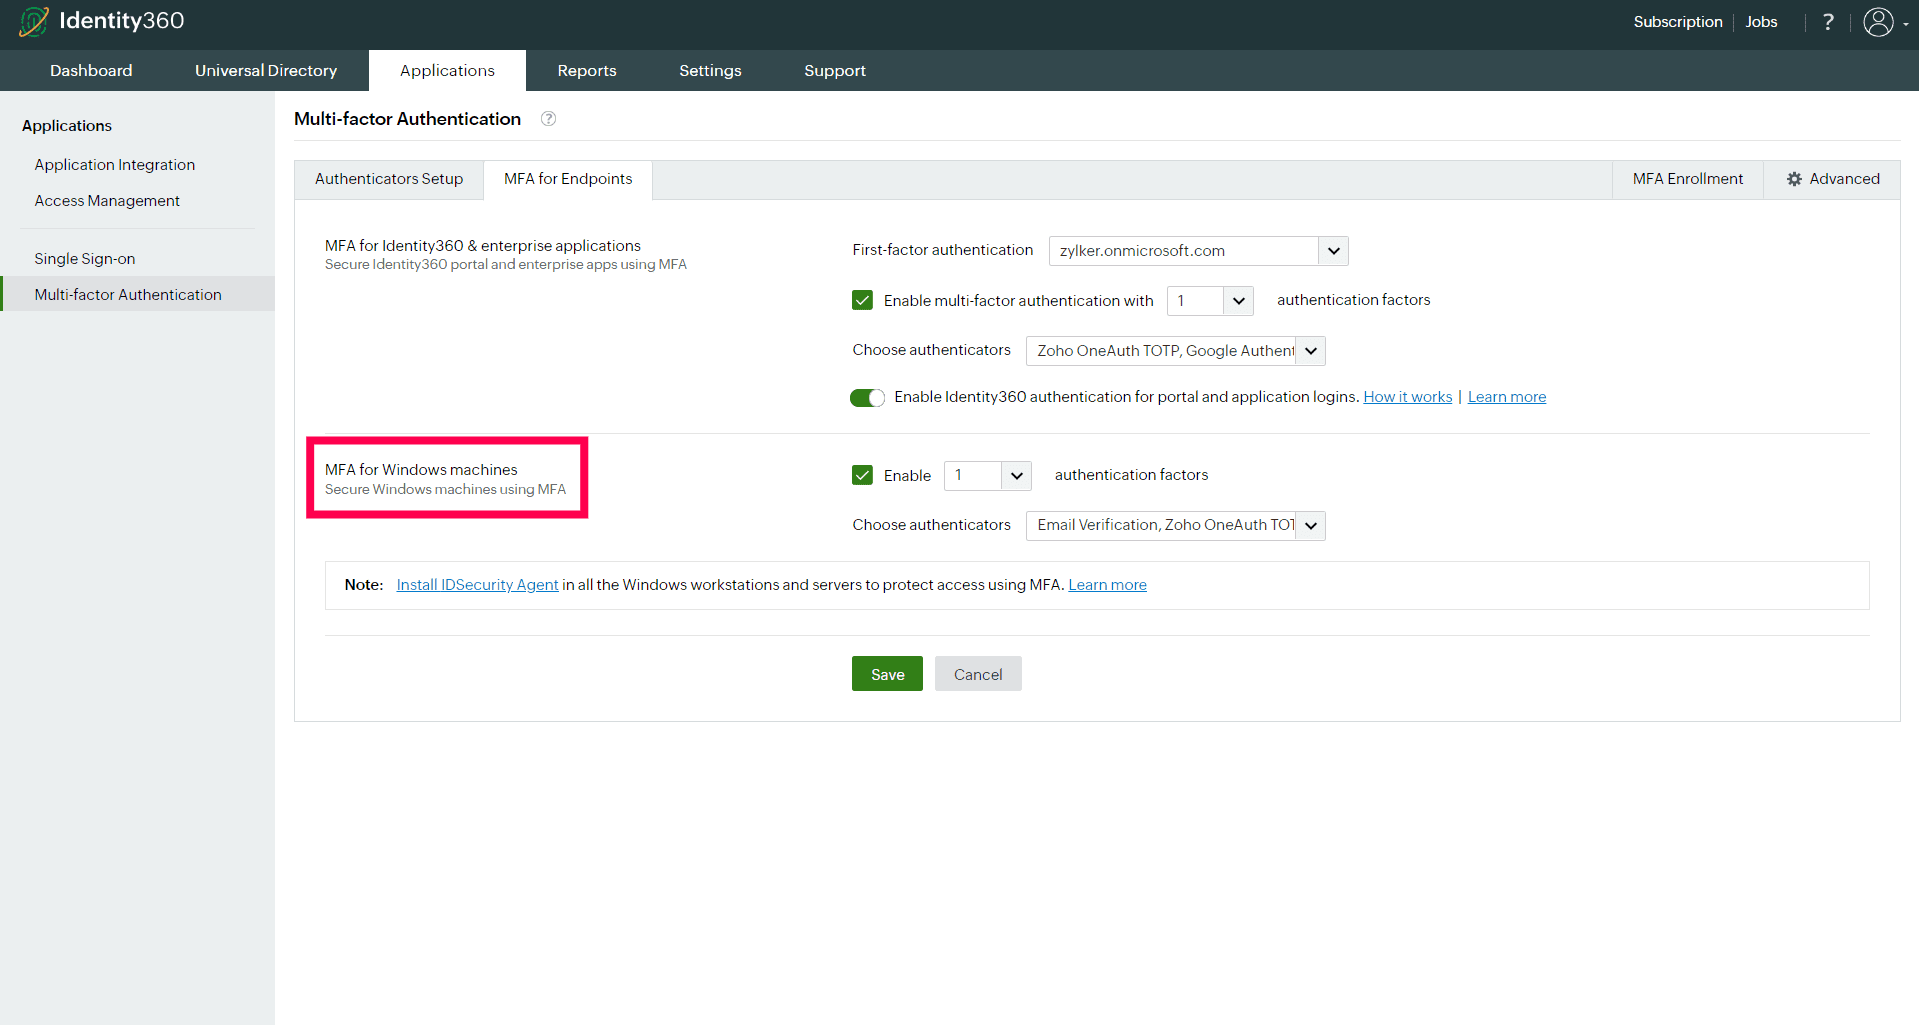
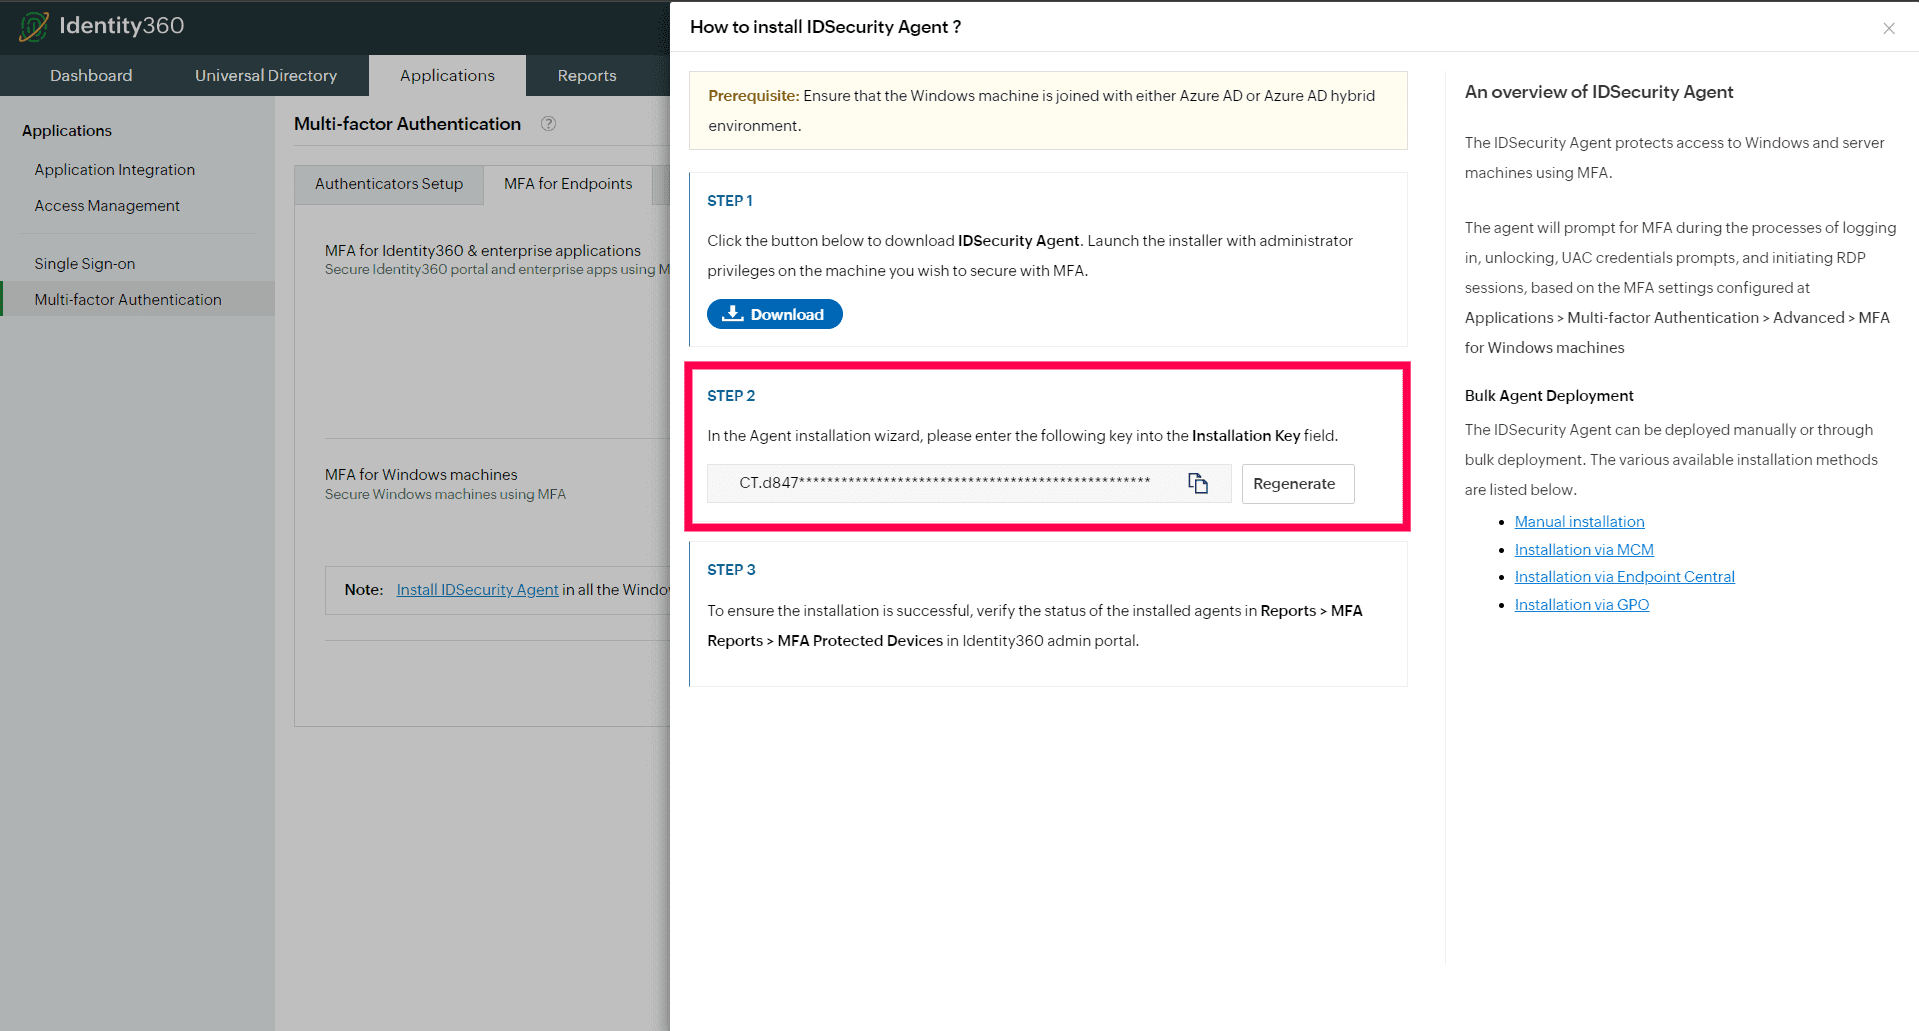
Note: Locate this file in Identity360's admin portal by navigating to Applications > Multi-factor Authentication > MFA for Endpoints > Install IDSecurity Agent > Step 1 > Download.
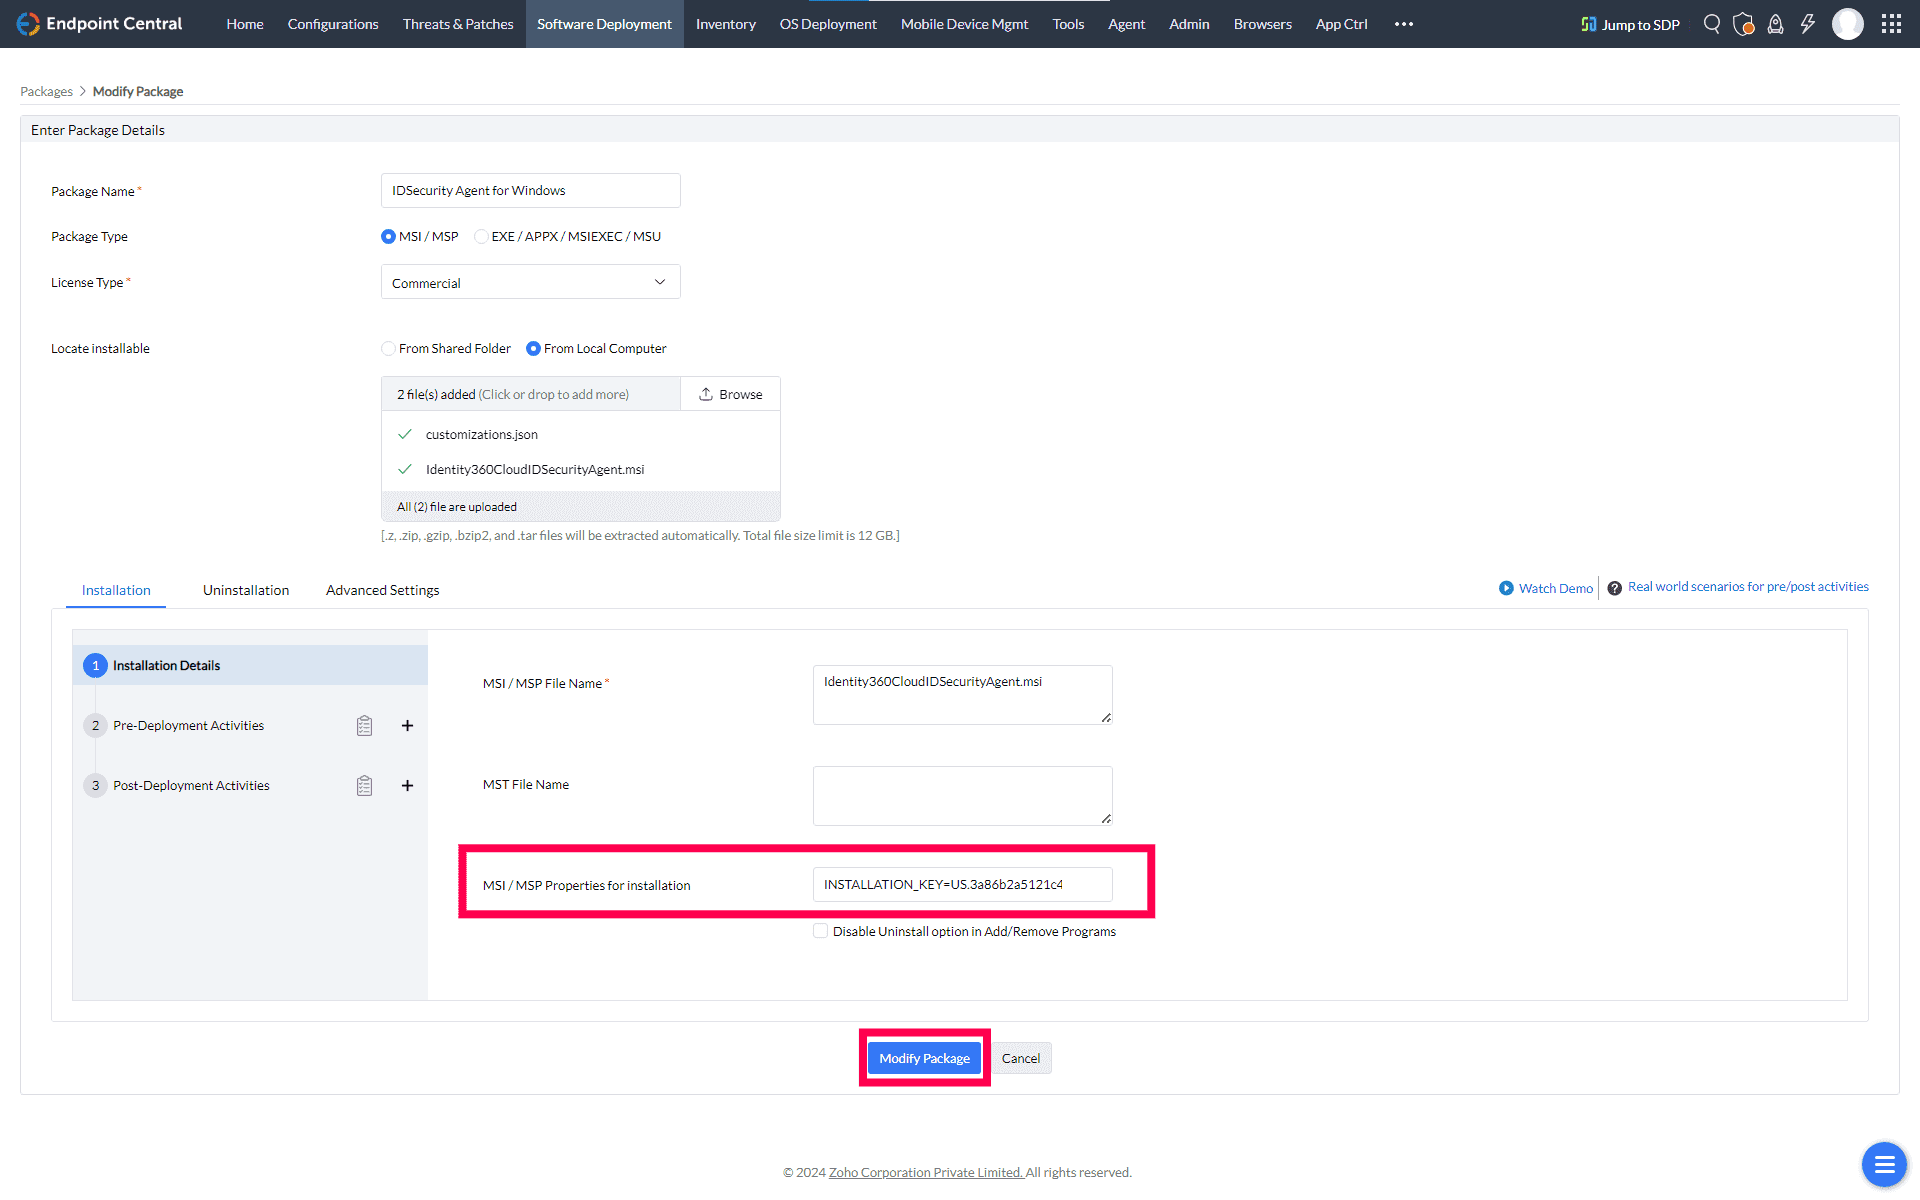
INSTALLATION_KEY="<KEY>"
Note: If a new installation key is generated, copy the command with the new installation key from the Identity360 admin portal and update the MSI/MSP Properties for installation field with the new command for all new installations.
The customizations.json file is used to customize the IDSecurity Agent's default parameters. Before proceeding with the installation, ensure you prepare a customizations.json file similar to the provided sample below. This file should contain the necessary parameters that require modification.
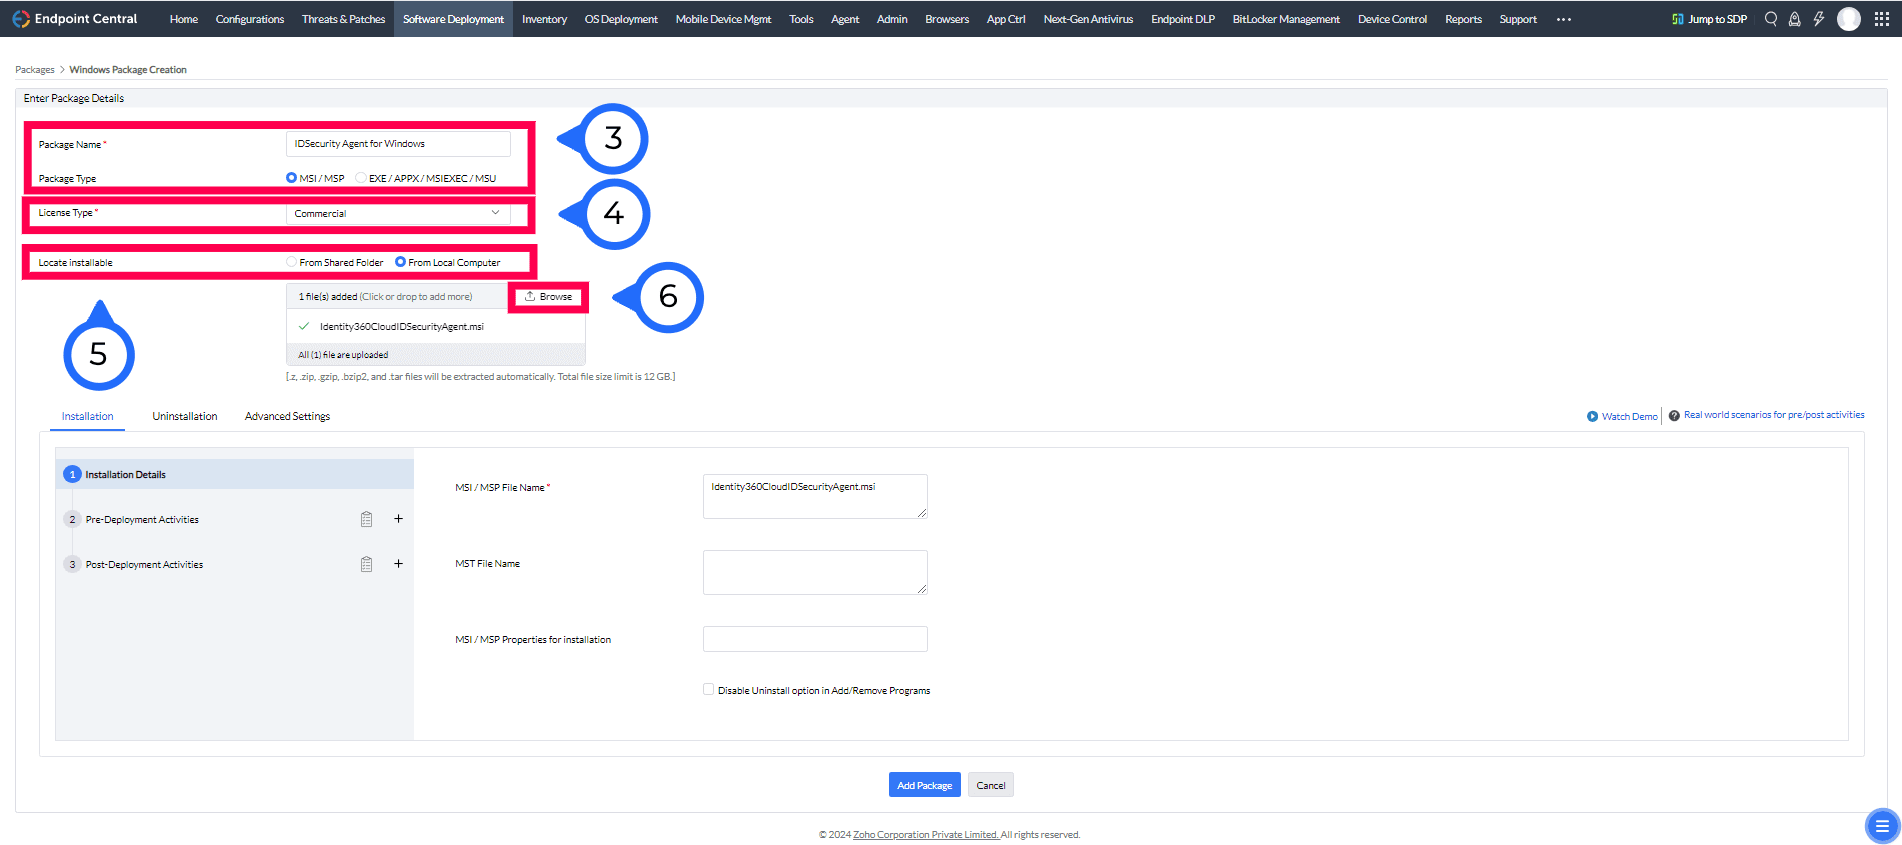
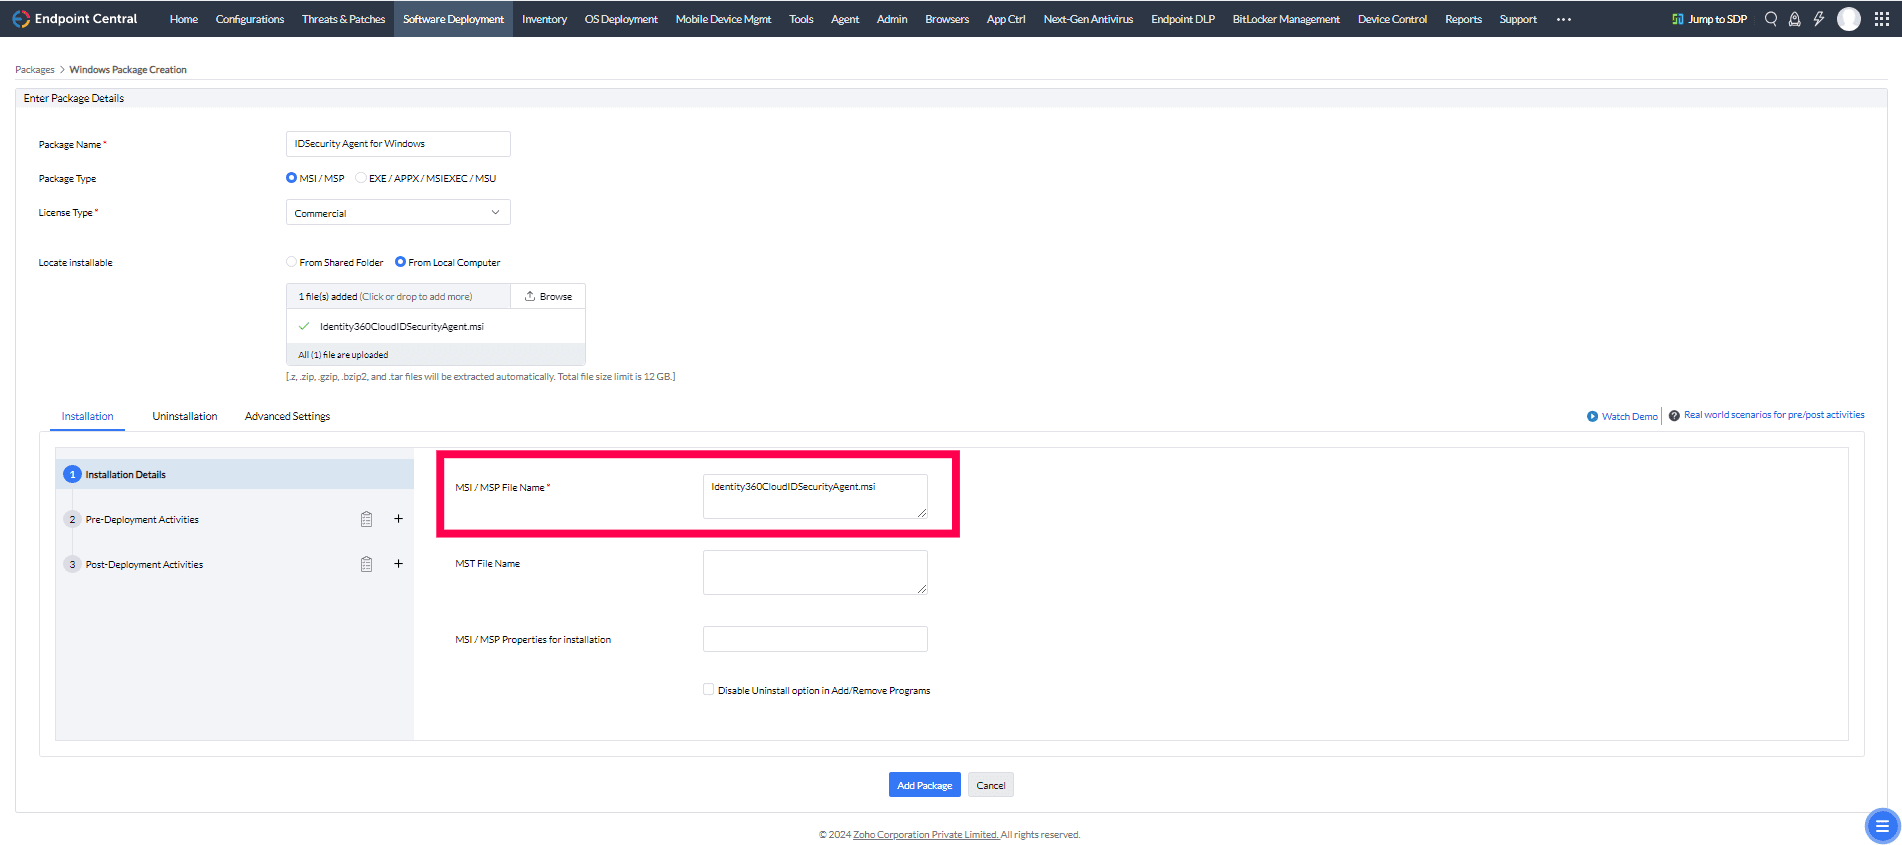
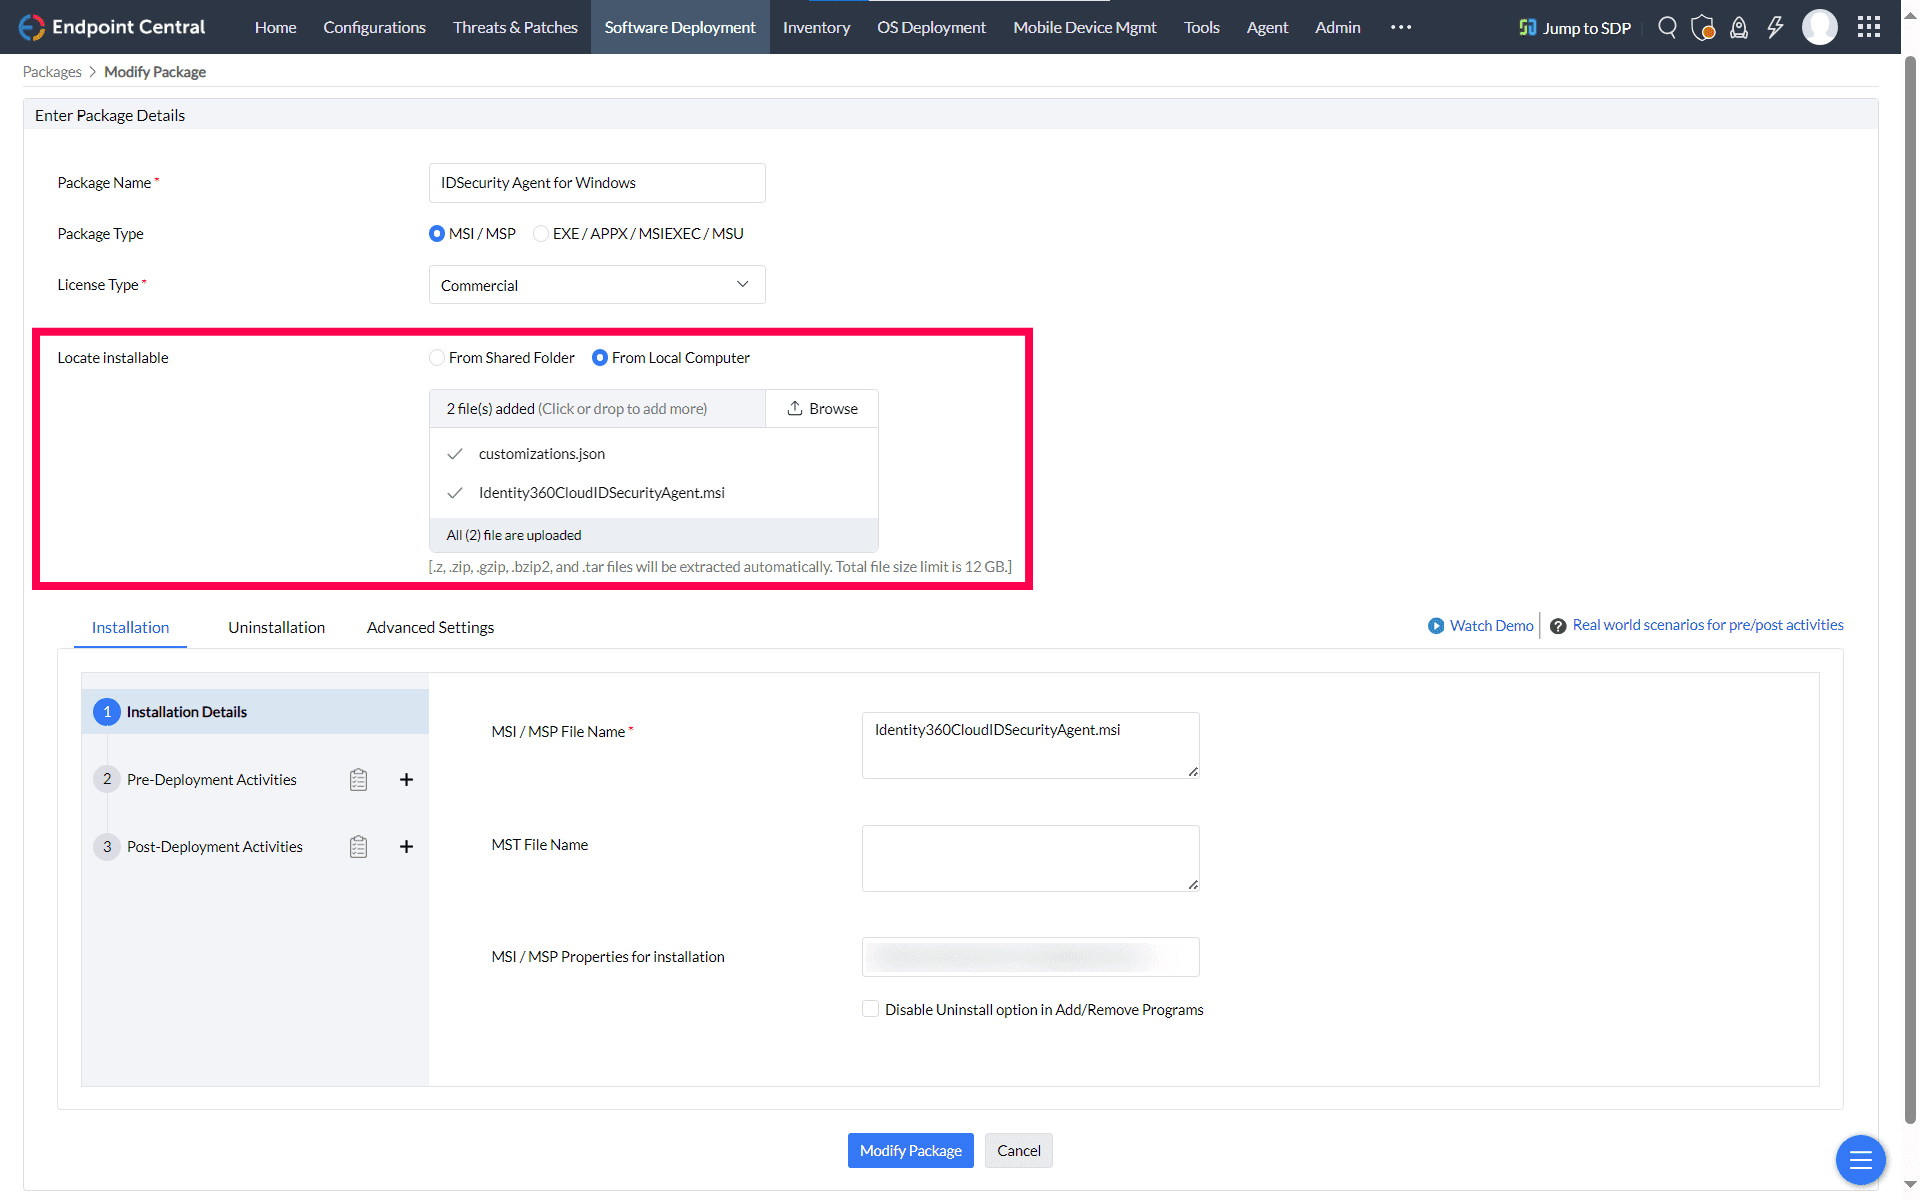
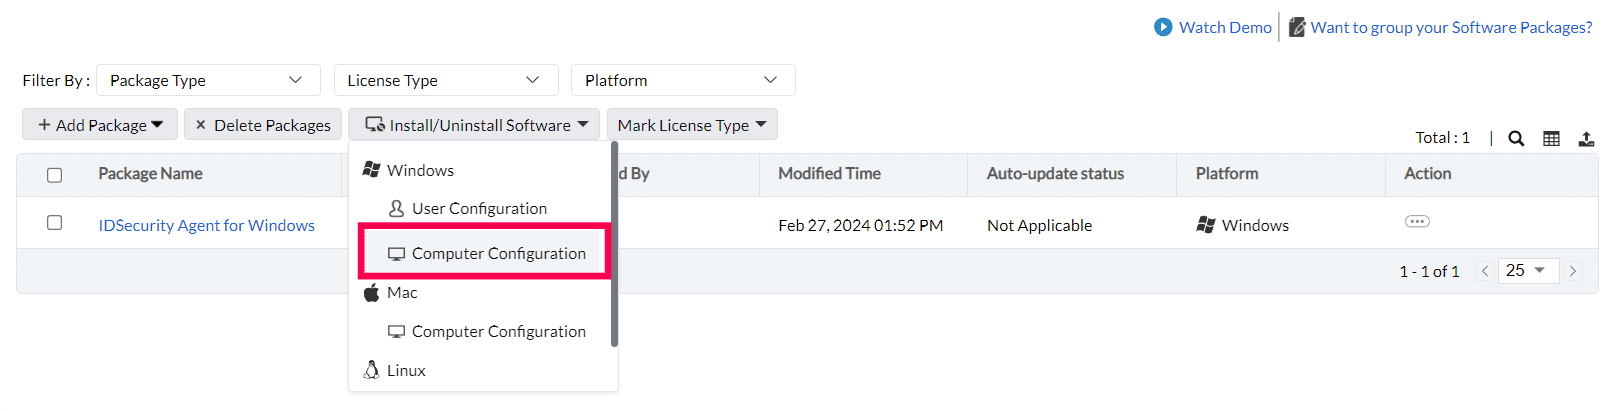
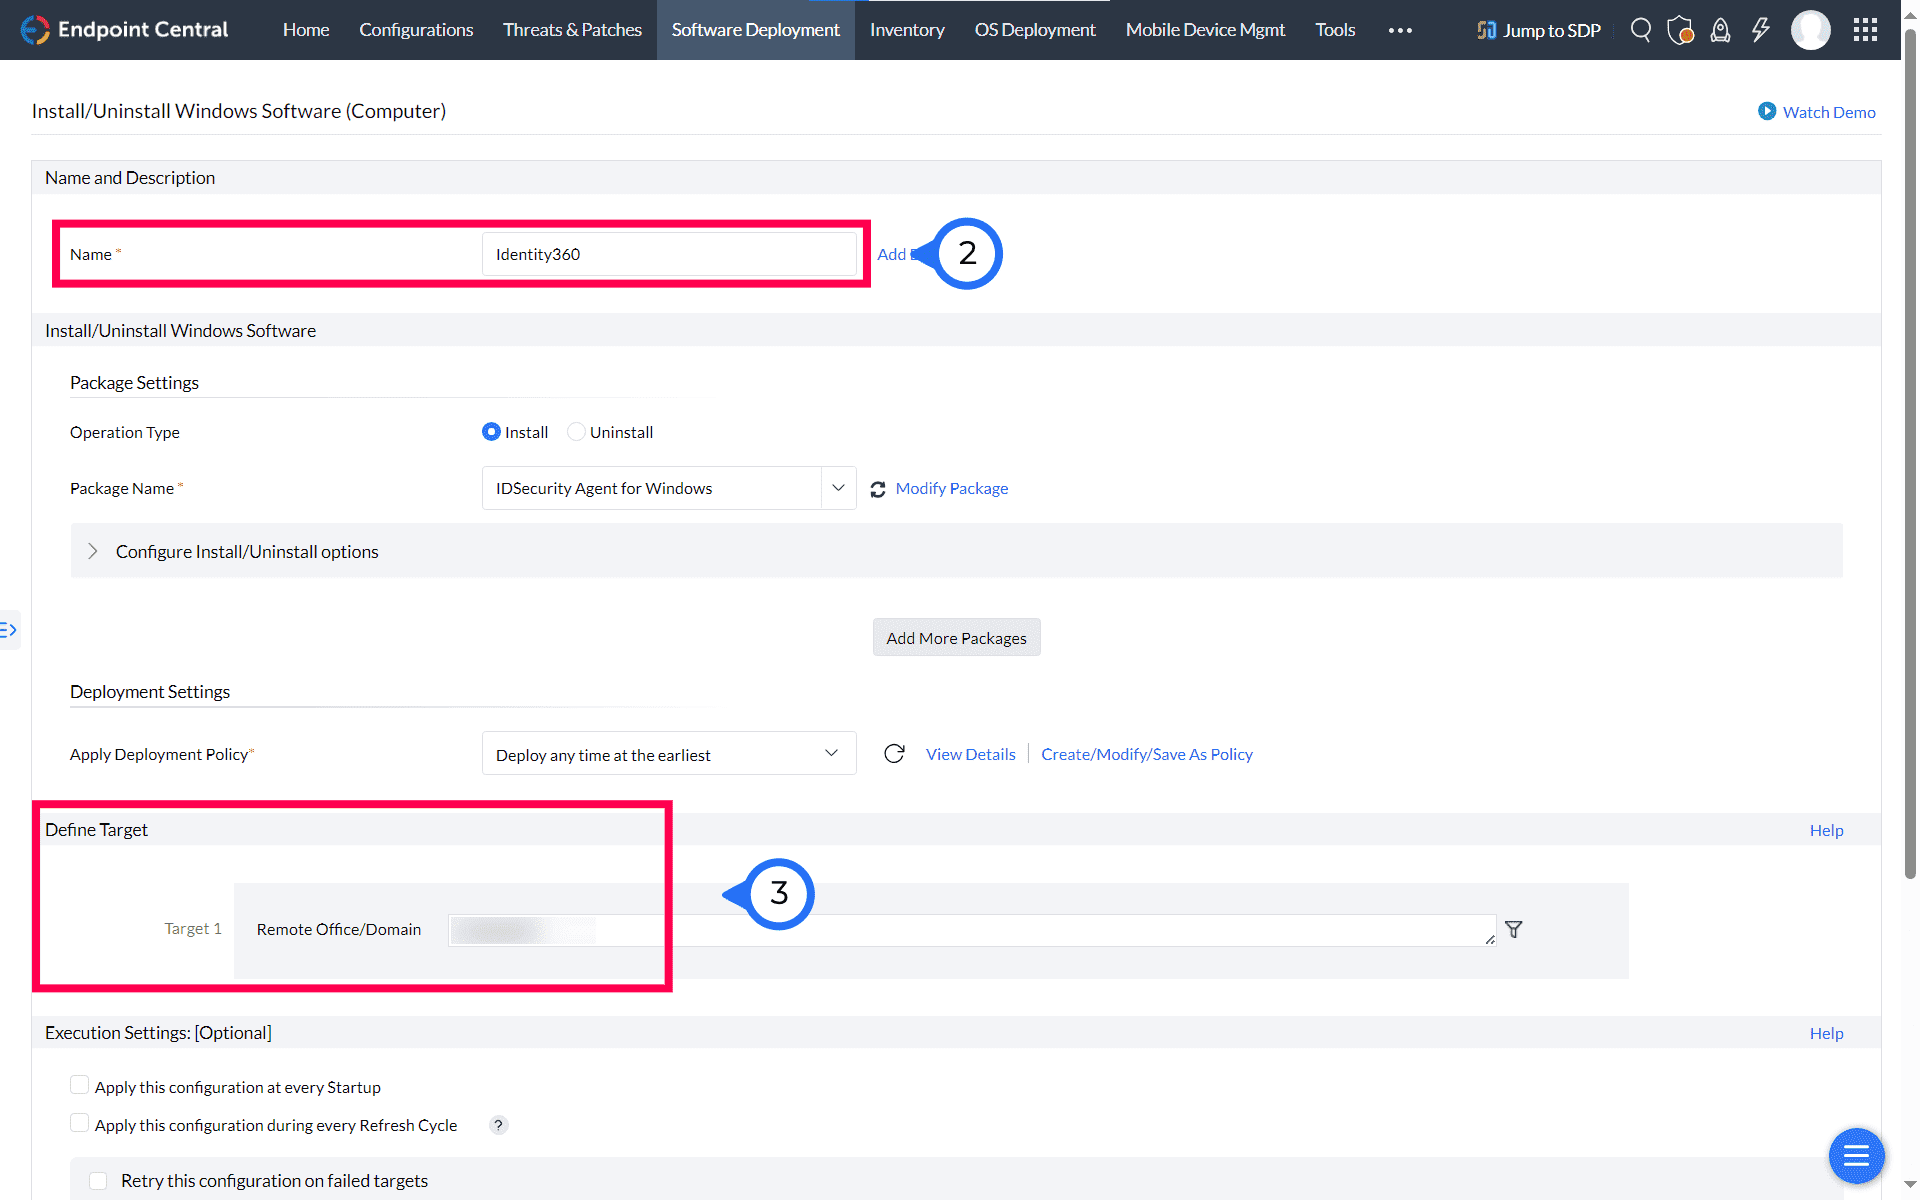
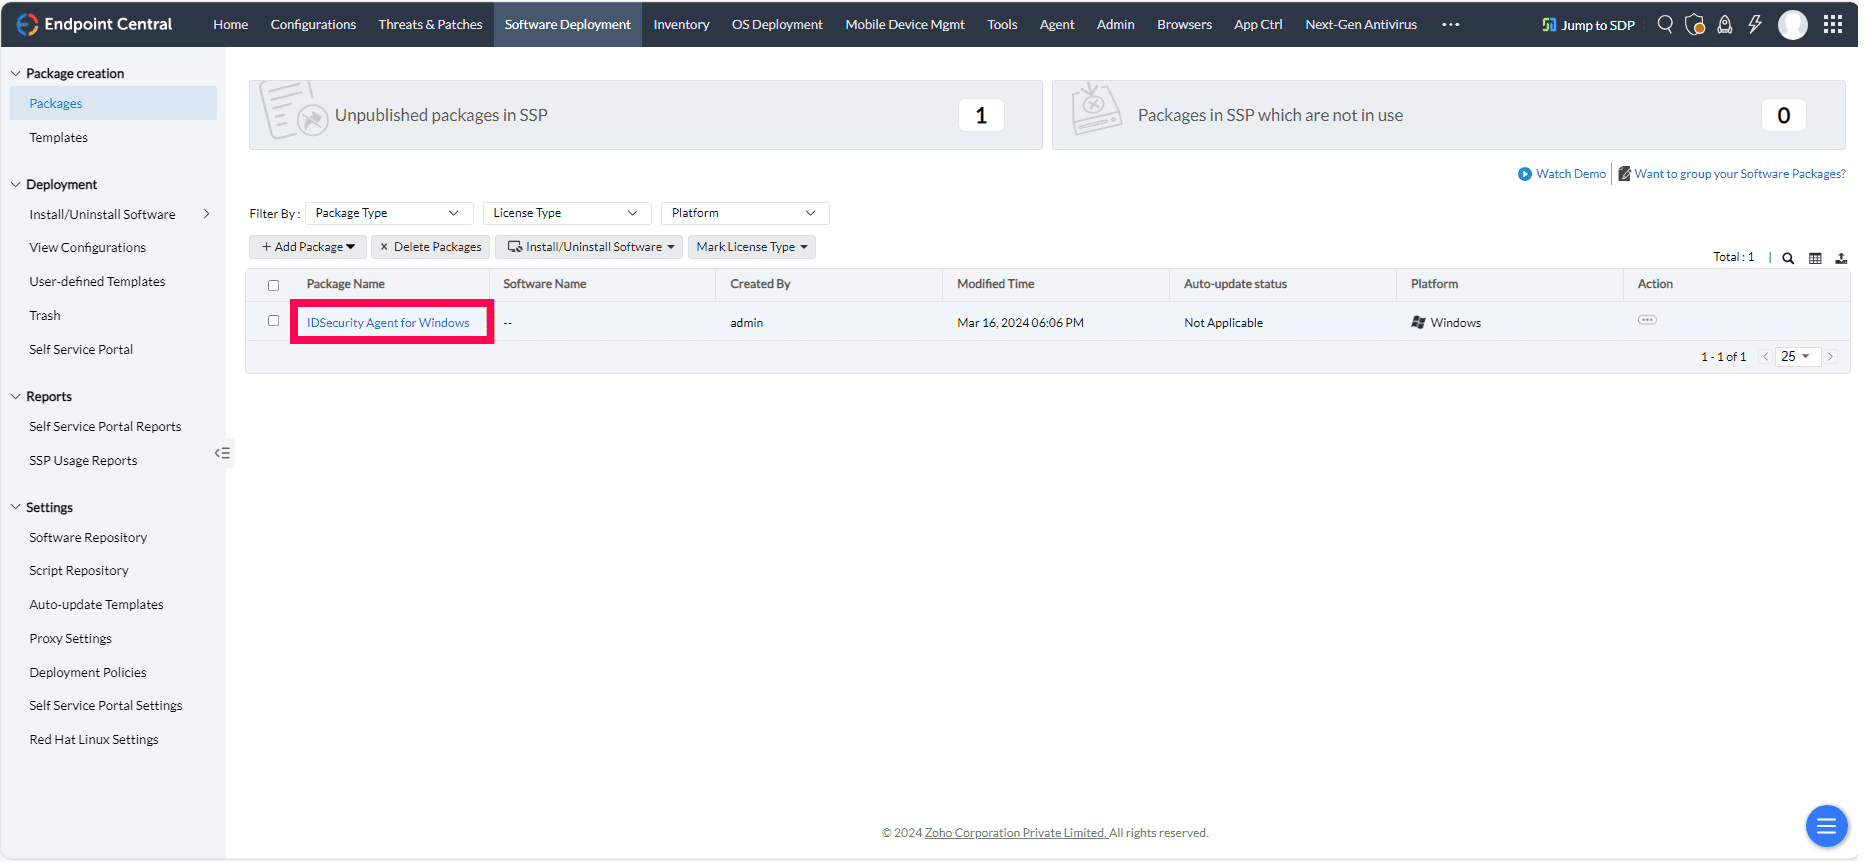
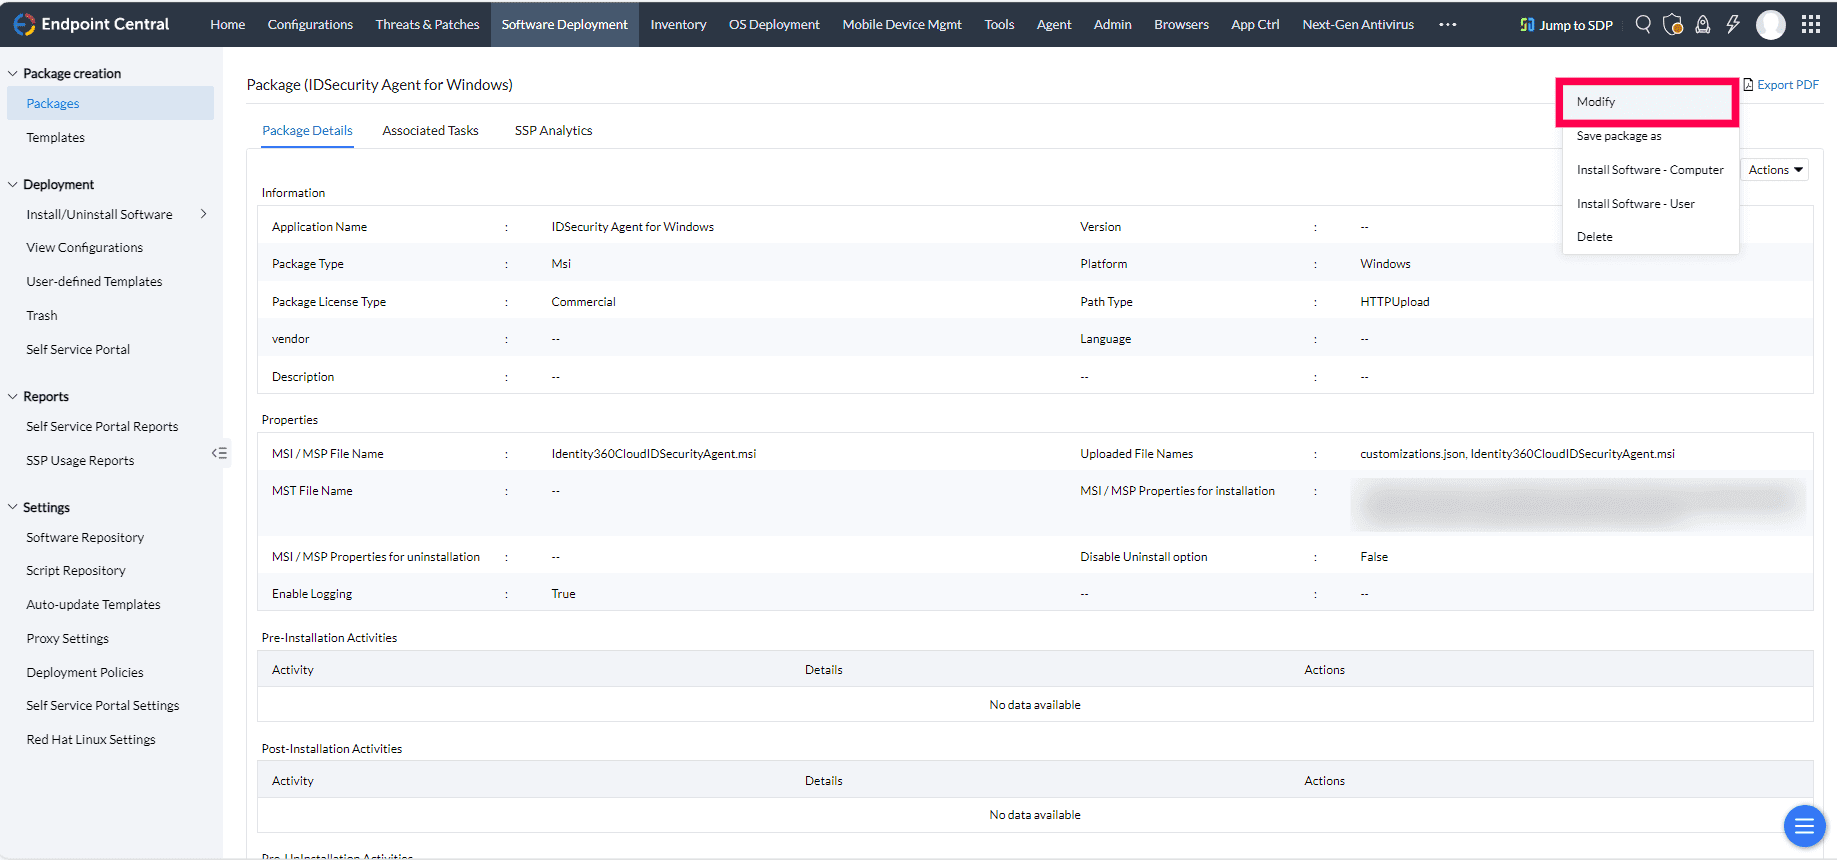
Upload the customizations.json file along with the MSI file by navigate to Software Deployment > Package creation > Packages > Add Package > Windows. Click Browse in the Locate Installable field on the Enter Package Details page to upload the file.
Note: If customization is not required, the MSI will automatically utilize the default parameters.
If you do not customize the file as mentioned in the previous step, you can still make adjustments later by editing the customizations.json file located in the C:\Program Files\ManageEngine\Identity360 Cloud IDSecurity Agent\conf folder.
Note: Please refrain from making any modifications to any files aside from customizations.json found in the installation folder, as these files are integral to the functioning of the IDSecurity Agent. Any changes to these files may disrupt functionality of both the agent and the system.
{
 "LogPath": "C:\\Program Files\\ManageEngine\\Identity360 Cloud IDSecurity Agent\\logs",
 "LogLevel": "NORMAL",
 "LogRotationMaxSize": "50",
 "LogArchivePath": "C:\\Program Files\\ManageEngine\\Identity360 Cloud IDSecurity Agent\\logs\\archive",
 "Title": "IDSecurity Agent",
 "WebclientFaviconPath": "C:\\Program Files\\ManageEngine\\Identity360 Cloud IDSecurity Agent\\resources\\favicon.ico"
}
The table below contains the list of default values and descriptions for all parameters.
| Parameter name | Default value | Description |
|---|---|---|
| LogPath | C:\Program Files\ManageEngine\Identity360 Cloud IDSecurity Agent\logs |
The log file is stored here. Caution: Modifying the value is advised only if there is a valid reason to do so. If the value is altered, ensure that the folder permissions include write permissions for the Users group and the SYSTEM account. |
| LogLevel | NORMAL | The default value is set to NORMAL, providing information essential for regular operation. If the value is changed to DEBUG, the log will incorporate detailed troubleshooting information crucial for the support team. Exercise caution, as setting the value to DEBUG will generate extra log entries, potentially causing a rapid increase in the log file's size. |
| LogRotationMaxSize | 50 | This parameter determines the maximum size of the log file. Upon reaching the specified limit, with a minimum of 10MB and a maximum of 50MB, a new log file is generated, and the previous log file is archived to the path specified in LogArchivePath. |
| LogArchivePath | C:\Program Files\ManageEngine\Identity360 Cloud IDSecurity Agent\logs\archive | This refers to the file path where log files are archived once they reach the specified LogRotationMaxSize limit. |
| Title | IDSecurity Agent | This is the title of the MFA prompt. |
| WebclientFaviconPath | C:\Program Files\ManageEngine\Identity360 Cloud IDSecurity Agent\resources\favicon.ico | This is the icon of the MFA prompt. |
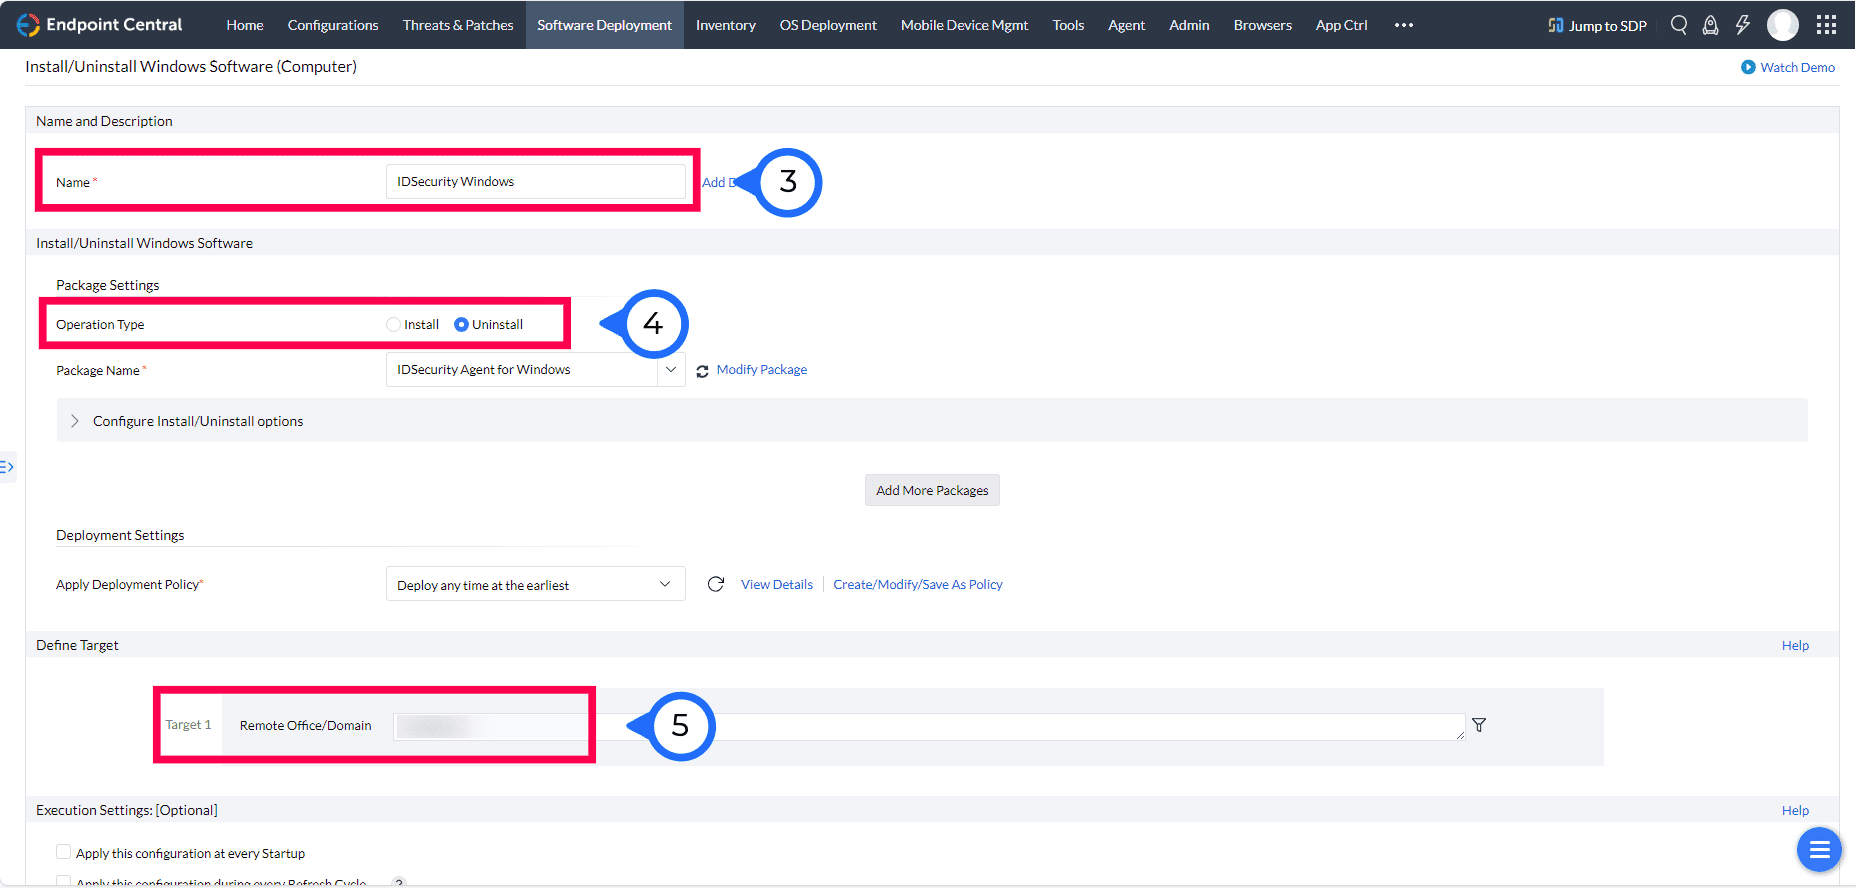
1. Uninstalling the IDSecurity Agent for specific computers
The following steps can be used when it becomes necessary to remove the IDSecurity Agent from particular computer machines.
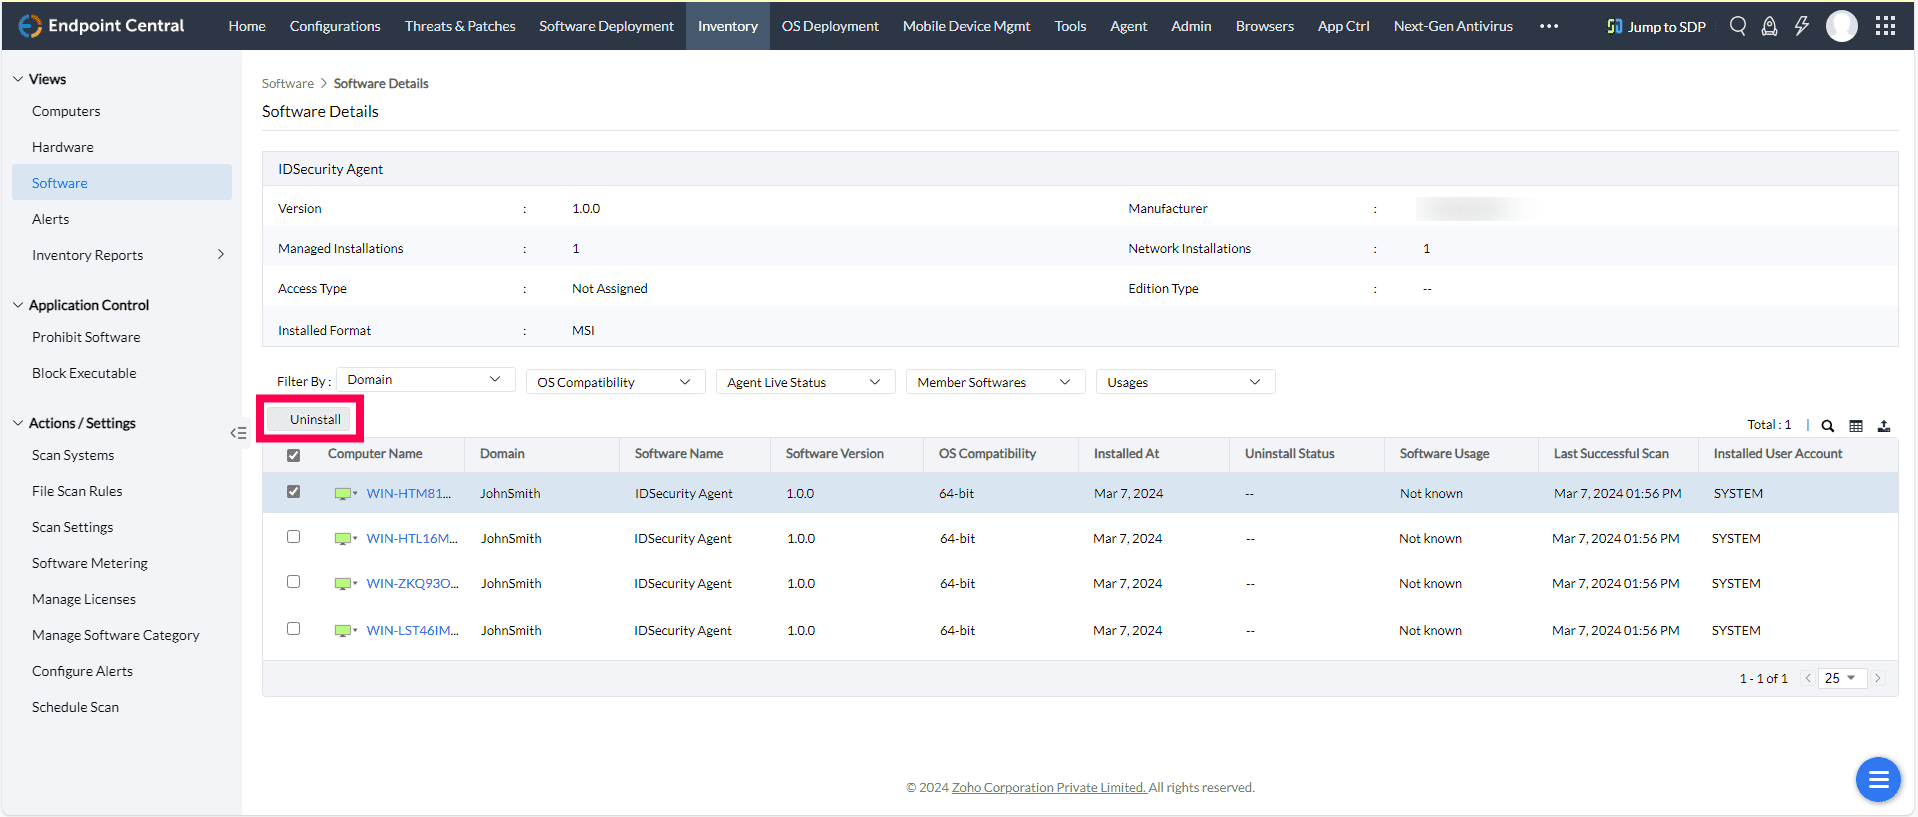
2. Uninstalling the IDSecurity Agent from all machines
The following steps can be used to uninstall IDSecurity Agent across all machines.

In case the current installation of the IDSecurity Agent is compromised, regenerate a new Installation Key by navigating to Applications > Multi-factor Authentication > Install IDSecurity Agent > Step 2 > Regenerate in Identity360 admin portal. Copy the command along with the newly generated key and follow these steps to update the Installation Key.
Please regenerate a new Installation Key using the link in Identity360 admin portal if the current Installation Key is compromised. Follow these steps to regenerate a key:
Copyright © 2025, ZOHO Corp. All Rights Reserved.