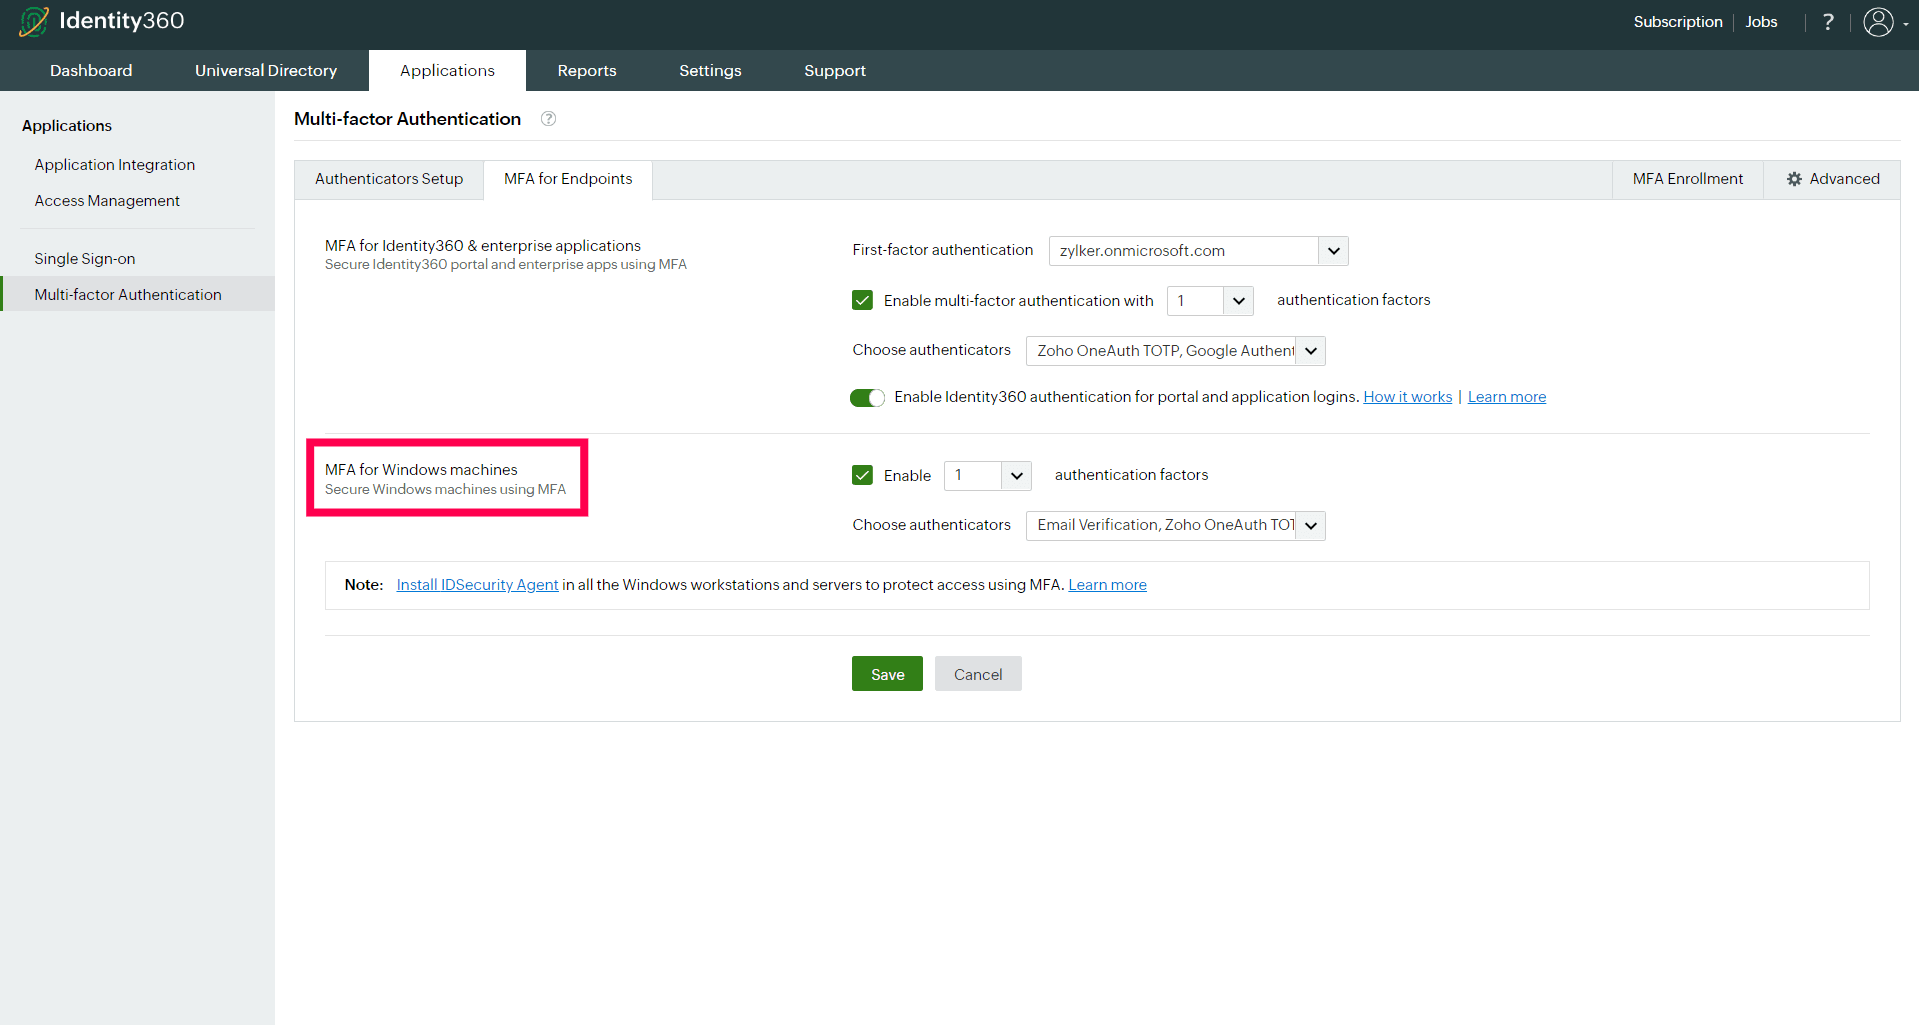
Here are the step-by-step instructions on how to manually deploy the Identity360's IDSecurity Agent for Windows.
The different platforms supported by the IDSecurity Agent are listed below.
| Windows servers | Windows clients |
|---|---|
| Windows Server 2022 | Windows 11 |
| Windows Server 2019 | Windows 10 |
| Windows Server 2016 | Windows 8.1 |
| Windows Server 2012 R2 | Windows 8 |
To install the IDSecurity Agent manually, you need to log in to each user machine individually and use either GUI or CLI methods to deploy the agent.
Prerequisites for manual installation:

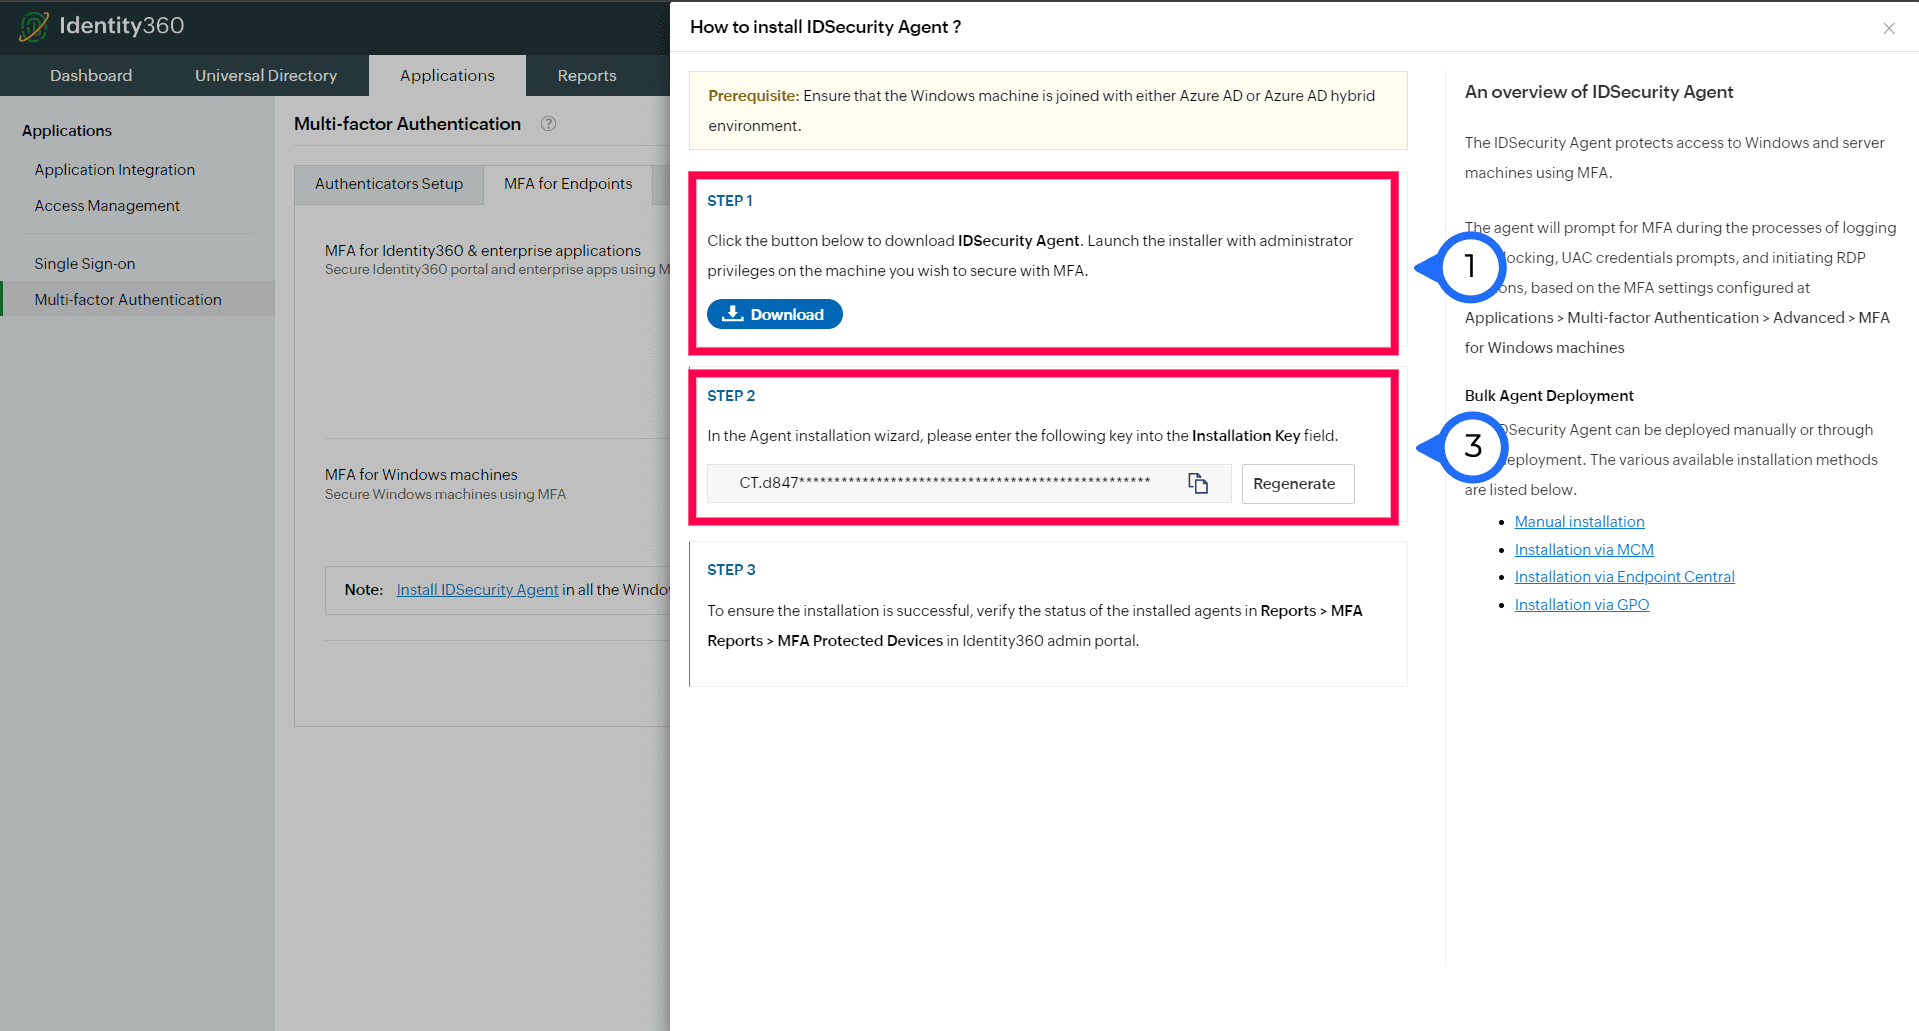
Steps to install the agent with the setup wizard:

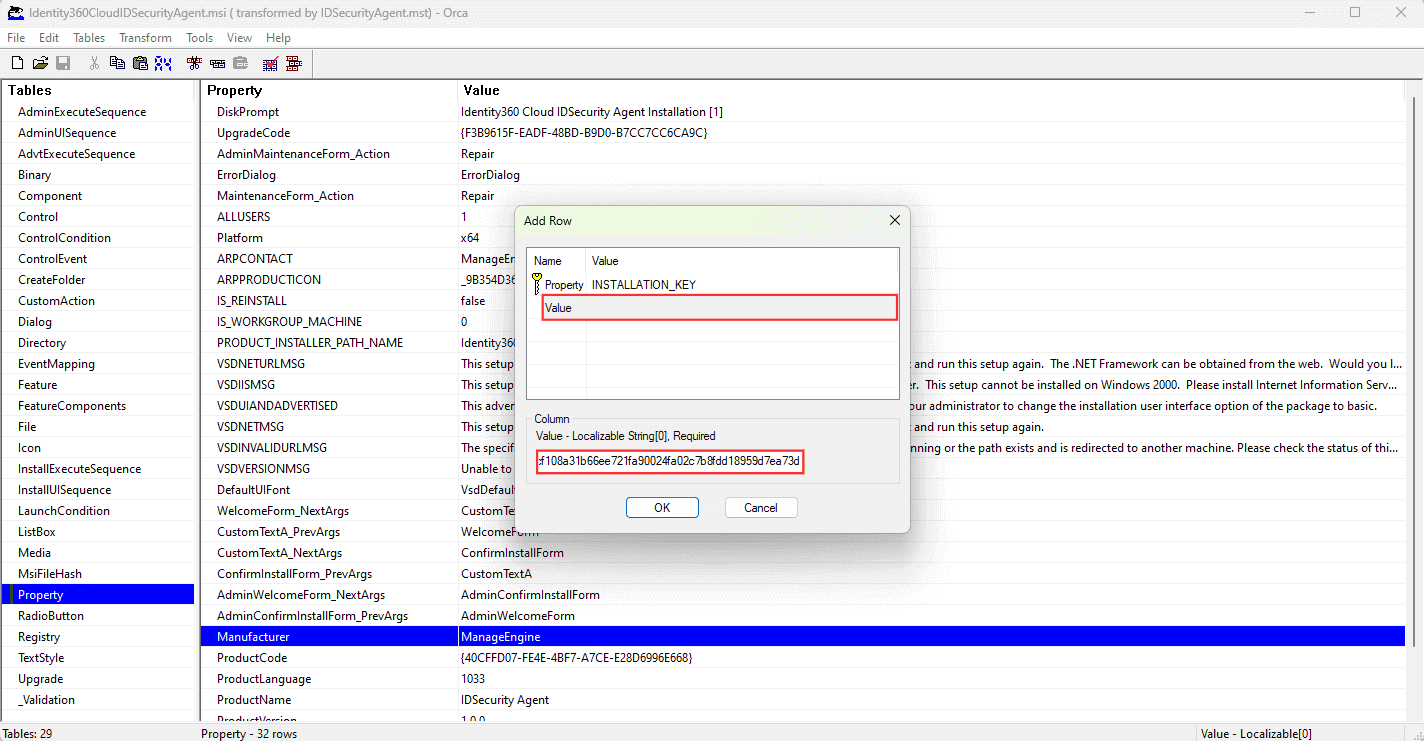
The installation of the MSI can be performed silently without user interactions through the Command Prompt by utilizing the appropriate command with the required parameters. This method allows for a streamlined and automated installation process without the need for user interaction.
To achieve a silent installation of the MSI, refer to the steps outlined below:

msiexec.exe /i "Identity360CloudIDSecurityAgent.msi" /qn INSTALLATION_KEY=<KEY>The customizations.json file is used to customize the IDSecurity Agent's default parameters. Before proceeding with the installation, ensure you prepare a customizations.json file similar to the sample provided below. This file should contain the necessary parameters that require modification. Place this file in the same path as the MSI file for customization. If customization is not required, the MSI will automatically utilize the default parameters.
If you have not prepared a customizations.json file during installation, you can still make adjustments by editing the file located at: C:\Program Files\ManageEngine\Identity360 Cloud IDSecurity Agent\conf\customizations.json
Note: Please refrain from making any modifications to any files aside from customizations.json found in the installation folder, as these files are integral to the functioning of the IDSecurity Agent. Any changes to these files may disrupt functionality of both the agent and the system.
{
 "LogPath": "C:\\Program Files\\ManageEngine\\Identity360 Cloud IDSecurity Agent\\logs",
 "LogLevel": "NORMAL",
 "LogRotationMaxSize": "50",
 "LogArchivePath": "C:\\Program Files\\ManageEngine\\Identity360 Cloud IDSecurity Agent\\logs\\archive",
 "Title": "IDSecurity Agent",
 "WebclientFaviconPath": "C:\\Program Files\\ManageEngine\\Identity360 Cloud IDSecurity Agent\\resources\\favicon.ico"
}
The table below contains the list of default values and descriptions for all parameters.
| Parameter Name | Default Value | Description |
|---|---|---|
| LogPath | C:\Program Files\ManageEngine\Identity360 Cloud IDSecurity Agent\logs |
The log file is stored here. Caution: Modifying the value is advised only if there is a valid reason to do so. If the value is altered, ensure that the folder permissions include write permissions for the Users group and the SYSTEM account. |
| LogLevel | NORMAL | The default value is set to NORMAL, providing comprehensive information essential for regular operation. If the value is changed to DEBUG, the log will incorporate detailed troubleshooting information crucial for the support team. Exercise caution, as setting the value to DEBUG will generate extra log entries, potentially causing a rapid increase in the log file's size. |
| LogRotationMaxSize | 50 | This parameter determines the maximum size of the log file. Upon reaching the specified limit, with a minimum of 10MB and a maximum of 50MB, a new log file is generated, and the previous log file is archived to the path specified in LogArchivePath. |
| LogArchivePath | C:\Program Files\ManageEngine\Identity360 Cloud IDSecurity Agent\logs\archive | This refers to the file path where log files are archived once they reach the specified LogRotationMaxSize limit. |
| Title | IDSecurity Agent | Title of the MFA prompt. |
| WebclientFaviconPath | C:\Program Files\ManageEngine\Identity360 Cloud IDSecurity Agent\resources\favicon.ico | Icon of the MFA prompt. |
Please regenerate a new Installation Key using the link in Identity360 admin portal if the current Installation Key is compromised. Follow these steps to regenerate a key:
If you encounter any issues or need assistance resolving common problems, kindly visit our troubleshooting page for detailed guidance and solutions tailored to address your concerns.
Copyright © 2025, ZOHO Corp. All Rights Reserved.