Steps to configure OAuth- or OpenID-Connect-based SSO for Okta
About Okta
Okta is an identity management platform that provides identity management capabilities for workforces.
The following steps will help you enable single sign-on (SSO) based on OAuth or OpenID Connect (OIDC) for Okta from ManageEngine Identity360.
Prerequisites
- The MFA and SSO license for Identity360 is required to enable SSO for enterprise applications. For more information, refer to the pricing details.
- Log in to Identity360 as an Admin or Super Admin, or as a Technician with a role that has Application Integration and Single Sign-on permissions.
- Navigate to Applications > Application Integration > Create New Application and select Okta from the applications displayed.
- On the General Settings tab, enter the Application Name and Description.
- Under Choose Capabilities, select SSO and click Continue.
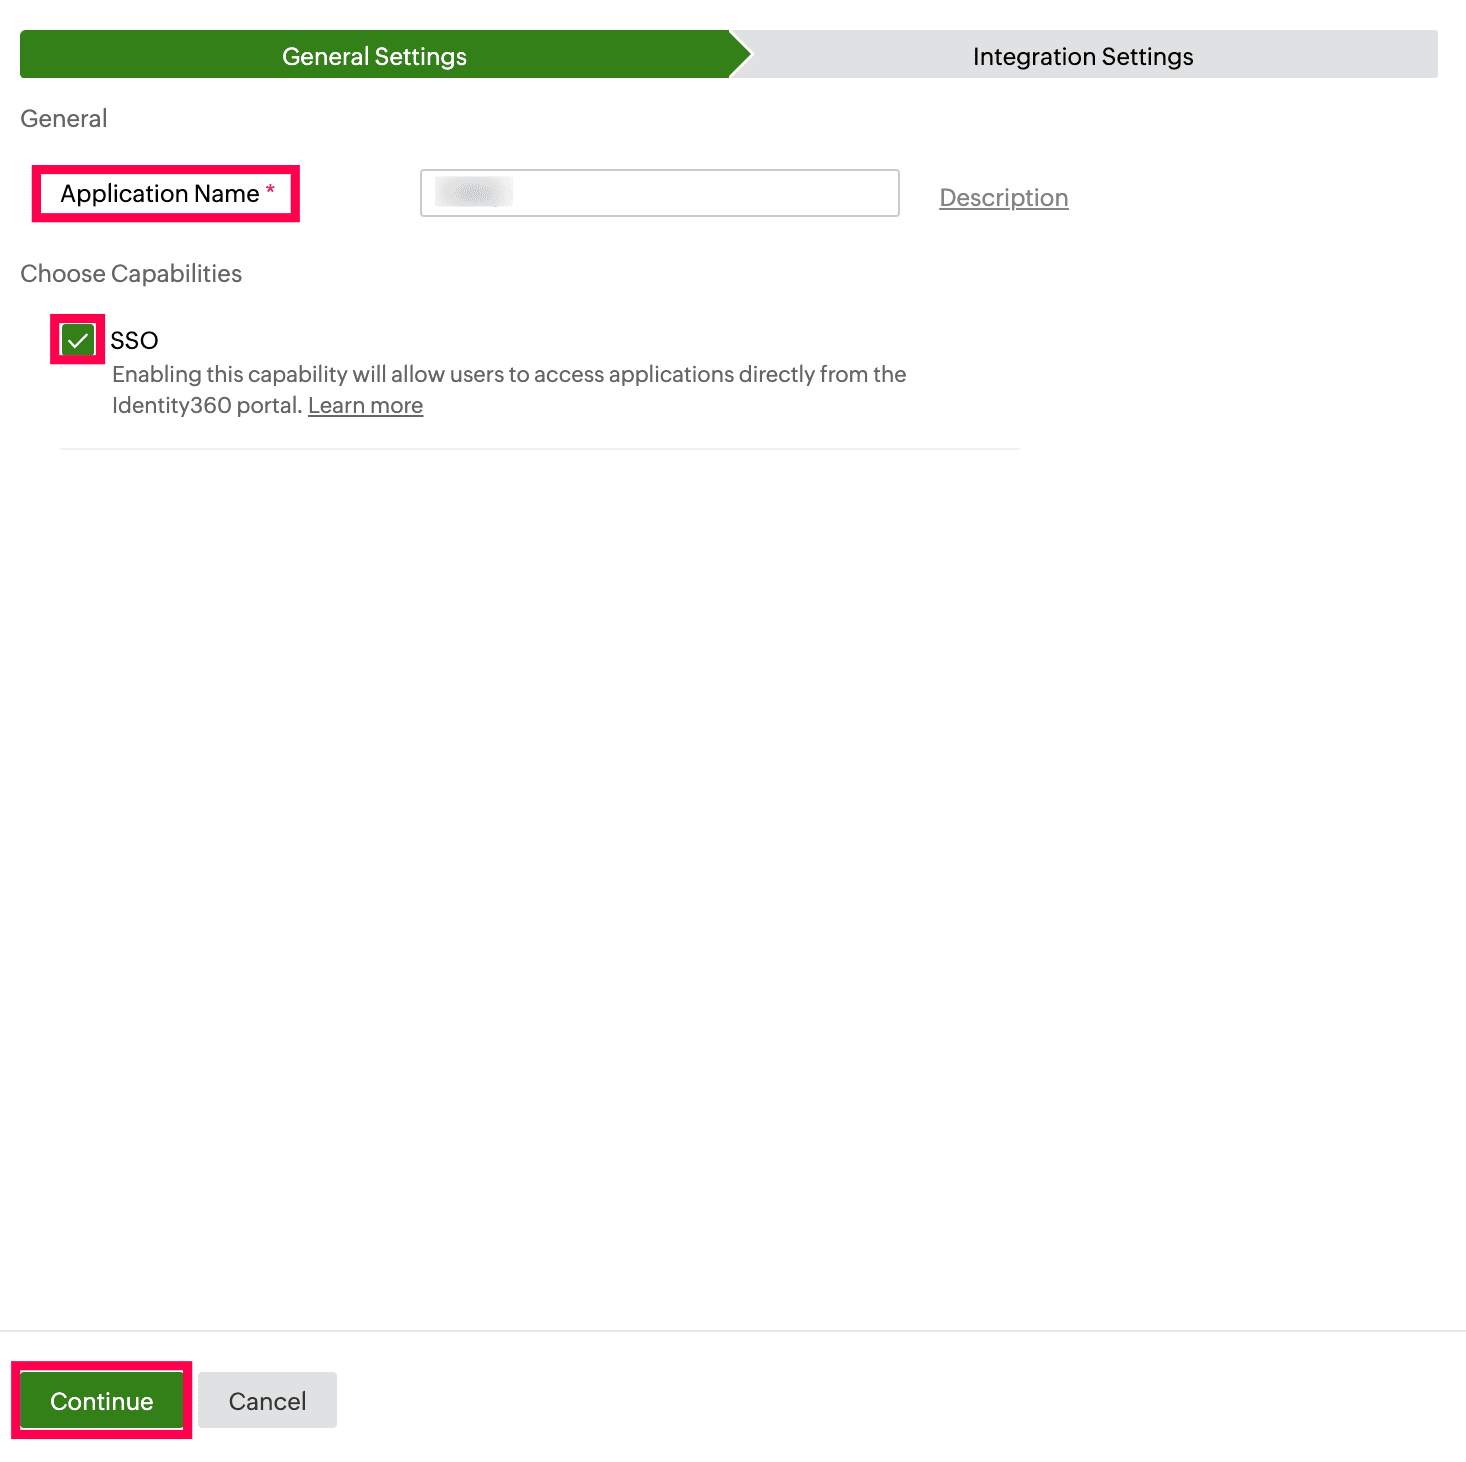 General Settings of SSO configuration for Okta.
- On the Integration Settings tab, navigate to Single Sign On, click IdP Details, and copy the highlighted field values in the screenshot below.
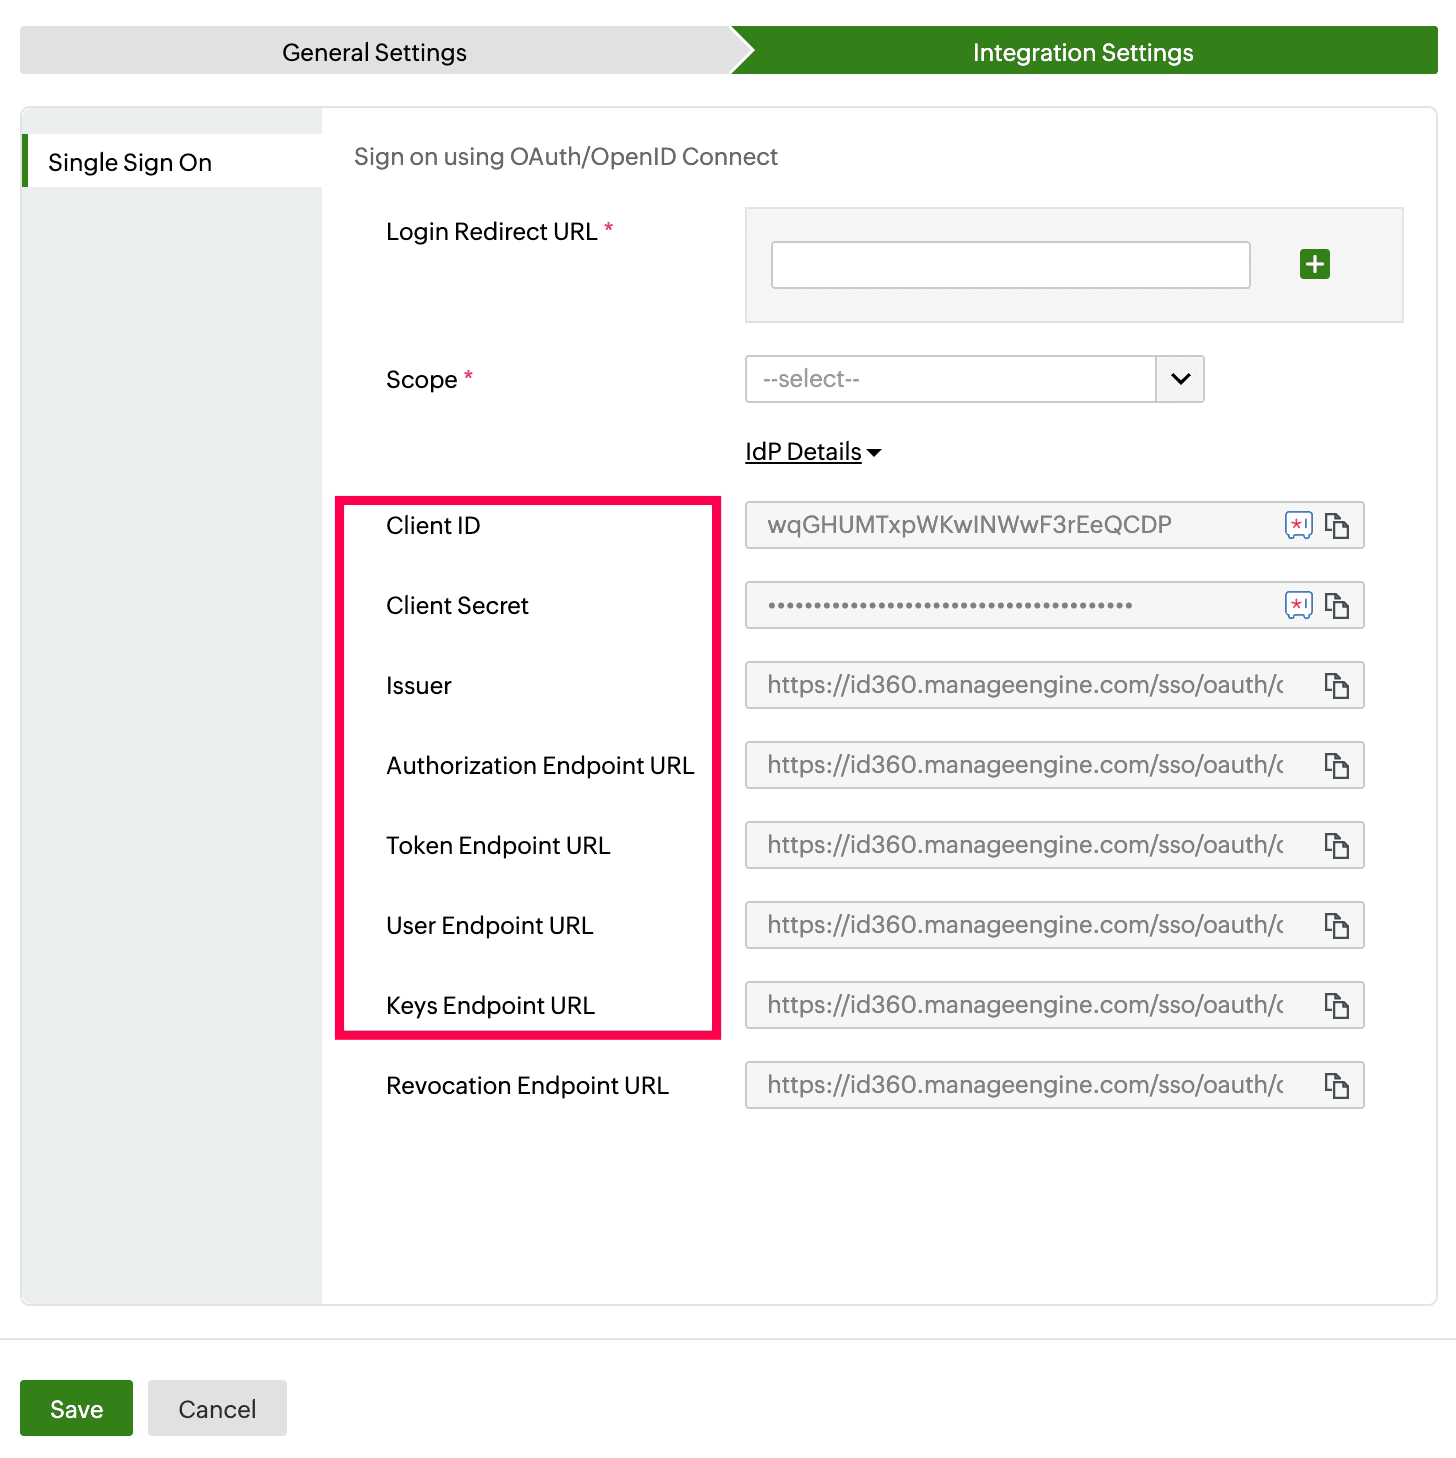 Integration Settings of SSO configuration for Okta.
Okta (service provider) configuration steps
- Log in to Okta as an administrator.
- Navigate to Security > Identity Providers > Add identity provider.
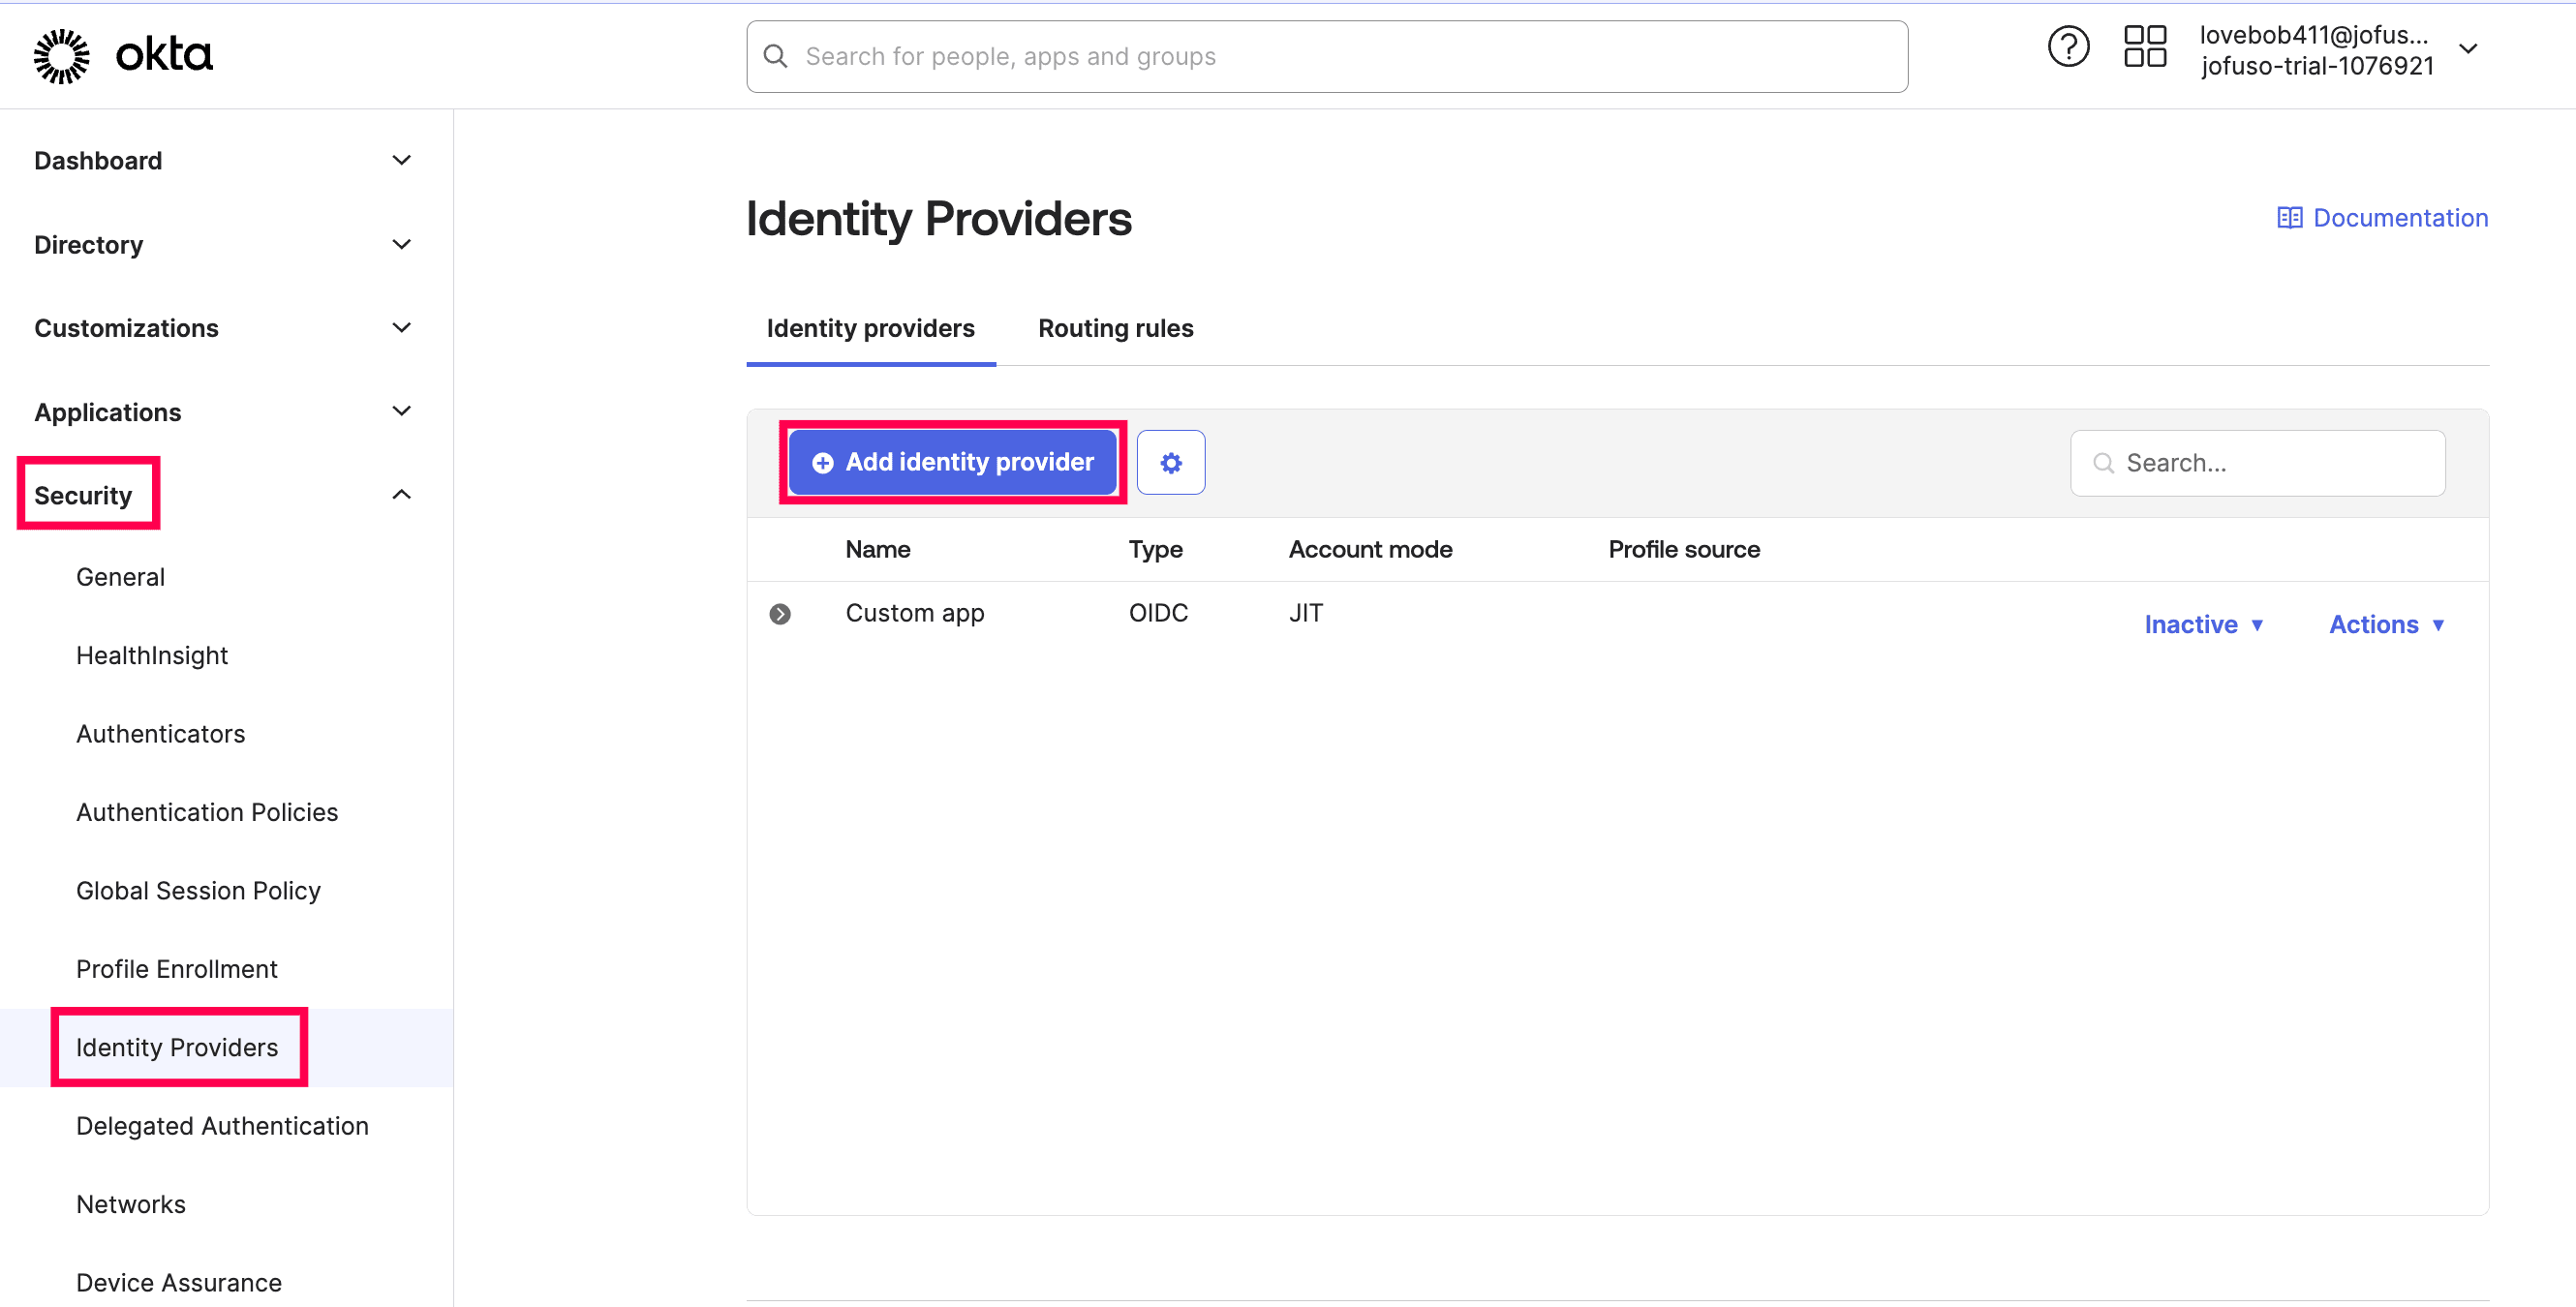 Okta admin portal view
- Click OpenID Connect IdP > Next.
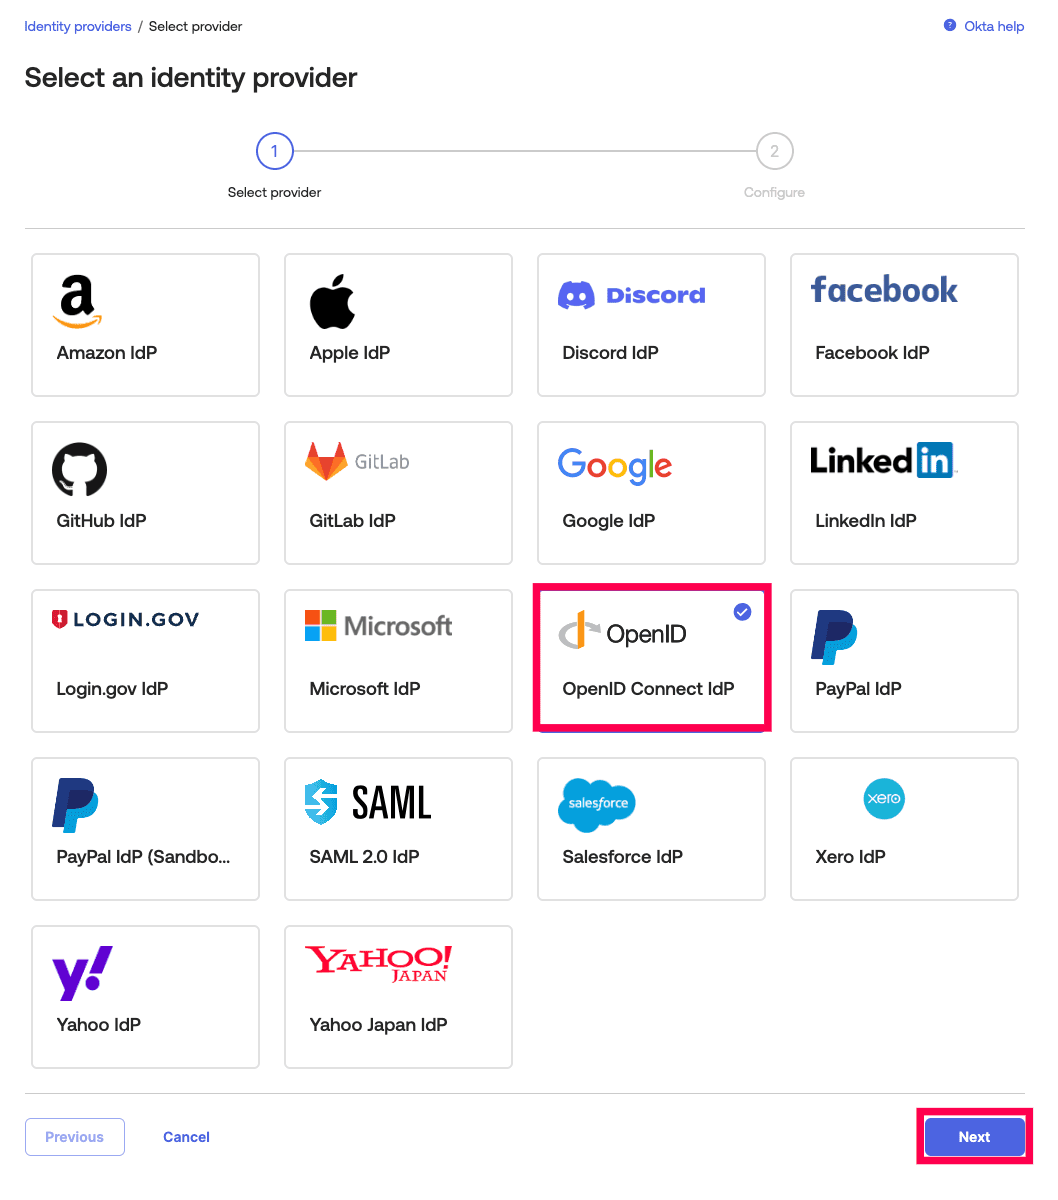 Selecting OpenID Connect IdP from Okta
- Fill in the following fields in the General settings section as follows:
- Name: Enter Identity360.
- IdP Usage: Select SSO only.
- Scopes: Select email, openid, and profile.
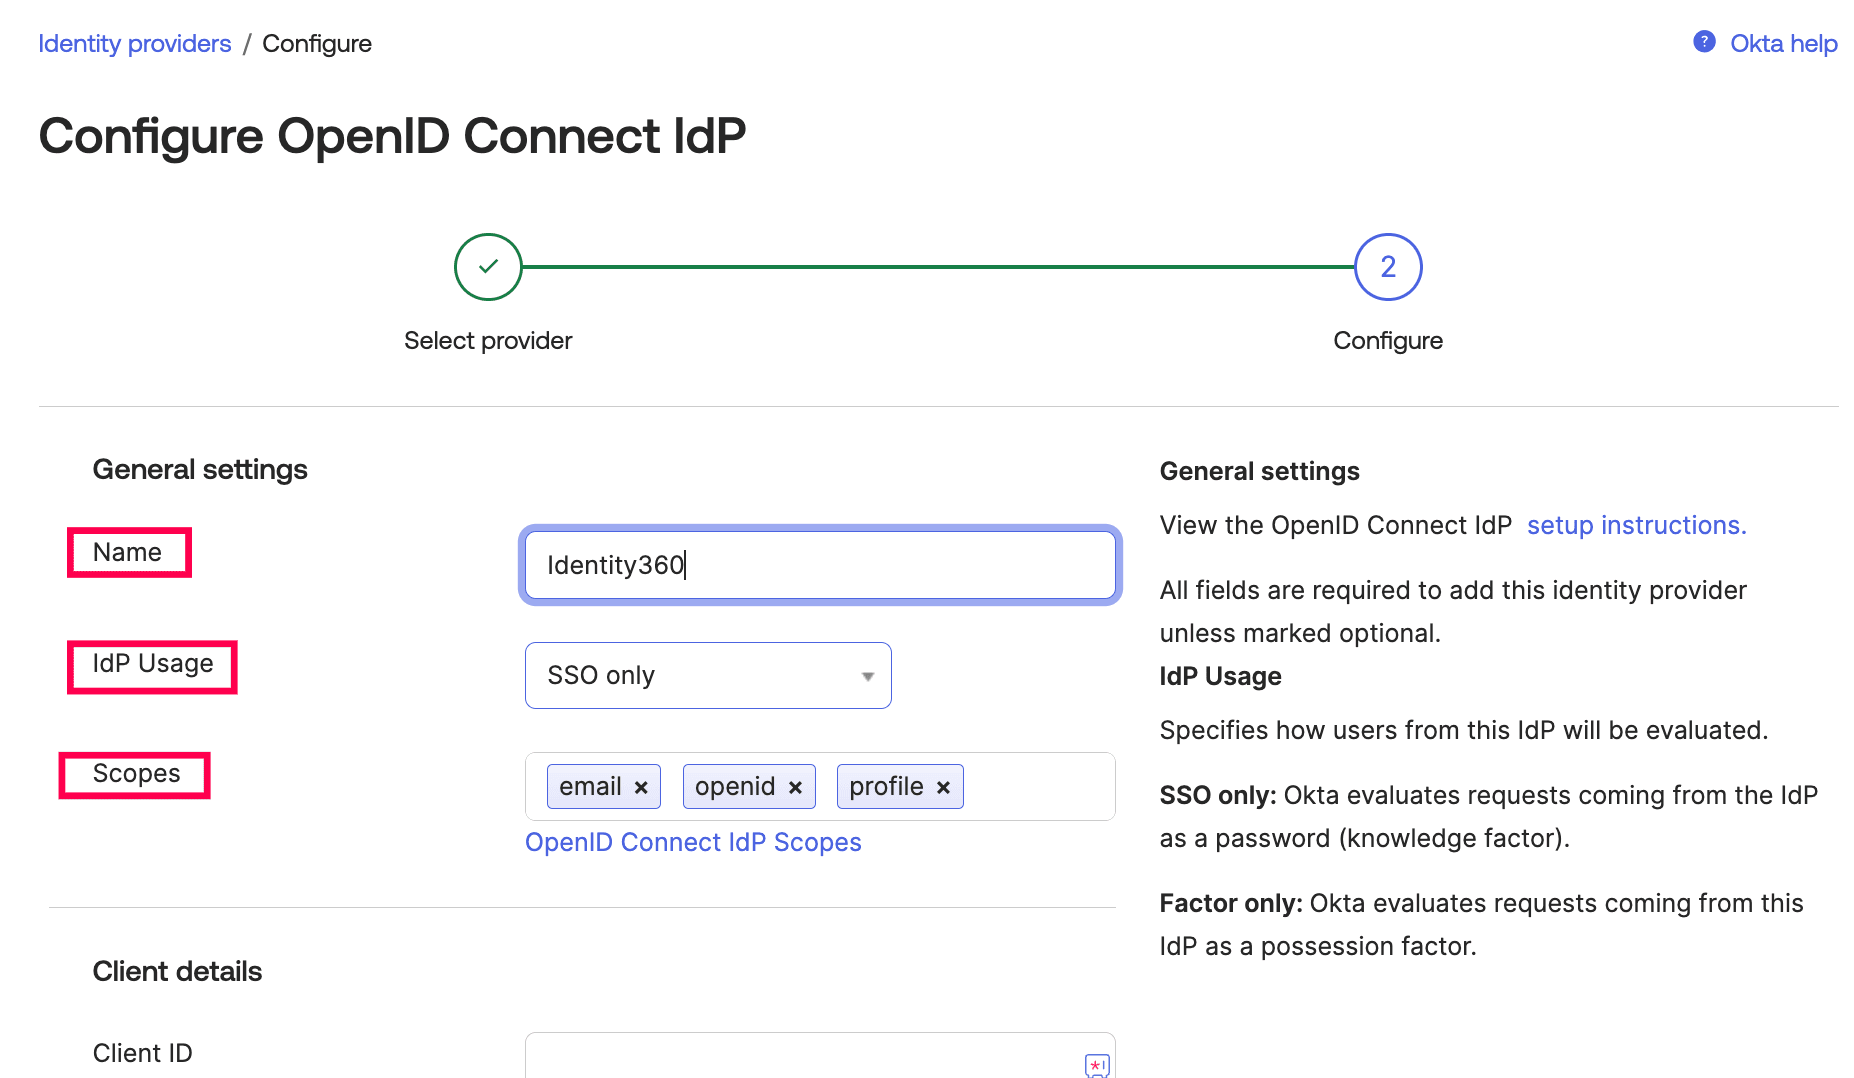 Configuring the OIDC IdP in Okta for SSO
- Fill in the following fields with the corresponding details copied from the Identity360 portal in step 6 of the prerequisites.
- Client ID: Paste the client ID.
- Authentication type: Select the Client secret radio button.
- Client Secret: Paste the Client Secret.
- Issuer: Paste the Issuer URL.
- Authorization endpoint: Paste the Authorization Endpoint URL.
- Token endpoint: Paste the Token Endpoint URL.
- JWKS endpoint: Paste the Keys Endpoint URL.
- Userinfo endpoint: Paste the User Endpoint URL.
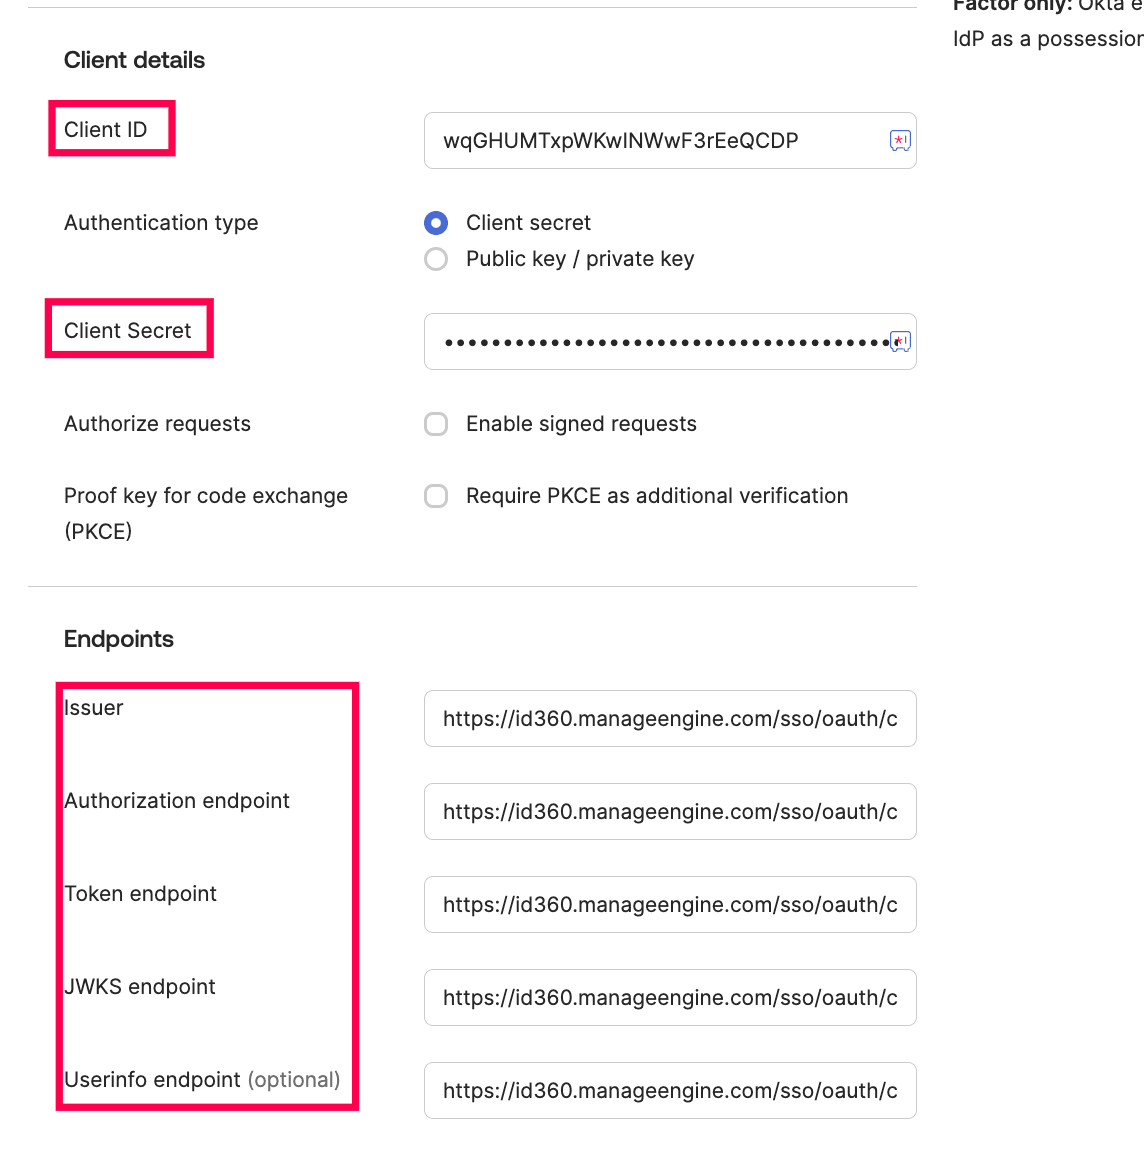 OIDC configuration details in Okta
- You can choose to customize the fields under Authentication Settings and JIT Settings as required by your organization.
- Click Finish to save the configuration settings.
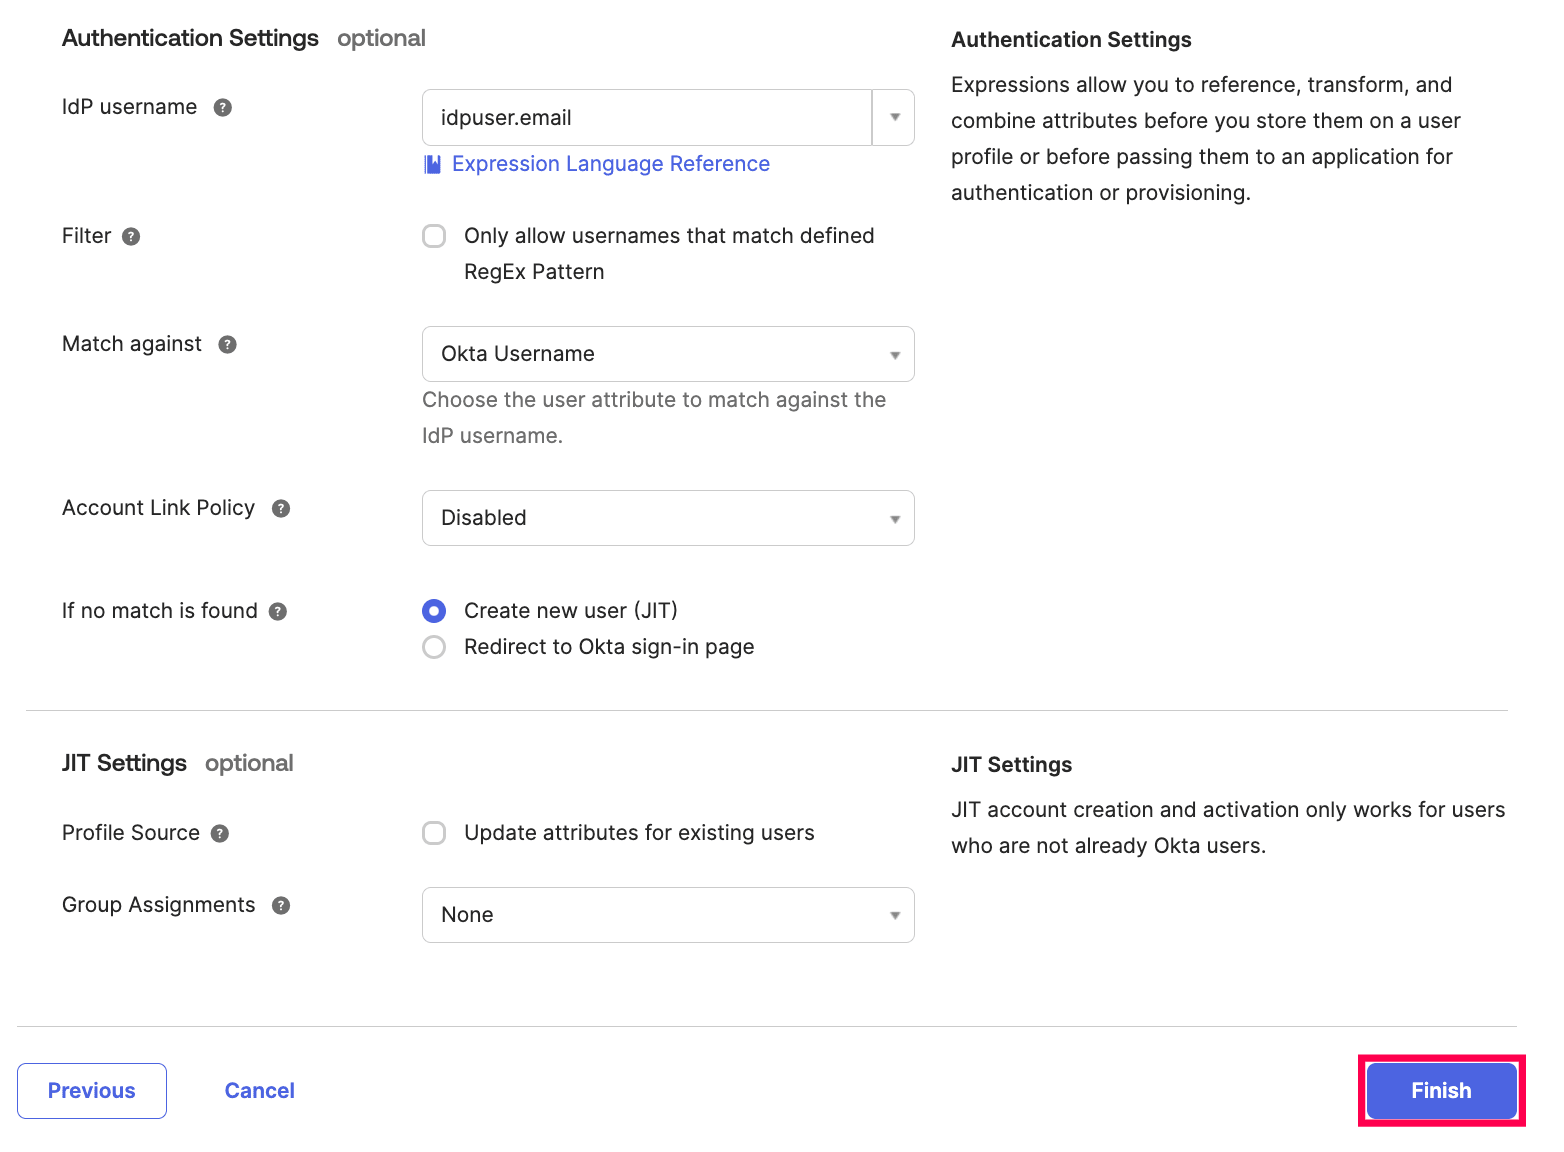 Okta OIDC SSO configuration
- After saving, copy the Redirect URI as it will be required during Identity360 configuration.
 The Redirect URI from Okta
- To add the instance of Identity360 to Okta's login screen, navigate to the Routing rules tab and click Add Routing Rule.
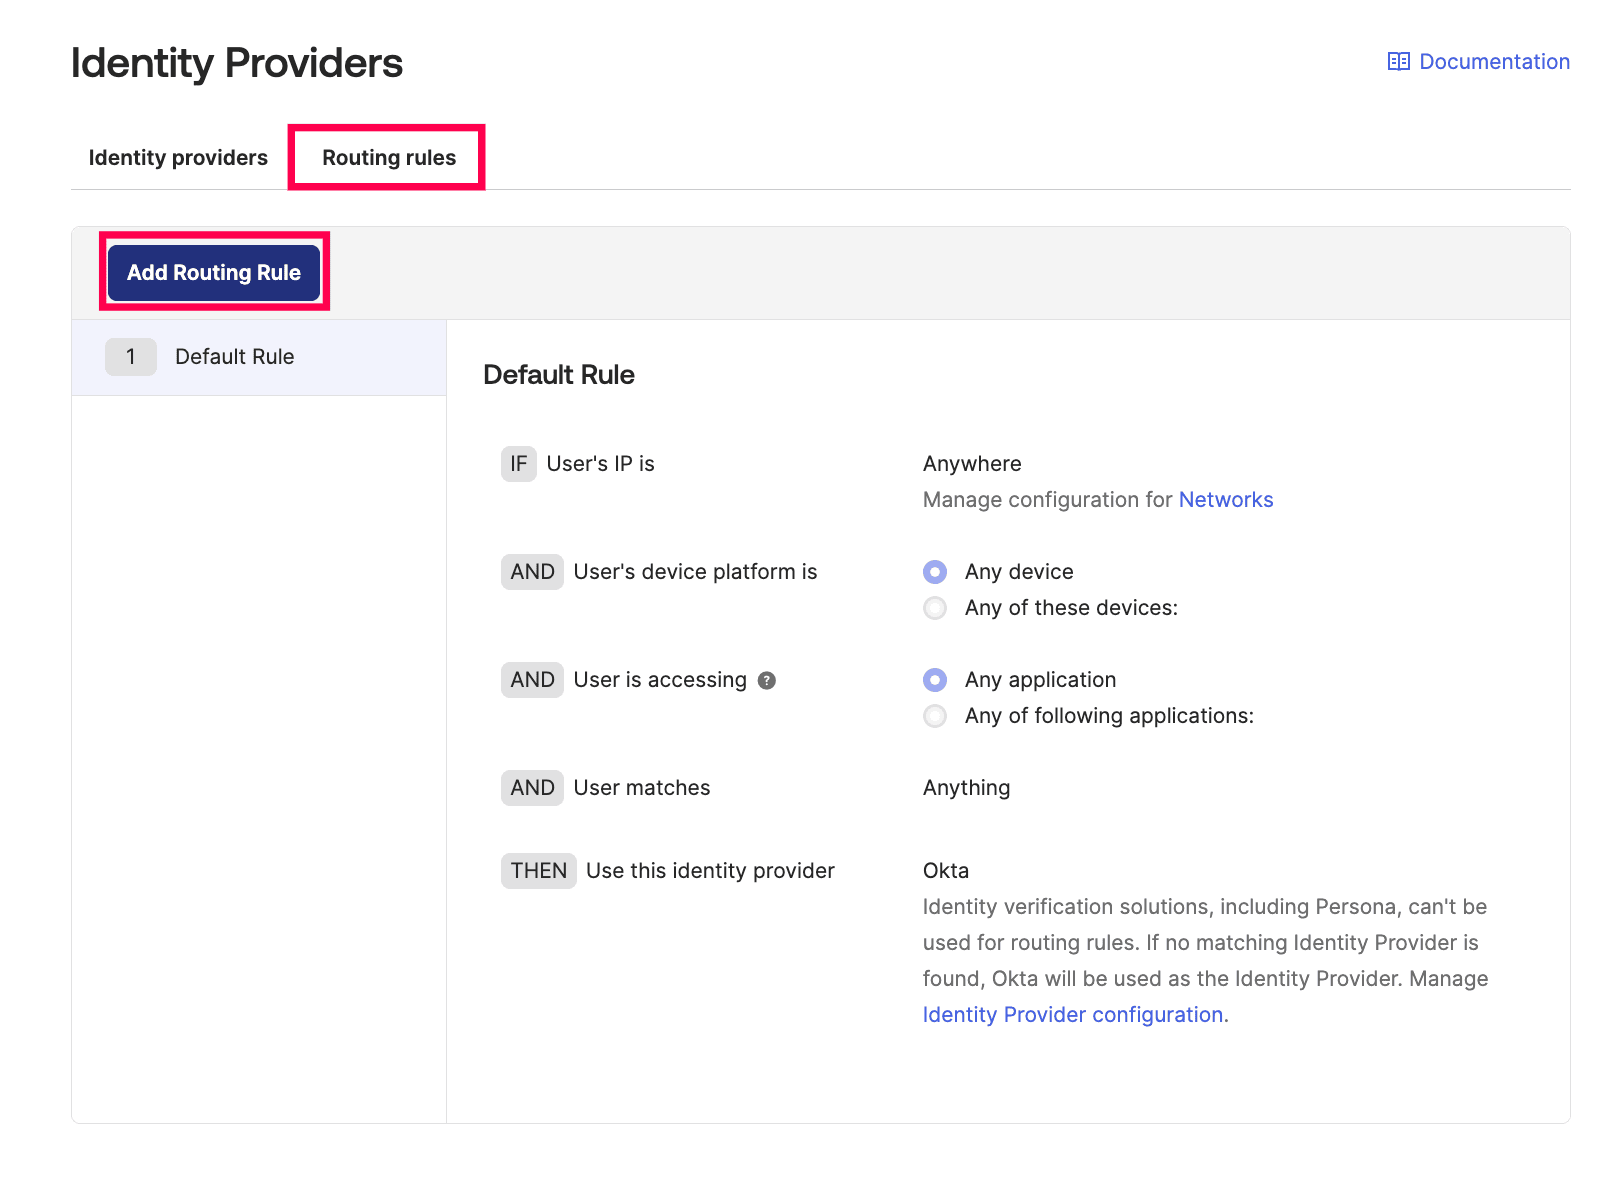 Routing rule addition in Okta
- In the pop-up that appears, provide a suitable Rule Name.
- Set the User matches field to Regex on login and set the value to .*. (adjust based on your organization's needs).
- Set the Use this identity provider field to Use specific IdP(s) and choose Identity360 from the IdP(s) drop-down list below.
- Click Create rule.
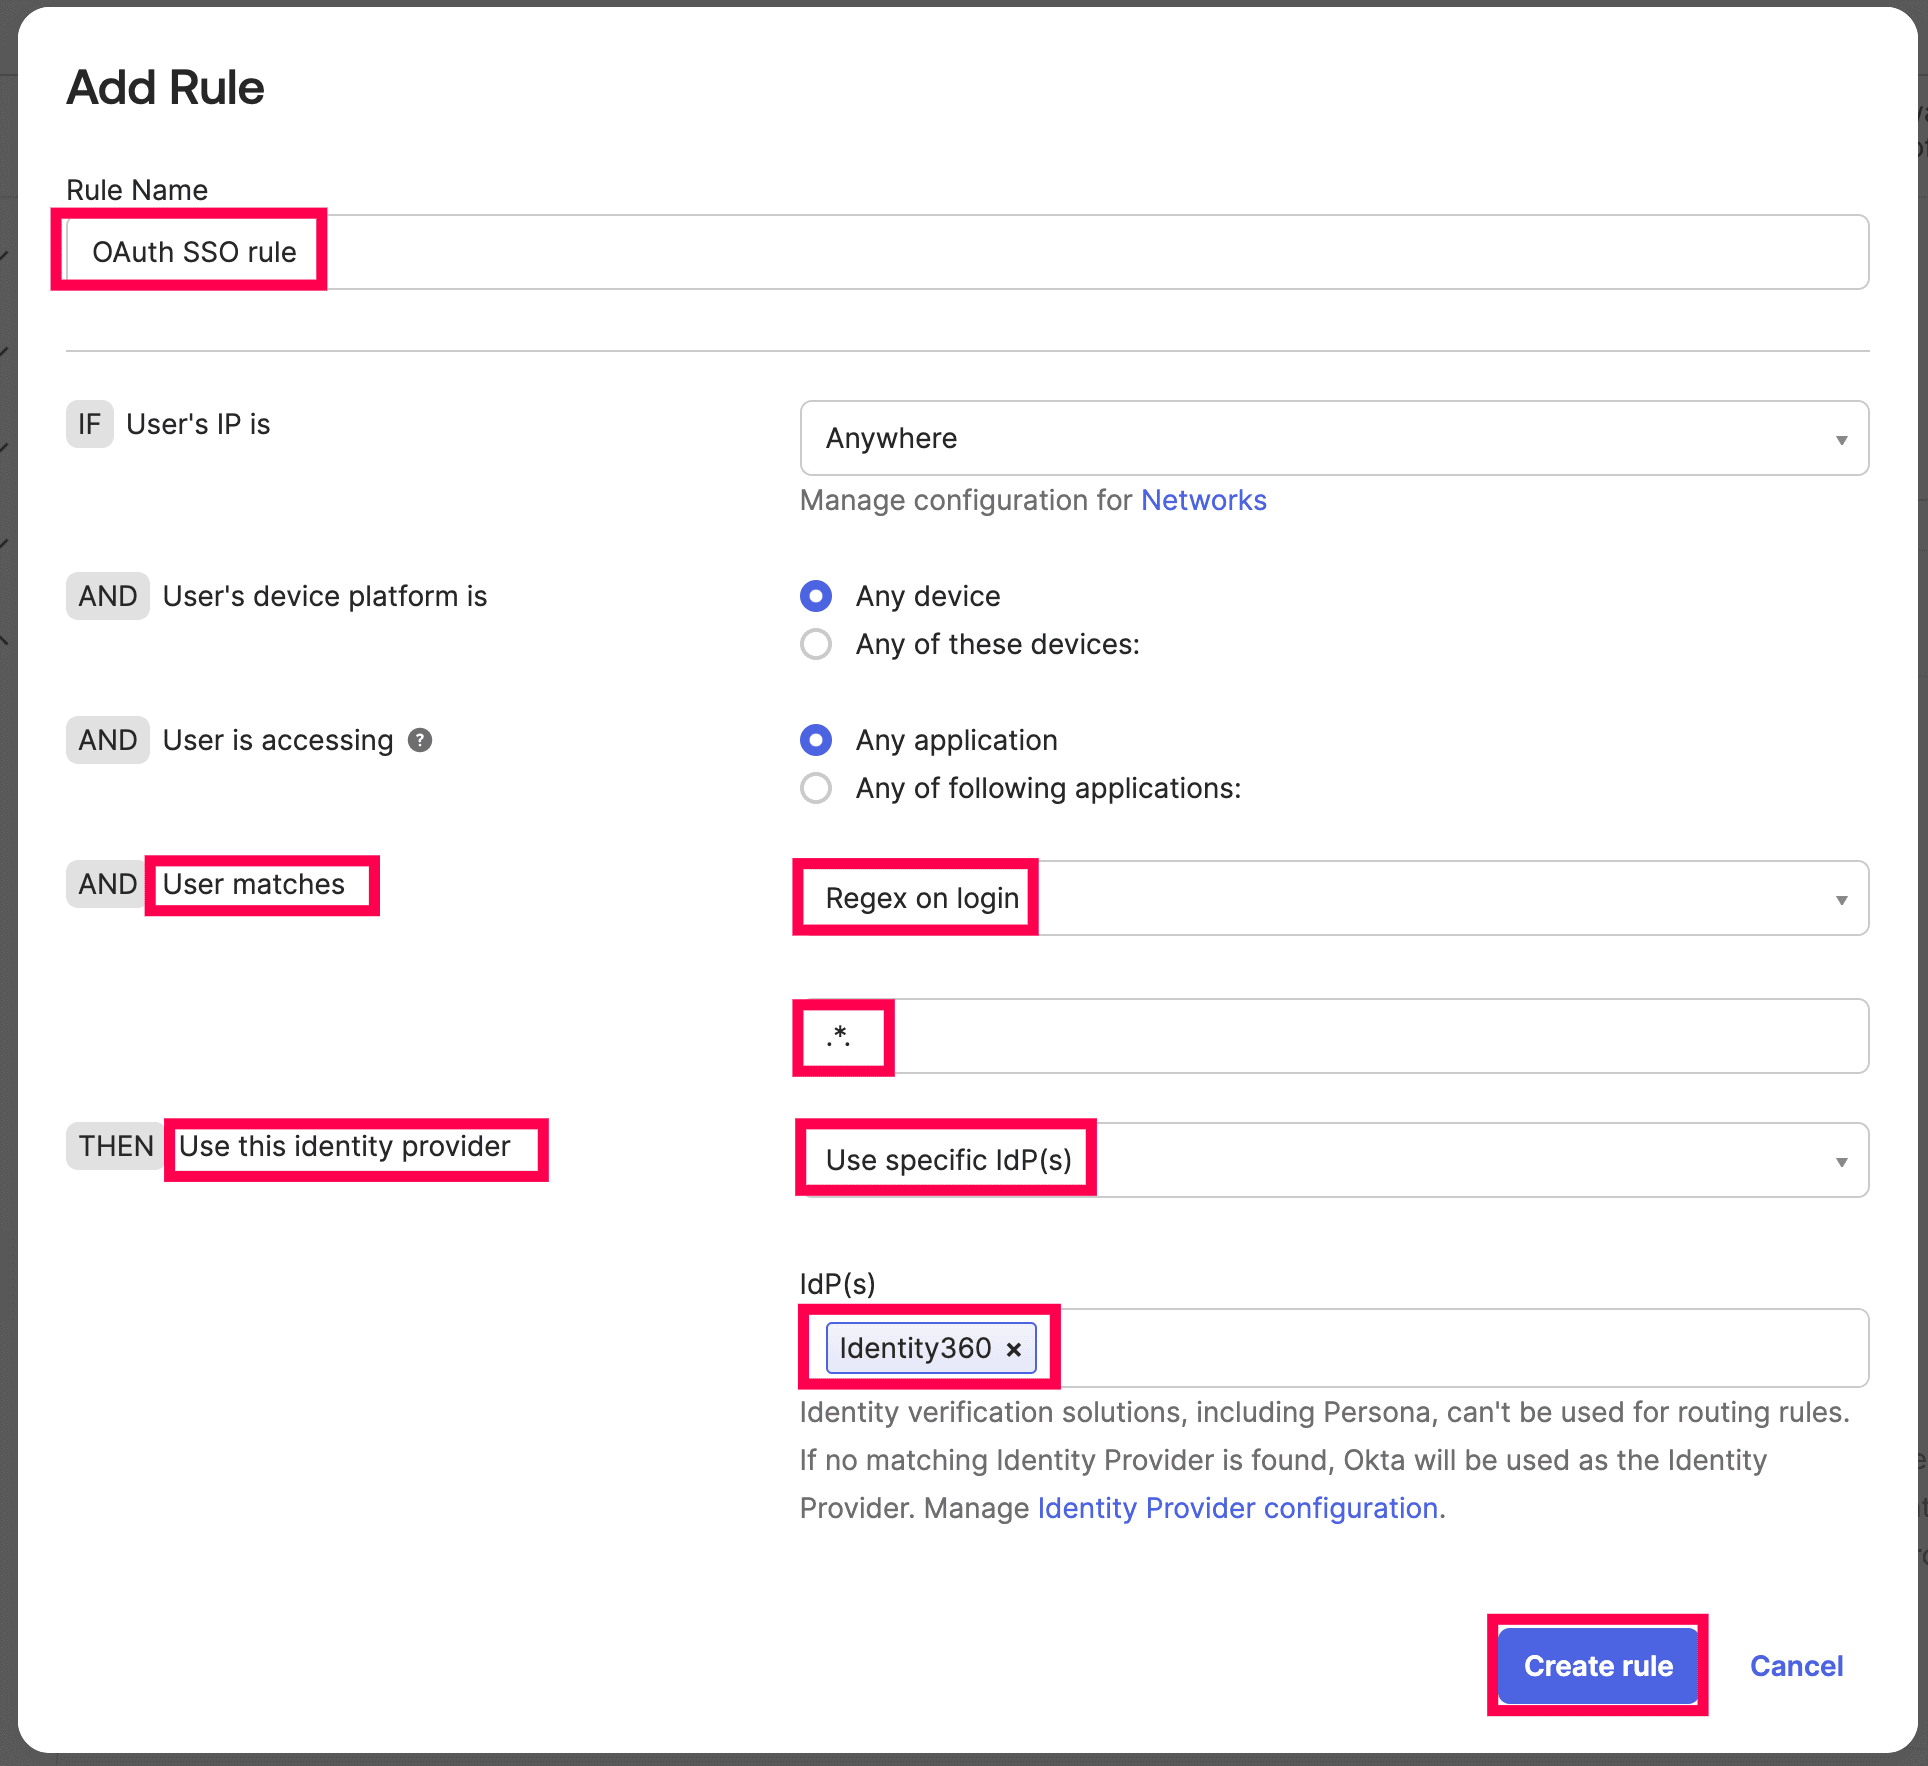 Routing rule creation in Okta
- In the pop-up that appears, click Activate.
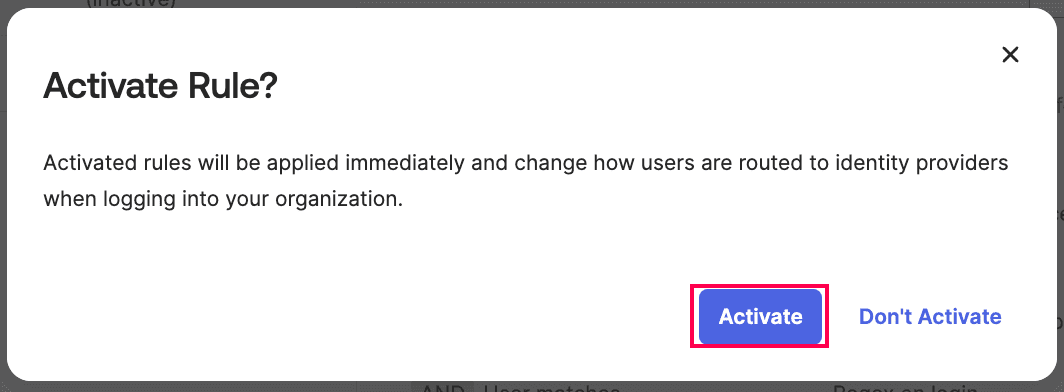 Routing rule activation for logins
Identity360 (identity provider) configuration steps
- Switch to Identity360's application configuration page.
- In the Login Redirect URL field, paste the Redirect URI copied from step 8 of Okta configuration.
- Select the required scopes from the Scope drop-down.
Note: Scopes define the level of access that can be requested by the service provider (SP) to access a resource. Identity360 supports the following scopes:
- openid: Establishes that this is an OIDC request
- email: Requests the user's email attribute
- profile: Requests the user's profile claims (FirstName and LastName)
- Click Save.
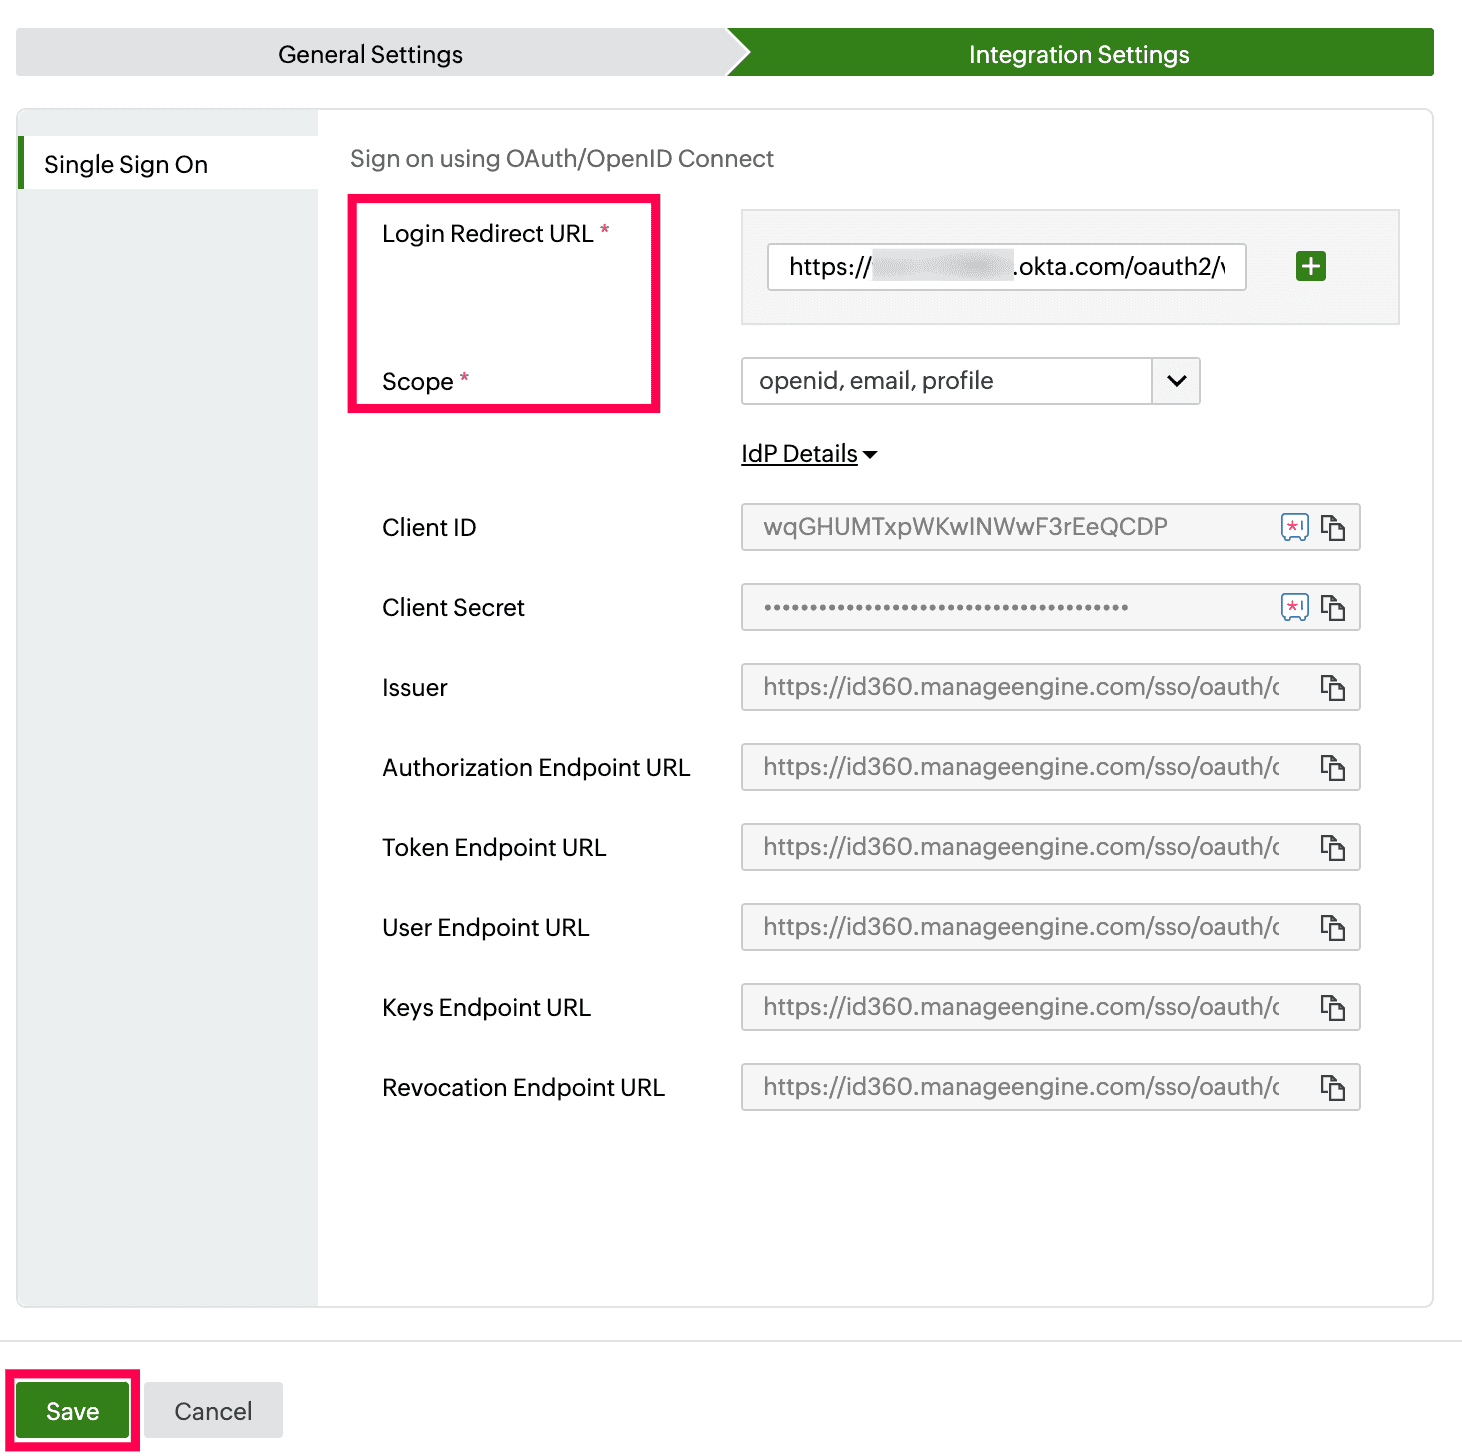 Integration Settings of SSO configuration for Okta
- To learn how to assign users and groups to one or more applications, refer to this page.
Your users should now be able to log in to Okta through the Identity360 portal.
Note: For Okta, SP-initiated flows are supported when SSO is enabled through OAuth.
Steps to enable MFA for Okta
Setting up MFA for Okta using Identity360 involves the following steps:
- Set up one or more authenticators for identity verification when users attempt to log in to Okta. Identity360 supports various authenticators, including Google Authenticator, Zoho OneAuth, and email-based verification codes. Click here for steps to set up the different authenticators.
- Integrate Okta with Identity360 by configuring SSO using the steps listed here.
- Now, activate MFA for Okta by following the steps mentioned here.
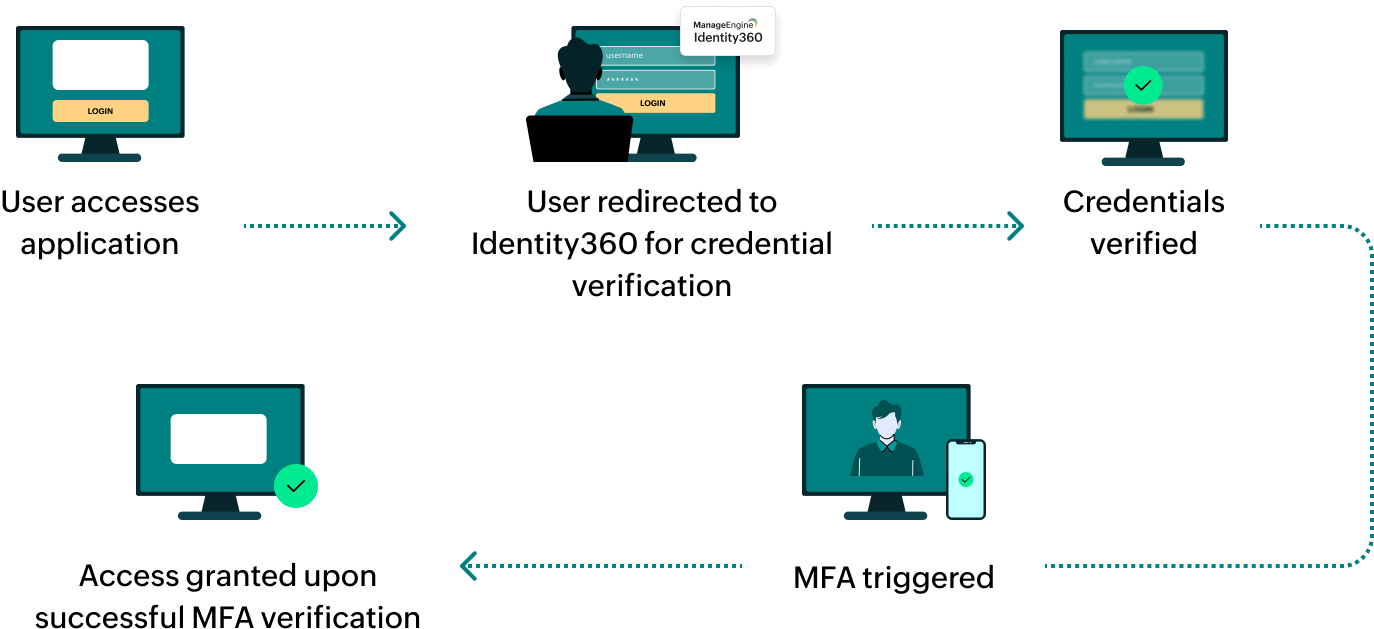
How does MFA for applications work in Identity360?
 General Settings of SSO configuration for Okta.
 Integration Settings of SSO configuration for Okta.
 Okta admin portal view
 Selecting OpenID Connect IdP from Okta
 Configuring the OIDC IdP in Okta for SSO
 OIDC configuration details in Okta
 Okta OIDC SSO configuration
 The Redirect URI from Okta
 Routing rule addition in Okta
 Routing rule creation in Okta
 Routing rule activation for logins
 Integration Settings of SSO configuration for Okta