Steps to configure SAML SSO for Opsgenie
About Opsgenie
Opsgenie is an incident management platform designed to help organizations manage and respond to critical incidents effectively. It integrates with various monitoring, ticketing, and collaboration tools to ensure that the right people are notified at the right time, reducing downtime and minimizing the impact of incidents on business operations.
The following steps will help you enable single sign-on (SSO) for Opsgenie from Identity360.
Prerequisites
- The MFA and SSO license for Identity360 is required to enable SSO for enterprise applications. For more information, refer to our pricing details.
- Log in to Identity360 as an Admin or Super Admin.
- Navigate to Applications > Application Integration > Create New Application, and select Opsgenie from the applications displayed.
Note: You can also find Opsgenie from the search bar located at the top.
- Under the General Settings tab, enter the Application Name and Description.
- Under the Choose Capabilities tab, choose SSO and click Continue.
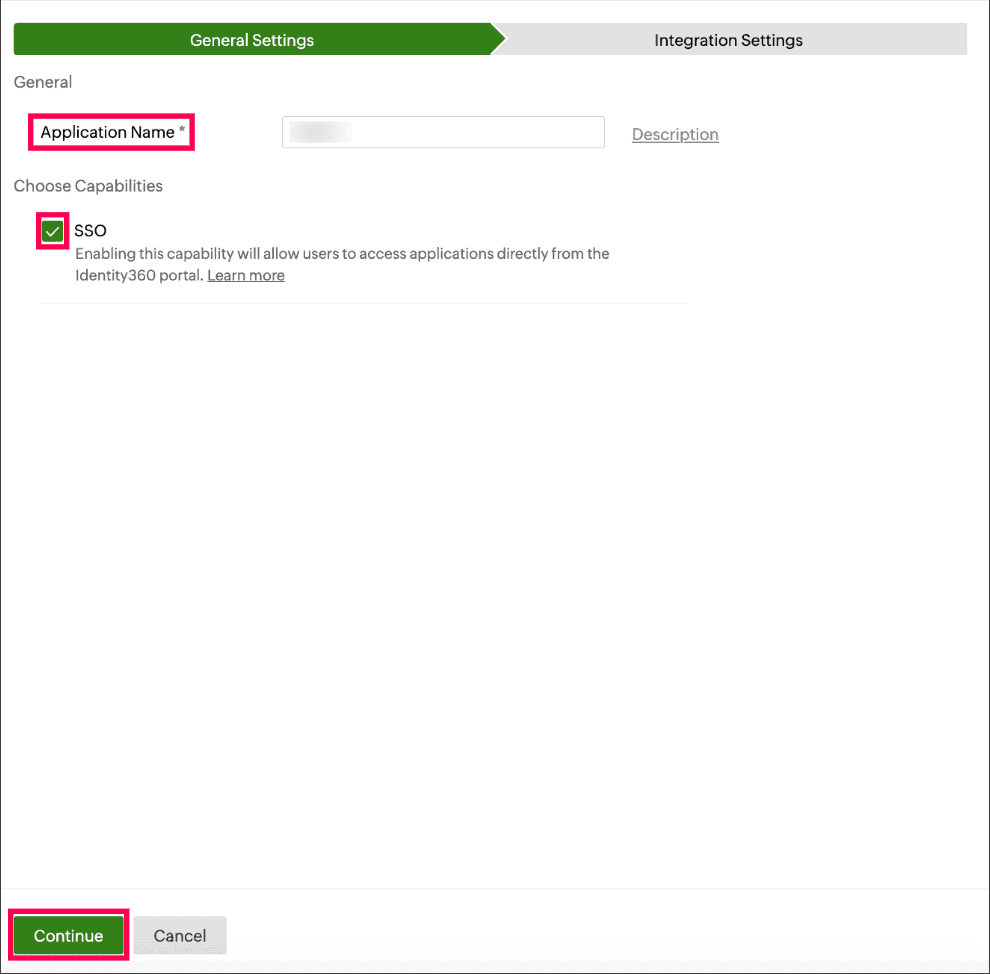 General Settings of SSO configuration for Opsgenie.
- Under Integration Settings, navigate to the Single Sign On tab and click Metadata Details.
- Copy the Login URL and Entity ID/Issuer URL, which will be used during the configuration of Atlassian Cloud.
- Copy the SSO certificate by clicking the Copy button near the Signing Certificate field.
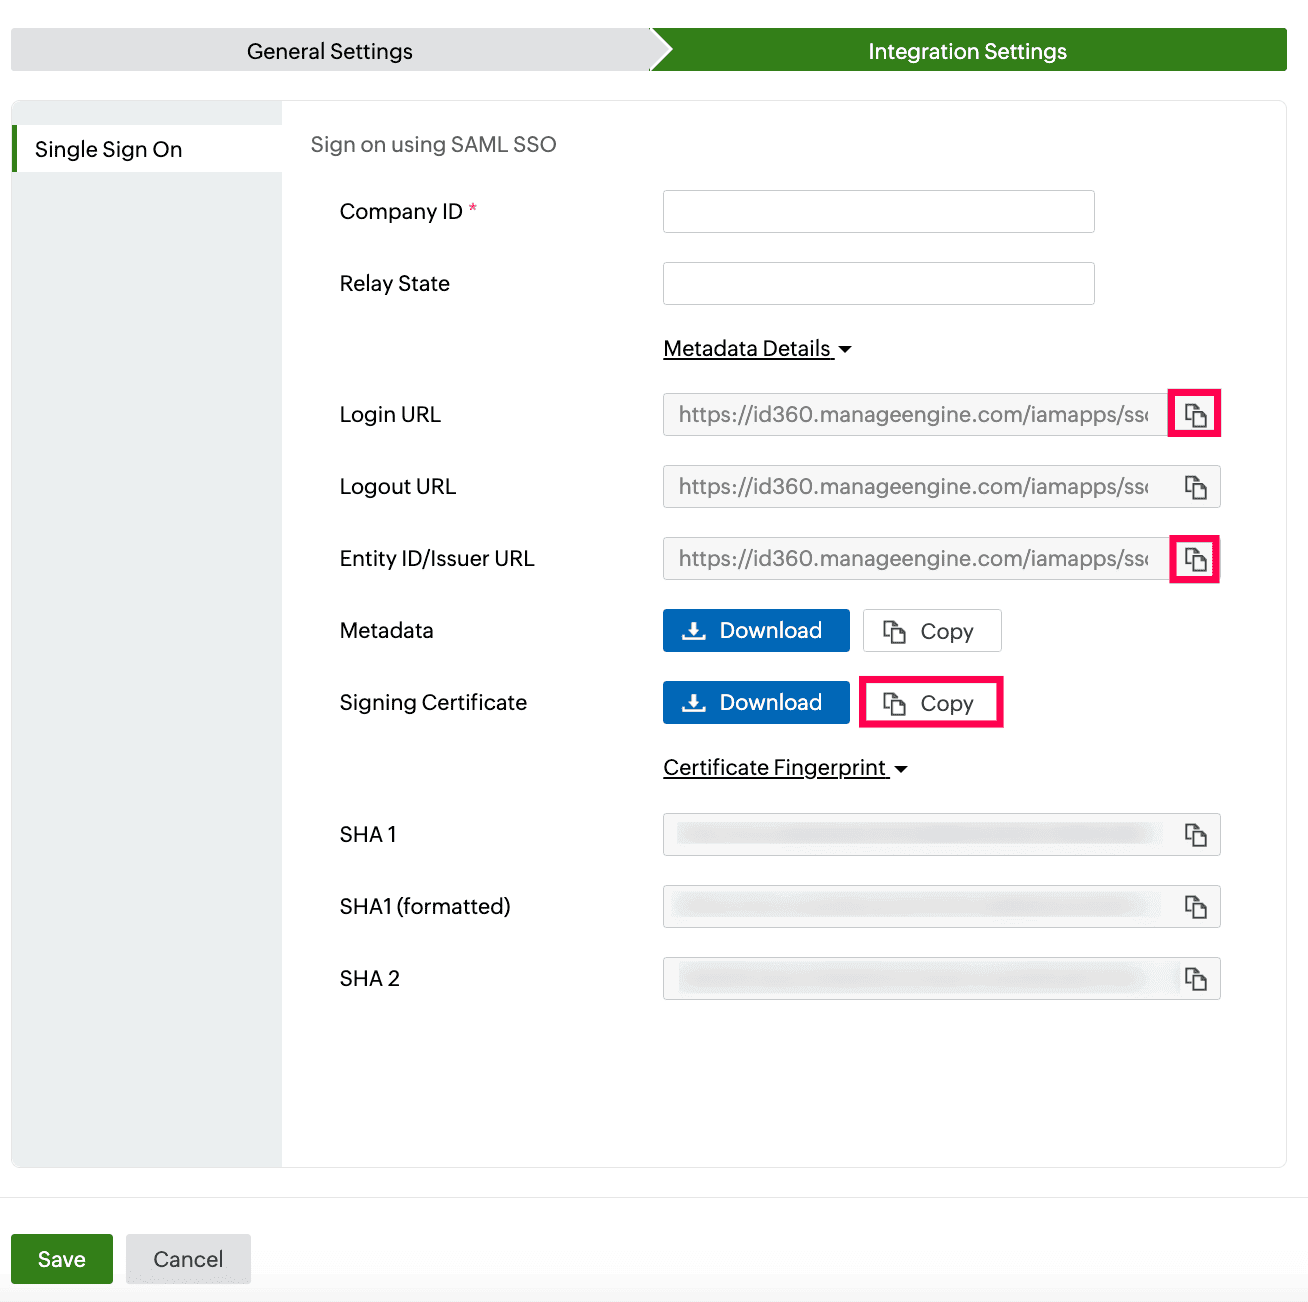 Integration Settings of SSO configuration for Opsgenie.
Opsgenie (service provider) configuration steps
- Log in to Opsgenie with admin privileges.
- Navigate to Settings > Login and SSO > Configure single sign-on with Atlassian Access.
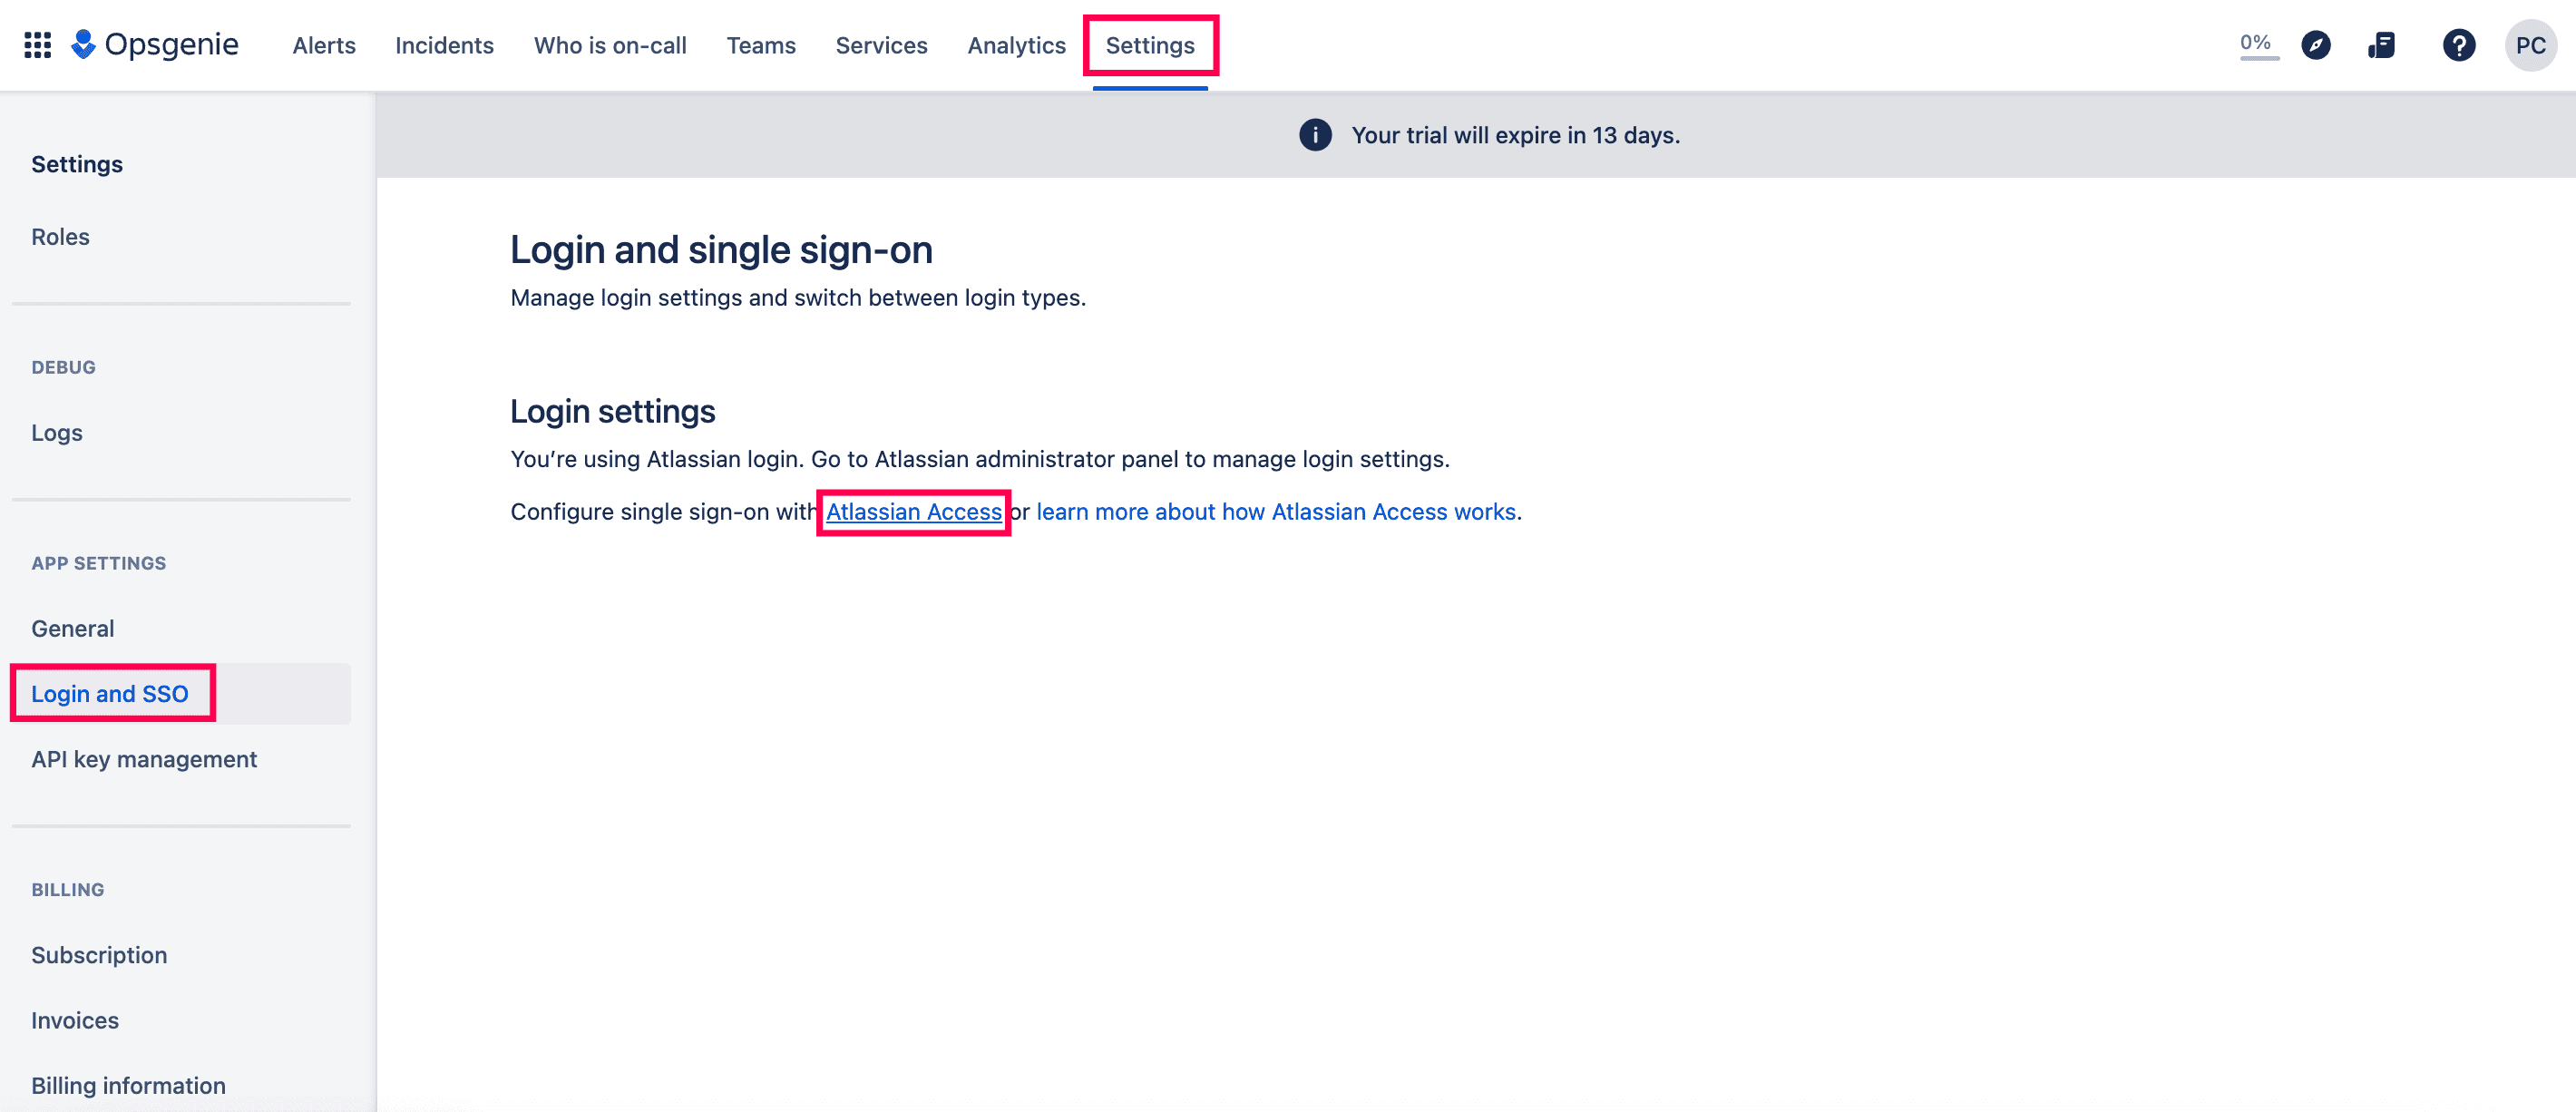 Portal view of Opsgenie.
- You will be redirected to Atlassian Cloud's portal.
- Click the Security tab.
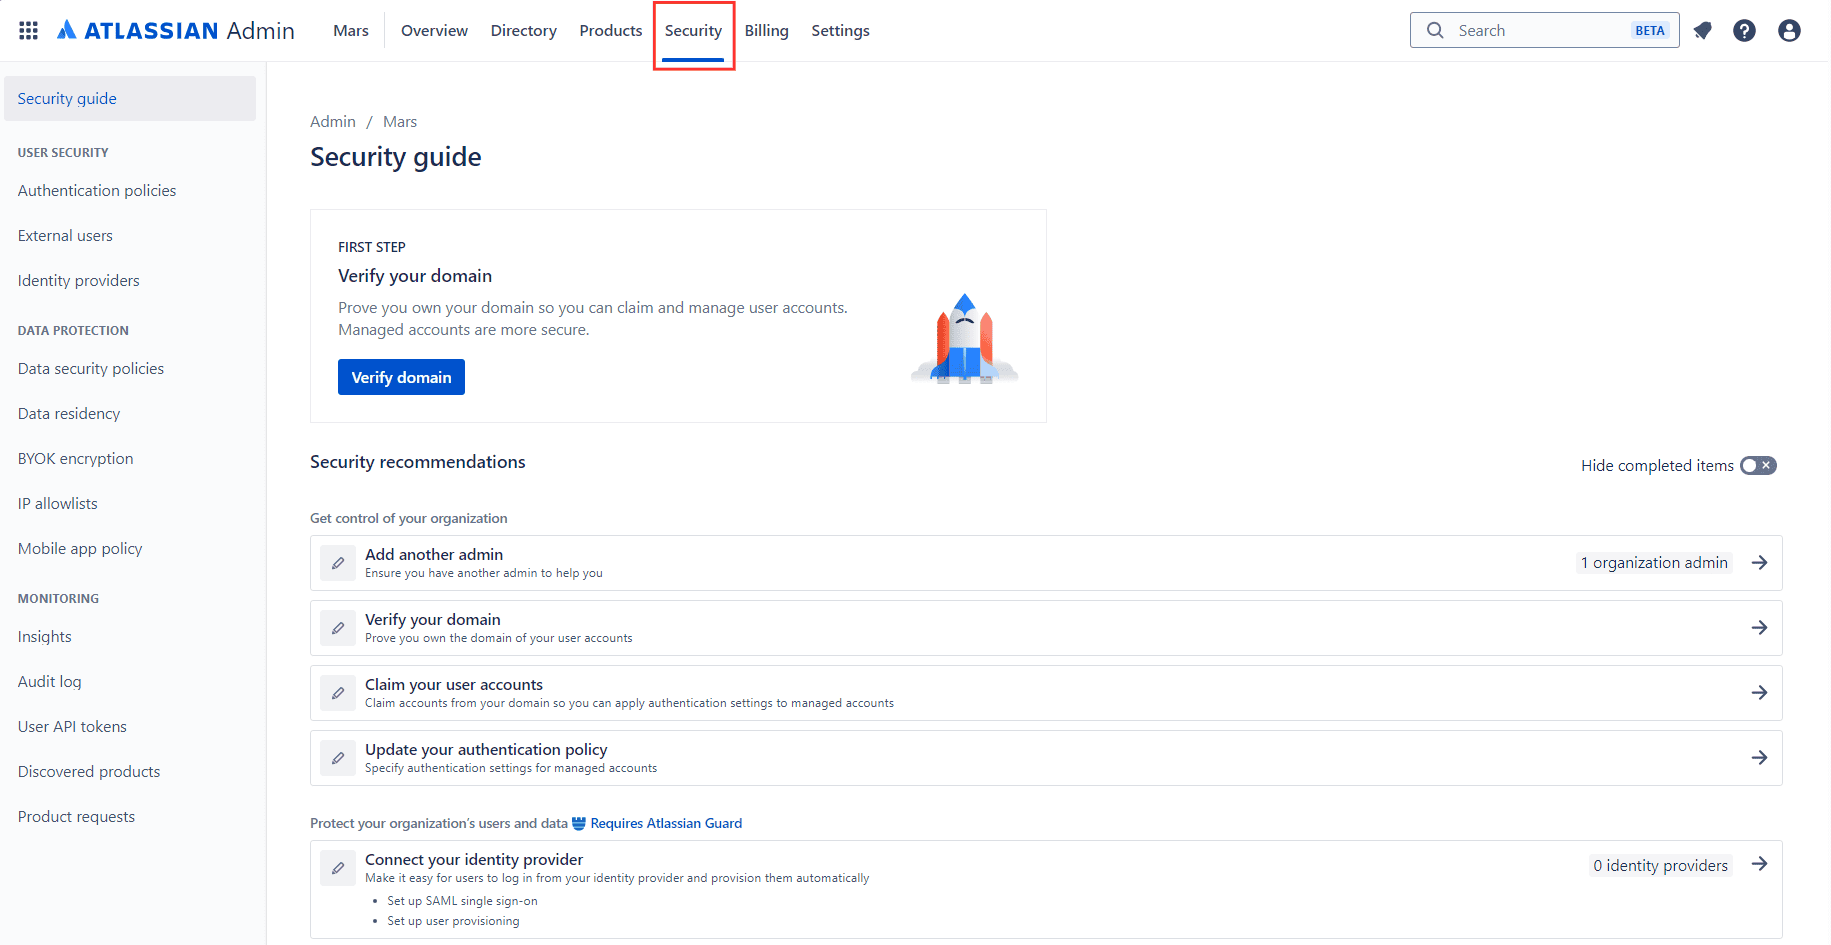 Security settings of Atlassian Cloud.
- Navigate to the Identity providers tab and click Choose in the Other Provider tile.
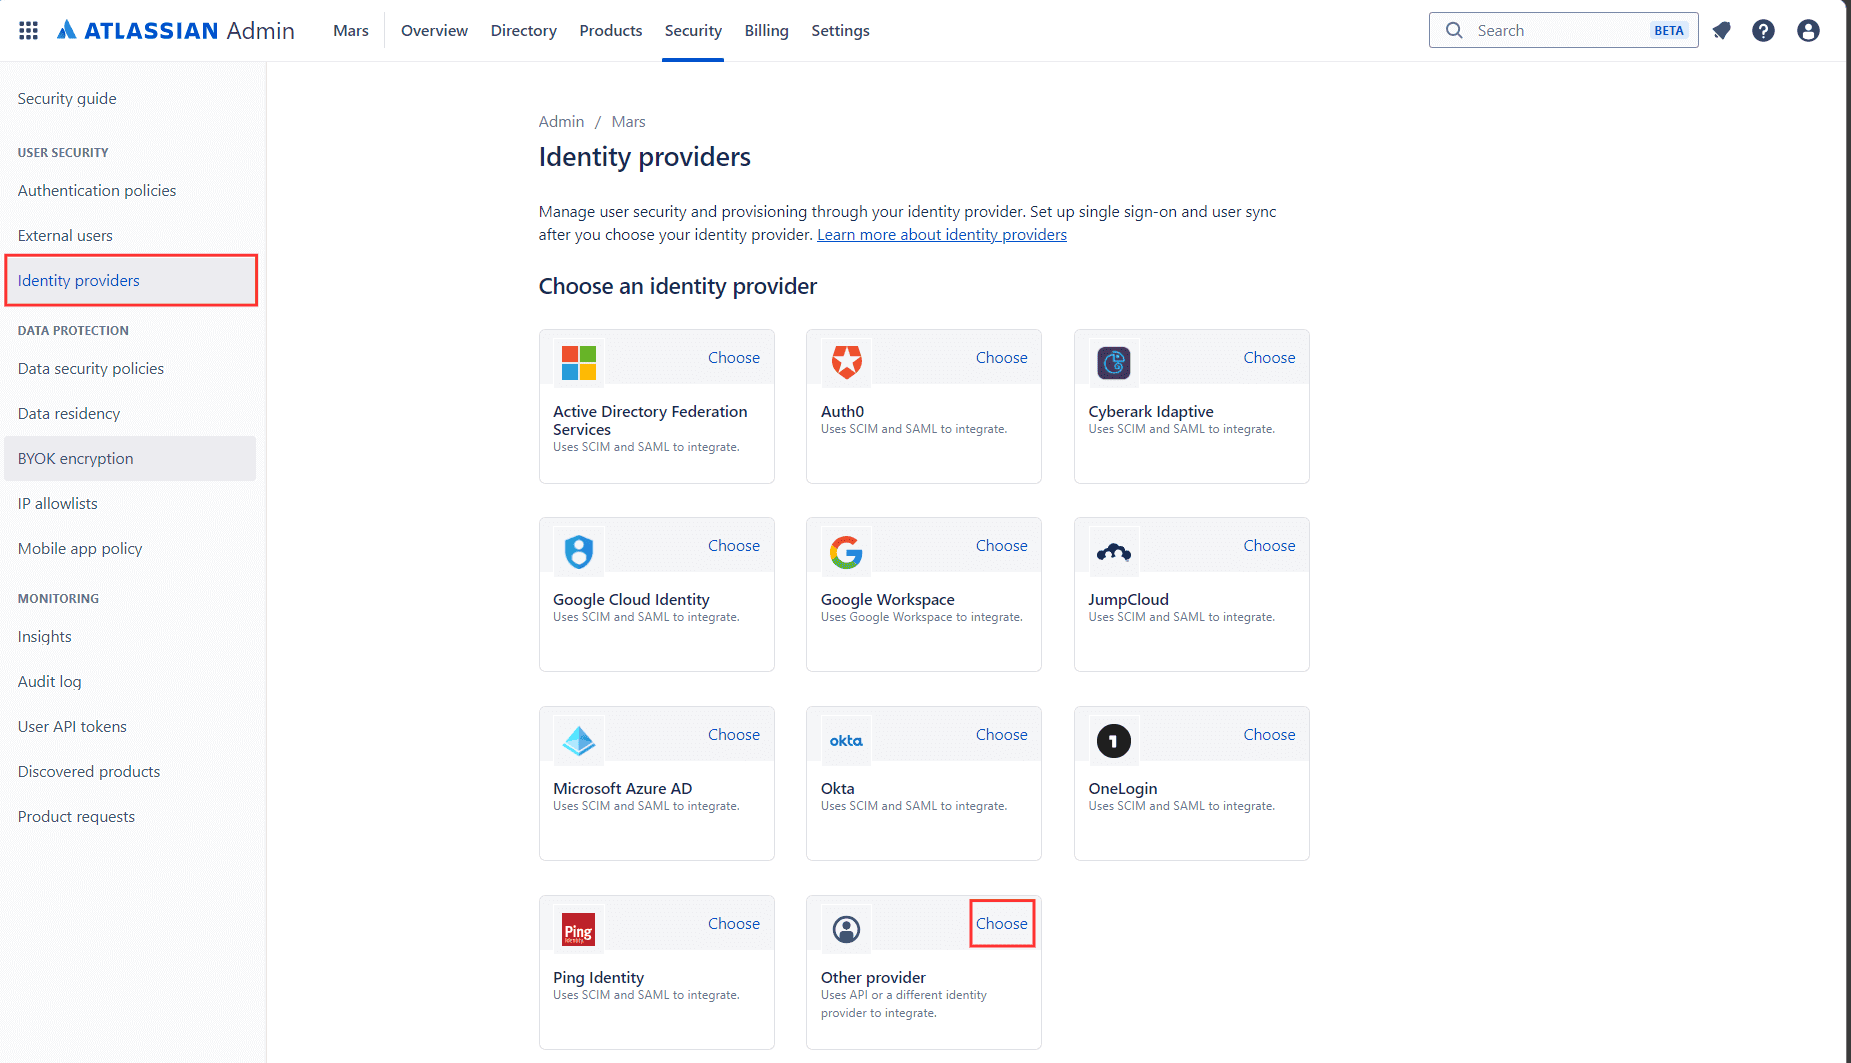 Identity provider settings of Atlassian Cloud.
- On the Add identity provider directory page, enter the Directory name and click Add.
 Configuration of an identity provider in Atlassian Cloud.
- On the Connect your identity provider page, click Set up SAML single sign-on.
 Selection of the SSO capability from Atlassian Cloud.
- Click Next under the Before you begin section.
- In the Add SAML details section, paste the Login URL, Entity ID/Issuer URL, and Signing Certificate, copied in step 6(i) and step 6(ii) of prerequisites, in the Identity provider Entity ID, Identity provider SSO URL, and Public x509 certificate fields, respectively. Click Next.
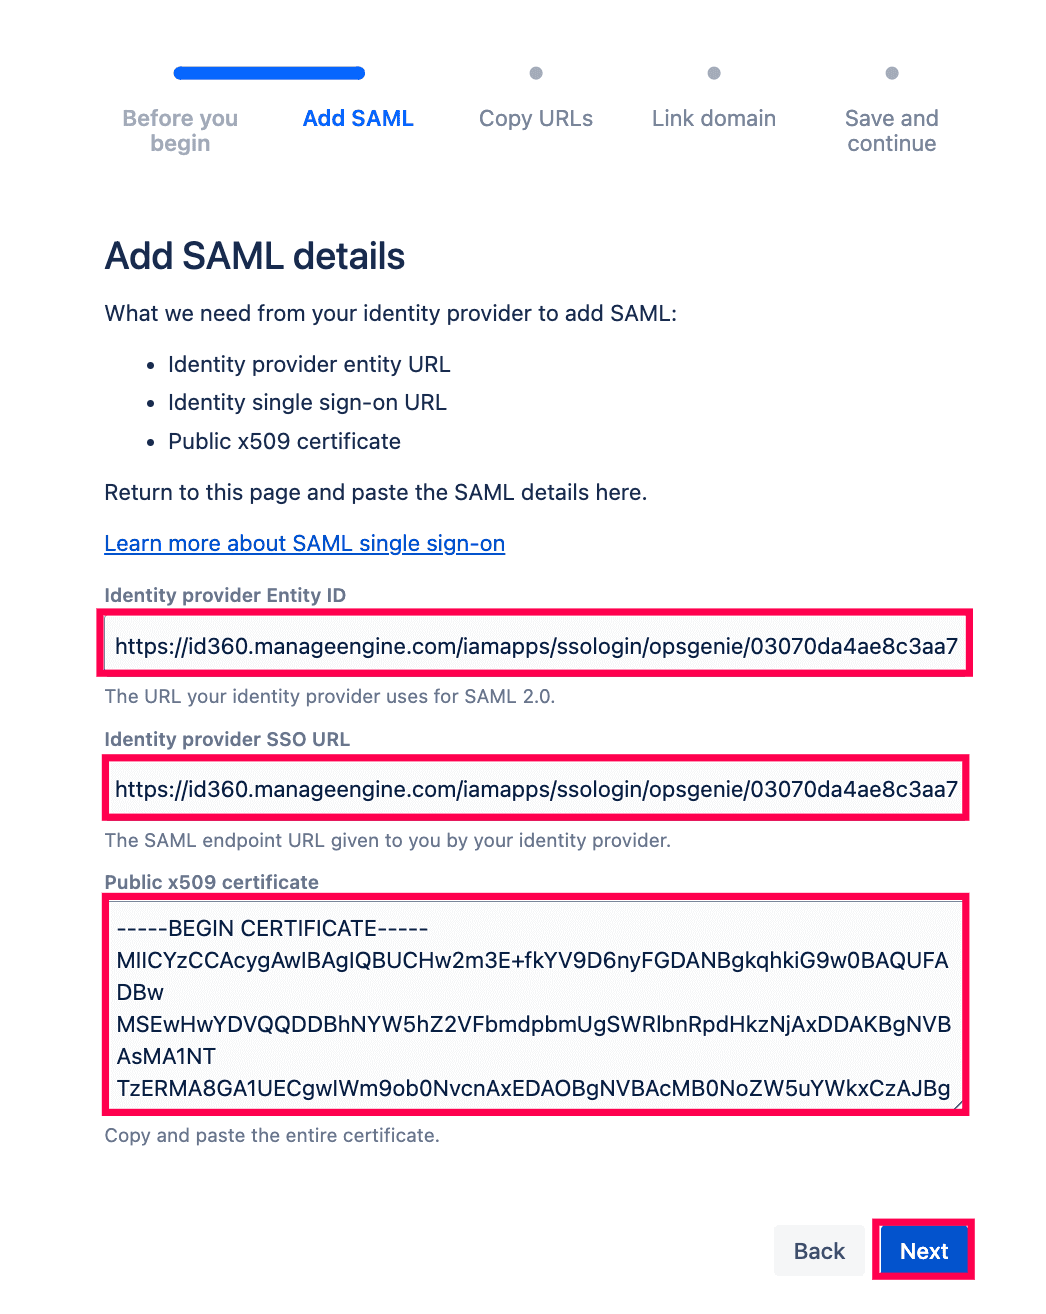 Configuration of SAML SSO from Atlassian Cloud.
- Copy the Unique ID from the Service provider entity URL field.
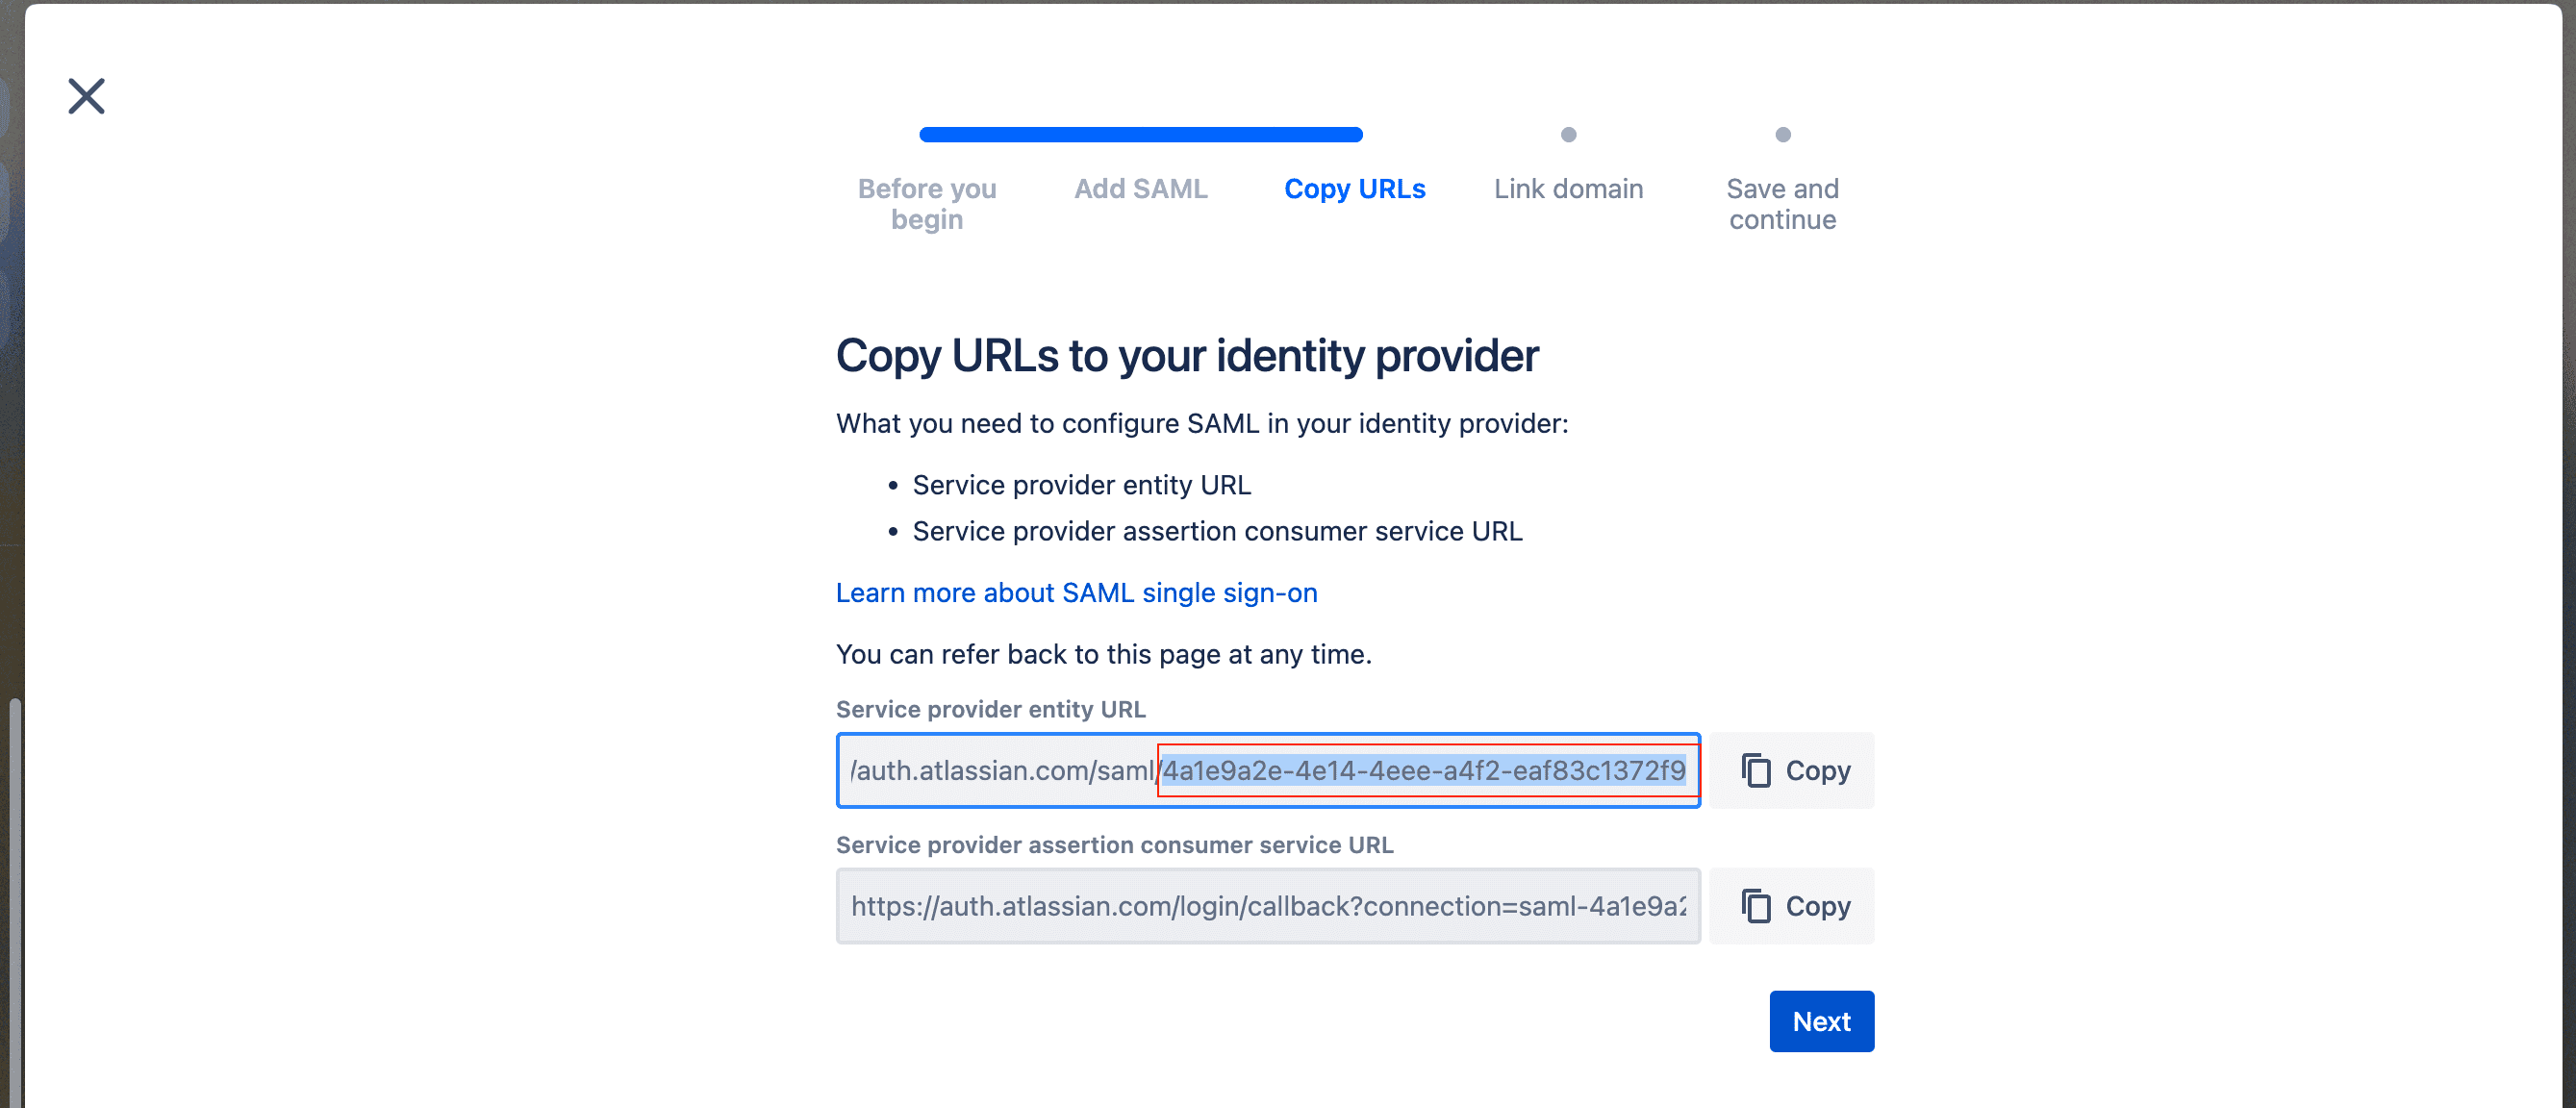 SP configuration details.
- In the Link a domain to your identity provider directory section, select your preferred domain from the Link domain drop-down and click Next.
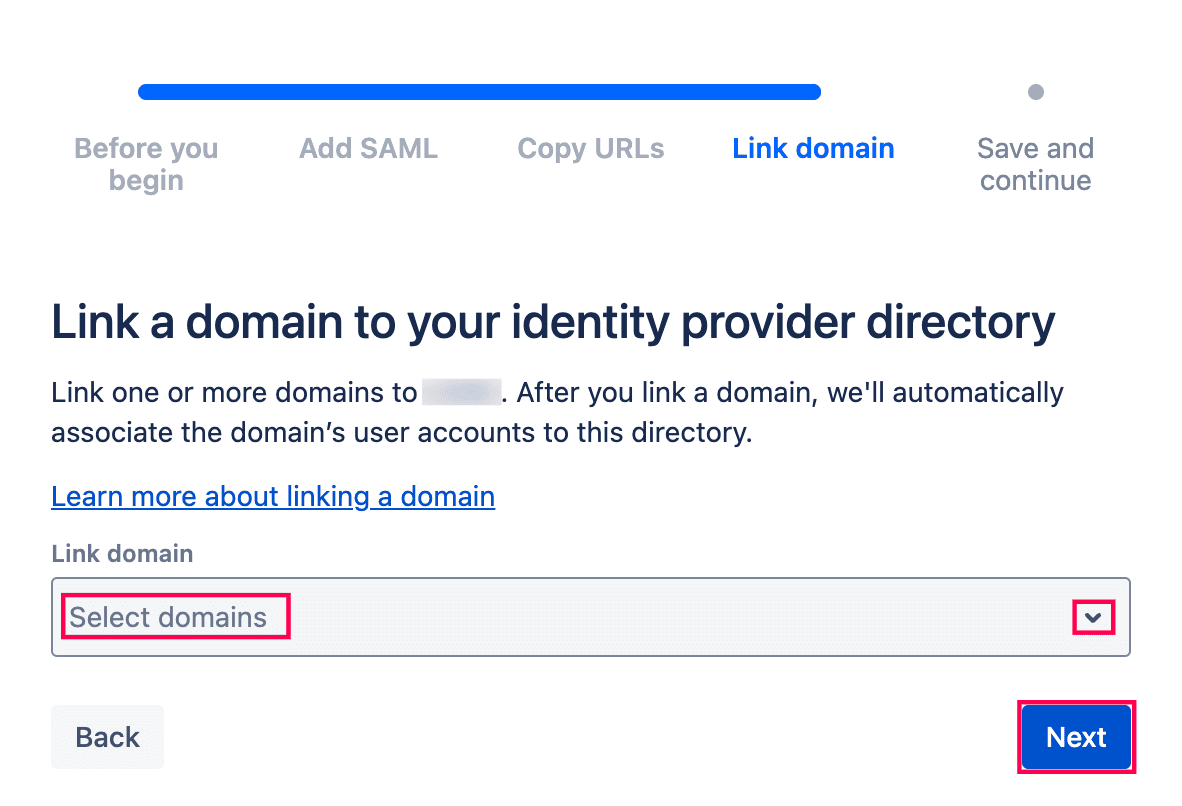 Linking a domain to the IdP directory.
- Click Stop and save SAML if you want to finish the SSO setup.
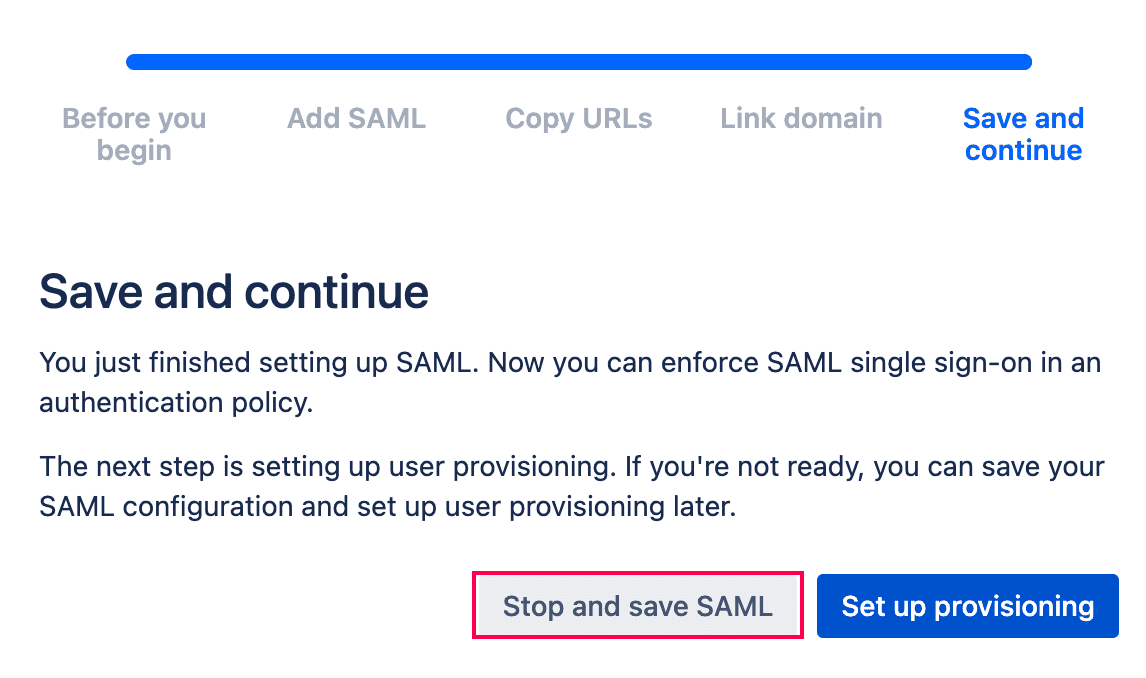 Saving and completing SAML configuration.
Identity360 (identity provider) configuration steps
- Switch to Identity360's application configuration page.
- In the Company ID field, enter the Unique Id value copied during step 10 of Atlassian Cloud configuration.
- Enter the Relay State parameter, if necessary.
Note: Relay State is an optional parameter used with a SAML message to remember where you were or to direct you to a specific page after logging in.
- Click Save.
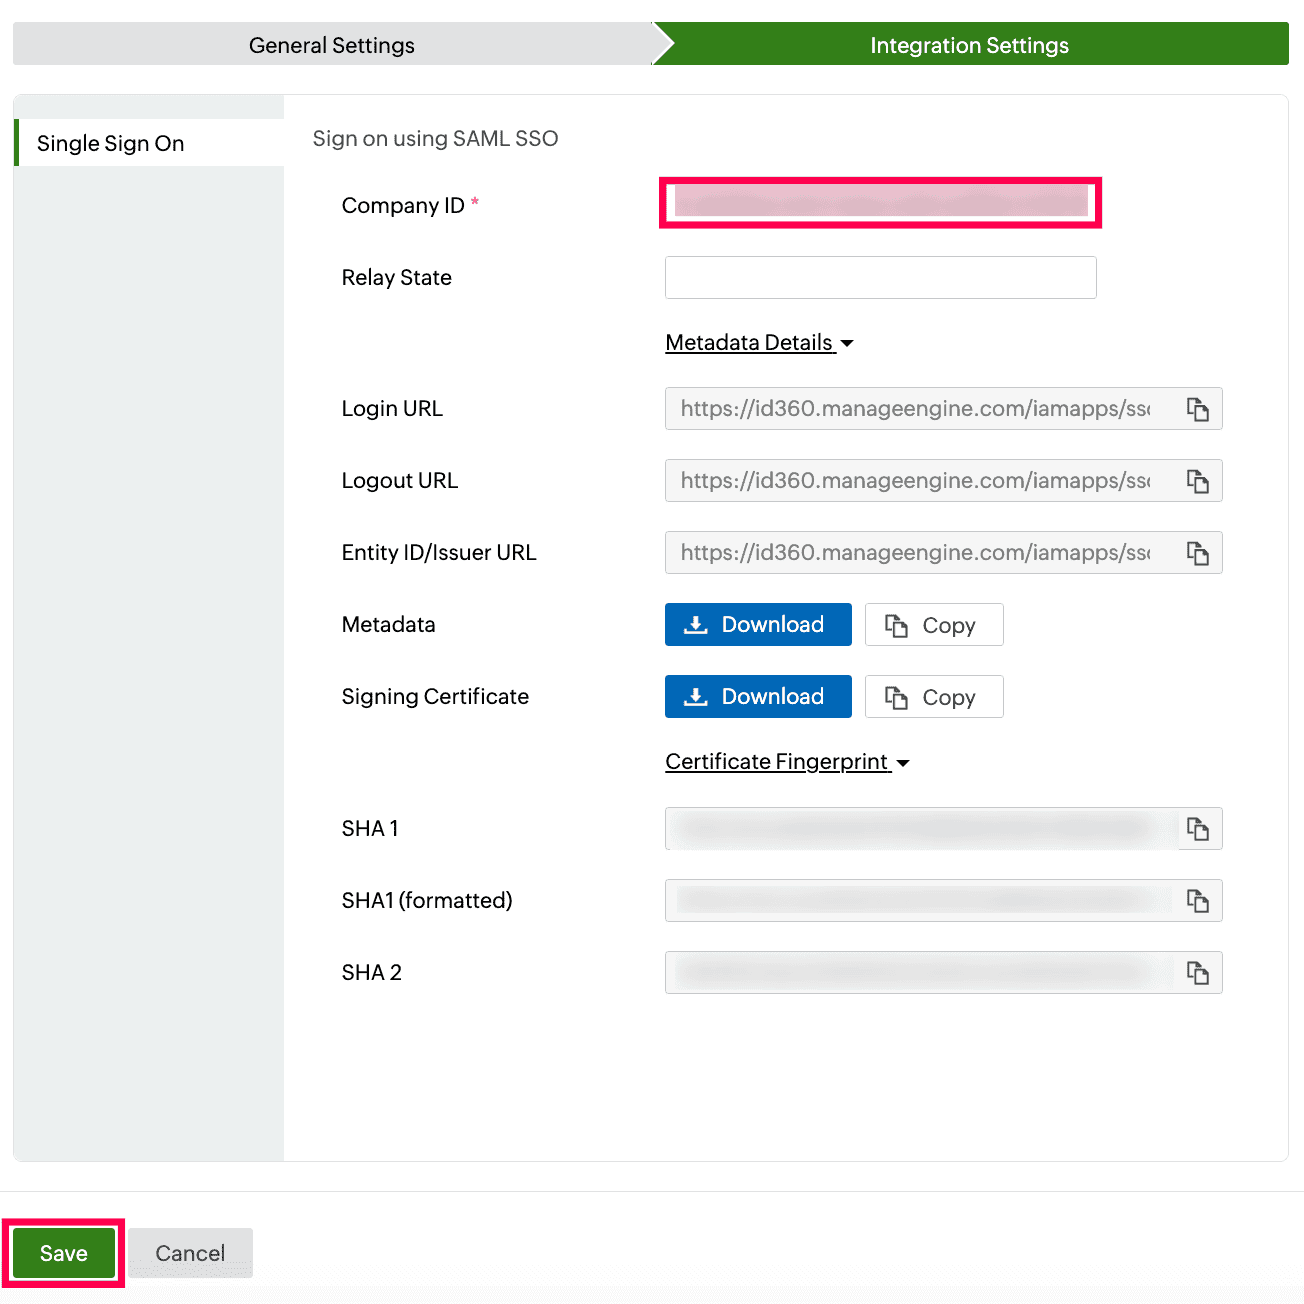 Integration Settings of SSO configuration for Opsgenie.
- To learn how to assign users or groups to one or more applications, refer to this page.
Your users will now be able to sign in to Opsgenie through the Identity360 portal.
Note: For Opsgenie, both SP-initiated and IdP-initiated flows are supported.
Steps to enable MFA for Opsgenie
Setting up MFA for Opsgenie using Identity360 involves the following steps:
- Set up one or more authenticators for identity verification when users attempt to log in to Opsgenie. Identity360 supports various authenticators, including Google Authenticator, Zoho OneAuth, and email-based verification codes. Click here for steps to set up the different authenticators.
- Integrate Opsgenie with Identity360 by configuring SSO using the steps listed here.
- Now, activate MFA for Opsgenie by following the steps mentioned here.
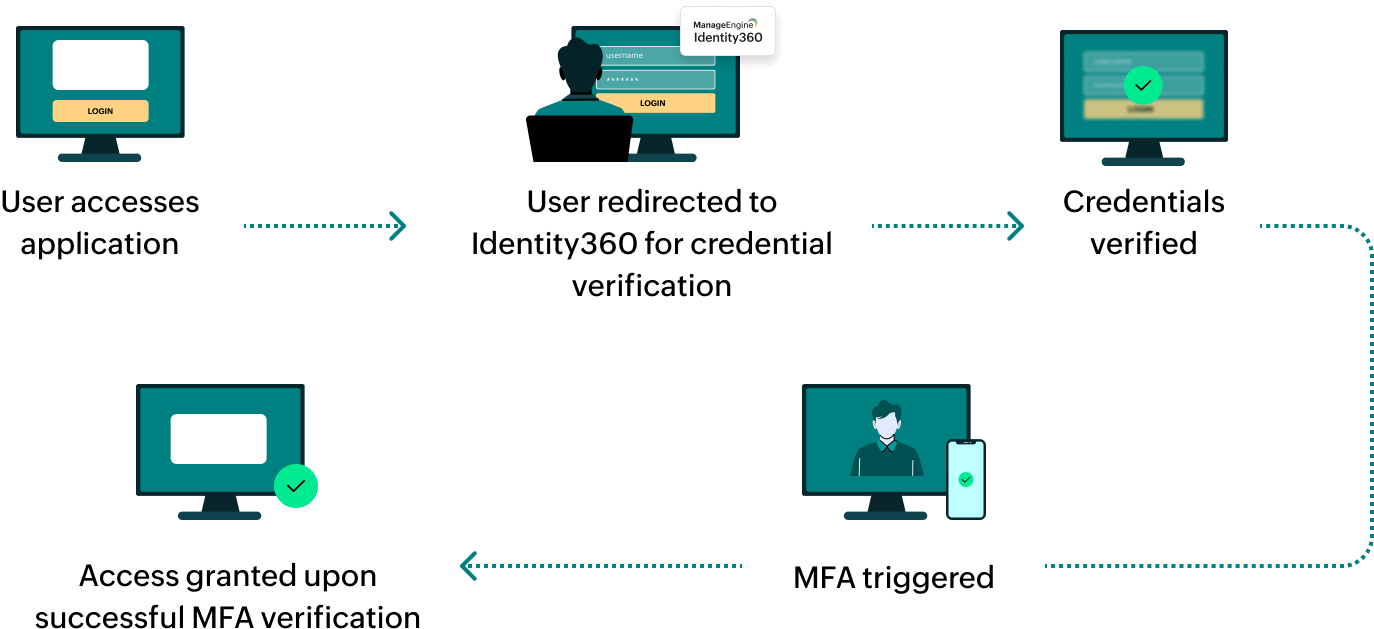
How does MFA for applications work in Identity360?
 General Settings of SSO configuration for Opsgenie.
 Integration Settings of SSO configuration for Opsgenie.
 Portal view of Opsgenie.
 Security settings of Atlassian Cloud.
 Identity provider settings of Atlassian Cloud.
 Configuration of an identity provider in Atlassian Cloud.
 Selection of the SSO capability from Atlassian Cloud.
 Configuration of SAML SSO from Atlassian Cloud.
 SP configuration details.
 Linking a domain to the IdP directory.
 Saving and completing SAML configuration.
 Integration Settings of SSO configuration for Opsgenie.