Steps to configure SAML SSO for ServiceNow
About ServiceNow
ServiceNow is a cloud-based platform that provides digital workflows for enterprise operations. It helps organizations streamline and automate business processes across various departments, including IT, HR, customer service, and security.
The following steps will help you enable single sign-on (SSO) for ServiceNow from Identity360.
Prerequisites
- The MFA and SSO license for Identity360 is required to enable SSO for enterprise applications.
- Log in to Identity360 as an Admin or Super Admin.
- Navigate to Applications > Application Integration > Create New Application, and select ServiceNow from the applications displayed.
Note: You can also find ServiceNow from the search bar located at the top.
- Under the General Settings tab, enter the Application Name and Description.
- Under the Choose Capabilities tab, choose SSO and click Continue.
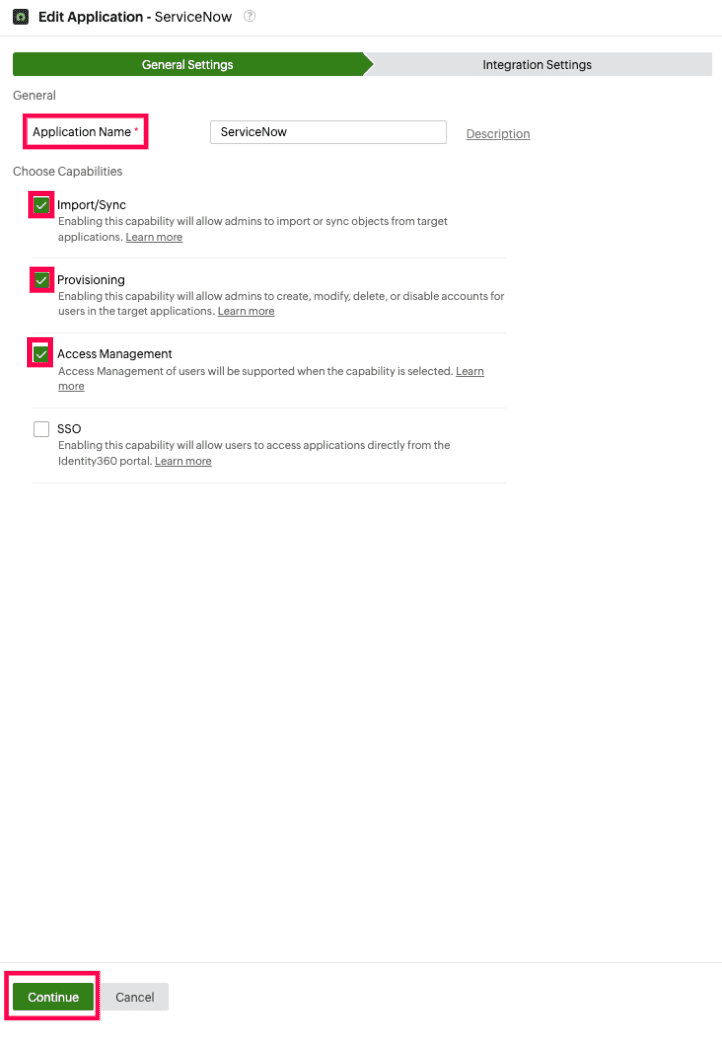 General Settings of SSO configuration for ServiceNow.
- Under Integration Settings, navigate to the Single Sign On tab and click Metadata Details. Copy the metadata file to be pasted during the configuration of ServiceNow in Identity360 by clicking Copy from the Metadata field.
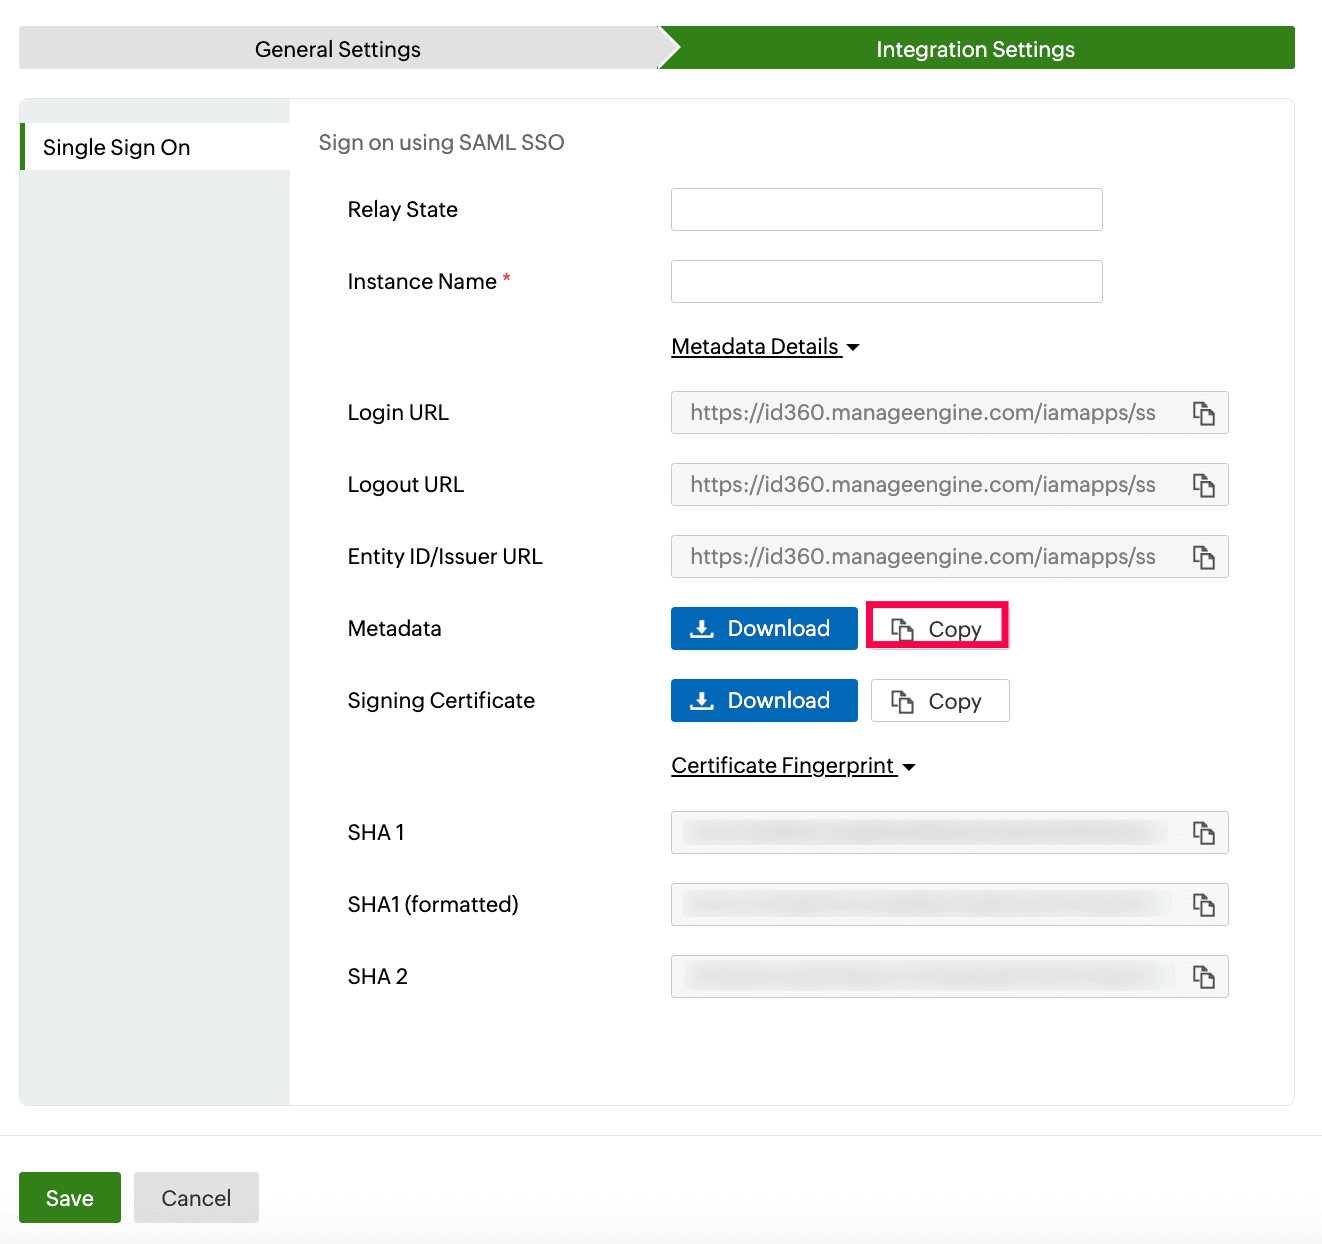 Integration Settings of SSO configuration for ServiceNow.
ServiceNow (service provider) configuration steps
- Log in to ServiceNow with admin privileges.
- In the top pane, click All and search for the System Definition section from the search box, and then select Plugins.
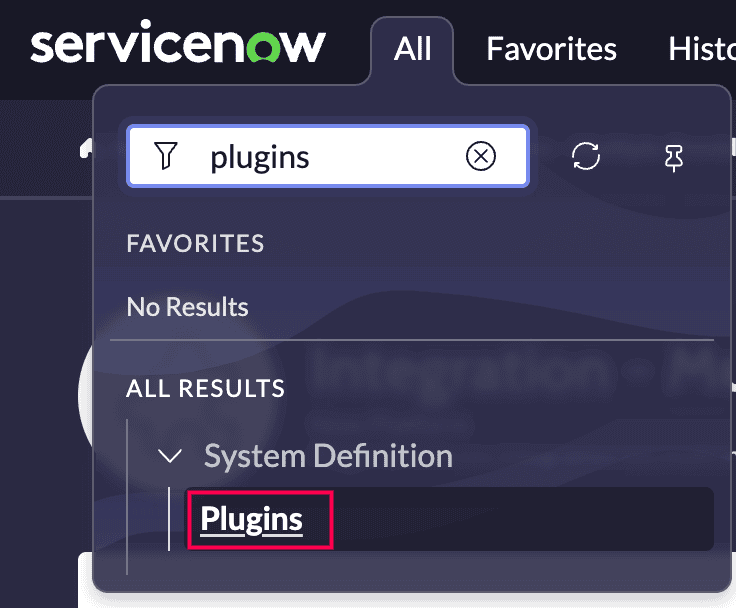 ServiceNow plugins selection.
- Search for Integration - Multiple Provider Single Sign-On Installer, then Install and activate it.
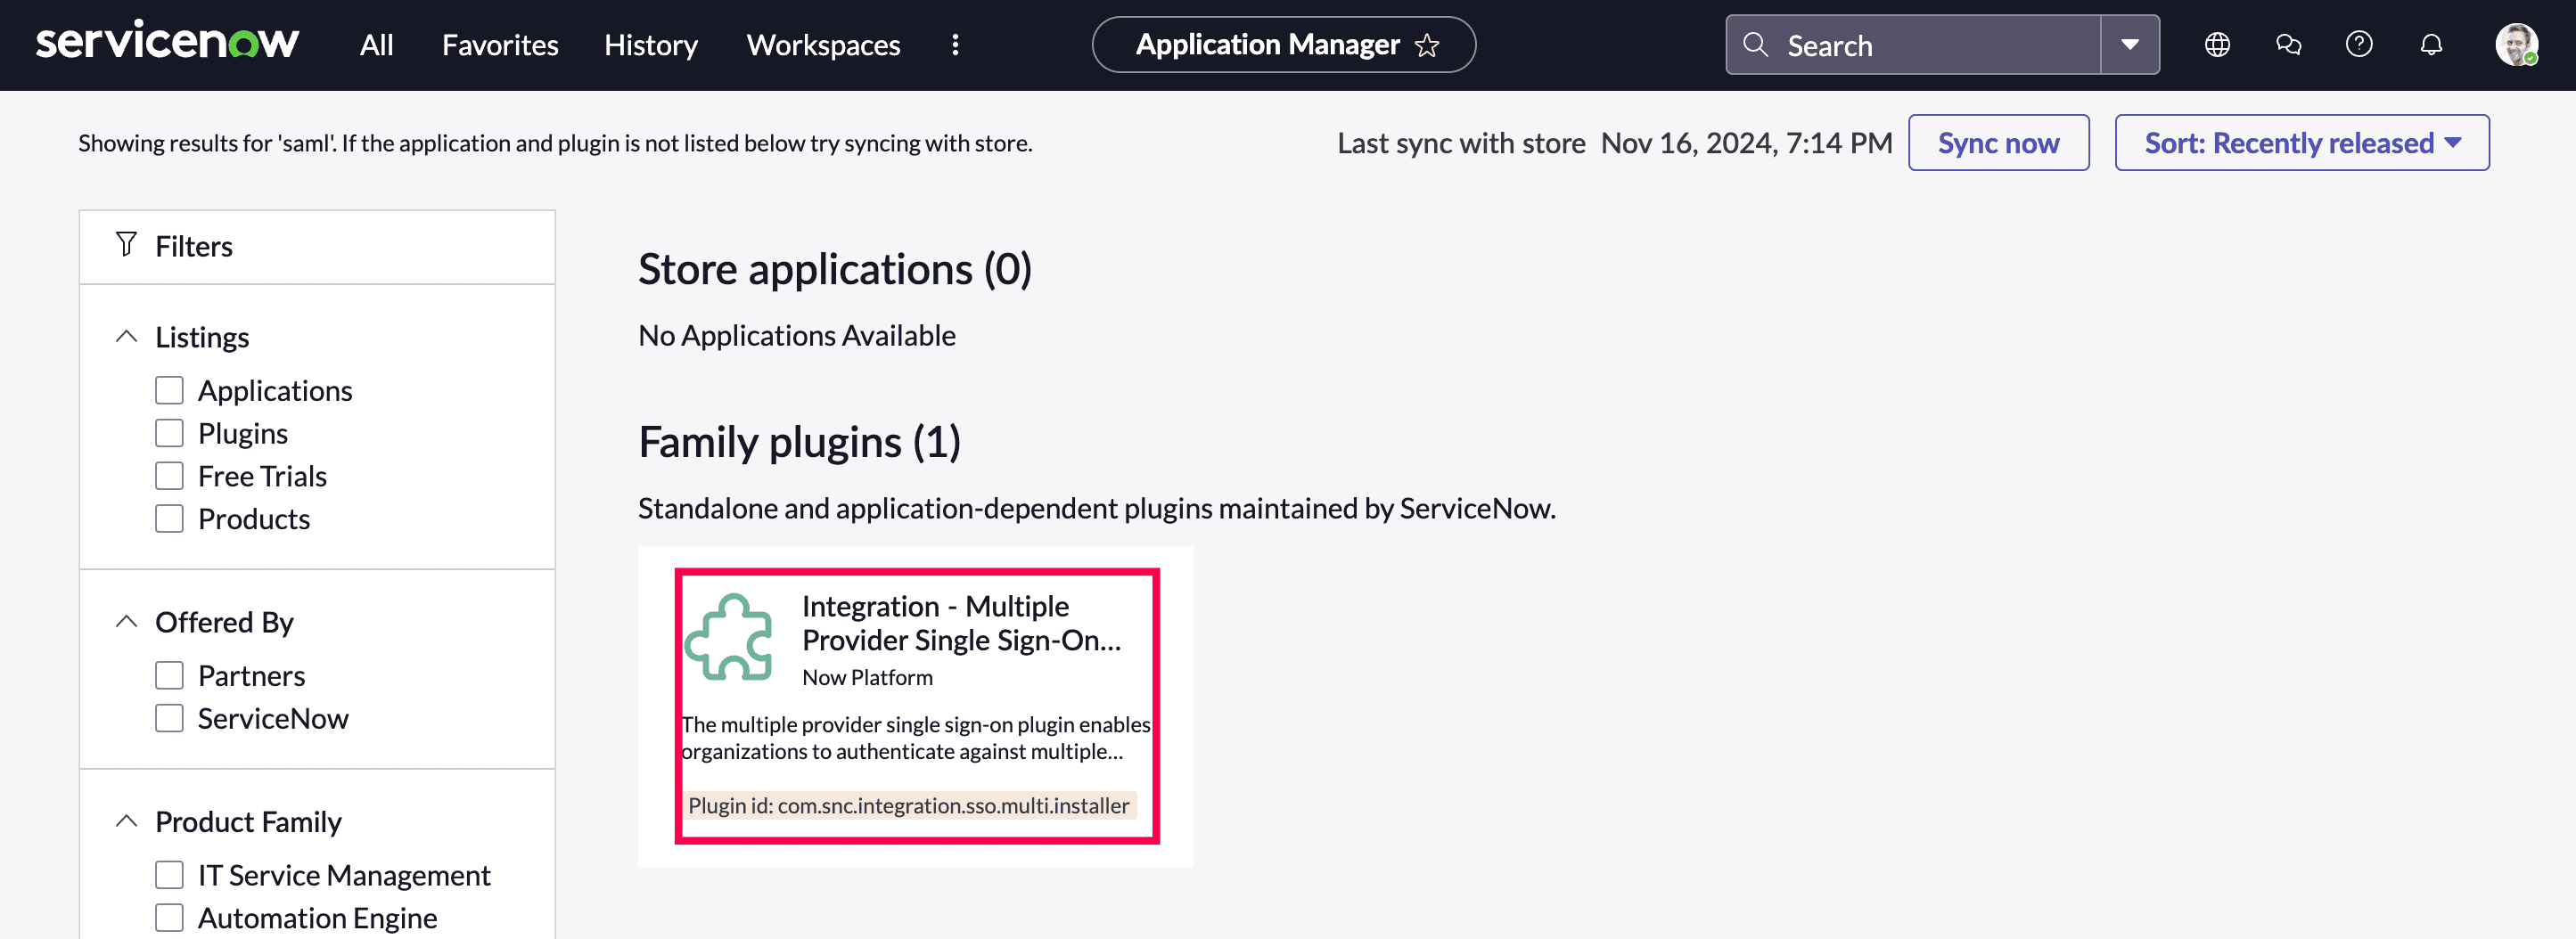 ServiceNow Multiple Provider Single Sign-On Installer installation.
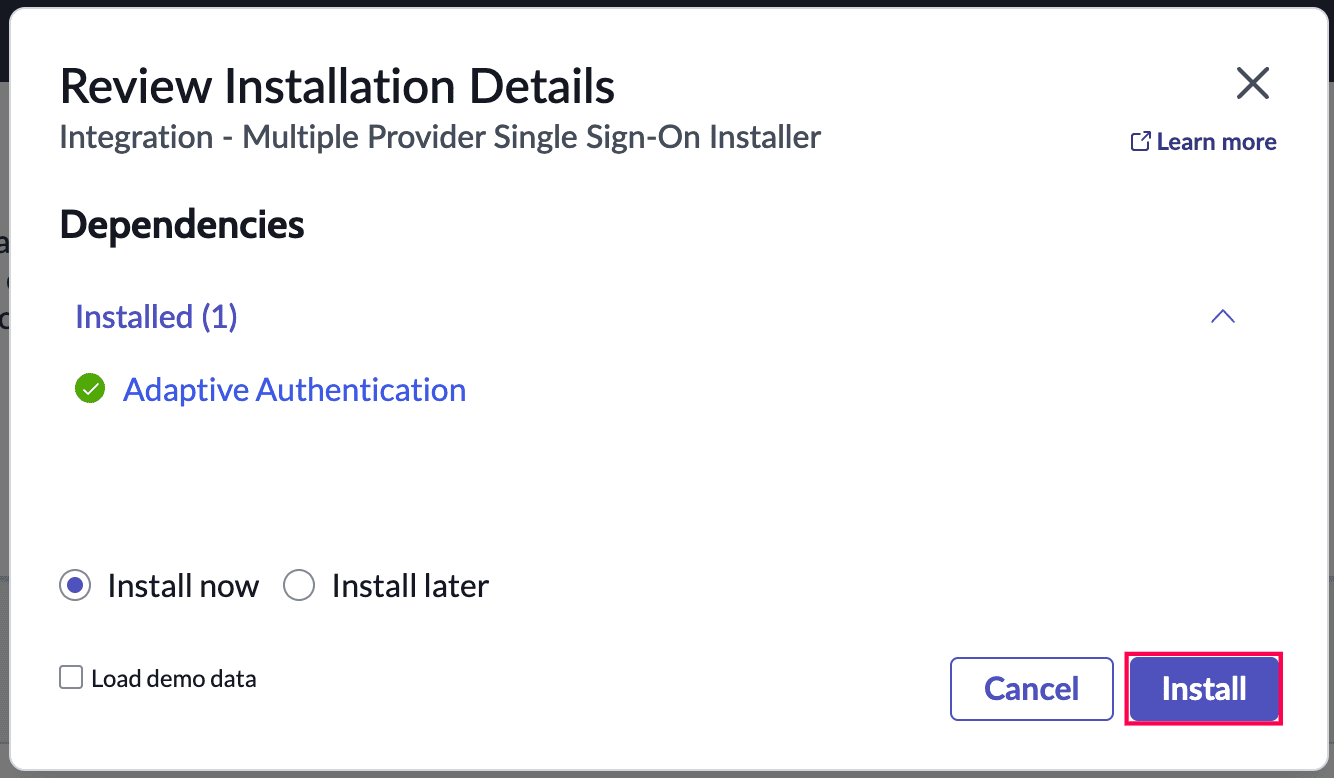 ServiceNow SSO installation review.
- In the left pane, search for the Multi-Provider SSO section from the search bar, and then select Properties from the Administration section.
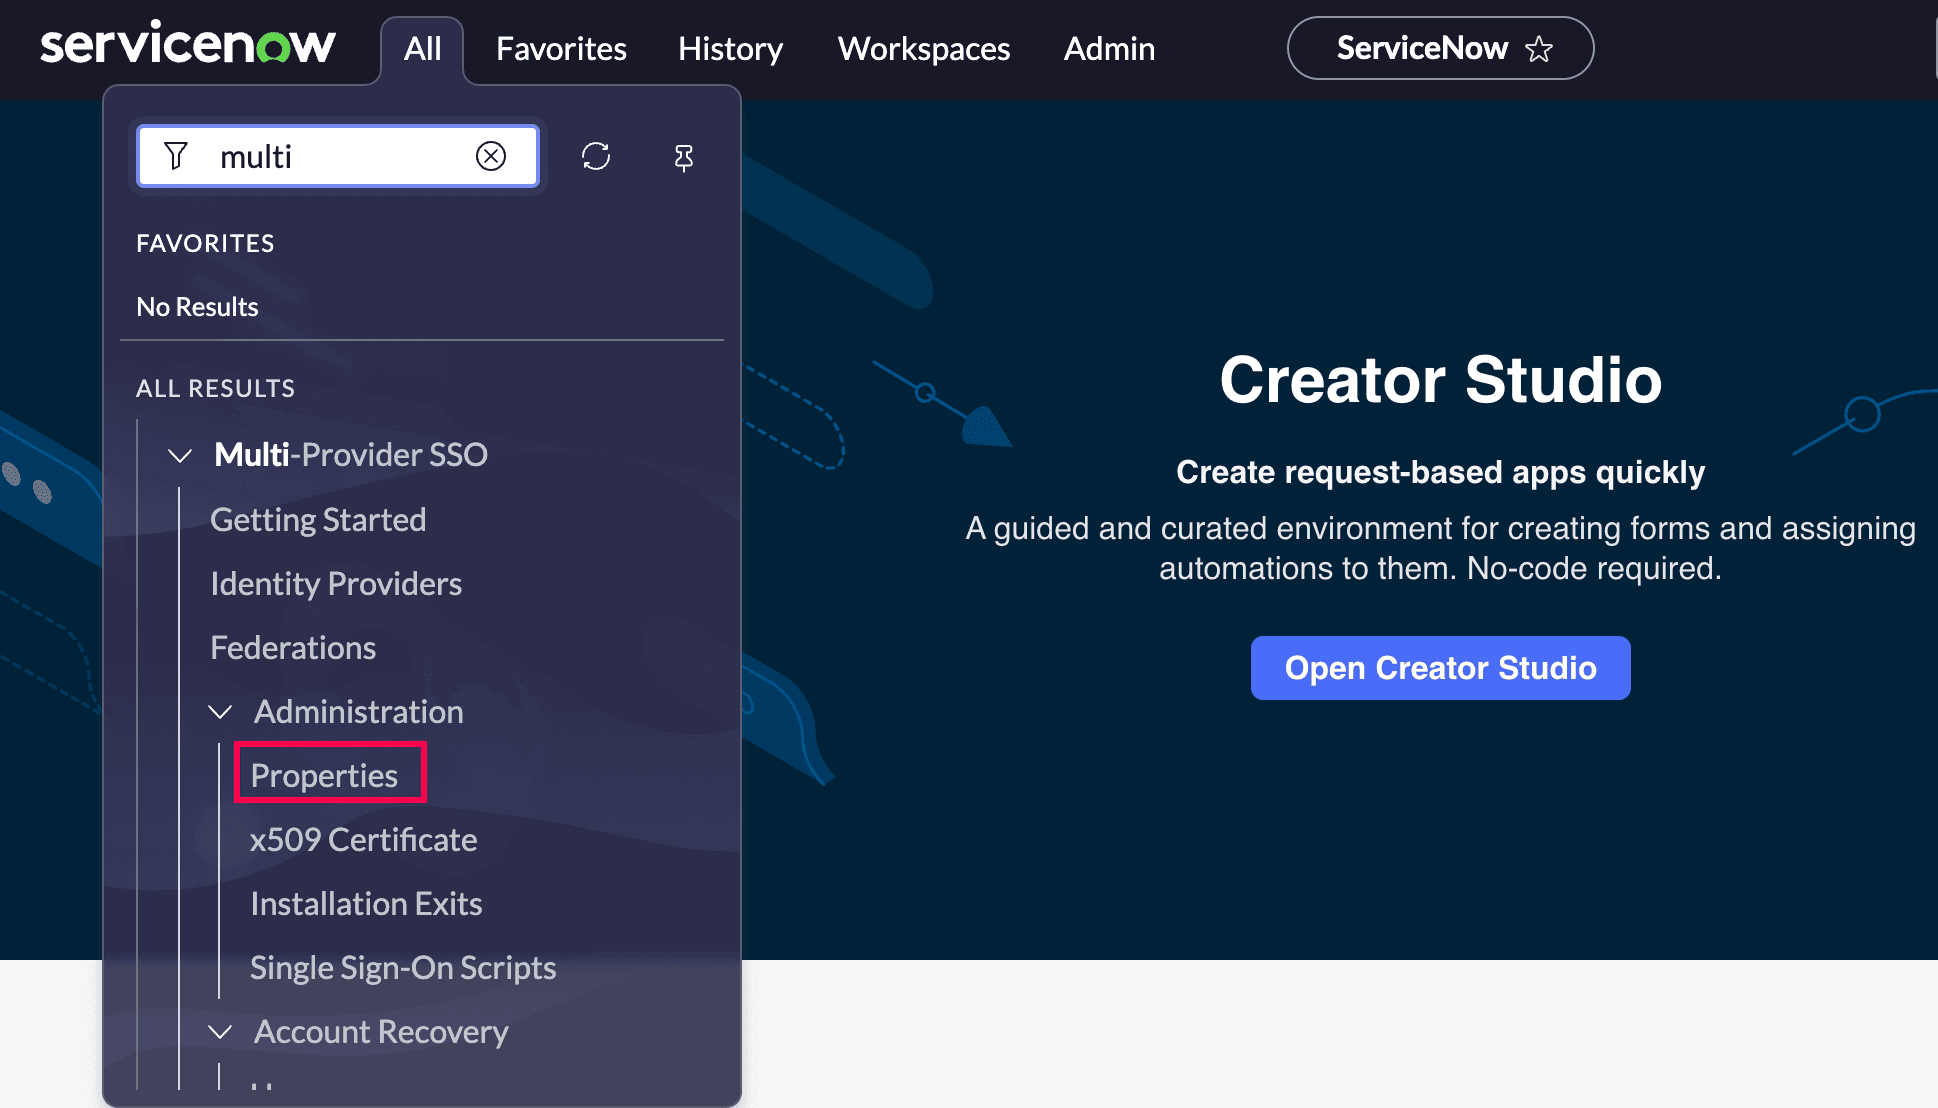 Portal view of ServiceNow.
- In the Multiple Provider SSO Properties dialog box, perform the following steps:
- Check Enable multiple provider SSO.
- Check Enable Auto Importing of users from all identity providers into the user table.
- Check Enable debug logging for the multiple provider SSO integration.
- Under The field on the user table that..., enter email.
- Select Save.
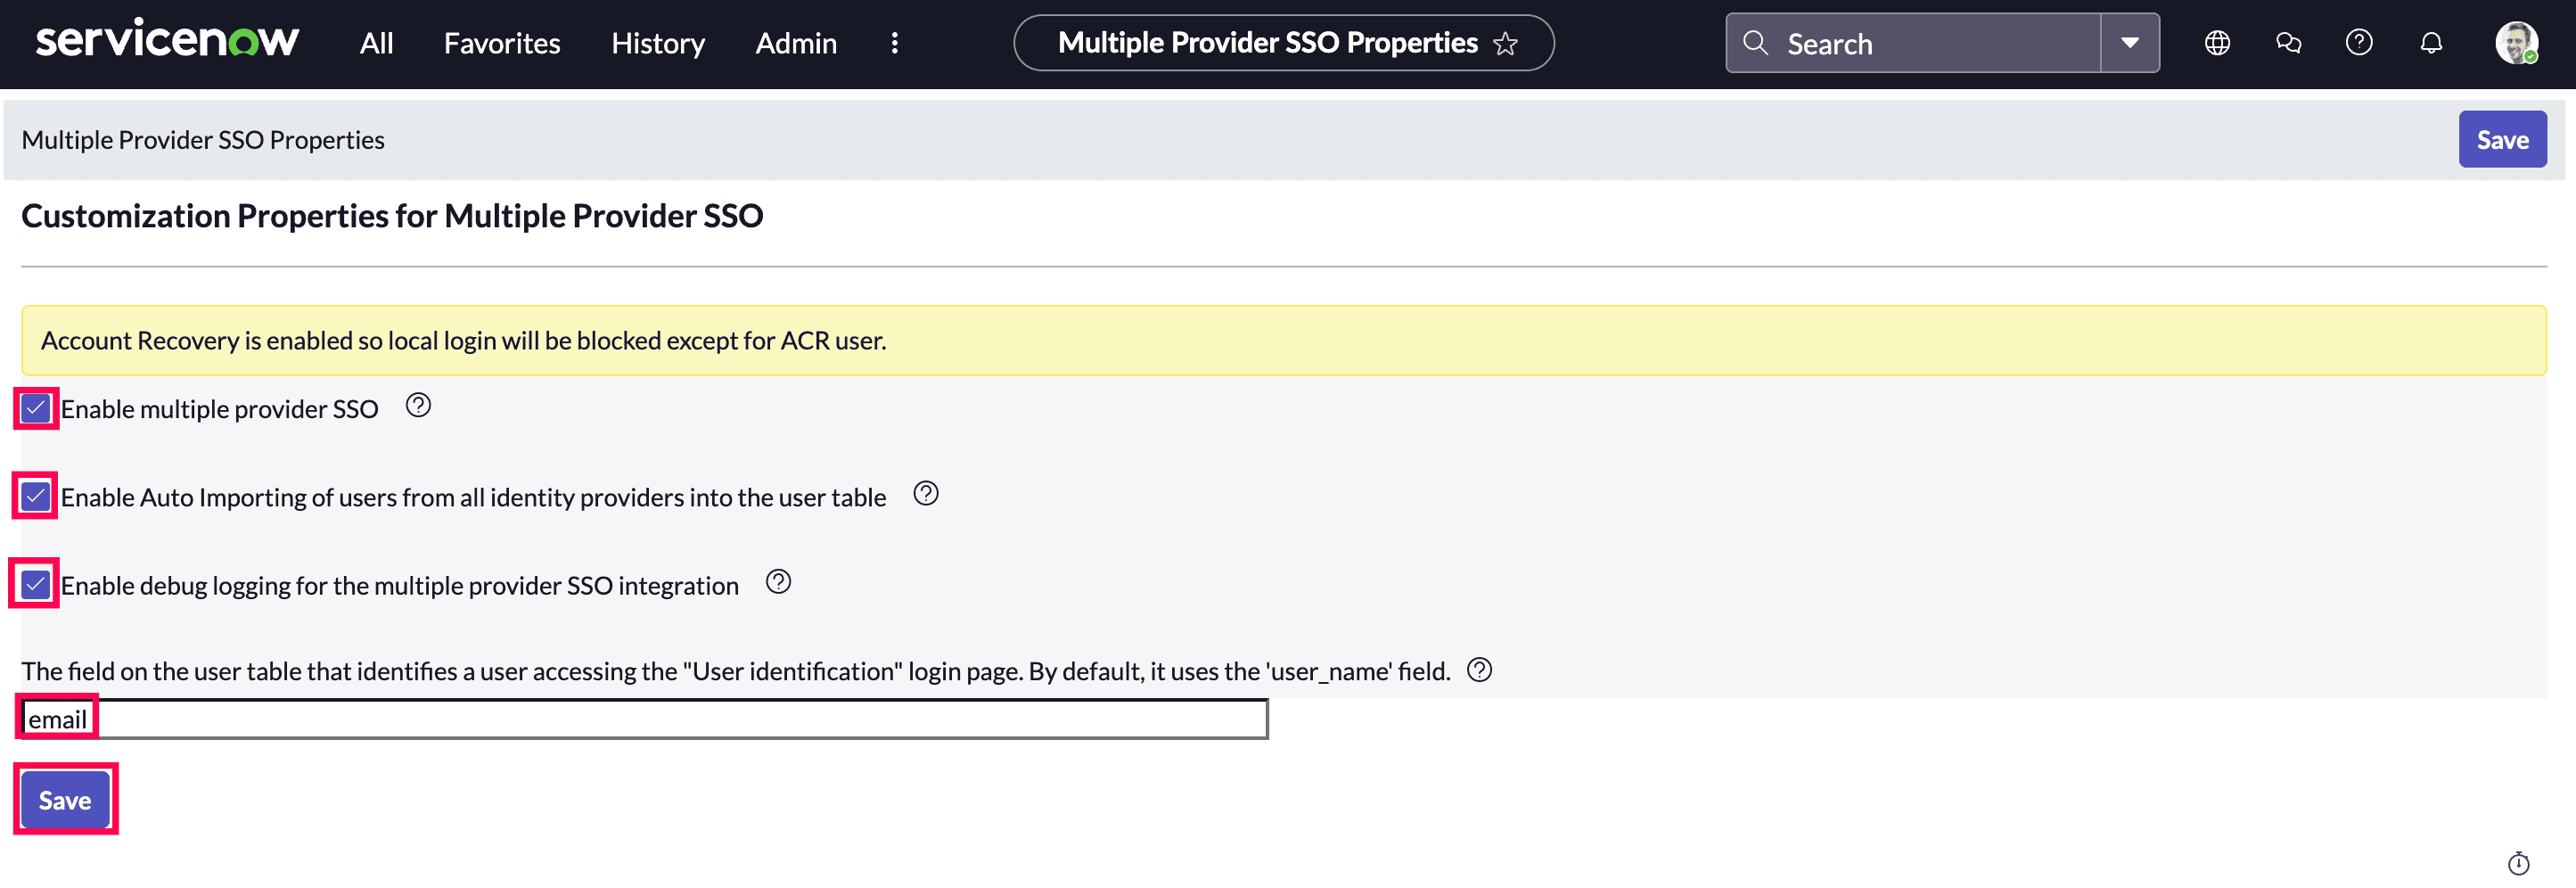 Customization of properties for ServiceNow SSO.
- In the top pane, click All, and search for Identity Providers.
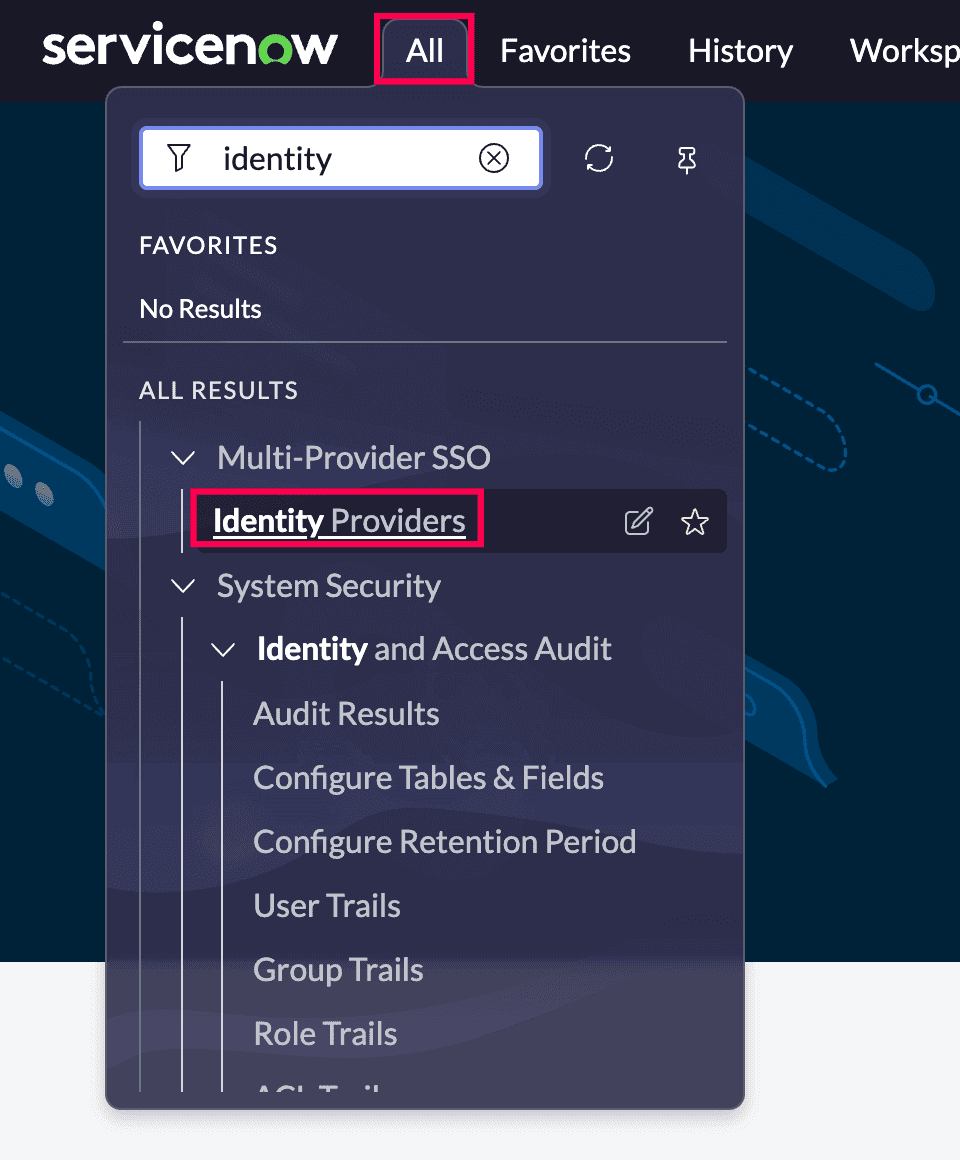 ServiceNow identity providers selection.
- In the Identity Providers dialog box, select New.
 New addition of an identity provider in ServiceNow.
- In the What kind of SSO are you trying to create? section, select SAML.
 Creation of SAML SSO in ServiceNow.
- Under Import Identity Provider Metadata, choose the XML radio button > paste the Metadata that you copied > click Import.
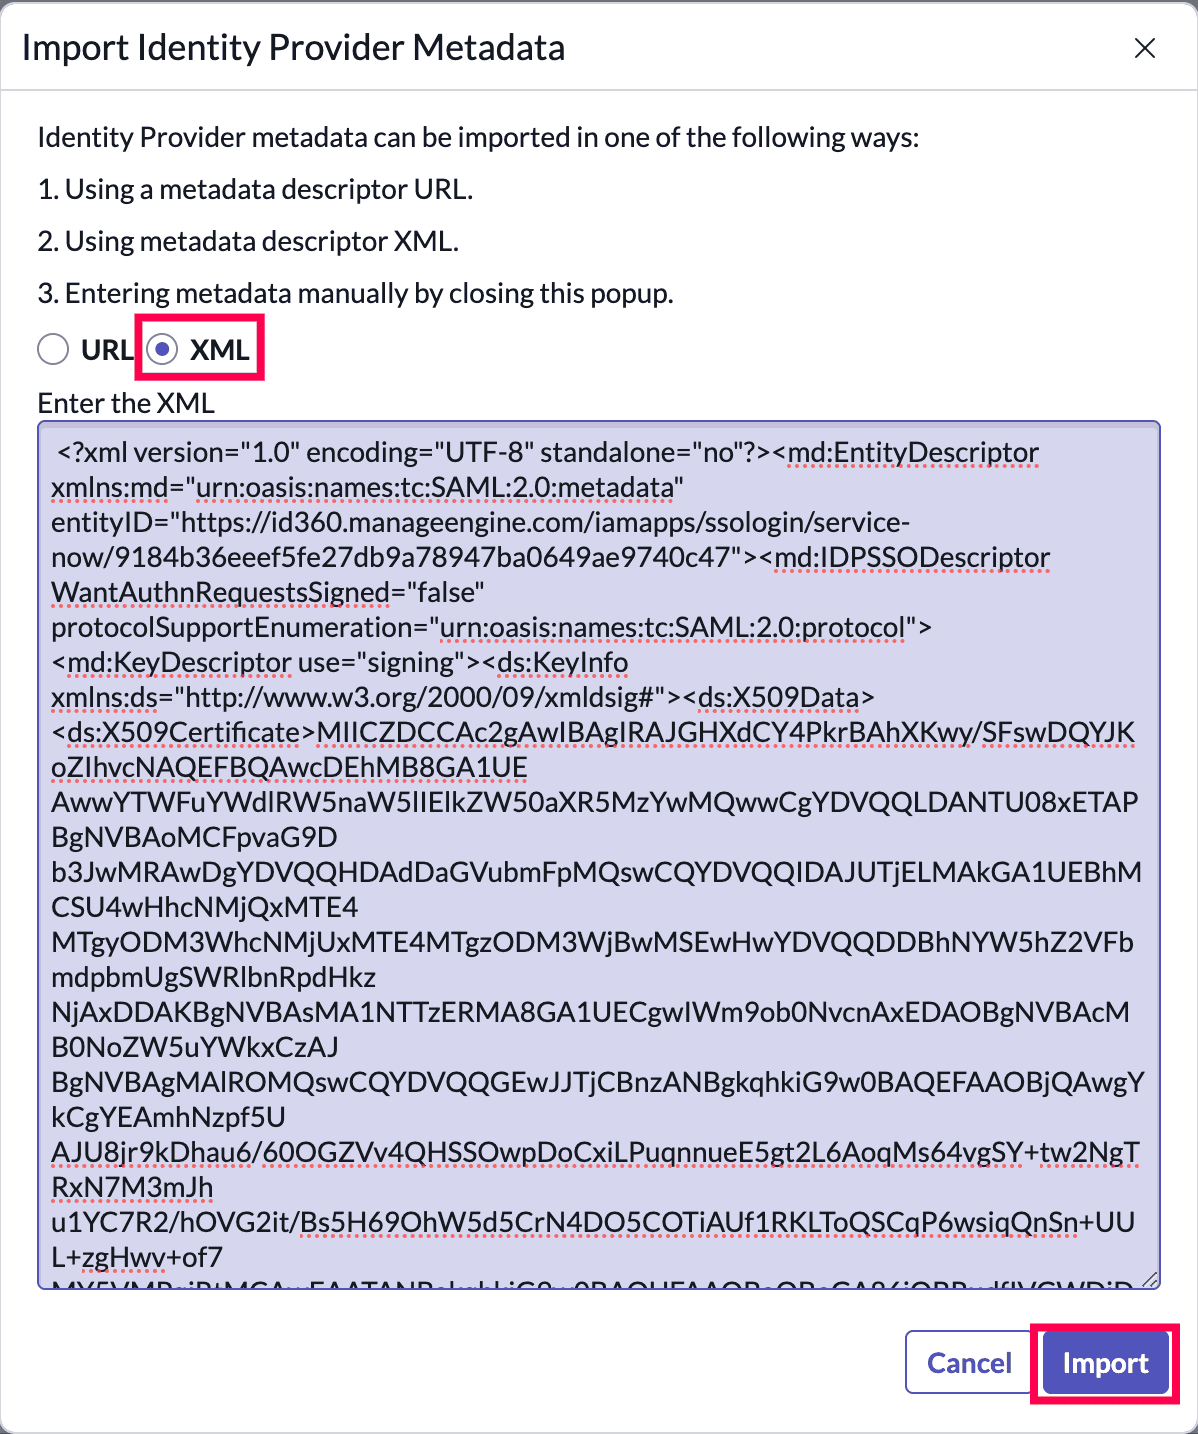 Import identity provider metadata in ServiceNow.
- It will read the identity provider metadata information and populate all the field information.
- For Name, enter a name for your configuration.
- Confirm that NameID Policy is set to urn:oasis:names:tc:SAML:1.1:nameid-format:emailAddress value.
- Click Update.
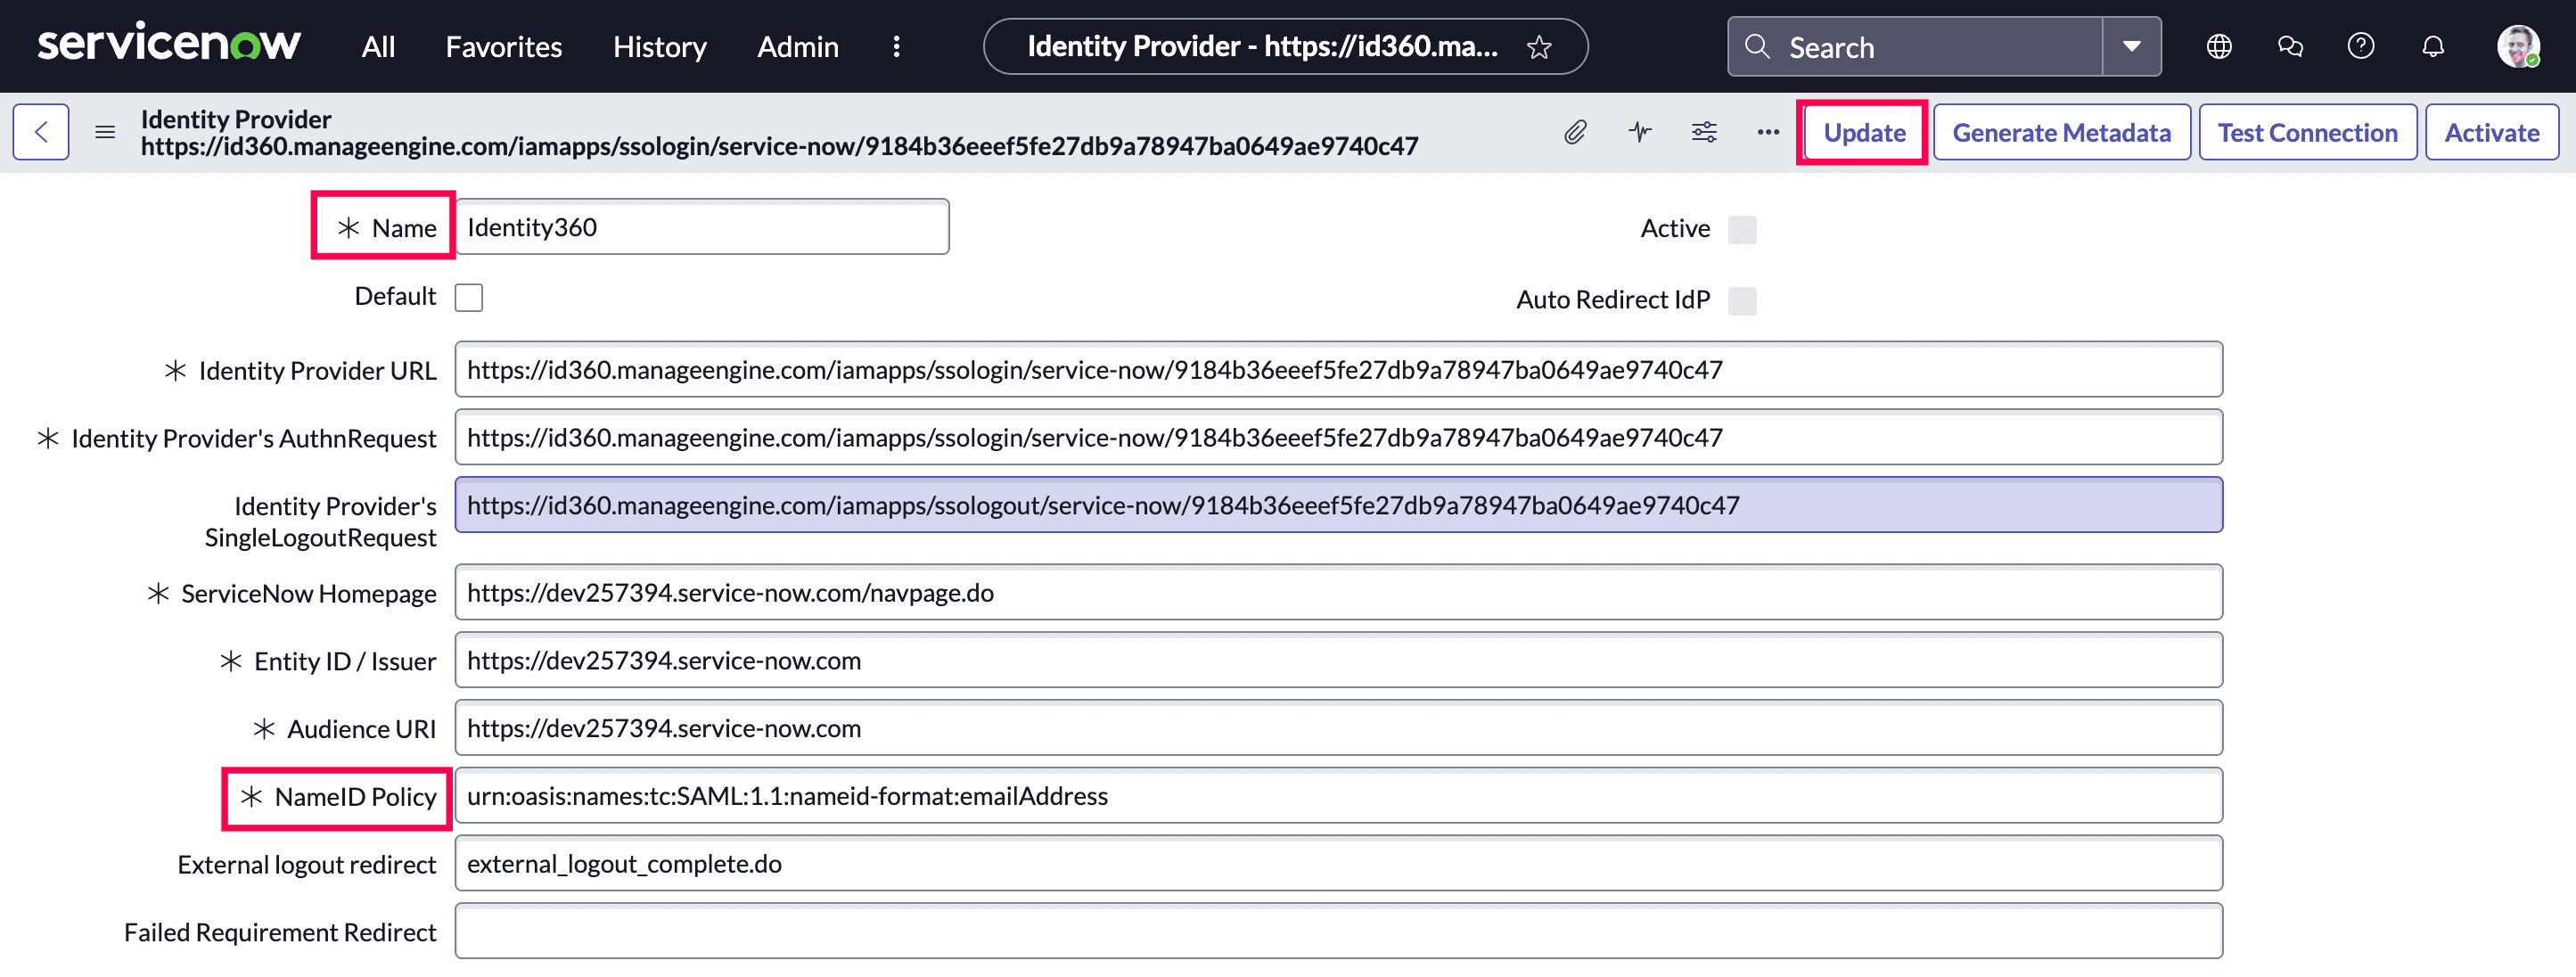 Import identity provider metadata in ServiceNow.
- Select Advanced. In User Field, enter email.
 Import identity provider metadata in ServiceNow.
- Select Test Connection at the top-right.
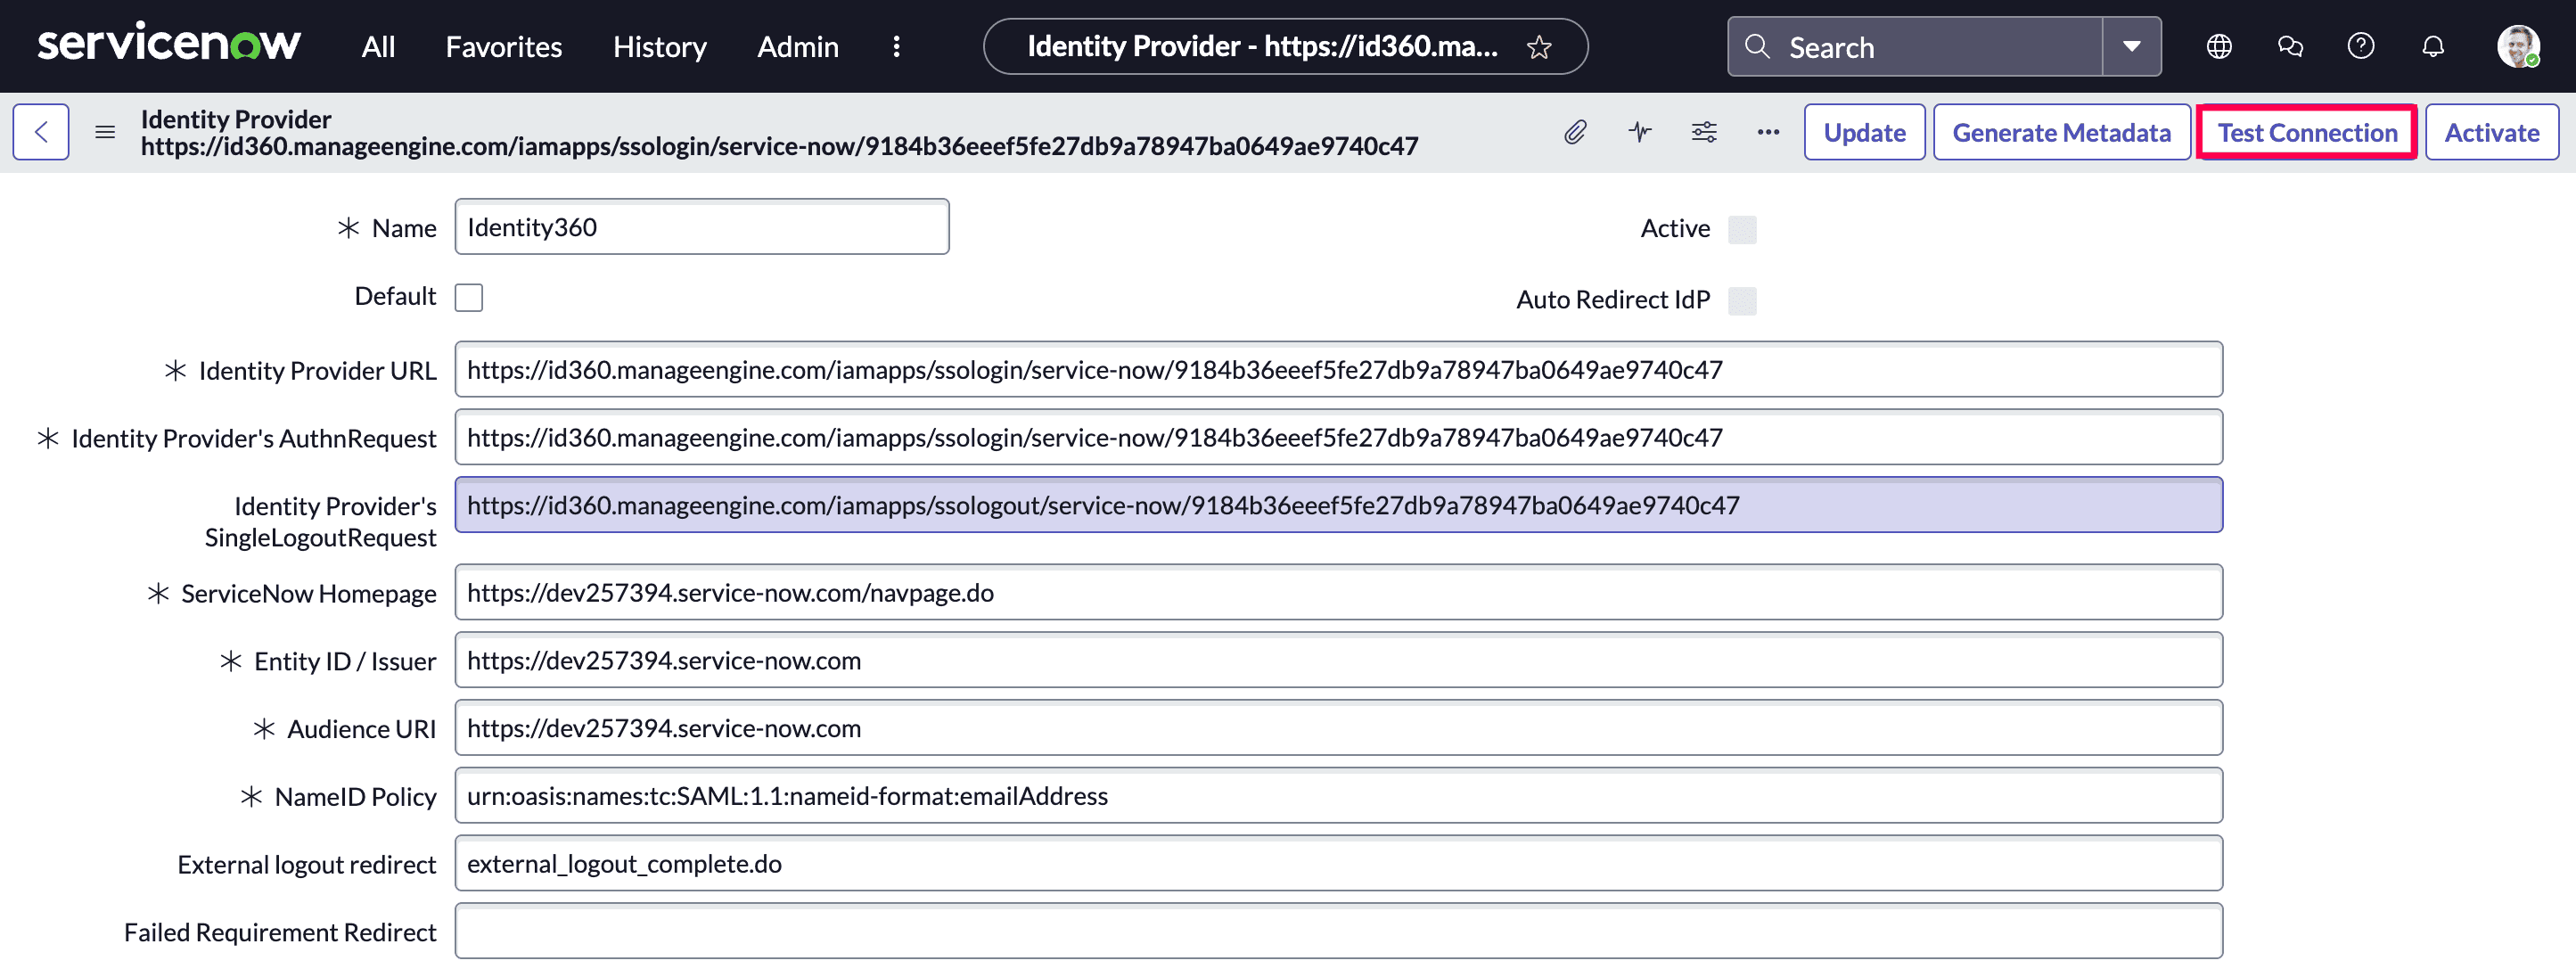 Import identity provider metadata in ServiceNow.
- You will be redirected to the Identity360 login page for authentication. Once authentication is completed, close the window and click Activate.
Identity360 (identity provider) configuration steps
- Switch to Identity360's application configuration page.
- Enter the Relay State parameter, if necessary.
Note: Relay State is an optional parameter used with a SAML message to remember where you were or to direct you to a specific page after logging in.
- Enter the Instance Name of your ServiceNow account.
Note: You can obtain your ServiceNow Instance Name by logging in to ServiceNow > Manage > Instance > copy the Instance Name.
- Click Save.
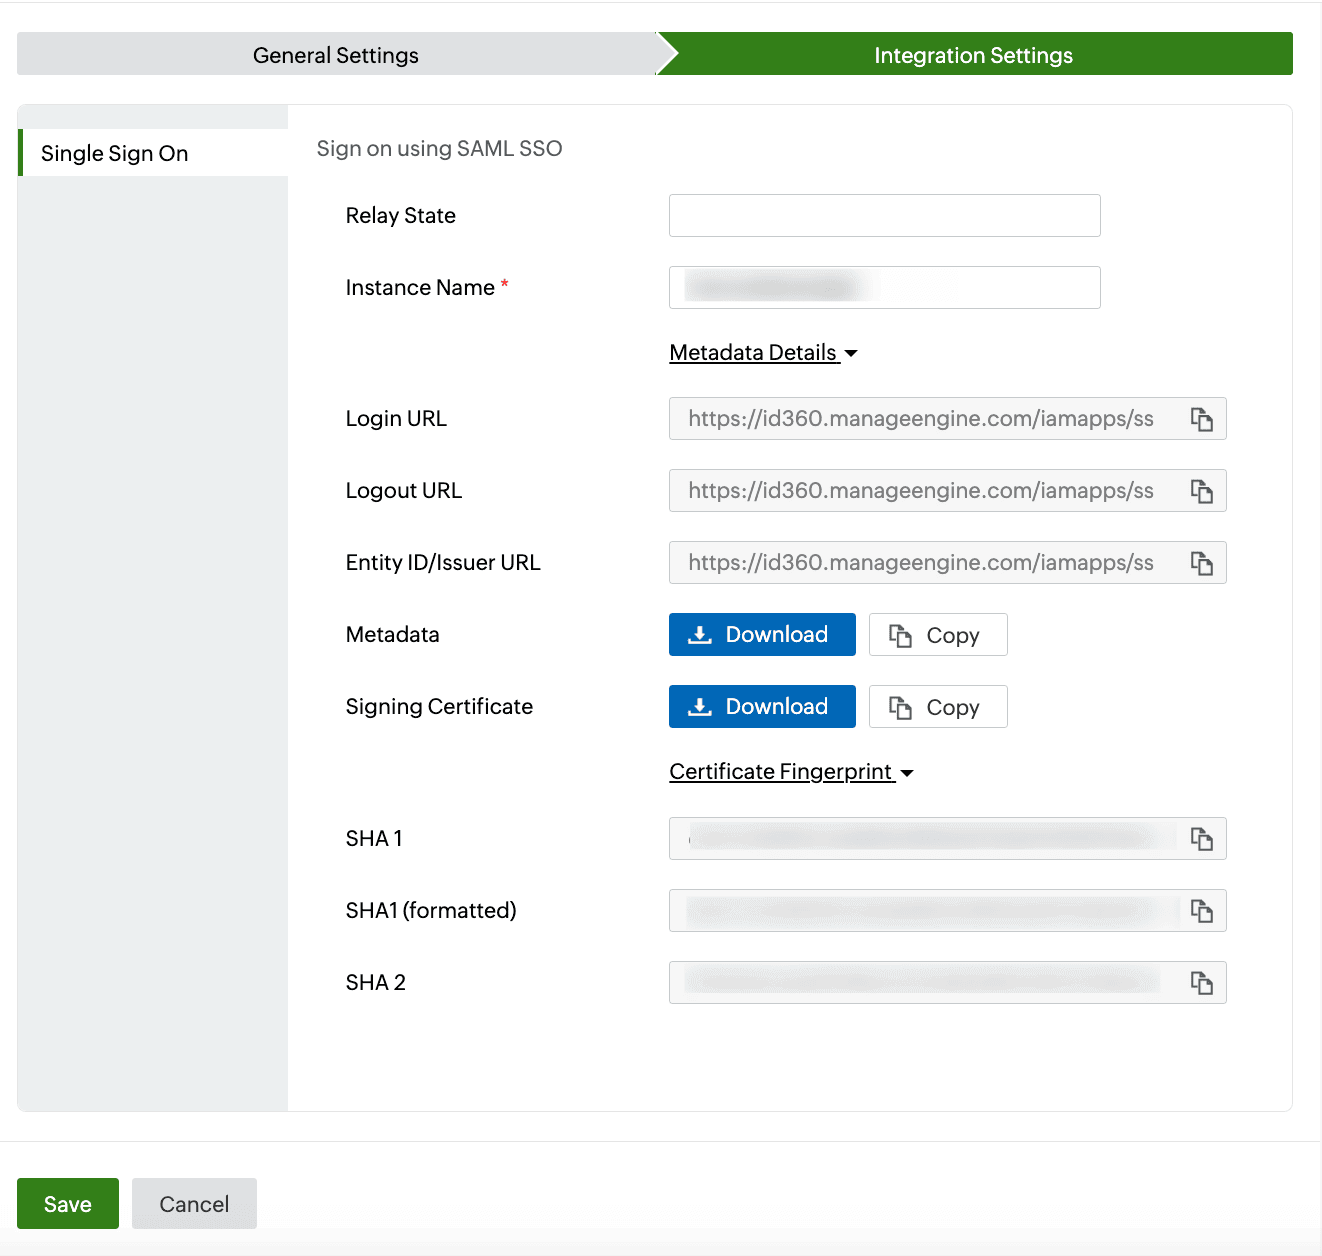 Integration Settings of SSO configuration for ServiceNow.
- To learn how to assign users or groups to one or more applications, refer to this page.
Your users will now be able to sign in to ServiceNow through the Identity360 portal.
Note: For ServiceNow, both SP-initiated and IdP-initiated flows are supported.
Steps to enable MFA for ServiceNow
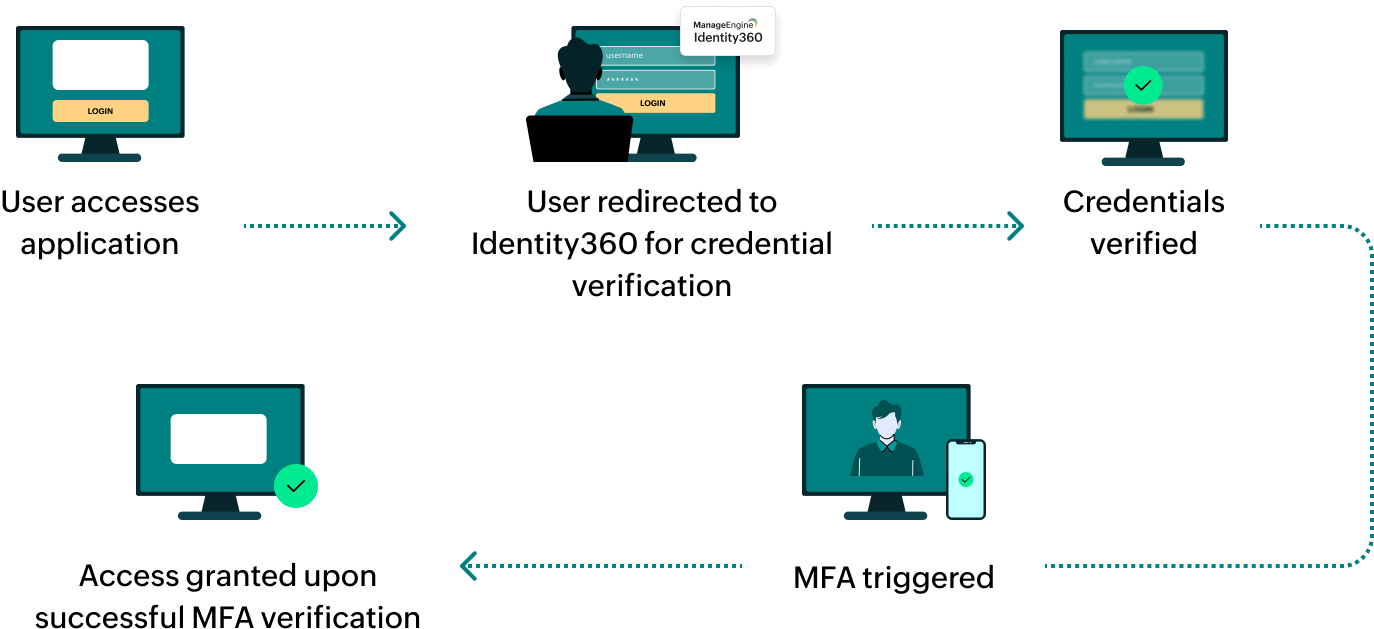
Setting up MFA for ServiceNow using Identity360 involves the following steps:
- Set up one or more authenticators for identity verification when users attempt to log in to ServiceNow. Identity360 supports various authenticators, including Google Authenticator, Zoho OneAuth, and email-based verification codes. Click here for steps to set up the different authenticators.
- Integrate ServiceNow with Identity360 by configuring SSO using the steps listed here.
- Now, activate MFA for ServiceNow by following the steps mentioned here.
How does MFA for applications work in Identity360?
 General Settings of SSO configuration for ServiceNow.
 Integration Settings of SSO configuration for ServiceNow.
 ServiceNow plugins selection.
 ServiceNow Multiple Provider Single Sign-On Installer installation.
 ServiceNow SSO installation review.
 Portal view of ServiceNow.
 Customization of properties for ServiceNow SSO.
 ServiceNow identity providers selection.
 New addition of an identity provider in ServiceNow.
 Creation of SAML SSO in ServiceNow.
 Import identity provider metadata in ServiceNow.
 Import identity provider metadata in ServiceNow.
 Import identity provider metadata in ServiceNow.
 Import identity provider metadata in ServiceNow.
 Integration Settings of SSO configuration for ServiceNow.