Creating Custom Reports
What are custom reports?
Endpoint Central MSP equips IT administrators with over 100 pre-built reports, covering everything from patch compliance and hardware inventory to application usage and security insights. While these ready-made reports address most routine needs, every organization has its own unique requirements. That’s where Custom Reports come in—offering the power to create tailor-made, detailed views of your IT environment. With flexible filters, grouping, and formula columns, you can slice data exactly the way you need. What’s more, you can transform raw numbers into compelling visual dashboards using charts like bar, pie, funnel, etc. Custom reports ensure that you not only track your endpoints, but also derive actionable insights that matter most to your business.
How to create custom reports?
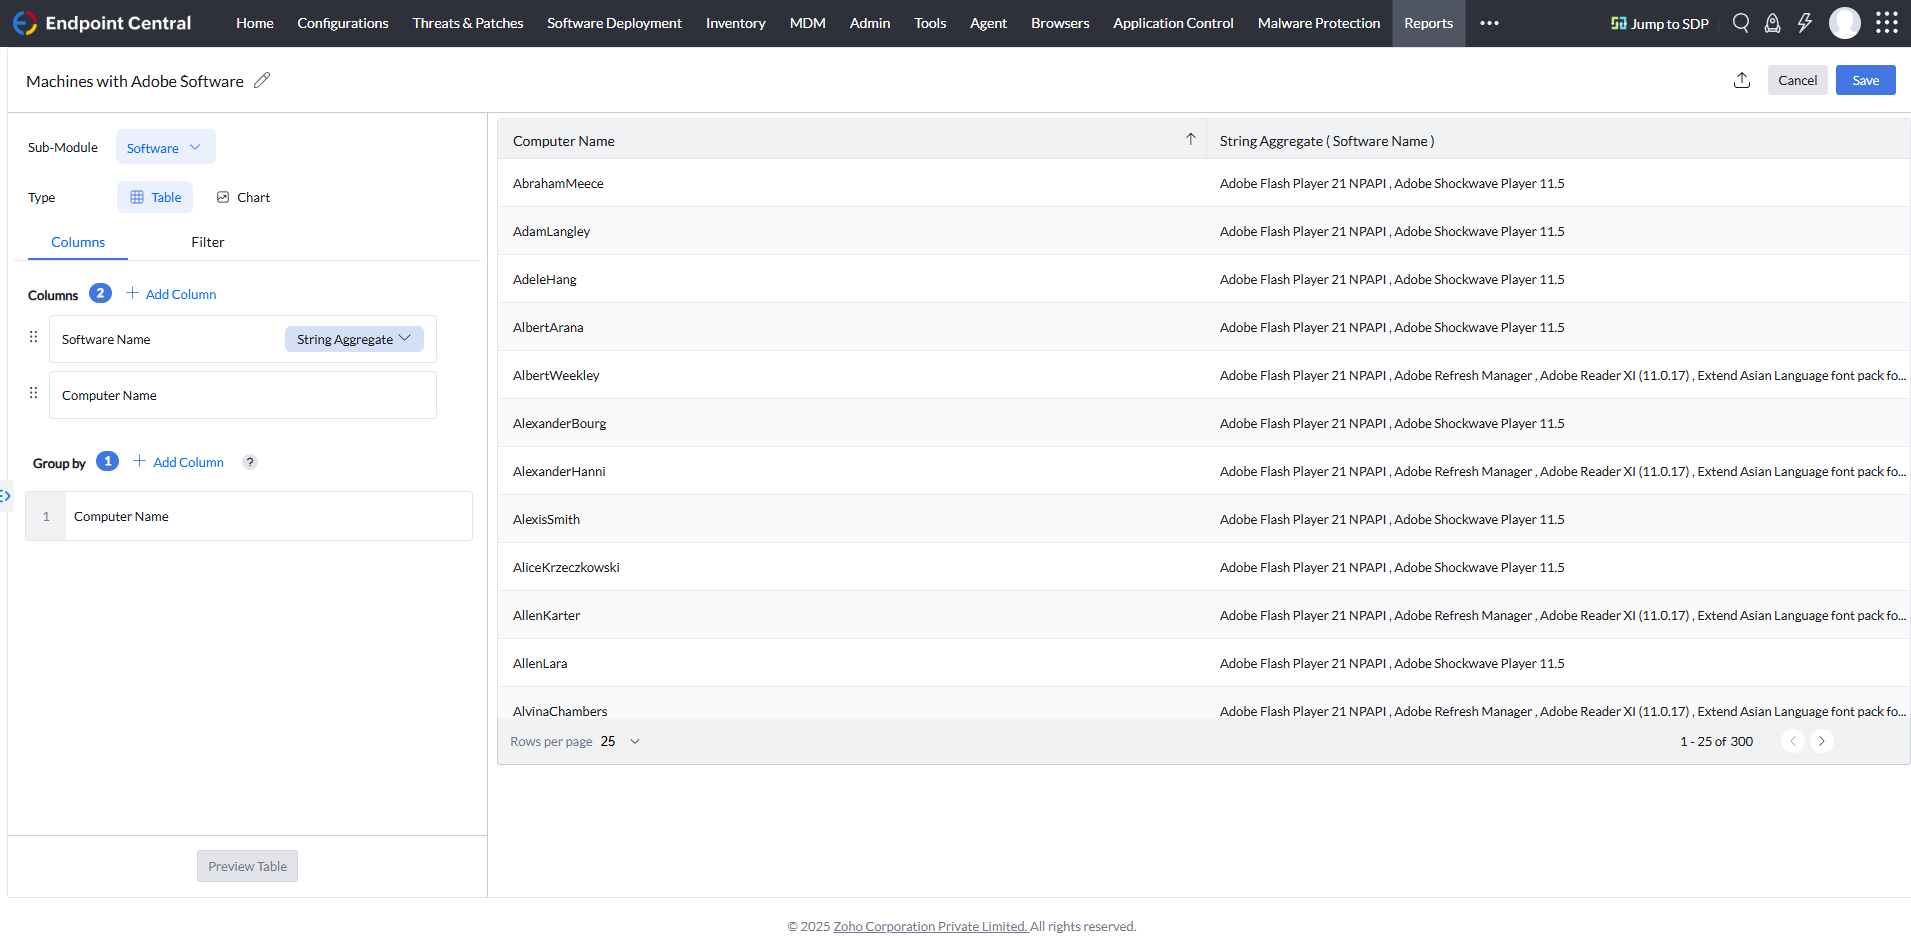
To create table based custom reports,
- In the Endpoint Central MSP web console, navigate to the Reports tab.
- Under the User-defined Reports category, select Custom Reports which displays the custom reports page.
- Click New Custom Report.
- Specify the Name for the report.
- Select the Sub Module as Computer, Hardware or Software.
- Select the type of the custom report as Table.
- Select the columns to view in the report. You can change the position of the columns by dragging the columns up and down.
- Use "Group By" and select the required columns to summarize your data. Grouped columns determine how rows are organized and will appear at the beginning of the report.
- Navigate to the filter tab and specify the criteria for generating the report. You can specify multiple criteria by clicking "Add Filter Condition".
- By adding multiple criteria, there will be a criteria pattern on which the filters shouldact. Use the pencil icon to customize the criteria pattern.
- Click the "Preview Table" button to view the devices that match the specified criteria with the selected columns.
- Click on the Save button to save the report permanently.

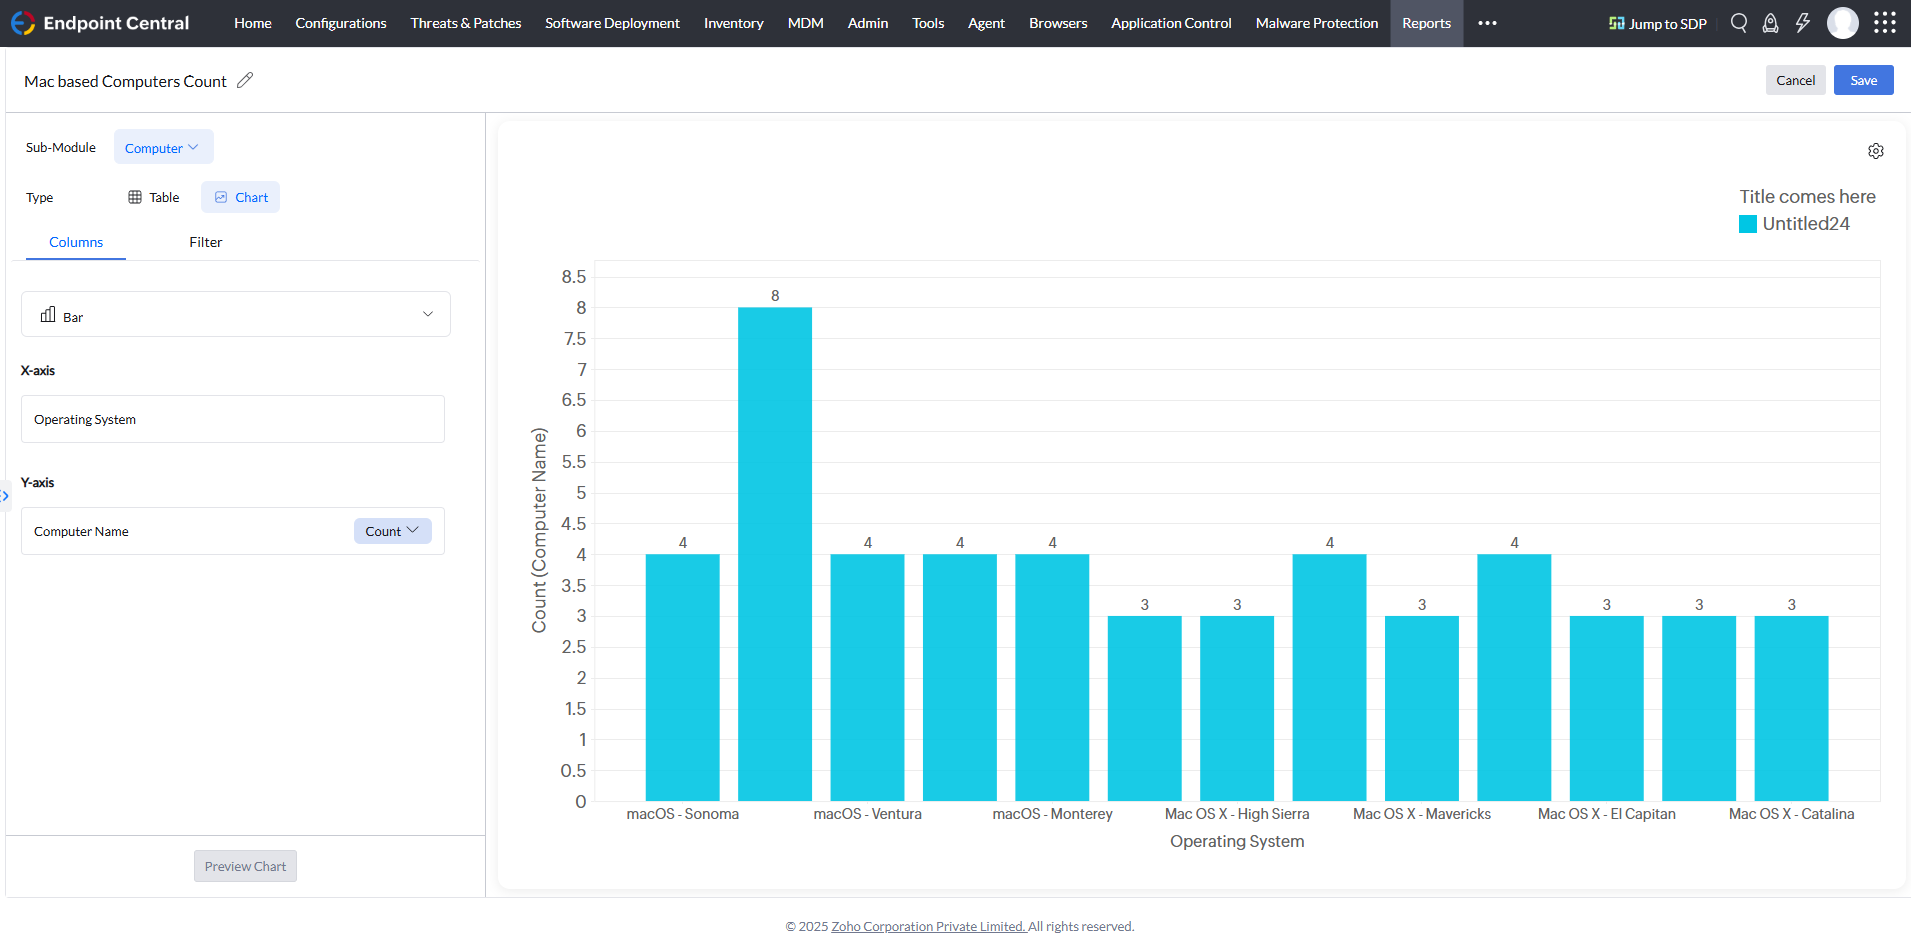
To create chart based custom reports,
- In the Endpoint Central MSP web console, navigate to the Reports tab.
- Under the User-defined Reports category, select Custom Reports which displays the custom reports page.
- Click New Custom Report.
- Specify the Name for the report.
- Select the Sub Module as Computer, Hardware or Software.
- Select the type of chart you wish to view the custom report. Supported chart types are Bar, Line, Area, Pie, Dial, Pyramid, and Funnel.
- Select the column that needs to be shown in the X-axis
- Select the column that needs to be shown in the Y-axis
- Click the "Preview Chart" button to view the devices that match the specified criteria with the selected columns in the X and Y-axis.
- Click on the Save button to save the chart report permanently.

What are Formula Columns?
The Formula Column feature allows you to create custom, rule-based columns in your reports by applying conditions on existing fields. This helps in deriving new values dynamically instead of relying only on raw database fields. For example, you can group computers based on naming conventions, filter devices by domain, or apply multiple conditions to classify a raw column into meaningful categories. These columns can be used in reports, dashboards, and filters just like standard columns.
How to define a Formula Column?
To define a formula column, follow the below steps:/p>
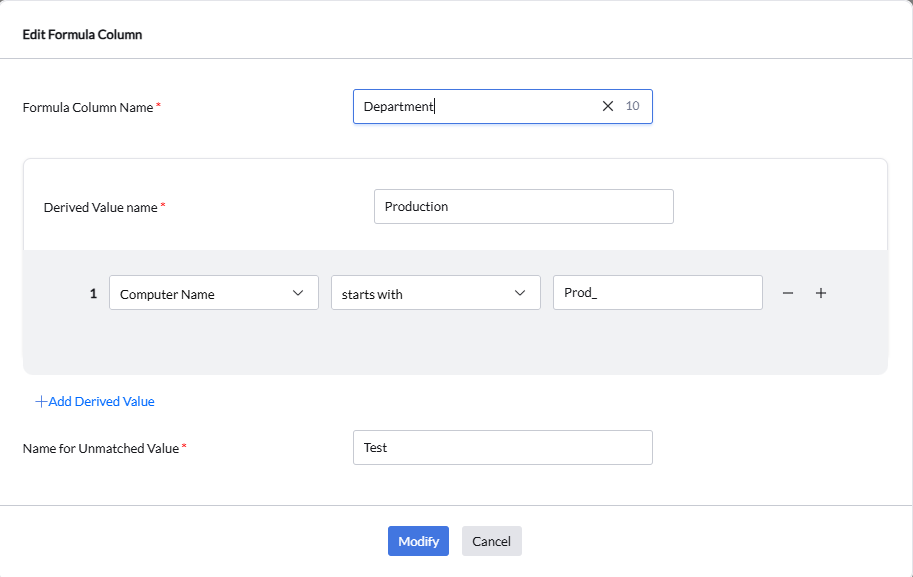
- While selecting columns in custom report, Click "Add Formula Columns".
- Provide an appropriate Formula Column Name.
- Provide a Derived Value Name. This value will be listed in the report if the criteria matches. Derived Value Name is a label for the value that matches the conditions you define. Example: If your condition checks for computer names starting with "ADF", the derived value could be ADF_Computers.
- Define the criteria that needs to be matched and shown as separate value in a column.
- You can add multiple derived values (up to 5) by clicking "Add Derived Value".
- Maximum of 30 criteria are allowed among all the derived values.
- Provides a label for any record that does not satisfy the defined conditions in the "Name for Unmatched Value" section.

Note:
- If you intend to make any changes to a saved report, you can make use of the Edit option in the Custom Report Page.
- You have an option to export this report in PDF, XLSX and CSV formats by masking, removing or retaining the PI data
- Chart based custom report is not supported to schedule the reports.
- Chart based custom report cannot be exported.
- The formula column created by one technician cannot be viewed by another technician.
- The formula column created in one sub-module will not reflect in other sub-module.