Steps to configure SAML SSO for Expensify
About Expensify
Expensify is a comprehensive expense management software designed to streamline the process of tracking expenses, managing receipts, and facilitating reimbursements for both individuals and businesses.
The following steps will help you enable SSO for Expensify from Identity360.
Prerequisites
- The MFA and SSO license for Identity360 is required to enable SSO for enterprise applications.
- Log in to Identity360 as an Admin, Super Admin, or Technician with a role that has Application Integration and Single Sign-on permissions.
- Navigate to Applications > Application Integration > Create New Application, and select Expensify from the applications displayed.
Note: You can also find Expensify from the search bar located at the top.
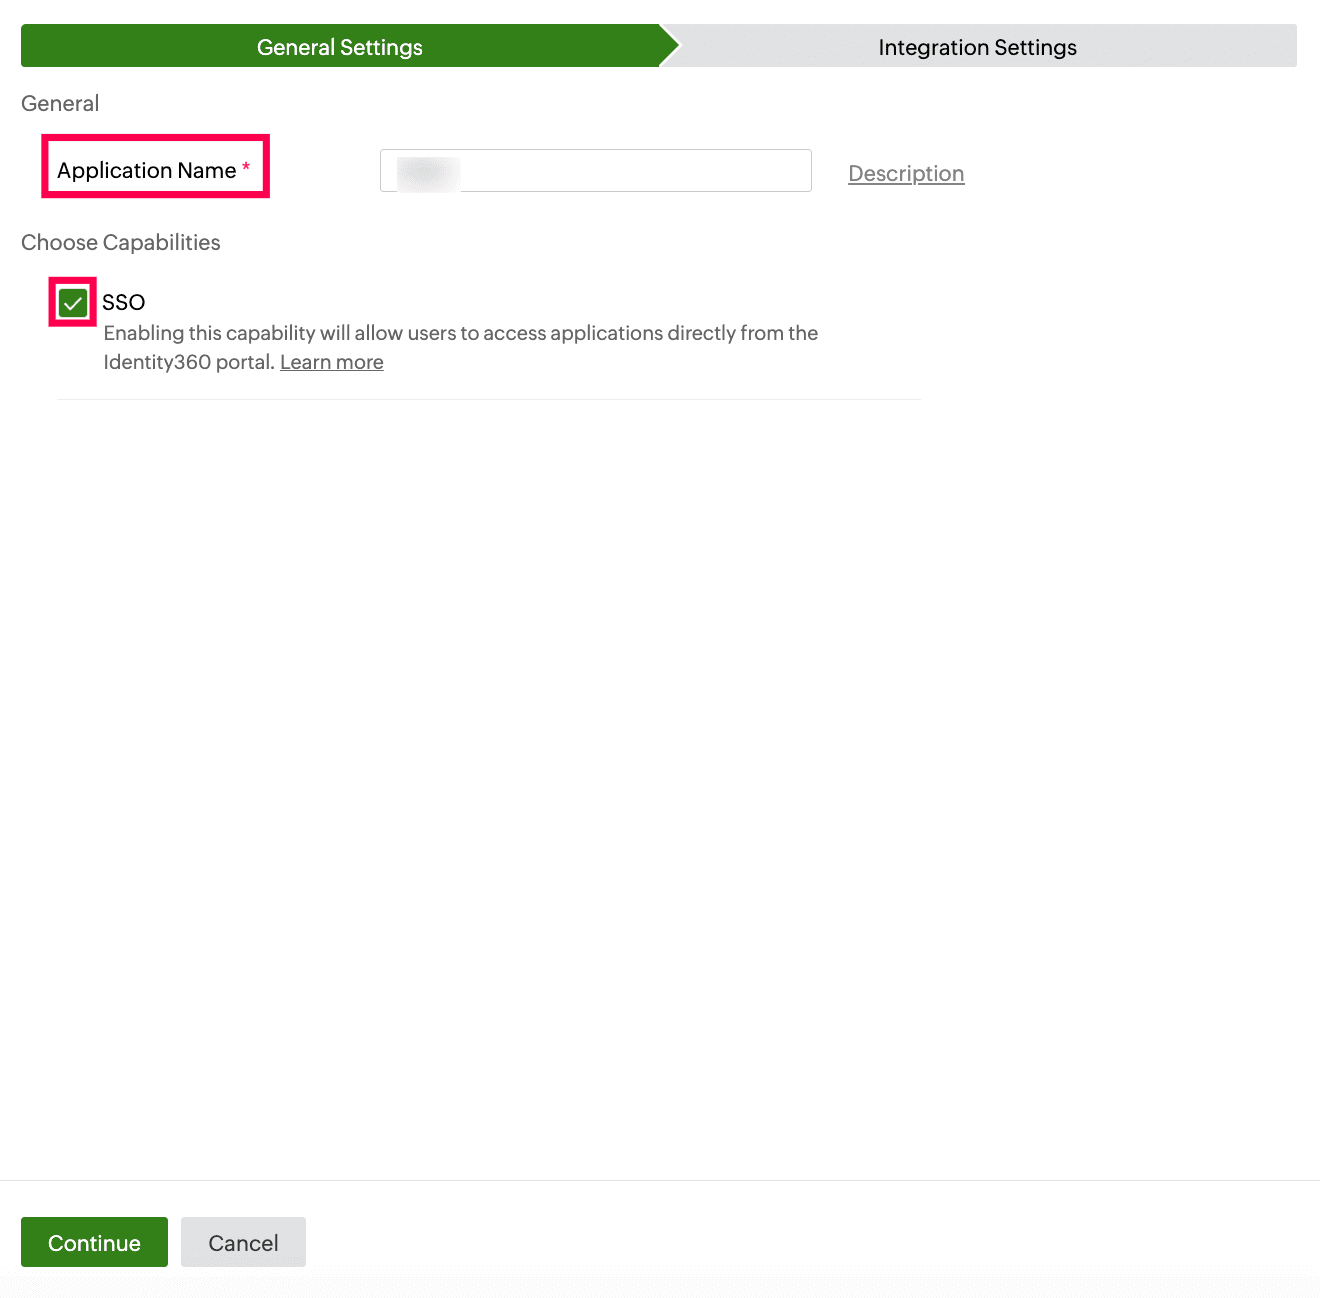
- Under the General Settings tab, enter the Application Name and Description.
- Under the Choose Capabilities tab, choose SSO and click Continue.
 General Settings of SSO configuration for Expensify.
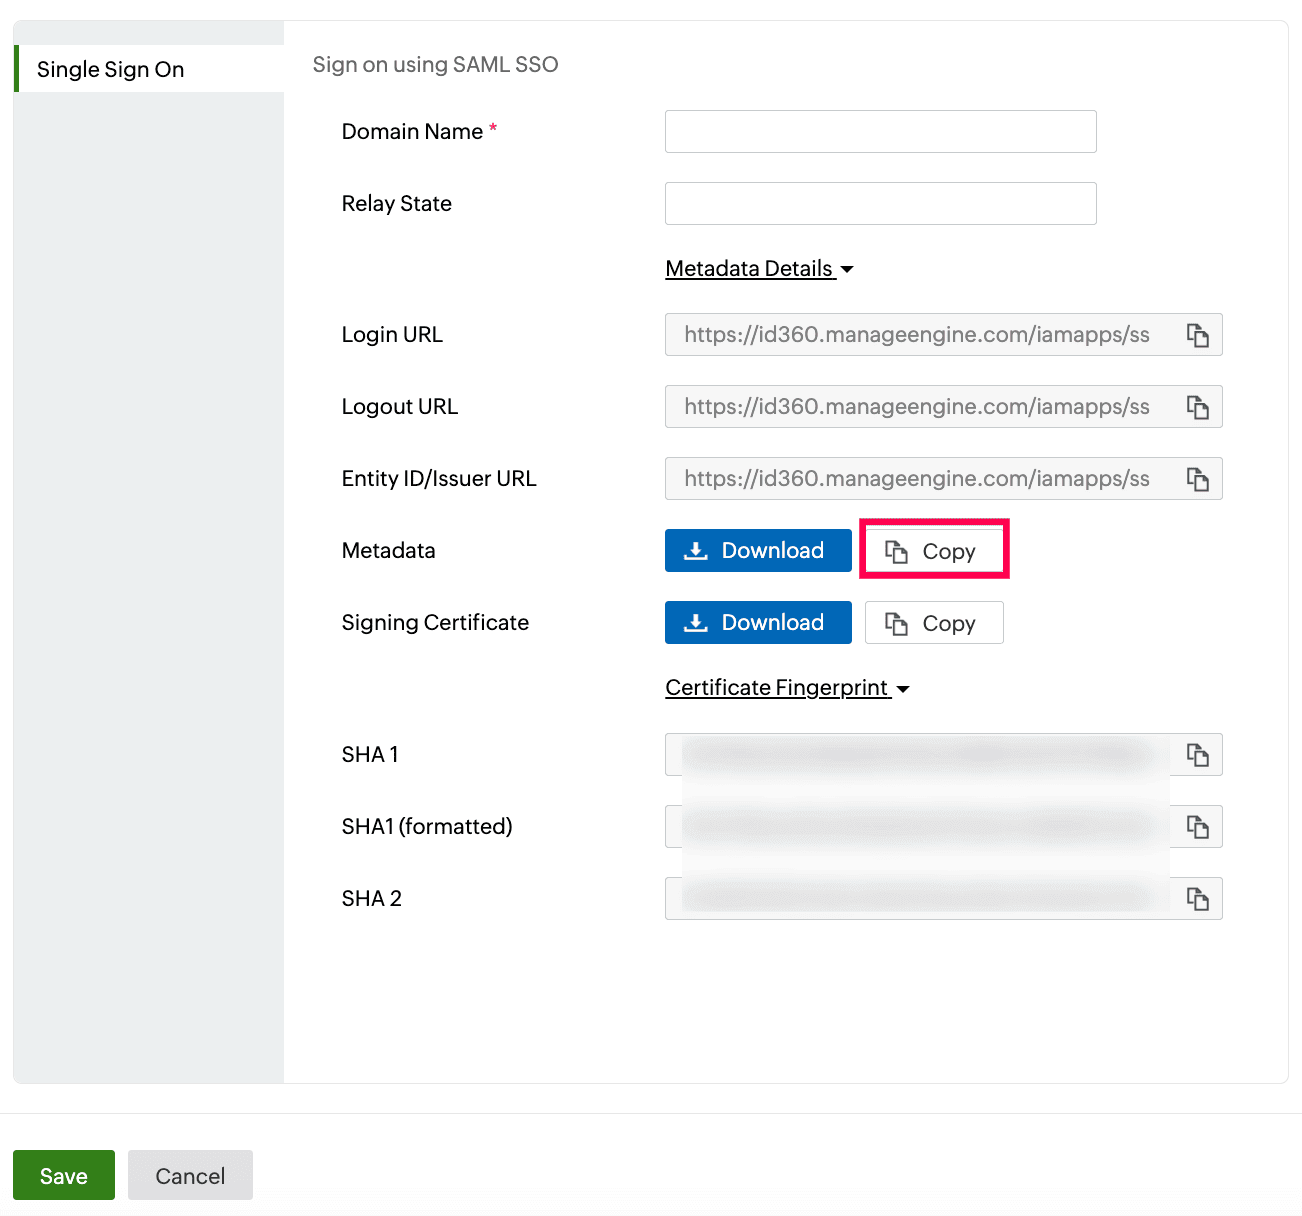
- Under Integration Settings, navigate to the Single Sign On tab and click Metadata Details. Obtain the Metadata by clicking on Copy from the Metadata field. This will be used later during the configuration of Expensify.
 Integration Settings of SSO configuration for Expensify.
Expensify (service provider) configuration steps
- Log into your Expensify account as an administrative user.
- In the left menu sidebar, hover your cursor over Settings and click Domains.
- On the top-right corner of the page, click New Domain.
- Type your email do main name into the Domain Name window, and then click Submit.
Note: If your email address is username@xyz.com, then xyz.com is the domain name.
- Follow the directions to add a TXT Token to your DNS records. The domain verification must be completed before you go to the next section.
- In the left menu sidebar, hover your cursor over Settings and then click Domains.
- In the left menu sidebar, click SAML. Click the SAML Login toggle switch to change it to ENABLED.
- Enable the Required for login option.
Note: After choosing this option, users can only sign in with SSO and cannot use an Expensify password. Please make sure the SAML configuration works properly before enabling this option.
- In the Identity Provider MetaData field, paste the Metadata copied in Step 6 of the prerequisites.
- The SAML settings are saved automatically.
Identity360 (identity provider) configuration steps
- Switch to Identity360's application configuration page.
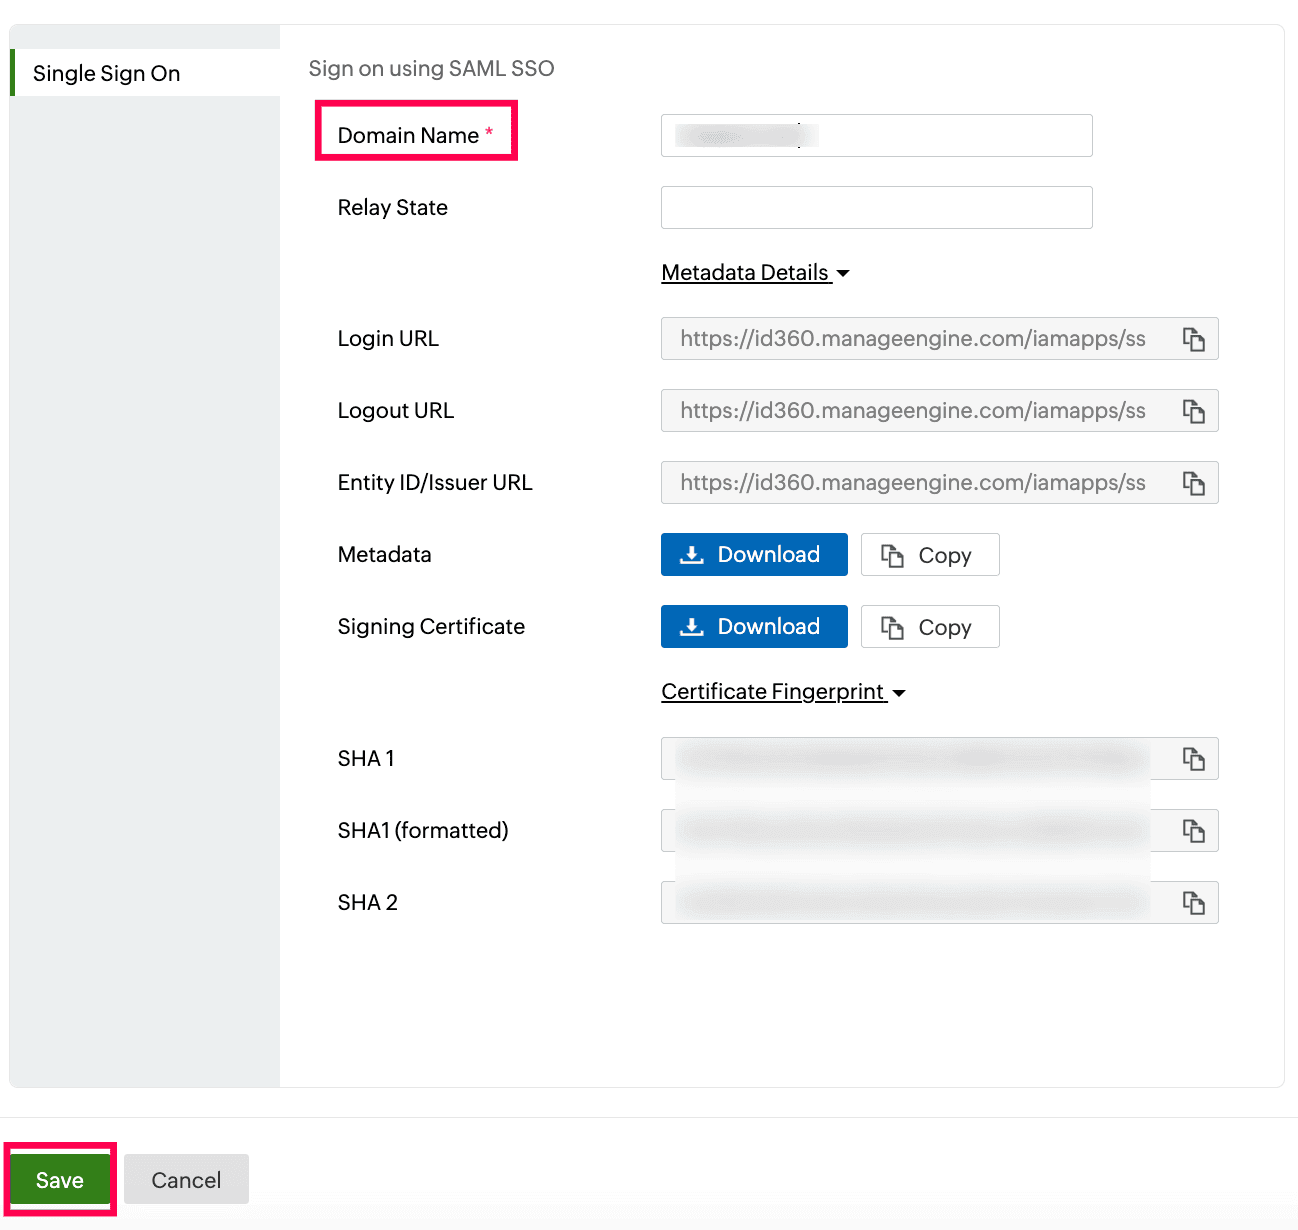
- Enter the Domain Name configured for SSO in your Expensify account from Step 4 of Expensify configuration.
- Enter the Relay State parameter, if necessary.
Note: Relay State is an optional parameter used with a SAML message to remember where you were or to direct you to a specific page after logging in.
- Click Save.
 Integration Settings of SSO configuration for Expensify.
- To learn how to assign users or groups to one or more applications, refer to this page.
Your users will now be able to sign in to Expensify through the Identity360 portal.
Note: For Expensify, both SP-initiated and IdP-initiated flows are supported.
Steps to enable MFA for Expensify
Setting up MFA for Expensify using Identity360 involves the following steps:
- Set up one or more authenticators for identity verification when users attempt to log in to Expensify. Identity360 supports various authenticators, including Google Authenticator, Zoho OneAuth, and email-based verification codes. Click here for steps to set up the different authenticators.
- Integrate Expensify with Identity360 by configuring SSO using the steps listed here.
- Now, activate MFA for Expensify by following the steps mentioned here.
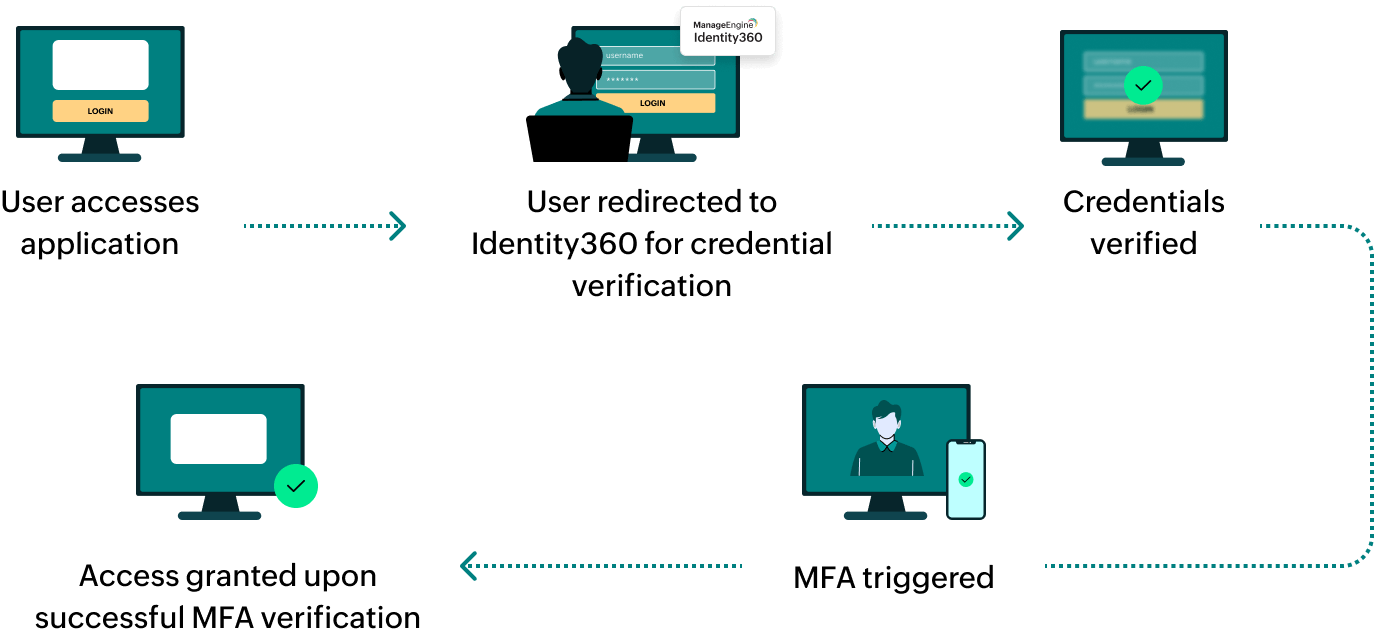
How does MFA for applications work in Identity360?
 General Settings of SSO configuration for Expensify.
 Integration Settings of SSO configuration for Expensify.
 Integration Settings of SSO configuration for Expensify.