Deploying OpManager MSP agents using Endpoint central
ManageEngine Endpoint Central is a unified endpoint management and security solution that helps network admins manage the devices in their network. By using Endpoint central, network admins can easily deploy OpManager MSP agents in OpManager MSP, that further helps them with monitoring their network.
The agents can be deployed via any of the following options:
Deployment via install/ uninstall windows software option
- Open Endpoint Central and click on the "Software Deployment" tab. You will be redirected to the packages console.
- Now, Navigate to "Add Package -> Windows".
- The windows package creation page will now be displayed.
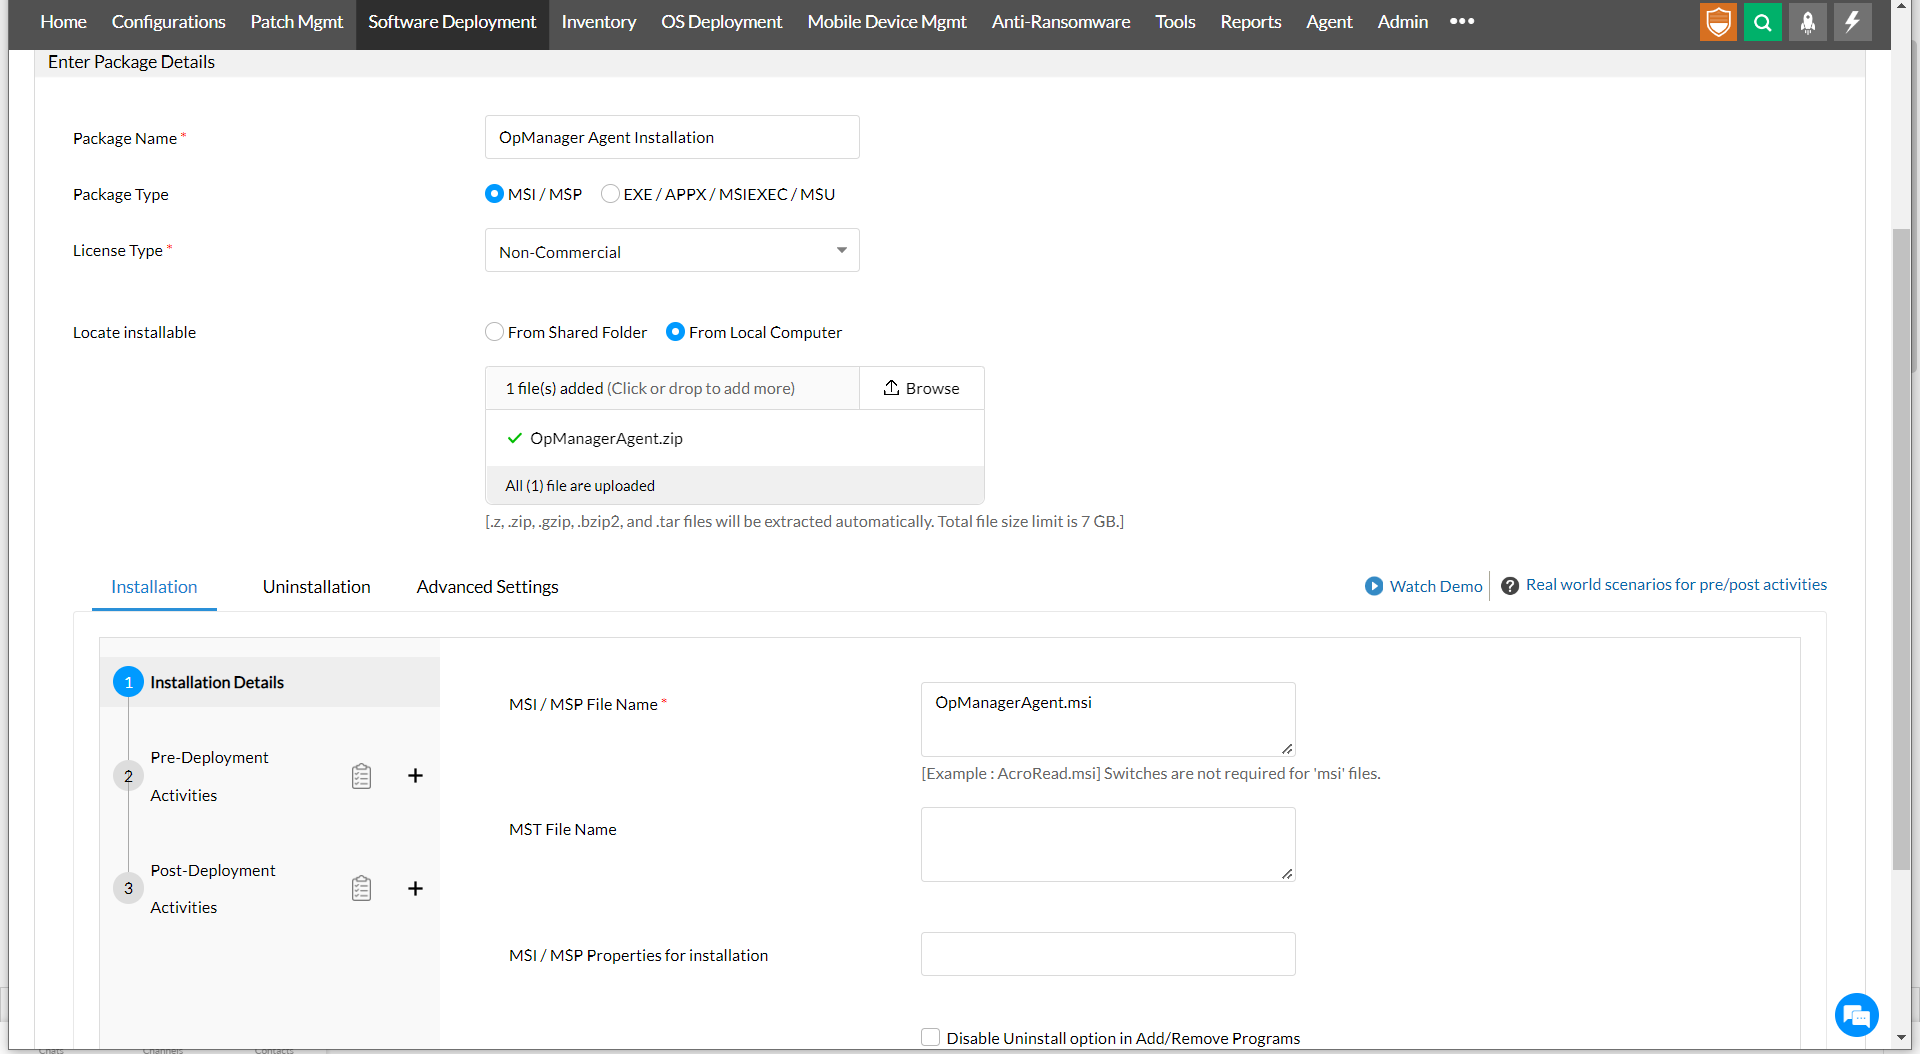
- Mention the package name as "OpManager MSP Agent".

- Choose "msi" as Package type and "Non-commercial" as License type.
- Download the executable zip file of OpManager MSP agent from the OpManager MSP web console, under "Settings > Discovery > Deploy Agent". For "LocateInstallable", choose "FromLocalComputer", and upload the OpManager MSP Agent zip file.
NOTE: We highly recommend users not to use the shared path.
- Now, Enter OpManagerAgent.msi as the MSI/MSP file name.
- Now, click on the "Add Package" option.
- The new package has now been created and you will be redirected to the packages console.
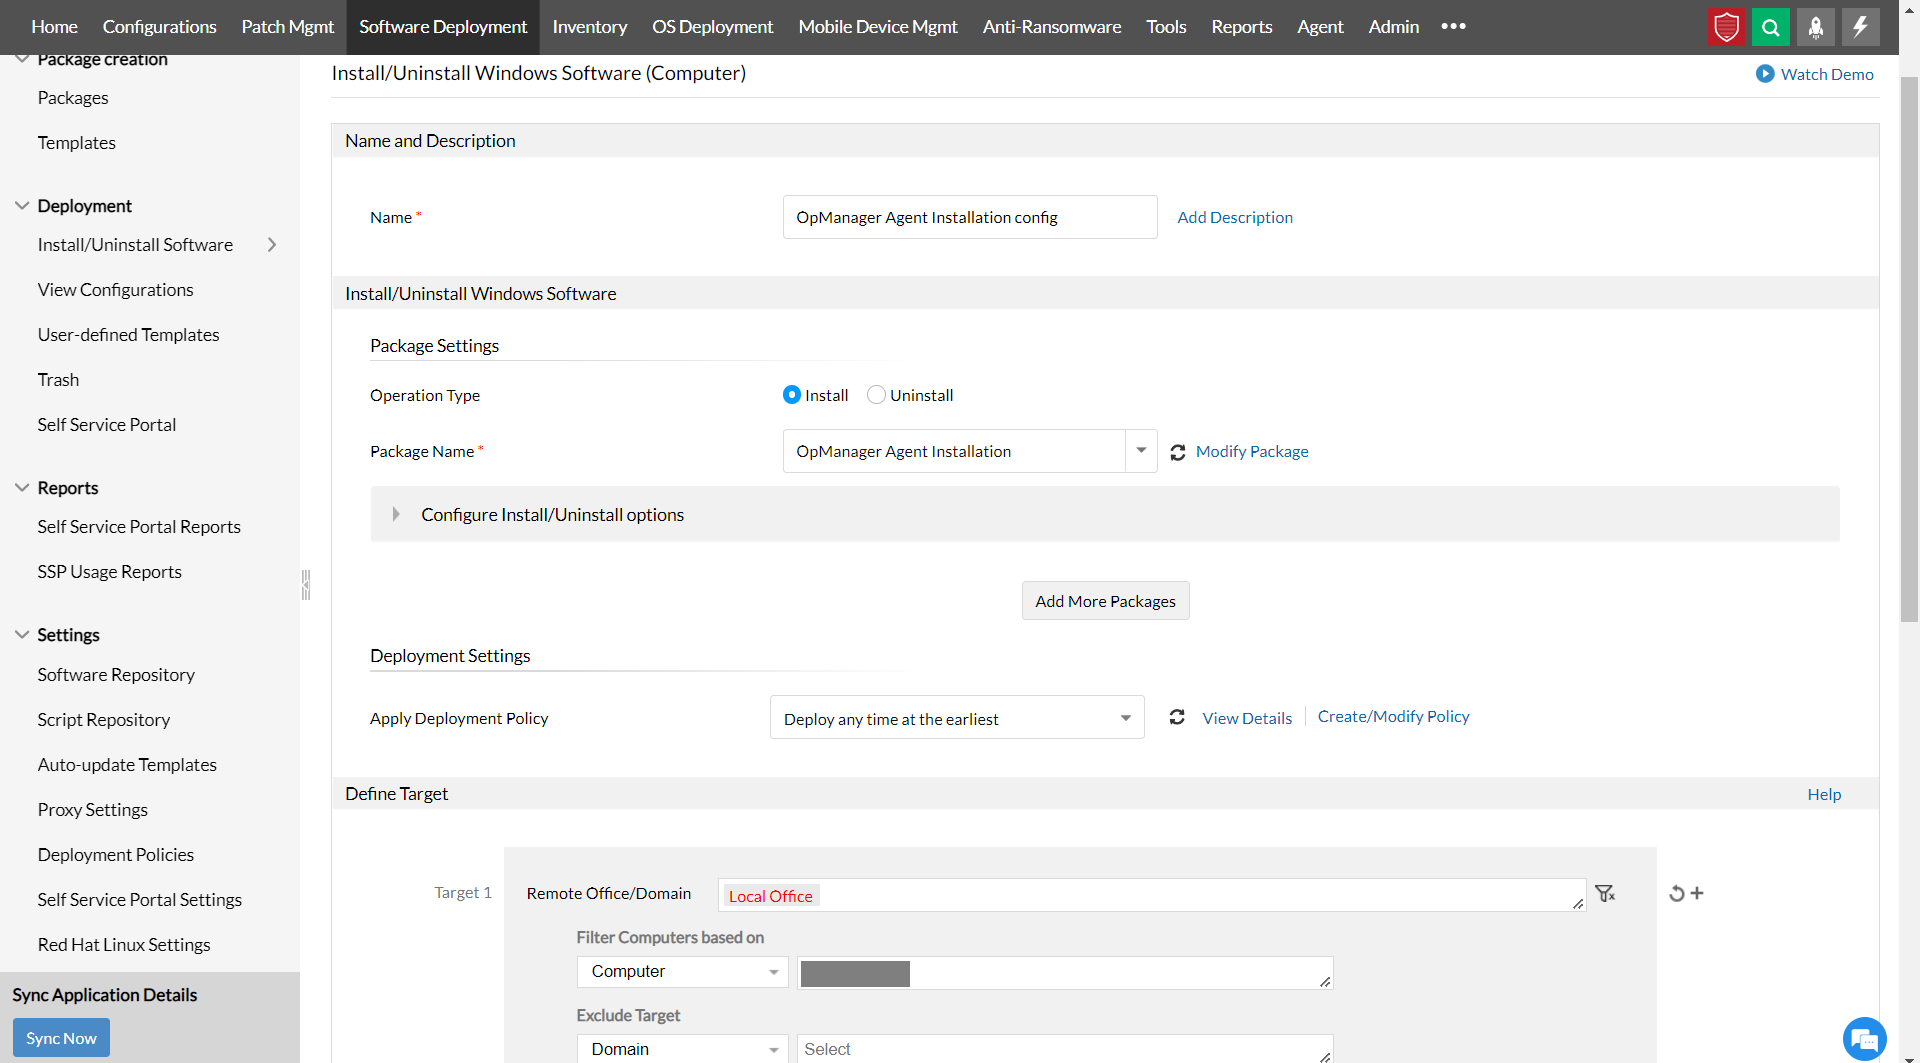
- Now, navigate to "Install/Uninstall software -> Windows -> Computer Configuration", and name the configuration as "OpManager Agent Deployment".
- The operation type will be"Install" by default.
- Mention the Package name as "OpManager Agent".
- Under the "Apply deployment policy", choose the "Deploy any time at the earliest" option.
- Choose the target machine(s) according to your requirements.
- Under the "Retry this configuration on failed targets", set the value as 2 for the "out of which retry" option, and 0 for the "time(s) during startup", and for the "time(s) during refresh" options.
- Now, click on the "Deploy Immediately" button. It will be redirected to the "View Configuration" Page, where you can see the status of the installation in remote machines.

Agent Deployment via custom scripts
- Navigate to "Configurations -> Windows -> Custom script -> computer".
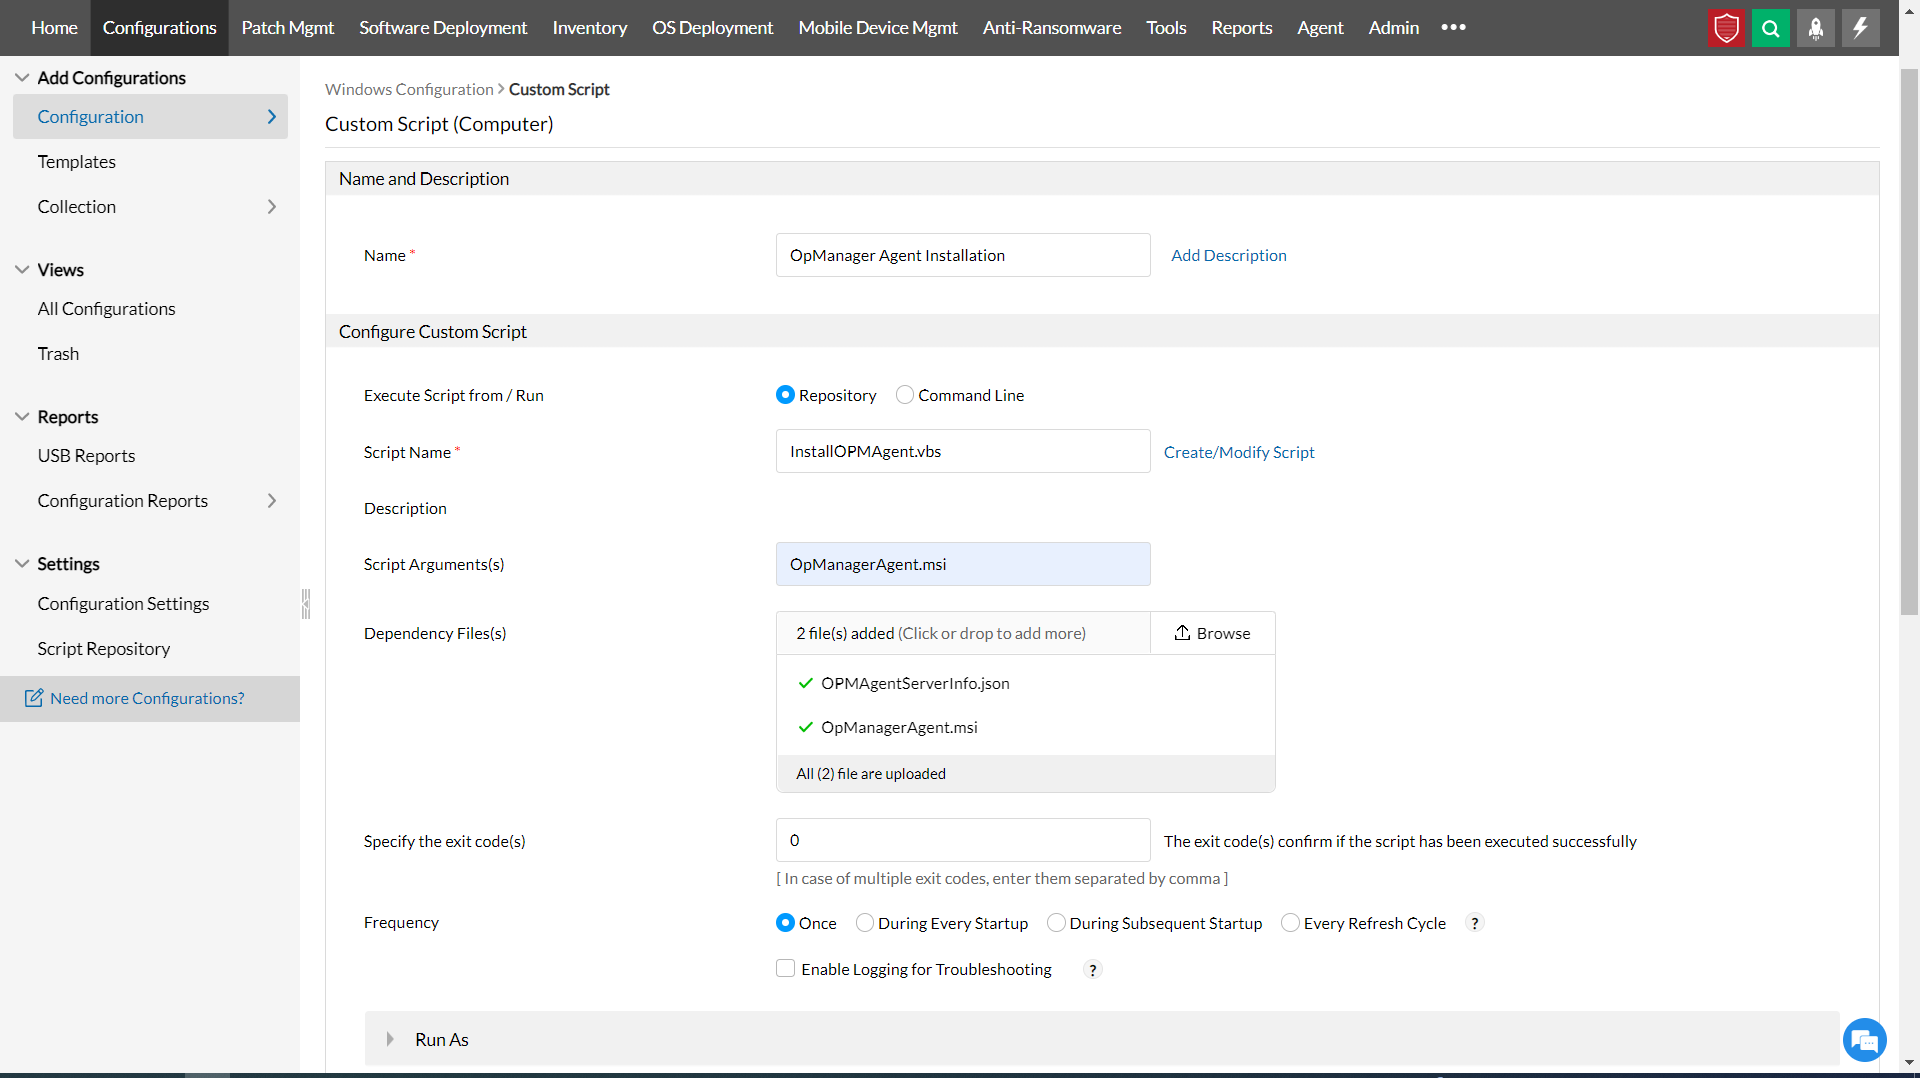
- Mention the name as "OpManager Agent Installation".
- Download the script from this page and save it as "InstallOPMAgent.vbs".
- If the InstallOPMAgent.vbs file has already been uploaded in the Endpoint Central Repository, then choose the "Repository" option or the "Command Line" option under "Execute Script from / Run" field.:
- If the "Repository" option has been chosen:
- Under the Script name field, select the "InstallOPMAgent.vbs" file.
- Enter "OpManagerAgent.msi" in the "Script Arguments".

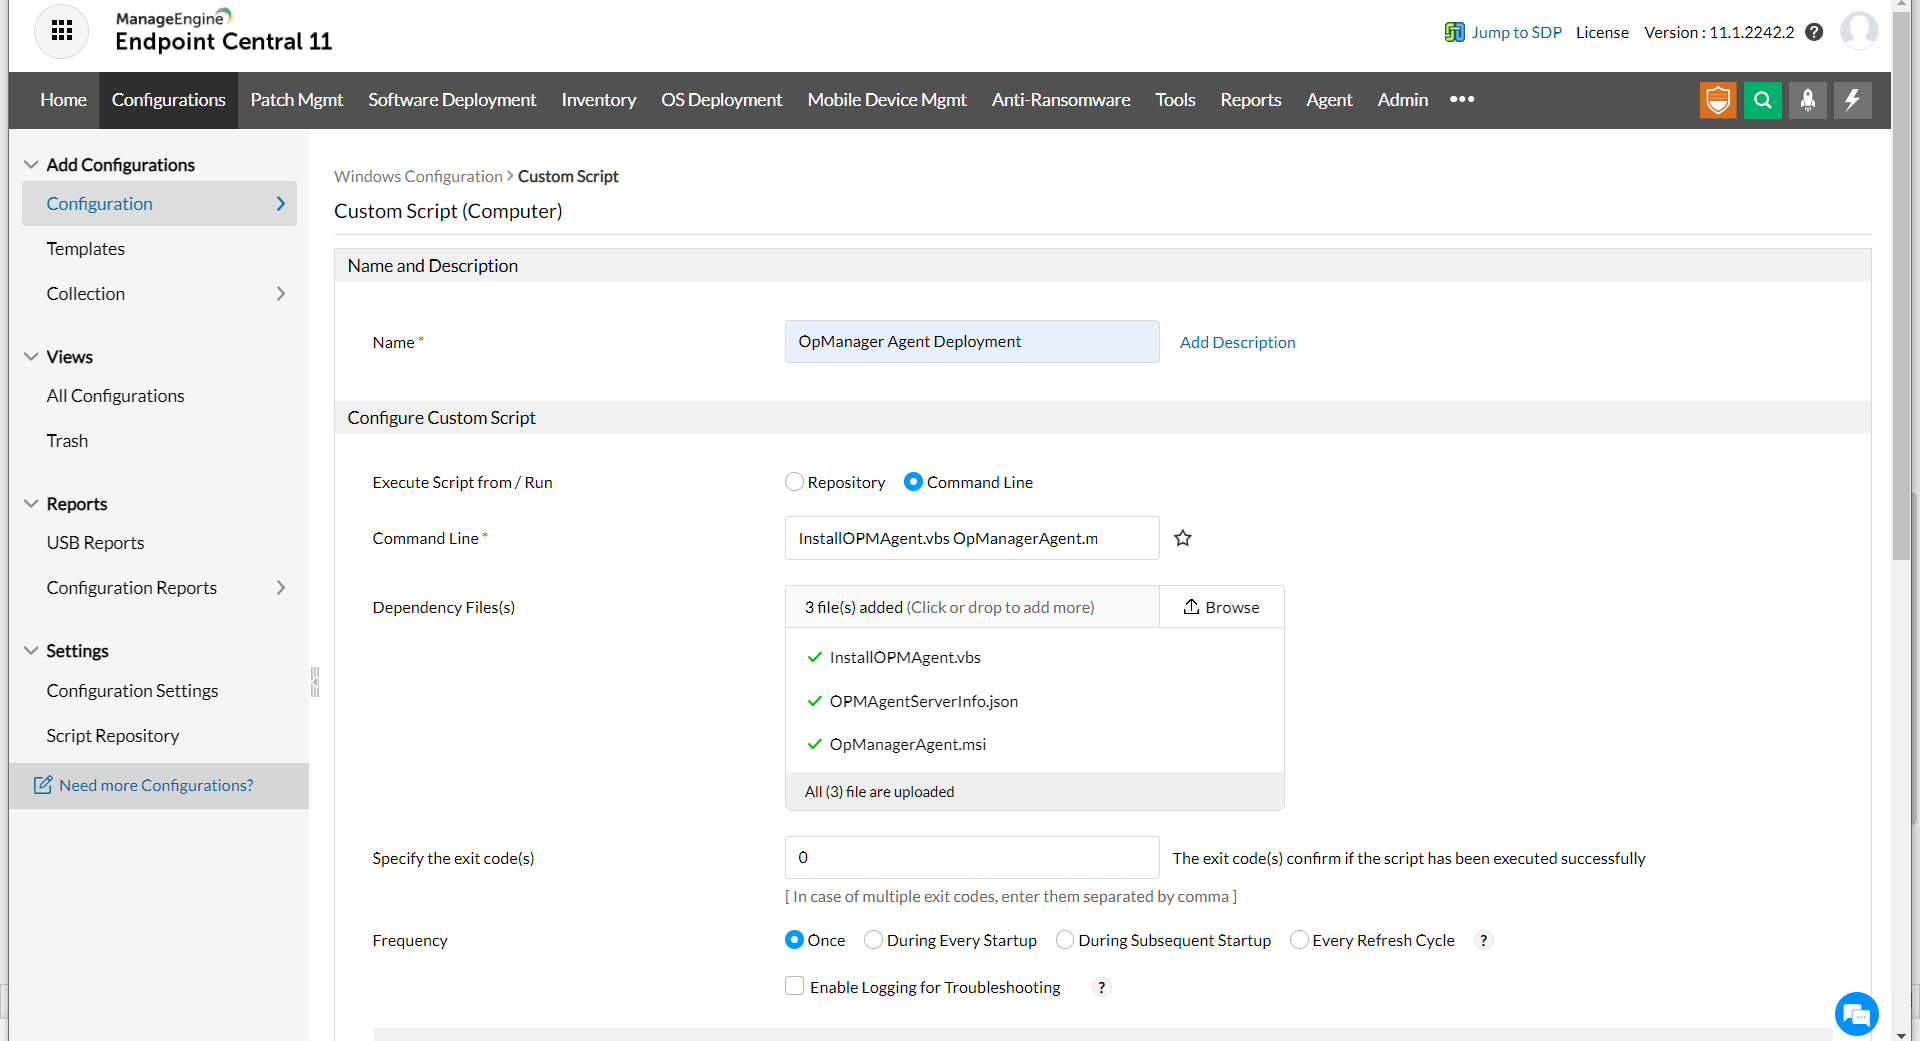
- If the "Command line" option has been chosen:
- Enter "InstallOPMAgent.vbs" and "OpManagerAgent.msi" in the "Command Line" field.

- Download the OpManager MSP Agent zip file from the OpManager MSP web console, under "Settings > Discovery > Deploy Agent", and extract the OpManagerAgent.msi and OPMAgentServerInfo.json files from the zip file. Now, place them in the local directory.
- Upload the OpManagerAgent.msi and OPMAgentServerInfo.json files in the "Dependency file(s)" section. If the command line is chosen in step 4, upload the downloaded InstallOPMAgent.vbs file as well.
- Set the "Specify the exit code(s)" as 0.
- Set the Frequency as "Once".
- In the "Run as" option, choose the user with the required permission(Admin / Application installation privilege user).
- Choose the required machine(s) in the required target.
- Under the "Retry this configuration on failed targets", set the value as 2 for the "out of which retry" option, 0 for the "time(s) during startup" and "time(s) during refresh" options.
- Click "Deploy Immediately". It will be redirected to the View Configuration Page, where you can see the status of the installation in remote machines.
If the agent has not been installed on any of the devices, or if you are facing issues with agent installation, kindly write to our support team.


