On-PremisesCloud
How to send log files to the support team?
Description
When you face issues while working, it is mandatory for our experts to refer to your logs to resolve the issues you are facing. To provide an appropriate solution for your issue, you must send us log files along with a description of the issue and screen shots, depending on the issue. You can follow this document and upload the required logs.
There are two stages in sending the log files, they are:
- Extracting the logs
- Sending it to support team
List of Log Files and their Locations
The following are the list of logs, that might be needed for trouble shooting purposes. You can find the steps to archive the logs
and the steps involved in sending it to the support team.
Need to upload the server logs while facing any problems from the below mentioned location. If you are using the server version below 10.1.2220.1 upload logs from <Install_Dir>\DesktopCentral_Server\logs. If you are using version 10.1.2220.1 or above upload logs from <Install_Dir>\UEMS_CentralServer\logs
Note: <Install_Dir> refers to the directory where the server is installed.
You need to upload Distribution Server logs, if you are facing problems on managing your remote office computers.
<Installation_Directory>\ UEMS_DistributionServer\ logs.
For example,C:\Program Files\ UEMS_DistributionServer\ logs
From the computer, where you have installed the agent, perform the following operations:
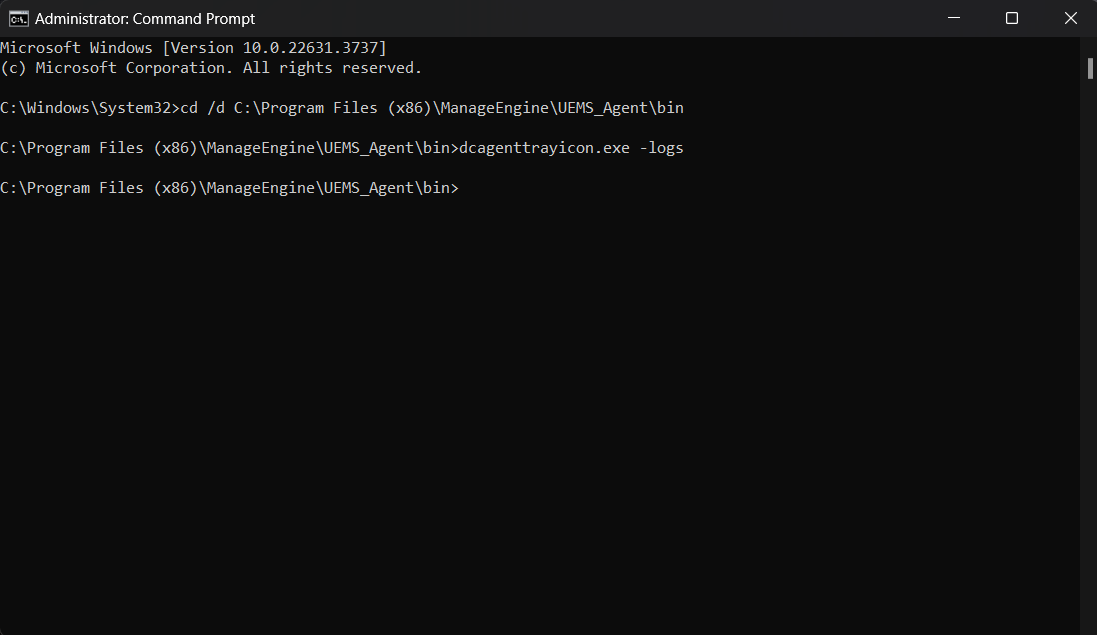
- Go to command prompt and navigate to the location, where UEMS Agent is installed.
For example: C:\Program Files (x86)\ManageEngine\UEMS_Agent\bin
- Type, dcagenttrayicon.exe -logs and press enter
- You can see that the logs will be extracted and archived in the UEMS_Agent folder.
The file will be saved in .7z format, the file name will be 1_<system name>_ZOHOCORP.7z (Example: 1_win2000_ZOHOCORP.7z)
You can upload/send this log file to the support team.

From the computer, where you have installed the agent, perform the following operations:
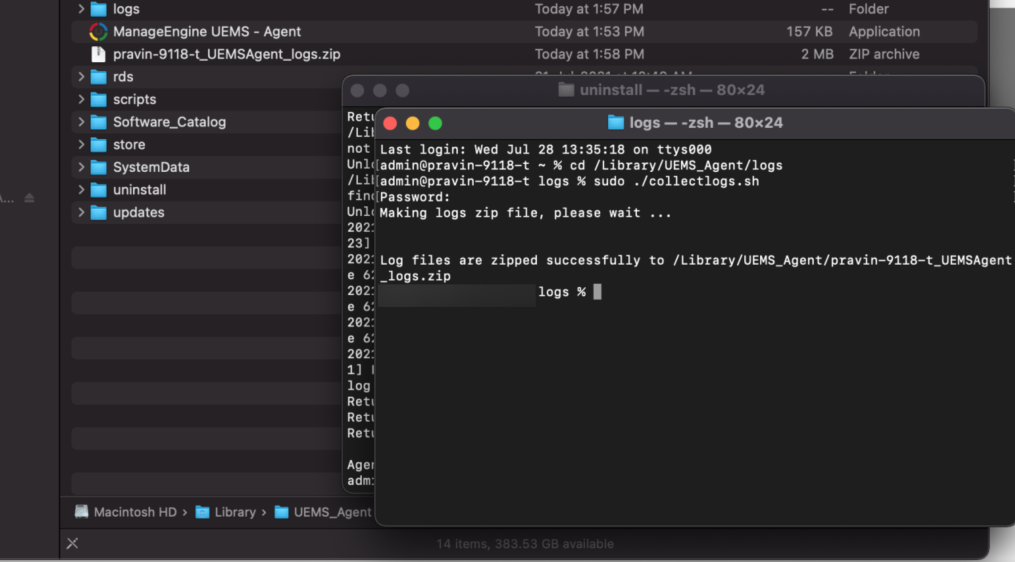
- Go to the Terminal
- As shown in the image above type, navigate to the folder where the agent is installed
(Example- machine name: ~machine name cd /Library/UEMS_Agent/logs/)
- Type sudo ./collectlogs.sh
- You can see that the logs will be extracted and archived in the UEMS_Agent/ folder.
The file will be saved in .zip format, the file name will be 1_<computer name>_ZOHOCORP.zip (Example: 1_MYMAC_ZOHOCORP.zip)
You can upload/send this log file to thes upport team.

From the computer, where you have installed the Linux agent, perform the following operations:
- Go to the Terminal
- Navigate to the location where the agent logs are located by using this command:
'cd < UEMS_Agent >/logs'
( Default location- : 'cd /usr/local/manageengine/uems_agent')
- Type sudo ./CollectLogs.sh
- You can see that the logs will be extracted and archived in the UEMS_Agent/< computer_name >_UEMSAgent_Logs.zip folder.
The file will be saved in .zip format. You can upload/send this log file to the support team.
Sending it to the support team
Ensure that the log files are zipped and ready to be uploaded. You can use HTTP option to upload files whose size is less than 20 GB. To send log files using the HTTP mode, follow the steps given below:
- From a web browser, connect to https://bonitas.zohocorp.com/
- Choose the respective product under Products
- Specify the Ticket Id, if you have one
- Add the modules, of which the logs are uploaded
- Specify your email address and the address to receive notifications
- Specify the reason
- Click Add files to browse and select the required, zipped, log files
- Click Upload
The zipped log files are successfully uploaded.